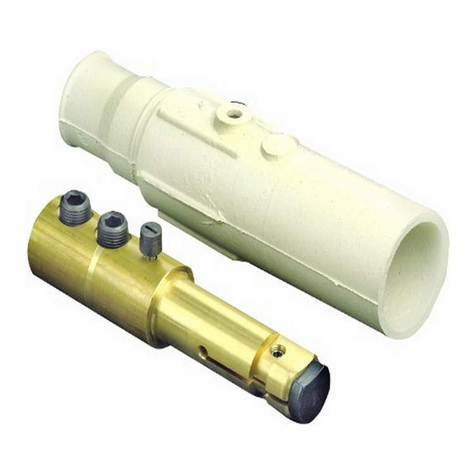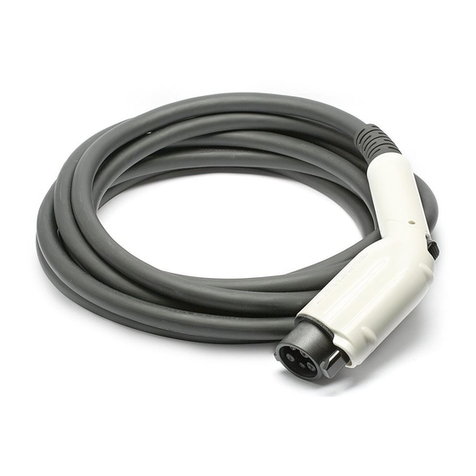
FICHE ET CONNECTEUR SECTIONNEURS
TRIPOLAIRES À QUATRE FILS
Nos de cat. 21415-LB, 21414-LB
Valeurs nominales : 30 A, 600 V c.a./20 A, 250 V c.c.
ENCHUFE Y CONECTOR DE INTERRUPCIÓN DE ENERGÍA
3 POLOS, 4 CABLES
Cat. No. 21415-LB, 21414-LB
&ODVL¿FDFLyQ$9&$$9&&
INSTALACIÓN ESPAÑOL
INSTALLATION FRANÇAIS
PK-A3240-10-02-5A
© 2018 Leviton Mfg. Co., Inc.
GARANTÍA LIMITADA POR DIEZ AÑOS Y EXCLUSIONES
/HYLWRQJDUDQWL]DDOFRQVXPLGRURULJLQDOGHVXVSURGXFWRV\QRSDUDEHQH¿FLRGHQDGLHPiVTXHHVWH
SURGXFWRHQ HOPRPHQWR GHVX YHQWDSRU /HYLWRQHVWi OLEUHGH GHIHFWRV HQ PDWHULDOHV R IDEULFDFLyQ
SRUXQ SHUtRGRGH GLH]DxRV GHVGHOD IHFKDGH ODFRPSUD RULJLQDO/D ~QLFDREOLJDFLyQ GH/HYLWRQ
HV FRUUHJLU WDOHV GHIHFWRV \D VHD FRQ UHSDUDFLyQ R UHHPSOD]R FRPRRSFLyQ Para detalles visite
www.leviton.com o llame al 1-800-824-3005.(VWD JDUDQWtDH[FOX\H \ UHQXQFLDWRGD UHVSRQVDELOLGDG
GHPDQR GHREUD SRUUHPRYHU RUHLQVWDODU HVWHSURGXFWR (VWDJDUDQWtD HVLQYiOLGD VLHVWH SURGXFWR
es instalado inapropiadamente o en un ambiente inadecuado, sobrecargado, mal usado, abierto,
DEXVDGRR DOWHUDGRHQ FXDOTXLHUPDQHUD RQR HVXVDGR EDMRFRQGLFLRQHV GHRSHUDFLyQ QRUPDOR QR
conforme con las etiquetas o instrucciones. No hay otras garantías implicadas de cualquier otro
tipo, incluyendo mercadotecnia y propiedad para un propósito en particular pero si alguna garantía
LPSOLFDGDVH UHTXLHUHSRU ODMXULVGLFFLyQ SHUWLQHQWHOD GXUDFLyQGH FXDOTXLHUDJDUDQWtD LPSOLFDGD
LQFOX\HQGRPHUFDGRWHFQLD\SURSLHGDGSDUDXQSURSyVLWRHQSDUWLFXODUHVOLPLWDGDDGLH]DxRVLeviton
no es responsable por daños incidentales, indirectos, especiales o consecuentes, incluyendo
sin limitación, daños a, o pérdida de uso de, cualquier equipo, pérdida de ventas o ganancias
o retraso o falla para llevar a cabo la obligación de esta garantía. Los remedios provistos aquí
VRQUHPHGLRV H[FOXVLYRVSDUD HVWDJDUDQWtD \DVHD EDVDGRHQ FRQWUDWRDJUDYLR RGH RWUDPDQHUD
GARANTIE LIMITÉE DE 10 ANS ET EXCLUSIONS
Leviton garantit au premier acheteur, et uniquement au crédit du dit acheteur, que ce produit ne
SUpVHQWHQLGpIDXWVGHIDEULFDWLRQQLGpIDXWVGHPDWpULDX[DXPRPHQWGHVDYHQWHSDU/HYLWRQHWQ¶HQ
présentera pas tant qu’il est utilisé de façon normale et adéquate, pendant une période de 10 ans
suivant la date d’achat. La seule obligation de Leviton sera de corriger les dits défauts en réparant ou
HQ UHPSODoDQW OH SURGXLW GpIHFWXHX[ VL FH GHUQLHU HVW UHWRXUQp SRUW SD\p DFFRPSDJQp G¶XQH SUHXYH
GH OD GDWH G¶DFKDW DYDQW OD ¿Q GH OD GLWH SpULRGH GH DQV j OD Manufacture Leviton du Canada
Limitée, au soin du service de l’Assurance Qualité, 165 boul. Hymus, Pointe-Claire, (Québec),
Canada H9R 1E93DUFHWWHJDUDQWLH/HYLWRQH[FOXWHWGpFOLQHWRXWHUHVSRQVDELOLWpHQYHUVOHVIUDLVGH
main d’oeuvre encourus pour retirer et réinstaller le produit. Cette garantie sera nulle et non avenue
si le produit est installé incorrectement ou dans un environnement inadéquat, s’il a été surchargé,
LQFRUUHFWHPHQWXWLOLVpRXYHUWHPSOR\pGHIDoRQDEXVLYHRXPRGL¿pGHTXHOOHTXHPDQLqUHTXHFHVRLW
RXV¶LOQ¶DpWpXWLOLVpQLGDQVGHVFRQGLWLRQVQRUPDOHVQLFRQIRUPpPHQWDX[GLUHFWLYHVRXpWLTXHWWHVTXL
l’accompagnent. Aucune autre garantie, explicite ou implicite, y compris celle de qualité marchande
et de conformité au besoin, n’est donnée, mais si une garantie implicite est requise en vertu de lois
applicables, la dite garantie implicite, y compris la garantie de qualité marchande et de conformité au
EHVRLQHVWOLPLWpHjXQHGXUpHGHDQVLeviton décline toute responsabilité envers les dommages
indirects, particuliers ou consécutifs, incluant, sans restriction, la perte d’usage d’équipement,
la perte de ventes ou les manques à gagner, et tout dommage-intérêt découlant du délai ou
du défaut de l’exécution des obligations de cette garantie. Seuls les recours stipulés dans les
SUpVHQWHV TX¶LOV VRLHQW G¶RUGUH FRQWUDFWXHO GpOLFWXHO RX DXWUH VRQW RႇHUWV HQ YHUWX GH FHWWH JDUDQWLH
Para Asistencia Técnica llame al: 1-800-824-3005 (Sólo en EE.UU.) www.leviton.com
Ligne d’Assistance Technique : 1 800 405-5320 (Canada seulement) www.leviton.com
SÓLO PARA MÉXICO
POLÍTICA DE GARANTÍA DE 10 AÑOS:
/HYLWRQ6GH5/GH&9/DJR7DQD1R&RO+XLFKDSDQ'HO0+LGDOJR&LXGDGGH0p[LFR&3
0p[LFR
Tel +52 (55) 5082-1040. Garantiza este producto por el término de un año en todas sus partes y mano de obra contra cualquier defecto de
IDEULFDFLyQ\IXQFLRQDPLHQWRDSDUWLUGHODIHFKDGHHQWUHJDRLQVWDODFLyQGHOSURGXFWREDMRODVVLJXLHQWHVCONDICIONES:
1.3DUDKDFHUHIHFWLYDHVWDJDUDQWtDQRSRGUiQH[LJLUVHPD\RUHVUHTXLVLWRVTXHODSUHVHQWDFLyQGHHVWDSyOL]DMXQWRFRQHOSURGXFWRHQHOOXJDU
GRQGHIXHDGTXLULGRHQFXDOTXLHUDGHORVFHQWURVGHVHUYLFLRTXHVHLQGLFDQDFRQWLQXDFLyQ
2./DHPSUHVDVHFRPSURPHWHDUHHPSOD]DURFDPELDUHOSURGXFWRGHIHFWXRVRVLQQLQJ~QFDUJRSDUDHOFRQVXPLGRUORVJDVWRVGHWUDQVSRUWDFLyQ
TXHVHGHULYHQGHVXFXPSOLPLHQWRVHUiQFXELHUWRVSRU/(9,7216GH5/GH&9
3.(OWLHPSRGHUHHPSOD]RHQQLQJ~QFDVRVHUiPD\RUDGtDVFRQWDGRVDSDUWLUGHODUHFHSFLyQGHOSURGXFWRHQFXDOTXLHUDGHORVVLWLRVHQ
donde pueda hacerse efectiva la garantía.
4.&XDQGRVHUHTXLHUDKDFHUHIHFWLYDODJDUDQWtDPHGLDQWHHOUHHPSOD]RGHOSURGXFWRHVWRVHSRGUiOOHYDUDFDERHQ/(9,7216GH5/GH&9
5.(VWDJDUDQWtDQRHVYiOLGDHQORVVLJXLHQWHVFDVRV$&XDQGRHOSURGXFWRKDVLGRXWLOL]DGRHQFRQGLFLRQHVGLVWLQWDVDODVQRUPDOHV%&XDQGR
el producto no ha sido operado de acuerdo con el instructivo de uso en idioma español proporcionado. C) Cuando el producto ha sido alterado
o reparado por personas no autorizadas por LEVITON, S. de R.L. de C.V.
6.(OFRQVXPLGRUSRGUiVROLFLWDUTXHVHKDJDHIHFWLYDODJDUDQWtDDQWHODSURSLDFDVDFRPHUFLDOGRQGHDGTXLULyHOSURGXFWR
7.(QFDVRGHTXHODSUHVHQWHJDUDQWtDVHH[WUDYLDUDHOFRQVXPLGRUSXHGHUHFXUULUDVXSURYHHGRUSDUDTXHVHOHH[SLGDRWUDSyOL]DGHJDUDQWtD
SUHYLDSUHVHQWDFLyQGHODQRWDGHFRPSUDRIDFWXUDUHVSHFWLYD
DATOS DEL USUARIO
NOMBRE: DIRECCION:
COL: C.P.
CIUDAD:
ESTADO:
TELEFONO:
DATOS DE LA TIENDAO VENDEDOR
RAZON SOCIAL: PRODUCTO:
MARCA: MODELO:
NO DE SERIE:
NO. DEL DISTRIBUIDOR:
DIRECCION:
COL: C.P.
CIUDAD:
ESTADO:
TELEFONO:
FECHA DE VENTA:
FECHA DE ENTREGAO INSTALACION:
AVERTISSEMENTS:
• POUR ÉVITER LES RISQUES D’INCENDIE, DE DÉCHARGE ÉLECTRIQUE OU
D’ÉLECTROCUTION, COUPER LE COURANT au fusible ou au disjoncteur et s’assurer que le
FLUFXLWHႋELHQFRXSpDYDQWGHSURFpGHUjO¶LQႋDOODWLRQ
• POUR ÉVITER LES RISQUES D’INCENDIE OU ENCORE DE LÉSIONS CORPORELLES
GRAVES OU MORTELLES, IL NE FAUT PAS ÉTAMER LES CONDUCTEURS.
MISES EN GARDE:
% &HVGLVSRVLWLIVGRLYHQWrWUHLQVWDOOpVHWXWLOLVpVFRQIRUPpPHQWDX[FRGHVGHO¶pOHFWULFLWpHQ
vigueur.
% À défaut de bien comprendre les présentes directives, en tout ou en partie, on doit faire
DSSHOjXQpOHFWULFLHQ
% 1¶XWLOLVHUFHVGLVSRVLWLIVTX¶DYHFGX¿OGHFXLYUH
% 1H¿[HUFHVGLVSRVLWLIVTX¶DXERXWGHFkEOHVRXGHFRUGRQVVRXSOHVFLUFXODLUHV $X[eWDWV
8QLVVHUHSRUWHUjO¶DUWLFOHGX1(&MD.
% &HVGLVSRVLWLIVGRLYHQWrWUHXWLOLVpVDYHFGHV¿OVG¶XQFDOLEUHGHj$:*j
l’intérieur de cordons des types suivants : SE, SEO, SJ, SJE, SJEO, SJO, SJOO, SJT,
SJTO, SJTOO, SO,SOO, SRD, SRDE, SRDT, ST, STO, STOO et W.NEC® Article 400.
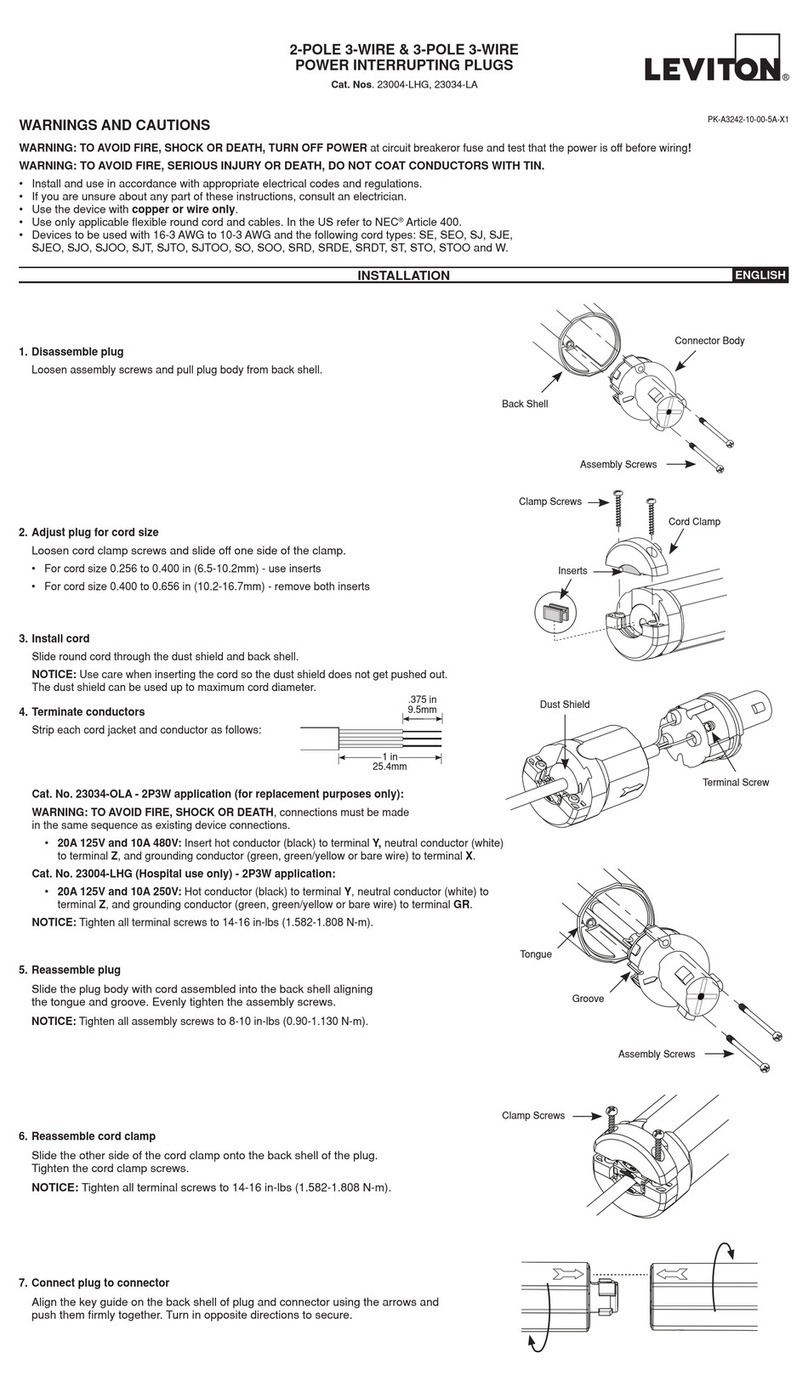
AVIS : VXLYUHOHVpWDSHVjSRXUOD¿FKHet le connecteur.
1. 'pVDVVHPEOHUOD¿FKHRXOHFRQQHFWHXU.
'HVVHUUHUOHVYLVG¶DVVHPEODJHHWVpSDUHUOHFRUSVGHOD¿FKHRXGXFRQQHFWHXU
de sa coquille.
2. $MXVWHUOD¿FKHRXOHFRQQHFWHXUHQIRQFWLRQGHODWDLOOHGXFRUGRQ
Desserrer les vis du collier de cordon et en sortir un des côtés. 3ODFHUOHVSLqFHV
DPRYLEOHVQRLUHVGHIDoRQjFHTXHOHVPDUTXHVGHGLDPqWUHVHIDVVHQWIDFH
AVIS : HQSUpVHQFHGHFRUGRQVGHjPPjSRUHWLUHUOHV
SLqFHVDPRYLEOHV
3. Insérer le cordon.
*OLVVHUOHFRUGRQDXWUDYHUVGHO¶pFUDQSDUHSRXVVLqUHHWGHODFRTXLOOH
AVIS : TXDQGRQLQVqUHOHFRUGRQLOIDXWSUHQGUHVRLQGHQHSDVIDLUHVRUWLU
O¶pFUDQFHOXLFLGRLWUHVWHUHQSODFHPrPHDYHFOHVFRUGRQVDXGLDPqWUH
PD[LPDOSHUPLV
(ႇHFWXHUOHVWHUPLQDLVRQV
Dégainer et dénuder chaque conducteur comme ci-dessus :
• 30 A, 600 V c.a./20 A, 250 V c.c.: insérer le conducteur de terre (vert, vert/
MDXQHRXGpQXGpGDQVODERUQH*5YLVKH[DJRQDOHYHUWH
• Insérer les conducteurs actifs (noirs, rouges ou bleus) dans les bornes X, Y
et Z.
AVIS : serrer les vis des bornes en appliquant un couple de 2,825 N.m (25 po-
lb).
5pDVVHPEOHUOD¿FKHRXOHFRQQHFWHXU
*OLVVHUGDQVODFRTXLOOHOHFRUSVGHOD¿FKHRXGXFRQQHFWHXUDWWDFKpDXFRUGRQ
en alignant la languette et la rainure. Serrer uniformément les vis d’assemblage.
AVIS : VHUUHUOHVYLVG¶DVVHPEODJHHQDSSOLTXDQWXQFRXSOHGHj1P
jSROE
6. Réassembler le collier de cordon.
5HPHWWUHODPRLWLpGHFROOLHUHQSODFHVXUODFRTXLOOHGHOD¿FKHRXGX
connecteur. Serrer les vis du collier.
AVIS : VHUUHUOHVYLVGXFROOLHUHQDSSOLTXDQWXQFRXSOHGHj1P
jSROE
7. &RQQHFWHUOD¿FKHjXQFRQQHFWHXURXOHFRQQHFWHXUjXQH¿FKH
$OLJQHUOHVÀqFKHVVLWXpHVVXUODFRTXLOOHGHOD¿FKHHWGXFRQQHFWHXUHWSRXVVHU
ces derniers fermement ensemble. /HVWRXUQHUHQVHQVRSSRVpVSRXUVROLGL¿HU
ODFRQQH[LRQ
ADVERTENCIAS:
• PARA EVITAR FUEGO, DESCARGA ELÉCTRICA O LA MUERTE, DESCONECTE LA
ELECTRICIDAD en el disyuntor o fusible y compruebe que la electricidad esté apagada antes
de realizar el cableado.
• PARA EVITAR FUEGO, LESIONES SERIAS O LA MUERTE, NO RECUBRA LOS CONDUC-
TORES CON ESTAÑO.
PRECAUCIONES:
• ,QVWDOH\XWLOLFHGHDFXHUGRDORVFyGLJRV\UHJODPHQWRVHOpFWULFRVDGHFXDGRV
(QFDVRGHTXHWHQJDDOJXQDGXGDHQUHODFLyQDFXDOTXLHUSDUWHGHHVWDVLQVWUXFFLRQHV
consulte a un electricista.
• Utilice el dispositivo con cable de cobre únicamente.
8WLOLFH~QLFDPHQWHFDEOHV\FRUGHOHVUHGRQGRVÀH[LEOHVDGHFXDGRV(Q(8$VROLFLWH$UWtFXOR
400 NEC®.
• Los dispositivos deben utilizarse con 12-4 AWG a 8-4 AWG y los siguientes tipos de cable:
SE, SEO, SJ, SJE, SJEO, SJO, SJOO, SJT, SJTO, SJTOO, SO, SOO, SRD, SRDE, SRDT,
ST, STO, STOO, y W.
NOTA: Siga los pasos 1-6 tanto para el enchufe como para el conector.
1. Desensamble del enchufe y el conector.
$ÀRMHORVWRUQLOORVGHHQVDPEOH\VDTXHHOFXHUSRGHOHQFKXIHFRQHFWRUGHOD
SDUWHWUDVHUDGHODUPD]yQ
2. Ajuste del enchufe y el conector para el tamaño del cable.
$ÀRMHORVWRUQLOORVGHODDEUD]DGHUDGHOFDEOH\GHVOLFHKDFLDDIXHUDXQODGR
GHODDEUD]DGHUD$MXVWHORVLQVHUWRVQHJURVSDUDTXHODVPDUFDVGHOGLiPHWUR
queden frente a frente:
NOTA: Tamaño de cable de 22 a 30 mm (0.88 a 1.16 pulgadas) – retire
insertos.
3. Instalación del cable.
Deslice el cable redondo a través del protector de polvo y la parte trasera de
DUPD]yQ
NOTA: Tenga cuidado al insertar el cable de tal manera que no empuje el
SURWHFWRUGHSROYR(OSURWHFWRUGHSROYRSXHGHVHUXWLOL]DGRKDVWDHOGLiPHWUR
Pi[LPRGHOFDEOH
4. Terminación de conductores.
Pele el revestimiento de cada cable y el conductor como anteriormente:
• 30A-600VCA/20A-250VCC: Inserte el conductor de puesta a tierra (verde,
verde/amarillo o cable desnudo) a la terminal GR WRUQLOORKH[DJRQDOYHUGH
• Inserte los conductores directos (negro, rojo o azul) a las terminales X, Y y Z.
NOTA: Apriete todos los tornillos terminales a 2.825 N-m (25 pulgadas-libras).
5. Reensamble del enchufe y el conector.
Deslice el cuerpo del enchufe/conector con el cable ensamblado dentro de la
SDUWHWUDVHUDGHODUPD]yQ alineando la lengüeta y la ranura. Apriete de manera
uniforme los tornillos de ensamble.
NOTA: Apriete todos los tornillos de ensamble a 0.90-1.130 N-m (8-10 pulga-
das-libras).
6. Reensamble de la abrazadera del cable.
Deslice el otro lado de la abrazadera del cable dentro de la parte trasera del
DUPD]yQ del enchufe/conector. Apriete los tornillos de la abrazadera del cable.
NOTA: Apriete todos los tornillos de la abrazadera del cable a 1.582-1.808 N-m
(14-16 pulgadas-libras).
7. Conexión del enchufe al conector.
Alinee la guía cable en ODSDUWHWUDVHUDGHODUPD]yQ del conector y el enchufe
XWLOL]DQGRODVÀHFKDV\HPS~MHORVMXQWRV¿UPHPHQWH*LUHHQGLUHFFLRQHV
RSXHVWDVSDUDD¿DQ]DU
