manuals.online logo
Brands
  1. Home
  2. •
  3. Brands
  4. •
  5. Leviton
  6. •
  7. Cables And Connectors
  8. •
  9. Leviton NE100-00C User manual

Leviton NE100-00C User manual

For Technical Assistance Call:
1-800-824-3005 (U.S.A. Only)
www.leviton.com
LIMITED 2 YEAR WARRANTY AND EXCLUSIONS
Leviton warrants to the original consumer purchaser and
not for the benefit of anyone else that this product at the
time of its sale by Leviton is free of defects in materials and
workmanship under normal and proper use for two years
from the purchase date. Leviton’s only obligation is to correct
such defects by repair or replacement, at its option, if within
such two year period the product is returned prepaid, with
proof of purchase date, and a description of the problem to
Leviton Manufacturing Co., Inc.,Att: Quality Assurance
Department, 59-25 Little Neck Parkway, Little Neck, New
York 11362-2591. This warranty excludes and there is
disclaimed liability for labor for removal of this product or
reinstallation. This warranty is void if this product is installed
improperly or in an improper environment, overloaded,
misused, opened, abused, or altered in any manner, or is
not used under normal operating conditions or not in
accordance with any labels or instructions. There are no
other or implied warranties of any kind, including
merchantability and fitness for a particular purpose, but if
any implied warranty is required by the applicable
jurisdiction, the duration of any such implied warranty,
includingmerchantability andfitness fora particular purpose,
is limited to two years. Leviton is not liable for incidental,
indirect, special, or consequential damages, including
without limitation, damage to, or loss of use of, any
equipment, lost sales or profits or delay or failure to perform
this warranty obligation. The remedies provided herein are
the exclusive remedies under this warranty, whether based
on contract, tort or otherwise.
DI-000-NE100-00A-Pilot
C O L L E C T I O N B Y L E V I T O N
SmartJack
Cat. No. NE100
24VDC
40mA, 1W
For use w/Leviton LCnet products
INSTALLATION INSTRUCTIONS
DI-000-NE100-00A-Pilot
Frame
Strap
Snaps
Push in 2 Locations
LCnet LED
Jack
RS-232 LED
A
A
A
A
Figure 1 - SmartJack Functions
Figure 2 - Color Conversion
FEATURES
•Leviton’s Decora®Style design
•Fits standard wall box
•Color conversion available
•Low-Voltage for easy installation
•Serial to RJ11 Cable included
INTRODUCTION
The SmartJack, Cat. No. NE100, is used in conjunction with software provided by Leviton to enable
control of a Leviton lighting system from a personal computer. This product allows messages to be
transferred back and forth from a user’s personal computer to the LCnet system, allowing a user to
have control of their own lights from the computer desktop. If there is a whole network of
computers, then each person can control their own lights. To enable this, the computer connected
to the SmartJack must be part of a network that supports HTTP.
DESCRIPTION
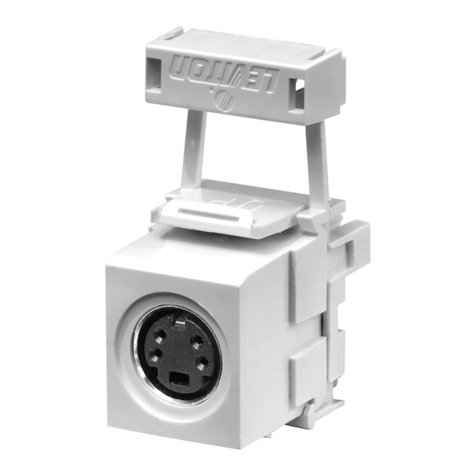
The SmartJack is a low-voltage Class II wiring device and installs in a regular wall box. There are
two connections, a pluggable connector (on back of device) and a jack (on front of device) to use
with the provided computer cable. The pluggable connector is used to connect the SmartJack to the
LCnet system. The provided cable connects the SmartJack to the serial port of a personal
computer. On one end of the cable there is a RJ-11 plug and on the other end a DB-9 connector.
There are two LED indicators on the face of the SmartJack. These indicators are used to display
the state of communication on each of the connectors. See the “To Operate”section for a
description of the functions of the indicators.
The Leviton Personal Dimmer and HTTP Server software provided works with Windows 95, 98,
2000 and NT 4.0. Instructions for installing the software are provided with the software files. Check
Leviton website for updated software.
FCC COMPLIANCE STATEMENT
This device complies with part 15 of the FCC Rules. Operation is subject to the following two
conditions: (1) This device must not cause harmful interference, and (2) This device must accept
any interference received, including interference that may cause undesired operation.
INSTALLATION INSTRUCTIONS
WARNING: TO BE INSTALLED AND/OR USED IN ACCORDANCE WITHAPPROPRIATE
ELECTRICAL CODES AND REGULATIONS.
WARNING: IF YOU ARE NOT SURE ABOUTANY PART OF THESE INSTRUCTIONS, CONSULT
A QUALIFIED ELECTRICIAN.
CAUTION: DISCONNECT POWER WHEN SERVICING FIXTURE OR CHANGING LAMPS.
CAUTION: THE SMARTJACK OPERATES OFF OF LOW-VOLTAGE (24VDC), SO CARE MUST
BE TAKEN WHEN REPLACING A LIGHT SWITCH. CONSULT LOCAL BUILDING CODES AND
REGULATIONS FOR PROPER LOW-VOLTAGE INSTALLATION.
TO INSTALL:
1. WARNING: TO AVOID FIRE, SHOCK, OR DEATH; TURN OFF POWER AT CIRCUIT
BREAKER OR FUSE AND TEST THAT POWER IS OFF BEFORE WIRING!
2. Remove existing wallplate and switch or dimmer, if applicable
CAUTION: IF APPLICABLE, ENSURE THAT CIRCUIT CONDUCTORS ARE PROPERLY
CAPPED OFF WITH WIRE CONNECTORS AND REMOVED FROM WALL BOX.
3. Connect per appropriate WIRING DIAGRAM as follows: Insert each lead into appropriate Plug
location by pushing firmly (refer to Wiring Diagram 1). If using stranded wire, twist strands of
each lead tightly (making sure that there are no stray strands) and push firmly into appropriate
Plug location. Tighten the screws on the Plug making sure that no bare conductor shows.
Connect Plug into Connector on the back of the SmartJack.
DI-000-NE100-00A-Pilot 9/21/01, 4:35 PM1
GND (Green) GND
Not Used Not Used
+24V DC (Green/White) +24V DC
CAN-L (Blue/White) CAN-L
CAN-H (Blue) CAN-H
To Power Pack
Back of SmartJack
Wiring Diagram 1 - Single Station Application
DI-000-NE100-00A-Pilot
4. Carefully position all wires to provide room in outlet box for SmartJack. Mount SmartJack into box
with mounting screws supplied.
NOTE: The SmartJack mounting orientation is with the LED’s above the jack opening.
5. Replace wallplate as follows:
•Remove “A”tab when using standard Decora®wallplate (refer to Figure 1).
•Leave “A”tabs intact when using Decora®Screwless wallplate.
6. Restore power at circuit breaker or fuse.
7. Connect the DB-9 end of cable to the personal computer. Insert the RJ-11 (phone type) jack into
the opening on the face of the SmartJack until the lever clicks into place. Install software on
computer by following Software Installation Instructions. INSTALLATION IS COMPLETE.
COLOR CONVERSION PROCEDURE
The color of this device can be changed to suit your interior design requirements. Simply obtain a
color conversion kit of the appropriate color from your Leviton distributor (a color conversion is
supplied with the product). Proceed as follows (please note that wallplate must be removed).
1. Select the color of the face you desire.
2. The frame has snaps on its sides. Using a small screwdriver, gently remove the frame from the strap
(refer to Figure 2).
3. Take the new frame and position it properly to the strap. Line up the plastic snaps with the square
holes in the strap. Insert the snaps on one side of the frame into the strap.
4. Firmly press sideways and down to slip the other snaps into place. The frame snaps in with an
audible click. Ensure that all four snaps are secure. Replace Decora®wallplate. The color
conversion is complete.
TO OPERATE
NOTE: The LED’s will be lit ORANGE between 5 and 10 seconds after power is applied.
The SmartJack begins operation when power is applied, and the connections are made. It does not
require any user intervention to operate other than the Leviton Personal Dimmer and HTTP Server
software interface. Refer to Users Guide.
LED Indicators - There are two LED indicators, one for each port.
*NOTE: The SmartJack orientation is with the LED’s above the jack opening.
TROUBLESHOOTING
•If NO LED’s are lit after connecting the LCnet port; there is no power
- Check wiring.
•If the client software is used to control the lights, but the Left LED does not blink green:
- check Serial cable is connected to the computer
- verify that the serial port works
•If a Controller is used to control the lights, and the Right LED does not blink green:
- check wiring on the LCNet port
- check wiring on the network wire pair
Refer to Installation Manual and User Guide for Troubleshooting and System Installation
details.
LED Position* Definition
RS-232 Right Blink Red –message sent to computer
Blink Green –message received from computer
LCnet Communication Left Blink Red –message sent to LCnet
Blink Green –message received from LCnet
DI-000-NE100-00A-Pilot 9/21/01, 4:35 PM2

This manual suits for next models

1

Other Leviton Cables And Connectors manuals

Leviton 41920-SP4 User manual

Leviton

Leviton 41920-SP4 User manual

Leviton 5S180-SH5 User manual

Leviton

Leviton 5S180-SH5 User manual

Leviton DMXSM-H18 User manual

Leviton

Leviton DMXSM-H18 User manual

Leviton Black & White 2421 User manual

Leviton

Leviton Black & White 2421 User manual

Leviton Black &  White Series User manual

Leviton

Leviton Black & White Series User manual

Leviton 21415-LB User manual

Leviton

Leviton 21415-LB User manual

Leviton 48642 User manual

Leviton

Leviton 48642 User manual

Leviton 115PR User manual

Leviton

Leviton 115PR User manual

Leviton QuickPort USOC Snap-In Connector 41106-R*6 User manual

Leviton

Leviton QuickPort USOC Snap-In Connector 41106-R*6 User manual

Leviton DMXSM-H18 User manual

Leviton

Leviton DMXSM-H18 User manual

Leviton 23004-LHG User manual

Leviton

Leviton 23004-LHG User manual

Leviton 15 Series User manual

Leviton

Leviton 15 Series User manual

Leviton 476TM-612 Installation instructions manual

Leviton

Leviton 476TM-612 Installation instructions manual

Leviton 476TM-652 User manual

Leviton

Leviton 476TM-652 User manual

Leviton 40951-1PW User manual

Leviton

Leviton 40951-1PW User manual

Leviton C0256-0SS User manual

Leviton

Leviton C0256-0SS User manual

Leviton 275 User manual

Leviton

Leviton 275 User manual

Leviton BLACK & WHITE 15A User manual

Leviton

Leviton BLACK & WHITE 15A User manual

Leviton 5G110-RX5 User manual

Leviton

Leviton 5G110-RX5 User manual

Leviton 113 User manual

Leviton

Leviton 113 User manual

Leviton 40735-R User manual

Leviton

Leviton 40735-R User manual

Leviton Black & white User manual

Leviton

Leviton Black & white User manual

Leviton CONTECH LIGHTING LPU2121 User manual

Leviton

Leviton CONTECH LIGHTING LPU2121 User manual

Leviton 41106-R User manual

Leviton

Leviton 41106-R User manual

Popular Cables And Connectors manuals by other brands

Festo NEBM-SM12G8-E Q5-LE6 Series Instructions & assembly

Festo

Festo NEBM-SM12G8-E Q5-LE6 Series Instructions & assembly

Hive Plug user guide

Hive

Hive Plug user guide

AV Access AVA-SP18-H00 user manual

AV Access

AV Access AVA-SP18-H00 user manual

Monoprice HD-140E3-3D-V2 manual

Monoprice

Monoprice HD-140E3-3D-V2 manual

Avermedia C039 manual

Avermedia

Avermedia C039 manual

Sony POC-DA12P quick guide

Sony

Sony POC-DA12P quick guide

Philips SWV4116S/10 user manual

Philips

Philips SWV4116S/10 user manual

ProVisual BA401-SP instruction manual

ProVisual

ProVisual BA401-SP instruction manual

CommScope BUDI-S installation instructions

CommScope

CommScope BUDI-S installation instructions

Griven AL4750 instruction manual

Griven

Griven AL4750 instruction manual

CNC4PC C86ACCP user manual

CNC4PC

CNC4PC C86ACCP user manual

Wentronic clicktronic 70742 user manual

Wentronic

Wentronic clicktronic 70742 user manual

NEUTRIK opticalCON HYBRID MED NKO16M-XP-0 Series Cleaning instruction

NEUTRIK

NEUTRIK opticalCON HYBRID MED NKO16M-XP-0 Series Cleaning instruction

NEC AccuSync 500 supplementary guide

NEC

NEC AccuSync 500 supplementary guide

Philips SWV2693W Specifications

Philips

Philips SWV2693W Specifications

Ophit HDMB2 user guide

Ophit

Ophit HDMB2 user guide

Rean RCAC3M-X-000 Assembly instruction

Rean

Rean RCAC3M-X-000 Assembly instruction

ENSOTECH SWAVE-E2 user manual

ENSOTECH

ENSOTECH SWAVE-E2 user manual

manuals.online logo
manuals.online logoBrands
  • About & Mission
  • Contact us
  • Privacy Policy
  • Terms and Conditions

Copyright 2025 Manuals.Online. All Rights Reserved.