LGB 10340 User manual

DAS PRODUKT
Mit der Pendelautomatik 10340 kön-
nen Sie Ihren Zug zwischen zwei
Bahnhöfen pendeln lassen. Die
Pendelautomatik verfügt über:
- zwei Betriebsarten
- “Einfach” mit einstellbarer Be-
schleunigung
- “Vorbildgetreu” mit einstellbarer
Beschleunigung und Bremsver-
zögerung
- einstellbare Wartezeit in den Bahn-
höfen
- Überlast- und Kurzschluß-Sicherung
Bedienungsanleitung
Instruction
Instructions de Service
Pendelautomatik
10340
GARANTIE
Unsere Produkte sind Präzisions-
wertarbeit in Design und Technik. Wie bei
einer wertvollen Uhr werden feinstme-
chanische Präzisionsteile von Hand ge-
fertigt. Permanente Materialkontrollen,
Fertigungskontrollen und die Endkon-
trolle vor Auslieferung garantieren unser
gleichbleibend hohes Qualitätsniveau.
Um wirklich ungetrübten Spaßzu haben,
lesen Sie bitte diese Garantie- und
Bedienungsanleitung.
Wir (ERNST PAUL LEHMANN PATENT-
WERK) auf dieses Produkt weltweit eine
Garantie von 2 Jahren ab dem Erstkauf
für Fehlerfreiheit von Material und
Funktion, sofern dieses Produkt mit
Kaufbeleg bei einem von uns autorisier-
ten Fachhändler erworben wurde.
Bei berechtigten Reklamationen innerhalb
von 2 Jahren nach Kaufdatum werden wir
gegen Vorlage des entsprechenden
Kaufbelegs nach unserem Ermessen
kostenlos nachbessern, bzw. kostenlosen
Ersatz liefern. Sollten Nachbesserung
oder Ersatzlieferung unmöglich sein, so
räumen wir Ihnen nach unserem Er-
messen eine angemessene Minderung
ein oder erstatten Ihnen statt dessen den
Kaufpreis zurück.
Unabhängig von diesen Garantie-
leistungen bleiben Ihnen selbstverständ-
lich Ihre gesetzlichen Ansprüche insbe-
sondere wegen Sachmängel erhalten.
Um einen Anspruch auf Garantieleistung
geltend zu machen, übergeben Sie bitte
das beanstandete Produkt, zusammen
mit dem Kaufbeleg, Ihrem von uns auto-
risierten Händler. Um einen autorisierten
Händler zu finden, wenden Sie sich bitte
an eine der unten aufgeführten Service-
Abteilungen. Sie können das Produkt
auch, zusammen mit dem Kaufbeleg, an
eine der beiden unten aufgeführten
Serviceabteilungen einschicken. Die
Einsendung erfolgt zu Ihren Lasten.
ERNST PAUL LEHMANN PATENTWERK
Service-Abteilung Garantie
Saganer Str. 1-5
90475 Nürnberg
Deutschland
Telefon (09 11) 83 707-0
LGB OF AMERICA
Warranty Service Department
6444 Nancy Ridge Drive
San Diego, CA 92 121
USA
Tel: (858) 535-93 87
Bitte beachten Sie:
- Für Schäden durch unsachgemäße
Behandlung oder Fremdeingriff sowie für
Verschleißteile besteht kein Garantie-
anspruch.
- Transformatoren und Regler unterliegen
strengen CE-UL-Vorschriften und dürfen
nur vom Hersteller geöffnet und repariert
werden. Zuwiderhandlungen bewirken
zwingend Garantieverlust und generelle
Reparaturverweigerung.
- Nur für USA: Diese Garantie gibt Ihnen
genau definierte Rechte. Weiterhin ver-
bleiben Ihnen unter Umständen je nach
Bundesstaat weitere Rechte.
Wir sind sehr stolz auf unsere Produkte.
Wir alle hoffen, daßsie Ihnen viele Jahre
lang Freude bereiten.
GARANTIE
Nos produits de qualitésupérieure sont le
résultat du mariage de l’innovation et de
la technologie. Àl’instar d’une montre
précieuse, tous les composants sont
fabriqués àla main par nos artisans méti-
culeux. Un programme rigoureux d’assu-
rance de la qualité, de la sélection des
matériaux àl’assemblage et aux vérifica-
tions avant sortie des ateliers, garantis-
sent un haut niveau de qualitéconstante.
Afin d’obtenir la plus grande satisfaction
de ce produit, veuillez lire la fiche d’ins-
tructions ainsi que cette garantie.
Nous (Ernst Paul Lehmann Patentwerk)
garantissons ce produit, àl’échelle mon-
diale, contre tout vice de matière et de
fabrication, pendant deux ans àpartir de
la date d’achat par l’acheteur original, si le
produit a étéachetéchez un détaillant
autorisé.
Si vous demandez un recours en garantie
pour un motif jugérecevable, joignez la
preuve de l’achat chez un détaillant auto-
riséet nous réparerons ou remplacerons
le produit ànotre discrétion. S’il s’avère
impossible de réparer ou de remplacer le
produit, nous rembourserons, ànotre
discrétion, tout ou partie du prix d’achat.
Vous pouvez disposer d’autres droits
légaux en plus de cette garantie, en parti-
culier en cas de vice de matière.
Pour initier une demande de règlement
au titre de cette garantie, veuillez ramener
le produit, avec la preuve d’achat, àvotre
revendeur autorisé. Pour trouver l’adres-
se d’un revendeur autorisé, veuillez entrer
en rapport avec l’un des Centres de servi-
ce après-vente cidessous. Vous pouvez
également renvoyer le produit, avec la
preuve d’achat, directement àl’un des
Centres de service après-vente ci-des-
sous. L’expéditeur est responsable des
frais d’expédition, de l’assurance et des
frais de douane.
ERNST PAUL LEHMANN PATENTWERK
Service-Abteilung Garantie
Saganer Str 1-5
90475 Nürnberg
ALLEMAGNE
Tel : (09 11) 83 707 0
LGB OF AMERICA
Warranty Service Department
6444 Nancy Ridge Drive
San Diego CA 92121
ÉTATS-UNIS
Tel : (858) 535-93 87
Veuillez bien noter que :
- Cette garantie ne couvre pas les dom-
mages résultat d’une utilisation inadé-
quate, ni de modification/réparation non
autorisée. Cette garantie ne couvre pas
l’usure normale.
- Les transformateurs et commandes
sont conformes aux normes rigoureuses
CE et UL et ne peuvent être ouverts et
réparés que par le fabricant. Toute viola-
tion àcet égard entraînera la perte impé-
rative de tous les droits de garantie et un
refus de toutes réparations, quelles qu’el-
les soient.
- États-Unis uniquement : Cette garantie
vous donne des droits légaux spéci-
fiques, et vous pouvez également avoir
d’autres droits qui varient d’un État àl’autre.
Nous sommes très fiers de nos produits
et nous vous souhaitons des années d’a-
musement inoubliables avec votre hobby
qui est également le nôtre.
WARRANTY
This precision product is made using
quality designs and technology. Like a
fine timepiece, it has been crafted by
hand. Constant monitoring of materials
and assembly, together with final testing,
ensure a consistent level of high quality.
To get the most enjoyment from this
product, we encourage you to read the
instructions and this warranty.
We (Ernst Paul Lehmann Patentwerk)
warrant this product worldwide for two
years from the date of original consumer
purchase against defects in materials and
workmanship, if purchased from an
authorized retailer.
If you have a valid warranty claim, includ-
ing proof of purchase from an authorized
retailer, we will repair or replace the prod-
uct at our discretion. If it is impossible to
repair or replace the product, we will
refund all or a reasonable portion of the
purchase price at our discretion.
Of course, you may have other legal
rights independent of this warranty, par-
ticularly in the case of material defects.
To make a claim under this warranty,
please bring the product, with the proof
of purchase, to your authorized retailer.
To find an authorized retailer, please con-
tact one of the service departments listed
below. You may also send the product,
with the proof of purchase, directly to one
of the service departments listed below.
You are responsible for any shipping
costs, insurance and customs fees.
ERNST PAUL LEHMANN PATENTWERK
Service-Abteilung Garantie
Saganer Str. 1-5
90475 Nürnberg
Deutschland
Telephone: (09 11) 83 707 0
LGB OF AMERICA
Warranty Service Department
6444 Nancy Ridge Drive
San Diego, CA 92121
USA
Telephone: (858) 535-93 87
Please note:
- This warranty does not cover damage
caused by improper use or unauthorized
modifications/repairs. This warranty does
not cover normal wear and tear.
- Transformers and controls are subject
to strict CE and UL regulations and may
only be opened and repaired by the man-
ufacturer. Any violations automatically
void this warranty and prevent any repair
by us.
- U.S. only: This warranty gives you spe-
cific legal rights, and you may also have
other rights which vary from State to
State.
We are very proud of our products, and
all of us sincerely hope they give you
many years of enjoyment!
Wolfgang, Rolf, Johannes
Richter
8.869110.267 1.0 0702 PF
Änderungen der technischen Ausführungen vorbehalten.
We reserve the right to make technical alterations without prior notice.
Modifications de constructions réservées.
Für drinnen und draussen - For indoors and outdoors
Achtung!
Verpackung und Betriebsanleitung aufbewahren!
Nicht für Kinder unter 8 Jahren geeignet, modellbedingt besteht Quetsch-
und Klemmgefahr durch Antriebsgestänge der Lok.
Nicht für Kinder unter 8 Jahren geeignet, wegen funktions- und modellbe-
dingter scharfer Kanten und Spitzen.
Attention!
This product is not for children under 8 years of age. It has moving parts
that can pinch and bind.
This product is not for children under 8 years of age. This product has
small parts, sharp parts and moving parts.
Attention!
Veuillez conserver l’emballage et le mode d’emploi!
Ne convient pas aux enfants de moins de 8 ans. L’embiellage de la loco-
motive peut pincer les doigts de jeunes enfants.
Ne convient pas aux enfants de moins de 8 ans. Présence de petits élé-
ments susceptibles d’être avalés.
Attenzione!
Conservare l’imballo e le istruzioni per l’uso!
Non adatto a bambini di età inferiore agli 8 anni poiché vi è possibilità a
pericolo di schiacciamento delle dita quando il treno è in funzione.
Non adatto a bambini di età inferiore agli 8 anni in quanto le strutture pre-
sentano spigoli vivi e punte accuminate.
Atención!
Guardar el carton de embalaje y las Instrucciones para el uso!
No adecuado para niños menores de 8 años. Según el modelo, existe el
peligro de sufrir contusiones o de cogerse los dedos a causa del varillaje
de accionamiento de la locomotora. No adecuado para niños menores de
8 años, debido a cantos y puntas peligrosas condicionadas por la función
o el modelo.
Attentie!
Verpakking en gebruiksaanwijzing bewaren!
Niet geschikt voor kinderen onder de 8 jaar omdat deze loc aandrijfstan-
gen bezit waaraan kinderen zich kunnen bezeren.
Niet geschikt voor kinderen onder de 8 jaar omdat dit model funktionele
scherpe kanten en punten bezit.

Die Packung enthält:
- 1 Prellbock mit Elektronik
- 2 Unterbrechergleise mit vormon-
tierten Dioden
- 1 blau/rotes Gleisanschlußkabel
- 1 blau/rotes Anschlußkabel vom
Fahrregler zum Prellbock
Achtung! Dieses Produkt kann nicht
mit dem LGB-Mehrzugsystem einge-
setzt werden. Lokomotiven mit
Decodern können jedoch mit der
Pendelautomatik und einem analo-
gen LGB-Trafo/Fahrregler betrieben
werden.
DAS LGB-PROGRAMM
Zum Einsatz mit diesem Modell
schlagen wir folgende LGB-Artikel
vor:
- 10153 Gerades Unterbrechergleis,
150 mm
- 10310 Prellbock, beleuchtet
- 50220 Graue Einfachlitze, 40 m
- 50520 Gleissperrsignal für Prell-
bock
Informationen über das komplette
LGB-Programm finden Sie im LGB-
Katalog.
BEDIENUNG
WARNUNG! Achten Sie darauf, daß
in beiden Bahnhöfen eine ausrei-
chende Bremsstrecke zur Verfügung
steht, um Unfälle zu vermeiden.
Wenn Sie die Fahrtgeschwindigkeit
Ihres Zuges oder die Einstellungen
der Pendelautomatik ändern, kann
sich die notwendige Bremsstrecke
ändern. Beispielsweise benötigen
schnelle Züge eine längere Brems-
strecke.
Hinweis: Diese Version der
Pendelautomatik 10340 hat neue
Funktionen, darunter einstellbare
Beschleunigung und Bremsver-
zögerung. Die Anleitung für diese
Version ist nicht für ältere Versionen
der Pendelautomatik 10340 geeignet.
Betriebsarten
Im Prellbock finden Sie eine Platine
mit zwei Schaltern und zwei
Einstellreglern (Potentiometern, Abb.
1). Um die Schalter einzustellen, dre-
hen Sie den Prellbock um. Der
Schalter “Mode”dient zum Einstellen
der Betriebsarten:
Betriebsart 1 (werkseitige Einstell-
ung): “Einfach”mit einstellbarer Be-
schleunigung und abruptem Ab-
bremsen. In dieser Betriebsart kann
die Pendelautomatik 10340 ältere
LGB-Pendelautomatiken (80090,
0090) ersetzen.
Betriebsart 2: “Mit vorbildgetreuem
Abbremsen”: einstellbare Beschleu-
nigung und Abbremsung.
Achtung! Eine neue Betriebsart wird
erst wirksam, nachdem die Betriebs-
spannung mindestens 15 Sekunden
lang ausgeschaltet ist.
BETRIEBSART 1 ("EINFACH")
Vorbereitung (Abb. 2)
1. Jeweils ein Unterbrechergleis am
Eingang der beiden Bahnhöfe ein-
bauen.
2. Mit dem blau/roten Gleisanschluß-
kabel die Anschlüsse “bl”(blau)
und “rt”(rot) am Ausgang "A" auf
der Platine an die Gleise ans-
chließen (Abb. 2).
3. Mit dem zweiten Kabel die
Anschlüsse “bl”(blau) und “rt”
(rot) am Ausgang "Power" auf der
Platine an den Gleichstroman-
schlußeines LGB-Fahrreglers
oder Regeltrafos anschließen.
4. Netzstecker des Trafos in eine
Steckdose stecken.
Bedienung
Zug auf die freie Strecke zwischen
den Bahnhöfen stellen. Fahrregler/
Regeltrafo auf eine mittlere Stellung
drehen. Nach einer kurzen Pause
fährt der Zug los. Wenn der Zug
einen der Bahnhöfe erreicht und über
das Unterbrechergleis fährt, hält er.
Nach dem Ablauf der eingestellten
Wartezeit beschleunigt er langsam in
die entgegengesetzte Richtung und
fährt zum anderen Bahnhof. Der Zug
pendelt zwischen den Bahnhöfen, bis
der Fahrstrom abgeschaltet wird.
BETRIEBSART 2 (“VORBILDGE-
TREUES ABBREMSEN”)
Vorbereitung (Abb. 3)
Hinweis: Zum Aufbau dieser
Betriebsart benötigt man zwei einpo-
lige Kabel (z. B. LGB 50220), um die
Unterbrechergleise anzuschließen.
1. Schrauben an den Schienen loc-
kern und Dioden herausziehen.
Jeweils ein Unterbrechergleis am
Eingang der beiden Bahnhöfe ein-
bauen. Die unterbrochenen
Schienen der beiden Unter-
brechergleise dürfen nicht auf
derselben Gleisseite liegen. Die
Strecke zwischen den Trenn-
gleisen mußlänger sein als der
Zug.
2. Anschlüsse “sw”(schwarz) und
“ws”(weiß) auf der Platine an die
Unterbrechergleise anschließen,
wie auf Abb. 3 gezeigt. Die
Schrauben an den Unterbrecher-
gleisen lockern und jeweils das
Kabel zwischen Schraube und
Schiene festklemmen.
3. Mit dem blau/roten Gleisanschluß-
kabel die Anschlüsse “bl”(blau)
und “rt”(rot) an den Ausgängen
"A" bzw. "B" auf der Platine an die
Gleise anschließen.
4. Mit dem zweiten Kabel die
Anschlüsse “bl”(blau) und “rt”
(rot) am Ausgang "Power" auf der
Platine an den Gleichstrom-
anschlußeines LGB-Fahrreglers
oder Regeltrafos anschließen.
5. Netzstecker des Trafos in eine
Steckdose stecken.
Bedienung
Zug auf die freie Strecke zwischen
den Bahnhöfen stellen. Fahrregler/
Regeltrafo auf eine mittlere Stellung
drehen. Nach einer kurzen Pause
fährt der Zug los. Wenn der Zug
einen der Bahnhöfe erreicht und über
das Unterbrechergleis fährt, bremst
er ab und hält. Nach Ablauf der ein-
gestellten Wartezeit beschleunigt er
langsam in die entgegengesetzte
Richtung und fährt zum anderen
Bahnhof. Der Zug pendelt zwischen
den Bahnhöfen, bis der Fahrstrom
abgeschaltet wird.
4 53
A B
A
bl rt
swbl rt
2
Betriebsart
1
Betriebsart
Dela
y
Verzö
g
erun
g
+
2x10
Mode
1
Pause
x1
2
MODE
1
Power
Power
rt bl
MODE rt bl ws
Pause
--
+
Halt
Pendelautomatik 10340
Betriebsart 1 (Ersatz für 0090)
Dispositif d'inversion de marche automatique 10340
Mode de operation 1
Automatic reversin
g
unit 10340
Mode of operation 1
1
50080
sw rt
10340
wsbl bl rt
2
Pendelautomatik 10340
Betriebsart 2 ( vorbild
g
etreu )
Dispositif d'inversion de marche automatique 10340
Mode de operation 2
10340
sw rtblwsblrt
Automatic reversin
g
unit 10340
Mode of operation 2
50080
21
Pendelautomatik 10340
Betriebsart 1 (Einfach)
Automatic reversing unit 10340 Dispositif d’inversion de marche automatique 10340
Mode of operation 1 Mode de operation 1
Pendelautomatik 10340
Betriebsart 2 (vorbildgetreu)
Automatic reversing unit 10340 Dispositif d’inversion de marche automatique 10340
Mode of operation 2 Mode de operation 2

6
EINSTELLUNGEN (BEIDE BETRIEB-
SARTEN)
Aufenthaltsdauer im Bahnhof eins-
tellen
Die Aufenthaltsdauer im Bahnhof
wird über den Schalter “Pause” und
den Einstellregler “Halt” auf der
Platine eingestellt (Abb. 1).
- Am rechten Schalter den Bereich
der Aufenthaltsdauer einstellen:
“x1” kurz (ca. 2 Sekunden - 1,5
Minuten) (werkseitige Einstellung)
“x10” lang (ca. 1 - 8 Minuten)
- Einstellregler drehen, um die
Aufenthaltsdauer innerhalb dieser
Bereiche einzustellen.
Hinweise:
- Bei Betriebsart 1 “Einfach”ent-
spricht die eingestellte Zeit der
Fahrzeit plus der Aufenthaltsdauer
(Umschaltzeit). Beispiel: Der Zug
benötigt 1 Minute, um von einer
Endstation zur anderen zu fahren.
Damit der Zug jeweils 1 Minute im
Bahnhof wartet, die Zeit auf 2
Minuten einstellen.
- Bei Betriebsart 2 "Vorbildgetreu"
wird die reine Aufenthaltsdauer ein-
gestellt.
Beschleunigung und Abbremsen
einstellen
Die Beschleunigung und Bremsver-
zögerung wird über den Einstell-
regler “Verzögerung”auf der Platine
eingestellt (Abb. 1). Einstellregler
drehen, um schnellere oder langsa-
mere Beschleunigung und Verzöger-
ung einzustellen. Beschleunigung
und Verzögerung lassen sich nicht
getrennt einstellen.
Hinweise:
- Bei Betriebsart 1 "Einfach" wird nur
die Beschleunigung eingestellt. Das
Abbremsen erfolgt immer abrupt
beim Überfahren der Unterbrecher-
gleise.
- Neue Einstellungen von Aufent-
haltsdauer und Beschleunigung/
Verzögerung werden erst nach
einem Halt im nächsten Bahnhof
wirksam. Dazu braucht die
Betriebsspannung nicht abgeschal-
tet zu werden.
Stromversorgung
Achtung! Um Sicherheit und Zu-
verlässigkeit zu gewährleisten, darf
das Produkt nur mit LGB-Trafos und
Fahrreglern betrieben werden. Bei
Verwendung von anderen Trafos
funktioniert die Überlast-Sicherung
unter Umständen nicht. Weiterhin
wird bei Verwendung von anderen
Trafos Ihre Garantie ungültig.
Überlast-Sicherung
Die Pendelautomatik ist mit einer
Überlast-Sicherung ausgestattet, die
vor Schäden bei Kurzschlußund
Überlastung schützt. Wenn ein
Strom von mehr als 3 A fließt, schal-
tet sich die Pendelautomatik 10
Sekunden lang ab. Diese Überstrom-
Abschaltung funktioniert jedoch nur,
wenn der angeschlossene Trafo/
Regler mindestens 3 A Fahrstrom lie-
fern kann. Nach 10 Sekunden schal-
tet sich die Pendelautomatik wieder
ein.
Wenn Ihr Trafo weniger als 3 A
abgibt, wird bei einem Kurzschluß
die Überlast-Sicherung des LGB-
Trafos ausgelöst.
Maximaler Fahrstrom
Mit der Pendelautomatik können
Züge mit einem Strombedarf von bis
zu 3 A betrieben werden. Sound-
Loks in Doppeltraktion oder mit vie-
len beleuchteten Wagen benötigen
unter Umständen mehr als 3 A (siehe
Überlast-Sicherung).
Mindest-Fahrspannung
Die Pendelautomatik funktioniert nur,
wenn die Betriebsspannung mindes-
tens 10 Volt beträgt.
Weitere Informationen über die LGB-
Trafos und Fahrregler zur Verwend-
ung im Haus oder im Freien und über
das Mehrzugsystem finden Sie im
LGB-Katalog.
7
A B
A
bl rt
swbl rt
2
Betriebsart
1
Betriebsart
Dela
y
Verzö
g
erun
g
+
2x10
Mode
1
Pause
x1
2
MODE
1
Power
Power
rt bl
MODE rt bl ws
Pause
--
+
Halt

1. Auffahrschutz bei Betriebsart 2
"Vorbildgetreu"
Um zu vermeiden, daßder Zug auf
den Prellbock am Gleisende auffährt,
können Sie “Auffahrschutz”-Schalt-
ungen am Ende beider Bahnhöfe ein-
bauen (Abb. 4). Bauen Sie die Dioden
(siehe Seite 5, Betriebsart 2,
Absatz 1) in zwei zusätzliche Unter-
brechergleise (10153, liegen nicht
bei) ein. Wenn die Lok das zweite
Unterbrechergleis überfährt, hält sie
sofort an.
Hinweis: Falls die Lok nach Überfah-
ren der Dioden weiterfährt, Dioden
umgekehrt einbauen.
2. Einstellbare Bremsverzögerung
in der Betriebsart 1 “Einfach”
In der Betriebsart 1 “Einfach”wird
die Bremsverzögerung ebenso wie in
der Betriebsart 2 “Vorbildgetreu”
über den Einstellregler bestimmt.
Diese Bremsverzögerung wird wirk-
sam, sobald die Fahrzeit abgelaufen
ist. Normalerweise hält der Zug
jedoch abrupt an, sobald er die
Unterbrechergleise mit den Dioden
überfährt.
Dies kann man vermeiden, indem
man die Fahrzeit so kurz einstellen,
daßder Zug mit dem Abbremsen
beginnt, bevor er das Unterbrecher-
gleis überfährt. Um dies genau ein-
zustellen, benötigt man etwas
Fingerspitzengefühl.
Hinweise:
- Anstatt die Fahrzeit zu verringern,
können Sie die Geschwindigkeit am
Fahrregler ein wenig langsamer
einstellen (und umgekehrt). Dies
erlaubt eine feinfühligere Einstell-
ung und hat eine sofortige
Wirkung. (Langsamere Fahrtge-
schwindigkeit = längere Fahrtdauer,
und umgekehrt)
- Bei dieser Einstellung ist die
Aufenthaltsdauer im Bahnhof kurz
und nicht einstellbar.
3. Kompensieren der Geschwindig-
keit auf Gefällestrecken
Wenn Sie einen Zug auf einer
Bergstrecke mit der Pendelautomatik
10340 betreiben, fährt der Zug ber-
gab schneller als bergauf. Mit einer
einfachen Schaltung kann die
Fahrspannung des bergab fahrenden
Zuges verringert werden. Diese
Schaltung funktioniert in beiden
Betriebsarten: “1: Einfach”und "2:
Vorbildgetreu" (Abb. 5).
- Bauen Sie ein zusätzliches Unter-
brechergleis (z. B. 10153) zwischen
den bereits vorhandenen Unter-
brechergleisen ein.
- Schalten Sie einige Dioden
(1N5400, liegen nicht bei) in Reihe
in der Richtung des Gefälles. Für
jede der in Reihe geschalteten
Dioden sinkt die Fahrspannung um
0,7 - 1 Volt ab.
- Schalten Sie eine einzelne Diode in
Bergrichtung parallel zur Dioden-
reihenschaltung.
Der Zug fährt mit der normalen
Geschwindigkeit bergauf und bei der
Rückfahrt langsam bergab.
Hinweis: Bei Betriebsart 1 "Einfach"
können Sie vor jedem Unterbrecher-
gleis eine solche richtungsabhängige
Langsamfahrstrecke einbauen, um
ein stufenweises Abbremsen zu
erhalten.
98
ANLEITUNG FÜR
FORTGESCHRITTENE
Pendelautomatik 10340
Betriebsart 2 mit Auffahrschutz
Dispositif d'inversion de marche automatique 10340
Mode de operation 2
10340
bl
CA
51070
rtsw
34 2 1
Automatic reversin
g
unit 10340
Mode of operation 2
D
B
ws bl rt
Pendelautomatik 10340
Betriebsart 1 (Ersatz für 0090)
Dispositif d'inversion de marche automatique 10340
Mode de operation 1
10340
Automatic reversin
g
unit 10340
Mode of operation 1
B
Geschwindi
g
keitsreduzierun
g
durch Dioden von B nach A
Ber
g
51070
34 2
sw rt bl
1
Tal
A
rtblws
Pendelautomatik 10340
Betriebsart 2 mit Auffahrschutz
Automatic reversing unit 10340 Dispositif d’inversion de marche automatique 10340
Mode of operation 2 Mode de operation 2
Pendelautomatik 10340
Kompensieren der Geschwindigkeit auf Gefällstrecke
Automatic reversing unit 10340 Dispositif d’inversion de marche automatique 10340
Mode of operation 1 Mode de operation 1
Abb. 4
Abb. 5

10
AUTORISIERTER SERVICE
Bei unsachgemäßer Wartung wird
Ihre Garantie ungültig. Um fachge-
rechte Reparaturleistungen zu erhal-
ten, wenden Sie sich an Ihren
Fachhändler oder an die LGB-
Service-Abteilung:
Ernst Paul Lehmann Patentwerk
Reparatur-Abteilung
Saganer Straße 1-5
D-90475 Nürnberg
DEUTSCHLAND
Tel.: (0911) 83707 0
Telefax: (0911) 83707 70
Die Einsendung erfolgt zu Ihren
Lasten.
Hinweis: Informationen zur LGB und
zu LGB-Vertretungen in aller Welt fin-
den Sie im Internet unter www.lgb.de
VORSICHT! Dieses Produkt ist nicht
für Kinder unter 8 Jahren geeignet.
Das Produkt hat kleine, scharfe und
bewegliche Teile. Verpackung und
Bedienungsanleitung aufbewahren.
Artikel, technische Daten und Liefer-
daten können sich ohne Voran-
kündigung ändern. Einige Artikel
sind nicht überall und über alle
Fachhändler erhältlich. Einige Ab-
bildungen zeigen Handmuster. LGB,
LGB of America, LEHMANN und der
LGB TOYTRAIN-Schriftzug sind ein-
getragene Marken der Firma Ernst
Paul Lehmann Patentwerk, Nürnberg,
Deutschland. Andere Marken sind
ebenfalls geschützt. © 2002 Ernst
Paul Lehmann Patentwerk.
10340
Automatic Reversing Unit
THE PRODUCT
With the 10340 Automatic Reversing
Unit, your train can shuttle automati-
cally between two stations. Features
include:
- two operating modes
- “basic”with adjustable accelera-
tion
- “prototypical”with adjustable
acceleration and braking
- adjustable stopping time at stations
- short circuit and overload protec-
tion
This package includes:
- 1 track bumper with circuit board
- 2 insulated track sections with fac-
tory-installed diodes
- 1 blue/red track power cable
- 1 blue/red connecting cable (trans-
former/track bumper)
Attention! This product cannot be
used with the LGB Multi-Train
System. However, locomotives with
decoders can be operated with the
reversing unit and an analog power
pack.
THE PROGRAM
With this product, we recommend
the following items:
- 10153 Insulated Track, Single,
150 mm
- 10310 Track Bumper, Lighted
- 50220 Gray Wire, 40 m
- 50520 End-of-Track Light
For information on the complete LGB
program, see the LGB catalog.
11
OPERATION
CAUTION! Make sure there is
enough stopping distance in each
station to prevent accidents.
Changing the speed of your train or
the settings of the 10340 will
change the required distance. For
example, faster trains require
longer stopping distances.
Hint: This version of the 10340 has
new features, including adjustable
acceleration and braking. The
instructions for this version do not
apply to earlier versions.
Operating modes
Inside the track bumper, there is a
circuit board with two switches and
two control knobs (variable resis-
tors, Fig. 1). To reach the controls,
turn the track bumper upside down.
The “Mode”switch selects the oper-
ating mode:
Mode 1 (factory pre-set): “Basic”
with adjustable acceleration and
abrupt braking. In this mode, the
10340 can be used as replacement
for older LGB reversing units
(80090, 0090).
Mode 2: “With prototypical braking:”
adjustable acceleration and braking.
Attention! Changes to the operating
mode settings will not take effect
until the power has been shut off for
at least 15 seconds.
GB
USA
A B
A
bl rt
swbl rt
2
Betriebsart
1
Betriebsart
Dela
y
Verzö
g
erun
g
+
2x10
Mode
1
Pause
x1
2
MODE
1
Power
Power
rt bl
MODE rt bl ws
Pause
--
+
Halt

13
MODE 2 (“WITH PROTOTYPICAL
BRAKING”)
Preparation (Fig. 3)
Hint: To set up this mode, you need
two single-strand wires (for exam-
ple, LGB 50220) to connect the insu-
lated track sections.
1. Loosen the screws on the tracks
and remove the diodes. Install one
of the insulated track sections at
the entrance to each station. The
interrupted rails of the two insulat-
ed track sections must be on
opposite sides of the track. The
track between the stations must
be longer than the train.
2. Connect terminals “sw”(black)
and “ws”(white) on the circuit
board to the insulated track sec-
tions as shown in Fig. 3. Loosen
the screws on the insulated track
sections and trap the wire between
the screw and the rail.
3. Use the blue/red track power cable
to connect the connectors "bl"
(blue) and "rt" (red) of the termi-
nals “A”and “B,”respectively, to
the tracks.
4. Use the blue/red connecting cable
to connect the connectors "bl"
(blue) and "rt" (red) on terminal
“Power”of the circuit board to the
DC output of an LGB throttle or
power pack.
5. Plug the power supply cord into a
house current outlet.
Operation
Place a train on the track between the
stations. Adjust the throttle to a
medium setting. After a short pause,
the train will start and proceed to one
station. When it crosses the insulat-
ed track section, it will slow to a stop.
After the pre-set wait time has
elapsed, it will slowly accelerate in
the opposite direction and proceed to
the other station. The train will shut-
tle between the stations until the
power is switched off.
12
MODE 1 (“BASIC”)
Preparation (Fig. 2)
1. Install one of the insulated track
sections at the entrance to each
station.
2. Use the blue/red track power cable
to connect the connectors marked
“bl”(blue) and “rt”(red) on termi-
nal “A”of the circuit board to the
tracks (Fig. 2).
3. Use the blue/red connecting cable
to connect the connectors "bl"
(blue) and "rt" (red) on terminal
“Power”of the circuit board to the
DC output of an LGB throttle or
power pack.
4. Plug the power supply cord into a
house current outlet.
Operation
Place a train on the track between the
stations. Adjust the throttle to a
medium setting. After a short pause,
the train will start and proceed to one
station. At the station, it will pass
over one of the insulated track sec-
tions and stop. After the pre-set wait-
ing time, it will slowly accelerate in
the opposite direction and proceed to
the other station. The train will shut-
tle between the stations until the
power is switched off.
Pendelautomatik 10340
Betriebsart 1 (Ersatz für 0090)
Dispositif d'inversion de marche automatique 10340
Mode de operation 1
Automatic reversin
g
unit 10340
Mode of operation 1
1
50080
sw rt
10340
wsbl bl rt
2
Pendelautomatik 10340
Betriebsart 2 ( vorbild
g
etreu )
Dispositif d'inversion de marche automatique 10340
Mode de operation 2
10340
sw rtblwsblrt
Automatic reversin
g
unit 10340
Mode of operation 2
50080
21
Pendelautomatik 10340
Betriebsart 1 (Einfach)
Automatic reversing unit 10340 Dispositif d’inversion de marche automatique 10340
Mode of 1 (Basic) Mode de operation 1
Pendelautomatik 10340
Betriebsart 2 (vorbildgetreu)
Automatic reversing unit 10340 Dispositif d’inversion de marche automatique 10340
Mode 2 (with prototypical braking) Mode de operation 2

14
ADJUSTING PARAMETERS (BOTH
MODES)
Adjusting the station stop time
The duration of the station stop is set
with the “Pause”switch and the
“Pause”adjustment knob on the cir-
cuit board (Fig. 1).
- Set the switch on the right to select
the range of time adjustment:
“x1”short (approx. 2 seconds - 1.5
minutes) (factory pre-set)
“x10”long (approx. 1 - 8 minutes)
- Turn the knob to adjust the time
within those ranges.
Hints:
- In mode 1 “Basic,”the selected
duration is the time of travel plus
the time at the station (time bet-
ween polarity reversals). Example:
If your train takes 1 minute to trav-
el from station to station and you
would like a wait of 1 minute at the
station, set the duration to 2 min-
utes.
- In mode 2 “Prototypical,”you
select the wait time only.
Adjusting the acceleration and
braking
The acceleration and braking are set
with the “Delay”adjustment knob on
the circuit board (Fig. 1). Turn the
adjustment knob for faster or slower
acceleration and braking. The accel-
eration and braking cannot be adjust-
ed separately.
Hints:
- In mode 1 “Basic,”only the accel-
eration can be adjusted. Braking
always is abrupt when the train
crosses the insulated track sec-
tions.
- New settings for station stop time
and acceleration/braking will take
effect after the next station stop. It
is not necessary to turn off the
power.
Power Supply
Attention! For safety and reliability,
operate this product with LGB power
supplies (transformers, power packs
and controls) only. The use of non-
LGB power supplies will void your
warranty.
Overload Protection
The 10340 is protected against short
circuits and overloading. If an over-
load current of more than 3 amps
occurs, the unit will switch off for 10
seconds. However, this overload pro-
tection functions only when using a
power supply with an output of 3
amps or more. After 10 seconds, the
unit will switch on again.
When using a power supply with an
output of less than 3 amps, a short
circuit will trigger the overload pro-
tection of your LGB power supply.
Maximum current
The 10340 can be used with trains
that draw up to 3 amps. If you are
double-heading locos with sound or
running long trains with lighted cars,
your trains may trigger the overload
protection (see Overload Protection).
15
Minimum Voltage
To operate properly, the 10340
requires an input voltage of 10 volts
or more.
For more information on LGB power
supplies for indoor, outdoor and
multi-train operation, see the LGB
catalog.
A B
A
bl rt
swbl rt
2
Betriebsart
1
Betriebsart
Dela
y
Verzö
g
erun
g
+
2x10
Mode
1
Pause
x1
2
MODE
1
Power
Power
rt bl
MODE rt bl ws
Pause
--
+
Halt

16 17
INSTRUCTIONS FOR ADVANCED
USERS
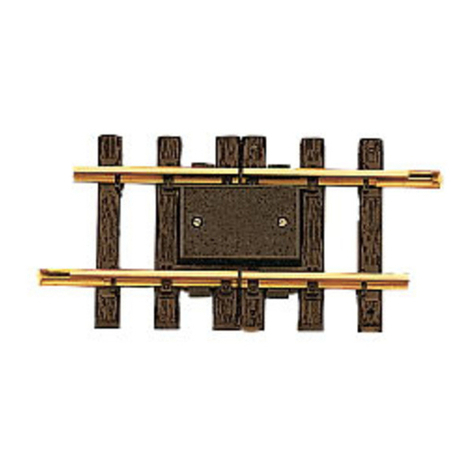
1. Emergency stop circuit for Mode
2 “Prototypical”
To prevent your train from hitting the
track bumper at the end of the tracks,
you can install “emergency stop”cir-
cuits at the end of each station (Fig.
4). Using two additional insulated
track sections (10153, not included),
install the diodes (see page 13, Mode
2, paragraph 1.). The loco will stop
abruptly if it crosses the second
insulated track section.
Hint: If the loco continues beyond
the diodes, reverse the directions of
the diodes.
2. Adjusting braking in mode 1
“Basic”
In mode 1 “Basic,”the acceleration
controls also control the braking, just
as in mode 2 “Prototypical.”The
braking is activated when the revers-
ing time has elapsed. However, the
diodes installed in the insulated track
sections usually cause the train to
brake abruptly.
This can be prevented by carefully
adjusting the station stop time to
make the braking start before the
train reaches the insulated track sec-
tions. Adjusting this requires a
skilled hand and some patience.
Hints:
- Instead of reducing the travel time,
you can decrease the speed slightly
at the throttle/power pack (and vice
versa). This allows a finer adjust-
ment and is effective immediately.
- With this setting, the duration of
the stop is short and not adjustable.
3. Adjusting train speed on grades
If you use your 10340 to run a train
on a grade, the train will run faster
downhill than uphill. However, with a
simple electronic circuit, you can
reduce the voltage the train receives
when going downhill. This circuit
works in both modes, Mode 1
“Basic”and Mode 2 “Prototypical”:
1. Install an additional insulated track
section (for example, 10153)
between the original insulated
track sections (Fig. 5).
2. Wire a number of diodes (1N5400,
not included) in series in the
downhill direction. For each diode
wired in series, the track voltage
will drop by 0.7-1 volt.
3. Wire a single diode in the uphill
direction, parallel to the series of
diodes.
The train will run at normal speed
uphill, but slow on the return trip
downhill.
Hint: In Mode 1 “Basic,”you can use
a directional “slow section”before
the train reaches the station to pro-
vide braking in steps.
AUTHORIZED SERVICE
Improper service will void your war-
ranty. For quality service, contact
your authorized retailer or one of the
following LGB factory service sta-
tions:
Ernst Paul Lehmann Patentwerk
Reparatur-Abteilung
Saganer Strasse 1-5
D-90475 Nürnberg
GERMANY
Telephone: (0911) 83707 0
Fax: (0911) 83707 70
LGB of America
Repair Department
6444 Nancy Ridge Drive
San Diego, CA 92121
USA
Telephone: (858) 535-9387
Fax: (858) 535-1091
You are responsible for any shipping
costs, insurance and customs fees.
Hint: Information on LGB products
Pendelautomatik 10340
Betriebsart 2 mit Auffahrschutz
Dispositif d'inversion de marche automatique 10340
Mode de operation 2
10340
bl
CA
51070
rtsw
34 2 1
Automatic reversin
g
unit 10340
Mode of operation 2
D
B
ws bl rt
Pendelautomatik 10340
Betriebsart 1 (Ersatz für 0090)
Dispositif d'inversion de marche automatique 10340
Mode de operation 1
10340
Automatic reversin
g
unit 10340
Mode of operation 1
B
Geschwindi
g
keitsreduzierun
g
durch Dioden von B nach A
Ber
g
51070
34 2
sw rt bl
1
Tal
A
rtblws
Pendelautomatik 10340
Betriebsart 2 mit Auffahrschutz
Automatic reversing unit 10340 Dispositif d’inversion de marche automatique 10340
Mode 2 with emergency stop circuit Mode de operation 2
Pendelautomatik 10340
Betriebsart 1 (Ersatz für 0090)
Automatic reversing unit 10340 Dispositif d’inversion de marche automatique 10340
Adjusting speed on grades Mode de operation 1
Fig. 4
Fig. 5

18 19
and LGB representatives around the
world is available online at
www.lgb.com
CAUTION! This product is not for
children under 8 years of age. This
product has small and sharp parts.
Save the supplied packaging and
instructions.
Products, specifications and avail-
ability dates are subject to change
without notice. Some products are
not available in all markets and at all
retailers. Some products shown are
pre-production prototypes. LGB,
LGB of America, LEHMANN and the
LGB TOYTRAIN logotype are regis-
tered trademarks of Ernst Paul
Lehmann Patentwerk, Germany.
Other trademarks are the property of
their owners. © 2002 Ernst Paul
Lehmann Patentwerk.
10340
Dispositif d'inversion de
marche automatique
LE PRODUIT
Grâce au dispositif d'inversion de
marche automatique 10340, votre
train peut faire la navette automati-
quement entre deux gares. Parmi les
caractéristiques de cet accessoire,
citons :
- deux modes opératoires
- «de base»avec accélération régla-
ble
- «identique au prototype»avec
accélération et freinage réglables
- temps d'arrêt aux gares réglable
- protection contre les courts-cir-
cuits et les surcharges
L'ensemble comprend :
- 1 heurtoir avec carte de circuits
- 2 rails de coupure avec diodes de
série
- 1 câble d'alimentation électrique de
la voie bleu/rouge
- 1 câble de raccordement bleu/
rouge (transformateur/heurtoir)
Attention ! Ce produit ne peut être
utiliséavec le système multitrain. Il
est toutefois possible de faire fonc-
tionner les locomotives équipées de
décodeur en utilisant le dispositif
d'inversion de marche et un groupe
d'alimentation analogique.
LE PROGRAMME
Nous recommandons d'utiliser les
accessoires suivants avec ce produit:
- 10153 Rail de coupure, 1 rail,
150 mm
- 10310 Heurtoir avec éclairage
- 50220 Fil gris à1 conducteur, 40 m
- 50520 Signal de fin de voie
Se reporter au catalogue général LGB
pour des renseignements sur le pro-
gramme LGB complet.
FONCTIONNEMENT
MISE EN GARDE ! Assurez-vous
que la distance de freinage à
chaque gare est suffisante pour évi-
ter tout accident. Le changement
de vitesse du train ou des réglages
du 10340 feront varier la distance
de freinage. Un train plus rapide a
besoin d'une distance de freinage
plus longue.
Conseil : Cette version du 10340
présente de nouvelles caractéris-
tiques comme l'accélération et le
freinage réglables. Ces instructions
ne peuvent être utilisées pour les
versions précédentes du dispositif
d'inversion de marche.
Modes opératoires
Le heurtoir comporte une carte de
circuits intégrée avec deux commu-
tateurs et deux boutons de comman-
de (résistances variables, figure 1).
Retourner le heurtoir pour accéder
aux commandes. Le sélecteur
«Mode»permet de choisir le mode
opératoire :
Mode 1 (réglage d’origine usine) :
«De base»avec accélération réglable
et freinage brutal. Ce mode permet
d’utiliser le 10340 comme accessoi-
re de remplacement des dispositifs
d’inversion de marche de type plus
ancien (80090, 0090).
Mode 2 : «Avec freinage identique au
prototype»:
Accélération et freinage réglables.
Attention ! Il faut couper l’alimenta-
tion électrique pendant au moins 15
secondes pour les nouveaux régla-
ges soient opérationnels.
F
A B
A
bl rt
swbl rt
2
Betriebsart
1
Betriebsart
Dela
y
Verzö
g
erun
g
+
2x10
Mode
1
Pause
x1
2
MODE
1
Power
Power
rt bl
MODE rt bl ws
Pause
--
+
Halt

MODE 2 («AVEC FREINAGE IDEN-
TIQUE AU PROTOTYPE»)
Préparation (figure 3)
Conseil : Pour pouvoir utiliser ce
mode, il faut deux fils àun conduc-
teur (comme par exemple le LGB
50220) pour raccorder les rails de
coupure.
1. Desserrer les vis des voies et enle-
ver les diodes. Installer un rail de
coupure àl’entrée de chaque gare.
Les rails interrompus des deux
rails de coupure doivent se trouver
du côtéopposéde la voie. La lon-
gueur de la voie entre les gares
doit être supérieure àla longueur
du train.
2. Raccorder les bornes identifiées
«sw»(noire) et «ws»(blanche) de
la carte de circuits aux rails de
coupure en suivant les indications
de la figure 3. Desserrer les vis
des rails de coupure et coincer le
fil entre la vis et le rail.
3. Utiliser le câble d’alimentation
électrique de la voie bleu/rouge
pour raccorder les connecteurs
identifiés «bl»(bleu) et «rt»
(rouge) sur les bornes «A»et «B»,
respectivement, aux voies.
4. Utiliser le câble de raccordement
bleu/rouge pour raccorder les
connecteurs identifiés «bl»(bleu)
et «rt»(rouge) sur la borne
«Power»de la carte de circuits àla
sortie c.c. d’une commande ou
d’un groupe d’alimentation LGB.
5. Brancher le cordon d’alimentation
dans une prise de courant dans la
maison.
Fonctionnement
Placer un train sur la voie entre les
gares. Amener la commande àune
position intermédiaire. Après un
court arrêt, le train démarre et se
dirige vers une gare. Il va ralentir,
puis s’arrêter après passage sur le
rail de coupure. Lorsque le temps
d’attente prévu s’est écoulé, le train
accélérera lentement dans le sens
opposéet se dirigera vers l’autre
gare. Le train fera la navette entre les
deux gares jusqu’à coupure de l’ali-
mentation électrique.
21
MODE 1 («DE BASE»)
Préparation (figure 2)
1. Installer un rail de coupure àl’en-
trée de chaque gare.
2. Utiliser le câble d’alimentation
électrique de la voie bleu/rouge
pour raccorder les connecteurs
identifiés «bl»(bleu) et «rt»
(rouge) sur la borne «A»de la
carte de circuits aux voies (figure
2).
3. Utiliser le câble de raccordement
bleu/rouge pour raccorder les
connecteurs identifiés «bl»(bleu)
et «rt»(rouge) sur la borne
«Power»de la carte de circuits àla
sortie c.c. d’une commande ou
d’un groupe d’alimentation LGB.
4. Brancher le cordon d’alimentation
dans une prise de courant dans la
maison.
Fonctionnement
Placer un train sur la voie entre les
gares. Amener la commande àune
position intermédiaire. Après un
court arrêt, le train démarre et se
dirige vers une gare. Arrivéàla gare,
il passera sur l’un des rails de cou-
pure et s’arrêtera. Après le temps
d’attente prévu, il accélérera lente-
ment dans le sens opposéet se diri-
gera vers l'autre gare. Le train fera la
navette entre les deux gares jusqu'à
coupure de l'alimentation électrique.
20
Pendelautomatik 10340
Betriebsart 1 (Ersatz für 0090)
Dispositif d'inversion de marche automatique 10340
Mode de operation 1
Automatic reversin
g
unit 10340
Mode of operation 1
1
50080
sw rt
10340
wsbl bl rt
2
Pendelautomatik 10340
Betriebsart 2 ( vorbild
g
etreu )
Dispositif d'inversion de marche automatique 10340
Mode de operation 2
10340
sw rtblwsblrt
Automatic reversin
g
unit 10340
Mode of operation 2
50080
21
Pendelautomatik 10340
Betriebsart 1 (Ersatz für 0090)
Automatic reversing unit 10340 Dispositif d’inversion de marche automatique 10340
Mode of operation 1 Mode opératoire 1 (de base)
Pendelautomatik 10340
Betriebsart 2 (vorbildgetreu)
Automatic reversing unit 10340 Dispositif d’inversion de marche automatique 10340
Mode of operation 2 Mode opératoire 2 (avec freinage identique au prototype)

2322
RÉGLAGE DES PARAMÈTRES
(POUR LES DEUX MODES)
Réglage du temps d'arrêt àla gare
Le réglage du temps d'arrêt àla gare
se fait par le commutateur «Pause»
et avec le bouton de réglage «Pause»
de la carte de circuits (figure 1).
- Positionner le commutateur sur la
droite pour sélectionner le temps
d'arrêt. :
- Temps d'arrêt court «x 1»(environ
2 secondes à1,5 minute) (réglage
d'origine usine).
- Temps d'arrêt long «x 10»(environ
1 à8 minutes).
- Tourner le bouton pour régler le
temps d'arrêt dans la plage choisie.
Conseils :
- En mode 1 «de base», la durée
sélectionnée correspond au temps
de déplacement du train plus le
temps d’arrêt àla gare (temps
écouléentre l’inversion des polari-
tés). Exemple : S’il faut 1 minute au
train pour aller d’une gare àl’autre
et que le temps d’arrêt àla gare
désiréest de 1 minute, régler la
durée sur deux minutes.
- En mode 2 «identique au prototype»,
la durée sélectionnée correspond
uniquement au temps d’attente.
Réglage de l’accélération et du
freinage
Le réglage de l’accélération et du
freinage se fait par le bouton de
réglage «Delay»de la carte de cir-
cuits (figure 1). Tourner le bouton
pour augmenter ou diminuer l’accé-
lération et le freinage.
L’accélération et le freinage ne peu-
vent être réglés séparément.
Conseils :
- En mode 1 «de base», seule l’accé-
lération peut être réglée, le freinage
est toujours brutal après le passage
du train sur le rail de coupure.
- Les nouveaux réglages du temps
d’arrêt en gare et de l’accéléra-
tion/freinage ne prendront effet
qu’après le prochain passage en
gare. Il n’est pas nécessaire de
couper l’alimentation électrique.
Blocs d’alimentation
Attention ! Pour des raisons de
sécuritéet de fiabilité, n'utiliser que
les blocs d’alimentation LGB (trans-
formateurs, groupes d’alimentation
et commandes) pour faire fonction-
ner ce produit. L’utilisation de blocs
d’alimentation autres que les blocs
d’alimentation LGB rendra la garantie
nulle et non avenue.
Protection contre les surcharges
Le 10340 est protégécontre les
courts-circuits et les surcharges.
L'accessoire se coupe pendant 10
secondes àl'apparition d'un courant
de surcharge de plus de 3A. Ce sys-
tème de protection ne fonctionne
toutefois qu'avec un bloc d'alimenta-
tion de sortie égale ou supérieure à
3A. L'accessoire se remet en service
après 10 secondes. Un court-circuit
déclenchera le système de protection
contre les surcharges avec un bloc
d'alimentation de sortie inférieure à
3A.
Intensitémaximale de courant
Le 10340 peut être utiliséavec des
trains qui «tirent»jusqu'à3A. Le cir-
cuit de protection contre les surchar-
ges peut être activési vous utilisez
des locos en double traction avec
effets sonores ou avez de longs
convois avec éclairage des voitures.
(se reporter à(Protection contre les
surcharges).
Tension minimale
Pour fonctionner correctement, le
10340 nécessite une tension d'en-
trée de 10 V au minimum.
Se reporter au catalogue général LGB
pour des renseignements complé-
mentaires au sujet des blocs d'ali-
mentation pour utilisation àl'inté-
rieur, àl'extérieur et pour le système
multitrain.
A B
A
bl rt
swbl rt
2
Betriebsart
1
Betriebsart
Dela
y
Verzö
g
erun
g
+
2x10
Mode
1
Pause
x1
2
MODE
1
Power
Power
rt bl
MODE rt bl ws
Pause
--
+
Halt

2524
INSTRUCTIONS POUR EXPERTS 1. Circuit d’arrêt d’urgence en
mode 2 «identique au prototype».
Pour éviter que le train ne percute le
heurtoir en bout de la voie, vous pou-
vez installer des circuits «d’arrêt
d’urgence»en bout de chaque gare
(figure 4). Utiliser deux rails de cou-
pure supplémentaires (10153, non
fournis) et installer les diodes (voir
page 21, Mode 2, paragraphe 1.). La
locomotive s’arrêtera brutalement
après passage sur le deuxième rail
de coupure.
Conseil : Si la locomotive continue
après le passage sur le deuxième rail
de coupure, inverser le sens de mon-
tage des diodes.
2. Réglage du freinage en mode 1
«de base»
- En mode 1 «de base», la comman-
de d’accélération contrôle égale-
ment le freinage, tout comme dans
le mode 2 «identique au prototy-
pe». Le freinage est déclenché
lorsque le temps d’inversion est
écoulé. Toutefois, les diodes mon-
tées sur les rails de coupure
déclenchent généralement le freina-
ge brutal du train.
Pour éviter ce problème, régler le
temps d'arrêt en gare de façon àce
que le freinage commence avant que
le train n'arrive sur le rail de coupu-
re. Il faut beaucoup de patience et
une main habile pour réussir.
Conseils : Au lieu de diminuer le
temps de déplacement entre les
gares, vous pouvez réduire légère-
ment la vitesse avec la commande ou
le groupe d'alimentation (et vice-
versa). Cela permet un réglage plus
fin et est efficace immédiatement.
- Avec ce réglage, le temps d’arrêt
est court et ne peut être changé.
Réglage de la vitesse du train sur
les pentes
Si vous utilisez un 10340 pour
contrôler un train sur une pente, le
train descendra la pente plus vite
qu'il ne la montera. Toutefois, au
moyen d'un circuit électronique sim-
ple, vous pouvez diminuer la tension
d'alimentation en descente. Ce cir-
cuit sera efficace aussi bien en mode
1 «de base »qu’en mode 2 «iden-
tique au prototype».
1. Installer un rail de coupure sup-
plémentaire (par exemple, un
10153) entre les rails de coupure
originaux (figure 5).
2. Câbler un certain nombre de dio-
des (1N5400, non fournies) en
série en descente. La tension de la
voie diminuera entre 0,7 et 1 V par
diode câblée.
3. Câbler une diode unique en mon-
tée, parallèlement aux diodes
câblées en série. Le train fonction-
nera àvitesse normale en montée,
mais ralentira en descente.
Conseil : En mode 1 «de base »,
vous pouvez utiliser une «section de
ralentissement»avant l’arrivée du
train en gare pour permettre un frei-
nage progressif.
CENTRES D’ENTRETIEN
AUTORISÉS
Un entretien inadéquat rendra la
garantie nulle et non avenue. Veuillez
entrer en contact avec votre reven-
deur ou avec l’un des centres d’en-
tretien ci-dessous :
Ernst Paul Lehmann Patentwerk
Reparatur –Abteilung
Saganer Strasse 1-5
D-90475 Nürnberg
ALLEMAGNE
Téléphone (0911) 83707 0
Fax : (0911) 83707 70
Pendelautomatik 10340
Betriebsart 2 mit Auffahrschutz
Dispositif d'inversion de marche automatique 10340
Mode de operation 2
10340
bl
CA
51070
rtsw
34 2 1
Automatic reversin
g
unit 10340
Mode of operation 2
D
B
ws bl rt
Pendelautomatik 10340
Betriebsart 1 (Ersatz für 0090)
Dispositif d'inversion de marche automatique 10340
Mode de operation 1
10340
Automatic reversin
g
unit 10340
Mode of operation 1
B
Geschwindi
g
keitsreduzierun
g
durch Dioden von B nach A
Ber
g
51070
34 2
sw rt bl
1
Tal
A
rtblws
Pendelautomatik 10340
Betriebsart 2 mit Auffahrschutz
Automatic reversing unit 10340 Dispositif d’inversion de marche automatique 10340
Mode of operation 2 Mode opératoire 2 avec circuit d’arrêt d’urgence
Pendelautomatik 10340
Betriebsart 1 (Ersatz für 0090)
Automatic reversing unit 10340 Dispositif d’inversion de marche automatique 10340
Mode of operation 1 Réglage de la vitesse du train sur les pentes
Illustr. 4
Illustr. 5

2625
LGB of America
Service des réparations
6444 Nancy Ridge Drive
San Diego CA 92121
États-Unis
Téléphone (858) 535-9387
Fax : (858) 535-1091
L’expéditeur est responsable des
frais d’expédition, de l’assurance et
des frais de douane.
Conseil : Pour des renseignements
au sujet des produits et des repré-
sentants LGB dans le monde, consul-
tez le site web àwww.lgb.com.
ATTENTION ! Ce modèle réduit n’est
pas pour les enfants en-dessous de 8
ans. Il comporte des petites pièces et
des parties pointues. Conserver
l’emballage et les instructions.
Les produits, spécifications et dates
de disponibilitésont sujettes àmodi-
fication sans préavis. Certains pro-
duits peuvent ne pas être disponibles
sur certains marchés et chez tous les
détaillants. Certains produits illustrés
sont des prototypes de pré-série.
LGB, LGB of America, LEHMANN et
le logo LGB TOYTRAIN sont des
marques déposées de Ernst Paul
Lehmann Patentwerk, Allemagne.
Les autres marques de commerce
sont la propriétéde leurs détenteurs
respectifs. © 2002 Ernst Paul
Lehmann Patentwerk.

Hinweise:
- In den Aufbauskizzen für "Betriebsart 2 (Vorbildgetreues Abbremsen)" und
"Auffahrschutz bei Betriebsart 2 Vorbildgetreu" der Bedienungsanleitung ver-
bergen sich zwei kleiner Fehler. Um die Funktion zu gewährleisten, verwenden
Sie bitte die neuen Aufbauskizzen dieses Beiblattes.
- Die Schienenreinigungslok 20670 kann auf der Pendelstrecke nicht mit der
Reinigungsfunktion betrieben werden.
Hints:
- The wiring diagrams for "Mode 2 (with Prototypical Braking)" and for
"Emergency Stop Circuit for Mode 2 (Prototypical)" in the instructions contain
minor errors. To ensure proper operations, please use the new wiring diagrams
shown on this sheet.
- The 20670 Track Cleaning Locomotive cannot operate in "cleaning" mode on a
layout connected to a 10340.
Conseils:
- Les schémas de câblage pour le «Mode 2 (avec freinage identique au prototy-
pe)» et pour le «Circuit d'arrêt d'urgence en Mode 2 (identique au prototype)»
de la fiche d'instructions contiennent de petites erreurs. Pour assurer un fonc-
tionnement fiable du produit, veuillez utiliser le nouveau schéma de câblage qui
figure sur cette feuille.
- La locomotive de nettoyage des voies 20670 ne peut fonctionner en mode «de
nettoyage» sur un réseau raccordé à un dispositif d'inversion de marche
10340.
Pendelautomatik 10340
Betriebsart2(vorbildgetreu )
Dispositif d'inversion de marche automatique 10340
Mode de operation 2
!"
sw rtblwsblrt
Automatic reversing unit 10340
Mode of operation 2
10340_2k.skd/HK/01_02_03
21
50080
Pendelautomatik 10340
Betriebsart 2 mit Auffahrschutz
Dispositif d'inversion de marche automatique 10340
ode de operation 2
!"
bl
+)
#%
rtsw
!"
Automatic reversin
g
unit 10340
Mode of operation 2
,
*
10340_14.skd/HK/07_05_02
ws bl rt
Other manuals for 10340
1
Table of contents
Languages:
Other LGB Toy manuals