Lincoln industrial QLS 301 Owner's manual

QLS 301 Lubrication System
2.1A-38006-C00 August 2000 Form 403013 Section - Q3 Page - 9B
QLS 301
Installation and Operation Instructions
4197a99
810-55230-1
Ordenar manual en español: página 26/28
Pour la commande de ce manuel en français, voir page 26/28

Page Number 2 of 28
QLS 301
Subjec o modifica ions
2.1B-38006-C00 Form 403013
Installation and Operation Instructions
Table of Contents
Safety Instru tions ...................................................... 2
Installation Instru tions ............................................. 3
Pump ............................................................................ 3
SSV Divider Block ......................................................... 3
Crosspor ing of he SSV Divider Block......................... 3
Check valves ................................................................. 4
Feedback of supplied lubrican ..................................... 4
Lube poin s .................................................................... 4
Ins alling Zerk-Locks on o grease fi ings .................... 4
Connec ing Feed Lines ................................................. 5
Filling of reservoir .................................................... 5
Se ing of lubrica ion cycle ime in erval ................. 5
QLS 301Selec ion Guide .............................................. 6
Elec rical Connec ion Diagrams ................................... 7
Des ription of QLS 301 .............................................. 9
Operating of QLS 301 ................................................. 9
Pressure relief valve .................................................... 10
Pump Display Window ................................................ 10
Moni oring ime/malfunc ion ....................................... 10
Acknowledging he malfunc ion ............................ 11
Low-level con rol .................................................... 11
Acknowledging he low level indica ion ................ 11
Malfunc ion/low level indica ion ............................ 11
Moni oring relay ........................................................... 11
Setting and operation
of the QLS 301 ........................................................... 12
Display mode ............................................................... 12
Opera ing mode .......................................................... 13
Programming mode .................................................... 14
Maintenan e, Repair and Test ................................. 15
Main enance ................................................................ 15
Refilling reservoir ................................................... 15
Repair .......................................................................... 15
Func ional Tes ............................................................ 15
Troubleshooting ........................................................ 16
Te hni al Data ........................................................... 19
Dimensions .................................................................. 20
Servi e Part of the QLS 301 ..................................... 22
Manufac urers declara ion ......................................... 26
Safety Instructions
Appropriate Use
Use QLS 301 only for he delivery of lubrican s. The pump
is designed for in ermi en opera ion. QLS 301 is
designed of supplying lubrican o a maximum of 18 lube
points per y le.
Do no use QLS 301 wi h SSV block in bo om moun ing
posi ion for mobile appli ations. Dont install the
pump in areas exposed to sho k.
General safety Instru tions
Do no over pressurize reservoir when filling he pump.
Refill QLS 301 pump wi h clean lubrican .
Incorrec use may resul in bearing damage caused by
poor or over-lubrica ion.
Each ou le used mus be equipped wi h an appropria e
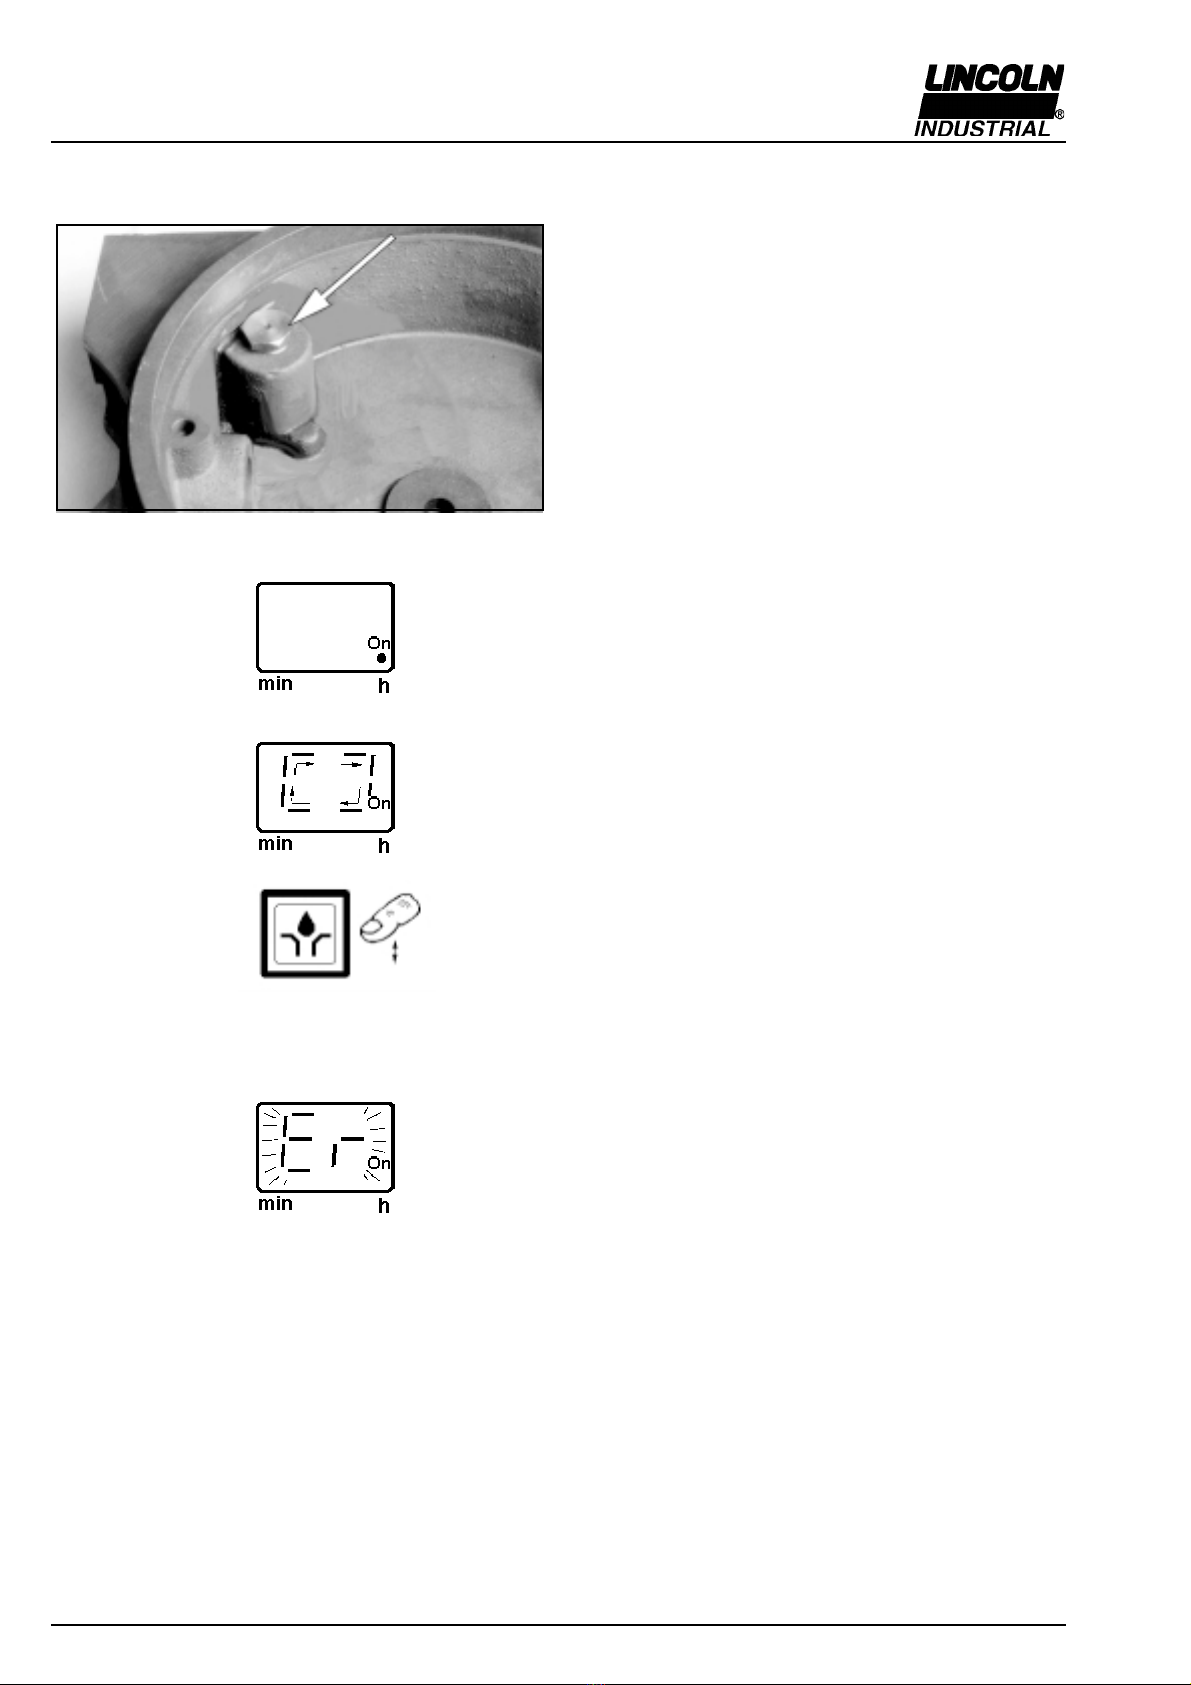
check valve see page 4, Fig.3.
Don pain pump 301. Before pain ing machine or com-
mercial vehicle remove or cover he comple e pump.
Unau horized modifica ions or changes o an ins alled
sys em are no recommended and will void warran y. Any
modifica ions mus be subjec o prior consul a ion wi h
he manufac urer of he QLS 301.
Regulations for prevention of a idents
To preven acciden s, observe all ci y, s a e and federal
safe y regula ion of he coun ry in which he produc will
be used.
For pumps with 120 VAC and 230 VAC, swit h off the po-
wer supply before beginning maintenan e or repair work.
QLS 301 opera es au oma ically. However, a regular
check (approxima ely every 2 weeks) should be made o
ensure ha lubrican is being dispensed from all lubrican
poin s.
Used or con amina ed lubrican s mus be disposed of in
accordance wi h local environmen al regula ions, see
echnical da a shee s of lubrican s.
The manufac urer of he cen ralized lubrica ion sys em
will no accep any liabili y for:
- damage due o he use of greases which are no or are
only condi ionally pumpable in cen ralized lubrica ion
sys ems.
- damage caused by insufficien lubrican and irregular
refilling of pump.
- damage caused by he use of con amina ed lubrican s.
- damage caused by inadequa e disposal of used or
con amina ed lubrican s.
- damage caused by unau horized modifica ion of sys em
componene s.
- damage caused by he use of unapproved par s (voids he
pump warran y).
Operation, Repair and Maintena e
Repairs should only be performed by au horized
personnel who are familliar wi h he ins ruc ions.
Explanation of symbols:
= explana ion
* = describes an ac ion
- = lis ing wi hin a sec ion
QLS 301 mus only opera e wi h moun ed or connec ed
SSV divider blocks.
Pump mus be regularly refilled wi h clean lubrican .

Subjec o modifica ions
Page Number 3 of 282.1B-38006-C00
QLS 301
Form 403013
Installation and Operation Instructions
Installation
Do no remove, modify or al er any safe y equipmen
already ins alled on he machine.
QLS 301 pump mus be kep away from he sources of
hea (see Opera ing Tempera ure Specifica ion).
Follow ins alla ion ins ruc ions of he OEM regarding
minimum dis ances be ween he drilled holes and welding
procedures.
Use following recommenda ions o selec an ins alla ion
loca ion:
- Keep he feed lines as shor as possible.
- Provide access o fill, clean and visually moni or he
pump opera ion.
Ins alling QLS 301 pump wi h he reservoir uprigh is
perferred, bu pump may be ins alled wi h he reservoir in
horizon al wi hou affec ing i s opera ion.
The QLS 301 may only be ins alled by qualified person-
nel. The connec ion (N/L/PE) of he supply vol age mus
be made according o VDE 0100 and VDE 0160.
Ins all a pro ec ive and lock ou device for isola ing and
disconnec ing he QLS 301. Before beginning he
ins alla ion work, disconnec he elec rical supply .
Failure o observe he safe y ins ruc ions, e. g. ouching
elec rically charged par s when he sys em is opened, or
improper handling of he QLS 301 may ause serious
injury or death.
If he values specified in he Technical Da a are exceeded,
he device may overhea . I may damage he QLS 301
and hus impair he elec ric safe y.
Installation Instructions
Pump Use drilling empla e o mark and drill moun ing holes of
he QLS 301. Drilling empla e and moun ing bol s are
included in he package.
SSV Divider Block Crossporting of the SSV divider blo ks
The ou le s of he SSV divider block can be combined o
increase he amoun of lubrican for a par icular ou le . To
do his, simply plug he unused ou le s wi h he closure
plug (see Fig. 2), provided in he accessory ki .
Lubrican from a plugged ou le is redirec ed o he nex
ou le on he same side of he SSV divider block in
descending numerical order (see Fig.1). For ins ance
plugging ou le s 5 and 3 will riple he amoun of lubrican
a ou le 1.
Unused lubrican can be in ernally feed back o he
resevoir, see paragraph direc in ernal feed back fea ure
Do not plug outlet numbers 1 and 2 on SSV 8, 12 and
18 of pump models wi h SSV divider block ins alled on he
bo om.
Fig.1 - Single double and riple lubrican ou pu , on back side
mou ed divider blocks
x -Ou le quan i y (single, double, e c.)
1... 6 Ou le numbers C - Enclosed grease
A - Clamping ring (brass) R - Re urn o reservoir
B - Grease supply
4163a98
Fig. 2 - Closure plug, also provided in he accessory ki s
* Ins all a closure plug in each ou le por hole which is no
required, see Fig. 1 or 4.
1014b00

Page Number 4 of 28
QLS 301
Subjec o modifica ions
2.1B-38006-C00 Form 403013
Installation and Operation Instructions
Installing Zerk-Lo ks onto grease fittings (for in h size
a essory kits only)
The Zerk-Lock fi ing consis s of he Zerk-Lock body,
inser and a Quicklinc fi ing.
* Place he Zerk-Lock body over he grease fi ing and place
he s aking ool firmly agains he Zerk-Lock inser .
(S aking ool is included in he accessory ki s, see page
8).
* S rike he ool sharply wi h a hammer un il he Zerk-Lock
inser par ially crimps on o he grease fi ing.
Fig. 6 - Place he Zerk-Lock
body over he grease fi ing
Direct (internal) eedback eature
Important: To change he ou le 2 for bearing lubrica ion,
replace closure plug wi h check valve (Fig. 3), then never
lose outlet 1, see Fig. 1.
Fig. 5 - In ernal feedback of supplied lubrican , only on
back-side moun ed SSV divider blocks (from serial No.
998000100C/001)
Che k valves
* Ins all one comple e check valve in each ou le por hole
which will be used, see Fig. 1 and 4.
* For feedlines (dia. 6x1.5 mm, 1/4 I.D., provided in he
accessory ki s) use check valves wi h s andard collar and
knurled flange.
Fig. 3 -Check valve, push-in ype
4180a99
x -Ou le quan i y (single, A - Clamping ring (brass)
double, e c.) B - Grease supply
1... 6 Ou le numbers C - Enclosed grease
R - Re urn line borehole
Fig. 7 - Ins alla ion of Zerk-
Locks wi h s aking ool
4201a99
4188b99
Note: To feed back unneeded lubricant quantities from
bottom - side mounted divider block to the reservoir, connect
unneeded outlet via feedline to plug 5 (Fig. 15 for external
return line.
Lubri ation points
4200a99
All pumps wi h he ba k mounted SSV divider blo k,
have he cababili y o feed back unused lubrican from
closed ou le s direc ly o he reservoir in ernally (see R
Fig. 4, 5).
The pumps up to serial No. 998000099C/001* and pre
serial numbers 9910006711/004* have capabili y o feed
back he lubrican direc ly o he reservoir only from even
outlets, see Fig. 4. For ins ance on a SSV 6 divider block,
he ou le s 2, 4, 6 are closed.
Important: Never close ou le 1.
* All pumps from serial No. 998000100C/001* have
capabili y o feed back he lubrican direc ly o he
reservoir from even and odd outlets via channel from
ou le 1 o ou le 2 . The ou le 2 should be closed wi h a
closure plug (see Fig. 2).
S ar closing of ou le s by he smalles ou le number, for
ins ance 2, 4, 6 on even side or 1, 3, 5 on odd side plus
ou le 2.
For ins ance (see Fig. 5) he lubrican from ou le s 1, 2
and 4 will be in ernally feed back o he reservoir, ou le 3
will have double amoun and ou le 6 will have single
amou of lubrican .
Installing Qui klin fittings into lube points
(for metri size a essory kits only)
* Remove hydraulic lube fi ings from lube poin s and ins all
appropria e Quicklinc-fi ings in o he bore holes of he
lube poin s.
Fig. 4 - In ernal feedback of supplied lubrican , only on
back-side moun ed SSV divider blocks (up o serial No.
998000099C/001)
x -Ou le quan i y (single, A - Clamping ring (brass)
double, e c.) B - Grease supply
1... 6 Ou le numbers C - Enclosed grease
R - Re urn line borehole
4188a00
* Refer o he serial numbers on he pump name pla e

Subjec o modifica ions
Page Number 5 of 282.1B-38006-C00
QLS 301
Form 403013
Installation and Operation Instructions
* Screw he Quicklinc fi ing in o he Zerk-Lock body and
igh en un il par s resis fur her igh ening (abou 1-1/2
urns).
If he lines are no primed, prime all lubrica ion feedlines
before connec ing hem o he Zerk-Locks.
Connec feedlines (dia. 6x1.5 mm, 1/4) from he check
valves direc ly o exis ing grease fi ings using he
Zerk-Lock fi ings included wi h he accessory ki .
Note: Push the end of the line firmly into the Quicklinc fitting
until it is fully seated in the body. The primed feedlines are
marked with white lines (Fig.9, 10 as an installation aid.
Fig. 8 - Screwing Quicklinc fi ing in o he Zerk-Lock body
Note: Quicklinc hex. is 12 mm. Zerk-Lock body hex is 1/2 .
* Move he Zerk-Lock and ube fi ing from side o side on
he grease fi ing o insure he Zerk-Lock is firmly sea ed.
Fig. 10 - Feedline inser in o he fi ing up o he nex whi e
mark
4157a98
Cu he pressure plas ic ube off a one of he whi e lines
before i is moun ed. Then inser he plas ic pressure ube
in o he fi ing up o he nex whi e mark. This will ensure
a correc ins alla ion of he pressure plas ic ube in he
hreaded ube fi ing.
Connection of Feed Lines
Measure, cu and rou e he feedlines included in he ki .
Avoid sharp bends of he plas ic ubing and he moving
par s of he machine ha could damage he lubrica ion
lines. Minimum bending radius is 50 mm (2 in).
Secure he lubrica ion lines o he machine using nylon
ies, clamps or s raps provided in he accessory ki .
Fig. 9 - Feedline ins alled in he Quicklinc fi ing
* Cu he feedline off a one of he whi e lines before i is
moun ed.
* Then inser he feedline in o he fi ing up o he nex
whi e mark.
This will ensure a correc ins alla ion of he feedline in
he ube fi ing.
Filling of reservoir
* Fill he reservoir wi h clean sui able lubrican .
* Expel all air from under follow pla e. Make sure ha he
follower pla e seal moves above he ven hole o ensure
ha all air pocke s are ven ed.
When filling he reservoir by means of pumps with a
large delivery volume do not ex eed the max. filling
mark. Risk of bursting if the reservoir is overfilled.
Fig. 11 - Ven hole on reservoir
4204a99
Setting of lubri ation y le time interval
* Se he lubrica ion cycle ime in erval (see page 13).
4203a99
4202a99

Page Number 6 of 28
QLS 301
Subjec o modifica ions
2.1B-38006-C00 Form 403013
Installation and Operation Instructions
QLS 301 Selection Guide
Pump models
Examples of par numbers P30100810111
P30162410151
P301 6 2 4 1 0 1 5 1
Pump
For grease........................................P301
SSV Divider Block
External, SSV 6, SSV 8**.................................0
External, SSV 12, SSV 18**.............................1
SSV 6 (back)...................................................3
SSV 8 (bottom)................................................4
SSV 12............................................................6
SSV 18............................................................9
SSV Divider Block Position
None.................................................................0
Back..................................................................1
Bottom1.............................................................2
Operating Voltage
12 VDC*.............................................................2
24 VDC*.............................................................4
120 VAC*............................................................6
2 0 VAC*............................................................8
eservoir/Low level control
1 l reservoir with low level control........................1
Dry Contacts
None...................................................................0
Yes.....................................................................1
Type of Plug Connector
Square-type, acc. to DIN 4 650 type
of construction A................................................1
Electrical Connectors
Without socket, without cable..............................0
With socket, without cable*.................................1
With socket, with cable, 10 m..............................5
With socket, with ADR cable, 10 m.....................6
Control p. c. b.
None....................................................................0
Monitored, 1cycle, SSV 12, SSV 18
Monitored, 1, 2, cycles, SSV 6, SSV 8...............1
Example of an explained model number:
Pump model P30131810111-Grease pump, SSV 6 block mounted on the back, 2 0 VAC, with low level and without dry contact.
* Note: Standard 120 and 230 VAC pump models for industry are shipped without electrical cable Standard 12 and 24 VDC pump
models for mobil applications can be shipped with 10 meter (30) electrical cable
** Note: For external divider block application only use the specific divider blocks SSV KNQLS
On pump models without divider block there is not possible to close cycles without changes on the p c b
1 Note: Do not use QLS 301 with SSV block in bottom mounting position for mobile applications Dont install
the pump in areas exposed to shock
A essory Kits
Inch Size Kits: Metric Size Kits:
SSV 6/8 part no. 550- 6971-1 SSV 6/8 part no. 550- 6970-1***
SSV 12 part no. 550- 6971-2 SSV 12 part no. 550- 6970-2 ***
SSV 18 part no. 550- 6971- SSV 18 part no. 550- 6970- ***
*** Lube fittings must be ordered separately

Subjec o modifica ions
Page Number 7 of 282.1B-38006-C00
QLS 301
Form 403013
Installation and Operation Instructions
Electrical Connecting Diagrams
Dire t urrent (DC) wi h in egra ed p.c. b. and a ached divider block
Ele tri al onne tion
Before s ar ing, make sure ha he elec rical supply is off.
The device may no be connec ed or disconnec ed when
he power is on. The pro ec ive conduc or mus always be
connec ed. Take care ha his line sec ion is undamaged
and conforms o s andards and he con ac s are safe.
* Connec he elec ric wires according. o he following
elec rical connec ing diagrams.
Note: The protection IP6K9K (NEMA 4 is guaranteed when
the socket (x1, x2 is tightened on housing cover with flat
packing.
Fig. 12 - Elec rical Connec ing Diagram, direc curren .
4253a00
Fig. 13 - Elec rical Connec ing Diagram, direc curren .
4258a00
Dire t urrent (DC) wi h in egra ed p.c. b. and ex ernal divider block

Page Number 8 of 28
QLS 301
Subjec o modifica ions
2.1B-38006-C00 Form 403013
Installation and Operation Instructions
Fig. 14 - Elec rical Connec ing Diagram, al erna e curren .
Alternate urrent (AC) wi h in egra ed p.c. b. and ex ernal divider block
Alternate urrent (AC) wi h in egra ed p.c. b. and a ached divider block
4254a00
4260a00
Fig. 15 - Elec rical Connec ing Diagram, al erna e curren .

Subjec o modifica ions
Page Number 9 of 282.1B-38006-C00
QLS 301
Form 403013
Installation and Operation Instructions
Description of QLS 301
The QLS 301 is a comple e compac lubrica ion sys em
for maximum of 18 lubri ation points per y le*.
*Note: More than 18 lubrication points are possible for
applications with limited lubrication requirements. Contact Lin-
coln Industrial Technical Sevice for additional
information.
The pump has hree basic configura ions:
- SSV divider block moun ed on he back (see fig. 16)
- SSV divider block moun ed on he bo om (see fig. 17)
- Pump wi hou he SSV divider block a ached.
The pump wi h he SSV divider block moun ed on he
bo om has he capabili y of using s eel ubing as
lubrica ion lines if necessary.
S andard lubrica ion lines are high pressure plas ic ubing
included in he pump ins alla ion ki for pumps wi h he
SSV divider block a ached.
Note: Regardless of the SSV divider, mounting the operation
of the pump is the same.
A signal from he pump imer s ar s he elec ric mo or and
pumping elemen s ar s pumping he lubrican o he SSV
divider block.
When all lubrica ion poin s have received lubrican , an
in ernal proximi y swi ch 1 Fig.16 urns he mo or off,
comple ing one lubrica ion cycle.
If pump does no comple e he cycle wi hin 15 minu es of
opera ion, alarm message Er will be displayed as a
flashing ligh in he keypad window, see Fig. 23
Fig. 16 - QLS 301 wi h back posi ion of he SSV divider block
Fig 18. - QLS 301 uni
peration of QLS 301
Fig. 17 - QLS 301 wi h bo om posi ion of he SSV divider
block
The QLS 301 opera es according o lube cycles (pause
and opera ing imes).
The pause ime begins he cycle, hen he opera ing ime
occurs.
A division of he lube poin s (option) via secondary
me ering devices and one main divider block (SSV 6,
SSV 8) is possible only up o max. 18 points per y le
(see * No e). In his case, he number of he cycles of he
main divider block mus be se (see P 3 on page 14).
4198a99
1 - Proximi y swi ch 3 - SSV divider block
2 - Con rol pin 4 - Nipple for ex ernal manual
lubrica ion (1/8)
4199a99
1 - Connec ing block 4 - Nipple for ex ernal manual
2 - Manifold lubrica ion (1/8)
3 - SSV divider block 5 - Plug (1/8) for
ex ernal re urn line (R)
ex ernal pressure line (P)
1 - Low-level con rol 4 - Con rol uni
2 - Proximi y swi ch 5 - Pump uni
3 - Keypad wi h display 6 - SSV 6, 8, 12, 18
4205a99

Page Number 10 of 28
QLS 301
Subjec o modifica ions
2.1B-38006-C00 Form 403013
Installation and Operation Instructions
Pressure relief valve
Fig. 19 - Pressure relief valve (car ridge) in housing
The QLS 301 is pro ec ed wi h a pressure relief valve
(car ridge).
The pressure relief valve limi s he pressure build-up in
he QLS 301. I opens a an overpressure of 201 bar
(3000 psi).
If he pressure relief valve is ac ua ed, his indica es ha
he sys em is malfunc ioning. The lubrican flows back
in o he reservoir (hardly visible).
Upon expira ion of he moni oring ime of 15 minu es, he
pump swi ches off. The faul indica ion Er is displayed
on he key pad of he pump. See Display mode under
Con rol uni .
Pump Display Window
Pump On is indica ed on he display by an illuminated
de imal point (pause ime is running) (fig. 20).
Pump running is indica ed on he display by a rotating
light movement of the green display (opera ing
ime)(fig. 21).
If he vol age supply is in errup ed during he opera ing
ime, he imes already expired are saved. When he
power supply is swi ched on again he opera ing ime
con inuous o opera e from he poin where i had been
in errup ed.
Fig. 21 - Green display (opera ing ime)
Fig. 20 - Green decimal poin (pause ime)
Additional lube y le (Manual Lube)
- is ini ia ed via he bu on (Fig. 22). Press he bu on for 2
seconds.
- can be ini ia ed a any ime, provided ha he power
supply is applied.
Note: If a malfunction is present (flashing display , first
acknowledge this malfunction.
If a faul signal (malfunc ion) is presen , i will be
cancelled af er he sys em is opera ing properly.
Monitoring time/malfun tion
Fig. 22 - Pushbu on for addi ional lubrica ion cycle
Fig. 23 - Display of a faul indica ion
4208a999
4209a99
4222a99
4210a99
4196a99
If he cycle is no comple e wi hin 15 minutes (moni oring
ime) af er expira ion of he pause ime, he pump
immeda ely swi ches off.
The faul indica ion Er (error) is displayed as a
flashing ligh (fig. 23). A he same ime, a po en ial free
con ac is available for he ex ernal faul indica ion
(op ion).
If a malfun tion is presen , he pump no longer swit-
hes on automati ally.

Subjec o modifica ions
Page Number 11 of 282.1B-38006-C00
QLS 301
Form 403013
Installation and Operation Instructions
When he reservoir is nearly emp y he pump display
shows LL (low level).
The follower pla e (3) (Fig. 27) of he reservoir moves he
pin (2) wi h he magne (1) ahead of he sensor on he
prin ed circui board and ini ia es he low level signal.
In his case, he pump is no swi ched off immedia ely.
The curren lube cycle is comple ed. Upon expira ion of
he pause ime, he pump canno be s ar ed again
au oma ically. The flashing display LL is indica ed.
Before filling he reservoir, press he bu on Fig. 25 for
acknowledging he low level indica ion.
As soon as he lubrican reservoir is filled up, he LL
display is cancelled. The lube cycle resumes.
Acknowledging the low level indication
* By pressing he bu on (Fig.25), he flashing display LL
is changed in o a con inuous ligh .
Malfunction/low level indication
If bo h indica ions occur a he same ime, hen bo h
displays Er and LL will flash.
Fig. 24 - Keypad wi h showing a malfunc ion
Fig. 25 - Acknowledging he malfunc ion
Fig. 26 - Display of a low-level con rol
Fig. 27 - Par s of low level con rol
1 - Magne 3 - Follower pla e
2 - Pin
In his case, swi ch on he pump by pressing he bu on
for addi ional lube cycle, see Fig. 22. Acknowledge he
malfunc ion before doing so.
When a malfunc ion is presen , i can only be cancelled
by ini ia ing an addi ional lube cycle and af er a proper
lube cycle has been execu ed af erward.
If he faul is s ill presen af er an addi ional lube cycle has
been ini ia ed, he faul indica ion Er is displayed again.
The moni oring ime s ar s a he same ime as he
opera ing ime. I is a fixed ime of 15 minu es.
If he vol age supply is in errup ed during he moni oring
phase (opera ing ime), he moni oring ime s ar s from
he beginning af er he pump is swi ched on again.
Acknowledging the malfunction
On pressing he bu on (Fig.25 ), he flashing display Er
changes in o a con inuous ligh .
Monitoring relay
The moni oring relay signals a low level condi ion or a
malfunc ion (only in combina ion wi h op ional connec or
X2, see elec rical connec ion diagrams). In bo h cases,
he moni oring relay will pick up. The signal is available
via a po en ial free con ac . The moni oring relay is
released upon acknowledgemen of he faul . The
flashing
indica ion swi ches o con inuous indica ion.
Models with Low-level ontrol
4228a99
4214a99
4211a99
4229a99

Page Number 12 of 28
QLS 301
Subjec o modifica ions
2.1B-38006-C00 Form 403013
Installation and Operation Instructions
As soon as vol age is applied o he pump, he key pad
is au oma ically in display mode. The right-hand
de imal point is illumina ed on he display.
Normally, he display is dark. Only he func ions (deci-
mal poin , ro a ing segmen display) or malfunc ions (Er,
LL) are displayed.
In the display mode
- The user receives informa ion on func ions and
malfunc ions.
- A es display is made when he vol age is applied, all
segmen s and decimal poin s are illumina ed for 2
seconds.
Note: If *EP* is displayed after the display test, this indicates
that the button or the key pad is defective.
- The righ -hand decimal poin (On/h) indica es he
available vol age supply during he pause ime. As soon
as ano her message is displayed, he decimal poin
urns off.
- The opera ing ime is displayed as a ro a ing segmen .
-Er is shown o indica e a malfunc ion
-LL is shown o indica e low level
(where applicable)
- The flashing display is changed in o a con inuous ligh
by pressing he bu on (a knowledging). To
a knowledge, press he bu on only briefly.
Messages which have been acknowledged bu have no
ye been remedied flash again af er he pump is swi -
ched off and on again.
Setting and operation of the QLS 301
Three possible modes of opera ion and se ings can be
selec ed a he key pad:
- Display mode
- Operating mode
- Programming mode
Display mode
Fig. 28 - Display in display mode
4206a99
4207a99 4227a99
4208a99
4209a99
4210a99 4211a99
4212a99 4213a99
4214a99

Subjec o modifica ions
Page Number 13 of 282.1B-38006-C00
QLS 301
Form 403013
Installation and Operation Instructions
Operating mode
Important:The opera ing mode is accessible only during he
pause ime, and canno be opera ed during he running ime
(pump opera ing ime).
Precondi ion: when he vol age supply is applied, he
decimal poin On/h is li .
Operating option: initiating an additional lube y le
* Press he bu on. The elapsed pause ime is rese . The
opera ing ime s ar s. A ro a ing segmen is visible on
he display during he whole opera ion ime.
Operating option: read information on how to set the
pause time and remaining pause time.
* Press he bu on.
Note: The following display sequence is shown twice and is
cancelled after 60 seconds. The change of display occurs
every two seconds. Example:
PP = 1 h 30min
rP = 5 h 10 min
PP (se pause ime)
12 . (hours)
. 30 (minu es)
rP (remain pause ime)
5 . (hours)
. 10 (minu es)
occurs af er second sequence.
Display press
after 2 se .
after 2 se .
after 2 se .
after 2 se .
after 2 se .
after 60 se .
Fig. 29 - Display in opera ing mode
4208a99
4209a99
³ 2 se
4208a99
³ 2 se
4223a99
4216a99
4220a99
4224a99
4225a99
4216a99
4208a99
4222a99
4214a99

Page Number 14 of 28
QLS 301
Subjec o modifica ions
2.1B-38006-C00 Form 403013
Installation and Operation Instructions
Programming mode
Setting number of y les P3 (Option)
Important: Se ings are only possible in connec ion wi h
progressive divider blo k SSV 6 or SSV 8 (connec ed
as a main divider block).
* Press he bu on. The selec ion of P3 (cycles) is
displayed.
* Fac ory se ing....................................................1 cycle
* Max...................................................................3 cycles
* Press he bu on and program he number of cycles (2,
3) in accordance wi h he desired dosage.
Completing the programming
* Press he bu on. P-is displayed.
Important: In order o avoid a wrong programm, make sure
o always carry ou he programming order comple ely, i. e.
se ing of P1 (hours), P2 (minu es), P3 (number of cycles)
and P- (programming end).
* Comle e he programming by pressing he bu on, see
fig.
Note: If the displayed button is not pressed within 30 secon-
ds, programming mode remains in the previously set time.
Important: Af er comple i ion of he programming order,
check he adjus men of he pause ime in he opera ing
mode, again (see page 13).
Display press press
Fig. 30 - Display in programming mode
Programming options - Pause time:
P1 0 99 hours
P2 0 59 minu es
Min. pause ime 20 minu es
Max. pause ime 99 hours 59 minu es
Setting hours P1
* Se ings are made in one direc ion: 0, 1, 2, 3, ..... 99 h
Bu on pressed once.......................increases by 1 hour
Bu on pressed con inuously................quick sequence
The fields hourand minu esare indica ed by a
de imal point on he right - hand for he hours and on
the left - hand for the minutes.
Setting minutes P2
* Se ings are made in one direc ion: 0, 1, 2, 3....59
minu es
Bu on pressed once.....................increases by 1 minu e
Bu on pressed con inuously....................quick sequence
Note: The minimum pause time begins with 20 minutes.
When pause times < 20 minutes are programmed, the
display automatically shows . 0.
* To access o he programming mode, press both but-
tons a he same ime > 4 se onds.
³ 4 se
4215a99
4222a99 4214a99
4222a99
4216a99
4217a99
4222a99
4214a99
4214a99
4214a99
4222a99
4222a99
4220a99
4218a99
4219a99
4221a99
4208a99

Subjec o modifica ions
Page Number 15 of 282.1B-38006-C00
QLS 301
Form 403013
Installation and Operation Instructions
Maintenance
To fill reservoir
Fig. 31 - Filling nipple for filling reservoir
Repair
Functional est
Fig. 32 - Push bu on for an addi ional lubrica ion cycle
Maintenance, Repair and Tests
Main enance is essen ially limi ed o refilling he reservoir
wi h clean lubrican as necessary. However, check regu-
larly whe her he lubrican is being dispensed o all he
lubrica ion poin s.
Also check he feed lines for damage and replace hem, if
necessary.
Swit h off the voltage supply for pumps 120 VAC and 230
VAC before servi ing the pump.
For repair work on he QLS 301 use only Lincoln Indus ri-
al original spare par s.
Using non-Lincoln Indus rial par s will void he pump
warran y.
Turn off the voltage supply for pumps 120 VAC and 230
VAC before servi ing the pump.
Important: To clean he sys em use pe roleum spiri or
pe roleum. Do not use Tri, Per or similar solvents or polar
or organi solvents su h as al ohol, methanol, a etone,
et .
Note: Whenever work is performed on the centralized
lubrication system, special attention should be paid to
cleanliness. Dirt will cause failure of the system.
Fill he reservoir up o he Max. mark via he filling
nipple
Important! The grease mus be free from impuri ies and
mus no be liable o change i s consis ency over he course
of ime.
Note: If the reservoir has been completely emptied, the pump
may require priming and a longer running time to reach the full
lubricant output. Therefore, initate additional lube cycles
manually.
* Press push bu on o ini ia e a
lubrica ion cycle.
Filling of the empty reservoir
Make sure, ha all air has been expelled from under he
follower pla e af er refilling he emp y reservoir.
* The follower pla e seal should clear he hole loca ed on
he op of he reservoir. Small amoun of grease should be
expelled o ensure expelling of air from under he follower
pla e.
1 - Filling nipple 3 - Follower pla e
2 - Ven hole
4222a99
4231a99
* By opera ing he drive mo or wi hou he reservoir ins al-
led, here is a risk of injury by eccen ric gear.
When filling he reservoir by means of pumps with a large
delivery volume do not ex eed the max. filling mark. Risk
of bursting if the reservoir is overfilled.

Page Number 16 of 28
QLS 301
Subjec o modifica ions
2.1B-38006-C00 Form 403013
Installation and Operation Instructions
Troubleshooting
Pump of the QLS 301 system
Fault: pump motor doesnt run
Cause:
Power supply in errup ed. Green decimal poin On/h on
display is no li .
* Check he vol age supply o he pump/
fuses. If necessary, elimina e he faul or
replace he fuses.
* Check he feed line from he fuses o he
plug of he pump and hen o he prin ed
circui board.
*Ini ia e an addi ional lube cycle. Check
vol age supply from he prin ed circui
board o he mo or.
* Replace prin ed circui board.
* Replace housing wi h key pad.
Remedy:
Power supply from prin ed circui board o mo or
in errup ed.
Prin ed circui board defec ive.
Key pad or bu on is defec ive. EP display a he key
pad flashes.
Fault: pump does not deliver lubri ant
Cause:
Reservoir is almos emp y. LLdisplay a he key pad is
flashing.
Pump los prime and Er display a he key pad is
flashing.
Air pocke s in lubrican .
Improper lubrican has been used.
Suc ion hole of pump elemen clogged.
Pump pis on is worn.
Check valve in pump elemen defec ive or clogged.
Remedy:
* Fill up he reservoir wi h clean grease. Le he pump run
(ini ia e an addi ional lube cycle) un il he lubrican
shows a all lube poin s.
Note: Dependent on the ambient temperature and/or sort of
lubricant output. Therefore, iniate several additional lube
cycles.
*Trigger an addi ional lubrica ion cycle. Lubrican mus
dispense wi hou air bubbles.
*Change he lubrican .
*Remove pump elemen . Check suc ion hole for foreign
par icles. If here are any, remove hem.
*Replace pump elemen .
The green ro a ing display indica es ha he pump
opera es properly.
4209a99
Fault: Pump either does not swit h off at all or only after the monitoring time of 15 min.
Reason:
Proximi y swi ch is no dampened, i.e. he con rol pin
does no move wi hin he swi ching range of he ini ia or,
or he dis ance be ween he con rol pin and he ini ia or
surface is more han 0.5 mm (0.02 in.).
Solution:
* Ini ia e an addi ional lubrica ion. Check whe her he
con rol pin moves cen rically over he swi ching surface
of he ini ia or. In case he adjus men s do no
correspond o he indica ions, he fixing posi ion of he
me ering device has o be correc ed.
* Check he dis ance be ween he con rol pin and he
swi ching surface of he ini ia or (max. 0.5 mm; 0.02 in.).
In case he adjus men s do no correspond o he
indica ions, he fixing posi ion of he proximi y swi ch
has o be correc ed.
* Dis ances be ween he swi ching surface of he ini ia or
and he upper edge of he fixing nu :
* When he me ering device is moun ed a he back: 16+ /
0,2 mm (0.62+/-0.08 in.)
* When he me ering device is moun ed a he bo om:
12,7 +/-0,1 mm (0.5 +/-0.004 in.).
* Tigh ening orque of he nu : 1,5 Nm (1.10 f -lb).

Subjec o modifica ions
Page Number 17 of 282.1B-38006-C00
QLS 301
Form 403013
Installation and Operation Instructions
Divider Blo k of the QLS 301
Fault: Blo kage in the downstream progressive system
Remedy:
De ermine he cause of he blockage as described in
he following example and elimina e i .
* Le he pump run (refer o Ini ia ing an addi ional lube
cycle)
* Disconnec all feed lines of he divider block one af er
he o her. If grease shows under pressure (i. e. a ou le
3, Fig. 33) he blockage is loca ed in he line of ou le 3
or in he connec ed bearing poin .
* Pump hrough he blocked line or bearing poin using a
hand pump.
Note: To check the individual outlets, leave all outlet
disconnected for a while, since only one piston stroke is
executed with each motor revolution. Several strokes are
required for a full cycle of all divider blocks.
* Check pressure relief valve (Fig.19). Replace i , if
necessary.
A - pressure relief valve
B - pump
C - SSV 12 divider block
D - feedlines
Fig. 33 - Example of a QLS 301
Cause:
Bearings, lines or divider block clogged
Moun ing posi ion of divider block : bo om
- In he case of he divider block SSV 8,12 and 18 he
ou le por s 1 and/or 2 are closed.
Moun ing posi ion of divider block: back-side, un il
preserial no 99800006711/004 and serial no
998000099C/001
- In he case of he divider block SSV 6, 12 and SSV 18
he ou le 1 is closed and ou le 2 is feed o a lube poin .
The faul can be iden ified as follows:
a) Faul indica ion Er flashing on he key pad
display.
b) The indica or pin moun ed on he divider block
pis on does no move.
4232a99
Fault: Pump runs ontinuously
Cause:
Programming of pause ime in s ep P1 was se o00.
Programming of fur her s eps P2, P3 and P- were no
carried ou .
Pump s ar s running imidia ely. The proximi y swi ch
swi ches off he cycle for wo minu es. Then pump is
running con inuously.
Remedy:
* Swi ch off pump (power supply) by removing lef -hand
socke from plug.
* Push bo h bu ons of keypad
* Swi ch on pump (power supply) by replugging lef -
hand socke .
* Le go bo h pushbo ons af er wo seconds.
* The fac ory se ed pause ime of 6 hours is
au oma ically rese ed. Af erwards new se ing of
pause ime is possible.
2 se

Page Number 18 of 28
QLS 301
Subjec o modifica ions
2.1B-38006-C00 Form 403013
Installation and Operation Instructions
Divider valve is blocked
Fault: Blo kage in the downstream progressive system, ontinuation
* Replace he divider block or clean i as follows.
* Remove all hreaded ube fi ings.
* Unscrew he pis on closure plugs.
* Remove he pis on, if possible, wi h a sof mandrel
(smaller han ø 6 mm, 0.24 in).
Important: The pis ons are individually fi ed in he bore ho-
les of he divider block. Af er removing he pis ons, mark
hem in order o reins all hem in he righ direc ion and posi-
ion. They may no be in erchanged.
* Thoroughly clean he divider block body in a grease-
desolving de ergen and dry hem ou wi h compressed
air.
* Clean hrough he ma erial passages (ø 1.5 mm, 0.59 in)
a he hread ends of he pis on bore holes using of a pin.
* Clean he divider block once more and dry i horoughly.
* Reassemble he divider block.
Fault:Differing lubri ant amounts at the lubri ation point
Cause:
Lubrican me ering no correc .
Se ing of he pause ime incorrec .
Remedy:
*Check he lubrican me ering acc. o he lubrica ion char .
*Check ime se ing.
Cause:
Remedy:

Subjec o modifica ions
Page Number 19 of 282.1B-38006-C00
QLS 301
Form 403013
Installation and Operation Instructions
Technical Data
The prin ed circui boards for Dire t Current DC:
- are EMV regula ion for on-road vehicles acc. EN 40839
par s 1, 3 and 4
- he vehicle guide line 95/245/EC
Time setting
Fac ory se ing
Pause ime.......................................................6 hours/cycle
Lubrica ion cycle ime ............................... 20 min. o 100 hrs
............................................................ incremen 1 minu e
Numbers of cycles, general .................................................. 1
wi h SSV 6, 8 divider block ...... 1, 2 or 3 cycles are possible
Timer memory ................................ indefini e over EEPROM
Opera ing empera ure ..... -25° C o 70° C (-10° F o 160° F)
Maximum opera ing pressure
pump model wi hou divider block ........ 205 bar (3,000 psig)
Number of ou le s .............................................. 6, 8, 12 or 18
Ou pu per ou le and cycle .......... approx.0.2 cm³ (0.012 in³)
Reservoir capaci y .............................................. 1.0 L (61 in³)
Lubrican ................................................ up o NLGI 2 Grease
Weigh (average) ......................................... 5.7 kg. (12.5 lbs)
Pro ec ion ................................................... IP6K9K (NEMA 4)
Reverse polari y pro ec ion:
The opera ing vol age inle s are pro ec ed agains reverse
polari y
Ele tri al Data AC (Alternate Current)
Opera ing vol age ............................. 120VAC/60 Hz +/- 10 %
Opera ing curren ............................................................ 1.0 A
Opera ing vol age ...................... 230 VAC;50/60 Hz+/- 10 %
Opera ing curren ............................................................ 0.5 A
Ele tri al Data DC (Dire t Current)
Opera ing vol age .................................... 12 V - 20 %/+ 30 %
Opera ing curren ............................................................ 2.0 A
Opera ing vol age ................................. 24 V - 20 %/ + 30 %
Opera ing curren ............................................................ 1.0 A
Residual ripple in rela ion
o he opera ing vol age....................± 5% acc. o DIN 41755
Note: The pump motor is suitable for intermittent operation
only
Elec ric mo or o housing...............................3 Nm (2.5 lb-f )
Pump elemen in housing.........................25 Nm ( 19.0 lb-f )
.
Lines
Plasti tube (dia. 6x1.5 mm; 1/4 in.)
Min. bending radius..........................................50 cm (2 in.)
Burs ing pressure
a 20° C ( 70°F)........................ approx. 210 bar (3050 psi )
Min. empera ure............................................-25° C (-10°F)
Closure plug (pis on) in divider block ............ 18 Nm (13.5 lb-f )
Closure plug (ou le s) in divider block ............ 15 Nm (11.0 lb-f )
Ou le fi ing in divider block
screw- ype ................................................. 17 Nm (12.5 lb-f )
push-in ype ................................................ 12 Nm (9.0 lb-f )
Compression nu on o ou le fi ing, screw- ype
plas ic ube .................................................. 10 Nm (7.5 lb-f )
s eel ube ..................................................... 11 Nm (8.0 lb-f )
Indica or pin in divider block ......................... 18 Nm (13.5 lb-f )
Moun ing of he divider block .......................... 10 Nm (8.0 lb-f )
Tightening Torques
Relay for Malfun tion
Po en ial-free ou le for malfunc ion/low level op ion
Swi ching vol age............................max. 230 VAC/125 VDC
Swi ching curren (resis ive)............................................2 A
Swi ching capaci y...........................................460 VA/80 W
Note: All datas depends on operating voltage, ambient
temperature and max. operating pressure.
Pump
Divider block, accessories
QLS 301, general

Page Number 20 of 28
QLS 301
Subjec o modifica ions
2.1B-38006-C00 Form 403013
Installation and Operation Instructions
Dimensions
QLS 301
Number of Ou le sDimensions A in mm (in.)
8 75 (2.95)
12 105 (4.13)
18 150 (5.90)
4234a99
Fig.33- Dimensions of QLS 301
2012b95
Number of Ou le sDimensions A in mm (in.)
6 60 (2.36)
12 105 (4.13)
18 150 (5.90)
4233a99
Fig.34- Dimensions of bo om moun ed SSV Divider Blocks
Fig.35- Dimensions of back moun ed SSV Divider Blocks
Other manuals for QLS 301
1
Table of contents
Other Lincoln industrial Lubrication System manuals

Lincoln industrial
Lincoln industrial B Series User manual

Lincoln industrial
Lincoln industrial Airless Spray System 85415 User manual

Lincoln industrial
Lincoln industrial QLS 301 Owner's manual

Lincoln industrial
Lincoln industrial VSG-KR User manual

Lincoln industrial
Lincoln industrial AM 08 User manual