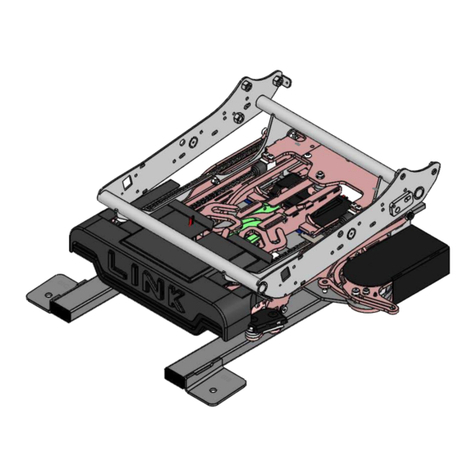
Link LK-TOY11CL User manual

LINK
INSTALLATION MANUAL
LK-TOY11CL
TOYOTA SIENNA
2011 & UP
DRIVER SIDE CENTER

LINK 2011 & UP Toyota Sienna Center Left –p.2
WARNINGS
PLEASE REVIEW BEFORE STARTING THE INSTALLATION
Look through the entire manual to understand the installation process.
Watch the tutorial videos that are found on the tablet.
During the installation use the ‘BYPASS’ mode to move the LINK.
Do not use the pendant or ‘PENDANT’ mode until you have reset the home position.
The LINK is designed to ALWAYS use the original seat. The biggest challenge this will present for the installer will
be extending the vehicle’s original seat wire harness, as this MUST be done. The general process does not vary, but
the exact steps will vary due to the trim level, the model and seat options from the vehicle manufacturer. Keeping
this in mind, we have made an effort to clearly describe the process required in this manual. However, it is possible
that the pictures in this manual do not match exactly the specific vehicle you are working on.
SEAT WIRING EXTENSION PROCESS
The wiring must be extended 80 inches. This extension is placed near the seat connectors that are under the seat.
The extension (80 inches) then passes under the LINK and loops around the back of the OEM seat –allowing the
seat and the LINK to travel in and out of the vehicle. Depending on the make, model and seat options, there are
components that must be disconnected, bypassed and/or relocated. On vehicle models with a seat position
memory function, the forward/backward, tilt and height adjustments as well as seat memory are replaced by the
LINK. However, the seat recline function is retained. (EXAMPLE: In the Ford F150, 2009-2014 model; the seat
height, tilt, forward and backward adjustment motors are disconnected and removed with the seat frame, but the
recline motor is retained. The control and memory box are relocated to the floor under the seat, next to the seat
connectors. The seat position sensor is also relocated to the floor under the seat. The wiring harness is then
extended from this point under the seat.)
PLEASE NOTE: If the ignition is turned on while extending a wire harness that includes airbags, this may cause the
airbag light to stay on following the installation.
ADAPT SOLUTIONS CANNOT BE HELD RESPONSIBLE FOR FAULTY WIRE EXTENSIONS.
Please use caution during the installation.
ANDROID TABLET –LINK I.T. SOFTWARE
If this is your first installation of a LINK, you will have also purchased an Android tablet that is required for the
installation and maintenance of the LINK product. This tablet will have the LINK IT software already installed.
We have prepared quick, easy and to the point tutorial videos imbedded into the software. Take a moment and
watch the video that shows all the features of the tablet. To do this, open the LINK IT app and tap on ‘INFO’.
Make sure your volume is turned up and tap on App-101. The video will start automatically.
REDUCED POWER MODE
A safeguard is integrated in the LINK system. Following any changes to the preset or sequence of the LINK, the
unit will enter a reduced power mode. This is to allow you to visually inspect the movements of the LINK to ensure
it is not damaging the vehicle or itself during its first cycle. On the tablet, a yellow bar will appear at the top of the
screen to indicate you are in reduced power mode. To exit, simply run the LINK a full cycle. NOTE:It is possible
that the LINK will stop during this cycle as power is reduced. Visually confirm nothing is impeding the movements
and then simply press the IN or OUT button again to continue the cycle. During the installation, if the 12V power is
removed and replaced at the same time as the 9V battery (LINK memory back up) is unplugged or fully drained,
the LINK will enter reduced power mode. Simply run a full cycle to exit. PLEASE NOTE: You will find an explanation
of this mode on a YELLOW tag attached to the hand pendant. Please explain the functions of the reduced power
mode to the LINK user (your client).
For technical support call 866.641.0419 or email tech@adaptsolutions.com
Please have the serial number of the unit on hand before placing your call.
6
7
12
8
3
2
13
17
1
16
10
11
3
4
5
7
9
20
19
15
14
18
31
21
23
24
25
26
27
28
29
30
22
1 of 4
ITEM
PART NUMBER
QTY
DESCRIPTION
1
LK000L-01
1
Short Model LINK -Left-
2
LK-UNI-305L
1
305 Top Bearing Plate -Left-
3
PRD 337-213P
3
Button head socket cap screw Zinc Plated 5/16-18 x 3/4
4
PRD 192-141
1
Spring Tensions Pin 3/16 x 3/4
5
PRD 337-193P
1
Socket Head Cap Screw Zinc Plated 1/4-20 UNC x 3/4
6
LK-TOY11CL-03
1
Seat Adapter -Left Central-
7
PRD 339-136P
4
Socket Shoulder Screw Zinc Plated 3/8 x 1/2 x 5/16-18 THD
8
L-LK912
1
Communication Cable Support
9
PRD 333-107
4
Nylon Insert Locknut 5/16-18
10
LK710B
1
Chain Covert -Black-
11
PRD 110-106
2
Round washer head tapping screw #8 x 3/4
12
LK750LB
1
Pivot Cover -Left- Black
13
LK730LB
1
Outside Cover -Left- Black
14
LK731LB
1
Intside Cover -Left- Black
15
PRD 251-177
4
Trim Panel Clip Ø1/4'' x 3/4'' Black
16
LK700B
1
Link Covert -Black-
17
LK720LB
1
Pivot Motor Cover -Left- Black
18
LK960
1
LINK Wired Control
19
LK-TOY11CL-01
1
Outside Floor Adapter -Left Central-
20
LK-TOY11CL-02
1
Inside Floor Adapter -Left Central-
21
EW-CK-00
1
12V Power Supply Wiring Kit
22
LK-TOY11C-BK
1
Bolt Kit -Central-
23
LK-TOY11CL-04
1
Cushion Front Plate -Left Central-
24
LK-TOY11C-05
1
Floor Adapter Transversal PLate
25
LK-TOY11C-06
1
Seat Inclination Handle -Central-
26
LK-TOY11CB-07
1
"A" Floor Cover -Central- Noir
27
LK-TOY11CB-08
1
"B" Floor Cover -Central- Black
28
LK-TOY11CLB-09
1
"C" Floor Cover -Lef Central- Black
29
LK-TOY11CLB-10
1
Seat Outside Moulding -Left Central- Black
30
LK-TOY11CLB-11
1
Seat Inside Moulding -Left Central- Black
31
LK760B
1
44" Vinyl Cover -Black-
LK-TOY11CL
ADAPT SOLUTIONS
|[email protected]|866.641.0419|418.889.9838 fax
PART NUMBER
Short Model Link Kit -Left-
DESCRIPTION
KIT LINK TOYOTA SIENNA 2011 +
-CENTRAL-

Step 1
1
2
5
35
4
Step 1: Drill 5/16 (2 thikness)
Step 2: Drill 3/16
Step 3: Thread 1/4-20 UNC
A
Drill: 5/16
Drill: 3/16
Thread: 1/4 - 20 UNC
DETAIL A
SCALE 1:1
2 of 4
ITEM
PART NUMBER
QTY
DESCRIPTION
1
LK000L-01
1
Short Model LINK -Left-
2
LK-UNI-305L
1
305 Top Bearing Plate -Left-
3
PRD 192-141
1
Spring Tensions Pin 3/16 x 3/4
4
PRD 337-193P
1
Socket Head Cap Screw Zinc Plated 1/4-20 UNC x 3/4
5
PRD 337-213P
3
Button head socket cap screw Zinc Plated 5/16-18 x 3/4
LK-TOY11CL
ADAPT SOLUTIONS
|[email protected]|866.641.0419|418.889.9838 fax
PART NUMBER
Short Model Link Kit -Left-
DESCRIPTION
KIT LINK TOYOTA SIENNA 2011 + -CENTRAL-

8
5
4
6
7
910
2
3
1
Step 2
3 of 4
ITEM
PART NUMBER
QTY
DESCRIPTION
1
LK-TOY11CL-03
1
Seat Adapter -Left Central-
2
L-LK912
1
Communication Cable Support
3
LK750LB
1
Pivot Cover -Left- Black
4
LK730LB
1
Outside Cover -Left- Black
5
LK731LB
1
Intside Cover -Left- Black
6
LK710B
1
Chain Covert -Black-
7
PRD 110-106
2
Round washer head tapping screw #8 x 3/4
8
PRD 251-177
4
Trim Panel Clip Ø1/4'' x 3/4'' Black
9
PRD 333-107
4
Nylon Insert Locknut 5/16-18
10
PRD 339-136P
4
Socket Shoulder Screw Zinc Plated 3/8 x 1/2 x 5/16-18 THD
LK-TOY11CL
ADAPT SOLUTIONS
|[email protected]|866.641.0419|418.889.9838 fax
PART NUMBER
Short Model Link Kit -Left-
DESCRIPTION
KIT LINK TOYOTA SIENNA 2011 + -CENTRAL-

1
Step 3
4 of 4
2
5
4
7
16
3
8
910
11
12 13
14 15
6
ITEM
PART NUMBER
QTY
DESCRIPTION
1
LK700B
1
Link Covert -Black-
2
LK720LB
1
Pivot Motor Cover -Left- Black
3
LK960
1
LINK Wired Control
4
LK-TOY11CL-01
1
Outside Floor Adapter -Left Central-
5
LK-TOY11CL-02
1
Inside Floor Adapter -Left Central-
6
LK-TOY11C-BK
1
Bolt Kit -Central-
7
LK760B
1
44" Vinyl Cover -Black-
8
LK-TOY11CL-04
1
Cushion Front Plate -Left Central-
9
LK-TOY11C-05
1
Floor Adapter Transversal PLate
10
LK-TOY11C-06
1
Seat Inclination Handle -Central-
11
LK-TOY11CB-07
1
"A" Floor Cover -Central- Noir
12
LK-TOY11CB-08
1
"B" Floor Cover -Central- Black
13
LK-TOY11CLB-09
1
"C" Floor Cover -Lef Central- Black
14
LK-TOY11CLB-10
1
Seat Outside Moulding -Left Central- Black
15
LK-TOY11CLB-11
1
Seat Inside Moulding -Left Central- Black
16
EW-CK-00
1
12V Power Supply Wiring Kit
LK-TOY11CL
ADAPT SOLUTIONS
|[email protected]|866.641.0419|418.889.9838 fax
PART NUMBER
Short Model Link Kit -Left-
DESCRIPTION
KIT LINK TOYOTA SIENNA 2011 + -CENTRAL-

LINK 2011 & UP Toyota Sienna Center Left –p.3
1. Remove the driver side center OEM seat and place on a workbench.
2. Remove all the plastic shrouds from the seat carriage and also the center brace.
3. Remove the seatbelt anchor bolt.

LINK 2011 & UP Toyota Sienna Center Left –p.4
4. Remove all the OEM bolts (keep for later use) of the exterior seat rail and remove the rail.
5. To remove the interior seat rail the gas tank will have to be lowered on the side next to the exhaust
system to gain access to the three bolts. Access to a vehicle lift will facilitate this. Retain the OEM
nuts for reinstallation.

LINK 2011 & UP Toyota Sienna Center Left –p.5
6. Install the LINK interior floor adapter (LK-TOY11CL-02) and tighten down with the original OEM
nuts before remounting the gas tank and lowering the vehicle.
7. The exterior floor adapter (LK-TOY11CL-01) can now be installed and bolted down with the OEM
bolts, reinstall the seat belt anchor bolt at this time.

LINK 2011 & UP Toyota Sienna Center Left –p.6
8. The floor adapter support brace can now installed (LK-TOY11C-05) use the four 3/8x7/8 flat head
allen bolts provided in the kit.
9. Install the plastic seat floor adapter covers. (LK-TOY11CB-07) (LK-TOY11CB-08) (LK-TOY11CRB-09)
10. Run the power from the battery to the LINK. To do this, thread the red power cable (+) under the
doorstep moulding and through the firewall. Make sure you pass through a grommet in the
firewall to prevent the cable from chaffing. Install the circuit breaker near the battery and then
connect the battery to the circuit breaker. Attach the black ground wire (-) to the vehicle’s frame,
under the doorstep moulding using a self-tapping screw. Locate a spot where the sheet metal is
doubled-up to ensure a proper ground.

LINK 2011 & UP Toyota Sienna Center Left –p.7
11. The remove the LINK from the shipping box and set it on a table or work bench. The LINK has
been pre-programmed to fit in the application it was ordered for. *IMPORTANT: Before connecting
auxiliary 12V power to the LINK, connect the 9V battery. The 9V battery will maintain memory of
the movements of the motors for approximately 12 hours, in event of 12V power loss. Connect the
9V battery to the LINK control box and slide the battery into its receiver located next to the control
box, under the motor. NOTE: If the installation takes more than a day or if the 12V power supply to
the LINK is disconnected, the 9v battery will be dead after approximately 12 hours. If the battery is
not installed and the 12V power supply is connected, the LINK will beep when in use to indicate
that the battery is low or not installed. (See audible warning codes at the end of the manual.)
12. Connect auxiliary 12V power to the LINK and connect your Android tablet via Bluetooth. To do this,
turn on the Bluetooth function of your Android tablet and connect the Bluetooth module (small,
blue and white, 4 pronged connector) to the LINK pendant plug. Using the LINK IT application, go
to ‘BYPASS’. (If this is your first installation, please watch the tutorial that appears when you press
‘BYPASS’) Using the ‘BYPASS’ mode in the LINK IT app, press the ‘PIVOT OUTWARD’ button to
move the LINK out just enough to see the eight (8) bolt holes.

LINK 2011 & UP Toyota Sienna Center Left –p.8
13. Place the LINK in the vehicle on the floor adaptors. Use the four (4) 3/8’’-16x1 1/4’’ socket cap
bolts to secure the LINK by the pivot, and use the four (4) 3/8’’-16x7/8’’ to secure the interior of
the LINK be careful not to pinch the wire at the back of the LINK. NOTE: Run the harness of the
LINK around and under the pivot. Do not run over the top of the pivot as it can interfere with the
function of the slide.
14. Connect the previously installed 12v power supply to the LINK, and using the ‘bypass’ mode on
your ADAPT SOLUTIONS tablet carefully ‘PIVOT’ ‘TRAVEL’ and ’TILT’ the LINK out of the
vehicle to install the seat base.

LINK 2011 & UP Toyota Sienna Center Left –p.9
15. With the seat installed on a workbench remove all the plastic shrouds. To remove the right hand
side shroud you will have to remove the seat belt receiver.

LINK 2011 & UP Toyota Sienna Center Left –p.10
16. Remove the recline handle. Disconnect the seat folding cable mechanism and then unbolt the two
bolts on each side to remove the seat back. Retain the OEM bolts for reinstallation.
17. Pull on the seat folding cable with the pink plastic to tilt the seat base and relieve the tension in the
spring. Then unbolt the seat base cushion from the metal base.

LINK 2011 & UP Toyota Sienna Center Left –p.11
18. Open the enclosures and zips on the underneath of the seat base to gain access to the internal
metal frame. Cut the wire clips at the front and remove the frame.
19. Install the provided seat base adapter (LK-TOY11CL-04) and attach at the front at the same place as
the metal clips with zip ties and then close the fabric of the seat.
20. Feel for the two mounting brackets through the fabric and then cut a little slot to let them through
the fabric.

LINK 2011 & UP Toyota Sienna Center Left –p.12
21. Install the three provided child seat attachment adaptors. Use the provided self-tapping screws to
fix them in position. Use the seat cushion holes for alignment

LINK 2011 & UP Toyota Sienna Center Left –p.13
22. The seat base can now be installed on to the LINK seat adapter using the four 5/16x1’’1/4 bolts
provided.
23. Reinstall the seat back using the OEM bolts. Then install the provided recline handle (LK-TOY11C-06)
with the OEM bolts.
24. Attach the pendant wire on the side under the left hand shroud and position it to come out
between the seat back and seat cushion. Leave enough loose cable to be able to plug in and unplug
the pendant and the Bluetooth module. The connector can be attached with velcro under the
shroud. Verify the positioning of the wire to make sure there is no chance of it pinching or binding
once the seat moves.

LINK 2011 & UP Toyota Sienna Center Left –p.14
25. Install the provided left hand side seat shroud (LK-TOY11CL-10)
26. Install the provided right hand shroud (LK-TOY11CL-11) and then the seat belt receiver using the
OEM bolt.

LINK 2011 & UP Toyota Sienna Center Left –p.15
27. Using the LINK IT app, use ‘RESET’ mode to bring the seat to the ‘HOME’ position. PLEASE WATCH
THE SHORT TUTORIAL THAT APPEARS WHEN YOU TOUCH ‘RESET’ TO UNDERSTAND HOW THIS
FEATURE WORKS. Use ‘TILT’ and ‘TRAVEL’ to bring all three motors to their ‘HOME’ position. Use
gentle movements to make sure to not go past the visual markers (yellow indicators) of the LINK’s
‘TRAVEL’ and ‘TILT’. Then make sure that the ‘PIVOT’ is completely in.
IMPORTANT NOTE: It is vital that the LINK be exactly at the ‘HOME’ position before moving on to
the next step. If the LINK is slightly off its ‘HOME’ position, the starting point of its movements,
there is a strong chance that the LINK will not fit through the doorway properly and/or will cause
problems for the preset of the LINK.
28. Once the visual markers (yellow indicators) are lined up using ‘RESET’ mode on the tablet, press
‘CONFIRM RESET’. A screen will pop up to ask: ‘ARE YOU SURE YOU WANT TO RESET ZERO
POSITION’. Press ‘ACCEPT’ and the LINK will emit two (2) audible beeps to confirm ‘RESET’. The
LINK is now set to its ‘HOME’ position.
NOTE: This is the position that the LINK will start its outward travel from. If the LINK is adjusted
forward and/or tilted up with the seat adjustment buttons found on the hand pendant, pressing
‘OUT’ will bring the LINK to this ‘HOME’ position before exiting the vehicle.
29. The installation is now finished. Plug in the 9V battery. Check the voltage on the 9V battery. To do
this, on the tablet, under INFO | LINK MANAGEMENT | DIAGNOSTIC. The real voltage will be
listed. Unplug the Bluetooth module and plug in the hand pendant. Make sure the LINK hand
pendant is working properly. Cycle the LINK in and out a few times, both with and without a
passenger to make sure all shrouds are properly installed and that nothing is rubbing or requiring
adjustment. Make a visual inspection while the LINK is in movement that all the wiring follows
the seat and does not risk being severed at any time.
FOR TECHNICAL SUPPORT CALL 866-641-0419 OR E-MAIL US TECH@ADAPTSOLUTIONS.COM
PLEASE HAVE THE SERIAL NUMBER OF THE UNIT ON HAND BEFORE PLACING YOUR CALL

LINK 2011 & UP Toyota Sienna Center Left –p.16
LINK AUDIBLE WARNINGS
Audible Signal
Meaning
Description
BEEEEEP
Overload
Protection
A safeguard against the application of excessive force on
the mechanical components of the LINK. The overload
protection prevents damage to the unit. Check for
mechanical failure, or something impeding proper
mechanical movements.
BEEP-BEEP
Obstruction
Something is impeding the LINK from moving. The LINK has
detected an obstruction. (Passenger or personal item)
BEEP-BEEP-BEEP
12v Power
Fluctuation
A problem with the 12 volt power supply. It could be a low
car battery or a faulty power supply connection. The
audible signal indicates activity of the LINK's sleep mode or
memory backup system that uses the 9 volt battery. This
backup system is to ensure that the LINK's programming
sequence remains in the memory of the unit. If there has
been substantial fluctuation and audible warnings,
replacement of the 9 volt battery is strongly suggested.
BEEP-BEEP
9v Battery
The LINK's memory back up battery (9 volt) is low or dead.
Please replace battery as soon as possible. This backup
system is to ensure that the LINK's programming sequence
remains in the memory of the unit.
BEEP-BEEP
BEEEEEP-BEEEEEP
Reset
To alert you that the LINK has 'RESET' and its current position
will be the starting point of the LINK's sequence and
mechanical 'home'. (Activated through the LINK IT
software - under RESET.) IMPORTANT: When you first supply
power to the LINK, you will hear this audible signal. The LINK
has been shipped to you without its 9 volt battery
connected. The 9v battery is the LINK's memory backup. It
is important that you install the 9v battery as soon as you
have supplied power to the LINK. This will ensure that all
movements of the LINK are acknowledged by the
sequence or programming of the unit. It will also prevent
any temporary power surges or failures during installation to
affect the programming.
9 Volt Battery
The LINK is designed to run off of the vehicle’s 12 volt battery. It is equipped with many safeguards
to ensure that the controller box always retains its programing sequence. One of those safeguards is
the 9 volt memory backup battery. This battery is designed to register and record the positions of
the encoders in the event that there is a problem with the 12 volt power supply.
The 9 volt will last 12 hours after the 12 volt power supply has been lost.
Table of contents
Other Link Automobile Accessories manuals

Link
Link HD150 User manual

Link
Link DD2000-XLC Manual

Link
Link 60K AIR LINK User manual

Link
Link LK-F250C11R User manual

Link
Link LK-TRV18CR User manual

Link
Link LK-RAV19R User manual

Link
Link LK-TRV18PL User manual

Link
Link LK-SILX07R User manual

Link
Link G5 VOODOO PRO User manual

Link
Link LK-F150C09L User manual
Popular Automobile Accessories manuals by other brands

Diamondback
Diamondback 180 installation guide

Buyers Products Company
Buyers Products Company 1501100 installation instructions

Whispbar
Whispbar K492W Fitting instructions

Uniden
Uniden BTSC1700 owner's manual

Fiamma
Fiamma Ultra Box Series Installation and use instructions

injen technology
injen technology SP3028 quick start guide