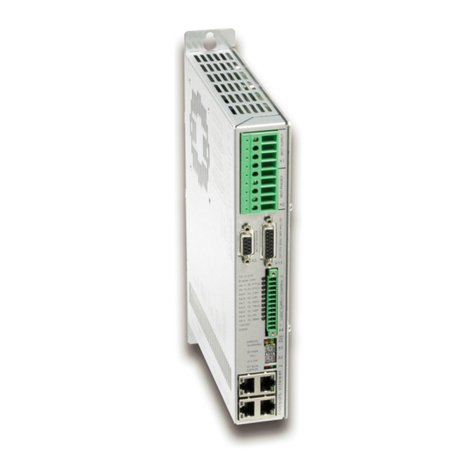
LinMot B1100-PP User manual

Quick Start Help for the Drives:
B1100-PP (-HC, -XC)
Quick Start uide B1100-PP

Quick Start Guide B1100-PP
Table of Content
SYSTEM OVERVIEW...............................................................................................................3
REFERENCES..........................................................................................................................3
WIRIN ..................................................................................................................................... 4
ETTIN STARTED................................................................................................................5
QUICK START CONFI URATION.........................................................................................15
INPUT AND OUTPUT CONFIGURATION......................................................................................15
IO MOTION CONFIGURATION..................................................................................................16
CONTACT ADDRESSES........................................................................................................17
© 2013 NTI AG
This work is rotected by co yright.
Under the co yright laws, this ublication may not be re roduced or transmitted in any form, electronic or mechanical, including
hotoco ying, recording, microfilm, storing in an information retrieval system, not even for didactical use, or translating, in whole
or in art, without the rior written consent of NTI AG.
LinMot® is a registered trademark of NTI AG.
Note
The information in this documentation reflects the stage of develo ment at the time of ress and is therefore without obligation.
NTI AG reserves itself the right to make changes at any time and without notice to reflect further technical advance or roduct
im rovement.
Document version: 1.3 / mk,Ro / December 2013
Page 2 of 17 Quick Start Guide B1100-PP, 18.12.2013 NTI AG/ LinMot/

Quick Start Guide B1100-PP
System Overview
This manual gives a short ste by ste introduction to the functionality of the B1100-PP(-HC/-
XC) drive family.
References
Ref Name Source
1 Installation_Guide_B1100. df www.linmot.com
2 Usermanual_LinMot-Talk. df www.linmot.com
3 Usermanual_EasySte s_A l. df www.linmot.com
4 Usermanual_MotionCtrlSW. df www.linmot.com
The documentation is distributed with the LinMot-Talk configuration SW, which can be
downloaded from the LinMot home age for free.
For more detailed information about the functionality of the SW lease refer to the manuals
above:
-Installation_Guide_B1100. df:
data sheet, wiring and connections
-Usermanual_LinMot-Talk. df:
how to use the configuration software
-Usermanual_EasySte s_A l. df :
EasySte s a lication software descri tion (smart control word behavior, analog
arameter scaling and IO motions)
-Usermanual_MotionCtrlSW. df:
motion controller software descri tion (State machine, motion interface)
NTI AG, LinMot Quick Start Guide E1100-PP, 18/12/2013 Page 3/17

Quick Start Guide B1100-PP
Wiring
Ty ical servo system B1100-XX-YY: Drive, motor and ower su ly.
Page 4 of 17 Quick Start Guide B1100-PP, 18.12.2013 NTI AG/ LinMot/

Quick Start Guide B1100-PP
etting Started
Connect the motor to the drive, wire at least the motor ower su ly on X1 and the 24VDC
logic su ly on X14.
Connect your configuration PC using a 1:1 serial RS232 cable (female/female) with the drive’s
X5.
Switch on the 24V logic su ly.
Start the LinMot-Talk configuration software.
Login the drive.
Im ort the B1100_PP_QuickStrt_Cfg.lmc configuration file:
NTI AG, LinMot Quick Start Guide E1100-PP, 18/12/2013 Page 5/17

Quick Start Guide B1100-PP
Start the motor wizard to configure your motor ty e, follow ste s 1 to 9:
Switch on the motor ower su ly.
Page 6 of 17 Quick Start Guide B1100-PP, 18.12.2013 NTI AG/ LinMot/

Quick Start Guide B1100-PP
The EasySte s software can be used to control the motor over digital in uts and out uts. For
testing ur oses, you can wire these in uts and out uts to your control anel or sim ly force
the values from the IO anel section in the control anel of the LinMot-Talk software:
NTI AG, LinMot Quick Start Guide E1100-PP, 18/12/2013 Page 7/17

Quick Start Guide B1100-PP
Set the in ut X14.14 high in order to get the motor controlled. It will automatically move for
homing:
After the homing sequence, the out ut on X14.5 goes high indicating the motor is in target
osition. Also the range indicator 1 out ut goes high ( osition range between –10mm and
5mm).
The range indicator 1 is configured as shown:
This out ut is high, if the term (Actual Position – 0) is in the range -10mm .. 5mm.
Page 8 of 17 Quick Start Guide B1100-PP, 18.12.2013 NTI AG/ LinMot/

Quick Start Guide B1100-PP
Set the in ut X14.15 high, so the motor moves to 20mm. This absolute motion command is
configured in the EasySte s arameter section.
The out ut of range indicator 1 (ma ed to X14.19) has been cleared. The out ut in target
osition (X14.5) may be cleared for a short time and will be set again.
NTI AG, LinMot Quick Start Guide E1100-PP, 18/12/2013 Page 9/17

Quick Start Guide B1100-PP
Set the in ut X14.3 high, so motor moves to 50mm. This absolute motion command is
configured in the EasySte s arameter section.
The out ut of range indicator 2 (ma ed to X14.7) has been cleared. The out ut in target
osition (X14.5) may be cleared for a short time and will be set again.
The range indicator 2 is configured as shown:
This out ut is high, if the term (Actual Position – 0) is in the range from 45mm to 51mm.
Page 10 of 17 Quick Start Guide B1100-PP, 18.12.2013 NTI AG/ LinMot/

Quick Start Guide B1100-PP
Set the in ut X14.2 high, the motor moves to 0mm. This absolute motion command is
configured in the EasySte s arameter section:
Set the in ut X14.16 high, the motor moves to 5mm. This incremental motion command is
configured in the EasySte s arameter section as well.
Set the in ut X14.16 high, the motor moves to 10mm. This incremental motion command is
configured in the EasySte s arameter section.
NTI AG, LinMot Quick Start Guide E1100-PP, 18/12/2013 Page 11/17

Quick Start Guide B1100-PP
An incremental motion command can be used e.g. for stacking or de-stacking a lications.
Page 12 of 17 Quick Start Guide B1100-PP, 18.12.2013 NTI AG/ LinMot/

Quick Start Guide B1100-PP
To change ositions without using the LinMot-Talk software, the EasySte s software su orts
the ossibility of teaching ositions manually over a single se arate in ut.
The following sequence has to be executed for a correct teaching:
First, select the motion, which has to be changed, by setting this out ut high. The motor
moves to the osition.
NTI AG, LinMot Quick Start Guide E1100-PP, 18/12/2013 Page 13/17

Quick Start Guide B1100-PP
Then set the teach in in ut (X14.4 high), this makes the motor current less, so the motor can
be moved manually to the new osition (in this exam le 30.03mm). Note: in vertical
a lications the slider can dro down due to gravitation.
When the motor is moved to the desired osition, set the teach in in ut low, the motor is now
osition controlled and owered again, and the new osition for the selected IO motion is
stored remanently (survives a ower cycle).
Page 14 of 17 Quick Start Guide B1100-PP, 18.12.2013 NTI AG/ LinMot/

Quick Start Guide B1100-PP
Quick Start Configuration
Input and Output Configuration
The in uts and out uts in the quick start exam le are configured as:
The in ut X14.4 is ma ed to the control word bit switch ON. In the EasySte s configuration
the additional behavior of this bit is configured as following:
-Auto home
-Error acknowledge to falling edge of the “Switch On“ flag
NTI AG, LinMot Quick Start Guide E1100-PP, 18/12/2013 Page 15/17

Quick Start Guide B1100-PP
IO Motion Configuration
The in ut X14.14 is ma ed to the control word bit “Switch On”, for this reason no IO motion
functionality is configured for this in ut.
On the in ut X14.2 no MC SW functionality is ma ed, so it’s free to use as IO motion in ut. In
the quick start exam le the motion go to absolute osition is configured. The motion
arameters (target osition = 0mm, max s eed = 0.4m/s, acceleration = 1m/s^2 and
deceleration = 1m/s^2) are configured in the section X14.2 IO Motion Config.
On the in uts X14.15 and X14.3 there are also configured “go to absolute osition”
commands, with target ositions 20mm and 50mm.
On the in ut X14.16 ‘Increment Target Position’ IO motion command is configured. In this
case the arameter osition = 5mm, means not the absolute osition but the target osition’s
increment. So on a rising edge of X14.16 the old target osition is incremented by 5mm. A
negative osition value would decrement the target osition. This kind of motion commands
can be used for stacking or de-stacking a lications.
On the in ut X14.4 the ‘Teach In IO Motion’ is configured. This functionality is only available
on this in ut.
Page 16 of 17 Quick Start Guide B1100-PP, 18.12.2013 NTI AG/ LinMot/

Quick Start Guide B1100-PP
Contact Addresses
-----------------------------------------------------------------------------------------------------------------------------
SWITZERLAND NTI A
Haerdlistr. 15
CH-8957 S reitenbach
Sales and Administration: +41-(0)56-419 91 91
Tech. Support: +41-(0)56-544 71 00
Tech. Support (Skype) : sky e:su ort.linmot
Tech. Support (Skype) : sky e:su ort.linmot
Fax: +41-(0)56-419 91 92
Web: htt ://www.linmot.com/
-----------------------------------------------------------------------------------------------------------------------------
USA LinMot, Inc.
204 E Morrissey Dr.
Elkhorn, WI 53121
Sales and Administration: 877-546-3270
262-743-2555
Tech. Support: 877-804-0718
262-743-1284
Fax: 800-463-8708
262-723-6688
E-Mail: [email protected]
Web: htt ://www.linmot-usa.com/
-----------------------------------------------------------------------------------------------------------------------------
Please visit htt ://www.linmot.com/ to find the distribution near you.
Smart solutions are…
NTI AG, LinMot Quick Start Guide E1100-PP, 18/12/2013 Page 17/17
Other manuals for B1100-PP
3
This manual suits for next models
2
Table of contents
Other LinMot DC Drive manuals
LinMot
LinMot C1250-EC-XC-0S User manual
LinMot
LinMot E1100-GP User manual
LinMot
LinMot Step User manual
LinMot
LinMot C1150-SE-XC-0S User manual

LinMot
LinMot E1100 Series User manual
LinMot
LinMot C1251-MI-XC-2S-XE User manual
LinMot
LinMot B1100 Series User manual
LinMot
LinMot E1250-LU-UC User manual
LinMot
LinMot C1250-PD-XC-0S User manual
LinMot
LinMot C1250-CM-XC-0S User manual

