• To erase the data block by block:
In the block selection display, press button
“C” to select the block of data to be erased,
and then press and hold button “B” until
“DEL” appears. The data only in the selected
block is erased from memory.
How to clear the stored data
Notes:
1. When a block of data is erased, the block
number is reassigned accordingly.
2. When the stored data in all the blocks is
erased, the mode is automatically changed
to the STOPWATCH.
3. The stored data cannot be erased one by
one.
• To erase the data in all the blocks at a
stretch:
In the block selection display with any block
number shown, press and hold button “B”
until “FREE” appears. The data in all the
blocks is erased from memory.
■TIMER MODE
• Up to 23 hours, 59 minutes and 59 seconds
can be set in second increments.
• After the set time is up, the timer counts
up the time up to 23 hours, 59 minutes and
59 seconds as many times as necessary
unless stopped and reset.
• The set time can be used repeatedly unless
canceled.
3. Press button “D” to set the flashing digits.
One digit is advanced with each press of
the button. Digits move quickly by keeping
button “D” pressed.
4.
After all the adjustments are completed, press
button “B” to return to the TIMER mode
.
* If the watch is left untouched in the timer
setting display with the digits flashing,
it will automatically return to the TIMER
mode in 1 to 2 minutes.
Press button “A” to show the TIMER mode.
“TIMER” is displayed first, and then the TIMER
mode appears.
Timer setting
1. Press button “B” for 2 to 3 seconds to
show the timer setting display. The second
digits start flashing.
2. Press button “C” to select the digits to be
adjusted (flashing).
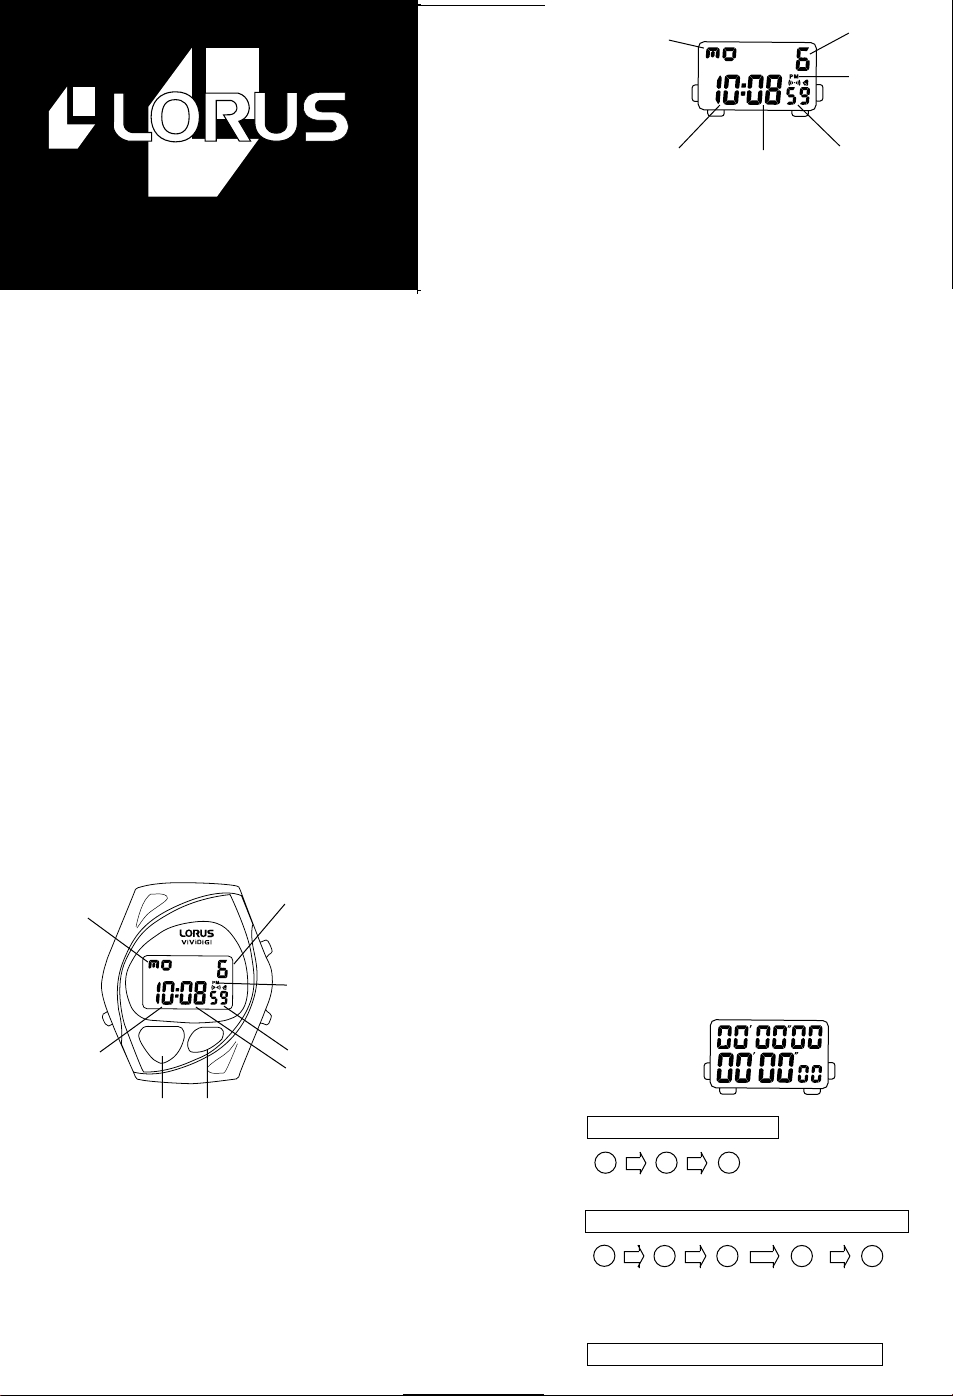
Minutes HourSeconds
B
A
Current
time
Set time
CD
→→
→
D
Start
D
Stop
D
Restart
Time-up
* Warning
sound
beeps.
**
D
Stop
**Restart and stop of the timer
can be repeated by pressing button
“D”.
* When the set time is up, a warning
sound beeps for 10 seconds. To
stop it manually, press any of
the buttons.
C
Reset
Notes:
1. After the set time is up, the
timer counts up the time up to
23 hours, 59 minutes and 59
secondsas manytimes asnecessary
unless it is stopped and reset.
2. Once the timer is set, the set
time is retained and can be used
repeatedly unless it is readjusted.
Timer operation
Press the buttons in the following order.
*With each press of the button, the stored
data is recalled successively from the
oldest to the newest.
DC
Lap/
split 1
C
Lap/
split 2
Start
• A “Start-Finish-End” stopwatch operation
system is used. The data obtained from
the start till finish of a race is recorded as
a block and stored in memory.
Split time
B
A
DC
Lap time
** C
Finish
(Final lap/split)
D
CEndReset
Number of
storable
data
B
C
D
A
1. Press button “C” to show the block selection
display. “RUN” and the block number are
displayed.
2. Press button “C” repeatedly to select the
desired block of data.
*With each press of the button, the block
number advances by one, starting from
Block 1.
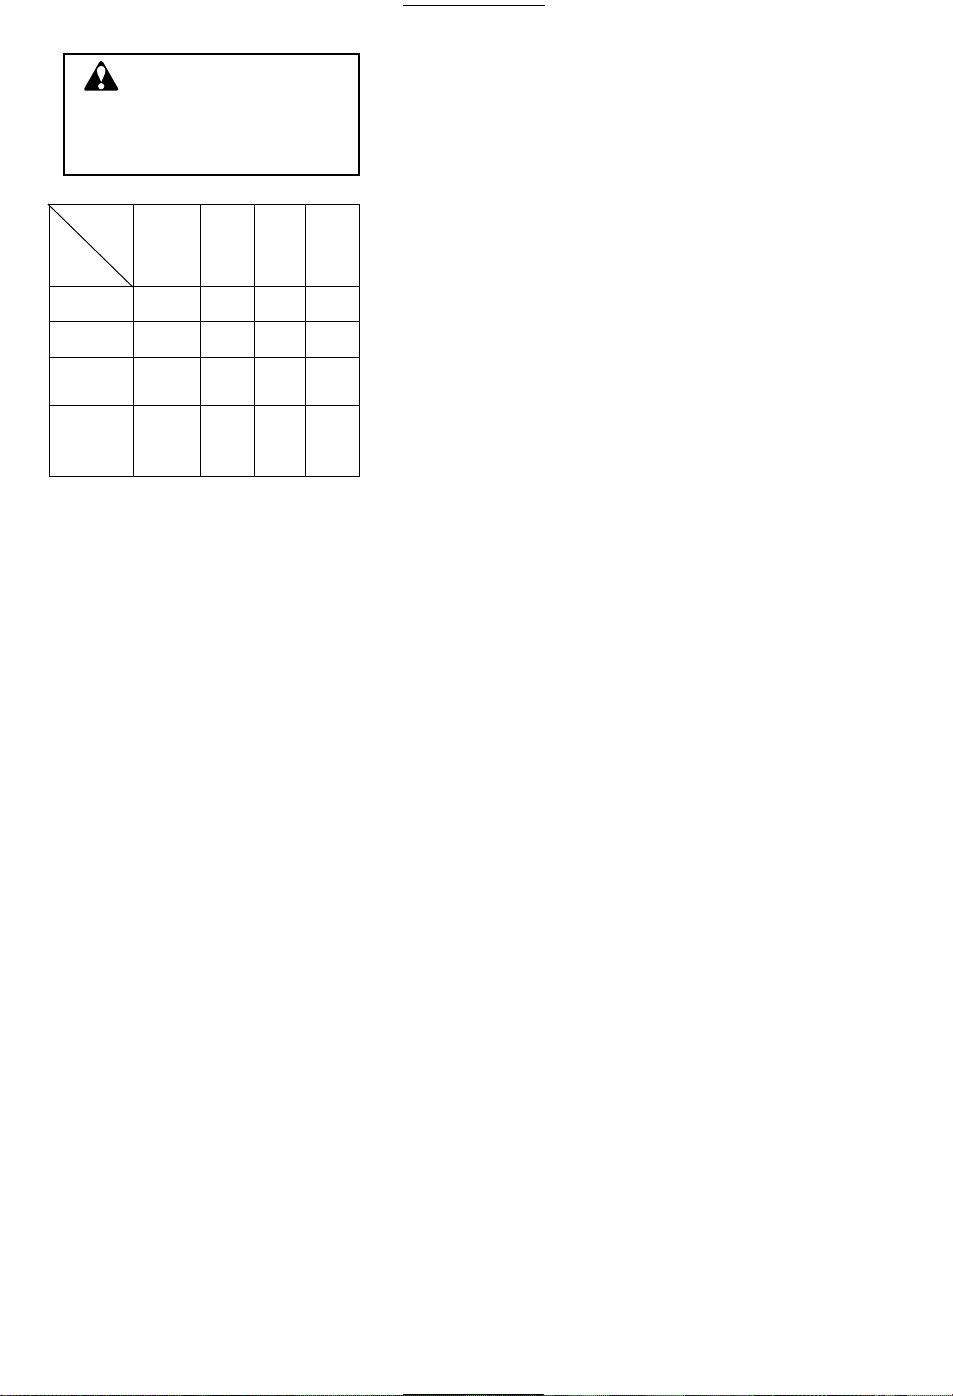
3. Press button “D” to recall the stored data
in the block. The lap/split number is
displayed first, and then the lap time and
split time are displayed in the upper and
lower rows, respectively.
Memory recall operation
Press button “A” to show the MEMORY RECALL
mode. “RECAL” is displayed first, and then
the MEMORY RECALL mode appears.
Notes:
1. Up to 75 measurements can be stored in
memory. If more than 75 measurements
are made, the measurements over 75 will
not be stored in memory.
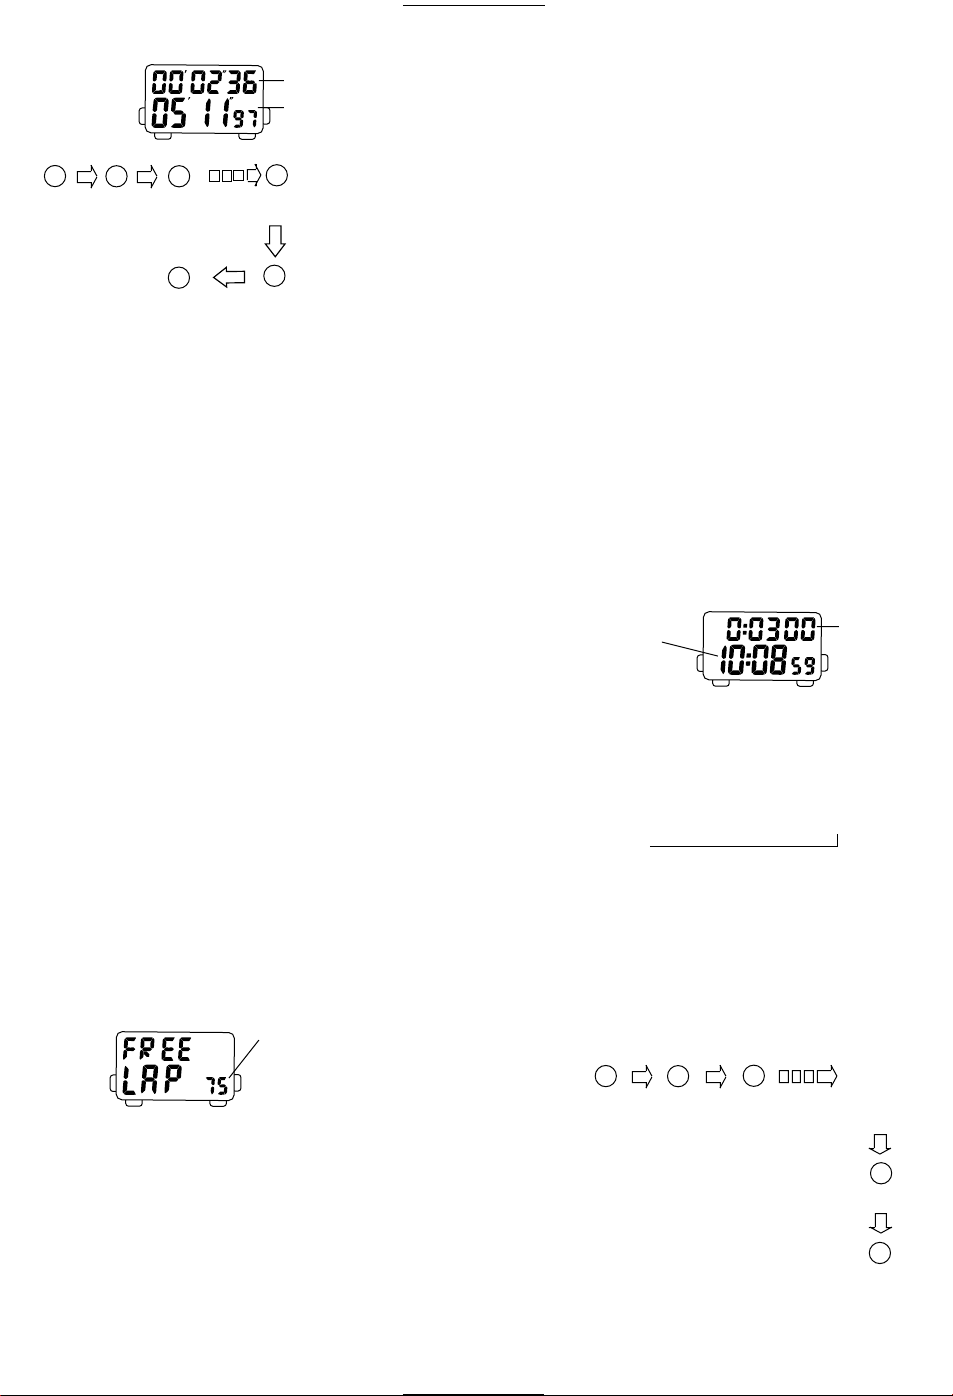
2. When the memory has become full and a
lap time/split time measurement is made,
“FULL” appears below the measured lap
time, indicating that the measurement data
is not stored in memory. To check the
memory capacity, change the mode to the
MEMORY RECALL mode, which displays
the number of storable data.
3. If the lap time measurement exceeds 60
minutes, any fraction less than a second
will be discarded when it is displayed.
The split time recalled in the MEMORY
RECALL mode, which is the accumulation
of the actual lap time measurements, therefore,
may not be exactly equal to the one displayed
when it was measured.
■MEMORY RECALL MODE
• Up to 75 sets of lap times and split times
can be stored in memory.
• Measurement data obtained from the start
to finish of a race is recorded as a block, to
which a block number is assigned.
• Up to 38 blocks of data can be stored in
memory, and stored data can be recalled
block by block after the measurement.
* Lap time measured remains displayed for
5 seconds in the upper row. In the lower
row, the lap number is displayed, followed
bysplittime measured. Then,themeasurement
in progress appears.
* The time elapsed from the finish of the
race until the end of the measurement will
not be included in the measurement.
** Lap time/split timecan be measuredrepeatedly
by pressing button “C”.


 User manual")