Luvele PURE User manual

LUVELE PURE YOGURT MAKER
eu
Instruction
Booklet
LPYM300WEU

Congratulations on the purchase of your new yogurt maker.
It’s time to create some delicious homemade yogurt and give your
gut some probiotic loving.
Enjoy!
• Remove all packaging before using your yogurt maker for the first time.
• Do not place appliance near the edge of a bench or table during
operation.
• Ensure the surface is level, free of liquids or other substances.
• Do not place your appliance on or near a hot stove or oven.
• Unplug from power outlet when not in use, before putting on or taking
off attachments, and before cleaning.
• All attachments should be removed with care before cleaning.
• Only use the accessories provided and recommended by Luvele.
• Do not use the yogurt maker without water.
• Do not place any parts of the appliance in a dishwasher or
microwave oven.
• Ceramic jars and silicone lid are all are dishwasher safe.
• Do not immerse the body of the appliance in water or other liquids.
• Never operate damaged appliance (incl. Mains cable).
• Operate appliance only through a professionally installed socket
supplying the correct voltage and do not use extension cables.
• Never remove main cable with wet hands, or lay cable on hot surface,
or let cable come into contact with oil.
• Unplug the appliance after each use, when the appliance is not in use
and before changing accessories or cleaning appliance.
• Do not try and perform any maintenance, other than cleaning. For any
• Do not operate outdoors.
• This appliance is not intended for use by young children or infirm
persons without supervision.
• Use a fire blanket only to extinguish fires on appliance.
• The appliance is not designed for commercial or industrial use; it is for
household use only.
INSTRUCTION | P3
Safety
Please read all instructions before using the Luvele Yogurt Maker.
Keep these instructions for future reference.

This appliance is intended to be used in household and similar
applications such as:
- Staff kitchen areas in shops, offices and other working environments;
- Farm houses;
- By clients in hotels, motels and other residential type environments;
- Bed and breakfast type environments
This appliance is not intended for use by persons (including children)
with reduced physical, sensory or mental capabilities, or lack of
experience and knowledge, unless they have been given supervision or
instruction concerning use of the appliance by a person responsible
for their safety.
Children 8 years and above can use this appliance, however, they should
be supervised to ensure that they do not play with the appliance. Children
should not play with the appliance.
Cleaning and user maintenance should not be made by children unless
they are older than 8 years old and supervised.
Keep the appliance and its cord out of reach of children less than 8
years.
Check the power supply cord for damage from time to time. If the power
supply cord is damaged, it must be replaced by the manufacturer or its
service agent or a similarly qualified person in order to avoid a hazard.
Use only designated accessories enclosed. This appliance is not intended
to be operated by means of external timer or separated remote-control
system.
Safety
INSTRUCTION | P4 INSTRUCTION | P5
Yogurt maker outer lid/cover
Digital, touch-panel controls
!!IMPORTANT
After each use, dry ‘heating
element’ with paper towel
or soft clean cloth
WARNING
Do not operate yogurt
maker without water
Basic
Features
Heating element
Temperature sensor
4x 400ml | 13.5oz. ceramic jars.
Set of four also available for
seperate purchase.
Waterbath fill line indicator ‘Tall Line
Indicator’ & ‘Short Line Indicator’

INSTRUCTION | P6
Basic
Features
The ‘Waterbath’ feature allows the yogurt
mix to incubate at an accurate & even
temperature.
When making yogurt in the Pure Yogurt
Maker, first fill the ceramic jars with yogurt
mix, then before adding them to the base,
fill the base with water to the ‘Short line
Indicator’. Then place the four ceramic jars
in and this will increase the water level to
exactly the
‘Tall Line Indicator’. The water must not be
filled over the ‘Tall Line Indicator’ as shown
above. Now you can set your temperature
& time.
4x 400ml | 13.5oz. jars
includes medical grade
silicone lid.
!WARNING
Do not operate yogurt
maker without water
Operating
INSTRUCTION | P7
Operating Cont.
TEMP button = Press the “Temp” button to select one of the temperatures from 25°C
to 50°C, press “+/-” button to adjust the temperature with 1 degree increments.
TIME button = Press the “Time” button to add or remove hours from 1 hour to 36
hours, press “+/-” button to adjust the time with 1 hour increments.
IMPORTANT; Set the Time and the Temperature before pressing the confirm button.
Do not just set one then press confirm as this will begin the incubation.
CONFIRM/CANCEL button= Press to begin incubation period once time and
temperature have been selected. Tap this button twice to re-set control panel.
Please Note: The digital timer will count down in 1 hour intervals from 36 to 10
hours, so 36 to 35, then 35 to 34 hours and so on. From 10 hours to 0, it will
count down in 30 minute intervals, so 9.5 to 9, then 8.5 to 8 hours and so on.

Before using the Luvele Pure Yogurt Maker remove all packaging
material. Then remove the outer yogurt maker lid and the ceramic jars
with lids. Wash them in warm, soapy water, then rinse under water and
dry thoroughly. Wipe the yogurt maker housing with a damp cloth and
dry thoroughly. Ensure that all parts are completely dry before use.
Before assembling the yogurt maker, make sure the power is
switched off at the power outlet and the power plug is removed from the
power outlet.
Prepare the yogurt mixture following the desired recipe
instructions. Refer to recipe on page 10 or visit our recipe blog at
www.luvele.eu for lots of gut loving, yogurt recipe ideas.
Pour the yogurt mixture into the yogurt jars. Place the silicone lids onto each
jar.
Fill the waterbath to the ‘Short Line Indicator’ before adding the jars.
Then place the four ceramic jars into the base and this will increase the
water level to exactly the ‘Tall Line Indicator’.
INSTRUCTION | P8
Operating
STEP
1
STEP
2
STEP
3
STEP
4
STEP
5
!PLEASE NOTE:
Do not operate your Luvele Pure Yogurt Maker
without the supplied jars or without water.
INSTRUCTION | P9
STEP
6
STEP
7
Switch the yogurt maker on by plugging the power plug into
a power outlet. This will light up the digital display and ‘OF’ will show.
Press the ‘TEMP’ button to select your desired temperature, use “+/-” buttons to
adjust the temperature in 1 degree increments (DO NOT press the Confirm button at
this stage).
Then press the ‘TIME’ button to select your incubation time between 1 & 36 hours,
using the “+/-” button to adjust up or down.
IMPORTANT; Set the Time and the Temperature before pressing the confirm button.
Do not just set one then press confirm as this will begin the incubation.
Once you have selected the temperature and time press the ‘CONFIRM/CANCEL’
button once, and the incubation period will start. If you want to cancel the incubation
time and temperature, tap the ‘CONFIRM/CANCEL’ button twice to reset.
What temperature should I use? Read more on this on page 15
Avoid moving the yogurt maker during the incubation period. Do not stir the yogurt
mix during or at the end of the incubation period.
At the end of the selected incubation time, remove the lids and check that
the yogurt has thickened and set. If the yogurt requires more thickening,
replace the lids and set the digital timer to required additional incubation
time. When the yogurt has thickened sufficiently, switch the power off at the outlet
and unplug the power cord. Remove the yogurt jars from the base and place into the
refrigerator overnight to achieve firmly set yogurt.
PLEASE NOTE:
During the incubation period, condensation may appear on the inside of the
outer lid/cover of the yogurt maker.
This is normal due to the waterbath feature. If this occurs, be careful when
lifting the outer lid/cover off the base that water does not spill or drip.
Some separation of the liquid whey may occur. This is normal.

INSTRUCTION | P10
For many more amazing yogurt recipes please scan this QR code or
visit our recipe blog at www.luvele.eu.
INGREDIENTS:
• 1.4L | 1.6qt. full cream milk
• 90ml | 3oz. natural yogurt (Starter)
• 60g | 2oz.full cream milk powder
(optional)
1Heat the milk to just below boiling point 80-85°C | 175-185°F, then allow to cool to 40°C
| 104°F, Use a sterilised kitchen thermometer to monitor temperature of milk when heating
and cooling.
2
When milk reaches 40°C | 104°F, stir in yogurt starter and milk powder until
combined. Do not aerate.
3
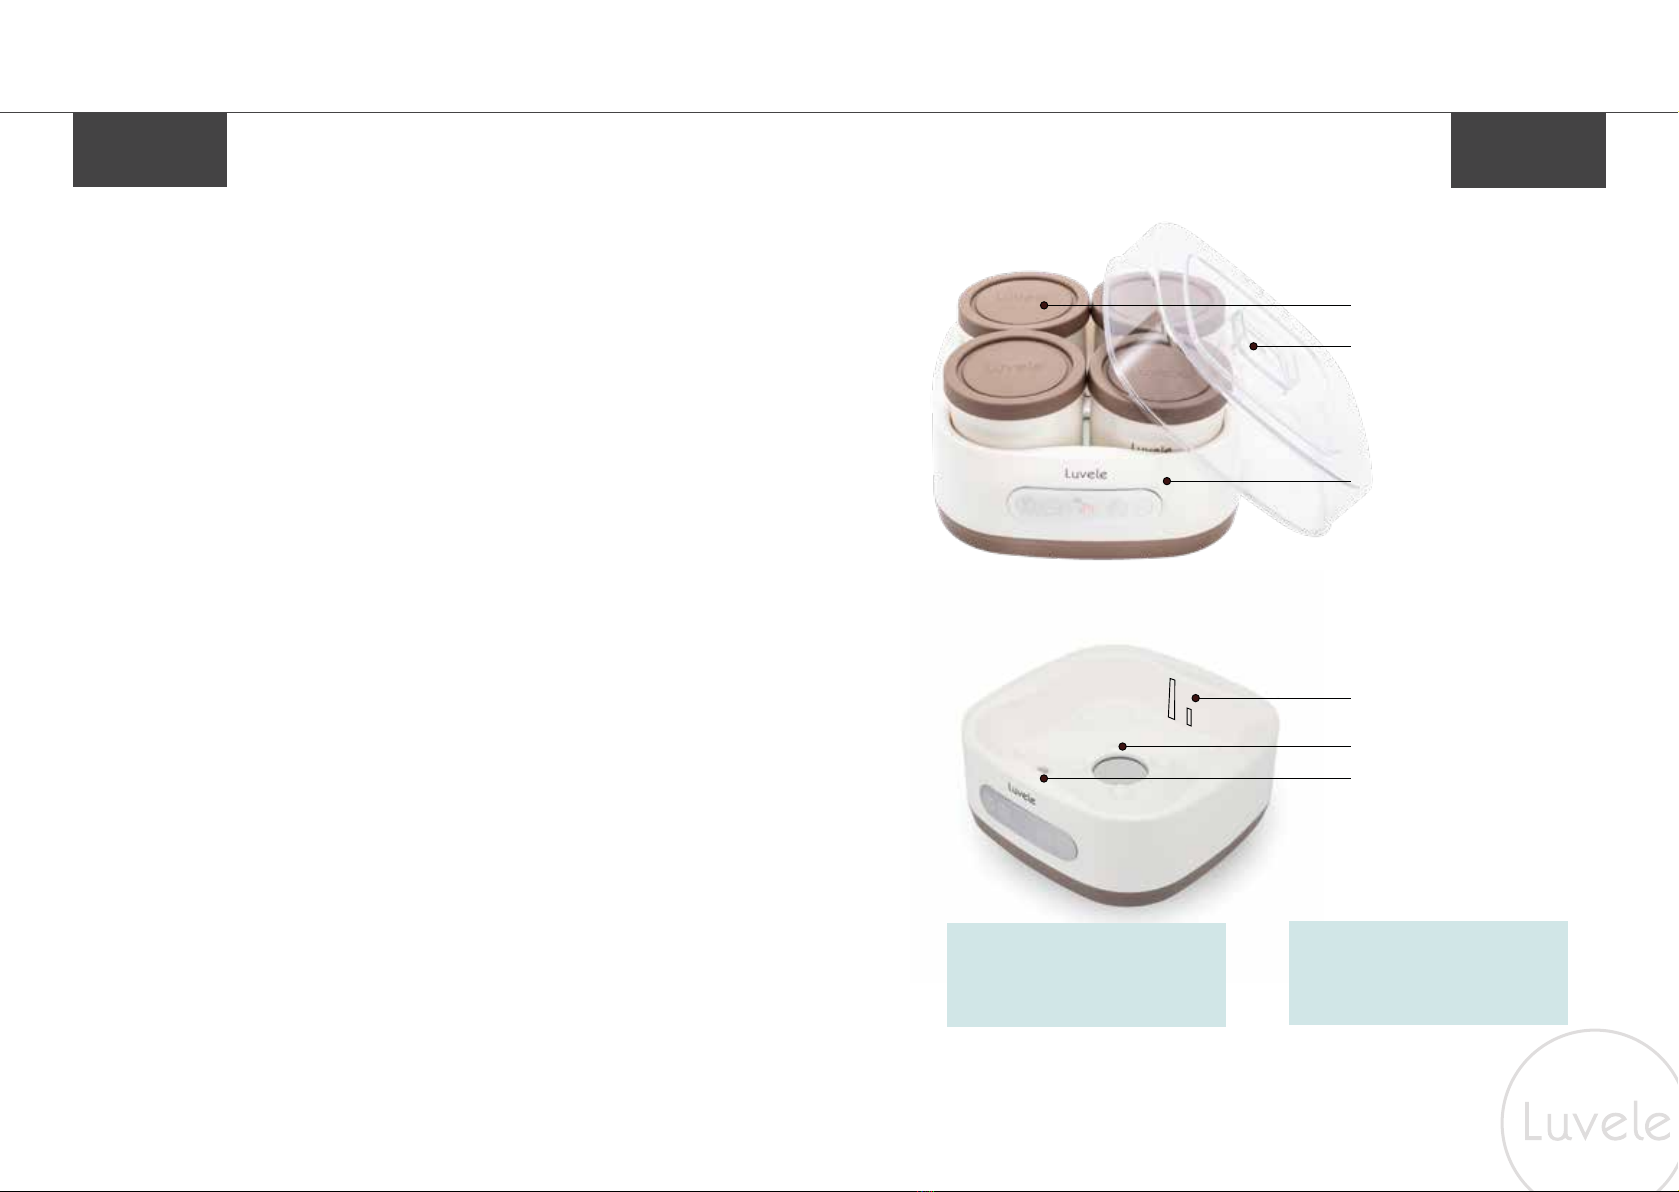
Pour the yogurt mixture into the yogurt jars. Place the silicone lids onto each jar. Place
the yogurt jars into the yogurt maker base, then add water to base, making sure not to fill
above the ‘Tall Line Indicator’ and then cover with outer yogurt maker lid.
4Select the desired temperature and time using the digital control panel. You can
experiment with incubation time to get the consistency you desire. However, you should
not have to go over an 8-10 hour incubation time.
5
When the yogurt maker has completed incubation time, remove the outer lid and yogurt
jars. Then remove the jar lids and check the texture of the yogurt. Do not stir the yoghurt. If
set to desired thickness switch yogurt maker off at power outlet and unplug. Replace the yogurt
jar lids and place into refrigerator for 8 hours or overnight.
6
Consume yogurt within 8 to 10 days, the fresher the better.
!PLEASE NOTE:
Store bought powder starters can
be used instead of yogurt
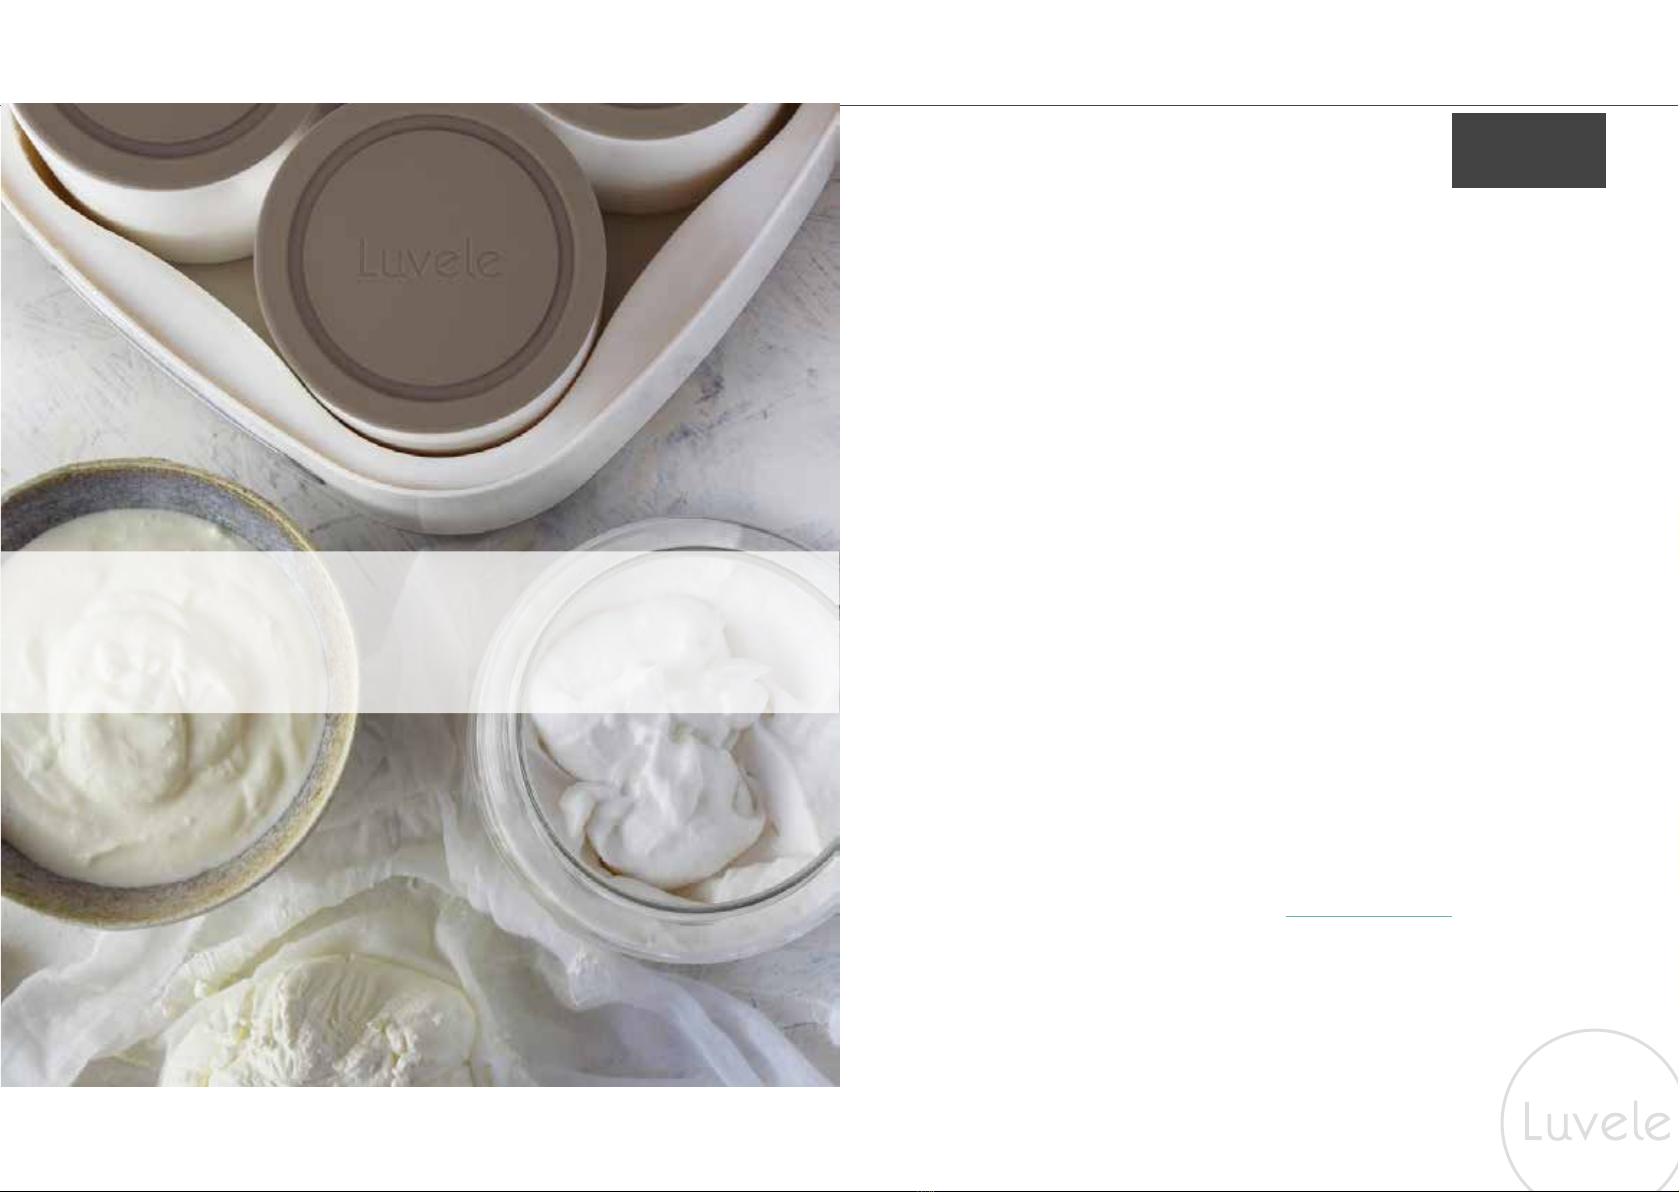
Basic Yogurt Recipe
INSTRUCTION | P11
It is said that SCD yogurt can assist is correcting the balance of bacteria types in the gut.
There has been much written about the benefits of adding SCD yogurt to your diet.
Introducing SCD yogurt to your diet can aid in correcting the balance of bacteria types in
the gut by eliminating the food supply of the undesirable types of bacteria and so starves
them out. This process then repopulates the gut with beneficial bacteria which further
displaces the harmful bacteria. SCD yogurt is also very nutritious and contains proteins,
vitamins, minerals, amino acids, fats, and much more.
MAKING SCD YOGURT
1
Heat the milk to just below boiling point 80-85°C | 175-185°F, then cool to 40°C. Use a
sterilised kitchen thermometer to monitor temperature.
2
Once cooled to 40°C | 100°F, stir in your yogurt starter until combined. Use ¼ cup of
yogurt starter per litre | quart of milk, do not aerate. It is recommended not to use milk
powder when making SCD yogurt.
3
Pour yogurt mixture into the yougrt jars and place the silicone lids onto each jar. Then
before adding them to the base, fill the base with water to the ‘Short line Indicator’. Then
place the four ceramic jars in and this will increase the water level to exactly the ‘Tall Line
Indicator’. The water must not be filled over the ‘Tall Line Indicator’.
4
Set the digital timer to incubate for 24 hours and the temperature to
38°C | 100°F, , then press confrim. Do not move yogurt maker during this time.
5
Unplug the yogurt maker and remove the jars. Place the yogurt jars into the refrigerator and
chill for 8 hours. The SCD yogurt is ready to consume after 8 hours of refrigeration.
SCD Yogurt | GAPS diet friendly
PLEASE NOTE:
If store bought yogurt is used as a starter, the yogurt can contain
Lactobacillus Acidophilus, Streptococcus Thermophilus, and Lactobacillus
Bulgaricus. It should not contain gums, sugars, additives, or flavours of any kind.
The yogurt must contain active live culture.
!

INSTRUCTION | P12
1Open the cans and spoon the coconut milk directly into your yogurt making jars. Note:
Depending on the temperature of your home the coconut milk will vary in consistency. On a
hot day, the coconut milk will be runny while in cool weather you will need to spoon it out.
2Add the sugar and your preferred starter culture, gently whisk it in.
3Put the lid on and place into your yogurt maker. The coconut milk is now ready to begin
fermentation.
4Set the temperature to 38°C | 100°F, and time to 24 hours.
5After 24 hours the fermentation is complete. Switch the yogurt maker off and remove the
yogurt jars. Straight from the warm maker, the yogurt will be runny and the coconut cream
will have separated with coconut water at the bottom. This is normal. In the fridge, the coconut
cream will set firm.
6
Place the jars in the fridge for at least 6 hours to chill and set.
7Thoroughly stir the yogurt to incorporate the cream and coconut water before serving. For
extra thick coconut yogurt, pour out some of the coconut water before stiring. Don’t throw
it away though - fermented coconut water is perfect added to smoothies or may be used as a
probiotic milk alternative.
Easy Coconut Yogurt Recipe
INGREDIENTS:
• 3 cans of coconut milk (Max 1.5L)
• 1 teaspoon of sugar
• Yogurt starter culture
(follow packet instructions) !PLEASE NOTE:
Coconut cream should be
preservative free, additive free
and gluten free. Also the cans
should have BPA free lining.
INSTRUCTION | P13
OTHER COCONUT CREAM BRANDS
Feel free to experiment with other additive-free brands of coconut cream to make this recipe.
Cans with a large percentage of ‘coconut pulp’ and a small portion of coconut water make
better yogurt. .
Recipe Tips
TIPS:
24-hour yogurt, even when made perfectly, will be thinner and runnier than other
yogurt you’ve had. This is because it doesn’t have added thickeners and because it
hasn’t been ‘dripped.’ If you want thicker yogurt, the first option is to drip it.
Dripping is what turns plain yogurt into ‘Greek yogurt.’ It’s the process of removing the
whey, which is liquid. Dripped yogurt is also higher in protein per serving than
regular yogurt. Dripping yogurt is easy to do, just strain the yogurt through a
cheesecloth. The excess whey (liquid) will drain away, leaving you with a thicker
yogurt.
Another option is to add a thickener like gelatin to the milk before fermenting it. Since
gelatin is beneficial for gut health, adding gelatin to 24-hour yogurt is a win-win. To
thicken your milk with gelatin, add 1 tablespoon of gelatin per 4 cups of milk before
heating the milk.

INSTRUCTION | P14
Cleaning & Care
Before disassembling and cleaning, ensure the power is switched off at the power
outlet, the power cord is unplugged from the power outlet and the appliance is cool.
Remove the yogurt maker’s outer lid from the top of the housing. Remove the yogurt
jars from inside the housing. Use a slightly damp, soft cloth to wipe the housing.
Dry thoroughly.
Wash the ceramic jars and lids in warm soapy water. Rinse with water and dry
thoroughly with a soft, clean cloth. Do not use abrasive cleaners or solvents as
these may damage the appliance. Do not wash any part of the yogurt maker in the
dishwasher. Ceramic jars and the silicone lids are dishwasher safe.
Important - After each use, thoroughly dry the ‘heating element’ with paper towel or
soft clean cloth.
INSTRUCTION | P15
Hints & Tips
Temperature & Time Settings:
> We have designed the Luvele yogurt maker with temperature settings of between
25°C and 50°C.
> The reason we designed our Yogurt Maker to encompass this wide range of
temperature settings, is to provide more control over the end result of your
homemade yogurt. Basically, incubating yogurt at different temperatures can change
the taste and texture of the yogurt. It is also to enable the incubation of some more
experimental cultures like L Gasseri and Bacillus coagulan.
The wide temperature range allows for other non-yogurt fermentations as well.
When making yogurt with traditional yogurt strains, we strongly recommend an
incubation temperature of between 96 and 106 degrees F.
This is because the probiotics or the good bacteria that turns milk into yogurt, thrive
and multiply at the same temperature as our gut or
our body temperature. This is approx. 37 degrees C or 100 Degrees F. For
homemade
yogurt to have the maximum probiotic and gut health benefits, it is important to
incubate it at the correct temperature. We recommend starting with the 38°C | 100°F
setting when making your first batch of yogurt. Once you are comfortable with the
process, you can then start to experiment with different temperatures.
For more information on L Reuteri yogurt please visit this link:

INSTRUCTION | P16
> To avoid milk sticking or burning to the base of the saucepan when heating, use
a medium heat and stir continuously with a metal spoon. Do not heat milk in the
microwave.
> After heating the milk, place the saucepan in a shallow, cold water bath to speed up
cooling. Use a sterilised kitchen thermometer to monitor temperature of the milk when
heating and cooling.
> Avoid moving the yogurt maker during the incubation period.
> Do not use the yogurt maker near a heat source, outdoors or in sunlight, as exposure
to excessive heat may make the yogurt separate and have a curdled appearance.
> Refrigerate yogurt for 8 hours before using. The texture and flavour will improve with
longer refrigeration.
For more amazing gut loving yogurt
recipes visit our recipe & community
blog at www.luvele.eu today.
Hints & Tips
Cont. Warranty
INSTRUCTION | P17
The complete Luvele range of products is backed by our 1 Year Total Cover
Warranty. Our warranty covers any manufacturing fault with the product and also
covers damage caused during transit.
Your warranty starts from the purchase date of your Luvele product. You do not
need to register your warranty as your details are automatically recorded at the time
of purchase.
WARRANTY PROCESS
We want to make any warranty claim as simple as possible. Simply contact us at
your item. Firstly, we will suggest some troubleshooting ideas to establish whether
or not the issue can be fixed without a return. Photos of the fault may be requested
if and where appropriate, and if it will ensure a faster resolution.
If a return is required, we will email you a prepaid return label that can be printed
out and used to send the item back. The new replacement item will be shipped
within 48 hours of receiving the fault item back. A confirmation email will be sent
when your faulty item is received back.
We are here to help, so please email us and the best solution to meet your needs

Notes
INSTRUCTION | P18
LUVELE PURE YOGURT MAKER
Instruction booklet
LPYM300W
L UVELE PURE JOGHURTBEREITER
d e
Benutzerhandbuch
LPYM300WEU

Herzlichen Glückwunsch zum Kauf Ihres neuen Joghurtbereiters.
Ab sofort können Sie leckeren Joghurt selbst zubereiten und Ihrem
Darm probiotische Zuwendung schenken.
Viel Spaß!
• Entfernen Sie die gesamte Verpackung, bevor Sie den Joghurtbereiter zum ersten Mal
verwenden.
• Stellen Sie das Gerät nie an die Kante einer Arbeitsfläche oder eines Tisches, während es in
Betrieb ist.
• Stellen Sie sicher, dass die Oberfläche eben, trocken und frei von anderen Substanzen ist.
• Platzieren Sie Ihr Gerät nicht in der Nähe eines heißen Herdes oder Backofens.
• Stecken Sie das Gerät aus, während es nicht in Betrieb ist, bevor Sie Aufsätze
anbringen oder entfernen und bevor Sie es reinigen.
• Alle Aufsätze sollten vor der Reinigung vorsichtig entfernt werden.
• Verwenden Sie nur das von Luvele gelieferte und empfohlene Zubehör.
• Betreiben Sie den Joghurtbereiter nicht ohne Wasser.
• Geben Sie keine Teile des Geräts in einen Geschirrspüler oder die Mikrowelle.
• Die Keramikbehälter und Silikondeckel sind spülmaschinengeeignet.
• Tauchen Sie das Gehäuse des Geräts nicht in Wasser oder andere Flüssigkeiten.
• Betreiben Sie nie beschädigte Geräte (was auch für das Stromkabel gilt).
• Betreiben Sie das Gerät nur über eine professionell installierte Steckdose mit der richtigen
Stromspannung und verwenden Sie keine Verlängerungskabel.
• Stecken Sie das Stromkabel nie mit nassen Händen aus, legen Sie es nicht auf heiße
Oberflächen und lassen Sie es nie mit Öl in Kontakt kommen.
• Stecken Sie das Gerät nach jeder Verwendung, während es nicht in Betrieb ist, vor dem
Austausch von Zubehör und bei der Reinigung aus.
• Führen Sie mit Ausnahme der Reinigung keine Wartungsarbeiten durch. Falls Sie Fragen zur
Wartung haben, kontaktieren Sie Luvele unter support@luvele.de.
• Betreiben Sie das Gerät nicht im Freien.
• Dieses Gerät darf von kleinen Kindern oder gebrechlichen Menschen nicht ohne Aufsicht
betrieben werden.
• Verwenden Sie nur eine Feuerlöschdecke, um Brände des Geräts zu löschen.
• Das Gerät ist nicht für die kommerzielle oder industrielle Nutzung geeignet. Es ist
ausschließlich für den normalen Hausgebrauch bestimmt.
BENUTZERHANDBUCH | S3
Sicherheit
Bie lesen Sie sich alle Anweisungen genau durch, bevor Sie den Luvele Joghurtbereiter
verwenden.
Bewahren Sie diese Anleitung zur späteren Einsichtnahme auf.

Dieses Gerät ist für den Hausgebrauch und ähnliche Einsatzbereiche bestimmt. Dazu gehören:
- Mitarbeiterküchen in Geschäften, Büros und anderen Arbeitsumfeldern
- Bauernhöfe
- Gäste von Hotels, Motels und anderen Wohnumgebungen
- Unterkünfte im Stile von Pensionen bzw. Bed & Breakfasts
Dieses Gerät ist nicht zur Verwendung durch Personen (einschließlich Kindern) mit
eingeschränkten körperlichen, sensorischen oder mentalen Fähigkeiten bzw. fehlender
Erfahrung und Wissen bestimmt, sofern diese bei der Verwendung des Geräts nicht von einer
Person, die für ihre Sicherheit verantwortlich ist, beaufsichtigt oder angeleitet werden.
Kinder ab 8 Jahre dürfen dieses Gerät verwenden, sollten allerdings beaufsichtigt werden,
um sicherzustellen, dass sie nicht mit dem Gerät spielen. Kinder sollten das Gerät nicht als
Spielzeug verwenden.
Reinigung und Wartung sollten nicht von Kindern durchgeführt werden, außer sie sind über 8
Jahre alt und werden dabei beaufsichtigt.
Bewahren Sie das Gerät und sein Kabel außer Reichweite von Kindern unter 8 Jahren auf.
Überprüfen Sie von Zeit zu Zeit, ob das Stromkabel beschädigt ist. Falls das Stromkabel
beschädigt ist, muss es vom Hersteller, seinem Dienstleister oder einer ähnlich qualifizierten
Person ersetzt werden, um sicherzustellen, dass es keine Gefahr darstellt.
Überprüfen Sie von Zeit zu Zeit, ob das Stromkabel beschädigt ist. Falls das Stromkabel
beschädigt ist, muss es vom Hersteller, seinem Dienstleister oder einer ähnlich qualifizierten
Person ersetzt werden, um sicherzustellen, dass es keine Gefahr darstellt.
Verwenden Sie nur das mitgelieferte Zubehör. Das Gerät darf nicht mit einem externen Timer
oder einem ferngesteuerten System betrieben werden.
Sicherheit
BENUTZERHANDBUCH | S4 BENUTZERHANDBUCH | S5
!!ACHTUNG
Trocknen Sie das „Heizelement“
nach jeder Benutzung mit
Küchenpapier oder einem weichen
Tuch ab.
ACHTUNG
Betreiben Sie den
Joghurtbereiter nicht
ohne Wasser.
Basisfunktionen
4 x 400 ml Keramikbehälter. Ein
Vierer-Set ist separat erhältlich.
Deckel des Joghurtbereiters
Touchscreen mit digitalen
Steuerelementen
Füllstandsanzeige des Wasserbads
„Langer Balken“ und „Kurzer Balken“
Heizelement
Temperatursensor

BENUTZERHANDBUCH | S6
Basisfunktionen
Die „Wasserbad“-Funktion ermöglicht es
Ihnen, die Joghurtmischung bei der richtigen,
gleichbleibenden Temperatur reifen zu lassen.
Um Joghurt im Pure Joghurtbereiter
zuzubereiten, füllen Sie zuerst die
Keramikbehälter mit der Joghurtmischung
und stellen Sie diese dann in die Basis des
Joghurtbereiters, bevor Sie Wasser bis zum
„kurzen Balken“ einfüllen. Stellen Sie dann die
vier Keramikbehälter in das Gerät, wodurch der
Wasserstand genau bis zum „langen Balken“
steigt. Der Wasserstand darf den hier gezeigten
„langen Balken“ nicht überschreiten. Jetzt können
Sie Temperatur & Zeit einstellen.
4 x 400 ml Behälter
mit Silikondeckel in
medizinischer Qualität.
!ACHTUNG
Betreiben Sie den
Joghurtbereiter nicht
ohne Wasser.
Betrieb
BENUTZERHANDBUCH | S7
Betrieb Fortsetzung
TEMP-Taste = Drücken Sie die „Temp“-Taste, um eine Temperatur zwischen 25 °C und 50 °C
auszuwählen. Drücken Sie die „+/-“-Taste, um die Temperatur um 1 Grad zu verändern.
TIME-Taste = Drücken Sie die „Time“-Taste, um Stunden (1 bis 36 Stunden) hinzuzufügen oder
zu entfernen. Drücken Sie „+/-“-Taste, um die Zeit in 1-Stunden-Schrien anzupassen.
WICHTIG: Stellen Sie die Zeit und die Temperatur ein, bevor Sie die Bestätigungstaste
drücken. Drücken Sie nicht auf Bestätigen, nachdem Sie nur einen Wert eingestellt haben, da
dadurch die Fermentation beginnt.
CONFIRM/CANCEL-Taste = Drücken Sie diese Taste, um die Reifezeit (Fermentation) zu
starten, nachdem Zeit und Temperatur eingestellt wurden. Tippen Sie zweimal auf die Taste,
um das Bedienfeld zurückzusetzen
Hinweis: Der digitale Timer zählt in 1-Stunden-Intervallen von 36 bis 10 Stunden herunter,
also 36, 35, 34 und so weiter. Ab 10 Stunden wird in 30-Minuten-Schrien heruntergezählt,
also 9,5, 9, 8,5, 8 Stunden und so weiter.

Entfernen Sie vor der Inbetriebnahme des Luvele Pure Joghurtbereiters die gesamte
Verpackung. Nehmen Sie den Deckel des Joghurtbereiters ab und holen Sie die Keramikbe-
hälter mit ihren Deckeln aus dem Gerät. Waschen Sie sie in warmem Seifenwasser, spülen Sie
sie gut ab und trocknen Sie sie gründlich. Wischen Sie das Gehäuse des Joghurtbereiters mit
einem feuchten Tuch ab und lassen Sie es gut trocknen. Stellen Sie sicher, dass alle Teile vor
der Inbetriebnahme vollkommen trocken sind.
Stellen Sie vor dem Zusammenbau des Joghurtbereiters sicher, dass die Steckdose
ausgeschaltet und das Stromkabel aus der Steckdose gezogen ist.
Bereiten Sie die Joghurtmischung laut dem gewünschten Rezept zu. Verwenden
Sie das Rezept auf Seite 10 oder stöbern Sie in unserem Rezeptblog aufn
www.luvele.de, wo Sie zahlreiche darmfreundliche Joghurt-Rezeptideen finden.
Gießen Sie die Joghurtmischung in die Joghurtbehälter. Verschließen Sie jeden
Behälter mit einem Silikondeckel.
Füllen Sie das Wasserbad bis zum „kurzen Balken“, bevor Sie die Behälter ins Gerät
stellen.
Stellen Sie dann die vier Keramikbehälter in die Basis, wodurch der Wasserstand
genau bis zum „langen Balken“ steigt.
BENUTZERHANDBUCH | S8
Betrieb
SCHRITT
1
SCHRITT
2
SCHRITT
3
SCHRITT
4
SCHRITT
5
!ACHTUNG:
Betreiben Sie Ihren Luvele Pure Joghurtbereiter
nicht ohne den mitgelieferten Behälter oder
ohne Wasser.
BENUTZERHANDBUCH | S9
SCHRITT
6
SCHRITT
7
Schalten Sie den Joghurtbereiter ein, indem Sie das Stromkabel in die Steckdose
einstecken. Jetzt leuchtet das digitale Display auf und es wird „OF“ angezeigt.
Drücken Sie die „TEMP“-Taste, um die gewünschte Temperatur auszuwählen. Drücken Sie die
„+/-“ -Tasten, um die Temperatur in 1-Grad-Schrien zu erhöhen oder zu verringern (drücken
Sie zu diesem Zeitpunkt NICHT die CONFIRM/CANCEL-Taste).
Drücken Sie dann die „TIME“-Taste und wählen Sie mit der „+/-“ -Taste eine Reifezeit zwischen 1
und 36 Stunden.
WICHTIG: Stellen Sie die Zeit und die Temperatur ein, bevor Sie die CONFIRM/CANCEL-
Taste drücken. Drücken Sie nicht auf CONFIRM/CANCEL , wenn Sie nur einen Wert eingestellt
haben, da dadurch die Fermentation beginnt.
Sobald Sie die Temperatur und die Zeit ausgewählt haben, drücken Sie einmal auf CONFIRM/
CANCEL, um die Fermentation zu starten. Wenn Sie die Reifezeit und Temperatur ändern
möchten, tippen Sie zweimal auf die CONFIRM/CANCEL-Taste, um sie zurückzusetzen.
Welche Temperatur sollte ich einstellen? Lesen Sie mehr dazu auf Seite 15.
Vermeiden Sie es, den Joghurtbereiter während der Fermentation zu bewegen. Rühren Sie die
Joghurtmischung während oder nach der Fermentation nicht um.
Nehmen Sie am Ende der Reifezeit die Deckel ab und kontrollieren Sie, ob der
Joghurt eingedickt ist. Falls der Joghurt noch zu dünn ist, verschließen Sie die
Behälter wieder und stellen Sie am digitalen Timer die gewünschte
zusätzliche Reifezeit ein. Wenn der Joghurt dick genug ist, schalten Sie die Steckdose aus und
stecken Sie das Gerät aus. Nehmen Sie die Joghurtbehälter aus der Basis und stellen Sie sie
über Nacht in den Kühlschrank, um festen Joghurt zu erhalten.
ACHTUNG:
Während der Fermentation (Reife) könnte sich an der Innenseite des Deckels
des Joghurtbereiters Kondenswasser sammeln.
Das ist normal, da der Joghurtbehälter in einem Wasserbad steht. Falls dies
passiert, önen Sie das Gerät vorsichtig, damit kein Wasser verschüet wird.
Es könnte sich etwas flüssige Molke vom Joghurt absetzen. Das ist normal.

ANLEITUNG | S10
Für weitere großartige Joghurtezepte scannen Sie bie diesen QR-Code oder
besuchen Sie unseren Rezeptblog unter www.luvele.de.
ZUTATEN:
• 1,4 l Vollmilch
• 90 ml Naturjoghurt (Starter)
• 60 g Vollmilchpulver (optional)
1Erhitzen Sie die Milch bis knapp unter den Siedepunkt (80-85 °C) und lassen Sie sie
dann auf 40 °C abkühlen. Kontrollieren Sie die Temperatur der Milch beim Erhitzen und
Abkühlen mit einem sterilen Küchenthermometer.
2
Sobald die Milch 40 °C erreicht hat, fügen Sie die Joghurt-Startkultur und das Milchpulver
hinzu und rühren Sie um. Schlagen Sie die Mischung nicht auf.
3
Gießen Sie die Joghurtmischung in die Joghurtbehälter und verschließen Sie sie mit den
Silikondeckeln. Stellen Sie die Joghurtbehälter in die Basis des Joghurtbereiters, füllen
Sie Wasser in die Basis und achten Sie darauf, dass der Wasserstand den „langen Balken“ nicht
übersteigt. Legen Sie jetzt den Deckel auf den Joghurtbereiter.
4Stellen Sie am digitalen Bedienfeld die gewünschte Temperatur und Zeit ein.
Experimentieren Sie mit der Reifezeit, um die gewünschte Konsistenz zu erreichen. Sie
sollten den Joghurt allerdings maximal 8 bis 10 Stunden lang fermentieren lassen.
5
Sobald die Reifezeit abgeschlossen ist, önen Sie den Deckel und nehmen Sie die
Joghurtbehälter aus dem Gerät. Önen Sie die Behälter und prüfen Sie die Konsistenz des
Joghurts. Rühren Sie den Joghurt nicht um. Falls er die gewünschte Konsistenz hat, schalten Sie
den Joghurtbereiter aus und stecken Sie ihn aus. Verschließen Sie die Joghurtbehälter wieder
und stellen Sie sie 8 Stunden lang oder über Nacht in den Kühlschrank.
6
Verbrauchen Sie den Joghurt innerhalb von 8 bis 10 Tagen – je frischer desto besser.
!HINWEIS:
Sta Joghurt kann auch ein
gekauftes Starterpulver verwendet
werden.
Joghurt-Basisrezept
ANLEITUNG | S11
Im Rahmen der Speziellen Kohlenhydratdiät (SCD) soll Joghurt das Gleichgewicht der
Bakterienstämme im Darm wiederherstellen. Es gibt viele Informationen über die Vorteile von
SCD-Joghurt, welches die Darmbakterien ins Gleichgewicht bringt, indem unerwünschten
Bakterien die Nahrungsgrundlage entzogen wird, wodurch sie verhungern. Danach wird
der Darm mit nützlichen Bakterien besiedelt, welche die schädlichen Bakterien ebenfalls
verdrängen. SCD-Joghurt ist auch sehr nährstoreich und enthält Proteine, Vitamine,
Mineralstoe, Aminosäuren, Fee und vieles mehr.
HERSTELLUNG VON SCDJOGHURT
1
Erhitzen Sie die Milch bis knapp unter den Siedepunkt auf 80-85°C und lassen Sie sie dann
auf 40 °C abkühlen. Kontrollieren Sie die Temperatur mit einem sterilen Küchenthermometer.
2
Sobald die Milch 40°C erreicht hat, fügen Sie die Joghurt-Starterkultur hinzu und rühren
Sie um. Verwenden Sie 65 g Joghurt-Starter pro Liter Milch und schlagen Sie die Mischung
nicht auf. Es wird empfohlen, bei der Herstellung von SCD-Joghurt kein Milchpulver zu
verwenden.
3
Gießen Sie Ihre Joghurtmischung in die Joghurtbehälter und verschließen Sie die Behälter
mit den Silikondeckeln. Bevor Sie die Behälter in die Basis stellen, füllen Sie die Basis bis zum
„kurzen Balken“ mit Wasser. Stellen Sie jetzt die vier Keramikbehälter in die Basis und füllen Sie
Wasser nach, bis es den „langen Balken“ erreicht. Der Wasserstand darf den „langen Balken“ nicht
überschreiten.
4
Stellen Sie den digitalen Timer auf eine Reifezeit von 24 Stunden und eine Temperatur von
38 °C ein und bestätigen Sie Ihre Auswahl. Bewegen Sie den Joghurtbereiter in diesem
Zeitraum nicht.
5
Stecken Sie den Joghurtbereiter aus und nehmen Sie die Behälter heraus. Stellen Sie die
Joghurtbehälter in den Kühlschrank und kühlen Sie sie 8 Stunden lang. Der SCD-Joghurt
kann nach 8 Stunden im Kühlschrank gegessen werden.
SCD-Joghurt | Für die GAPS-Diät geeignet
!ACHTUNG:
Falls Sie gekauften Joghurt als Starter verwenden, kann der Joghurt Lactobacillus
acidophilus, Streptococcus thermophilus und Lactobacillus bulgaricus enthalten. Er
darf nicht mit Gummi, Zucker, Zusatzstoen oder Aromen jeder Art versetzt worden
sein. Der Joghurt muss lebende Kulturen enthalten.

ANLEITUNG | S12
1Önen Sie die Dosen und löeln Sie die Kokosmilch direkt in deine Joghurtbehälter.
Hinweis: Abhängig von der Temperatur Ihres Hauses wird die Kokosmilch eine
unterschiedliche Konsistenz aufweisen. An heißen Tagen ist die Kokosmilch flüssig, an kalten
Tagen müssen Sie sie herauslöeln.
2Fügen Sie den Zucker und Ihre bevorzugte Starterkultur hinzu und rühren Sie vorsichtig
um.
3Verschließen Sie die Behälter und stellen Sie sie in Ihren Joghurtbereiter. Die Kokosmilch
kann jetzt fermentiert werden.
4Stellen Sie die Temperatur auf 38 °C und die Zeit auf 24 Stunden ein.
5Nach 24 Stunden ist die Fermentation abgeschlossen. Schalten Sie den Joghurtbereiter
aus und nehmen Sie die Joghurtbehälter heraus. Zu diesem Zeitpunkt ist der Joghurt
flüssig und die Kokoscreme hat sich vom Kokoswasser am Boden der Behälter abgesetzt. Das ist
normal. Im Kühlschrank wird die Kokosmilch fest werden.
6
Stellen Sie die Behälter mindestens 6 Stunden lang in den Kühlschrank, damit der Joghurt
fest wird.
7Rühren Sie den Joghurt vor dem Servieren gründlich um, um die Kokoscreme und das
Kokoswasser zu vermischen. Für einen besonders dicken Kokosjoghurt gießen Sie vor
dem Umrühren einen Teil des Kokoswassers ab. Schüen Sie es nicht weg: fermentiertes
Kokoswasser eignet sich hervorragend für Smoothies oder als probiotische Milchalternative.
Einfaches Kokosjoghurt-Rezept
ZUTATEN:
• 3 Dosen Kokosmilch (max 1,5 l)
• 1 TL Zucker
• Joghurt-Starterkultur (Anweisungen auf der
Packung befolgen) !HINWEIS:
Die Kokosmilch sollte frei von
Konservierungsstoen, Zusatzst-
oen und Gluten sein. Außerdem
sollte die Beschichtung der Dosen
BPA-frei sein.
ANLEITUNG | S13
ANDERE KOKOSMILCHMARKEN
Experimentieren Sie bei diesem Rezept gerne mit anderen zusatzstofreien Kokosmilchmarken.
Dosen mit einem hohen Anteil von „Kokosfleisch“ und wenig Kokoswasser ergeben
besseren Joghurt.
Rezepttipps
TIPPS:
24-Stunden-Joghurt ist auch bei perfekter Zubereitung dünner und flüssiger sein als andere
Joghurts. Das liegt daran, dass ihm keine Verdickungsmiel zugesetzt wurden und er nicht
„abgetropft“ wurde. Wenn Ihr Joghurt dicker sein soll, kann er abgetropft werden.
Durch das Abtropfen wird normaler Joghurt zu „griechischem Joghurt“. Dabei wird die Molke,
also die Flüssigkeit, entfernt. Abgetropfter Joghurt enthält außerdem mehr Eiweiß pro Portion
als normaler Joghurt. Das Abtropfen des Joghurts ist ganz einfach: Sie müssen den Joghurt nur
durch ein Seihtuch abseihen. Die überschüssige Molke (Flüssigkeit) fließt ab, wodurch Sie einen
dickeren Joghurt erhalten.
Eine andere Möglichkeit ist es, der Milch vor dem Fermentieren ein Verdickungsmiel wie Gel-
atine hinzuzufügen. Da Gelatine gut für die Darmgesundheit ist, hat die Zugabe von Gelatine
zu 24-Stunden-Joghurt mehrere Vorteile. Um Ihre Milch mit Gelatine anzudicken, geben Sie 1
Esslöel Gelatine pro 4 Tassen Milch hinzu, bevor Sie die Milch erhitzen.

ANLEITUNG | S14
Reinigung & Pflege
Bevor Sie das Gerät auseinandernehmen und reinigen, stellen Sie sicher, dass die Steckdose
ausgeschaltet, das Stromkabel ausgesteckt und das Gerät abgekühlt ist.
Nehmen Sie den äußeren Deckel des Joghurtbereiters ab und holen Sie die Joghurtbehälter aus
dem Gerät. Wischen Sie das Gehäuse mit einem leicht feuchten, weichen Tuch ab und lassen
Sie es gründlich trocknen.
Waschen Sie die Keramikbehälter und Deckel in warmem Seifenwasser. Spülen Sie sie mit
Wasser ab und trocknen Sie sie gründlich mit einem weichen, sauberen Tuch. Verwenden Sie
keine scheuernden Reiniger oder Lösungsmittel, da diese das Gerät beschädigen könnten.
Waschen Sie keine Teile des Joghurtbereiters im Geschirrspüler.
Wichtig – Trocknen Sie das „Heizelement“ nach jeder Verwendung gründlich mit Küchenpapier
oder einem weichen, sauberen Tuch.
ANLEITUNG | S15
Tipps & Tricks
Temperatur- und Zeiteinstellungen:
> Der Luvele Joghurtbereiter verfügt über Temperatureinstellungen zwischen 25 und 50 Grad
Celsius.
> Der Grund für die zahlreichen Temperatureinstellungen unseres Joghurtbereiters ist
eine bessere Steuerung des hausgemachten Joghurts. Indem Joghurt bei verschiedenen
Temperauren gereift wird, verändern sich Geschmack und Konsistenz. Außerdem wird die
Fermentation von experimentellen Kulturen wie L. Gasseri und Bacillus coagulan möglich.
Der große Temperaturbereich ermöglicht auch die Fermentation von anderen Dingen als
Joghurt.
Wenn Sie Joghurt mit herkömmlichen Joghurtstämmen herstellen, empfehlen wir dringend eine
Reifetemperatur zwischen 35 und 41 Grad Celsius.
Das liegt daran, dass Probiotika, die guten Bakterien, die Milch in Joghurt verwandeln, bei der
Temperatur gedeihen und sich vermehren, die in unserem Darm bzw. Körper herrscht. Diese
liegt bei ca. 37 Grad Celsius. Damit selbstgemachter Joghurt den maximalen Probiotikagehalt
hat und den Darm optimal unterstützen kann, ist es wichtig, ihn bei der richtigen Temperatur zu
reifen. Wir empfehlen Ihnen, beim ersten Mal mit 38 °C zu beginnen. Sobald Sie mit dem Ablauf
vertraut sich, können Sie mit verschiedenen Temperaturen experimentieren.
Weitere Informationen über L Reuteri Joghurt finden Sie unter diesem Link:

ANLEITUNG | S16
> Um zu verhindern, dass die Milch während des Erhitzens am Topf kleben bleibt oder anbrennt,
wählen Sie eine milere Temperatureinstellung und rühren Sie ständig mit einem Metalllöel um.
Erhitzen Sie die Milch nicht in der Mikrowelle.
> Nachdem Sie die Milch erhitzt haben, stellen Sie den Topf in ein flaches, kaltes Wasserbad,
damit sie schneller abkühlt. Verwenden Sie ein steriles Küchenthermometer, um die Temperatur
der Milch während des Erhitzens und Abkühlens zu überwachen.
> Vermeiden Sie es, den Joghurtbereiter während der Fermentation (Reife) zu bewegen.
> Verwenden Sie den Joghurtbereiter nicht in der Nähe einer Wärmequelle, im Freien oder bei
direkter Sonneneinstrahlung, da übermäßige Wärme zur Folge hat, dass sich der Joghurt trennt
und geronnen aussieht.
> Stellen Sie den Joghurt vor der Verwendung 8 Stunden lang in den Kühlschrank. Konsistenz
und Geschmack verbessern sich, je länger der Joghurt im Kühlschrank aufbewahrt wird.
.
Weitere groaßrtige, darmfreundliche
Joghurtrezepte finden Sie auf unserem
Community-Blog unter www.luvele.de.
Tipps & Tricks Fortsetzung Garantie
ANLEITUNG | S17
Wir gewähren auf die gesamte Luvele-Produktkollektion 1 Jahr Vollgarantie. Unsere
Garantie deckt sowohl Fabrikationsfehler der Produkte als auch während des
Transports entstandene Schäden ab.
Ihre Garantie beginnt am Kaufdatum Ihres Luvele-Produkts. Sie müssen Ihre Garantie
nicht registrieren, da Ihre Daten beim Kauf automatisch gespeichert werden.
GARANTIEABWICKLUNG
Wir versuchen, jeden Garantieanspruch so problemlos wie möglich abzuwickeln.
Kontaktieren Sie uns einfach unter support@luvele.de
und beschreiben Sie das Problem, das Sie mit Ihrem Gerät haben. Wir werden Ihnen einige
Problemlösungen vorschlagen, um festzustellen, ob der Fehler ohne Rücksendung behoben
werden kann. Fotos des Fehlers könnten nach Bedarf angefordert werden, falls der Antrag
dadurch schneller bearbeitet werden kann.
Falls eine Rücksendung notwendig ist, senden wir Ihnen per E-Mail ein Rück- sendeetike,
das Sie ausdrucken können, um das Produkt zurückzusenden. Das neue Ersatzprodukt wird
innerhalb von 48 Stunden nach Erhalt des fehlerhaften Geräts versandt. Sie bekommen eine
Bestätigungsmail, nachdem wir Ihr fehlerhaftes Gerät erhalten haben.
Wir helfen Ihnen gerne weiter! Senden Sie uns bie jederzeit eine E-Mail,
damit wir schnell eine Lösung finden können. support@luvele.de.

Notizen
ANLEITUNG | S18
LUVELE PURE JOGHURTBEREITER
Benutzerhandbuch
LPYM300W
YAOURTIÉRE LUVELE PURE
fr
Manuel de
l’utilisateur
LPYM300WEU

• Enlevez tout l’emballage avant d’utiliser votre yaourtière pour la première fois.
• Ne placez pas l’appareil près du bord d’un plan ou d’une table pendant l’utilisation.
• Vérifiez que la surface est bien plane, sans présence de liquide ou d’autres substances.
• Ne placez pas votre appareil sur ou contre un réchaud ou un four chaud.
• Débranchez la prise d’alimentation lorsque vous n’utilisez pas l’appareil, avant d’installer ou de
retirer des accessoires, et avant tout neoyage.
• Tous les accessoires doivent être soigneusement enlevés avant le neoyage.
• N’utilisez que des accessoires fournis et recommandés par Luvele.
• N’utilisez pas la yaourtière sans eau.
• Ne placez aucune pièce de l’appareil dans un lave-vaisselle ou dans un four à micro-ondes.
• Les pots en céramiques et les couvercles en silicone sont lavables au lave-vaisselle.
• Ne plongez pas le corps de l’appareil dans l’eau ou dans un autre liquide.
• Ne faites jamais fonctionner un appareil endommagé (y compris le câble d’alimentation).
• Utilisez l’appareil seulement avec une prise installée par un professionnel fournissant le voltage
approprié et n’utilisez pas de rallonges.
• Ne retirez jamais le câble d’alimentation avec des mains mouillées, ne posez pas le câble sur
une surface chaude, et ne le meez pas en contact avec de l’huile.
• Débranchez l’appareil après chaque utilisation, lorsque vous ne l’utilisez pas et avant de chang-
er des accessoires ou de neoyer l’appareil.
• N’essayez pas d’eectuer un entretien, excepté le neoyage. Pour tout problème d’entretien,
• N’utilisez pas l’appareil en extérieur.
• Cet appareil n’est pas conçu pour être utilisé sans surveillance par de jeunes enfants ou des
personnes en situation de handicap.
• Utilisez uniquement une couverture anti-incendie pour éteindre des incendies sur l’appareil.
• Cet appareil n’est pas conçu pour un usage industriel ou commercial, mais uniquement pour
un usage domestique.
INSTRUCTION | P3
Sécurité
Veuillez lire toutes ces indications avant d’utiliser la yaourtière Luvele. Conservez-les pour
les relire ultérieurement.
Félicitations pour l’achat de votre nouvelle yaourtière. Voici le mo-
ment de créer un savoureux yaourt fait maison et de donner à vos
intestins un traitement bio de choix !
Bonne dégustation!
This manual suits for next models
1
Table of contents
Languages:
Other Luvele Yogurt Maker manuals