T. 1300 222 445 | www.melec.com.au For further information about our Warranties please go to: melec.com.au/legal/warrantiesT. 1300 222 445 | www.melec.com.au For further information about our Warranties please go to: melec.com.au/legal/warranties
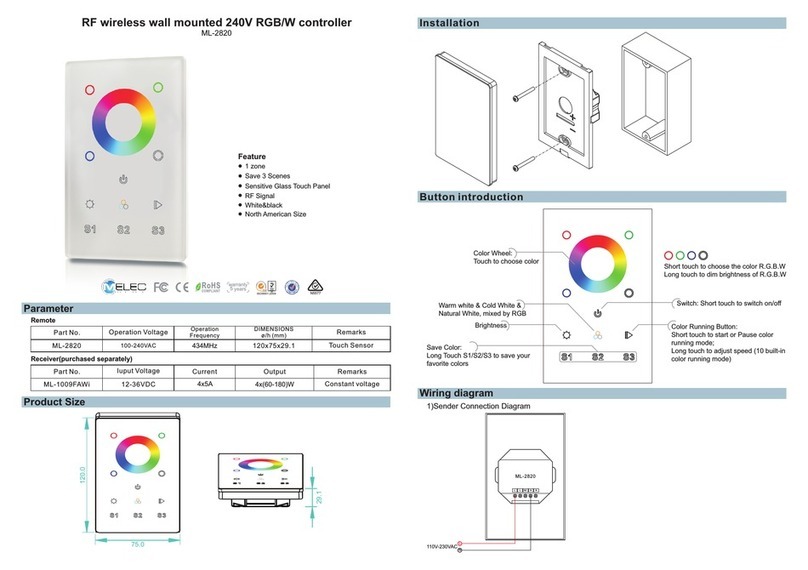
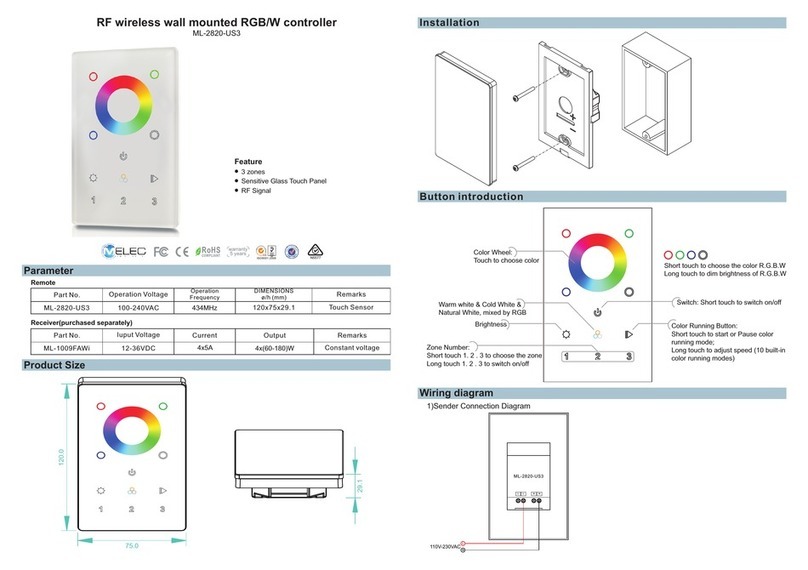
INSTALLATION GUIDE
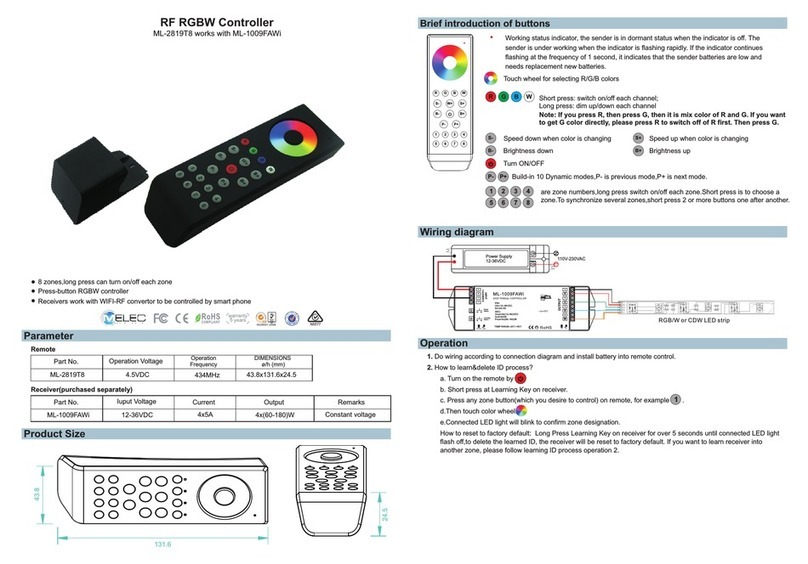
BUTTON GUIDE
WIRING DIAGRAM
WIRING DIAGRAM
1) Sender Connection Diagram
2) Receiver connection Diagram for Single Unit
1. Connecting and Learning Operation
A: Connect the LED device to the assigned colour outputs, matching the LED wiring.
B: Connect Input DC Voltage required for LED device 12 – 24VDC.
C: Power on the RF controller by touching ON/OFF button.
D: Short press “Prog.” key on the ML-VLC-C5 3 times (or reset power 3 times) to set it to RF pairing
mode.
E: Select & Press the zone button on the controller.
F: Touch the colour wheel.
G: The connected LED device will ash to conrm learning operation.
Note 1: To delete all previous learned controllers,press and hold the learning button down for
approximately 3 seconds until the LED device ashes,this conrms all learned controllers have been
removed.
Note 2: Each ML-2820-US3 controller can control unlimited receivers within the Radio Frequency
range.
Note 3: Master/ Slave option is set on the ML-VLC-C5 via the jumper pin, closed is set to Master, an
open jumper is set to Slave.
Set one ML-VLC-C5 as master and pair it to any zone of a remote.This zone shall only have one
receiver which works as master. Set all other ML-VLC-C5 as slave and pair them to other zones of
the remote, multiple ML-VLC-C5 can be paired to each zone. Then choose all zones on the remote
and play the color changing effects, the master will send sync signals to the slaves to achieve perfect
synchronization. The max. sync distance between the master and any slave is up to 30m.
2. Using the Color Wheel
Changing each zones colour is done by rst selecting the desired zone then by touching the colour
wheel, If you would like to control all 3 zones simultaneously press buttons 1 & 2 & 3, then touch the
colour wheel.
3.Color Changing Mode
Select the required zone by pressing 1, 2 or 3 then press the button for start, pressing the
button again will stop the colour change to the current colour.
4.Brightness adjustment
Adjusting the brightness can be done by either a xed colour or under colour changing mode by
pressing the button.
OPERATION
