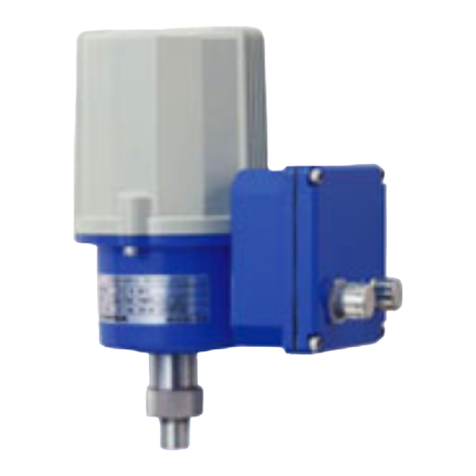
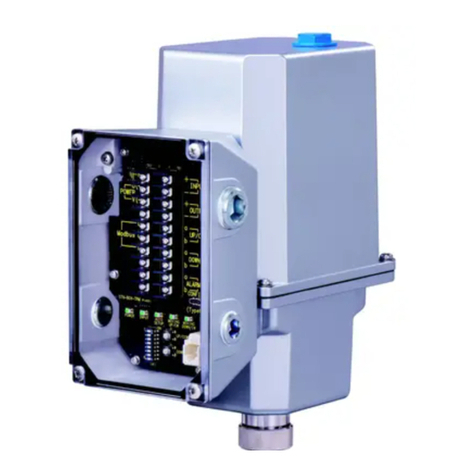
M-system EAR70 User manual

EAR70
5-2-55, Minamitsumori, Nishinari-ku, Osaka 557-0063 JAPAN
Phone: +81(6)6659-8201 Fax:
+81(6)6659-8510 E-mail: info@m-system.co.jp
EM-4885 P. 1 / 8
SERVO-TOP VALVE ACTUATOR TYPE E
(rotary type) MODEL EAR70
INSTRUCTION MANUAL
BEFORE USE ....
Thank you for choosing M-System. Before use, please check
contents of the package you received as outlined below.
If you have any problems or questions with the product,
please contact M-System’s Sales Office or representatives.
■PACKAGE INCLUDES:
Servo-Top type E........................................................... (1)
■MODEL NO.
Confirm that the model number described on the product is
exactly what you ordered.
■INSTRUCTION MANUAL
This manual describes necessary points of caution when
you use this product, including installation, connection and
basic maintenance procedures.
■SAFETY PRECAUTIONS
Before using this product, read this manual carefully to
handle the product correctly. Gain a thorough understand-
ing of this product and all of the instructions and precau-
tions relating to safety before you start using it. Make sure
that the end users read this manual and then keep the
manual in a safe place for future reference.
WARNING: Indicates that incorrect handling may cause
hazardous conditions, resulting in death or severe injury.
CAUTION:
Indicates that incorrect handling may cause
hazardous conditions, resulting in injury or property damage.
WARNING
• Shut off the all external power supply before wiring to the
terminals. Failure to do so may result in electric shock or
electric leakage.
• Ground the provided earth screw (M4) on the upper left of
the terminal box. Failure to do so may result in operation
failure due to damage of printed wiring boards.
• DO NOT open the body cover for the product after instal-
lation. Failure to do so may result in electric shock.
• The cover is secured with drop-proof screws. DO NOT
remove screws by force. Doing so can cause damage to the
product and result in electric shock.
• The enclosure is made of aluminium die-cast. DO NOT
drop the product on your feet or fingers. Doing so may
cause injury.
• DO NOT install the product where it is exposed to di-
rect sunlight or rain. Doing so may cause failure, electric
shock or electric leakage due to dew condensation.
• A fuse is installed on the top side of the control PWB in-
side the unit for safety. It is 250 V/2 A slow blow type. A
spare fuse is secured on the base plate inside the product
with adhesive tape. Shut off the power supply before re-
placing the fuse. Failure to do so may result in electric
shock.
• DO NOT step onto the actuator. DO NOT rest a heavy
object on or against it. It could cause injury.
• When installing the EAR70 outdoor or where it is exposed
to rain or water drops, adequate precaution must be done
for preventing water from entering inside through wiring
conduits. It could cause electric shock.
• Be sure that the power supply is removed. Hand or arm
could be caught and cause injury.
CAUTION
DO NOT disassemble or repair the product. There are
many machined parts such as gears. Doing so may cause
injury of fingers.
POINTS OF CAUTION
■CONFORMITY WITH LOW VOLTAGE DIRECTIVE
• This equipment is suitable for Pollution Degree 2 and In-
stallation Category II (transient voltage 2500V). Rein-
forced insulation (Power to I/O: 300V, Power to metallic
housing: 300V) is maintained. Prior to installation, check
that the insulation class of this unit satisfies the system
requirements.
• Altitude up to 2000 meters.
• The equipment must be installed such that appropriate
clearance and creepage distances are maintained to con-
form to CE requirements. Failure to observe these re-
quirements may invalidate the CE conformance.
■POWER INPUT RATING & OPERATIONAL RANGE
Locate the power input rating marked on the product and
confirm its operational range as indicated below:
100 V AC ±10%(50/60 Hz)
200 V AC ±10%(50/60 Hz)
■GENERAL PRECAUTIONS
• Remove the power supply to the actuator before wiring to
it.
• DO NOT install control signal wires and power sup-
ply wires together in one duct and wire from one duct
because it may cause a malfunction or failure of printed
wiring boards.
For control signal wires, separate from power supply
wires and use shielded cables. This measure reduces the
cause of a malfunction or failure.
■ENVIRONMENT
• Indoor or outdoor, keep away from direct sunlight.
• Operating temperature -10 to +60°C (14 to 140°F)
• Operating humidity 30 to 90%RH (non-condensing)
• Observe at least 200 mm (7.9 in.) of open space at the top
of its body cover, if there is a possibility to exchange the
actuator.
EAR70
5-2-55, Minamitsumori, Nishinari-ku, Osaka 557-0063 JAPAN
Phone: +81(6)6659-8201 Fax:
+81(6)6659-8510 E-mail: info@m-system.co.jp
EM-4885 P. 2 / 8
■ANTINOISE ELECTRICAL CONNECTION
• Lightning surge protection
In order to protect the unit from lightning surges enter-
ing through cables, use of appropriate lightning surge
protectors are recommended. Installing a noise filter
enables protection from various electrical stresses.
• Ground the earth screw. If the unit is installed in the
environment without earthing, it may cause a malfunc-
tion or failure.
■DESIGNING JOINT AND YOKE
• Operate this unit within specified voltage and frequency.
The rated output torque is 70 N·m. Do not operate this
unit within the condition that the output stem is locked.
(The valve stem is locked or more than 120 N·m torque
is necessary.) Design the connected stem so that it is not
sheared. Observe enough strength when designing the
yoke so that there is no bending and distortion.
• Prevent from heat conduction and radiation when con-
necting surface is high temperature or its radiated heat
is high. If the temperature of the unit rises by a heat con-
ducted or radiated from external, it may cause a failure.
■ENVIRONMENT
• The unit does not endure all vibration at installation site.
Even if that is low vibration, the unit cannot be guaran-
teed over a long period. Please use after evaluation with
customer’s installation environment. (Particularly avoid
using at the place where there is water hammer, steam
hammer or cavitation on the valve side.)
• The actuator must be installed in a place where mainte-
nance and inspection can be conducted. Leave spaces of
at least 20 cm (7.9 in.) for maintenance and inspection
above the unit and around its terminal cover.
• DO NOT use in hazardous atmosphere such like explosive
gases, corrosive gases, corrosive liquids or salt pollution.
■OPERATING CONDITION
• Depending on operating condition, the internal tempera-
ture may rise extremely high.
• Operating continuously under such conditions results in
short life span or damage of the product and may impair
expected performance.
• Operate with an enough margin such as shortening the
operational duty time ratio (duty ratio of <50% or less
than 13 strokes per minute).

EAR70
5-2-55, Minamitsumori, Nishinari-ku, Osaka 557-0063 JAPAN
Phone: +81(6)6659-8201 Fax:
+81(6)6659-8510 E-mail: info@m-system.co.jp
EM-4885 P. 3 / 8
COMPONENT IDENTIFICATION
12
V
N
L2L1
L
U
RUN INPUT
3
4
5
6
+
+
-
-
Power Supply PWB
Terminal BOX
Spare Fuse
Fuse
AC Reversible Motor
Cover
Indicator
Potentiometer
Cover Screw
Body
Stopper Bolt
Output Stem (12 sq.) Manual Operation Stem (8 sq.)
Control PWB
Terminal BOX
Cover Screw
Earth Symbol
Earth Screw
(2 - G3/4)
Conduit Port
(2 - G1/2)
Conduit Port
Motor Capacitor Plate
Specifications
POWER VOLTAGE
INPUT
OUTPUT
,
,
FUSE 250V 8A
Pointer
Status Indicator LED
Full-shut Position Adjuster
Full-open Position Adjuster
Resolution Adjuster (fixed)
DIP SW
SW1, SW2
Setting at Abnormally Low Input
'=
63$1
=(52
㸯㸰
㸱
㸲
㸳
㸴
0(;.(
6:
6:
6:
6:
23(5$7,21$/02'(6(783
6,*1$/2873875(9(56(
6,*1$/,13875(9(56(
,1387
287387
32:(592/7$*(
9
1
//
/
8
($
581 ,1387
SW3, SW4
Switching Operation Direction
1234
ON
Wiring Section

EAR70
5-2-55, Minamitsumori, Nishinari-ku, Osaka 557-0063 JAPAN
Phone: +81(6)6659-8201 Fax:
+81(6)6659-8510 E-mail: info@m-system.co.jp
EM-4885 P. 4 / 8
TERMINAL CONNECTIONS
3
4
6
5
1
2
(U)
(V)
POWER SUPPLY
+
–
+
–
E
INPUT (4 - 20 mA DC)
OUTPUT (4 - 20 mA DC)
OUTPUT STEM OPERATION
20mA DC input
Full-open
90 °
■DESCRIBING THE CASE OF CCW.
4mA DC input
Full-close
0°
(Approx. 7°) (Approx. 6°)
Mechanical StopperMechanical Stopper
OPERATING MANUAL OPERATION STEM
■PROCEDURE
• Turn off the power. With power on, the manual operation stem cannot be operated.
• Shape of the manual operation stem is 8 mm square. Use an adequate wrench.
• Moving the output stem to the direction of full-open, turn the manual operation stem to the right viewing from the top of
the cover.
• Rotate the manual operation stem while visually checking the indicator (O-S) and the pointer on the top of the cover, and
confirming the direction, and the angle (90° to 0°).
• A mechanical stopper is provided inside the machinery to prevent excessive movement when using the manual operation
stem. Continuing turning the manual operation stem strongly even though it has hit the mechanical stopper, the inside
the machinery may cause malfunction.

EAR70
5-2-55, Minamitsumori, Nishinari-ku, Osaka 557-0063 JAPAN
Phone: +81(6)6659-8201 Fax:
+81(6)6659-8510 E-mail: info@m-system.co.jp
EM-4885 P. 5 / 8
SETTING AT ABNORMALLY LOW INPUT
■Abnormally low input (in case of the CCW.)
The unit detects the abnormally low input when the input signal is lower than 1.48 mA DC (±0.4 mA DC).
(0.37 V DC (±0.1 V DC ) for voltage input.)
The unit also automatically judges the abnormally low input if the input signal is suddenly fallen to the lower of the set value
from 20 mA position or middle position.
SELECTABLE BY
ORDERING INFROMATION POSITION OF SW1 & SW2 OPERATION
(POSITION OF THE OUTPUT STEM)
N
1234
ON
Stem hold at input failure
S
1234
ON
Stem stop at full-shut
O
1234
ON
Stem stop at full-open
Note: Black squares in the above figures show the position of the DIP switch.
'=
63$1
=(52
㸯㸰
㸱
㸲
㸳
㸴
0(;.(
6:
6:
6:
6:
23(5$7,21$/02'(6(783
6,*1$/2873875(9(56(
6,*1$/,13875(9(56(
,1387
287387
32:(5 92/7$*(
9
1
//
/
8
($
581 ,1387
FactorySetting
WiringSection

EAR70
5-2-55, Minamitsumori, Nishinari-ku, Osaka 557-0063 JAPAN
Phone: +81(6)6659-8201 Fax:
+81(6)6659-8510 E-mail: info@m-system.co.jp
EM-4885 P. 6 / 8
SWITCHING OPERATION DIRECTION
■CURRENT INPUT
• CCW
INPUT POSITION OF
OUTPUT STEM
ROTATION DIRECTION
OF OUTPUT STEM
(Viewing from indicator)
OUTPUT SW
4 mA DC Shut (0°) Turn Clockwise
SHUT (S) 4 mA DC
1234
ON
20 mA DC Open (90°) Turn Counter Clockwise
OPEN (O) 20 mA DC
· Only reverse the output signal.
20 mA DC
1234
ON
4 mA DC
• CW
INPUT POSITION OF
OUTPUT STEM
ROTATION DIRECTION
OF OUTPUT STEM
(Viewing from indicator)
OUTPUT SW
4 mA DC Open (90°) Turn Counter Clockwise
OPEN (O) 4 mA DC
1234
ON
20 mA DC Shut (0°) Trun Clockwise
SHUT (S) 20 mA DC
■VOLTAGE INPUT
• CCW
INPUT POSITION OF
OUTPUT STEM
ROTATION DIRECTION
OF OUTPUT STEM
(Viewing from indicator)
OUTPUT SW
1 V DC SHut (0°) Turn Clockwise
SHUT (S) 1 V DC
1
234
ON
5 V DC Open (90°) Turn Counter Clockwise
OPEN (O) 5 V DC
· Only reverse the output signal.
5 V DC
1
234
ON
1 V DC
• CW
INPUT POSITION OF
OUTPUT STEM
ROTATION DIRECTION
OF OUTPUT STEM
(Viewing from indicator)
OUTPUT SW
1 V DC Open (90°) Turn Counter Clockwise
OPEN (O) 1 V DC
1234
ON
5 V DC Shut (0°) Turn Counter Clockwise
SHUT (S) 5 V DC
Note: Black squares in the above figures show the position of the DIP switch.

EAR70
5-2-55, Minamitsumori, Nishinari-ku, Osaka 557-0063 JAPAN
Phone: +81(6)6659-8201 Fax:
+81(6)6659-8510 E-mail: info@m-system.co.jp
EM-4885 P. 7 / 8
ANGLE OF OUTPUT STEM FINE ADJUSTMENT
Use "ZERO" adjuster to fine-adjust output stem angle of full-shut position.
Use "SPAN" adjuster to fine-adjust output stem angle of full-open position.
Operation direction of output stem differs according to the rotation direction of each adjuster as following.
20mA DC input
full-open
90°
SPAN
(approx. 5°)
(approx. 4°)
SPAN
ZERO
ZERO
max to
the left
max to
the right
max to
the right
max to
the left
4mA DC input
full-shut
0°
(approx 3°)
(approx. 5°)
'=
63$1
=(52
㸯㸰
㸱
㸲
㸳
㸴
0(;.(
6:
6:
6:
6:
23(5$7,21$/02'(6(783
6,*1$/2873875(9(56(
6,*1$/,13875(9(56(
,1387
287387
32:(5 92/7$*(
9
1
//
/
8
($
581 ,1387
WiringSection
Adjustor (ZERO/SPAN)
adjusted to 1/200 resolution
DO NOT rotate the adjustor

EAR70
5-2-55, Minamitsumori, Nishinari-ku, Osaka 557-0063 JAPAN
Phone: +81(6)6659-8201 Fax:
+81(6)6659-8510 E-mail: info@m-system.co.jp
EM-4885 P. 8 / 8
MAINTENANCE
For effective use and longer life of the unit, regular checking appropriate at once a year is recommended. In the case regular
checking is not performed, the unit may result in failure for shorter life-span depending on its operating conditions.
■CHECKING POINT
• Check the main power voltage. (voltmeter)
• Measure the open-shut operation time. (stopwatch)
• No abnormal noise during open-shut operation. (auditory)
• No rust, no corrosion inside the machinery. (visual)
• Non condensing inside the machinery. (visual)
• No discolored parts inside the machinery where can be visually checked. (visual)
• No significant vibration variation from the time of installation during operation. (tactile)
• No deterioration and changes of the packing and O-ring between the mechanism and the cover, and on the inner surface of
the lid of the BOX. (visual)
■NO NECESSARY CHECKING POINT
There is no need of lubrication for the transmission gear mechanism inside the machinery.
The mechanism is lubricated with organic molybdenum grease. There is no oil separation from thickener due to high or low
temperature, or frequent operation. (While using, the oil color changes to kind of black. It is no problem for quality.)
■REGULAR TEST RUNNING
If the valve is not frequently operated, run a test operation regularly (once a week, for example) to check proper functions.
FAILURE AND PROVISION
■NO OPERATION
First, perform the checking point.
• Replacing the fuse: Exchanging the parts
• Rust and corrosion inside the machinery: Exchanging the unit
• Failure on power circuit and control PWB: Exchanging the unit
• Degradation of various parts due to end of life-span: Exchanging the unit
Table of contents
Other M-system Controllers manuals

M-system
M-system PSP10 User manual

M-system
M-system 18PP User manual

M-system
M-system MRP4 User manual

M-system
M-system M8PP User manual

M-system
M-system SC200 Series User manual

M-system
M-system MSP10 User manual

M-system
M-system MSP5 User manual

M-system
M-system SC100 Series User manual

M-system
M-system SC100 Series Instructions for use

M-system
M-system MSP4C User manual