ĞĐůĂƌĂƟŽŶ ŽĨ ŽŶĨŽƌŵŝƚLJ
,h
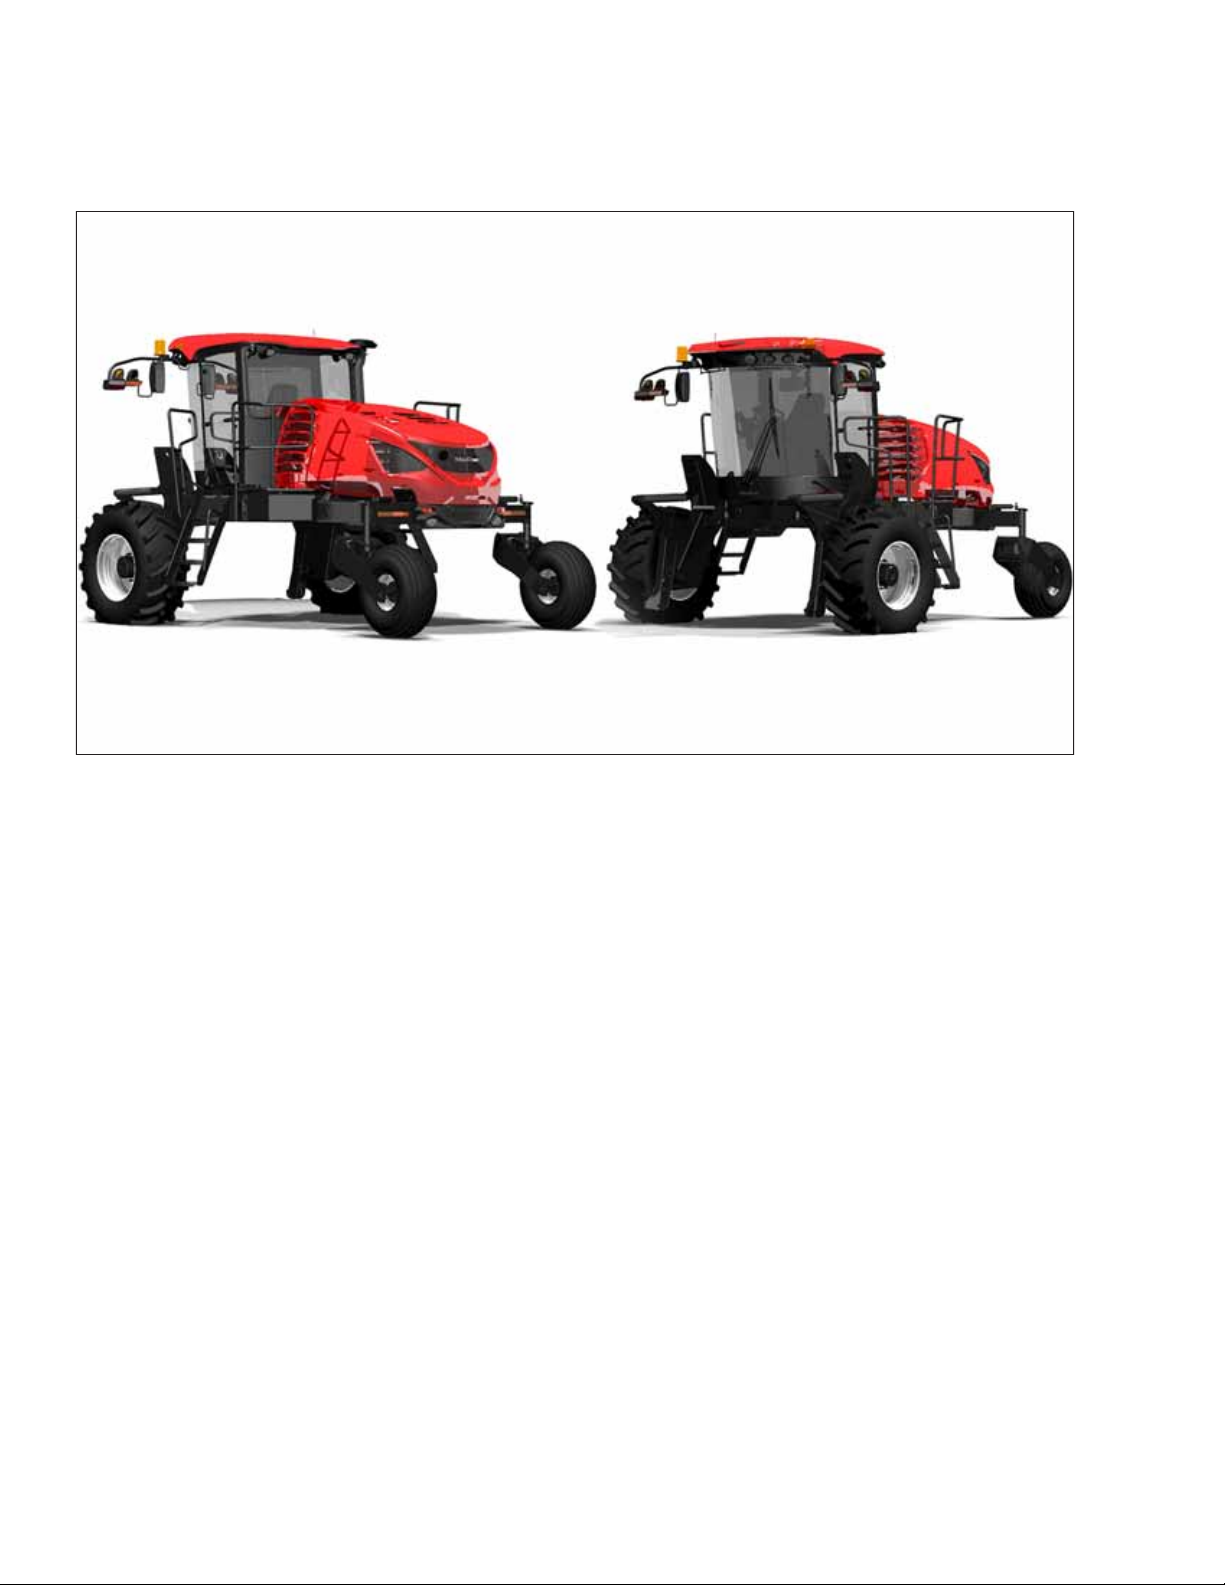
Dŝ ϭ
njĞŶŶĞů ŬŝũĞůĞŶƚũƺŬ ŚŽŐLJ ĂŬƂǀĞƚŬĞnjƅ ƚĞƌŵĠŬ
'ĠƉ ơƉƵƐĂ Ϯ
EĠǀ ĠƐ ŵŽĚĞůů ϯ
^njĠƌŝĂƐnjĄŵ;ŽŬͿ ϰ
ƚĞůũĞƐşƟ ĂŬƂǀĞƚŬĞnjƅ ŝƌĄŶLJĞůǀ ƂƐƐnjĞƐ ǀŽŶĂƚŬŽnjſ
ĞůƅşƌĄƐĂŝƚ ϮϬϬϲϰϮ<
nj ĂůĄďďŝ ŚĂƌŵŽŶŝnjĄůƚ ƐnjĂďǀĄŶLJŽŬ ŬĞƌƺůƚĞŬ
ĂůŬĂůŵĂnjĄƐƌĂ Ăϳ;ϮͿ ĐŝŬŬĞůLJ ƐnjĞƌŝŶƚ
E /^K ϰϮϱϰ-ϭϮϬϭϯ
E /^K ϰϮϱϰ-ϳϮϬϬϵ
ŶLJŝůĂƚŬŽnjĂƩĠƚĞů ŝĚĞũĞ ĠƐ ŚĞůLJĞ ϱ
njŽŶ ƐnjĞŵĠůLJ ŬŝůĠƚĞ ĠƐ ĂůĄşƌĄƐĂ ĂŬŝ ũŽŐŽƐƵůƚ Ă
ŶLJŝůĂƚŬŽnjĂƚ ĞůŬĠƐnjşƚĠƐĠƌĞ ϲ
njŽŶ ƐnjĞŵĠůLJ ŶĞǀĞ ĠƐ ĂůĄşƌĄƐĂ ĂŬŝ ĨĞůŚĂƚĂůŵĂnjŽƩ Ă
ŵƾƐnjĂŬŝ ĚŽŬƵŵĞŶƚĄĐŝſ ƂƐƐnjĞĄůůşƚĄƐĄƌĂ
ĞŶĞĚŝŬƚ ǀŽŶ ZŝĞĚĞƐĞů
sĞnjĠƌŝŐĂnjŐĂƚſ DĂĐŽŶ ƵƌŽƉĞ 'ŵď,
,ĂŐĞŶĂƵĞƌ ^ƚƌĂƘĞ ϱϵ
ϲϱϮϬϯ tŝĞƐďĂĚĞŶ ;EĠŵĞƚŽƌƐnjĄŐͿ
ďǀŽŶƌŝĞĚĞƐĞůΛŵĂĐĚŽŶĐŽŵ
>d
DĞƐ ϭ
WĂƌĞŝƓŬŝĂŵĞ ŬĂĚ ƓŝƐ ƉƌŽĚƵŬƚĂƐ
DĂƓŝŶŽƐ ƟƉĂƐ Ϯ
WĂǀĂĚŝŶŝŵĂƐ ŝƌ ŵŽĚĞůŝƐ ϯ
^ĞƌŝũŽƐ ŶƵŵĞƌŝƐ ;-ŝĂŝͿ ϰ
ĂƟƟŶŬĂ ƚĂŝŬŽŵƵƐ ƌĞŝŬĂůĂǀŝŵƵƐ ƉĂŐĂů ŝƌĞŬƚLJǀČ
ϮϬϬϲϰϮ
EĂƵĚŽũĂŵŝ ŚĂƌŵŽŶŝnjƵŽƟ ƐƚĂŶĚĂƌƚĂŝ ŬĂŝ ŶƵƌŽĚŽŵĂ
ƐƚƌĂŝƉƐŶLJũĞ ϳ;ϮͿ
E /^K ϰϮϱϰ-ϭϮϬϭϯ
E /^K ϰϮϱϰ-ϳϮϬϬϵ
ĞŬůĂƌĂĐŝũŽƐ ǀŝĞƚĂ ŝƌ ĚĂƚĂ ϱ
ƐŵĞŶƐ ƚĂƉĂƚLJďĦƐ ĚƵŽŵĞŶLJƐ ŝƌ ƉĂƌĂƓĂƐ ĂƐŵĞŶƐ
ťŐĂůŝŽƚŽ ƐƵĚĂƌLJƟ ƓŝČ ĚĞŬůĂƌĂĐŝũČ ϲ
sĂƌĚĂƐ ŝƌ ƉĂǀĂƌĚĦ ĂƐŵĞŶƐ ŬƵƌŝƐ ťŐĂůŝŽƚĂƐ ƐƵĚĂƌLJƟ Ɠť
ƚĞĐŚŶŝŶť ĨĂŝůČ
ĞŶĞĚŝŬƚ ǀŽŶ ZŝĞĚĞƐĞů
'ĞŶĞƌĂůŝŶŝƐ ĚŝƌĞŬƚŽƌŝƵƐ DĂĐŽŶ ƵƌŽƉĞ 'ŵď,
,ĂŐĞŶĂƵĞƌ ^ƚƌĂƘĞ ϱϵ
ϲϱϮϬϯ tŝĞƐďĂĚĞŶ ;sŽŬŝĞƟũĂͿ
ďǀŽŶƌŝĞĚĞƐĞůΛŵĂĐĚŽŶĐŽŵ
>s
DĤƐ ϭ
ĞŬůĂƌĤũĂŵ ŬĂ ƉƌŽĚƵŬƚƐ
DĂƓţŶĂƐ ƟƉƐ Ϯ
EŽƐĂƵŬƵŵƐ ƵŶ ŵŽĚĞůŝƐ ϯ
^ĤƌŝũĂƐ ŶƵŵƵƌƐ;-ŝͿ ϰ
ƚďŝůƐƚ ǀŝƐĈŵ ďƻƟƐŬĂũĈŵ ŝƌĞŬƤǀĂƐ ϮϬϬϲϰϮ<
ƉƌĂƐţďĈŵ
WŝĞŵĤƌŽƟ ƓĈĚŝ ƐĂƐŬĂźŽƟĞ ƐƚĂŶĚĂƌƟ ŬĈ ŵŝŶĤƚƐ
ϳ ƉĂŶƚĂ Ϯ ƉƵŶŬƚĈ
E /^K ϰϮϱϰ-ϭϮϬϭϯ
E /^K ϰϮϱϰ-ϳϮϬϬϵ
ĞŬůĂƌĈĐŝũĂƐ ƉĂƌĂŬƐƤƓĂŶĂƐ ǀŝĞƚĂ ƵŶ ĚĂƚƵŵƐ ϱ
dĈƐ ƉĞƌƐŽŶĂƐ ǀĈƌĚƐ ƵnjǀĈƌĚƐ ƵŶ ƉĂƌĂŬƐƚƐ ŬĂƐ ŝƌ
ƉŝůŶǀĂƌŽƚĂ ƐĂŐĂƚĂǀŽƚ ƓŽ ĚĞŬůĂƌĈĐŝũƵ ϲ
dĈƐ ƉĞƌƐŽŶĂƐ ǀĈƌĚƐ ƵnjǀĈƌĚƐ ƵŶ ĂĚƌĞƐĞ ŬĂƐ ŝƌ
ƉŝůŶǀĂƌŽƚĂ ƐĂƐƚĈĚţƚ ƚĞŚŶŝƐŬŽ ĚŽŬƵŵĞŶƚĈĐŝũƵ
ĞŶĞĚŝŬƚƐ ĨŽŶ ZţĚţnjĞůƐ
+ĞŶĞƌĈůĚŝƌĞŬƚŽƌƐ DĂĐŽŶ ƵƌŽƉĞ 'ŵď,
,ĂŐĞŶĂƵĞƌ ^ƚƌĂƘĞ ϱϵ
ϲϱϮϬϯ tŝĞƐďĂĚĞŶ ;sĈĐŝũĂͿ
ďǀŽŶƌŝĞĚĞƐĞůΛŵĂĐĚŽŶĐŽŵ
E>
tŝũ ϭ
sĞƌŬůĂƌĞŶ ĚĂƚ ŚĞƚ ƉƌŽĚƵĐƚ
DĂĐŚŝŶĞƚLJƉĞ Ϯ
EĂĂŵ ĞŶ ŵŽĚĞů ϯ
^ĞƌŝĞŶƵŵŵĞƌ;ƐͿ ϰ
ǀŽůĚŽĞƚ ĂĂŶ ĂůůĞ ƌĞůĞǀĂŶƚĞ ďĞƉĂůŝŶŐĞŶ ǀĂŶ ĚĞ
ZŝĐŚƚůŝũŶ ϮϬϬϲϰϮ
'ĞŚĂƌŵŽŶŝƐĞĞƌĚĞ ŶŽƌŵĞŶ ƚŽĞŐĞƉĂƐƚ njŽĂůƐ ǀĞƌŵĞůĚ
ŝŶ ƌƟŬĞů ϳ;ϮͿ
E /^K ϰϮϱϰ-ϭϮϬϭϯ
E /^K ϰϮϱϰ-ϳϮϬϬϵ
WůĂĂƚƐ ĞŶ ĚĂƚƵŵ ǀĂŶ ǀĞƌŬůĂƌŝŶŐ ϱ
EĂĂŵ ĞŶ ŚĂŶĚƚĞŬĞŶŝŶŐ ǀĂŶ ĚĞ ďĞǀŽĞŐĚĞ ƉĞƌƐŽŽŶ Žŵ
ĚĞ ǀĞƌŬůĂƌŝŶŐ ŽƉ ƚĞ ƐƚĞůůĞŶ ϲ
EĂĂŵ ĞŶ ĂĚƌĞƐ ǀĂŶ ĚĞ ŐĞĂƵƚŽƌŝƐĞĞƌĚĞ ƉĞƌƐŽŽŶ Žŵ
ŚĞƚ ƚĞĐŚŶŝƐĐŚ ĚŽƐƐŝĞƌ ƐĂŵĞŶ ƚĞ ƐƚĞůůĞŶ
ĞŶĞĚŝŬƚ ǀŽŶ ZŝĞĚĞƐĞů
ůŐĞŵĞĞŶ ĚŝƌĞĐƚĞƵƌ DĂĐŽŶ ƵƌŽƉĞ 'ŵď,
,ĂŐĞŶĂƵĞƌ ^ƚƌĂƘĞ ϱϵ
ϲϱϮϬϯ tŝĞƐďĂĚĞŶ ;ƵŝƚƐůĂŶĚͿ
ďǀŽŶƌŝĞĚĞƐĞůΛŵĂĐĚŽŶĐŽŵ
WK
DLJ ŶŝǏĞũ ƉŽĚƉŝƐĂŶŝ ϭ
KƑǁŝĂĚĐnjĂŵLJ ǏĞ ƉƌŽĚƵŬƚ
dLJƉ ƵƌnjČĚnjĞŶŝĂ Ϯ
EĂnjǁĂ ŝŵŽĚĞů ϯ
EƵŵĞƌ ƐĞƌLJũŶLJŶƵŵĞƌLJ ƐĞƌLJũŶĞ ϰ
ƐƉĞųŶŝĂ ǁƐnjLJƐƚŬŝĞ ŽĚƉŽǁŝĞĚŶŝĞ ƉƌnjĞƉŝƐLJ ĚLJƌĞŬƚLJǁLJ
ϮϬϬϲϰϮt
ĂƐƚŽƐŽǁĂůŝƑŵLJ ŶĂƐƚħƉƵũČĐĞ ;njŚĂƌŵŽŶŝnjŽǁĂŶĞͿ
ŶŽƌŵLJ njŐŽĚŶŝĞ njĂƌƚLJŬƵųĞŵ ϳ;ϮͿ
E /^K ϰϮϱϰ-ϭϮϬϭϯ
E /^K ϰϮϱϰ-ϳϮϬϬϵ
ĂƚĂ ŝŵŝĞũƐĐĞ ŽƑǁŝĂĚĐnjĞŶŝĂ ϱ
/ŵŝħ ŝŶĂnjǁŝƐŬŽ ŽƌĂnj ƉŽĚƉŝƐ ŽƐŽďLJ ƵƉŽǁĂǏŶŝŽŶĞũ ĚŽ
ƉƌnjLJŐŽƚŽǁĂŶŝĂ ĚĞŬůĂƌĂĐũŝ ϲ
/ŵŝħ ŝŶĂnjǁŝƐŬŽ ŽƌĂnj ĂĚƌĞƐ ŽƐŽďLJ ƵƉŽǁĂǏŶŝŽŶĞũ ĚŽ
ƉƌnjLJŐŽƚŽǁĂŶŝĂ ĚŽŬƵŵĞŶƚĂĐũŝ ƚĞĐŚŶŝĐnjŶĞũ
ĞŶĞĚŝŬƚ ǀŽŶ ZŝĞĚĞƐĞů
LJƌĞŬƚŽƌ ŐĞŶĞƌĂůŶLJ DĂĐŽŶ ƵƌŽƉĞ 'ŵď,
,ĂŐĞŶĂƵĞƌ ^ƚƌĂƘĞ ϱϵ
ϲϱϮϬϯ tŝĞƐďĂĚĞŶ ;EŝĞŵĐLJͿ
ďǀŽŶƌŝĞĚĞƐĞůΛŵĂĐĚŽŶĐŽŵ
ZK
EŽŝ ϭ
ĞĐůĂƌĉŵ Đĉ ƵƌŵĉƚŽƌƵů ƉƌŽĚƵƐ
dŝƉƵů ŵĂƕŝŶŝŝ Ϯ
ĞŶƵŵŝƌĞĂ ƕŝ ŵŽĚĞůƵů ϯ
EƵŵĉƌ ;ŶƵŵĞƌĞͿ ƐĞƌŝĞ ϰ
ĐŽƌĞƐƉƵŶĚĞ ƚƵƚƵƌŽƌ ĚŝƐƉŽnjŝƜŝŝůŽƌ ĞƐĞŶƜŝĂůĞ ĂůĞ
ĚŝƌĞĐƟǀĞŝ ϮϬϬϲϰϮ
Ƶ ĨŽƐƚ ĂƉůŝĐĂƚĞ ƵƌŵĉƚŽĂƌĞůĞ ƐƚĂŶĚĂƌĚĞ ĂƌŵŽŶŝnjĂƚĞ
ĐŽŶĨŽƌŵ ĂƌƟĐŽůƵůƵŝ ϳ;ϮͿ
E /^K ϰϮϱϰ-ϭϮϬϭϯ
E /^K ϰϮϱϰ-ϳϮϬϬϵ
ĂƚĂ ƕŝ ůŽĐƵů ĚĞĐůĂƌĂƜŝĞŝ ϱ
/ĚĞŶƟƚĂƚĞĂ ƕŝ ƐĞŵŶĉƚƵƌĂ ƉĞƌƐŽĂŶĞŝ ŠŵƉƵƚĞƌŶŝĐŝƚĞ
ƉĞŶƚƌƵ ŠŶƚŽĐŵŝƌĞĂ ĚĞĐůĂƌĂƜŝĞŝ ϲ
EƵŵĞůĞ ƕŝ ƐĞŵŶĉƚƵƌĂ ƉĞƌƐŽĂŶĞŝ ĂƵƚŽƌŝnjĂƚĞ ƉĞŶƚƌƵ
ŠŶƚŽĐŵŝƌĞĂ ĐĉƌƜŝŝ ƚĞŚŶŝĐĞ
ĞŶĞĚŝŬƚ ǀŽŶ ZŝĞĚĞƐĞů
DĂŶĂŐĞƌ 'ĞŶĞƌĂů DĂĐŽŶ ƵƌŽƉĞ 'ŵď,
,ĂŐĞŶĂƵĞƌ ^ƚƌĂƘĞ ϱϵ
ϲϱϮϬϯ tŝĞƐďĂĚĞŶ ;'ĞƌŵĂŶŝĂͿ
ďǀŽŶƌŝĞĚĞƐĞůΛŵĂĐĚŽŶĐŽŵ
^s
sŝ ϭ
/ŶƚLJŐĂƌ ĂƩ ƉƌŽĚƵŬƚĞŶ
DĂƐŬŝŶƚLJƉ Ϯ
EĂŵŶ ŽĐŚ ŵŽĚĞůů ϯ
^ĞƌŝĞŶƵŵŵĞƌ ϰ
ƵƉƉĨLJůůĞƌ ĂůůĂ ƌĞůĞǀĂŶƚĂ ǀŝůůŬŽƌ ŝĚŝƌĞŬƟǀĞƚ
ϮϬϬϲϰϮ'
,ĂƌŵŽŶŝĞƌĂĚĞ ƐƚĂŶĚĂƌĚĞƌ ĂŶǀćŶĚƐ ƐĊƐŽŵ ĂŶŐĞƐ ŝ
ĂƌƟŬĞů ϳ;ϮͿ
E /^K ϰϮϱϰ-ϭϮϬϭϯ
E /^K ϰϮϱϰ-ϳϮϬϬϵ
WůĂƚƐ ŽĐŚ ĚĂƚƵŵ ĨƂƌ ŝŶƚLJŐĞƚ ϱ
/ĚĞŶƟƚĞƚ ŽĐŚ ƐŝŐŶĂƚƵƌ ĨƂƌ ƉĞƌƐŽŶ ŵĞĚ ďĞĨŽŐĞŶŚĞƚ ĂƩ
ƵƉƉƌćƩĂ ŝŶƚLJŐĞƚ ϲ
EĂŵŶ ŽĐŚ ĂĚƌĞƐƐ ĨƂƌ ƉĞƌƐŽŶ ďĞŚƂƌŝŐ ĂƩ ƵƉƉƌćƩĂ ĚĞŶ
ƚĞŬŶŝƐŬĂ ĚŽŬƵŵĞŶƚĂƟŽŶĞŶ
ĞŶĞĚŝŬƚ ǀŽŶ ZŝĞĚĞƐĞů
ĚŵŝŶŝƐƚƌĂƟǀ ĐŚĞĨ DĂĐŽŶ ƵƌŽƉĞ 'ŵď,
,ĂŐĞŶĂƵĞƌ ^ƚƌĂƘĞ ϱϵ
ϲϱϮϬϯ tŝĞƐďĂĚĞŶ ;dLJƐŬůĂŶĚͿ
ďǀŽŶƌŝĞĚĞƐĞůΛŵĂĐĚŽŶĐŽŵ
^>
Dŝ ϭ
ŝnjũĂǀůũĂŵŽ ĚĂ ŝnjĚĞůĞŬ
sƌƐƚĂ ƐƚƌŽũĂ Ϯ
/ŵĞ ŝŶ ŵŽĚĞů ϯ
^ĞƌŝũƐŬĂ-ĞƓƚĞǀŝůŬĂ-Ğ ϰ
ƵƐƚƌĞnjĂ ǀƐĞŵ njĂĚĞǀŶŝŵ ĚŽůŽēďĂŵ ŝƌĞŬƟǀĞ
ϮϬϬϲϰϮ^
hƉŽƌĂďůũĞŶŝ ƵƐŬůĂũĞŶŝ ƐƚĂŶĚĂƌĚŝ ŬŽƚ ũĞ ŶĂǀĞĚĞŶŽ ǀ
ēůĞŶƵ ϳ;ϮͿ
E /^K ϰϮϱϰ-ϭϮϬϭϯ
E /^K ϰϮϱϰ-ϳϮϬϬϵ
<ƌĂũ ŝŶ ĚĂƚƵŵ ŝnjũĂǀĞ ϱ
/ƐƚŽǀĞƚŶŽƐƚ ŝŶ ƉŽĚƉŝƐ ŽƐĞďĞ ŽƉŽůŶŽŵŽēĞŶĞ njĂ
ƉƌŝƉƌĂǀŽ ŝnjũĂǀĞ ϲ
/ŵĞ ŝŶ ŶĂƐůŽǀ ŽƐĞďĞ ƉŽŽďůĂƓēĞŶĞ njĂ ƉƌŝƉƌĂǀŽ
ƚĞŚŶŝēŶĞ ĚĂƚŽƚĞŬĞ
ĞŶĞĚŝŬƚ ǀŽŶ ZŝĞĚĞƐĞů
'ĞŶĞƌĂůŶŝ ĚŝƌĞŬƚŽƌ DĂĐŽŶ ƵƌŽƉĞ 'ŵď,
,ĂŐĞŶĂƵĞƌ ^ƚƌĂƘĞ ϱϵ
ϲϱϮϬϯ tŝĞƐďĂĚĞŶ ;EĞŵēŝũĂͿ
ďǀŽŶƌŝĞĚĞƐĞůΛŵĂĐĚŽŶĐŽŵ
^<
DLJ ϭ
ƚljŵƚŽ ƉƌĞŚůĂƐƵũĞŵĞ ǎĞ ƚĞŶƚŽ ǀljƌŽďŽŬ
dLJƉ njĂƌŝĂĚĞŶŝĂ Ϯ
EĄnjŽǀ ĂŵŽĚĞů ϯ
sljƌŽďŶĠ ēşƐůŽ ϰ
ƐƉŰŸĂ ƉƌşƐůƵƓŶĠ ƵƐƚĂŶŽǀĞŶŝĂ ĂnjĄŬůĂĚŶĠ ƉŽǎŝĂĚĂǀŬLJ
ƐŵĞƌŶŝĐĞ ē ϮϬϬϲϰϮ^
WŽƵǎŝƚĠ ŚĂƌŵŽŶŝnjŽǀĂŶĠ ŶŽƌŵLJ ŬƚŽƌĠ ƐĂ ƵǀĄĚnjĂũƷ ǀ
ůĄŶŬƵ ē ϳ;ϮͿ
E /^K ϰϮϱϰ-ϭϮϬϭϯ
E /^K ϰϮϱϰ-ϳϮϬϬϵ
DŝĞƐƚŽ ĂĚĄƚƵŵ ƉƌĞŚůĄƐĞŶŝĂ ϱ
DĞŶŽ ĂƉŽĚƉŝƐ ŽƐŽďLJ ŽƉƌĄǀŶĞŶĞũ ǀLJƉƌĂĐŽǀĂƛ ƚŽƚŽ
ƉƌĞŚůĄƐĞŶŝĞ ϲ
DĞŶŽ ĂĂĚƌĞƐĂ ŽƐŽďLJ ŽƉƌĄǀŶĞŶĞũ njŽƐƚĂǀŝƛ ƚĞĐŚŶŝĐŬlj
ƐƷďŽƌ
ĞŶĞĚŝŬƚ ǀŽŶ ZŝĞĚĞƐĞů
'ĞŶĞƌĄůŶLJ ƌŝĂĚŝƚĞű DĂĐŽŶ ƵƌŽƉĞ 'ŵď,
,ĂŐĞŶĂƵĞƌ ^ƚƌĂƘĞ ϱϵ
ϲϱϮϬϯ tŝĞƐďĂĚĞŶ ;EĞŵĞĐŬŽͿ
ďǀŽŶƌŝĞĚĞƐĞůΛŵĂĐĚŽŶĐŽŵ
/d
EŽŝ ϭ
ŝĐŚŝĂƌŝĂŵŽ ĐŚĞ ŝů ƉƌŽĚŽƩŽ
dŝƉŽ Ěŝ ŵĂĐĐŚŝŶĂ Ϯ
EŽŵĞ ĞŵŽĚĞůůŽ ϯ
EƵŵĞƌŽ;ŝͿ Ěŝ ƐĞƌŝĞ ϰ
ƐŽĚĚŝƐĨĂ ƚƵƩĞ ůĞ ĚŝƐƉŽƐŝnjŝŽŶŝ ƌŝůĞǀĂŶƟ ĚĞůůĂ ĚŝƌĞƫǀĂ
ϮϬϬϲϰϮ
hƟůŝnjnjŽ ĚĞŐůŝ ƐƚĂŶĚĂƌĚ ĂƌŵŽŶŝnjnjĂƟ ĐŽŵĞ ŝŶĚŝĐĂƚŽ
ŶĞůůΖƌƟĐŽůŽ ϳ;ϮͿ
E /^K ϰϮϱϰ-ϭϮϬϭϯ
E /^K ϰϮϱϰ-ϳϮϬϬϵ
>ƵŽŐŽ ĞĚĂƚĂ ĚĞůůĂ ĚŝĐŚŝĂƌĂnjŝŽŶĞ ϱ
EŽŵĞ ĞĮƌŵĂ ĚĞůůĂ ƉĞƌƐŽŶĂ ĂƵƚŽƌŝnjnjĂƚĂ ĂƌĞĚŝŐĞƌĞ ůĂ
ĚŝĐŚŝĂƌĂnjŝŽŶĞ ϲ
EŽŵĞ ĞƉĞƌƐŽŶĂ ĂƵƚŽƌŝnjnjĂƚĂ ĂĐŽŵƉŝůĂƌĞ ŝů ĮůĞ
ƚĞĐŶŝĐŽ
ĞŶĞĚŝŬƚ ǀŽŶ ZŝĞĚĞƐĞů
'ĞŶĞƌĂů DĂŶĂŐĞƌ DĂĐŽŶ ƵƌŽƉĞ 'ŵď,
,ĂŐĞŶĂƵĞƌ ^ƚƌĂƘĞ ϱϵ
ϲϱϮϬϯ tŝĞƐďĂĚĞŶ ;'ĞƌŵĂŶŝĂͿ
ďǀŽŶƌŝĞĚĞƐĞůΛŵĂĐĚŽŶĐŽŵ
Wd
EſƐ ϭ
ĞĐůĂƌĂŵŽƐ ƋƵĞ ŽƉƌŽĚƵƚŽ
dŝƉŽ ĚĞ ŵĄƋƵŝŶĂ Ϯ
EŽŵĞ ĞDŽĚĞůŽ ϯ
EƷŵĞƌŽ;ƐͿ ĚĞ ^ĠƌŝĞ ϰ
ĐƵŵƉƌĞ ƚŽĚĂƐ ĂƐ ĚŝƐƉŽƐŝĕƁĞƐ ƌĞůĞǀĂŶƚĞƐ ĚĂ ŝƌĞĐƟǀĂ
ϮϬϬϲϰϮ
EŽƌŵĂƐ ŚĂƌŵŽŶŝnjĂĚĂƐ ĂƉůŝĐĂĚĂƐ ĐŽŶĨŽƌŵĞ ƌĞĨĞƌŝĚŽ
ŶŽ ƌƟŐŽ ϳ;ϮͿ
E /^K ϰϮϱϰ-ϭϮϬϭϯ
E /^K ϰϮϱϰ-ϳϮϬϬϵ
>ŽĐĂů ĞĚĂƚĂ ĚĂ ĚĞĐůĂƌĂĕĆŽ ϱ
/ĚĞŶƟĚĂĚĞ ĞĂƐƐŝŶĂƚƵƌĂ ĚĂ ƉĞƐƐŽĂ ĂƵƚŽƌŝnjĂĚĂ Ă
ĞůĂďŽƌĂƌ ĂĚĞĐůĂƌĂĕĆŽ ϲ
EŽŵĞ ĞĞŶĚĞƌĞĕŽ ĚĂ ƉĞƐƐŽĂ ĂƵƚŽƌŝnjĂĚĂ ĂĐŽŵƉŝůĂƌ Ž
ĮĐŚĞŝƌŽ ƚĠĐŶŝĐŽ
ĞŶĞĚŝŬƚ ǀŽŶ ZŝĞĚĞƐĞů
'ĞƌĞŶƚĞ 'ĞƌĂů DĂĐŽŶ ƵƌŽƉĂ >ƚĚĂ
,ĂŐĞŶĂƵĞƌ ^ƚƌĂƘĞ ϱϵ
ϲϱϮϬϯ tŝĞƐďĂĚĞŶ ;ůĞŵĂŶŚĂͿ
ďǀŽŶƌŝĞĚĞƐĞůΛŵĂĐĚŽŶĐŽŵ
^Z
Dŝ ϭ
/njũĂǀůũƵũĞŵŽ ĚĂ ƉƌŽŝnjǀŽĚ
dŝƉ ŵĂƓŝŶĞ Ϯ
EĂnjŝǀ ŝŵŽĚĞů ϯ
^ĞƌŝũƐŬŝ ďƌŽũ;ĞǀŝͿ ϰ
/ƐƉƵŶũĂǀĂ ƐǀĞ ƌĞůĞǀĂŶƚŶĞ ŽĚƌĞĚďĞ ĚŝƌĞŬƟǀĞ
ϮϬϬϲϰϮ
<ŽƌŝƓčĞŶŝ ƐƵ ƵƐŬůĂĝĞŶŝ ƐƚĂŶĚĂƌĚŝ ŬĂŽ ƓƚŽ ũĞ ŶĂǀĞĚĞŶŽ
ƵğůĂŶƵ ϳ;ϮͿ
E /^K ϰϮϱϰ-ϭϮϬϭϯ
E /^K ϰϮϱϰ-ϳϮϬϬϵ
ĂƚƵŵ ŝŵĞƐƚŽ ŝnjĚĂǀĂŶũĂ ĚĞŬůĂƌĂĐŝũĞ ϱ
/ĚĞŶƟƚĞƚ ŝƉŽƚƉŝƐ ůŝĐĂ ŽǀůĂƓčĞŶŽŐ njĂ ƐĂƐƚĂǀůũĂŶũĞ
ĚĞŬůĂƌĂĐŝũĞ ϲ
/ŵĞ ŝĂĚƌĞƐĂ ŽƐŽďĞ ŽǀůĂƓčĞŶĞ njĂ ƐĂƐƚĂǀůũĂŶũĞ ƚĞŚ-
ŶŝğŬĞ ĚĂƚŽƚĞŬĞ
ĞŶĞĚŝŬƚ ǀŽŶ ZŝĞĚĞƐĞů
'ĞŶĞƌĂůŶŝ ĚŝƌĞŬƚŽƌ DĂĐŽŶ ƵƌŽƉĞ 'ŵď,
,ĂŐĞŶĂƵĞƌ ^ƚƌĂƘĞ ϱϵ
ϲϱϮϬϯ tŝĞƐďĂĚĞŶ ;EĞŵĂēŬĂͿ
ďǀŽŶƌŝĞĚĞƐĞůΛŵĂĐĚŽŶĐŽŵ