2 ©2014 MadCow Rocketry™ FG Mini BB2 Assembly
Please make sure you read all directions and understand how to assemble your model
beforeyoustartconstruction.Itisalsoagoodideatotestteachpartbeforeassembly.
Fiberglass parts still contain small amounts of mold release and other materials on the
surface that will inhibit adhesives and/or paint. It is important to clean each part prior
to assembly with a solution of 1 part rubbing alcohol, 3 parts water and a drop of dish
washing soap. IMPORTANT: do not sand any parts until after you have cleaned them -
youwillembedthematerialsyouaretryingtocleanmakingitdifculttoclean.
The G10 parts will have holding tabs left over from the CNC machine. These small tabs
will need to be sanded off before assembly. Before assembling any part with epoxy,
rough up the surface to be epoxied using course sandpaper. The scratches in the G10
surface will give the epoxy something to grab onto.
Step 1 – Motor Mount Assembly
Step 2 – Insert Motor Tube Assembly into Body Tube
Testteachofthensintotheprecutnslots.BecauseG10thicknessvaries,youwill
need to sand the slot to the correct width. Wrap the shock chord into a small bundle
andstuffitinsidethemotortubeforthisnextstep.Testtthemotortubeassemblyinto
thebodytubetoensureasnugt.Sandthecenteringringsifnecessary.Whenyou
aresatisedwiththet,spreadsomeepoxyontheinsideofthebodytubeandslidethe
forward centering ring of the motor assembly into the body tube. Make sure you have
the motor assembly facing the right way! Spread some more epoxy on the inside
edge of the body tube before sliding the rear centering ring into the body tube. Continue
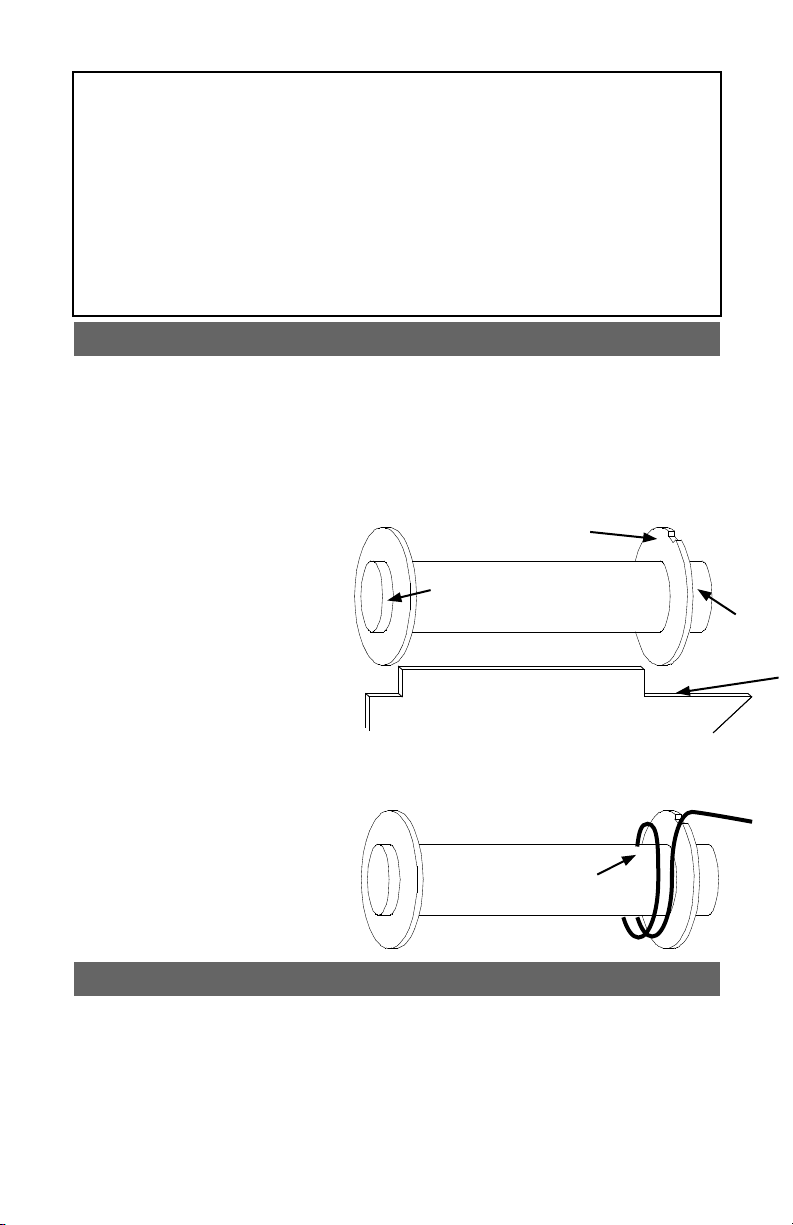
Testtcenteringringsoverthemotormounttubeandsandmotortubeifnecessary.Also
testtthecenteringringsinthebodytubeandsandifnecessary.Spreadsomeepoxyon
the outside of one end of the motor tube and slide the ring (without the notch) until there
is approximately 1/2” of motor tube exposed. Make sure you clean the motor tube of any
epoxysoasnottointerferewiththentangslater.Aftertheaftringisdry,makeamark
1/2” from the other end of the motor tube. Spread some epoxy on the motor tube and
slide the forward ring until it aligns with the mark. VERY IMPORTANT: make sure there
is not any epoxy on the motor tube that would interfere with the n tangs later on.
Fin
Fin Tang
1/2” Exposed
1/2” Exposed
Forward Ring Notch
Push cord in corner and
tack with epoxy
The shock cord in this kit consists
of a shorter section of Kevlar and a
longer section of nylon cording. The
two sections should be tied together
using a single overhand, ring bend
ordoublesherman’sknot.The
Kevlar section will be attached to
the motor mount and the nylon
section will be attached to the nose
cone.
Wrap the end of the Kevlar shock
cord around the forward end of the
motor tube and tack in place with
CA.Makesurethecordlaysat
enough so it will not interfere with
the body tube when you slide the
motor tube inside. Apply some
epoxy to the cord to hold it in place.
Make sure the cord is secure
and will not come loose later with
ejection forces that will pull on the
shock cord.


