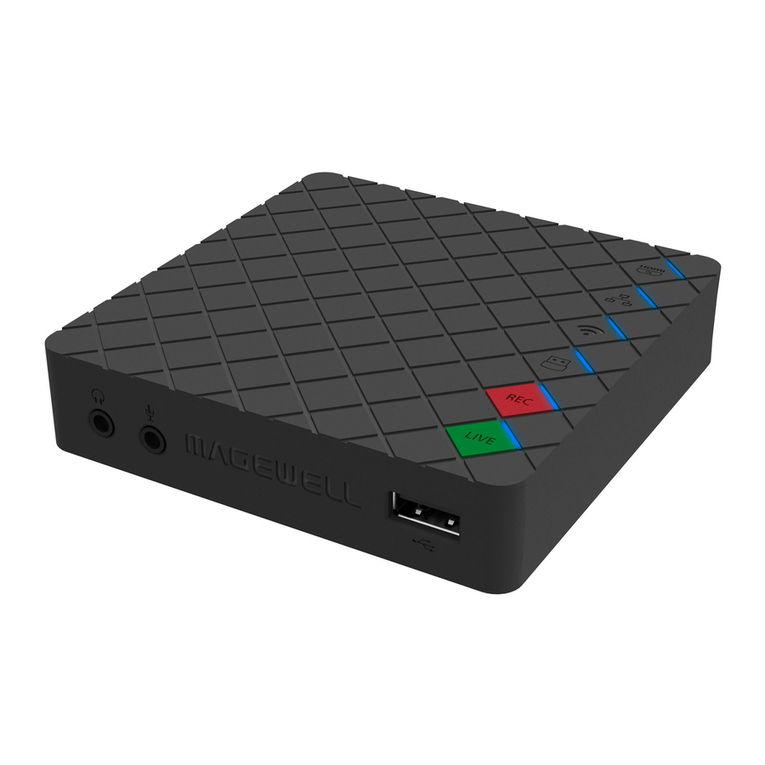
Magewell Ultra Encode User manual


03
Getting Started
03Overview
04Key Features
04System Requirements
05
Tutorial
05Part 1. Ultra Encode Set Up
09Part 2. YouTube Set Up
10
Installation
10Safety Information
11Interfaces & Indicators
14
Getting Started With Ultra Encode
14Accessing Web UI
15Initialization
16
Web UI Configuration
16Accessing the Web UI
16
Web UI Configuration
16Accessing the Web UI
17Signing In/Out
18Dashboard
21Streaming Server
36General
39Encoding Parameters
41Network
44Firmware
46User Admin
49About
50
FAQ
52
Support
53
Warranty
55
Notice
TABLE OF CONTENTS
2

Overview
Our Ultra Encode family of universal live media encoders offers systems
integrators, streaming professionals, and OEM partners a flexible and
affordable encoding solution for applications including live streaming, AV over
IP, remote contribution, IP production workflows and much more. Available in
HDMI and SDI models, Ultra Encode supports high-quality H.264, H.265 (HEVC)
and NDI |HX encoding and multiple streaming protocols with wired or wireless
network connectivity.
Encoder converts input signal to custom format, using H.264/H.265 video
encoders and AAC audio encoder. It can push multiple streams to
RTSP/RTMP/RTMPS/SRT Caller/SRT Listener/NDI|HX2/HLS(push)/TS over
UDP/TS over RTP video servers simultaneously that you have access to.
Encoder is ideal for broadcast video and audio, natively support live broadcast
for Facebook, YouTube, and Twitch, as well as your own site, with multi-
platform distribution. To custom encoder perfectly for your session, we have
Web UI, where device work status, a thumbnail preview window and tabs for
streaming settings, analytics, and stream health monitoring are provided.
Getting Started
®
3

Key Features System Requirements
Network
Web UI Supported Web Browser
Ultra Encode Family
Support RTSP/RTMP/RTMPS/SRT Caller/SRT Listener/NDI|HX2/HLS
(push)/TS over UDP/TS over RTP streaming protocols
■
Dual code stream
■
Multi-streaming to various video platforms simultaneously
■
video encoders - H.264 and H.265 (HEVC)
■
Audio encoder - AAC
■
Web UI - a network remote management - provides webpage
configuration with kinds of customization for functions and devices,
including
■
Dashboard provides real-time device performance status monitor.
■
Streaming Server provides live stream server configuration.
■
General provides general settings of your device.
■
Encoding Parameters provides wizards to configure encoding profile.
■
Network provides network management and configuration.
■
Firmware provides online and manual update to refresh device
firmware.
■
User Admin provides user management.
■
About provides device information and configuration report for
troubleshooting.
■
10/100/1000Mbps Ethernet
■
Wi-Fi 802.11 a/b/g/n/ac
■
USB 3G/4G mobile broadband modem (not included)
■
Microsoft Internet Explorer 11
■
Microsoft Edge
■
Mozilla Firefox version 61 and above
■
Google Chrome version 49 and above
■
Apple Safari 11.1 and above
■
Opera 55.0.2994.44 and above
■
Ultra Encode HDMI
■
Ultra Encode SDI
■
4

Tutorial
Let’s learn by example.
Throughout this tutorial, we’ll walk you through the creation of a basic YouTube live streaming with Ultra Encode.
It’ll consist of two parts:
Part 1. Ultra Encode set up
Part 2. YouTube set up
Part 1. Ultra Encode Set Up
1. Find the Encode
1. Connect the encoder to a LAN and power it up.
2. Access Web UI
i. In Windows 10, open a File Explorer window, find the encoder in Network > Other Devices.
ii. Double click the encoder icon to open the Web UI of the device in your default web browser.
3. Log in with your username and password.
5

Find your Device
Sign In
6

2. Add YouTube to encoder stream server
1. In the left control panel, go to Streaming Server tab. Click Add Server and choose .
2. Go to YouTube https://www.google.com/device, and paste the code prompted.
3. Log in with your account and password, and trust your device following the instructions shown on the web page.
7

4. Choose the Event where you want to show your video clips.
Then you can simply save the server with default parameters for streaming.
5. Start the stream server: back to Streaming Server tab and turn on the switch before YouTube server icon.
6. Now the encoder is ready to bring your content to YouTube directly with all these settings are done.
8

Part 2. YouTube Set Up
Create a live stream task in YouTube Studio to go live, and specify the Title, Category, Privacy, etc.
9

Installation
Safety Information
Electrical Safety
Operation Safety
Seek professional assistance before using an adapter or extension cord. These devices could interrupt the grounding circuit.
■
Make sure that you are using the correct power adapter for the local voltage. If you are not sure about the voltage of the electrical outlet you are using, contact
your local power company.
■
If the power adapter is broken, do not try to fix it by yourself. Contact a qualified service technician or your retailer for help.
■
Before using the product, make sure all cables are correctly connected and the power cables are not damaged. If you notice any damage, contact your dealer
immediately.
■
To avoid short circuits, keep paper clips, screws, and staples away from connectors, slots, sockets and circuitry.
■
Avoid dust, humidity, and temperature extremes. Do not place the product in any area where it may become wet.
■
If you encounter technical problems with the product, contact your dealer or the Magewell Support Team via support@magewell.net.
■
10

Interfaces & Indicators
Ultra Encode HDMI
Figure 1 Ultra Encode HDMI
11

Ultra Encode SDI
Figure 2 Ultra Encode SDI
12

Descriptions of indicators status are as follows. The indicators are located on
the device panel as shown in Interfaces.
PWR (Power)
IN (HDMI/SDI)
LIVE
ETH
Wi-Fi
Descriptions of multiple indicators status are as follows.
Indicators
On: power on.
■
Off: power off.
■
On: input signal detected.
■
Off: input signal undetected.
■
On: the encoder is streaming to at least one streaming address.
■
Breathing: none of the live sessions is enabled.
■
On: Ethernet connected.
■
Off: Ethernet unconnected.
■
On: Wi-Fi connected.
■
Off: Wi-Fi unconnected.
■
All but PWR indicator lights flash once simultaneously: system is booting up
or rebooting.
■
The indicator lights flash in turn from IN to Wi-Fi: firmware is updating.
■
If any other status appear, please try to unplug and re-plug in the
power cable to recover your encoder.
13

Accessing Web UI
Manage your device via wired networks or Wi-Fi.
1. Connect your device to your LAN and power it up.
2. Open Web UI:
Getting Started With Ultra Encode
To ensure a smooth video, you are recommended to connect to a
wired network.
Via File Explorer on Windows 7/8/8.1/10
i. Open File Explorer in your PC, then locate your device in Network
> Other Devices named Ultra Encode + (Serial number).
ii. Double click the device icon, open the sign page of Web GUI.
■
Via device Wi-Fi AP, IP Address: 192.168.48.1
i. In your smartphone/pad/laptop, turn on WLAN, search and join in
the device AP.
The AP names after your gear's Serial number, the password is
the last 8 bit of the serial number.
We recommended that the distance between the Web UI and the
encoder should be within 10m.
ii. In your web browser, enter 192.168.48.1 to open the Web UI.
■
Plug included Wi-Fi antenna when you want to connect to a
wireless network.
14

3. Input your username and password.
Initialization
Follow the instructions of the Web UI performing the device initialization and
set a new device name.
The default administrator name and password are both Admin.
■
We recommend you to modify the admin password after initial log-in.
■
15

Accessing the Web UI
If you know your device's IP address, type it into your web browser to display
the Web UI. Alternatively, you can access the Web UI via wired Ethernet or Wi-
Fi.
1. Connect your device to your LAN and power it up.
2. Open Web UI:
Web UI Configuration
To ensure a smooth video, you are recommended to connect to a
wired network.
Via File Explorer on Windows 7/8/8.1/10
i. Open File Explorer in your PC, then locate your device in Network
> Other Devices named Ultra Encode + (Serial number).
ii. Double click the device icon, open the sign page of Web GUI.
■
Via device Wi-Fi AP, IP Address: 192.168.48.1
i. In your smartphone/pad/laptop, turn on WLAN, search and join in
the device AP.
The AP names after your gear's Serial number, the password is
the last 8 bit of the serial number by default.
■
Plug included Wi-Fi antenna when you want to connect to a
wireless network.
16

Signing In/Out
The Web UI allows multiple users to have read/write access to make
configuration settings at the same time after logging-in. However, to avoid
configuration conflicts, we do not recommend you to operate one device
simultaneously.
1. Signing In: enter your account and password in the SIGN IN page.
2. Signing Out: click the drop-list icon behind the logging-in username
at the top-right of the Web UI, and select Sign out.
We recommended that the distance between the Web UI and the
encoder should be within 10m.
ii. In your web browser, enter 192.168.48.1 to open the Web UI.
The default administrator name and password are both Admin.
■
We recommend you to modify the admin password after initial log-in.
■
17

Setting Volume
Dashboard
In Dashboard page, you can:
thumbnail preview the encoded video
■
check device hardware information
■
check system performance status
■
set global volume and color
■
HDMI/SDI IN: adjust input signal volume
■
LINE IN: adjust the audio connected to the LINE IN
■
LINE OUT: adjust the LINE OUT audio which mixes input audio and LINE IN
■
: mute current channel
■
: restore current channel to default value
■
Reset: restore all settings of the volume to default settings
■
Done: click to save your configuration
■
18

Setting Color
Set color format of preview and stream video.
Previewing Thumbnails
Thumbnail gives you a quick snapshot of your video as they're browsing video
target server.
Brightness: range from -100 to 100, the default value is 0.
■
Contrast: range from 50 to 200, the default value is 100.
■
Saturation: range from 0 to 200, the default value is 100.
■
Hue: range from -90 to 90, the default value is 0.
■
Reset: restore all settings of the color to default settings
■
Done: save your configuration
■
Add/editor destination servers in "Streaming Server" tab, and start your live
stream.
■
Specify encoding parameters in "Encoding Parameters" tab for main and
sub code streams.
■
19

Checking Hardware Information
Checking System Performance
Serial number: show the serial number of your unit, which is also marked
on your device.
■
Hardware version: show the hardware version of your unit.
■
Firmware version: show the current firmware version that is installed in your
unit. You can update the firmware, via the System > Firmware tab.
■
Gives you an overview of your system CPU, memory usage, network usage
in real-time in order to evaluate the device performance & health.
■
20
Other manuals for Ultra Encode
1
This manual suits for next models
2
Table of contents
Other Magewell Media Converter manuals

Magewell
Magewell ULTRA STREAM User manual

Magewell
Magewell XI006AUSB User manual

Magewell
Magewell Ultra Stream HDMI User manual

Magewell
Magewell ULTRA STREAM User manual

Magewell
Magewell Ultra Encode User manual

Magewell
Magewell Pro Convert for NDI to HDMI 4K User manual

Magewell
Magewell Director Mini User manual

Magewell
Magewell Pro Convert AES67 User manual

Magewell
Magewell Ultra Stream SDI User manual

Magewell
Magewell Ultra Encode AIO User manual