Magewell ULTRA STREAM User manual


03
Getting Started
03Overview
03Key Features
04System Requirements
05
Installation
05Safety Information
06Interfaces & Indicators
09
Configuration
09Accessing the Web UI
10Signing In/Out
11Dashboard
17USB Flash Drive
19Storage
21Upload
24Streaming Server
33General
41Encoding Parameters
24Streaming Server
33General
41Encoding Parameters
44EDID
47Network
50Firmware
52User Admin
55About
56
Support
57
Warranty
59
Notice
TABLE OF CONTENTS
2

Overview
Ultra Stream encoder makes live streaming remarkably simple even for non-
professional users, enabling them to record or stream high-quality video with
one click using on-device buttons or an intuitive smartphone app. Designed for
users who want to stream but may have minimal technical knowledge, the
encoder is ideal for everyone from church volunteers and educators to
corporate communicators and live event organizers.
Users can stream to popular services including YouTube, Facebook Live or
Twitch or to a custom-specified server. Streams can be output to a third-party
service and custom server simultaneously, while real-time video preview in the
app allows easy monitoring. In addition to outputting live streams, Ultra Stream
can record video as files to a directly-connected USB drive, embedded storage
or the associated smartphone.
Key Features
Getting Started
Streaming to Facebook, Twitch and YouTube platforms
■
Streaming to up to 2 servers simultaneously
■
Recording to USB flash drive
■
Recording to mobile device
■
Recording to local storage
■
Device configuration using Web UI or application
■
Registration with Magewell Cloud platform for centralized management
■
3

System Requirements
Network
Supported Mobile Clients
Supported Web Browser
Application
10/100/1000Mbps Ethernet
■
IEEE 802.11 a/b/g/n/ac
■
Android 5.0 and above
■
iOS 9.0 and above
■
iPhone 6s and above
■
iPod Touch 7 and above
■
Microsoft Internet Explorer 11
■
Microsoft Edge
■
Mozilla Firefox version 61 and above
■
Google Chrome version 49 and above
■
Apple Safari 11.1 and above
■
Opera 55.0.2994.44 and above
■
To register with Magewell Cloud platform for centralized
management, you should use Web UI.
For Android 5.0 and above, search Ultra Stream or Magewell in the
Google Play or scan the QR code to download the Ultra Stream app.
■
For iOS 9.0 and above, search Ultra Stream or Magewell in the App Store
to download the Ultra Stream app.
■
Ultra Stream App has in-app help. You can obtain the PDF version from
Magewell website User Manual for Ultra Stream Family.
To join a Wi-Fi network, you need to install Ultra Stream application.
4

Installation
Safety Information
Electrical Safety
Operation Safety
Seek professional assistance before using an adapter or extension cord. These devices could interrupt the grounding circuit.
■
Make sure that you are using the correct power adapter for the local voltage. If you are not sure about the voltage of the electrical outlet you are using, contact
your local power company.
■
If the power adapter is broken, do not try to fix it by yourself. Contact a qualified service technician or your retailer for help.
■
Before using the product, make sure all cables are correctly connected and the power cables are not damaged. If you notice any damage, contact your dealer
immediately.
■
To avoid short circuits, keep paper clips, screws, and staples away from connectors, slots, sockets and circuitry.
■
Avoid dust, humidity, and temperature extremes. Do not place the product in any area where it may become wet.
■
If you encounter technical problems with the product, contact your dealer or the Magewell Support Team via support@magewell.net.
■
5

Interfaces & Indicators
Ultra Stream HDMI
6

Ultra Stream SDI
7

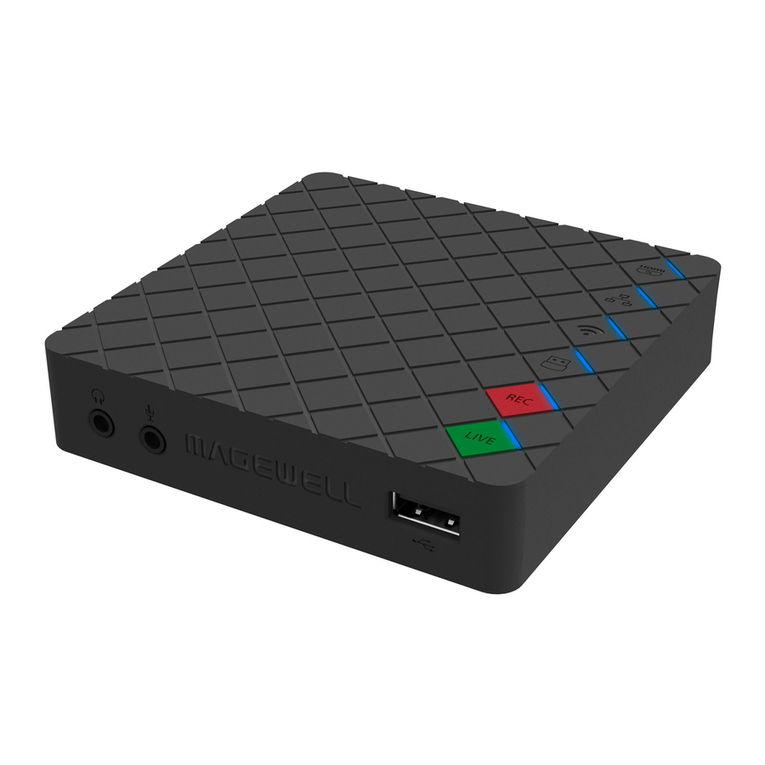
Descriptions of indicators status are as follows. The indicators are located on
the device panel as shown in Interfaces.
HDMI/SDI IN
Ethernet
Wi-Fi
USB
RECREC
LIVELIVE
Descriptions of multiple indicators status are as follows.
Indicators
On: input signal is detected.
■
Pulsing slow: input signal is not detected.
■
On: Ethernet is connected.
■
Pulsing slow: Ethernet is disconnected.
■
On: network is detected.
■
Pulsing slow: network is not detected.
■
Flashing: the encoder is connecting to Wi-Fi.
■
On: USB is available.
■
Pulsing slow: USB is unavailable.
■
Flashing: there is insufficient storage on the USB.
■
On: the encoder is under recording.
■
Pulsing slow: input signal is not detected.
■
Off: the USB flash drive is unavailable.
■
Flash once and then restore to its former state: recording failed.
■
On: the encoder is streaming to at least one streaming address.
■
Pulsing slow: at least one streaming server is configured.
■
Flashing: the encoder is connecting to at least one streaming address.
■
Off: neither of the stream servers are configured.
■
Flashes once and then restore to its former state: live streaming failed to
start.
■
The indicator lights flash in turn from HDMI/SDI IN to LIVE: system is
booting up.
■
The indicator lights flash in turn from LIVE to HDMI/SDI IN: firmware is
updating.
■
All indicator lights flash once simultaneously and then flash in turn from
HDMI/SDI to LIVE: the encoder is rebooting.
■
All indicator lights flash once simultaneously and then restore to their
former state: in the device list of Ultra Stream app, choose an encoder and
tap the device status icon at the upper right corner, and all the indicators on
that encoder will light.
■
If any other status appear, please try to unplug and re-plug in the
power cable to your encoder.
8

Accessing the Web UI
If you know your device's IP address, type it into your web browser to Web UI.
Alternatively, you can access the Web UI via wired Ethernet or Wi-Fi.
1. Connect your device to your LAN and power it up.
2. Open Web UI:
Configuration
To ensure a smooth video, you are recommended to connect to a
wired network.
Via File Explorer on Windows 7/8/8.1/10
i. Open File Explorer in your PC, then locate your device in Network
> Other Devices.
ii. Double click the device icon to open the sign page of Web GUI.
■
Via device Wi-Fi AP, IP Address: 192.168.48.1
i. In your smartphone/pad/laptop, turn on WLAN, search for and
join the device AP named Ultra Stream + (Serial number).
The AP names after your gear's Serial number, and the password
is the last 8-number of the serial number by default. For example,
a serial number C301110101001 indicates the initial AP password
is 10101001.
We recommend that the distance between the Web UI and the
encoder should be within 10m.
ii. In your web browser, enter 192.168.48.1 to open the Web UI.
■
9

Signing In/Out
The Web UI allows multiple users to have read/write access to make
configuration settings at the same time after logging-in. However, to avoid
configuration conflicts, we do not recommend you to operate one device
simultaneously.
1. Sign In: enter your account and password in the SIGN IN page.
2. Sign Out: click the drop-list icon behind the logging-in username at
the top-right of the Web UI, and select Sign out.
The default administrator name and password both are Admin.
■
We recommend you to modify the admin password after initial
logging-in.
■
10

Setting Volume
Dashboard
On Dashboard page, you can:
preview the thumbnail of the encoded video
■
check device hardware information
■
check system performance status
■
set global volume and color
■
HDMI/SDI: adjust input signal volume.
■
Microphone: adjust the audio connected to the LINE IN.
■
Headset: adjust the output audio which is embedded in input signal.
■
: click to mute current channel.
■
: restore current channel to default value.
■
Reset: restore all settings of the volume to default settings.
■
Done: click to save your configuration.
■
11

Setting Color
Set color format of preview and stream video.
Previewing Thumbnails
Thumbnails give you a quick snapshot of your video as they’re browsing on the
target video platform and recording.
Descriptions of encoder indicators are as follows.
Descriptions of stream status are as follows.
Brightness: range from -100 to 100, the default value is 0.
■
Contrast: range from 50 to 200, the default value is 100.
■
Saturation: range from 0 to 200, the default value is 100.
■
Hue: range from -90 to 90, the default value is 0.
■
Reset: restore all settings of the color to default settings.
■
Done: save your configuration.
■
HDMI/SDI IN: Light being on indicates input signal is detected; pulsing
slowly indicates input signal is not detected.
■
Ethernet: Light being on indicates Ethernet is connected; pulsing slowly
indicates Ethernet is disconnected.
■
Wi-Fi: Light being on indicates network is detected; pulsing slowly
indicates network is not detected.
■
USB: Light being on indicates USB is available; pulsing slowly indicates
there is insufficient storage on the USB.
■
Resolving DNS: Indicates that domain name resolution is being performed
■
12

on the live streaming address.
Connecting: Indicates that the encoder is connecting to the live streaming
server
■
Waiting: Indicates the previous connection to the streaming server failed,
and the encoder is trying to reconnect.
■
Authenticating: Indicates the encoder has connected to the live streaming
server and live authentication is in progress.
■
Authentication Failed: If you connect the encoder to an RTMP server, make
sure your authentication settings are correct; if you connect the encoder to
a live streaming video platform, you can log out and re-log in.
■
13

14

Starting/stopping Recording
You can modify the recording policy in General > Recording.
1. Do any of the following to start/stop recording.
2. Check the recording status on the right side of the thumbnail, such as
record mode and duration.
Starting/stopping Streaming
Make sure you have set the streaming servers before start streaming. To ensure
smooth live streaming experience, connecting to a wired Ethernet network is
recommended.
1. Do any of the following to start/stop streaming.
2. Check streaming status in the right side of the thumbnail preview.
Plug in a USB flash drive in your encoder before recording to USB.
Go to Dashboard page, and click the REC button .
■
Press the red REC button located on the top panel of the
device.
■
Go to Dashboard page, and click the green LIVE button .
■
Press the green LIVE button located on the top panel of the
encoder.
■
15

Checking Hardware Information
Checking System Performance
Serial number: serial number of your unit, which is also marked on your
device.
■
Hardware version: hardware version of your unit.
■
Firmware version: current firmware version that is installed in your unit. You
can update the firmware, via the System > Firmware tab.
■
Gives you an overview of your system CPU, memory usage, network usage
in real-time in order to evaluate the device performance & health.
■
16

USB Flash Drive
Manage the USB and files stored in the USB Flash Drive page.
Check USB Info, such as File system, Free space, and Estimated remaining
recording time.
It is recommended that you use a USB with FAT32/VFAT file system.
■
Format USB
Click to start Format. When prompted, click YES.
The USB Flash Drive data cannot be recovered after formatting. Please be
cautious.
After formatting, the file system of USB will be changed to VFAT.
■
Test USB Performance
Click to start Performance Test.
Test whether the write speed of USB flash drive meets the requirements
before recording. If the USB fails the test, please change another one, or the
recording may stop automatically.
■
17

Managing Video Clips in USB
1. To download: move the cursor to a specified clip and click the icon to
download the chosen one.
2. To choose a specific video: move the cursur to a video and click to
download the clip.
3. To check all videos: click More to enter Videos page and check all
recorded clips.
4. To delete videos: click More to enter Videos page and choose one or
more, or all clips to delete.
18

Managing Local Storage
Managing Video Clips in Local Storage
1. To download: move the cursor to a specified clip and click the icon to
download the chosen one.
2. To choose a specific video: move the cursur to a video clip and click .
3. To check all videos: click More to enter Videos page and check all
recorded clips.
4. To delete videos: click More to enter Videos page and choose one or
more, or all clips to delete.
5. To upload videos: click More to enter Videos page. Then you can move
the cursur to a video clip and click the icon. Or you can select several
Storage
Manage the local storage and files stored in the Storage page.
Check local storage, such as File system, Free space, and Estimated
remaining recording time.
Check remaining time for normal recording, and total recording time for
loop recording.
■
Format storage
Click to start Format.
After formatting, the file system of USB will be changed to VFAT.
■
19
Other manuals for ULTRA STREAM
1
Table of contents
Other Magewell Media Converter manuals

Magewell
Magewell Ultra Encode User manual

Magewell
Magewell Ultra Encode User manual

Magewell
Magewell Ultra Stream SDI User manual

Magewell
Magewell Ultra Encode AIO User manual

Magewell
Magewell Pro Convert AES67 User manual

Magewell
Magewell XI006AUSB User manual

Magewell
Magewell Pro Convert for NDI to HDMI 4K User manual

Magewell
Magewell Ultra Stream HDMI User manual

Magewell
Magewell Director Mini User manual

Magewell
Magewell ULTRA STREAM User manual