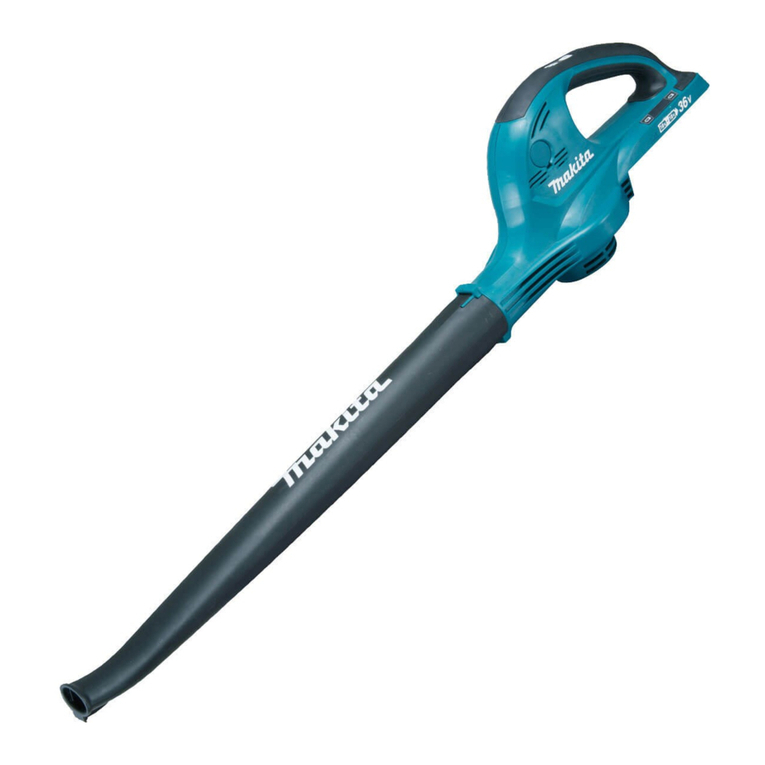
Makita DUB363 User manual

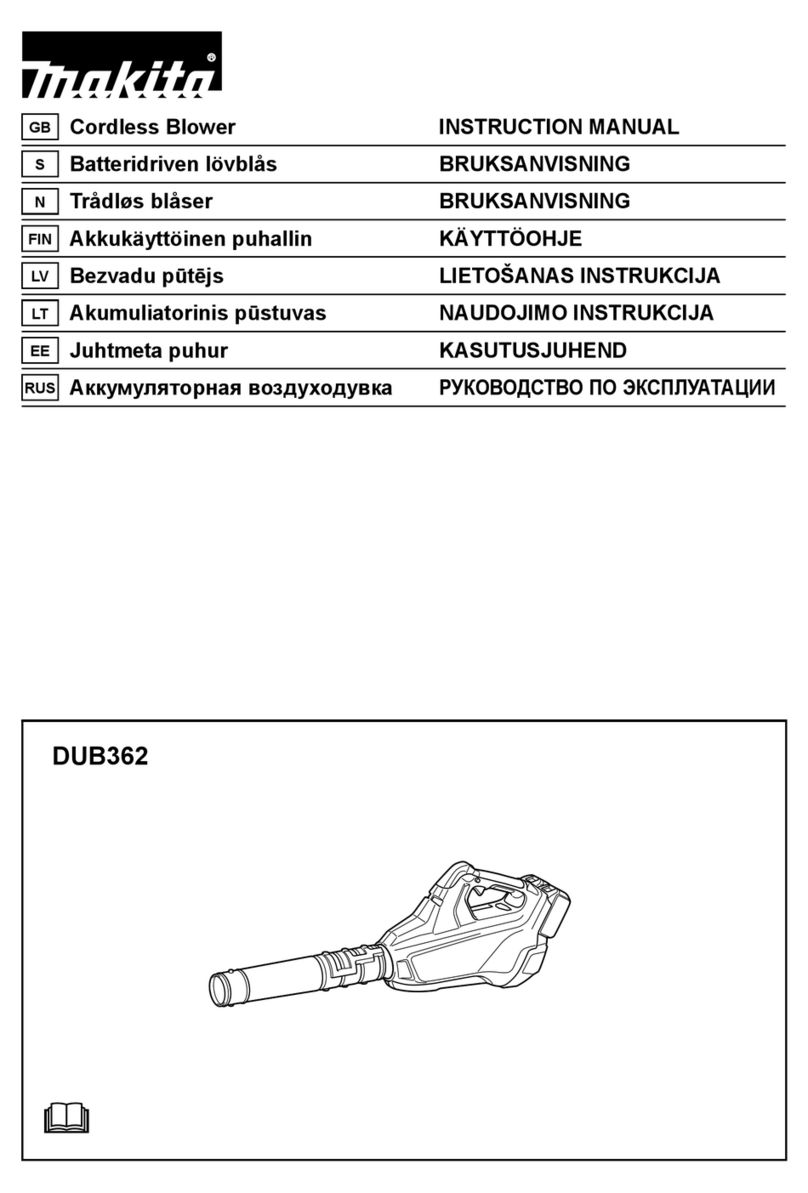
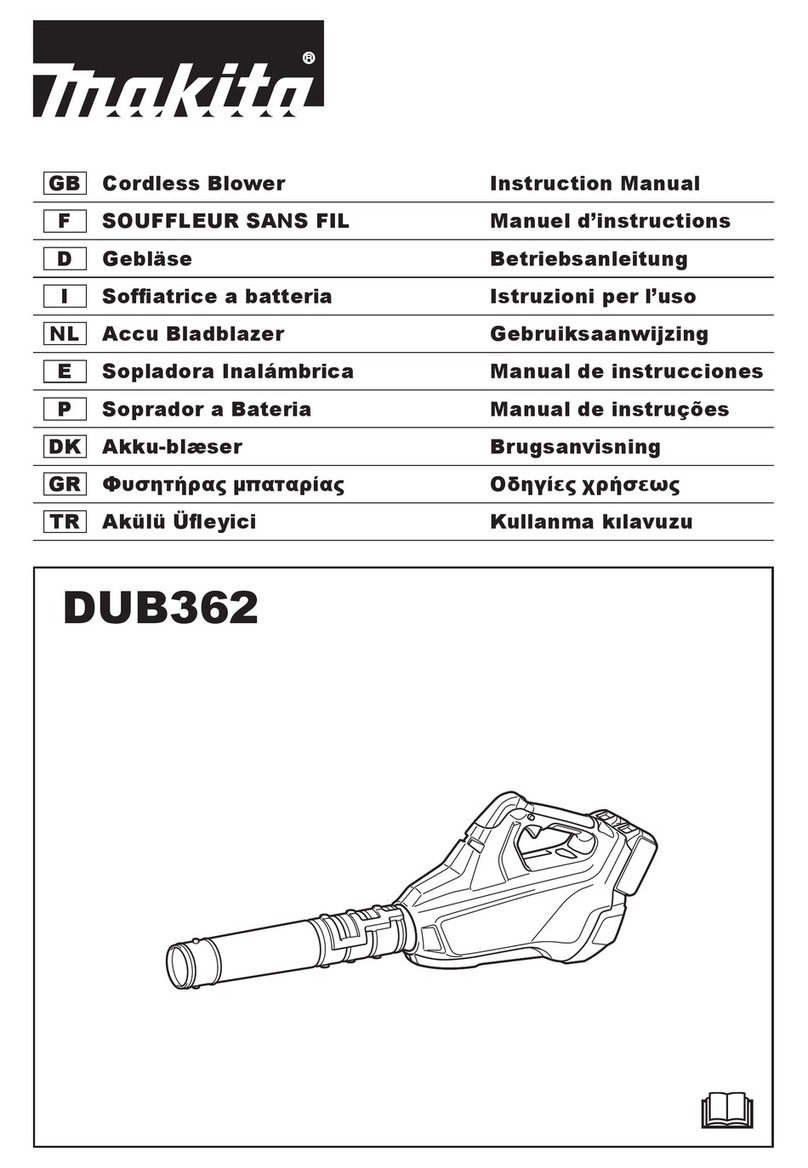
DUB363
EN Cordless Blower INSTRUCTION MANUAL 7
FR
SOUFFLEUR SANS FIL (ASPIRO /
SOUFFLEUR (SANS FIL))
MANUEL D’INSTRUCTIONS 15
DE Gebläse (Sauger) BETRIEBSANLEITUNG 24
IT Sofatore a batteria ISTRUZIONI PER L’USO 33
NL Accubladblazer GEBRUIKSAANWIJZING 42
ES Sopladora Inalámbrica MANUAL DE
INSTRUCCIONES 51
PT Soprador a Bateria
(Soprador / Aspirador a Bateria)
MANUAL DE INSTRUÇÕES 60
DA Akku blæser BRUGSANVISNING 69
EL Φορητός φυσητήρας ΕΓΧΕΙΡΙΔΙΟ ΟΔΗΓΙΩΝ 77
TR Akülü Üeyici KULLANMA KILAVUZU 87

1
2
1
Fig.1
1
2
Fig.2
1 2
Fig.3
1
2
3
Fig.4
2

2
1
3
Fig.5
1
1
Fig.6
1
Fig.7
1 2
33
Fig.8
1
2 3
Fig.9
1
2
3
Fig.10
3

1
2
Fig.11
2
3
1
Fig.12
1
2
1
Fig.13
1
1
Fig.14
1
2
3
Fig.15
4

1
2
Fig.16
21
3
Fig.17
1
Fig.18
1
Fig.19
1
Fig.20
Fig.21
1
4
3
2
Fig.22
5

Fig.23
1
Fig.24
6

7ENGLISH
ENGLISH (Original instructions)
SPECIFICATIONS
Model: DUB363
Capacities Air volume 0 - 13.4 m3/min
Air speed (average) 0 - 54 m/s
Air speed (max.) 0 - 65 m/s
Dimensions (L x W x H) *1 341 mm x 193 mm x 415 mm
Rated voltage D.C. 36 V
Net weight Blower *2 3.8 - 5.2 kg
Vacuum *3 6.0 - 6.6 kg
*1. Without pipes, nozzles, dust bag, shoulder strap, and battery cartridges.
*2. With blower pipe, end nozzle and at nozzle, and without suction pipe, suction nozzle, elbow pipe, dust bag and
shoulder strap.
*3. With suction pipe, suction nozzle, elbow pipe, dust bag and shoulder strap, and without blower pipe, end nozzle
and at nozzle.
• Due to our continuing program of research and development, the specications herein are subject to change
without notice.
• Specications may differ from country to country.
• The weight may differ depending on the attachment(s), including the battery cartridge. The lightest and heavi-
est combination, according to EPTA-Procedure 01/2014, are shown in the table.
Applicable battery cartridge
BL1815N / BL1820 / BL1820B / BL1830 / BL1830B / BL1840 / BL1840B / BL1850 / BL1850B / BL1860B
• Some of the battery cartridges listed above may not be available depending on your region of residence.
WARNING: Only use the battery cartridges listed above. Use of any other battery cartridges may cause
injury and/or re.
Symbols
The followings show the symbols used for the equip-
ment. Be sure that you understand their meaning before
use.
Take particular care and attention.
Read instruction manual.
Keep hands away from rotating parts.
Long hair may cause entanglement
accident.
Keep bystanders away.
Wear eye and ear protection.
Do not expose to moisture.
Ni-MH
Li-ion
Only for EU countries
Do not dispose of electric equipment or battery
pack together with household waste material!
In observance of the European Directives,
on Waste Electric and Electronic
Equipment and Batteries and Accumulators
and Waste Batteries and Accumulators
and their implementation in accordance
with national laws, electric equipment and
batteries and battery pack(s) that have
reached the end of their life must be col-
lected separately and returned to an envi-
ronmentally compatible recycling facility.
Intended use
The machine is intended for blowing and vacuuming.
Noise
The typical A-weighted noise level determined accord-
ing to EN50636-2-100:
Sound pressure level (LpA) : 84.8 dB(A)
Uncertainty (K) : 1.3 dB(A)
Sound power level (LWA) : 94.9 dB (A)
Uncertainty (K) : 0.3 dB(A)
NOTE:
The declared noise emission value(s) has been
measured in accordance with a standard test method
and may be used for comparing one tool with another.
NOTE:
The declared noise emission value(s) may
also be used in a preliminary assessment of exposure.

8ENGLISH
WARNING: Wear ear protection.
WARNING: The noise emission during actual
use of the power tool can differ from the declared
value(s) depending on the ways in which the
tool is used especially what kind of workpiece is
processed.
WARNING: Be sure to identify safety mea-
sures to protect the operator that are based on an
estimation of exposure in the actual conditions of
use (taking account of all parts of the operating
cycle such as the times when the tool is switched
off and when it is running idle in addition to the
trigger time).
Vibration
The vibration total value (tri-axial vector sum) deter-
mined according to EN50636-2-100:
Work mode: operation without load (blowing)
Vibration emission (ah) : 2.5 m/s2or less
Uncertainty (K) : 1.5 m/s2
Work mode: operation without load (vacuuming)
Vibration emission (ah) : 2.5 m/s2or less
Uncertainty (K) : 1.5 m/s2
NOTE: The declared vibration total value(s) has been
measured in accordance with a standard test method
and may be used for comparing one tool with another.
NOTE: The declared vibration total value(s) may also
be used in a preliminary assessment of exposure.
WARNING: The vibration emission during
actual use of the power tool can differ from the
declared value(s) depending on the ways in which
the tool is used especially what kind of workpiece
is processed.
WARNING: Be sure to identify safety mea-
sures to protect the operator that are based on an
estimation of exposure in the actual conditions of
use (taking account of all parts of the operating
cycle such as the times when the tool is switched
off and when it is running idle in addition to the
trigger time).
EC Declaration of Conformity
For European countries only
The EC declaration of conformity is included as Annex A
to this instruction manual.
SAFETY WARNINGS
Cordless Blower Safety Instructions
WARNING: Read all safety warnings and
all instructions. Failure to follow the warnings and
instructions may result in electric shock, re and/or
serious injury.
Save all warnings and instruc-
tions for future reference.
Training
1. Read the instructions carefully. Be familiar
with the controls and the correct use of the
machine.
2. Never allow children, persons with reduced
physical, sensory or mental capabilities or
lack of experience and knowledge or people
unfamiliar with these instructions to use the
machine. Local regulations may restrict the
age of the operator.
3. Never operate the machine while people, espe-
cially children, or pets are nearby.
4. Keep in mind that the operator or user is
responsible for accidents or hazards occurring
to other people or their property.
Preparation
1. Always wear substantial footwear and long
trousers while operating the machine.
2. Do not wear loose clothing or jewellery that
can be drawn into the air inlet. Keep long hair
away from the air inlets.
3. Always wear protective goggles to protect
your eyes from injury when using power tools.
The goggles must comply with ANSI Z87.1 in
the USA, EN 166 in Europe, or AS/NZS 1336
in Australia/New Zealand. In Australia/New
Zealand, it is legally required to wear a face
shield to protect your face, too.
It is an employer's responsibility to enforce
the use of appropriate safety protective equip-
ments by the tool operators and by other per-
sons in the immediate working area.
4. To prevent dust irritation the wearing of a face
mask is recommended.
5. While operating the machine, always wear
non-slip and protective footwear. Non-skid,
closed-toed safety boots and shoes will reduce the
risk of injury.
6. Use personal protective equipment. Always
wear eye protection. Protective equipment such
as a dust mask, non-skid safety shoes, hard hat or
hearing protection used for appropriate conditions
will reduce personal injuries.

9ENGLISH
Operation
1. Switch off the machine and remove the battery
cartridge and make sure that all moving parts
have come to a complete stop
• whenever you leave the machine.
• before clearing blockages.
• before checking, cleaning or working on
the machine.
• if the machine starts to vibrate
abnormally.
• whenever you convert the machine from
blower to vacuum, and vice versa.
2. Operate the machine only in daylight or in
good articial light.
3. Do not overreach and keep proper balance and
footing at all times.
4. Always be sure of your footing on slopes.
5. Walk, never run.
6. Keep all cooling air inlets clear of debris.
7. Never blow debris in the direction of
bystanders.
8. Operate the machine in a recommended posi-
tion and on a rm surface.
9. Do not operate the machine at high places.
10. Never point the nozzle at anyone in the vicinity
when using the machine.
11. Never block suction inlet and/or blower outlet.
• Be careful not to block suction inlet or
blower outlet with dust or dirt when oper-
ating in dusty area.
• Do not use nozzles other than the nozzles
provided by Makita.
• Do not use the blower to inate balls,
rubber boat or the similar.
12.
Do not operate the machine near open window, etc.
13. Operating the machine only at reasonable
hours is recommended - not early in the
morning or late at night when people might be
disturbed.
14. Using rakes and brooms to loosen debris
before blowing is recommended.
15. If the machine strikes any foreign objects or
should start making any unusual noise or
vibration, immediately switch off the machine
to stop it. Remove the battery cartridge from
the machine and inspect the machine for
damage before restarting and operating the
machine. If the machine is damaged, ask
Makita Authorized Service Centers for repair.
16. Do not insert ngers or other objects into
suction inlet or blower outlet.
17. Prevent unintentional starting. Ensure the
switch is in the off-position before inserting
battery cartridge, picking up or carrying the
machine. Carrying the machine with your n-
ger on the switch or energizing the machine
that has the switch on invites accidents.
18. Never blow or vacuum dangerous materials,
such as nails, fragments of glass, or blades.
19.
Do not operate the machine near ammable materials.
20. Avoid operating the machine for a long time in
low temperature environment.
Maintenance and storage
1. Keep all nuts, bolts and screws tight to be sure
the machine is in safe working condition.
2. If the parts are worn or damaged, replace them
with parts provided by Makita.
3. Store the machine in a dry place out of the
reach of children.
4.
When you stop the machine for inspection, ser-
vicing, storage, or changing accessory, switch
off the machine and make sure that all moving
parts come to a complete stop, and remove the
battery cartridge. Cool down the machine before
making any work on the machine. Maintain the
machine with care and keep it clean.
5. Always cool down the machine before storing.
6. Do not expose the machine to rain. Store the
machine indoors.
7.
When you lift the machine, be sure to bend your
knees and be careful not to hurt your back.
Battery tool use and care
1. Recharge only with the charger specied by
the manufacturer. A charger that is suitable for
one type of battery pack may create a risk of re
when used with another battery pack.
2. Use power tools only with specically desig-
nated battery packs. Use of any other battery
packs may create a risk of injury and re.
3. When battery pack is not in use, keep it away
from other metal objects, like paper clips,
coins, keys, nails, screws or other small metal
objects, that can make a connection from one
terminal to another. Shorting the battery termi-
nals together may cause burns or a re.
4. Under abusive conditions, liquid may be
ejected from the battery; avoid contact. If con-
tact accidentally occurs, ush with water. If
liquid contacts eyes, additionally seek medical
help. Liquid ejected from the battery may cause
irritation or burns.
5. Do not use a battery pack or tool that is dam-
aged or modied. Damaged or modied batteries
may exhibit unpredictable behaviour resulting in
re, explosion or risk of injury.
6. Do not expose a battery pack or tool to re or
excessive temperature. Exposure to re or tem-
perature above 130 °C may cause explosion.
7. Follow all charging instructions and do not
charge the battery pack or tool outside the
temperature range specied in the instruc-
tions. Charging improperly or at temperatures
outside the specied range may damage the
battery and increase the risk of re.
Electrical and battery safety
1. Do not dispose of the battery(ies) in a re.
The cell may explode. Check with local codes for
possible special disposal instructions.
2.
Do not open or mutilate the battery(ies). Released
electrolyte is corrosive and may cause damage to
the eyes or skin. It may be toxic if swallowed.
3.
Do not charge battery in rain, or in wet locations.
4. Do not charge the battery outdoors.
5. Do not handle charger, including charger plug,
and charger terminals with wet hands.
10 ENGLISH
Service
1. Have your power tool serviced by a qualied
repair person using only identical replacement
parts. This will ensure that the safety of the power
tool is maintained.
2. Never service damaged battery packs. Service
of battery packs should only be performed by the
manufacturer or authorized service providers.
SAVE THESE INSTRUCTIONS.
WARNING:
DO NOT let comfort or familiarity
with product (gained from repeated use) replace strict
adherence to safety rules for the subject product.
MISUSE or failure to follow the safety rules stated in this
instruction manual may cause serious personal injury.
Important safety instructions for
battery cartridge
1.
Before using battery cartridge, read all instruc-
tions and cautionary markings on (1) battery char-
ger, (2) battery, and (3) product using battery.
2. Do not disassemble battery cartridge.
3. If operating time has become excessively
shorter, stop operating immediately. It may
result in a risk of overheating, possible burns
and even an explosion.
4.
If electrolyte gets into your eyes, rinse them out
with clear water and seek medical attention right
away. It may result in loss of your eyesight.
5. Do not short the battery cartridge:
(1) Do not touch the terminals with any con-
ductive material.
(2) Avoid storing battery cartridge in a con-
tainer with other metal objects such as
nails, coins, etc.
(3) Do not expose battery cartridge to water
or rain.
A battery short can cause a large current
ow, overheating, possible burns and even a
breakdown.
6. Do not store the tool and battery cartridge in
locations where the temperature may reach or
exceed 50 °C (122 °F).
7. Do not incinerate the battery cartridge even if
it is severely damaged or is completely worn
out. The battery cartridge can explode in a re.
8. Be careful not to drop or strike battery.
9. Do not use a damaged battery.
10.
The contained lithium-ion batteries are subject to
the Dangerous Goods Legislation requirements.
For commercial transports e.g. by third parties,
forwarding agents, special requirement on pack-
aging and labeling must be observed.
For preparation of the item being shipped, consulting an
expert for hazardous material is required. Please also
observe possibly more detailed national regulations.
Tape or mask off open contacts and pack up the
battery in such a manner that it cannot move
around in the packaging.
11.
When disposing the battery cartridge, remove it from
the tool and dispose of it in a safe place. Follow your
local regulations relating to disposal of battery.
12. Use the batteries only with the products
specied by Makita. Installing the batteries to
non-compliant products may result in a re, exces-
sive heat, explosion, or leak of electrolyte.
13. If the tool is not used for a long period of time,
the battery must be removed from the tool.
SAVE THESE INSTRUCTIONS.
CAUTION:
Only use genuine Makita batteries.
Use of non-genuine Makita batteries, or batteries that
have been altered, may result in the battery bursting
causing res, personal injury and damage. It will also
void the Makita warranty for the Makita tool and charger.
Tips for maintaining maximum
battery life
1.
Charge the battery cartridge before completely dis-
charged. Always stop tool operation and charge the
battery cartridge when you notice less tool power.
2.
Never recharge a fully charged battery cartridge.
Overcharging shortens the battery service life.
3.
Charge the battery cartridge with room tempera-
ture at 10 °C - 40 °C (50 °F - 104 °F). Let a hot
battery cartridge cool down before charging it.
4. Charge the battery cartridge if you do not use
it for a long period (more than six months).
ASSEMBLY
CAUTION: Always be sure that the machine is
switched off and the battery cartridge is removed
before carrying out any work on the machine.
NOTICE: Before operating the machine, be sure
to completely assemble the machine. Otherwise,
the machine does not work.
Assembly for blowing
Installing or removing blower pipe
and nozzle
1. Attach the blower pipe to the main unit.
Insert the blower pipe into the main unit with the bolt
facing left as shown in the gure. Turn the blower pipe
as shown in the gure so that the bolt is aligned with the
hole on the main unit, and then tighten the bolt rmly
using the hex wrench.
► Fig.1: 1. Bolt 2. Blower pipe
2. Align the protrusion on the blower pipe with the
groove on the end nozzle, then attach the end nozzle to
the blower pipe, and then turn the end nozzle to lock it
into place.
► Fig.2: 1. End nozzle 2. Blower pipe
To remove the blower pipe and end nozzle, perform the
installation procedure in reverse.
NOTE: The length of the nozzle can be changed by
moving the nozzle as shown in the gure.
► Fig.3: 1. End nozzle 2. Blower pipe

11 ENGLISH
Installing or removing at nozzle or
extension nozzle
Optional accessory
Attach the at nozzle or extension nozzle to the end
nozzle, and then turn it to lock it into place.
► Fig.4: 1. Flat nozzle 2. Extension nozzle 3. End
nozzle
You can also attach the at nozzle or extension nozzle
to the blower pipe.
► Fig.5: 1. Flat nozzle 2. Extension nozzle 3. Blower
pipe
To remove the at nozzle or extension nozzle, perform
the installation procedure in reverse.
Attaching shoulder strap
CAUTION: Be sure to attach the hooks of
the shoulder strap to the machine securely. If the
hooks are attached incompletely, they may come off
and cause an injury.
CAUTION: Be sure to use the shoulder strap
dedicated to this machine. Using other shoulder
strap may cause an injury.
Attach the hooks of the shoulder strap to the machine
as shown in the gure.
► Fig.6: 1. Hook
The shoulder strap features a means of quick release.
Simply squeeze the sides of the buckle to release the
machine from the shoulder strap.
► Fig.7: 1. Buckle
Assembly for vacuuming
Installing or removing suction pipe
and nozzle
Optional accessory
1. Align the triangle mark on the suction nozzle with
that on the suction pipe, and then insert the suction
nozzle into the suction pipe until the latch on the nozzle
snaps into place.
► Fig.8: 1. Suction nozzle 2. Suction pipe 3. Triangle
mark
2. Loosen the bolt on the fan cover using the hex
wrench, and open the fan cover.
► Fig.9: 1. Bolt 2. Fan cover 3. Hex wrench
3. Align the triangle mark on the suction pipe
with mark on the main unit, and then attach the
suction pipe to the main unit.
► Fig.10: 1. Suction pipe 2. Triangle mark 3. mark
4. Turn the suction pipe clockwise so that the bolt
on the pipe is aligned with the hole on the main unit,
and then fasten the bolt rmly using the hex wrench to
secure the pipe to the main unit.
► Fig.11: 1. Suction pipe 2. Bolt
To remove the suction pipe and nozzle, perform the
installation procedure in reverse.
Installing or removing elbow pipe
and dust bag
Optional accessory
1. Insert the elbow pipe into the dust bag and tighten
the belt to x the elbow pipe as shown in the gure.
► Fig.12: 1. Dust bag 2. Elbow pipe 3. Belt
2. Attach the elbow pipe to the main unit.
Insert the elbow pipe into the main unit with the bolt
facing left as shown in the gure. Turn the elbow pipe
as shown in the gure so that the bolt is aligned with the
hole on the main unit, and then tighten the bolt rmly
using the hex wrench.
► Fig.13: 1. Bolt 2. Elbow pipe
3. Attach the hook of the dust bag to the shoulder
strap, and then attach the hooks of the shoulder strap to
the main unit as shown in the gure.
► Fig.14: 1. Hook
To remove the dust bag and elbow pipe, perform the
installation procedure in reverse.
FUNCTIONAL DESCRIPTION
CAUTION: Always be sure that the machine is
switched off and the battery cartridge is removed
before adjusting or checking function on the
machine.
Installing or removing battery
cartridge
CAUTION: Always switch off the machine
before installing or removing of the battery
cartridge.
CAUTION: Hold the machine and the battery
cartridge rmly when installing or removing bat-
tery cartridge. Failure to hold the machine and the
battery cartridge rmly may cause them to slip off
your hands and result in damage to the machine and
battery cartridge and a personal injury.
CAUTION: Always install the battery cartridge
fully until the red indicator cannot be seen. If not,
it may accidentally fall out of the machine, causing
injury to you or someone around you.
CAUTION: Do not install the battery cartridge
forcibly. If the cartridge does not slide in easily, it is
not being inserted correctly.
► Fig.15: 1. Red indicator 2. Button 3. Battery
cartridge
To remove the battery cartridge, slide it from the
machine while sliding the button on the front of the
cartridge.
To install the battery cartridge, align the tongue on the
battery cartridge with the groove in the housing and slip
it into place. Insert it all the way until it locks in place
with a little click. If you can see the red indicator on the
upper side of the button, it is not locked completely.

12 ENGLISH
Indicating the remaining battery
capacity
Only for battery cartridges with the indicator
► Fig.16: 1. Indicator lamps 2. Check button
Press the check button on the battery cartridge to indi-
cate the remaining battery capacity. The indicator lamps
light up for a few seconds.
Indicator lamps Remaining
capacity
Lighted Off Blinking
75% to 100%
50% to 75%
25% to 50%
0% to 25%
Charge the
battery.
The battery
may have
malfunctioned.
NOTE: Depending on the conditions of use and the
ambient temperature, the indication may differ slightly
from the actual capacity.
Machine/battery protection system
The machine is equipped with a machine/battery
protection system. This system automatically cuts off
power to the motor to extend machine and battery life.
The machine will automatically stop during operation if
the machine or battery is placed under one of the fol-
lowing conditions:
Overload protection
When the machine or battery is operated in a manner
that causes it to draw an abnormally high current, the
machine automatically stops and the lamp for mode
1 blinks in green. In this situation, turn the machine
off and stop the application that caused the machine
to become overloaded. Then turn the machine on to
restart.
Overheat protection
When the machine or battery is overheated, the
machine stops automatically and the lamp for mode 1
lights up in red. In this case, let the machine and battery
cool down before turning the machine on again.
Overdischarge protection
When the battery capacity is not enough, the machine
stops automatically and the lamp for mode 1 blinks in
red. In this case, remove the battery from the machine
and charge the battery.
Main power switch
WARNING: Always turn off the main power
switch when not in use.
To turn on the machine, press the main power switch.
The lamps for mode 1 and mode 2 light up in green. To
turn off, keep pressing the main power switch until the
lamps for mode 1 and mode 2 go off.
► Fig.17: (1) Lamp for mode 1 (2) Lamp for mode 2
(3) Main power switch
You can use the machine in the vacuuming mode. In the
vacuuming mode, the suction volume becomes smaller
than in the normal mode.
When you turn on the machine, the machine starts up in
the normal mode. To use the machine in the vacuuming
mode, press the main power switch when the machine
is turned on. The lamp for mode 2 goes off and only the
lamp for mode 1 lights up in green. When you press the
main power switch again, the machine returns to the
normal mode, and the lamps for mode 1 and mode 2
light up in green.
NOTE: The lamp for mode 1 blinks in green if the
machine is operated under unoperatable conditions.
The lamp blinks in one of the following conditions.
• The switch trigger is pulled, when the bolt on the
fan cover or suction pipe is not tightened rmly,
or the bolt on the blower pipe or elbow pipe is
not tightened rmly.
• The machine is turned on, when the control
lever is not fully returned to the off position, or
while you are pulling the switch trigger.
NOTE: This machine employs the auto power-off
function. To avoid unintentional start up, the main
power switch will automatically shut down when the
switch trigger is not pulled for a certain period after
the main power switch is turned on.
Switch action
WARNING: Before installing the battery car-
tridge into the machine, always check to see that
the switch trigger actuates properly and returns
to the "OFF" position when released.
► Fig.18: 1. Switch trigger
To start the machine, simply pull the switch trigger. The
speed is increased by increasing pressure on the switch
trigger. Release the switch trigger to stop.
Cruise control function
The cruise control function allows the operator to main-
tain a constant speed without pulling the trigger. To
increase the speed, turn the control lever forward. To
decrease the speed, turn the control lever backward.
► Fig.19: 1. Control lever

13 ENGLISH
Hex wrench storage
When not in use, store the hex wrench as illustrated to
keep it from being lost.
► Fig.20: 1. Hex wrench
Accidental re-start preventive
function
If you turn on the machine while pulling the switch trig-
ger or while the control lever is not in the off position,
the machine does not start. To start the machine, rst
release the switch trigger and return the control lever
fully, and then turn on the machine.
Electronic function
The machine is equipped with the electronic function for
easy operation.
• Constant speed control
The speed control function provides the constant
rotation speed regardless of load conditions.
OPERATION
CAUTION: Do not place the machine on the
ground while it is switched on. Sand or dust may
enter from suction inlet and cause a malfunction or
personal injury.
Blower operation
CAUTION: When performing the blower
operation, be sure to remove the suction pipe,
suction nozzle, elbow pipe and dust bag from the
machine, and attach the blower pipe and nozzles
to the machine.
Hold the machine rmly with a hand and perform the
blowing operation by moving it around slowly. When
blowing around building, big stone or vehicle, direct the
nozzle away from them. When performing an operation
in a corner, start from the corner and then move to wide
area.
► Fig.21
Vacuuming operation
CAUTION: When performing the vacuuming
operation, be sure to remove the blower pipe and
nozzles from the machine, and attach the suction
pipe, suction nozzle, elbow pipe, dust bag, and
shoulder strap to the machine.
CAUTION: Check the dust bag frequently for
wear or deterioration.
CAUTION: Be sure to fasten the fastener of
the dust bag before operating the machine.
CAUTION: Always switch off the machine
before opening or fastening the fastener of the
dust bag.
NOTICE: Do not allow wet materials, such as
wet leaves, and foreign materials, such as large
wood chips, metals, glass, pebbles, etc., to be
sucked into the machine. Otherwise, a malfunction
may occur.
NOTICE: Empty the dust bag before it becomes
full. Otherwise, a malfunction may occur.
NOTICE: To prevent the suction of foreign mate-
rials, operating the machine in the vacuuming
mode is recommended.
1. Put the shoulder strap and dust bag on the shoul-
der as shown in the gure. Adjust the length of the
strap.
► Fig.22: 1. Shoulder strap 2. Carry handle 3. Assist
handle 4. Dust bag
2. Hold the carry handle with your right hand and the
assist handle with the other hand.
► Fig.23
3. While operating the machine, adjust the switch
trigger so that the suction force is appropriate for the
work location and conditions.
MAINTENANCE
CAUTION: Always be sure that the machine is
switched off and the battery cartridge is removed
before attempting to perform inspection or
maintenance.
To maintain product SAFETY and RELIABILITY,
repairs, any other maintenance or adjustment should
be performed by Makita Authorized or Factory Service
Centers, always using Makita replacement parts.
Cleaning the machine
Clean the machine by wiping off dust with a dry cloth or
one dipped in soapy water and wrung out.
NOTICE: Never use gasoline, benzine, thinner,
alcohol or the like. Discoloration, deformation or
cracks may result.
Remove dust or dirt from the suction inlets.
► Fig.24: 1. Suction inlet

14 ENGLISH
TROUBLESHOOTING
Before asking for repairs, conduct your own inspection rst. If you nd a problem that is not explained in the man-
ual, do not attempt to dismantle the machine. Instead, ask Makita Authorized Service Centers, always using Makita
replacement parts for repairs.
State of abnormality Probable cause (malfunction) Remedy
Motor does not run. Battery cartridge is not installed. Install the battery cartridge.
Battery problem (under voltage) Recharge the battery. If recharging is not effective,
replace battery.
For blower
The blower pipe is not attached.
The fan cover is not closed.
Attach the blower pipe, and then tighten the bolt.
Close the fan cover, and then tighten the bolt.
For vacuum
The elbow pipe or suction pipe is not
attached.
Attach the elbow pipe or suction pipe, and then
tighten the bolt.
The drive system does not work
correctly.
Ask your local authorized service center for repair.
Motor stops running after a little use. Battery's charge level is low. Recharge the battery. If recharging is not effective,
replace battery.
Overheating. Stop using the machine to allow it to cool down.
The machine does not reach the
maximum speed.
Battery is installed improperly. Install the battery cartridge as described in this
manual.
Battery power is dropping. Recharge the battery. If recharging is not effective,
replace battery.
The drive system does not work
correctly.
Ask your local authorized service center for repair.
Abnormal vibration:
stop the machine immediately!
The drive system does not work
correctly.
Ask your local authorized service center for repair.
Motor cannot stop:
Remove the battery immediately!
Electric or electronic malfunction. Remove the battery and ask your local authorized
service center for repair.
OPTIONAL
ACCESSORIES
CAUTION: These accessories or attachments
are recommended for use with your Makita prod-
uct specied in this manual. The use of any other
accessories or attachments might present a risk of
injury to persons. Only use accessory or attachment
for its stated purpose.
If you need any assistance for more details regard-
ing these accessories, ask your local Makita Service
Center.
• Vacuum kit
• Extension nozzle
• Flat nozzle
• Shoulder strap
• Makita genuine battery and charger
NOTE: Some items in the list may be included in the
product package as standard accessories. They may
differ from country to country.

15 FRANÇAIS
FRANÇAIS (Instructions originales)
SPÉCIFICATIONS
Modèle : DUB363
Capacités Volume d’air 0 - 13,4 m3/min
Vitesse de l’air (moyenne) 0 - 54 m/s
Vitesse de l’air (max.) 0 - 65 m/s
Dimensions (L x P x H)*1 341 mm x 193 mm x 415 mm
Tension nominale 36 VCC
Poids net Soufeur*2 3,8 - 5,2 kg
Aspirateur*3 6,0 - 6,6 kg
*1. Sans tuyaux, buses, sac à poussière, bandoulière et batteries.
*2. Avec tube de soufeur, buse d’extrémité et buse plate, et sans tube d’aspiration, suceur, tube coudé, sac à pous-
sière et bandoulière.
*3. Avec tube d’aspiration, suceur, tube coudé, sac à poussière et bandoulière, et sans tube de soufeur, buse d’ex-
trémité et buse plate.
• Étant donné l’évolution constante de notre programme de recherche et de développement, les spécications
contenues dans ce manuel sont sujettes à modication sans préavis.
• Les spécications peuvent varier suivant les pays.
• Le poids peut être différent selon les accessoires, notamment la batterie. Les associations la plus légère et la
plus lourde, conformément à la procédure EPTA 01/2014, sont indiquées dans le tableau.
Batterie applicable
BL1815N / BL1820 / BL1820B / BL1830 / BL1830B / BL1840 / BL1840B / BL1850 / BL1850B / BL1860B
• Certaines batteries répertoriées ci-dessus peuvent ne pas être disponibles selon la région où vous résidez.
AVERTISSEMENT : N’utilisez que les batteries répertoriées ci-dessus. L’utilisation de n’importe quelle
autre batterie peut provoquer des blessures et/ou un incendie.
Symboles
Vous trouverez ci-dessous les symboles utilisés pour
l’appareil. Veillez à comprendre leur signication avant
toute utilisation.
Veuillez être prudent et rester attentif.
Lire le mode d’emploi.
Gardez vos mains à l’écart des pièces en
rotation.
Les cheveux longs risquent de se prendre
dans les pièces en mouvement.
Tenez les personnes à l’écart.
Porter des lunettes de protection et un
serre-tête antibruit.
Ne pas exposer à l’humidité.
Ni-MH
Li-ion
Pour les pays de l’Union européenne
uniquement
Ne jetez pas les appareils électriques ou
les batteries avec vos ordures ménagères !
Conformément aux directives européennes
relatives aux déchets d’équipements
électriques et électroniques et aux piles
et accumulateurs ainsi qu’aux déchets de
piles et d’accumulateurs et leur mise en
œuvre conformément aux lois nationales,
les équipements électriques, les piles et les
batteries en n de vie doivent faire l’objet
d’une collecte sélective et être conés à
une usine de recyclage respectueuse de
l’environnement.
Utilisations
La machine est conçue pour soufer et aspirer.
Bruit
Niveau de bruit pondéré A typique, déterminé selon
EN50636-2-100 :
Niveau de pression sonore (LpA) : 84,8 dB (A)
Incertitude (K) : 1,3 dB (A)
Niveau de puissance sonore (LWA ) : 94,9 dB (A)
Incertitude (K) : 0,3 dB (A)

16 FRANÇAIS
NOTE : La ou les valeurs d’émission de bruit décla-
rées ont été mesurées conformément à la méthode
de test standard et peuvent être utilisées pour com-
parer les outils entre eux.
NOTE : La ou les valeurs d’émission de bruit décla-
rées peuvent aussi être utilisées pour l’évaluation
préliminaire de l’exposition.
AVERTISSEMENT : Portez un serre-tête
antibruit.
AVERTISSEMENT : L’émission de bruit
lors de l’usage réel de l’outil électrique peut être
différente de la ou des valeurs déclarées, suivant
la façon dont l’outil est utilisé, particulièrement
selon le type de pièce usinée.
AVERTISSEMENT : Les mesures de sécurité
à prendre pour protéger l’utilisateur doivent être
basées sur une estimation de l’exposition dans
des conditions réelles d’utilisation (en tenant
compte de toutes les composantes du cycle
d’utilisation, comme par exemple le moment de
sa mise hors tension, lorsqu’il tourne à vide et le
moment de son déclenchement).
Vibrations
Valeur totale de vibrations (somme de vecteur triaxial)
déterminée selon EN50636-2-100 :
Mode de travail : fonctionnement à vide (soufage)
Émission de vibrations (ah) : 2,5 m/s2ou moins
Incertitude (K) : 1,5 m/s2
Mode de travail : fonctionnement à vide (aspiration)
Émission de vibrations (ah) : 2,5 m/s2ou moins
Incertitude (K) : 1,5 m/s2
NOTE : La ou les valeurs de vibration totales décla-
rées ont été mesurées conformément à la méthode
de test standard et peuvent être utilisées pour com-
parer les outils entre eux.
NOTE : La ou les valeurs de vibration totales décla-
rées peuvent aussi être utilisées pour l’évaluation
préliminaire de l’exposition.
AVERTISSEMENT : L’émission de vibrations
lors de l’usage réel de l’outil électrique peut être
différente de la ou des valeurs déclarées, suivant
la façon dont l’outil est utilisé, particulièrement
selon le type de pièce usinée.
AVERTISSEMENT : Les mesures de sécurité
à prendre pour protéger l’utilisateur doivent être
basées sur une estimation de l’exposition dans
des conditions réelles d’utilisation (en tenant
compte de toutes les composantes du cycle
d’utilisation, comme par exemple le moment de
sa mise hors tension, lorsqu’il tourne à vide et le
moment de son déclenchement).
Déclaration de conformité CE
Pour les pays européens uniquement
La déclaration de conformité CE est fournie en Annexe
A à ce mode d’emploi.
CONSIGNES DE
SÉCURITÉ
Consignes de sécurité pour
soufeur sans l (aspiro / soufeur
(sans l))
AVERTISSEMENT : Lisez toutes les
consignes de sécurité et toutes les instructions. Il
y a risque d’électrocution, d’incendie et/ou de graves
blessures si les mises en garde et les instructions ne
sont pas respectées.
Conservez toutes les mises en
garde et instructions pour réfé-
rence ultérieure.
Formation
1. Lisez attentivement les instructions.
Familiarisez-vous avec les commandes et la
bonne utilisation de la machine.
2. Ne laissez en aucun cas les enfants, les per-
sonnes aux facultés physiques, sensorielles
ou mentales diminuées ou sans expérience
ni expertise ou les personnes qui ne sont pas
familiarisées avec ces instructions utiliser la
machine. Les réglementations locales peuvent
limiter l’âge de l’utilisateur.
3. N’utilisez jamais la machine alors que des per-
sonnes — et tout particulièrement des enfants
— ou des animaux domestiques se trouvent à
proximité.
4. Gardez à l’esprit que l’opérateur ou l’utilisa-
teur est responsable des accidents ou risques
encourus par les personnes ou leur propriété.
Préparatifs
1. Portez toujours des chaussures robustes et
un pantalon long pendant l’utilisation de la
machine.
2. Ne portez pas de vêtements amples ou de
bijoux qui peuvent être happés par l’entrée
d’air. Maintenez les cheveux longs à l’écart des
entrées d’air.
3. Pour protéger vos yeux des blessures lorsque
vous utilisez un outil électrique, portez tou-
jours des lunettes de protection, lesquelles
doivent être conformes à ANSI Z87.1 aux
États-Unis, EN 166 en Europe ou AS/NZS 1336
en Australie/Nouvelle-Zélande. En Australie/
Nouvelle-Zélande, la loi exige également le
port d’un écran facial pour se protéger le
visage.

17 FRANÇAIS
L’employeur est responsable d’imposer le
port d’équipements de sécurité appropriés
par les utilisateurs de l’outil et par les autres
personnes se trouvant à proximité de la zone
de travail.
4. Il est recommandé de porter un écran facial
pour éviter les irritations dues à la poussière.
5. Pendant l’utilisation de la machine, toujours
porter des chaussures antidérapantes et de
protection. Porter des bottes ou des chaussures
de sécurité fermées et antidérapantes permet de
réduire le risque de blessure.
6. Utilisez un équipement de protection indivi-
duelle. Portez toujours une protection ocu-
laire. Les équipements de sécurité tels que les
masques contre les poussières, les chaussures
de sécurité antidérapantes, les casques ou les
protecteurs d’oreilles utilisés pour les conditions
appropriées réduiront les blessures.
Fonctionnement
1. Éteignez la machine, retirez la batterie et assu-
rez-vous que toutes les pièces mobiles sont
parfaitement arrêtées
• chaque fois que vous laissez la machine
sans surveillance ;
• avant de débloquer l’outil ;
• avant d’effectuer la vérication, le net-
toyage ou l’entretien de la machine ;
• si la machine se met à vibrer de façon
anormale ;
• chaque fois que vous faites passer la
machine de soufeur à aspirateur, et vice
versa.
2. N’utilisez la machine qu’à la lumière du jour ou
sous un bon éclairage articiel.
3. Ne vous penchez pas trop loin et maintenez
constamment une bonne assise et un bon
équilibre.
4. Assurez-vous toujours d’être en position
stable dans les pentes.
5. Ne courez jamais ; marchez.
6. Assurez-vous que toutes les entrées de l’air de
refroidissement ne sont pas obstruées par des
débris.
7. Ne soufez jamais de débris en direction des
personnes.
8. Utilisez la machine dans la position recom-
mandée et sur une surface ferme.
9. N’utilisez pas la machine en hauteur.
10. Ne pointez jamais la buse en direction d’une
personne à proximité lorsque vous utilisez la
machine.
11. Ne bloquez jamais l’entrée d’aspiration et/ou la
sortie du soufeur.
• Prenez garde de ne pas bloquer l’entrée
d’aspiration ou la sortie du soufeur
avec de la poussière ou de la saleté
lorsque vous travaillez dans une zone
poussiéreuse.
• N’utilisez pas de buses autres que celles
fournies par Makita.
•
N’utilisez pas le soufeur pour goner des
ballons, un bateau pneumatique ou autre.
12. N’utilisez pas la machine près de fenêtres
ouvertes, etc.
13. Il est recommandé d’utiliser la machine uni-
quement à des heures raisonnables : pas tôt
le matin ni tard le soir lorsque vous risquez de
déranger les gens.
14.
Il est recommandé de séparer les débris à l’aide
d’un râteau ou d’un balai avant de les soufer.
15. Si la machine heurte un corps étranger ou
démarre en faisant un bruit anormal ou en
vibrant, éteignez-la immédiatement pour l’arrê-
ter. Retirez la batterie de la machine et vériez
l’absence de dommages avant de redémarrer
et d’utiliser la machine. Si la machine est
endommagée, demandez à votre centre de
service après-vente Makita agréé de la réparer.
16.
N’insérez pas les doigts ou d’autres objets dans
l’entrée d’aspiration ou la sortie du soufeur.
17. Évitez les démarrages intempestifs. Assurez-
vous que l’interrupteur est en position d’arrêt
avant d’insérer la batterie, de ramasser ou de
transporter la machine. Transporter la machine
en ayant le doigt sur l’interrupteur ou l’allumer
alors que l’interrupteur est en position de
marche est source d’accidents.
18. Ne soufez ni n’aspirez jamais de matières
dangereuses, comme des clous, des débris de
verre ou des lames.
19. N’utilisez pas la machine à proximité de maté-
riaux inammables.
20. Évitez d’utiliser la machine pendant une
période prolongée dans un environnement à
basse température.
Entretien et rangement
1. Gardez tous les écrous, boulons et vis bien
serrés pour assurer le fonctionnement sûr de
la machine.
2. Si les pièces sont usées ou endommagées,
remplacez-les par des pièces fournies par
Makita.
3. Rangez la machine dans un endroit sec hors
de la portée des enfants.
4. Lorsque vous arrêtez la machine pour ins-
pection, entretien, rangement ou changement
d’accessoire, éteignez-la et assurez-vous
que toutes les pièces mobiles sont parfaite-
ment arrêtées, et retirez la batterie. Laissez
refroidir la machine avant toute intervention.
Entretenez la machine avec soin et gardez-la
propre.

18 FRANÇAIS
5. Laissez toujours refroidir la machine avant de
la ranger.
6. N’exposez pas la machine à la pluie. Rangez la
machine à l’intérieur.
7. Lorsque vous soulevez la machine, assu-
rez-vous de plier les genoux et prenez soin de
ne pas vous blesser le dos.
Utilisation et entretien des outils fonctionnant sur
batterie
1. Rechargez la batterie uniquement avec le char-
geur spécié par le fabricant. Un chargeur qui
est adapté à un type spécique de batterie peut
présenter un risque d’incendie s’il est utilisé avec
un autre type de batterie.
2. Utilisez un outil électrique uniquement avec la
batterie spéciquement indiquée. L’utilisation
de toute autre batterie peut présenter un risque de
blessure et d’incendie.
3.
Lorsque vous n’utilisez pas la batterie, tenez-la
à l’écart des objets métalliques, comme des
trombones, pièces de monnaie, clés, clous, vis
ou autres petits objets métalliques, susceptibles
de créer une connexion entre deux bornes. Court-
circuiter les bornes d’une batterie entre elles peut
provoquer des brûlures ou un incendie.
4. Dans des conditions d’utilisation inadéquate,
il peut y avoir une fuite de l’électrolyte de la
batterie. Le cas échéant, évitez tout contact
avec ce liquide. En cas de contact accidentel,
rincez à l’eau. Si le liquide pénètre dans les
yeux, consultez par ailleurs un médecin. Le
liquide s’échappant de la batterie peut provoquer
une irritation ou des brûlures.
5. N’utilisez pas une batterie ou un outil s’ils sont
endommagés ou modiés. Une batterie endom-
magée ou modiée peut avoir un comportement
imprévisible susceptible d’entraîner un incendie,
une explosion ou des blessures.
6. N’exposez pas la batterie ou l’outil au feu ou à
une température excessive. L’exposition au feu
ou à une température supérieure à 130 °C peut
provoquer une explosion.
7. Respectez toutes les instructions de charge et
ne chargez pas la batterie ou l’outil en dehors
de la plage de température indiquée dans les
instructions. Une charge incorrecte ou à une
température en dehors de la plage indiquée peut
endommager la batterie et augmenter le risque
d’incendie.
Sécurité électrique et sécurité des batteries
1. Ne jetez pas la ou les batteries au feu.
L’élément de la pile pourrait exploser. Consultez
les codes locaux pour de possibles instructions de
mise au rebut spéciales.
2. N’ouvrez ni ne manipulez la ou les batteries.
L’électrolyte qui s’échappe de la batterie est cor-
rosif et peut irriter la peau ou les yeux. Il peut être
toxique en cas d’ingestion.
3. Ne chargez pas la batterie sous la pluie ou
dans un endroit mouillé.
4. Ne pas charger la batterie à l’extérieur.
5. Ne manipulez pas le chargeur, y compris la
che du chargeur et les bornes du chargeur
avec les mains mouillées.
Dépannage
1. Conez la réparation de votre outil électrique à
un réparateur qualié qui utilise des pièces de
rechange identiques. La sécurité de l’outil élec-
trique sera ainsi préservée.
2. Ne dépannez jamais les batteries endomma-
gées. Le dépannage des batteries doit être effec-
tué uniquement par le fabricant ou un dépanneur
agréé.
CONSERVEZ CES
INSTRUCTIONS.
AVERTISSEMENT : NE vous laissez PAS
tromper (au l d’une utilisation répétée) par un
sentiment d’aisance et de familiarité avec le
produit, en négligeant le respect rigoureux des
consignes de sécurité qui accompagnent le pro-
duit en question.
La MAUVAISE UTILISATION de l’outil ou l’igno-
rance des consignes de sécurité indiquées
dans ce mode d’emploi peut entraîner de graves
blessures.
Consignes de sécurité importantes
pour la batterie
1. Avant d’utiliser la batterie, lisez toutes les
instructions et précautions relatives (1) au
chargeur de batterie, (2) à la batterie, et (3) au
produit utilisant la batterie.
2. Ne démontez pas la batterie.
3. Cessez immédiatement l’utilisation si le temps
de fonctionnement devient excessivement
court. Il y a risque de surchauffe, de brûlures,
voire d’explosion.
4. Si l’électrolyte pénètre dans vos yeux, rin-
cez-les à l’eau claire et consultez immédiate-
ment un médecin. Il y a risque de perte de la
vue.
5. Ne court-circuitez pas la batterie :
(1) Ne touchez les bornes avec aucun maté-
riau conducteur.
(2) Évitez de ranger la batterie dans un
conteneur avec d’autres objets métal-
liques, par exemple des clous, des pièces
de monnaie, etc.
(3) N’exposez pas la batterie à l’eau ou à la
pluie.
Un court-circuit de la batterie peut provoquer
une intensité de courant élevée, une sur-
chauffe, parfois des brûlures et même une
panne.
6. Ne rangez pas l’outil et la batterie dans un
endroit où la température risque d’atteindre ou
de dépasser 50 °C.
7. Ne jetez pas la batterie au feu même si elle est
sérieusement endommagée ou complètement
épuisée. La batterie peut exploser au contact
du feu.
8. Évitez de laisser tomber ou de cogner la
batterie.
9. N’utilisez pas la batterie si elle est
endommagée.

19 FRANÇAIS
10. Les batteries au lithium-ion contenues sont
soumises aux exigences de la législation sur
les marchandises dangereuses.
Lors du transport commercial par des tierces
parties ou des transitaires par exemple, des exi-
gences spéciques en matière d’étiquetage et
d’emballage doivent être respectées.
Pour la préparation de l’article expédié, il est
nécessaire de consulter un expert en matériau
dangereux. Veuillez également respecter les
réglementations nationales susceptibles d’être
plus détaillées.
Recouvrez les contacts exposés avec du ruban
adhésif ou du ruban de masquage et emballez la
batterie de telle sorte qu’elle ne puisse pas bouger
dans l’emballage.
11. Lors de la mise au rebut de la batterie, reti-
rez-la de l’outil et jetez-la en lieu sûr. Suivez les
réglementations locales en matière de mise au
rebut des batteries.
12. Utilisez les batteries uniquement avec les
produits spéciés par Makita. L’insertion de
batteries dans des produits non conformes peut
provoquer un incendie, une chaleur excessive,
une explosion ou une fuite de l’électrolyte.
13. Lorsque vous n’utilisez pas l’outil pendant une
période prolongée, la batterie doit être retirée
de l’outil.
CONSERVEZ CES
INSTRUCTIONS.
ATTENTION : N’utilisez que des batteries
Makita d’origine. L’utilisation de batteries de marque
autre que Makita ou de batteries modiées peut pro-
voquer l’explosion des batteries, ce qui présente un
risque d’incendie, de dommages matériels et corpo-
rels. Cela annulera également la garantie Makita pour
l’outil et le chargeur Makita.
Conseils pour assurer la durée
de vie optimale de la batterie
1. Chargez la batterie avant qu’elle ne soit com-
plètement déchargée. Arrêtez toujours l’outil
et rechargez la batterie quand vous remarquez
que la puissance de l’outil diminue.
2. Ne rechargez jamais une batterie complète-
ment chargée. La surcharge réduit la durée de
service de la batterie.
3. Chargez la batterie à une température
ambiante comprise entre 10 °C et 40 °C. Avant
de charger une batterie chaude, laissez-la
refroidir.
4. Rechargez la batterie si elle est restée inutili-
sée pendant une période prolongée (plus de
six mois).
ASSEMBLAGE
ATTENTION : Vériez toujours que la
machine est hors tension et que la batterie est
retirée avant toute intervention dessus.
REMARQUE : Avant de faire fonctionner la
machine, veillez à l’assembler complètement.
Autrement, la machine ne fonctionnera pas.
Assemblage pour le soufage
Pose ou dépose du tube de soufeur
et de la buse
1. Fixez le tube de soufeur à l’unité principale.
Insérez le tube de soufeur dans l’unité principale avec
le boulon tourné vers la gauche comme illustré sur la
gure. Tournez le tube de soufeur comme illustré sur la
gure de sorte que le boulon soit aligné avec le trou sur
l’unité principale, puis serrez fermement le boulon au
moyen de la clé hexagonale.
► Fig.1: 1. Boulon 2. Tube de soufeur
2. Alignez la partie saillante du tube de soufeur
avec la rainure sur la buse d’extrémité, puis xez la
buse d’extrémité sur le tube de soufeur, et enn tour-
nez la buse d’extrémité pour qu’elle se verrouille en
place.
► Fig.2: 1. Buse d’extrémité 2. Tube de soufeur
Pour retirer le tube de soufeur et la buse d’extrémité,
effectuez la procédure de pose en sens inverse.
NOTE : La longueur de la buse peut être modiée en
la déplaçant comme illustré sur la gure.
► Fig.3: 1. Buse d’extrémité 2. Tube de soufeur
Pose ou dépose de la buse plate ou
de la rallonge de buse
Accessoire en option
Fixez la buse plate ou la rallonge de buse sur la buse d’ex-
trémité, puis tournez-la pour qu’elle se verrouille en place.
► Fig.4: 1. Buse plate 2. Rallonge de buse 3. Tuyau
adaptateur
Vous pouvez également xer la buse plate ou la ral-
longe de buse sur le tube de soufeur.
► Fig.5: 1. Buse plate 2. Rallonge de buse 3. Tube
de soufeur
Pour retirer la buse plate et la rallonge de buse, effec-
tuez la procédure de pose en sens inverse.
Fixation de la bandoulière
ATTENTION : Veillez à xer solidement les
crochets de la bandoulière à la machine. Si les
crochets sont mal xés, ils risquent de se dégager et
de provoquer des blessures.
ATTENTION : Veillez à utiliser la bandoulière
conçue spécialement pour cet outil. L’utilisation
d’une autre bandoulière peut entraîner des blessures.

20 FRANÇAIS
Fixez les crochets de la bandoulière sur la machine
comme illustré sur la gure.
► Fig.6: 1. Crochet
La bandoulière est pourvue d’un système de desser-
rage rapide. Il suft d’appuyer sur les côtés de la boucle
pour que la machine se décroche de la bandoulière.
► Fig.7: 1. Boucle
Assemblage pour l’aspiration
Pose ou dépose du tube d’aspiration
et de la buse
Accessoire en option
1. Alignez le repère triangulaire sur le suceur avec
celui sur le tube d’aspiration, puis insérez le suceur
dans le tube d’aspiration jusqu’à ce que le loquet sur le
suceur se verrouille en place.
► Fig.8:
1. Suceur 2. Tube d’aspiration 3. Repère triangulaire
2. Desserrez le boulon sur le couvercle du ventila-
teur au moyen de la clé hexagonale et ouvrez le cou-
vercle du ventilateur.
► Fig.9: 1. Boulon 2. Couvercle du ventilateur 3. Clé
hexagonale
3. Alignez le repère triangulaire sur le tube d’aspira-
tion avec le repère sur l’unité principale, puis xez le
tube d’aspiration sur l’unité principale.
► Fig.10: 1. Tube d’aspiration 2. Triangle 3. repère
4. Tournez le tube d’aspiration dans le sens des
aiguilles d’une montre de sorte que le boulon sur le tube
soit aligné avec le trou sur l’unité principale, puis serrez
fermement le boulon au moyen de la clé hexagonale
pour xer solidement le tube à l’unité principale.
► Fig.11: 1. Tube d’aspiration 2. Boulon
Pour retirer le tube d’aspiration et la buse, effectuez la
procédure de pose en sens inverse.
Pose ou dépose du tube coudé et du
sac à poussière
Accessoire en option
1. Insérez le tube coudé dans le sac à poussière et
serrez la sangle pour xer le tube coudé comme illustré
sur la gure.
► Fig.12: 1. Sac à poussière 2. Tube coudé 3. Sangle
2. Fixez le tube coudé à l’unité principale.
Insérez le tube coudé dans l’unité principale avec le
boulon tourné vers la gauche comme illustré sur la
gure. Tournez le tube coudé comme illustré sur la
gure de sorte que le boulon soit aligné avec le trou sur
l’unité principale, puis serrez fermement le boulon au
moyen de la clé hexagonale.
► Fig.13: 1. Boulon 2. Tube coudé
3. Fixez le crochet du sac à poussière à la bandou-
lière, puis xez les crochets de la bandoulière à l’unité
principale comme illustré sur la gure.
► Fig.14: 1. Crochet
Pour retirer le sac à poussière et le tube coudé, effec-
tuez la procédure de pose en sens inverse.
DESCRIPTION DU
FONCTIONNEMENT
ATTENTION :
Assurez-vous toujours que la
machine est hors tension et que sa batterie est retirée
avant de l’ajuster ou de vérier son fonctionnement.
Insertion ou retrait de la batterie
ATTENTION : Éteignez toujours la machine
avant de mettre en place ou de retirer la batterie.
ATTENTION :
Tenez fermement la machine et la
batterie lors de la mise en place ou du retrait de la batterie.
Si vous ne tenez pas fermement la machine et la batterie, elles
peuvent vous glisser des mains, et s’abîmer ou vous blesser.
ATTENTION : Insérez toujours complètement
la batterie jusqu’à ce que le voyant rouge ne soit
plus visible. Sinon, elle risque de tomber accidentel-
lement de la machine, ce qui peut blesser l’opérateur
ou une autre personne qui se trouve à proximité.
ATTENTION : N’insérez pas la batterie de
force. Si elle ne glisse pas facilement, c’est que vous
ne l’insérez pas correctement.
► Fig.15: 1. Voyant rouge 2. Bouton 3. Batterie
Pour retirer la batterie, faites-la glisser hors de la machine
tout en faisant glisser le bouton à l’avant de la batterie.
Pour mettre en place la batterie, alignez la languette sur la
batterie avec la rainure sur le compartiment et insérez-la.
Insérez-la à fond jusqu’à ce qu’un léger déclic se fasse
entendre. Si le voyant rouge sur le dessus du bouton est
visible, cela signie qu’elle n’est pas bien verrouillée.
Indication de la charge restante de la batterie
Uniquement pour les batteries avec voyant lumineux
► Fig.16: 1. Témoins 2. Bouton de vérication
Appuyez sur le bouton de vérication sur la batterie
pour indiquer la charge restante de la batterie. Les
témoins s’allument pendant quelques secondes.
Témoins Charge
restante
Allumé Éteint Clignotant
75 % à 100 %
50 % à 75 %
25 % à 50 %
0 % à 25 %
Chargez la
batterie.
Anomalie
possible
de la batterie.
Other manuals for DUB363
9
Table of contents
Languages:
Other Makita Blower manuals

Makita
Makita BLOWER 4014NV User manual

Makita
Makita PM7651H User guide

Makita
Makita GSA01 User manual

Makita
Makita DUB184 User manual

Makita
Makita AS001G User manual

Makita
Makita PM001G User manual

Makita
Makita UB141DZ User manual

Makita
Makita UB002C User manual

Makita
Makita BHX2500 User manual

Makita
Makita AS001G User manual

Makita
Makita UB001CZ User manual

Makita
Makita EB7660TH User manual

Makita
Makita UB003C User manual

Makita
Makita BHX2500 Quick start guide

Makita
Makita XGT 40 V Max User manual

Makita
Makita UB001G User manual

Makita
Makita 4014N User manual

Makita
Makita DUB143 User manual

Makita
Makita UB120D User manual

Makita
Makita DUB183 User manual