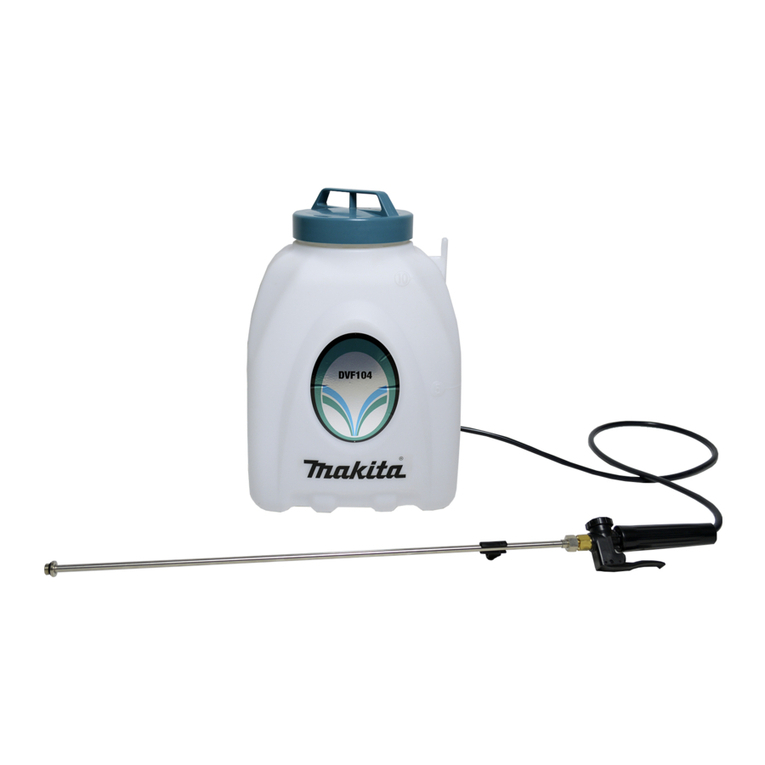
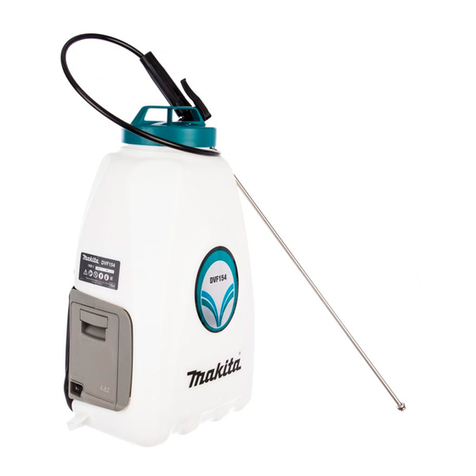
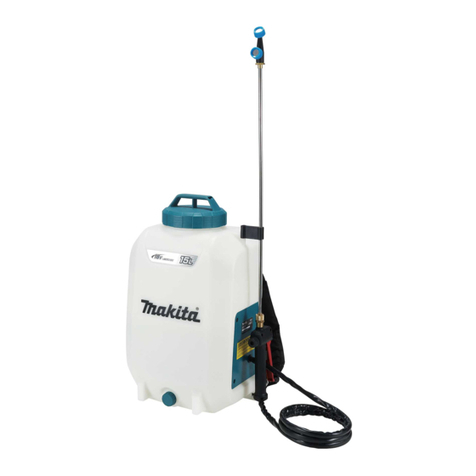
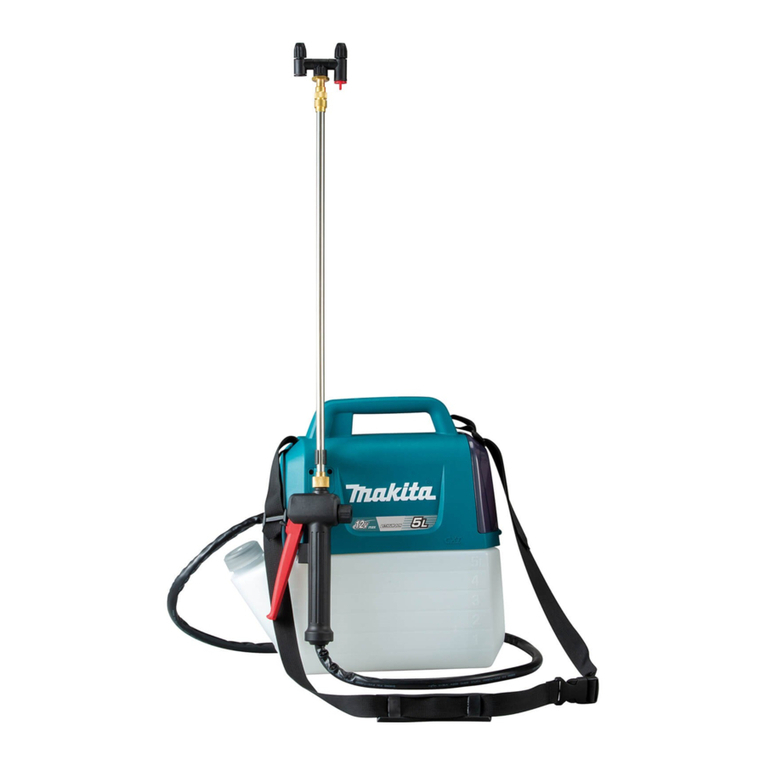
Makita DVF104 User manual

EN Cordless Garden Sprayer Instruction manual
ZHCN 充电式喷雾器 使用说明书
ID
Mesin Semprotan Kebun Nirkabel
Petunjuk penggunaan
VI Maùy Phun Thuoác Baûo Veä Thöïc Taøi lieäu höôùng daãn
Vaät Ñeo Vai Hoaït Ñoäng Baèng Pin
TH
DVF104
DVF154
010131

2
1012664 2015676
3010133
1
2
3
4
5
6
7
89

3
4014444
5010143 6010137
DVF104
DVF154
10
11
11
12
A
B
C

4
7010135 8010136
9010138 10 010144
11 010139 12 010140
13 010141 14 010142
13
14
15
15
16
17
18
19
20
21

5
15 010145
22

6
ENGLISH (Original instructions)
Explanation of general view
SPECIFICATIONS
1. Red indicator
2. Button
3. Battery cartridge
4. Battery pack cover
5. Indicator lamps
6. C eck button
7. Spray pipe
8. Lever cock
9. Nozzle
10. Pass t e belt part of t e back
strap t roug t e slot on t e
sprayer.
11. Clip on back strap ooks
12. Switc
13. Buckle
14. Lift up buckle
15. Pull
16. Water absorption strainer
17. Lever cock cap
18. Strainer
19. Spray pipe older
20. Hooking older onto post on
s oulder of tank
21. Hooking older onto metal ring of
back strap
22. Insert water ose ere
Model DVF104 DVF154
Pump type Ceramic gear system
C emical tank capacity 10L 15L
Tank drain Wit out Wit
Spray valve Integral grip lever
Dimension (W X L X H) 315 mm x 225 mm x 415 mm 345 mm x 235 mm x 525 mm
Net weig t 3.8 kg 4.1 kg
Performance
Maximum pressure 0.3 Mpa
Disc arge
Uprig t double-
eaded nozzle 0.8 L / min.
Wide-angle
erbicide nozzle 1.3 L / min.
Continuous
work time
Battery
BL1815
Uprig t double-
eaded nozzle 60 min.
Wide-angle
erbicide nozzle 90 min.
Battery
BL1815N
Uprig t double-
eaded nozzle 73 min.
Wide-angle
erbicide nozzle 101 min.
Battery
BL1820/
BL1820B
Uprig t double-
eaded nozzle 81 min.
Wide-angle
erbicide nozzle 130 min.
Battery
BL1830/
BL1830B
Uprig t double-
eaded nozzle 125 min.
Wide-angle
erbicide nozzle 200 min.
Battery
BL1840/
BL1840B
Uprig t double-
eaded nozzle 184 min.
Wide-angle
erbicide nozzle 268 min.
Battery
BL1850/
BL1850B
Uprig t double-
eaded nozzle 225 min.
Wide-angle
erbicide nozzle 328 min.
Battery
BL1860B
Uprig t double-
eaded nozzle 272 min.
Wide-angle
erbicide nozzle 396 min.
Rated voltage D.C. 18 V D.C. 18 V

7
• Due to our continuing program of researc and development, t e specifications erein are subject to c ange wit out
notice.
• Specifications and battery cartridge may differ from country to country.
• Weig t, wit battery cartridge, according to EPTA-Procedure 01/2003
Symbols END007-4
T e following s ow t e symbols used for t e equipment.
Be sure t at you understand t eir meaning before use.
............. Read instruction manual.
............. Do not use in rain.
............. Wear protective mask.
............. Wear protective gloves.
Intended use ENE071-1
T e tool is intended for spraying agricultural and
orticultural c emicals for pest and weed control.
General Po er Tool Safety
Warnings GEA006-2
WARNING Read all safety warnings and all
instructions. Failure to follow t e warnings and
instructions may result in electric s ock, fire and/or
serious injury.
Save all arnings and
instructions for future reference.
T e term “power tool” in t e warnings refers to your
mains-operated (corded) power tool or battery-operated
(cordless) power tool.
Work area safety
1. Keep work area clean and well lit. Cluttered or dark
areas invite accidents.
2. o not operate power tools in explosive
atmospheres, such as in the presence of
flammable liquids, gases or dust. Power tools
create sparks w ic may ignite t e dust or fumes.
3. Keep children and bystanders away while
operating a power tool. Distractions can cause you
to lose control.
Electrical safety
4. Power tool plugs must match the outlet. Never
modify the plug in any way. o not use any
adapter plugs with earthed (grounded) power
tools. Unmodified plugs and matc ing outlets will
reduce risk of electric s ock.
5. Avoid body contact with earthed or grounded
surfaces such as pipes, radiators, ranges and
refrigerators. T ere is an increased risk of electric
s ock if your body is eart ed or grounded.
6. o not expose power tools to rain or wet
conditions. Water entering a power tool will increase
t e risk of electric s ock.
7. o not abuse the cord. Never use the cord for
carrying, pulling or unplugging the power tool.
Keep cord away from heat, oil, sharp edges or
moving parts. Damaged or entangled cords increase
t e risk of electric s ock.
8. When operating a power tool outdoors, use an
extension cord suitable for outdoor use. Use of a
cord suitable for outdoor use reduces t e risk of
electric s ock.
9. If operating a power tool in a damp location is
unavoidable, use a ground fault circuit interrupter
(GFCI) protected supply. Use of an GFCI reduces
t e risk of electric s ock.
Personal safety
10. Stay alert, watch what you are doing and use
common sense when operating a power tool. o
not use a power tool while you are tired or under
the influence of drugs, alcohol or medication. A
moment of inattention w ile operating power tools
may result in serious personal injury.
11. Use personal protective equipment. Always wear
eye protection. Protective equipment suc as dust
mask, non-skid safety s oes, ard at, or earing
protection used for appropriate conditions will reduce
personal injuries.
12. Prevent unintentional starting. Ensure the switch
is in the off-position before connecting to power
source and/or battery pack, picking up or carrying
the tool. Carrying power tools wit your finger on t e
switc or energising power tools t at ave t e switc
on invites accidents.
13. Remove any adjusting key or wrench before
turning the power tool on. A wrenc or a key left
attac ed to a rotating part of t e power tool may result
in personal injury.
14. o not overreach. Keep proper footing and
balance at all times. T is enables better control of
t e power tool in unexpected situations.
15. ress properly. o not wear loose clothing or
jewellery. Keep your hair, clothing, and gloves
away from moving parts. Loose clot es, jewellery or
long air can be caug t in moving parts.
16. If devices are provided for the connection of dust
extraction and collection facilities, ensure these
are connected and properly used. Use of dust
collection can reduce dust-related azards.
Power tool use and care
17. o not force the power tool. Use the correct power
tool for your application. T e correct power tool will
do t e job better and safer at t e rate for w ic it was
designed.
18. o not use the power tool if the switch does not
turn it on and off. Any power tool t at cannot be
controlled wit t e switc is dangerous and must be
repaired.

8
19. isconnect the plug from the power source and/or
the battery pack from the power tool before
making any adjustments, changing accessories,
or storing power tools. Suc preventive safety
measures reduce t e risk of starting t e power tool
accidentally.
20. Store idle power tools out of the reach of children
and do not allow persons unfamiliar with the
power tool or these instructions to operate the
power tool. Power tools are dangerous in t e ands
of untrained users.
21. Maintain power tools. Check for misalignment or
binding of moving parts, breakage of parts and
any other condition that may affect the power
tool’s operation. If damaged, have the power tool
repaired before use. Many accidents are caused by
poorly maintained power tools.
22. Keep cutting tools sharp and clean. Properly
maintained cutting tools wit s arp cutting edges are
less likely to bind and are easier to control.
23. Use the power tool, accessories and tool bits etc.
in accordance with these instructions, taking into
account the working conditions and the work to
be performed. Use of t e power tool for operations
different from t ose intended could result in a
azardous situation.
Battery tool use and care
24. Recharge only with the charger specified by the
manufacturer. A c arger t at is suitable for one type
of battery pack may create a risk of fire w en used
wit anot er battery pack.
25. Use power tools only with specifically designated
battery packs. Use of any ot er battery packs may
create a risk of injury and fire.
26. When battery pack is not in use, keep it away from
other metal objects, like paper clips, coins, keys,
nails, screws or other small metal objects, that
can make a connection from one terminal to
another. S orting t e battery terminals toget er may
cause burns or a fire.
27. Under abusive conditions, liquid may be ejected
from the battery; avoid contact. If contact
accidentally occurs, flush with water. If liquid
contacts eyes, additionally seek medical help.
Liquid ejected from t e battery may cause irritation or
burns.
Service
28. Have your power tool serviced by a qualified
repair person using only identical replacement
parts. T is will ensure t at t e safety of t e power tool
is maintained.
29. Follow instruction for lubricating and changing
accessories.
30. Keep handles dry, clean and free from oil and
grease.
SPRAYER SAFETY WARNINGS
GEB044-4
Safety Warnings for Spraying Operation:
1. o not use the sprayer for any other purpose than
spraying agricultural and horticultural chemicals
for pest and weed control.
2. o not use the sprayer for spraying flammable
materials.
3. Be aware of any hazards presented by the material
being sprayed. Consult the markings on the
container or the information supplied by the
manufacturer of the material to be sprayed.
4. o not spray any material where the hazard is not
known.
5. Concerning the use of chemical sprays, be sure to
thoroughly read the chemical instructions, in
order to become fully acquainted with toxicities
and usage methods.
6. If chemical comes into contact with skin,
immediately wash thoroughly with soap.
7. Firmly close chemical tank lid to prevent leaking.
8. Never transfer chemical to another container.
9. Always thoroughly wash empty chemical
containers when mixing spray liquid and then
follow chemical manufacturer’s instructions to
correctly dispose of containers at all times.
10. Before using the sprayer, be sure to check there
are no abnormalities, such as displacement of
packing from connector, looseness of screws,
missing components, and/or cracked/worn/
damaged hose.
Using an incomplete sprayer may cause an accident
and/or injury.
11. People not involved in spraying should refrain
from approaching the worksite during spraying.
12. When transporting a chemical-loaded sprayer by
vehicle, there is a risk of leaking, so always firmly
tighten the chemical tank lid, and secure the
sprayer in an upright position.
13. Never use items such as strongly acidic
chemicals, paints, thinners, gasoline or benzene
with the sprayer, as there is a danger of burns or
fire.
14. o not clean the sprayer with flammable solvents.
15. Be sure to select the appropriate chemical (taking
into consideration usage method and
effectiveness) to deal with the pest or weed in
question.
16. An inappropriately mixed chemical may harm
humans as well as damage crops/plants. When
mixing chemical, thoroughly read chemical
instructions, and dilute chemical correctly prior to
use.
17. Always mix chemical before loading it into tank.
18. To prevent inhalation and/or contact with
chemical, be sure to wear safety clothing (hat,
protective goggles, protective mask, rubber
gloves, long-sleeved pest-control jacket, long
trousers and gumboots), so that skin is not
exposed when spraying.
19. Always load the tank with chemical or clean water
when operating the sprayer, as operating the

9
sprayer with an empty tank may damage the
pump.
20. If the sprayer stops running, or an abnormal
sound is emitted, immediately switch OFF the
sprayer, and discontinue use.
21. Constantly be aware of wind direction while
spraying, to ensure spraying from upwind to
downwind, in order to prevent direct chemical
contact with body. Also, be careful to keep
chemical from reaching surroundings, and stop
using the sprayer when the wind is strong.
22. As there is a risk of chemical poisoning when
spraying in a greenhouse, always ventilate while
spraying.
23. Avoid spraying when atmospheric temperature is
high.
24. Avoid prolonged operation of sprayer. Whenever
possible, rotate operators.
25. If even a slight headache or dizziness, etc.,
occurs, stop spraying work immediately, and
consult a doctor. Moreover, be sure to clearly
inform the doctor of the name of the agrochemical
being used, and the operating circumstances.
26. In cases where spray status deteriorates and
nozzle needs cleaning, there is a risk of the
chemical liquid coming into contact with the face,
so be sure to switch OFF the sprayer, and then
remove the nozzle to clean.
27. Be sure to dispose of wastewater generated from
washing used containers and chemical tank
appropriately in a location where it will not flow
into rivers and streams and/or contaminate
groundwater.
28. After spraying, if chemical remains in the chemical
tank, spray hose, spray pipe and nozzle, it may
cause spray injury. Be sure to fully wash away
residual chemical with clean water - in particular,
after spraying with herbicide.
29. Keep agrochemicals away from children. Be sure
to store residual chemicals in chemical-
designated storage containers.
30. After completion of spraying, be sure to wash
(spray wash) equipment with clean water, drain off
the washing water, and store indoors away from
direct sunlight and freezing temperatures, and out
of reach of children.
31. After completion of spraying, be sure to
thoroughly wash entire body with soap, rinse
eyes, and gargle. uring spraying period, change
clothes daily.
SAVE THESE INSTRUCTIONS.
WARNING:
O NOT let comfort or familiarity with product (gained
from repeated use) replace strict adherence to safety
rules for the subject product. MISUSE or failure to
follow the safety rules stated in this instruction
manual may cause serious personal injury.
IMPORTANT SAFETY
INSTRUCTIONS ENC007-11
FOR BATTERY CARTRIDGE
1. Before using battery cartridge, read all
instructions and cautionary markings on (1)
battery charger, (2) battery, and (3) product using
battery.
2. o not disassemble battery cartridge.
3. If operating time has become excessively shorter,
stop operating immediately. It may result in a risk
of overheating, possible burns and even an
explosion.
4. If electrolyte gets into your eyes, rinse them out
with clear water and seek medical attention right
away. It may result in loss of your eyesight.
5. o not short the battery cartridge:
(1) o not touch the terminals with any
conductive material.
(2) Avoid storing battery cartridge in a container
with other metal objects such as nails, coins,
etc.
(3) o not expose battery cartridge to water or
rain.
A battery short can cause a large current flow,
overheating, possible burns and even a
breakdown.
6. o not store the tool and battery cartridge in
locations where the temperature may reach or
exceed 50°C (122°F).
7. o not incinerate the battery cartridge even if it is
severely damaged or is completely worn out. The
battery cartridge can explode in a fire.
8. Be careful not to drop or strike battery.
9. o not use a damaged battery.
10. The contained lithium-ion-batteries are subject to
the angerous Goods Legislation requirements.
For commercial transports e.g. by t ird parties,
forwarding agents, special requirement on packaging
and labeling must be observed.
For preparation of t e item being s ipped, consulting
an expert for azardous material is required. Please
also observe possibly more detailed national
regulations.
Tape or mask off open contacts and pack up t e
battery in suc a manner t at it cannot move around in
t e packaging.
11. Follow your local regulations relating to disposal
of battery.
SAVE THESE INSTRUCTIONS.
CAUTION: Only use genuine Makita batteries.
Use of non-genuine Makita batteries, or batteries t at
ave been altered, may result in t e battery bursting
causing fires, personal injury and damage. It will also void
t e Makita warranty for t e Makita tool and c arger.
Tips for maintaining maximum battery life
1. Charge the battery cartridge before completely
discharged.

10
Always stop tool operation and charge the battery
cartridge when you notice less tool power.
2. Never recharge a fully charged battery cartridge.
Overcharging shortens the battery service life.
3. Charge the battery cartridge with room
temperature at 10°C - 40°C (50°F - 104°F). Let a hot
battery cartridge cool down before charging it.
4. Charge the battery cartridge if you do not use it for
a long period (more than six months).
FUNCTIONAL DESCRIPTION
CAUTION:
• Always be sure t at t e tool is switc ed off and t e
battery cartridge is removed before adjusting or
c ecking function on t e tool.
Installing or remo ing battery cartridge
(Fig. 1)
• Open Sprayer’s battery pack cover.
• Always switc off t e tool before insertion or removal of
t e battery cartridge.
• To remove t e battery cartridge, wit draw it from t e
tool w ile sliding t e button on t e front of t e cartridge.
• To insert t e battery cartridge, align t e tongue on t e
battery cartridge wit t e groove in t e ousing and slip
it into place. Always insert it all t e way until it locks in
place wit a little click. If you can see t e red part on
t e upper side of t e button, it is not locked completely.
Insert it fully until t e red part cannot be seen. If not, it
may accidentally fall out of t e tool, causing injury to
you or someone around you.
• Do not use force w en inserting t e battery cartridge. If
t e cartridge does not slide in easily, it is not being
inserted correctly.
Indicating the remaining battery capacity
(Only for battery cartridges wit “B” at t e end of t e
model number.) (Fig. 2)
Press t e c eck button on t e battery cartridge to indicate
t e remaining battery capacity. T e indicator lamps lig t
up for few seconds.
015658
NOTE:
• Depending on t e conditions of use and t e ambient
temperature, t e indication may differ slig tly from t e
actual capacity.
ASSEMBLY
CAUTION:
• Always be sure t at t e tool is switc ed off and t e
battery cartridge is removed before carrying out any
work on t e tool.
Spray pipe and nozzle assembly method
(Fig. 3)
• As s own in t e diagram, assemble spray pipe and
t en nozzle onto lever cock.
• Adjust direction of nozzle using nut on spray pipe.
• Firmly attac components to ensure t ere is no leaking.
• Select nozzle according to type of spraying to be done.
NOTE:
• All connector units use packing. Before assembly,
always c eck to see t at t e units ave packing.
• C eck to make sure t at t e spray ose is not cracked,
worn and/or damaged.
• Firmly tig ten on t e spray pipe to prevent liquid leaks.
• If t ere is a leak from a connector unit, tig ten furt er
using a and tool (by approximately 45 degrees).
• Do not use a spray pipe t at is longer t an t e standard
one provided. Doing so may cause leaking from
connector units.
Back strap attaching method (Fig. 4)
Use t e diagram pointers to attac t e back strap at top
and bottom, making sure t ere are no twists in t e strap.
NOTE:
• C eck to make sure t at back strap is securely
attac ed to c emical tank.
OPERATION
CAUTION:
• Before inserting t e battery cartridge into t e tool,
always c eck to see t at t e tool is switc ed off.
Spraying
CAUTION:
• To prevent sudden spraying, be sure to set t e lever
cock to STOP, before turning sprayer switc ON or
OFF.
• W en spray work is interrupted, be sure to turn switc
OFF, to prevent inadvertent spraying. (Fig. 5)
Be sure to c eck t e situation of surroundings before
turning sprayer switc ON.
Operate lever cock to spray.
Once spraying is complete, immediately set lever cock to
STOP, and t en turn sprayer switc OFF.
How to use le er cock (Fig. 6)
1. Position “A” is t e STOP position.
2. Position “B” is t e spray position. Release t e lever,
and it will return to position “A” and spraying will stop.
(Intermittent spraying)
Indicator lamps
Remaining
capacity
Lig ted Off Blinking
75% to 100%
50% to 75%
25% to 50%
0% to 25%
C arge t e
battery.
T e battery may
ave
malfunctioned.

11
3. Position “C” is t e continuous spray position.
(Continuous spraying)
NOTE:
• C eck to make sure t e tank is loaded wit c emical or
clean water w en operating t e sprayer, as continued
operation of t e sprayer wit an empty tank may burn
out t e pump.
• Running t e sprayer for prolonged periods wit t e
lever cock closed may ave an adverse effect on t e
pump as well as drain t e battery. Be sure to turn
sprayer switc OFF w enever possible.
• If spray splutters, or pumps suddenly screec es, t e
c emical tank is empty, so immediately turn sprayer
switc OFF.
• Do not spray wit t e battery cover open and/or wit
t e back-support cus ioning removed, as t ere is a risk
of damage to electrical system. Moreover, do not spray
pointing t e spray nozzle at t e sprayer.
• Do not forcibly andle t e lever cock and/or t e spray
pipe.
Mixing chemical
CAUTION:
• Never use Kelt ane water dispersible powder
(acaricide) because it tends to arden due to eat
generated by pump during operation, w ic causes t e
pump to stop. Use a Kelt ane emulsion, Akar emulsion
or Osadan water dispersible powder as t e acaricide.
• W en using a water dispersible powder or lime sulfur,
be sure to dissolve well prior to use.
• Take maximum care w en andling c emicals. Was
away t oroug ly if c emical comes into contact wit
body.
• C emicals are armful. Always ad ere to c emical
manufacturer instructions w en andling c emicals.
• See t e following c art for ratio information t at is
useful w en diluting c emicals.
• Never spray c emicals undiluted.
• W en using a water dispersible powder, etc., dissolve
t oroug ly in a container suc as a bucket.
012665
Chemical replenishment
WARNING:
• W en c anging c emical, be sure to carefully was t e
tank, pump, and nozzle, etc. wit clean water. Residue
of t e previous c emical may cause a spray injury.
Moreover, if c emicals mix, a c emical c ange may
occur, wit t e danger of generating a toxic gas.
• Be sure to wear protective gloves.
• Do not c ange c emical in poorly ventilated locale.
(prevent c emical poisoning)
C eck to make sure t e sprayer switc is OFF and
replenis c emical tank wit mixed c emical.
W en filling tank wit c emical, always strain c emical
t roug equipped tank strainer.
T e side of t e c emical tank is marked wit scale
divisions, so be sure to use t ese as operation guidelines.
Firmly tig ten c emical tank lid to prevent leaking.
Back strap adjustment
Adjust back strap to a lengt t at brings t e sprayer as
close to t e body as feasibly possible.
Lengthening strap
(1) Lift up buckle.
(2) Pull t e belt on t e side connected to t e sprayer.
(Fig. 7)
Shortening strap
Pull t e belt on t e free side. (Fig. 8)
NOTE:
W en s ortening t e strap, it will move relatively easily if
t ere is no weig t exerted on t e strap.
MAINTENANCE
CAUTION:
• Always be sure t at t e tool is switc ed off and t e
battery cartridge is removed before attempting to
perform inspection or maintenance.
• For inspection and maintenance, always wear
protective gloves.
• Never use gasoline, benzine, t inner, alco ol or t e
like. Discoloration, deformation or cracks may result.
After-use maintenance
• After use, remove residual liquid from c emical tank,
and was away clinging c emical from inside of tank
using clean water.
• Now fill up c emical tank wit clean water and run t e
sprayer for 2 to 3 minutes to was out residual
c emical from t e pump, ose, and nozzle, etc.
• Remove t e residual liquid from inside t e c emical
tank, restart t e pump, and run t e sprayer until
residual liquid ceases to come out of t e nozzle, and
t en turn sprayer switc OFF.
• Wipe away moisture and dirt from equipment, and t en
c eck for damage and leaks.
Daily checks
• Before work, c eck to see w et er or not fastened
units are loose and components are missing.
• C eck to make sure t e spray ose is not cracked,
worn and/or damaged.
• After use, always be sure to wipe dirt off of exterior, and
to c eck for damage and/or leaks.
Cleaning water absorption strainer
(Fig. 9)
After removing c emical from tank, remove t e water
absorption strainer at t e bottom of t e tank, and clean it.
Cleaning le er cock strainer (Fig. 10)
Remove lever cock cap and clean strainer.
Chemical Dilution ratio
Water 500 1,000 2,000
4 8 m 4 m 2 m
6 12 m 6 m 3 m
8 16 m 8 m 4 m
10 20 m 10 m 5 m
12 24 m 12 m 6 m
15 30 m 15 m 7.5 m

12
NOTE:
Water absorption strainer
• T is is a filter used to prevent dirt and dust (t at for
some reason as got passed t e tank strainer into t e
tank) from getting into t e pump. If t e water absorption
strainer becomes blocked, spraying will deteriorate,
and t ere is a risk of t e pump being adversely
affected.
Lever cock strainer
• Spraying deteriorates if t e lever cock strainer
becomes blocked.
Sprayer storage
• Was t e equipment using t e after-use maintenance
procedures.
• In particular, w en storing during t e winter season,
breakdown or damage may occur due to freezing of
residual c emical and/or was ing water in t e pump.
Run t e pump until all residual liquid as exited from
t e nozzle, c eck to make sure t ere is no more
residual liquid, turn t e sprayer switc OFF, and t en
store t e sprayer away.
CAUTION:
Store t e Garden Sprayer out of reac of c ildren, in an
indoor locale t at does not freeze, is away from direct
sunlig t, and as good ventilation.
- Take full care in storing t e sprayer, as, in some cases,
t e plastic components will deteriorate markedly if left
in direct sunlig t for a prolonged period; moreover,
product caution labels will discolor and/or come off.
Useful Tips
Spray pipe holder
Be sure to attac t e older in t e rig t direction. (Fig. 11)
NOTE:
• For configuration reasons, force is required in t e
attac ing process, but care s ould be taken not to
bend t e spray pipe.
Use t e older w en taking a rest, replenis ing c emical
liquid, and at times of storage, etc. (Fig. 12)
For Model VF154 only (Fig. 13)
Chemical tank holder post (Fig. 14)
T e older post also serves as a temporary older for t e
c emical tank lid, so please ook it onto t is post.
Tank strainer
Hands can be freed up by inserting t e water ose in t e
useful notc ed section of t e tank strainer. (Fig. 15)
Main plant diseases and pests
Always ad ere to c emical manufacturer instructions
w en andling c emicals.T oroug ly dissolve c emical
prior to use.
What to do if you think there is a
breakdown
Before asking for repairs, first, conduct your own
inspection. If you find a problem t at is not explained in
t e manual, do not ras ly dismantle t e sprayer. Instead,
ask Makita Aut orized Service Centers, always using
Makita replacement parts.

13
010146
To maintain product SAFETY and RELIABILITY, repairs,
any ot er maintenance or adjustment s ould be
performed by Makita Aut orized Service Centers, always
using Makita replacement parts.
OPTIONAL ACCESSORIES
CAUTION:
• T ese accessories or attac ments are recommended
for use wit your Makita tool specified in t is manual.
T e use of any ot er accessories or attac ments mig t
present a risk of injury to persons. Only use accessory
or attac ment for its stated purpose.
If you need any assistance for more details regarding
t ese accessories, ask your local Makita Service Center.
• Various nozzles
• Makita genuine battery and c arger
NOTE:
• Some items in t e list may be included in t e tool
package as standard accessories. T ey may differ from
country to country.
Malfunction status Cause Action
Motor (pump) will not work
Switc OFF T e switc is OFF Turn switc ON
Switc ON
Battery problem (under
voltage)
Rec arge
If rec arging is not effective,
replace battery.
Wiring connector is
disconnected Request an over aul
Wiring break Request an over aul
Switc breakdown Request an over aul
Motor breakdown Request an over aul
Blown fuse Request an over aul
Pump is working but spray is not coming out
Blocked nozzle Clean or replace
No liquid in c emical tank Replenis
C emical tank lid’s blow ole is
blocked Clean
Blocked piping Request an over aul
Broken or cracked piping Request an over aul
Disconnected or broken piping Request an over aul
Blocked water absorption
strainer Remove and clean
Sprayer sprays but is abnormal or spray pressure is
weak
C emical tank lid’s blow ole is
blocked Clean
Blocked piping Request an over aul
Broken or cracked piping Request an over aul
Disconnected or broken piping Request an over aul
Blocked water absorption
strainer Remove and clean
Blocked lever cock strainer Remove and clean
Abnormal pressure regulator Request an over aul
Worn gear case Request an over aul
A strange sound is emitted w en switc is turned ON
Coupling t at drives pump is
broken Request an over aul
Blocked nozzle Clean or replace
W en sprayer is left after being switc ed OFF, a large
amount of liquid flows out of t e nozzle
Lever cock is set to continuous
spray Set lever cock to STOP

14
简体中文 (原厂指导手册)
总图说明
规格
1. 红色指示灯
2. 按钮
3. 电池套管
4. 电池组盖
5. 指示灯
6. 检查按钮
7. 喷雾管道
8. 杠杆 塞
9. 喷嘴
10.将背带的皮带部分穿过喷
雾器槽。
11.夹在背带上
12.开关
13.搭扣
14.提起搭扣
15.拉
16.吸水过滤器
17.杠杆 塞盖
18.过滤器
19.喷雾管道固定器
20.将固定器挂在水箱肩部的
支柱上
21.将固定器挂在背带的金属
环上
22.在此处插入水软管
型号 DVF104 DVF154
泵类型 陶瓷齿轮系统
化学品箱容量 10L 15L
水箱排放 不带 带
喷雾阀 一体式握把杆
尺寸 (W X L X H)
315 mm x 225 mm x 415 mm 345 mm x 235 mm x 525 mm
净重 3.8 kg 4.1 kg
性能
最大压力 0.3 Mpa
排放 直立双头喷嘴 0.8 L / min.
广角除草剂喷嘴 1.3 L / min.
连续
工作
时间
电池
BL1815
直立双头喷嘴 60 min.
广角除草剂喷嘴 90 min.
电池
BL1815N
直立双头喷嘴 73 min.
广角除草剂喷嘴 101 min.
电池
BL1820/
BL1820B
直立双头喷嘴 81 min.
广角除草剂喷嘴 130 min.
电池
BL1830/
BL1830B
直立双头喷嘴 125 min.
广角除草剂喷嘴 200 min.
电池
BL1840/
BL1840B
直立双头喷嘴 184 min.
广角除草剂喷嘴 268 min.
电池
BL1850/
BL1850B
直立双头喷嘴 225 min.
广角除草剂喷嘴 328 min.
电池
BL1860B
直立双头喷嘴 272 min.
广角除草剂喷嘴 396 min.
额定电压 D.C. 18 V D.C. 18 V

15
•鉴于我司将持续实施研发计划,此处规格如有变更,恕不另行通知。
•本产品在各个国家的规格和电池套管可能有所不同。
•本产品 (带电池套管)的重量符合 EPTA-01/2003 规程的标准
符号 END007-4
下列所示为用于设备的符号。请确保在使用
前理解各个符号的含义。
............ 请阅读操作手册。
............ 请勿雨中使用。
............ 请戴好防护面罩。
............ 请戴好防护手套。
设计用途 ENE071-1
该工具用于喷洒农业和园艺化学品,用于害
虫和杂草控制。
电动工具一般安全警告
GEA006-2
警告 请仔细阅读所有的安全警告和操作指
示。违反这些警告和指示可能导致触电、火
灾和 / 或严重的人身伤害事故。
请妥善保存所有的警告和操
作指示以备日后参考。
在该警告中的 “电动工具”是指电网电源供
电 (接电源线)的电动工具或电池驱动 (充
电式)电动工具。
工作区域安全
1. 保持工作区域 净,照明良好。杂乱或
黑暗的工作场所容易引发事故。
2. 不得在有爆炸性危险的环境 (如存在易
燃液体、气体和粉尘)中使用电动工具。
操作电动工具时会产生火花,而这可能
引燃粉尘或烟雾。
3. 操作电动工具时,请让儿童和旁观者远
离工作区域。注意力分散可能导致操作
失控。
电气安全
4. 电动工具的插头必须与插座相匹配。切
勿以任何方式对插头进行改装。转接插
头不得和接了地线的电动工具一起使用。
未经改动的插头和相匹配的插座有利于
减少电击危险。
5. 避免身体与接地的物体接触,如水管、
散热器、电炉和电冰箱等。如果您的身
体接地 ,会增加电击的危险。
6. 不得将电动工具暴露在雨中或湿的环境
中。如果有水进入电动工具将增加电击
的危险。
7. 请勿不当使用电线。切勿用导线拖携工
具或拔下电动工具的插头。将电线保存
在远离高温、油垢、锐边或移动部件之
处。损坏或缠绕的电线会增加电击危险。
8. 当在户外操作电动工具时,只能使用合
适的户外专用延长电线。使用合适的户
外专用电线将减少电击危险。
9. 如果不能避免在潮湿的环境中使用电动
工具,请使用随供的漏电保护器
(GFCI)。使用 GFCI 可减少电击危险。
人身安全
10. 操作电动工具时请保持警惕,注意您的
操作并运用常识。疲惫、饮酒或服用毒
品、药物之后,切勿操作电动工具。使
用电动工具时只要稍微分心便可能导致
严重的人身伤害事故。
11. 请使用个人劳防用品。总是佩戴护目镜。
根据使用情况穿戴合适的防护装备,例
如防尘面罩、止滑工作鞋、安全帽或耳
罩,可降低人身伤害事故发生的几率。
12. 防止意外启动。在连接电源和 / 或电池
组、拿起或搬运工具之前,请确保开关
处于关闭位置。如果在提携电动工具时,
您的手指触碰 开关,或连接电源时,
开关仍然处于启动位置,都可能引发意
外事故。
13. 电动工具开机前,除去任何调节工具或
扳手。电动工具的 转部件上如果还插
有扳手或调节工具可能会导致人身伤害。
14. 避免错误的持机姿势。务必站稳并始终
保持平衡。正确的操作姿势能够帮助您
在突发状况下及时控制住电动工具。
15. 合理着装。请勿穿戴宽松的衣服或佩戴
首饰。保持头发、衣服、手套等远离移

16
动机件。宽松的衣服、首饰或长头发可
能会被卡入移动机件中。
16. 如果设备能连接除尘或集尘装置,确保
这些装置已经连接并被正确使用。使用
集尘装置可减少尘屑相关的危害。
电动工具使用和保养
17. 不要滥用电动工具。根据应用情况选择
适合的电动工具。正确地选用电动工具
可以在规定的功率范围中,更有效率更
安全的操作机器。
18. 不要使用开关故障的电动工具。如果无
法正常操控起停开关,极容易在操作机
器时产生意外,必须进行修理。
19. 在调整机器设置、更换配件或存放电动
工具前,必须先断开插头与电源的连接
和/或从电动工具中取出电池组。这些
预防性的安全措施能减少意外启动电动
工具的危险。
20. 将不用的电动工具保存在儿童接触不到
的地方。禁止不熟悉电动工具或这些操
作说明的人员使用电动工具。未经训练
的人员操作电动工具是危险的行为。
21. 保养电动工具。检查运动部件是否有偏
差或粘连,部件是否破损,以及其它可
能会影响工具运行的情况。如有损坏,
使用前需修理毕。很多事故都是由于
没有对电动工具进行很好维护造成的。
22. 切割工具必须保持锋利和清洁。经过细
心保养且刀刃锋利的切割工具不易被夹
住,并较容易操作。
23. 使用电动工具、配件和刀头等时应考虑
工作条件和要进行工作的性质,遵循相
应的操作指示。将电动工具用于既定用
途以外的目的时,可能会导致危险。
电池工具使用和保养
24. 仅使用制造商指定的充电器进行充电。
适用于一种类型电池组的充电器如果用
于其他电池组可能会引起火灾危险。
25. 使用电动工具时仅使用指定的电池组。
使用任何其他电池组可能会引起人身伤
害或火灾危险。
26. 当电池组未用时,请将其保存在远离金
属物品之处,如回形针、硬币、钥匙、
钉子、螺丝或其他小金属物体等。这些
物体可能会将电池的两个端子连在一起。
短接电池端子可能会引起爆炸或火灾。
27. 如果使用不当可能从电池渗出液体。避
免接触此类流动物体。如果意外接触到
电池漏液,请用水冲洗。如果上述液体
侵入眼睛必须即刻就医。从电池流出的
液体会刺激或灼伤皮肤。
维修
28. 电动工具只能由有相关资质的维修人员
进行修理,修理时只能使用原厂零配件。
唯有如此才能确保电动工具的安全性。
29. 按照要求对配件进行润滑和更换。
30. 保持手柄燥、清洁,避免油、脂污染。
喷雾器安全警告 GEB044-4
喷雾操作安全警告:
1. 除了喷洒农业和园艺化学品进行害虫和
杂草控制之外,请勿将喷雾器用于任何
其他目的。
2. 请勿使用喷雾器喷洒易燃材料。
3. 注意喷洒材料带来的任何危险。请查阅
容器上的标记或制造商提供的待喷洒材
料的信息。
4. 请勿在危险未知的地方喷洒任何材料。
5. 关于使用化学喷雾剂,请务必仔细阅读
化学说明书,以便充分了解毒性和使用
方法。
6. 如果化学物质与皮肤接触,请立即用肥
皂彻底清洗。
7. 牢牢关闭化学品罐盖,防止泄漏。
8. 切勿将化学品转移到另一个容器。
9. 在混合喷雾液时,务必彻底清洗空的化
学品容器,然后按照化学品制造商的说
明正确处理容器。
10. 使用喷雾器前,请务必检查有无异常,
例如从连接器中取出填料、螺钉松动、
部件缺失和/或软管破裂 /磨损 /损坏。
使用不完整的喷雾器可能会导致事故和 /
或伤害。
11. 未参与喷洒的人员应避免在喷洒过程中
接近工地。
12. 当用车辆运输装有化学品的喷雾器时,
存在泄漏风险,因此要始终拧紧化学品
箱盖,并将喷雾器固定在垂直位置。

17
13. 切勿在喷雾器上使用强酸性化学品、油
漆、稀释剂、汽油或苯等物品,否则有
灼伤或火灾危险。
14. 请勿使用易燃溶剂清洁喷雾器。
15. 一定要选择合适的化学品(考虑使用方
法及有效性)来处理有害生物或杂草。
16. 混合不当的化学品可能伤害人类,也可
能损害农作物 / 植物。混合化学品时,
请仔细阅读化学品说明,并在使用前正
确稀释化学品。
17. 在将化学品装入水箱之前,务必混合化
学品。
18. 为防止吸入和 / 或接触化学品,请务必穿
戴安全服 (帽子、防护眼镜、防护面
罩、橡胶手套、长袖防虫夹克、长裤和
胶靴)
,以免喷洒时皮肤暴露。
19. 操作喷雾器时,务必将化学品或清洁水
装入水箱,因为使用空水箱操作喷雾器
可能会损坏泵。
20. 如果喷雾器停止运行或发出异常声音,
请立即关闭喷雾器电源并停止使用。
21. 喷洒时要时刻注意风向,保证从上风向
下风喷洒,防止化学品直接接触身体。
另外,小心不要让化学品接触到周围环
境,当风很大时,停止使用喷雾器。
22. 在温室内喷洒有化学品中毒的危险,因
此喷洒时务必通风。
23. 大气温度较高时,避免喷洒。
24. 避免长时间操作喷雾器。尽可能轮换操
作员。
25. 如果出现轻微头痛或头晕等症状,立即
停止喷洒工作,并咨询医生。此外,一
定要清楚地告知医生所使用的农用化学
品的名称和操作情况。
26. 如果喷雾状态变差且喷嘴需要清洁,则
化学液体可能会与面部接触,因此请务
必关闭喷雾器,然后取下喷嘴进行清洁。
27. 务必将冲洗用过容器和化学品箱产生的
废水妥善处理,不会流入河流和溪流和/
或污染地下水的地方。
28. 喷洒后,如果化学品残留在化学品箱、
喷洒软管、喷管和喷嘴中,可能会造成
喷洒伤害。务必用清水彻底冲洗掉残留
的化学物质 - 特别是喷洒除草剂后。
29. 使农用化学品远离儿童。务必将残留的
化学品储存在化学品储存容器中。
30. 喷洒 成后,务必用清水冲洗 (喷洗)
设备,排洗涤水,室内存放,避免阳
光直射和冰冻温度,并 且儿童接触不到。
31. 喷洒 成后,务必用肥皂彻底清洗整个
身体、冲洗眼睛、漱口。喷洒期间,每
天换衣服。
请妥善保 说明书。
警告:
不要因为舒适或对产品熟悉 (因重复使用而
获得)而不严格遵守产品的安全准则。工具
使用不当或未遵守本说明书所列的安全规则
可能导致严重的人身伤害。
重要安全指导 ENC007-11
电池套
1. 使用电池套管前,请阅读 (1) 电池充电
器、(2) 电池和 (3) 使用电池之产品上的
所有指导 明和警戒标记。
2. 请勿拆开电池套管。
3. 如果操作时间变得过短,立即停止操作。
其可能导致过热、造成灼伤,甚至爆炸
的危险。
4. 如果电解液进入您的双眼,用清水冲洗,
并立即就医。其可能导致您的视力下降。
5. 请勿短接电池套管:
(1) 请勿使用任何导电材料接触端子。
(2) 避免在装有其它金属物体的容器内存
放电池套管,例如钉子、硬币等。
(3) 不要将电池套管暴露在水或雨中。
电池短路可能导致过大的电流、过热,
可能造成灼伤,甚至发生故障。
6. 请勿将工具和电池套管存放于温度可能
到或超过 50°C (122°F) 的位置。
7. 即使电池套管严重损坏或全磨损,也
不要烧弃之。电池套管在火中可能爆炸。
8. 请小心,不要掉落或撞击电池。
9. 不要使用损坏的电池。
10. 所含锂离子电池符合 《危险品立法》的
要求。
对于商业运输 (如通过第三方、运输代
理),必须遵守包装和标签的特殊要求。

18
对于要发运的物品准备,必须咨询危险
材料方面的专家。也请遵守可能更加详
细的相关国家规定。
缠绕或屏蔽开口触点,并包装好电池,
让其不能在包装盒内移动。
11. 请遵守当地关于电池处置的规定。
请妥善保 说明书。
注意:仅使用牧田正品电池。
使用非牧田正品电池或改装后的电池,可导
致电池爆炸,引起火灾,造成人员受伤和物
品损坏。这还会丧失牧田对牧田工具和充电
器的保修。
保持电池最大寿命的提示
1. 在电池套管完全放电前,进行充电。
在您注意到工具功率下降时,务必停止
操作工具,并给电池套管充电。
2. 切勿重新给 全充电的电池套管再次充
电。
过度充电会缩短电池使用寿命。
3. 在 10°C - 40°C (50°F - 104°F) 的室温
给电池套管充电。充电前,让灼热的电
池套管冷却下来。
4. 如果长期不使用 (超过六个月),请充
电电池套管。
功能说明
注意:
•在工具上调整和检查功能前,务必关闭工
具开关和电池套管。
安装或拆卸电池套管 (图 1)
•打开喷雾器的电池组盖。
•插入或拆卸电池套管前,务必关闭工具的
开关。
•取出电池套管时,滑动电池套管前面的按
钮,将其从工具中收回。
•插入电池套管时,将电池套管上的凸榫对
准外壳上的沟槽,并将其滑入到位。务必
一直插入,直到其锁定在位,这时候会响
起微弱的“咔哒”声。如果能看到按钮上
侧的红色部分,则表示没有完全锁紧。完
全插入,直到不能看到红色部分。否则,
其可能意外从工具中掉出,导致您或您周
围的人员受到伤害。
•插入电池套管时,请勿用力。如果电池套
管没有轻松地滑入,表明其可能没有正确
插入。
指示剩余的电池电量
(仅限型号以“B”结尾的电池套管。)
(图 2)
按下电池套管上的检查按钮以指示剩余电池
电量。指示灯亮起几秒钟。
015658
注:
•根据使用条件和环境温度,指示可能与实
际电量稍有不同。
组装
注意:
•在工具上执行任何工作前,务必关闭工具
开关并取下电池套管。
喷管和喷嘴 装方法 (图 3)
•如图所示,将喷管和喷嘴组装到杠杆 塞
上。
•使用喷管上的螺母调整喷嘴方向。
•牢固连接组件以确保没有泄漏。
•根据要进行的喷雾类型选择喷嘴。
指示灯
剩余电量
亮起关闪烁
75% 至 100%
50% 至 75%
25% 至 50%
0% 至 25%
电池充电。
电池可能有
故障。

19
注:
•所有连接器单元都使用包装装配前,请务
必检查装置是否有包装。
•检查以确保喷雾软管没有破裂、磨损和/或
损坏。
•牢牢拧紧喷雾软管,防止液体泄漏。
•如果连接器单元有泄漏,请使用手动工具
进一步拧紧(约 45 度)。
•不要使用比标准喷雾软管长的软管。这样
做可能会导致连接器单元泄漏。
背带连接方法 (图 4)
使用图表指针将背带固定在顶部和底部,确
保背带没有扭曲。
注:
•检查以确保背带牢固地连接到化学品箱。
操作
注意:
•将电池套管插入工具前,务必检查工具电
源是否已关闭。
喷雾
注意:
•为防止突然喷洒,开关喷雾器前务必设置
杠杆 塞为 TOP(停止)。
•喷洒工作中断时,确保关闭电源,防止意
外喷洒。(图 5)
打开喷雾器开关前,务必检查周围环境。
操作杠杆 塞喷洒。
喷洒完成后,立即将杠杆 塞设置为 TOP,
然后关闭喷雾器开关。
如何使用杠杆旋塞 (图 6)
1. 位置 “A”是 TOP 位置。
2. 位置 “B”是喷雾位置。松开控制杆,它
将回到位置 “A”,喷洒将停止。( 间 歇
喷洒)
3. 位置 “C”是连续喷射位置。(连续喷
洒)
注:
•操作喷雾器时,检查以确保水箱装满化学
品或清洁水,因为使用空水箱继续操作喷
雾器可能会烧坏泵。
•杠杆 塞关闭的情况下长时间运行喷雾器
可能会对泵产生不利影响,并会耗尽电池。
确保尽可能关闭喷雾器开关。
•如果喷雾器或泵突然发出尖叫声,化学品
箱是空的,因此立即关闭喷雾器开关。
•电池盖打开和 / 或背部支撑垫被移除时请勿
喷洒,因为有损坏电气系统的危险。此外,
不要将喷嘴喷在喷雾器上。
•不要强行操作杠杆 塞和 / 或喷雾软管。
混合化学品
注意:
•禁止使用 Kelthane 水分散性粉末(杀螨
剂),因为它在运行过程中会因泵产生的热
量而硬化,导致泵停止工作。使用
Kelthane 乳剂、Akar 乳剂或 Osadan 水分
散性粉末作为杀螨剂。
•使用水分散性粉末或石灰硫时,使用前一
定要充分溶解。
•处理化学品时要格外小心。如果化学品接
触到身体,请彻底冲洗。
•化学品是有害的。处理化学品时始终遵守
化学品制造商的说明。
•有关稀释化学品时有用的比率信息,请参
阅下表。
•不要喷洒化学药品。
•当使用水分散性粉末等时,应在桶等容器
中彻底溶解。
012665
化学品补充
警告:
•更换化学品时,一定要用清水仔细清洗水
箱、泵和喷嘴等。残留的化学物质可能会
化学品 稀释比
水 500 1,000 2,000
4 L 8 mL 4 mL 2 mL
6 L 12 mL 6 mL 3 mL
8 L 16 mL 8 mL 4 mL
10 L 20 mL 10 mL 5 mL
12 L 24 mL 12 mL 6 mL
15 L 30 mL 15 mL 7.5 mL

20
造成喷雾伤害。此外,如果化学品混合,
可能发生化学变化,产生有毒气体的危险。
•务必戴上防护手套。
•不要在通风不良的地方更换化学品。(防止
化学中毒)
检查确保喷雾器开关关闭,并用混合化学品
补充化学品箱。
在向箱子加注化学品时,务必通过配备的水
箱滤网过滤化学品。
化学箱的侧面标有刻度,因此请务必使用这
些刻度作为操作指南。
拧紧化学品箱盖以防泄漏。
背带调节
调整背带的长度,使喷雾器尽可能靠近身体。
拉长背带
(1)提起皮带扣。
(2)拉动与喷雾器连接侧的皮带。
(图 7)
缩短背带
将皮带拉到自由侧。(图 8)
注:
缩短皮带时,如果皮带上没有施加任何重量,
它将相对容易移动。
维护
注意:
•尝试进行检查或维护前,务必关闭工具电
源,并拆下电池套管。
•为检查和维护,未必戴上防护手套。
•不得使用汽油、苯、稀释剂、酒精或其它
类似产品。否则可能出现退色、变形或裂
缝。
使用后维护
•使用后,清除化学品罐中残留的液体,用
清水冲洗罐内粘附的化学物质。
•现在用清水注入化学品箱,并将喷雾器运
行 2 到 3 分钟,清除泵、软管和喷嘴等残
留的化学品。
•除去化学品箱内残留的液体,重新启动泵,
然后运行喷雾器,直到残留的液体不再从
喷嘴中流出,关闭喷雾器开关。
•擦去设备上的水分和污垢,然后检查是否
有损坏和泄漏。
每日检查
•在工作之前,检查固定装置是否松动,部
件是否缺失。
•检查以确保喷涂软管没有破裂、磨损和/或
损坏。
•使用后,务必擦拭外部污垢,并检查是否
有损坏和/或泄漏。
清洁吸水过滤器 (图 9)
从箱中取出化学品后,取下箱底部的吸水过
滤器,并进行清洁。
清洁杠杆旋塞过滤器 (图 10)
拆下杠杆 塞盖并清洁过滤器。
注:
吸水过滤器
•这是一个过滤器,用于防止污垢和灰尘
(由于某种原因已经通过水箱过滤器进入水
箱)进入泵。如果吸水过滤器堵塞,喷雾
效果会变差,并且存在泵受到不利影响的
风险。
杠杆 塞过滤器
•如果杠杆 塞过滤器堵塞,喷雾效果会变
差。
喷雾器存放
•执行使用后维护程序清洗设备。
•特别是,当在冬季存放时,由于泵中残留
的化学品和 / 或洗涤水冻结,可能发生故
障或损坏。运行泵直到所有残留液体从喷
嘴中排出,检查确保没有残留液体,关闭
喷雾器开关,然后将喷雾器存放起来。
注意:
将喷雾器存放在儿童接触不到、不会冻结的
室内,远离阳光直射并且通风良好的地方。
-存放喷雾器时要特别小心,因为在某些情
况下,如果长时间在阳光直射下,塑料部
件会明显变质;此外,产品警告标签会褪
色和 / 或脱落。
有用提示
喷雾管道固定器
固定器的安装务必方向正确。(图 11)
Other manuals for DVF104
2
This manual suits for next models
1
Table of contents
Languages:
Other Makita Paint Sprayer manuals

Makita
Makita DUS108 User manual

Makita
Makita DUS054 User manual

Makita
Makita DUS108 User manual

Makita
Makita DUS108 User manual

Makita
Makita EVH2000 User guide

Makita
Makita BVF154 User manual

Makita
Makita DUS108 User manual

Makita
Makita EVH2000 User guide

Makita
Makita BVF154 User manual

Makita
Makita BVF104 User manual

Makita
Makita DUS054Z User manual

Makita
Makita BVF104 User manual

Makita
Makita EVH2000 User guide

Makita
Makita DVF104 User manual

Makita
Makita BVF104 User manual

Makita
Makita DVF104 User manual

Makita
Makita DUS054 User manual

Makita
Makita DUS108 User manual

Makita
Makita EF1550RH User manual

Makita
Makita PM7651H User guide