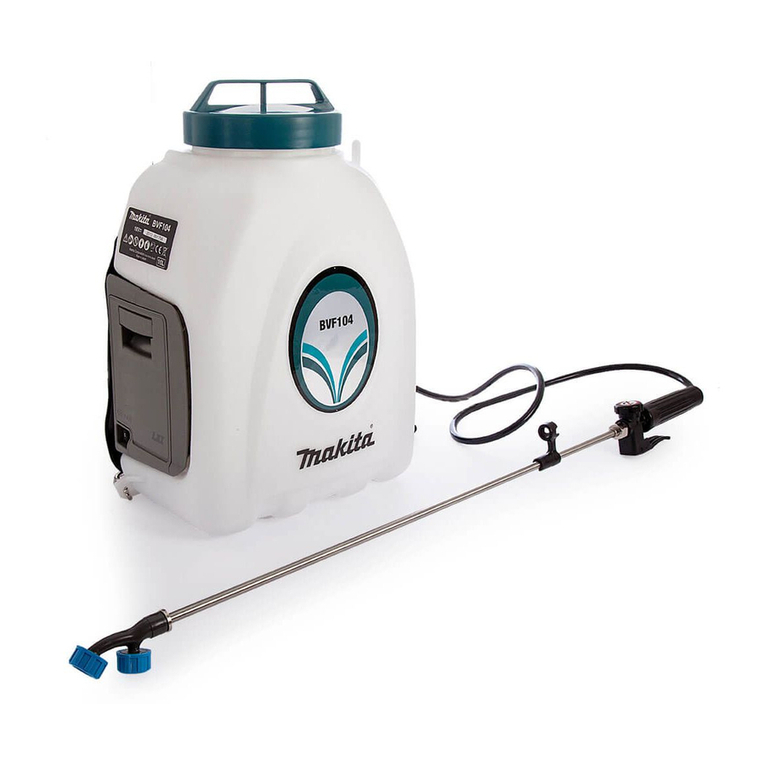
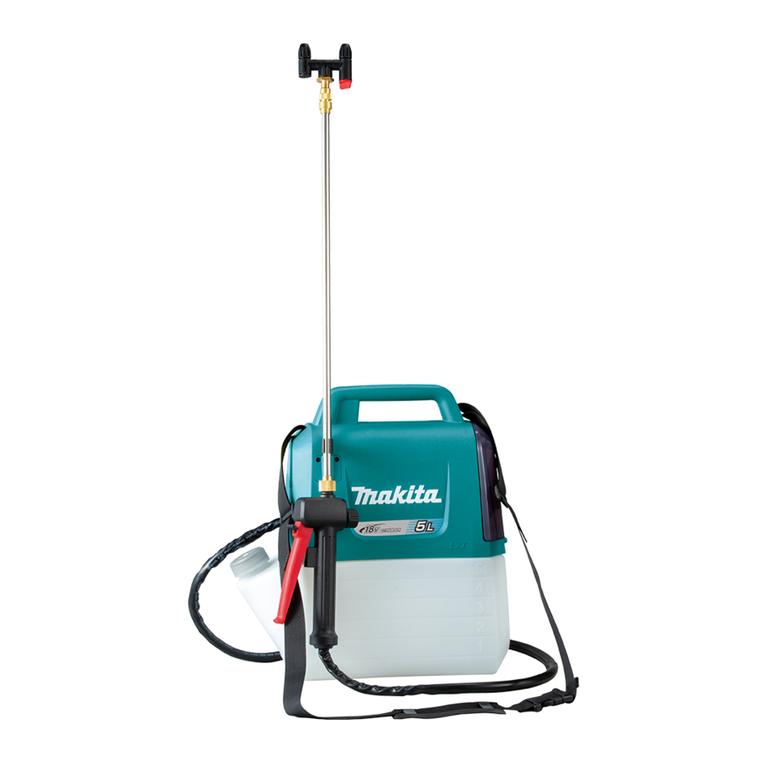
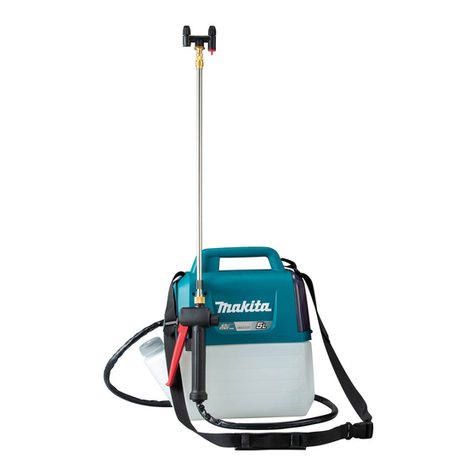
Makita XSU03 User manual

EN Cordless Garden Sprayer INSTRUCTION MANUAL 2
ESMX
Fumigador Inalámbrico para Jardín
MANUAL DE INSTRUCCIONES
18
XSU03
IMPORTANT: Read Before Using.
IMPORTANT: Lire avant usage.
IMPORTANTE: Lea antes de usar.

2English
1
8
13
2
9
3
10 11 12
5
4
6
16
17
14
15
7
English (Original instructions)
1 Head switch cock 2 Extension nut 3 Handle 4 Measuring cup
5 Spray wand bracket 6 Shoulder strap 7 Battery cover 8 Adjustable spray head
9 Spray wand 10 Lever 11 Hose 12 5L tank
13 Indicator lamps 14 On/off switch 15 Spray wand holder 16 Locking lever
17 Hook (for attaching the spray wand) - - - -

3English
SPECIFICATIONS
Model XSU03
Rated voltage D.C. 18 V
Tank capacity 5 L (1.3 Gal.)
Hose length 1.7 m (67")
Total extendable length 50 - 70 cm (19-3/4" - 27-1/2")
Nozzle type 2-Head (Switchable to 1 head)
Max. working pressure 0.3 MPa
Working pressure with standard nozzle Max. Approx. 0.26 Mpa
Min. Approx. 0.13 Mpa
Flow rate with standard nozzle Max. Approx. 0.91 L/min (0.24 GPM)
Min. Approx. 0.47 L/min (0.12 GPM)
Nozzle tting screw G 1/4"
Dimensions (L × W × H) 343 × 182 × 368 mm (13-1/2" x 7-1/8" x 14-1/2")
Net weight 3.2 - 3.5 kg (7.1 - 7.7 lbs)
• Due to our continuing program of research and development, the specications herein are subject to change
without notice.
• Specications may differ from country to country.
• The weight may differ depending on the attachment(s), including the battery cartridge. The lightest and heaviest
combination, according to EPTA-Procedure 01/2014, are shown in the table.
Applicable battery cartridge and charger
Battery cartridge BL1820B / BL1830 / BL1830B / BL1840B / BL1850B / BL1860B
Charger DC18RC / DC18RD / DC18RE / DC18SD / DC18SE / DC18SF /
DC18SH
• Some of the battery cartridges and chargers listed above may not be available depending on your region of
residence.
WARNING: Only use the battery cartridges and chargers listed above. Use of any other battery cartridges
and chargers may cause injury and/or re.
WARNING: Do not use a corded power supply such as battery adapter or portable power pack with
this machine. The cable of such power supply may hinder the operation and result in personal injury.
Symbols
The followings are symbols used for the equipment. Be sure that you understand their meaning before use.
Wear ear protection. Warning
Wear a breathing mask. Wear eye protection.
Wear safety footwear. Wear protective gloves.
Do not use in the rain or leave the sprayer outdoors while raining.
Read instruction manual.
volts
direct current

4English
Important safety instructions
WARNING: When using electric gardening
appliances, basic safety precautions should
always be followed to reduce the risk of re,
electric shock, and personal injury, including the
following:
READ ALL INSTRUCTIONS.
1. Avoid Dangerous Environment - Do not use
appliances in damp or wet locations.
2. Don’t Use In Rain.
3. Keep Children Away - All visitors should be kept
at a distance from work area.
4. Dress Properly - Do not wear loose clothing or
jewelry. They can be caught in moving parts. Use
of rubber gloves and substantial footwear is rec-
ommended when working outdoors. Wear protec-
tive hair covering to contain long hair.
5. Use Safety Glasses – Always use face or dust
mask if operation is dusty.
6. Use Right Appliance - Do not use appliance for
any job except that for which it is intended.
7. Avoid Unintentional Starting - Do not carry
appliance with nger on switch. Be sure switch is
off before inserting battery pack.
8. Do not Force Appliance - It will do the job better
and with less likelihood of a risk of injury at the rate
for which it was designed.
9. Do not Overreach - Keep proper footing and
balance at all times.
10. Stay Alert - Watch what you are doing. Use com-
mon sense. Do not operate appliance when you
are tired.
11. Store Idle Appliances Indoors - When not in use,
appliances should be stored indoors in dry, and
high or locked-up place out of reach of children.
12. Maintain Appliance With Care - Keep cutting
edge sharp and clean for best performance and
to reduce the risk of injury. Follow instructions for
lubricating and changing accessories. Keep han-
dles dry, clean, and free from oil and grease.
13. Check Damaged Parts - Before further use of the
appliance, a guard or other part that is damaged
should be carefully checked to determine that it will
operate properly and perform its intended function.
Check for alignment of moving parts, binding of
moving parts, breakage of parts, mounting, and
any other condition that may affect its operation.
A guard or other part that is damaged should be
properly repaired or replaced by an authorized
service center unless indicated elsewhere in this
manual.
Cordless Garden Sprayer
Safety Warnings
WARNING: Risk of re or explosion. Do not
spray ammable liquids such as gasoline. Look
for this symbol reference on the container.
WARNING: Some spray created from products
used with the sprayer contains chemicals known
to cause cancer, birth defect of other reproductive
harm.
Some examples of these chemicals are:
· compounds in fertilize
· compounds in insecticides, herbicides, and pesticides;
· arsenic and chromium from chemically treated lumber.
Follow directions on containers of all such products.
To reduce your exposure to these chemicals, wear
approved safety equipment such as face masks that
are specially designed to filter out sprays, gloves, and
other appropriate protective equipment.
■ Before using any pesticide or other spray mate-
rials in this sprayer, read the label on its original
container thoroughly and follow its directions.
Some spray materials are dangerous and should
not be used in this sprayer, as they can damage the
sprayer and cause serious bodily injury or property
damage.
■ Electric shock hazard. Never spray toward electri-
cal outlets.
■ Do not use commercial grade chemicals or
chemicals for commercial or industrial pur-
poses. Use only consumer grade water-based lawn
and garden chemicals.
■ Do not pour hot or boiling liquids into the tank.
These can weaken or damage the hose or tank.
■ Spray area must be well ventilated.
■ Avoid spraying on windy days. Spray can be
accidentally blown onto plants or objects that should
not be sprayed.
■ Store the sprayer in a secure, well-ventilated
indoor space with the uid tank empty.
■ Do not use caustic (alkali) self-heating or cor-
rosive (acid) liquids in this sprayer. These can
corrode metal parts or weaken the tank and hose.
■ Know the contents of the chemical being
sprayed. Read all Material Safety Data Sheets
(MSDS) and container labels provided with the
chemical. Follow the chemical manufacturer s
safety instructions.
■ Do not leave residue or spray material in the
tank after using the sprayer. Clean after each use.
■ Do not smoke while using the sprayer, or spray
where spark or ame is present.

5English
■ Risk of injection. Do not discharge directly against
skin.
■ To reduce the risk of electric shock, do not put
the sprayer into water or other liquid. Do not
place or store the sprayer where it can fall or be
pulled into a tub or sink.
■ Maintain this product. Thoroughly inspect both
the inside and outside of the sprayer and exam-
ine the components before each use. Check for
cracked and deteriorated hoses, leaks, clogged
nozzles, and missing or damaged parts. If dam-
aged, have the product repaired before use.
Many accidents are caused by poorly maintained
products.
■ Disconnect the battery from the unit before
draining, cleaning, or storing the sprayer. Such
preventive safety measures reduce the risk of acci-
dental starting.
■ Always wear eye protection with side shields
or goggles marked to comply with ANSI Z87.1.
Failure to do so could result in uids entering your
eyes resulting in possible serious injury.
■ Protect your lungs. Wear a face or dust mask
when using the sprayer. Following this rule will
reduce the risk of serious personal injury.
■ Battery tools do not have to be plugged into
an electrical outlet; therefore, they are always
in operating condition. Be aware of possible
hazards when not using your battery tool or
when changing accessories. Remove battery
pack when tool is not in use. Following this rule
will reduce the risk of electric shock, re, or serious
personal injury.
■ Do not place battery tools or their batteries near
re or heat. This will reduce the risk of explosion
and possibly injury.
■ Do not crush, drop or damage battery pack. Do
not use a battery pack or charger that has been
dropped or received a sharp blow. A damaged
battery is subject to explosion. Properly dispose of a
dropped or damaged battery immediately.
■ Batteries can explode in the presence of a
source of ignition, such as a pilot light. To reduce
the risk of serious personal injury, never use any
cordless product in the presence of open ame. An
exploded battery can propel debris and chemicals. If
exposed, ush with water immediately.
■ Do not charge battery tool in a damp or wet
location. Following this rule will reduce the risk of
electric shock.
■
For best results, your battery tool should be
charged in a location where the temperature is
more than 10 °C (50 °F) but less than 40 °C (104 °F).
To reduce the risk of serious personal injury, do not
store outside or in vehicles.
■ Under extreme usage or temperature conditions,
battery leakage may occur. If liquid comes in
contact with your skin, wash immediately with
soap and water. If liquid gets into your eyes,
ush them with clean water for at least 10 min-
utes, then seek immediate medical attention.
Following this rule will reduce the risk of serious
personal injury.
■ Do not use battery-operated appliance in rain.
Exercise care in handling batteries in order not
to short the battery with conducting materials
such as rings, bracelets, and keys. The battery or
conductor may overheat and cause burns.
■ Do not dispose of the battery(ies) in a re. The
cell may explode. Check with local codes for possi-
ble special disposal instructions.
■ Do not open or mutilate the battery(ies).
Released electrolyte is corrosive and may cause
damage to the eyes or skin. It may be toxic if
swallowed.
■ Avoid Dangerous Environment - Don’t use appli-
ances in damp or wet locations.
■ Use Right Appliance - Do not use appliance for
any job except that for which it is intended.
■ Don’ t Force Appliance - It will do the job better
and with less likelihood of a risk of injury at the rate
for which it was designed.
■ Store Idle Appliances Indoors - When not in use,
appliances should be stored indoors in dry, and high
or locked-up place - out of reach of children.
■ Maintain Appliance With Care - Keep clean for
best performance and to reduce the risk of injury.
Follow instructions for changing accessories.
Inspect appliance cord, and if damaged, have it
repaired by an authorized service facility. Keep
handles dry, clean, and free from oil and grease.
■ Check Damaged Parts - Before further use of the
appliance, a guard or other part that is damaged
should be carefully checked to determine that it will
operate properly and perform its intended function.
Check for alignment of moving parts, binding of
moving parts, breakage of parts, mounting, and any
other condition that may affect its operation. A guard
or other part that is damaged should be properly
repaired or replaced by an authorized service center
unless indicated elsewhere in this manual.
6English
Important safety instructions for
battery cartridge
1. Before using battery cartridge, read all instruc-
tions and cautionary markings on (1) battery
charger, (2) battery, and (3) product using
battery.
2. Do not disassemble or tamper the battery car-
tridge. It may result in a re, excessive heat, or
explosion.
3. If operating time has become excessively
shorter, stop operating immediately. It may
result in a risk of overheating, possible burns
and even an explosion.
4. If electrolyte gets into your eyes, rinse them
out with clear water and seek medical atten-
tion right away. It may result in loss of your
eyesight.
5. Do not short the battery cartridge:
(1) Do not touch the terminals with any con-
ductive material.
(2) Avoid storing battery cartridge in a con-
tainer with other metal objects such as
nails, coins, etc.
(3) Do not expose battery cartridge to water or
rain.
A battery short can cause a large current ow, over-
heating, possible burns and even a breakdown.
6. Do not store and use the tool and battery car-
tridge in locations where the temperature may
reach or exceed 50 °C (122 °F).
7. Do not incinerate the battery cartridge even if it
is severely damaged or is completely worn out.
The battery cartridge can explode in a re.
8. Do not nail, cut, crush, throw, drop the battery
cartridge, or hit against a hard object to the
battery cartridge. Such conduct may result in a
re, excessive heat, or explosion.
9. Do not use a damaged battery.
10. The contained lithium-ion batteries are subject
to the Dangerous Goods Legislation require-
ments.
For commercial transports e.g. by third parties, for-
warding agents, special requirement on packaging
and labeling must be observed.
For preparation of the item being shipped, consult-
ing an expert for hazardous material is required.
Please also observe possibly more detailed
national regulations.
Tape or mask off open contacts and pack up the
battery in such a manner that it cannot move
around in the packaging.
11. When disposing the battery cartridge, remove
it from the tool and dispose of it in a safe place.
Follow your local regulations relating to dis-
posal of battery.
12. Use the batteries only with the products speci-
ed by Makita. Installing the batteries to non-com-
pliant products may result in a re, excessive heat,
explosion, or leak of electrolyte.
13. If the tool is not used for a long period of time,
the battery must be removed from the tool.
14. During and after use, the battery cartridge may
take on heat which can cause burns or low tem-
perature burns. Pay attention to the handling of
hot battery cartridges.
15. Do not touch the terminal of the tool imme-
diately after use as it may get hot enough to
cause burns.
16. Do not allow chips, dust, or soil stuck into the
terminals, holes, and grooves of the battery
cartridge. It may result in poor performance or
breakdown of the tool or battery cartridge.
17. Unless the tool supports the use near high-volt-
age electrical power lines, do not use the
battery cartridge near high-voltage electrical
power lines. It may result in a malfunction or
breakdown of the tool or battery cartridge.
18. Keep the battery away from children.
SAVE THESE INSTRUCTIONS.
CAUTION: Only use genuine Makita batteries.
Use of non-genuine Makita batteries, or batteries that
have been altered, may result in the battery bursting
causing res, personal injury and damage. It will
also void the Makita warranty for the Makita tool and
charger.
Tips for maintaining maximum
battery life
1. Charge the battery cartridge before completely
discharged. Always stop tool operation and
charge the battery cartridge when you notice
less tool power.
2. Never recharge a fully charged battery car-
tridge. Overcharging shortens the battery ser-
vice life.
3.
Charge the battery cartridge with room tempera-
ture at 10 °C - 40 °C (50 °F - 104 °F). Let a hot
battery cartridge cool down before charging it.
4. When not using the battery cartridge, remove it
from the tool or the charger.
5. Charge the battery cartridge if you do not use it
for a long period (more than six months).

7English
CORDLESS GARDEN SPRAYER USE AND CARE
1. The cordless garden sprayer can work by Makita lithium-ion battery cartridge. Use of any other batteries may
create a risk of re. Recharge batteries only with the specied charger. A charger that may be suitable for one type
of battery may create a risk of re when used with another battery.
2. When inserting or removing the battery, always place the cordless garden sprayer on a at and stable surface.
3. Do not use any batteries, attachments or accessories not recommended by the manufacturer of this appliance.
The use of batteries, attachments or accessories not recommended can result in serious personal injury.

8English
ASSEMBLY
CAUTION:
Always be sure that the machine is switched off and the battery cartridge is removed before carrying out any work on
the machine.
CAUTION:
Make sure that the all parts are securely assembled so that the liquid does not leak when operating the machine.
Assembly of the spray wand
1. Remove the cap from the handle.
2. Make sure the O-ring is in place, then thread the spray wand onto the handle and tighten it securely. Refer to
Figure 1.
3. Loosen the extension nut and pull out the spray wand to the desire length.
4. Retighten the extension nut.
12 3 4 5
1 Adjustable spray head 2 Extension nut
3 Spray wand 4 O-ring
5 Handle
Figure 1
Shoulder strap
Attach the shoulder strap to the hangers of the machine as shown in the gure. Refer to Figure 2.
1
1 Hanger
Figure 2

9English
FUNCTIONAL DESCRIPTION
CAUTION:
Always be sure that the machine is switched off and the battery cartridge is removed before adjusting or checking
function on the machine.
Installing or removing the battery cartridge
CAUTION:
• Always switch off the machine before installing or removing of the battery cartridge.
• Hold the machine and the battery cartridge rmly when installing or removing battery cartridge. Failure to hold
the machine and the battery cartridge rmly may cause them to slip off your hands and result in damage to the
machine and battery cartridge and a personal injury.
• Do not use force when installing the battery cartridge. If the cartridge does not slide in easily, it is not being inserted
correctly.
To install the battery cartridge, pull down the locking lever, and then open the battery cover. Align the tongue on the
battery cartridge with the groove in the housing and slip it into place. Always insert it all the way until it locks in place
with a little click. Refer to Figure 3.
To remove the battery cartridge, slide it from the machine while pressing the button. Refer to Figure 4.
Figure 3 Figure 4

10 English
Indicating the residual battery capacity
Press the check button on the machine to indicate residual battery capacity. The indicator lamps light up for few
seconds. Refer to Figure 5.
Indicator lamps
Residual battery capacity
Lighted Off
50 % to 100 %
30 % to 50 %
0 % to 30 %
NOTE:
• Depending on the conditions of use and the ambient temperature, the indication may differ slightly from the actual
capacity.
12
1Indicator lamps 2Check button
Figure 5
Machine / battery protection system
The machine is equipped with the protection system. This system automatically cuts off power to the motor to
extend machine and battery life. The machine will automatically stop during operation if the machine or battery is
placed under one of the following conditions.
- Overload protection : When the machine is operated in a manner that causes it to draw an abnormally high current,
the machine automatically stops without any indication. In this situation, turn the machine off and stop the applica-
tion that caused the machine to become overloaded. Then turn the machine on to restart.
- Overdischarge protection : When the battery capacity becomes low, the machine stops automatically. If the
machine does not operate even when the switches are operated, remove the battery cartridge from the machine
and charge it.
Indicating the remaining battery capacity
Only for battery cartridges with the indicator
1
2
1Indicator lamps 2Check button
Figure 6

11 English
Press the check button on the battery cartridge to indicate the remaining battery capacity. The indicator lamps light
up for a few seconds.
Indicator lamps
Remaining capacity
Lighted Off
75 % to 100 %
50 % to 75 %
25 % to 50 %
0 % to 25 %
NOTE: Depending on the conditions of use and the ambient temperature, the indication may differ slightly from the
actual capacity.
NOTE: The rst (far left) indicator lamp will blink when the battery protection system works.

12 English
Mixture
WARNING! Always follow the chemical manufacturer’s instructions printed on their product labeling
for use, cleaning, and storage. Clean thoroughly after each use, following the instructions in the
Maintenance and cleaning section of this manual. Chemicals should be stored out of the reach of
children. Failure to do so may result in serious personal injury.
WARNING! THE PRODUCT IS DESIGNED FOR SPRAYING CONSUMER-GRADE HOME AND
GARDEN CHEMICALS SUCH AS WEED KILLERS, FUNGICIDES, INSECTICIDES, AND FERTILIZERS.
CAUTION: Be sure that no previously used chemical has been left in tank. If so, chemical reaction may
occur generating harmful gas.
NOTICE: Do not over ll the tank. Doing so may damage the machine.
NOTICE: Liquids to be sprayed must be as thin as water. Thicker liquids will not spray properly.

13 English
1. Remove the battery prior to adding chemical liquid to the tank.
2. Hold the tank rmly and rotate it anti-clockwise so as to separate the motor housing from the tank. Refer to Figure 7.
3. Unscrew and remove the measuring cup.
4. Measure the recommended liquid. The cup can be used to measure up to 50 ml (2 oz) of liquid. Refer to Figure 8.
5. Carefully pour the liquid into the tank with measuring cup through the lling opening of the tank. You can also
dissolve chemical liquid in water completely in a separate container and then pour it into the tank. Make sure you
always pour chemical liquid into the tank through the lling opening of the tank rather than small opening which is for
measuring cup storage. Make sure that the tank lling strainer is in place. Refer to Figure 9.
6. Rinse the measuring cup with clean water.
7. Ret the cup, making sure it is tightened securely.
8. Insert the hose into the depressed part of the tank lling strainer. Refer to Figure 10.
9. Reattach the motor housing to the tank and rotate it clockwise to “Click”. Refer to Figure 11.
*Container is not included.
Figure 7 Figure 8
Figure 9 Figure 10
Figure 11

14 English
WARNING! Risk of re or explosion. Spray area must be well-ventilated and away from sparks or ames.
OPERATION
CAUTION:
When operating the machine, be sure to put the shoulder belt on your shoulder rmly.
Turning the machine on/off
1. Before operating the machine, put on safety goggles and other safety gear.
2. Press the On/off switch to start the machine.
3. Press and hold the lever down to start spraying. Refer to Figure 12.
4. Release the lever to stop spraying.
Lock-on
The lock-on feature is convenient for continuous spray or when covering a large area.
1. To lock-on, press the lever down and pull the lock button backwards, then release the lever. Refer to Figure 13.
2. To release the lock-on, press the lever and push the lock button forward.
Note: Make sure the lever is not in locked position before inserting the battery pack into the machine.
1
2
1Lock button 2Lever
Figure 12 Figure 13
Adjustment to one-head type
1. Turn the cock to the “lock” side to use the machine as one head type. Refer to Figure 14.
23(1
/2&.
ORFN
RSHQ
Figure 14
Adjusting spray
You can mist or jet the liquid using the adjustable spray head.
1. Remove the battery pack from the machine.
2. To mist the liquid, tighten the adjustable spray head.
3. To jet the liquid, loosen the adjustable spray head.
Tighten
Loosen

15 English
Caution • Do not overturn cock exceeding 180o. Disperse orice may break.
• Do not touch nozzle lever by mistake when resting nozzle on nozzle stand to avoid
erroneous spraying.
• Do not leave leftover chemical inside tank for a long period of time.
This would damage parts and shorten life of product.
Spraying
WARNING! Never set the unit on the ground during use. Avoid the machine and battery from getting wet at
all times. Do not spray near or directly at the unit.
1. Aim the sprayer nozzle directly at the plants or objects you wish to spray.
2. Never point the spray end of the wand at yourself or others.
3.
Be aware of splash back, stand far enough from the object being sprayed to prevent the spray splashing back onto you
.
4. Never spray in the direction of people or animals; always spray downwind.
5. Avoid spraying on windy days. Spray can be accidentally blown onto plants or objects that should not be sprayed.
MAINTENANCE AND CLEANING
CAUTION:
Always be sure that the machine is switched off and the battery cartridge is removed before attempting to perform
inspection or maintenance.
To maintain product SAFETY and RELIABILITY, repairs, any other maintenance or adjustment should be performed
by Makita Authorized or Factory Service Centers, always using Makita replacement parts.
MAINTENANCE
WARNING! To avoid serious personal injury, always remove the battery pack from the machine when
cleaning or performing any maintenance.
WARNING! Always wear eye protection with side shields or goggles marked to comply with ANSI Z87.1.
Failure to do so could result in uids entering your eyes resulting in possible serious injury.
WARNING! When servicing, use only identical replacement parts. Use of any other parts may create a
hazard or cause product damage.
WARNING! Do not at any time let brake uids, gasoline, penetrating oils, etc., come in contact with
plastic parts. Chemicals can damage, weaken, or destroy plastic which may result in serious personal
injury.
NOTICE: Periodically inspect the entire product for damaged, missing, or loose parts such as screws,
nuts, bolts, caps, etc. Tighten securely all fasteners and caps and do not operate this product until all
missing or damaged parts are replaced. Please contact customer service or a qualied service center for
assistance.
NOTICE:
Never use gasoline, benzine, thinner, alcohol or the like. Discoloration, deformation or cracks may result.
GENERAL MAINTENANCE: Avoid using solvents when cleaning plastic parts. Most plastics are susceptible to
damage from various types of commercial solvents and may be damaged by their use. Use clean clothes to remove
dirt, dust, oil, grease, etc.
CLEANING THE UNIT
WARNING! Always store and dispose of chemicals properly. Disposal of contaminated rinse water
should be performed according to local ordinances and by laws.

16 English
DRAINING THE TANK
If there is any liquid left in the tank after spraying, the tank should be drained before cleaning.
• Remove the battery pack.
• Remove the motor housing from the tank.
• Drain the contents through the ll area.
NOTE: Drain the liquid back into the original container. Do not store chemical liquid in the tank.
CLEANING THE TANK
• Fill the tank about one-third full with clean water. A small amount of mild household detergent may be added.
NOTE: Never use ammable chemicals or abrasive cleaning agents to clean the tank.
• Wipe the outside of the tank with a clean, dry cloth.
• Reattach the motor housing to the tank.
• Reinstall the battery pack. Spray until the tank has been emptied. Make sure to direct the spray toward an area that
will not be damaged by the spray solution.
• Rell and repeat the procedure with clean water. It may be necessary to rinse the tank more than once, then drain
again as instructed above.
• Allow all parts to completely dry before reinstalling parts and storing the unit.
CLEANING THE NOZZLE
If the nozzle becomes plugged, use the steps below to clear.
• Remove the battery pack.
• Unscrew and remove the nozzle cap form adjustable spray head of the spray wand.
•
Push a small wire through the exposed holes to clear any debris. Then ush with clean water. Refer to Figure 15
.
• Wipe the adjustable spray head with a clean dry cloth, and reattach the nozzle cap to the adjustable spray head.
CLEANING THE PUMP
If the sprayer cannot draw the uid from tank or it cannot spray out liquid at the rst use or after long-term storage.
Follow the procedures below to clean the pump:
1. Switch off the machine and remove the battery.
2. Remove the spray wand from handle.
3. Drain any remaining liquid or store leftover liquid to another container to make sure the tank is empty.
4. Separate the motor housing from the tank and turn it upside down. Refer to Figure 16.
5. Unscrew the red cap to open water inlet hole, and then connect the hole to the water tap. Make sure the O-ring is
placed inside the red cap.
6. Open the water tap slowly and press down the lever at the same time to allow water ush away any debris
adhered to the pump. Refer to Figure 17.
7. Disconnect the water tap and re-tighten the red cap. Make sure that the O-ring inside the cap is in place.
Figure 15
2
1
Figure 16 Figure 17
1 Red cap 2 O-ring

17 English
OPTIONAL ACCESSORIES
CAUTION:
These accessories or attachments are recommended for use with your Makita product specied in this manual. The
use of any other accessories or attachments might present a risk of injury to persons. Only use accessory or attach-
ment for its stated purpose.
If you need any assistance for more details regarding these accessories, ask your local Makita Service Center.
• Makita genuine battery and charger.
NOTE:
• Some items in the list may be included in the product package as standard accessories. They may differ from
country to country.
MAKITA LIMITED WARRANTY
Please refer to the annexed warranty sheet for the most current warranty terms applicable to this product. If annexed
warranty sheet is not available, refer to the warranty details set forth at below website for your respective country.
United States of America: www.makitatools.com
Canada: www.makita.ca
Other countries: www.makita.com

18 Español
Español (Instrucciones originales)
1 Cabezal de ajuste 2 Tuerca de extension 3 Manija 4 Copa de medición
5 Soporte del rociador 6 Tirantes 7 Tapa de la batería 8 Cabezal ajustable del
rociador
9 Varilla de rociar 10 Gatillo para rociar 11 Manguera 12 Tanque de 5 litros
13 Lámparas indicadoras 14 Botón de encendido y
apagado 15 Soporte de la varilla
para rociar 16 Seguro del gatillo para
rociar
17 Gancho (para la varilla de rociar) - - - -
1
8
13
2
9
3
10 11 12
5
4
6
16
17
14
15
7

19 Español
ESPECIFICACIONES
Modelo XSU03
Tensión nominal D.C. 18 V
Capacidad del tanque 5 litros (1,3 galones)
Longitud de la manguera 1,7 m (67")
Longitud total de la manguera 50 cm - 70 cm (19-3/4" - 27-1/2")
Tipo de boquilla De doble cabezal (ajustable a uno solo)
Máxima presión de trabajo 0,3 MPa
Presión de trabajo con boquilla estándar Max. Aprox. 0,26 Mpa
Min. Aprox. 0,13 Mpa
Nivel de ujo con boquilla estándar Max. Aprox. 0,91 L/min (0,24 GPM)
Min. Aprox. 0,47 L/min (0,12 GPM)
Tornillo de ajuste de la boquilla G 1/4"
Medidas (largo × ancho × altura) 343 mm × 182 mm × 368 mm (13-1/2" x 7-1/8" x 14-1/2")
Peso neto 3,2 kg - 3,5 kg (7,1 lbs - 7,7 lbs)
• Debido a nuestro programa continuo de investigación y desarrollo, las especicaciones en este documento
están sujetas a cambios sin previo aviso.
• Las especicaciones pueden diferir de un país a otro.
• El peso puede variar dependiendo del/de los accesorio(s), incluido el cartucho de batería. La combinación más
liviana y la más pesada, según el procedimiento EPTA 01/2014, se muestran en la tabla.
Cargador y cartucho de batería correspondientes
Cartucho de batería BL1820B / BL1830 / BL1830B / BL1840B / BL1850B / BL1860B
Cargador
DC18RC / DC18RD / DC18RE / DC18SD / DC18SE / DC18SF / DC18SH
• Algunos de los cartuchos de batería y cargadores mencionados a continuación pueden no estar disponibles
dependiendo de su región de residencia.
ADVERTENCIA: Utilice únicamente los cartuchos y cargadores de batería mencionados arriba. El uso
de cualquier otro cartucho de batería o cargadores puede causar lesiones y/o incendio.
ADVERTENCIA: No utilice fuentes de energía con cable tales como adaptadores de batería en este
equipo. El uso de este tipo de fuentes de energía puede impedir la operación del equipo y resultar en heridas a su
persona.
Símbolos
Los siguientes son símbolos utilizados en su equipo. Asegúrese de entender su signicado antes de su uso.
Utilice protección auditiva. Advertencia
Utilice máscara de
respiración.
Utilice protección para los
ojos.
Utilice calzado de
seguridad. Utilice guantes de seguridad.
No se use el rociador bajo la lluvia o se lo deje a la intemperie
cuando llueva.
Lea el manual de instrucciones.
Volteos
corriente directa

20 Español
INSTRUCCIONES DE SEGURIDAD
IMPORTANTES
ADVERTENCIA: Cuando utilice equipo de
jardinería eléctrico, deben tomarse medidas pre-
cautorias de seguridad a n de reducir el riesgo
de incendio, descarga eléctrica o daño persona,
incluidas las siguientes:
LEA TODAS LAS
INSTRUCCIONES.
1. Evite lugares peligrosos – No utilice aparatos en
lugares mojados o húmedos.
2. No se utilice cuando llueva.
3. Mantenga alejados a los niños - Todo visitante
deberá mantener una distancia segura respecto al
área de trabajo.
4. Vístase adecuadamente – No utilice ropa oja ni
joyería. Pueden ocurrir atrapamientos en partes
en movimiento. Se recomienda la utilización de
guantes de caucho y de calzado de seguridad al
trabajar al aire libre. Utilice una coa para ocultar
el cabello largo.
5. Use lentes de seguridad – Siempre utilice una
mascarilla facial o para el polvo cuando el trabajo
lo requiera.
6. Uso adecuado del equipo – Nunca utilice
el equipo en otra actividad distinta a la de su
propósito.
7. Evite encendidos accidentales – No sujete el
aparato con el dedo sobre el botón de encendido.
Asegúrese de que el botón de encendido esté
apagado antes de insertar la batería.
8. No fuerce el equipo – Realizará un mejor trabajo
y con un menor riesgo de causar heridas si se
utiliza la potencia para la que fue diseñado.
9. No trabaje fuera de límites – Mantenga siempre
el equilibrio y pise sobre terreno rme.
10. Manténgase alerta – Ponga atención a lo que
está haciendo. Use su sentido común. No utilice el
equipo cuando esté cansado.
11. Resguarde el equipo en interiores – Cuando
no esté en uso, el equipo debe resguardarse en
interiores secos, en lugares elevados o bajo llave
fuera del alcance de los niños.
12. Dé mantenimiento al equipo con cuidado –
Mantenga los bordes cortantes losos y limpios
para un mejor desempeño. Siga el instructivo
para la lubricación y el cambio de accesorios.
Mantenga las manijas secas, limpias, libres de
aceite y grasa.
13. Revise las partes dañadas – Antes de continuar
usando el equipo, debe revisarse la guarda o
alguna pieza que esté dañada para determinar si
se puede seguir operando adecuadamente y si el
equipo puede realizar la función para la que está
diseñado. Revise la alineación de las partes móvi-
les, su unión, montura, el rompimiento de piezas o
cualquier otra condición que pueda afectar la uti-
lización del equipo. Cualquier guarda o parte que
esté dañada debe de ser reparada o reemplazada
por un servicio autorizado a menos que existan
otras indicaciones al respecto en este manual.
Advertencias de Seguridad
del Rociador de Jardín
Inalámbrico.
ADVERTENCIA: Riesgo de incendio o
explosión. No rocíe líquidos inamables como la
gasolina. Busque éste símbolo de referencia en
el empaque.
ADVERTENCIA: Algunos productos que
pueden llegar a utilizarse en este rociador contie-
nen químicos cancerígenos, que pueden causar
defectos de nacimientos o daños reproductivos.
Algunos ejemplos de estos químicos son:
· Componentes de fertilizantes.
·
Componentes de insecticidas, herbicidas y pesticidas.
·
Arsénico y cromo proveniente de madera tratada.
Siga las instrucciones que vienen en los empaques
de estos productos. Para reducir su exposición a este
tipo de químicos, utilice equipo de protección personal
aprobado, tales como máscaras especialmente
diseñadas para filtrar aerosoles, guantes y otro tipo de
quipo apropiado de protección personal.
■ Antes de utilizar cualquier pesticida o cualquier
otro material con este rociador, lea a fondo las
etiquetas en su contenedor original y siga sus
indicaciones. Algunos productos rociables son
peligrosos y no deben emplearse en este rociador,
ya que pueden dañar el equipo y causar serias
heridas corporales o daño a la propiedad.
■Peligro de descarga eléctrica. Nunca rocíe hacia
enchufes eléctricos.
■ No utilice químicos de grado comerciales o
químicos para propósitos comerciales o indus-
triales. Utilice únicamente agua de grado para
consumo en céspedes y químicos de jardinería.
■ No vierta líquidos calientes o hirviendo dentro
del tanque. Estos pueden debilitar o dañar la man-
guera o el tanque.
■ El área que vaya a rociar debe estar bien
ventilada.
■
Evite rociar en días de mucho viento. El líquido
que rocíe podría accidentalmente ser desviado hacia
plantas u objetos que no debieran ser rociados.
■
Resguarde el rociador en un lugar seguro, bien ven-
tilado en un espacio interior y con el tanque vacío.
■ No utilice líquidos cáusticos (alcalinos), autoca-
lentables o corrosivos (ácidos) en este rociador.
Estos pueden corroer partes metálicas o dañar el
tanque y la manguera.
■ Conozca el contenido de los químicos que
va a rociar. Lea todas las Fichas de Datos de
Seguridad de los Materiales (MSDS) y las eti-
quetas en los contenedores de los químicos
que utilice. Siga las instrucciones de seguridad del
proveedor de los químicos que utilice.
■ No deje residuos o materiales rociables dentro
del tanque después de usar el rociador. Limpie
cada uno después de usarlo.
■ No fume mientras esté utilizando el rociador y
nunca rocíe en presencia de amas o chispas.
Table of contents
Languages:
Other Makita Paint Sprayer manuals

Makita
Makita DUS054 User manual

Makita
Makita BVF104 User manual

Makita
Makita BVF104 User manual

Makita
Makita US053D User manual

Makita
Makita DUS108 User manual

Makita
Makita BVF154 User manual

Makita
Makita BVF104 User manual

Makita
Makita DVF104 User manual

Makita
Makita DVF104 User manual

Makita
Makita EVH2000 User guide

Makita
Makita US053D User manual

Makita
Makita DUS108 User manual

Makita
Makita US053D User manual

Makita
Makita BVF104 User manual

Makita
Makita DUS108 User manual

Makita
Makita DUS054Z User manual

Makita
Makita EVH2000 User guide

Makita
Makita DUS108 User manual

Makita
Makita PM7651H User guide

Makita
Makita EF1550RH User manual