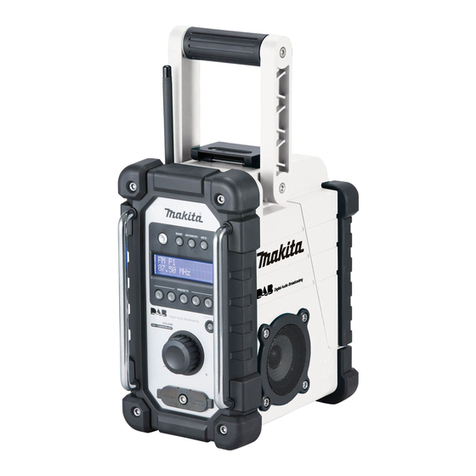
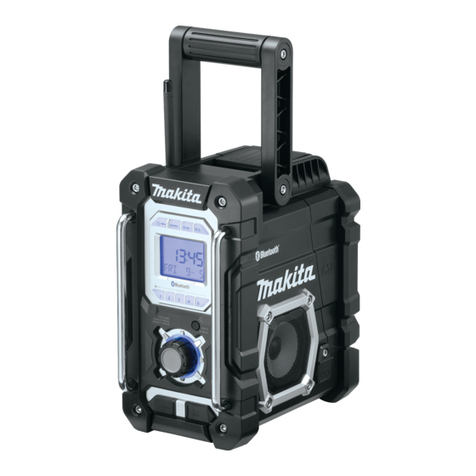
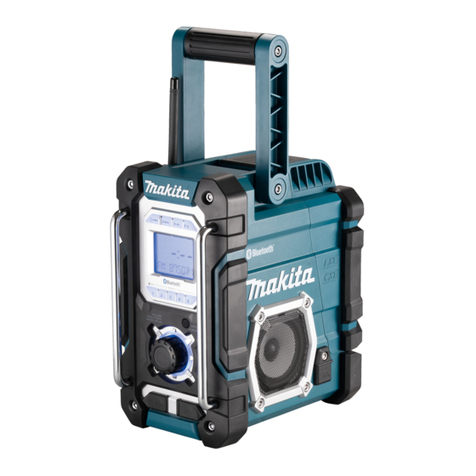
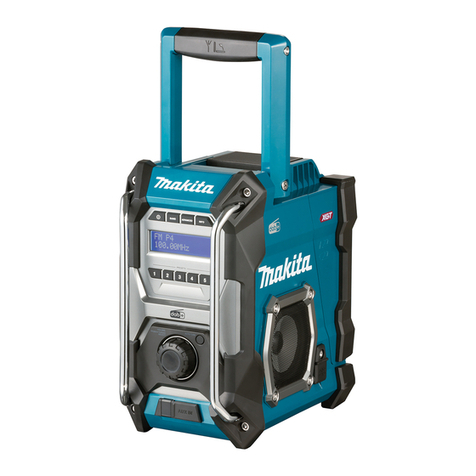
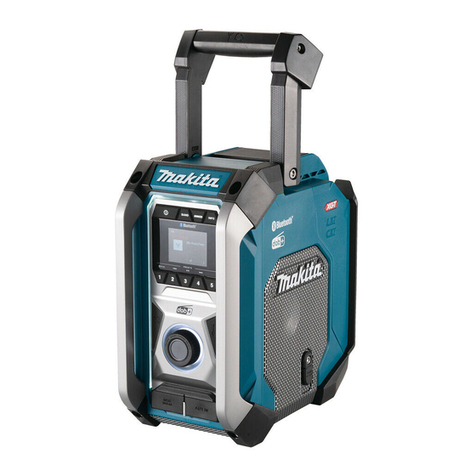
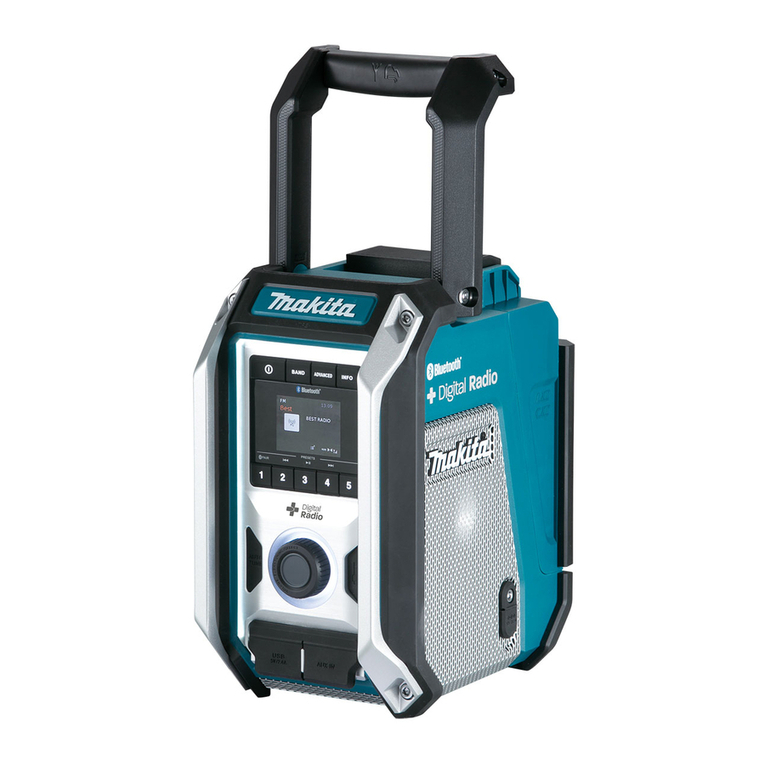
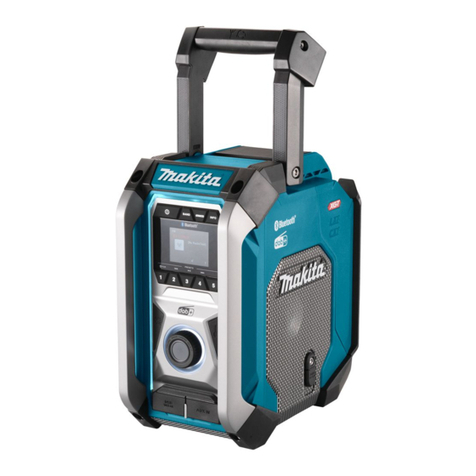
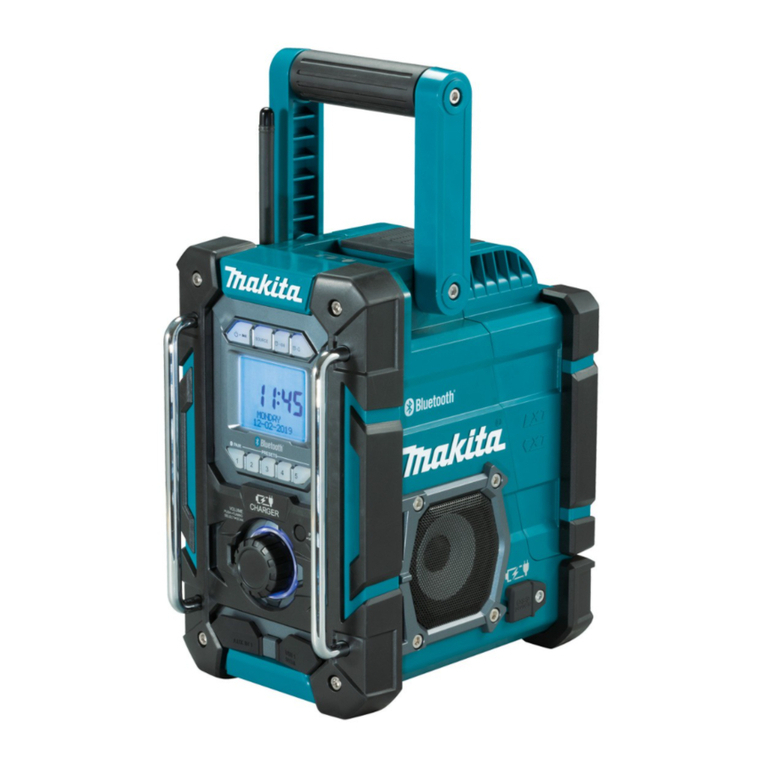
Makita DMR110N User manual

EN Job Site Radio Instruction manual 4
PL Akumulatorowy odbiornik radiowy Instrukcja obsługi 12
HU Munkahelyi rádió Használati utasítás 20
SK Pracovné rádio Návod na obsluhu 28
CS Pracovní rádio Návod k obsluze 36
UK Радіоприймач для використання на
робочому місці Інструкція з експлуатації 44
RO Radio pentru locul de lucru Manual de instrucţiuni 53
DE Baustellenradio Betriebsanleitung 61
SL Prenosni Radio Navodila za uporabo 70
SQ Radio për kantier pune Manuali i përdorimit 77
BG Радио за Работни Обекти Упътване за употреба 85
HR Gradilišni Radio Upute za uporabu 94
MK Радио за работно место Упатство за работа 101
SR Radio za gradilište Uputstvo za upotrebu 110
RU Радиоприемник для использования
на рабочей площадке Инструкция по
эксплуатации 119
DMR110N

2
1
16
17
18
19
7
8
6
1234
5
9
10
14
15
12
13
11

3
4
2
5
7
3
6
LXT
CXT
1
2
1
2
LXTCXT

4 ENGLISH
ENGLISH
(Original instructions)
EXPLANATION OF
GENERAL VIEW (Fig. 1)
1. Power button
2. Band button
3. Advanced setting button
4. Info button
5. Preset button
6. Auto tune button
7. Volume/Tuning Control/Select knob
8. DC IN socket
9. AUX IN socket
10. LCD display
11. Soft bended rod antenna
12. Handle
13. Battery compartment cover (covering battery
cartridge)
14. Speaker
15. Battery compartment locker
16. Micro USB port for software upgrade
17. Battery compartment (for LXT battery)
18. Battery compartment (for cluster battery)
19. Battery compartment (for CXT battery)
FEATURES
●FM/DAB or DAB+
●Large LCD display with illumination
●Manual/Preset/Scan tuning
●Rotary tuning and volume control
●5 preset stations for each band
●Micro USB port for software upgrade
●Stereo speaker for rich sound performance
●Ultra rugged design
●Water resistant to IP64
●Powered by both Makita battery pack and supplied
power adaptor
SYMBOLS
The following show the symbols used for the equipment.
Be sure that you understand their meaning before use.
Read instruction manual.
Only for EU countries.
Due to the presence of hazardous
components in the equipment, waste
electrical and electronic equipment,
accumulators and batteries may have
a negative impact on the environment
and human health.
Do not dispose of electrical and
electronic appliances or batteries with
household waste!
In accordance with the European
Directive on waste electrical and
electronic equipment and on
accumulators and batteries and
waste accumulators and batteries,
as well as their adaptation to national
law, waste electrical equipment,
batteries and accumulators should be
stored separately and delivered to a
separate collection point for municipal
waste, operating in accordance with
the regulations on environmental
protection.
9
8

5 ENGLISH
This is indicated by the symbol of the
crossed-out wheeled bin placed on the
equipment.
IMPORTANT SAFETY
INSTRUCTIONS
WARNING:
When using electric tools, basic safety precautions
should always be followed to reduce the risk of fire,
electric shock, and personal injury, including the
following:
1. Read this instruction manual and the charger
instruction manual carefully before use.
2. Clean only with dry cloth.
3. Do not install near any heat sources such as
radiators, heat registers, stoves, or other apparatus
(including amplifiers) that produce heat.
4. Only use attachments/accessories specified by the
manufacturer.
5. Unplug this apparatus during lighting storms or
when unused for long periods of time.
6. A battery operated radio with integral batteries or a
separate battery pack must be recharged only with
the specified charger for the battery. A charger that
may be suitable for one type of battery may create a
risk of fire when used with another battery.
7. Use battery operated radio only with specifically
designated battery packs. Use of any other batteries
may create a risk of fire.
8. When battery pack is not in use, keep it away from
other metal objects like: paper clips, coins, keys,
nails, screws, or other small metal objects that can
make a connection from one terminal to another.
Shorting the battery terminals together may cause
sparks, burns, or a fire.
9. Avoid body contact with grounded surfaces such
as pipes, radiators, ranges and refrigerators. There
is an increased risk of electric shock if your body is
grounded.
10. Under abusive conditions, liquid may be ejected
from the battery; avoid contact. If contact
accidentally occurs, flush with water. If liquid
contacts eyes, additionally seek medical help.
Liquid ejected from the battery may cause irritation
or burns.
11. The MAINS plug is used as the disconnect device,
and it shall remain readily operable.
12. Do not use a battery pack or tool that is damaged
or modified. Damaged or modified batteries may
exhibit unpredictable behavior resulting in fire,
EXPLOSION or risk of injury.
13. Do not expose a battery pack or tool to fire
or excessive temperature. Exposure to fire or
temperature above 130°C may cause explosion.
14. Follow all charging instructions and do not charge
the battery pack or tool outside the temperature
range specified in the instructions. Charging
improperly or at temperatures outside the specified
range may damage the BATTERY and increase the
risk of fire.
SAVE THESE INSTRUCTIONS
SPECIFIC SAFETY RULES
FOR BATTERY CARTRIDGE
1. Before using battery cartridge, read all instructions
and cautionary markings on (1) battery charger, (2)
battery, and (3) product using battery.
2. Do not disassemble battery cartridge.
3. If operating time has become excessively shorter,
stop operating immediately. It may result in a risk of
overheating, possible burns and even an explosion.
4. If electrolyte gets into your eyes, rinse them out with
clear water and seek medical attention right away. It
may result in loss of your eyesight.
5. Do not short the battery cartridge:
(1) Do not touch the terminals with any conductive
material.
(2) Avoid storing battery cartridge in a container
with other metal objects such as nails, coins,
etc.
(3) Do not expose battery cartridge to water or
rain. A battery short can cause a large current
flow, overheating, possible burns and even a
breakdown.
6. Do not store and use the tool and battery cartridge
in locations where the temperature may reach or
exceed 50°C (122°F).
7. Do not incinerate the battery cartridge even if it is
severely damaged or is completely worn out. The
battery cartridge can explode in a fire.
8. Do not nail, cut, crush, throw, drop the battery
cartridge, or hit against a hard object to the battery
cartridge. Such conduct may result in a fire,
excessive heat, or explosion.
9. Do not use a damaged battery.
10. To avoid risk, the manual of replaceable the battery
should be read before use. And the max discharging
current of the battery should be greater than or
equal to 8A.
11. The contained lithium-ion batteries are subject to
the Dangerous Goods Legislation requirements.
12. When disposing the battery cartridge, remove
it from the tool and dispose of it in a safe place.
Follow your local regulations relating to disposal of
battery.
6 ENGLISH
13. Use the batteries only with the products specified
by Makita. Installing the batteries to non-compliant
products may result in a fire, excessive heat,
explosion, or leak of electrolyte.
14. If the tool is not used for a long period of time, the
battery must be removed from the tool.
15. During and after use, the battery cartridge may take
on heat which can cause burns or low temperature
burns.
16. Do not touch the terminal of the tool immediately
after use as it may get hot enough to cause burns.
17. Do not allow chips, dust, or soil stuck into the
terminals, holes, and grooves of the battery
cartridge. It may result in poor performance or
breakdown of the tool or battery cartridge.
18. Unless the tool supports the use near a high-
voltage electrical power lines, do not use the battery
cartridge near a high-voltage electrical power lines.
It may result in a malfunction or breakdown of the
tool or battery cartridge.
19. Keep the battery away from children.
CAUTION:
● Danger of explosion if battery is incorrectly
replaced.
● Replace only with the same or equivalent type.
● Only use genuine Makita batteries. Use of non-
genuine Makita batteries, or batteries that have
been altered, may result in the battery bursting
causing fires personal injury and damage. It will
also void the Makita warranty for the Makita tool
and charger.
Tips for maintaining maximum battery
life
1. Charge the battery cartridge before completely
discharged. Always stop tool operation and charge
the battery cartridge when you notice less tool power.
2. Never recharge a fully charged battery cartridge.
Overcharging shortens the battery service life.
3. Charge the battery cartridge with room temperature
at 10°C - 40°C (50°F - 104°F). Let a hot battery
cartridge cool down before charging it.
4. When not using the battery cartridge, remove it from
the tool or the charger.
5. Charge the battery cartridge if you do not use it for a
long period (more than six months).

7 ENGLISH
OPERATING TIME
The following tables indicate the operating time with a full charged battery.
Battery capacity
Battery cartridge voltage At speaker output =
50mW + 50mW
Unit: Hour (Approximately)
10.8V - 12V max 14.4V 18V
1.3Ah BL1013
BL1014 7.0
1.5Ah
BL1016 8.0
BL1415N 7.0
BL1815N 8.0
2.0Ah
BL1021B 10.0
BL1820B 10.0
3.0Ah
BL1430B 12.0
BL1830B 14.0
4.0Ah
BL1041B 21.0
BL1440 19.0
BL1840B 20.0
5.0Ah BL1850B 26.0
6.0Ah
BL1460B 25.0
BL1860B 32.0
: Cluster battery
: Slide battery
WARNING:
Only use the battery cartridges listed above. Use of any other battery cartridges may cause injury and/or fire.
Note:
●Table regarding to the battery operating time above is for reference. The actual operating time may differ with the
type of the battery, charging condition, or usage environment.
●Some of the battery cartridges listed above may not be available depending on your region of residence.
●The operating time is based on the operation in DAB/DAB+ on a single charge.

8 ENGLISH
INSTALLATION
Installing or removing Slide battery
cartridge (Fig. 2 & 3 & 4)
CAUTION:
Always switch off the radio before removing the battery
cartridge.
●Always switch off the tool before installing or
removing of the battery cartridge.
●Hold the tool and the battery cartridge firmly when
installing or removing battery cartridge.
●To install the battery cartridge, align the tongue on
the battery cartridge with the groove in the housing
and slip it into place. Always insert it all the way until
it locks in place with a little click.
●If you can see the red indicator on the upper side of
the button, it is not locked completely. Install it fully
until the red indicator cannot be seen. If not, it may
accidentally fall out of the radio, causing injury to you
or someone around you.
●Do not use force when installing the battery cartridge.
If the cartridge does not slide in easily, it is not being
inserted correctly.
●To remove the battery cartridge, slide it from the radio
while sliding the button on the front of the cartridge or
pressing the buttons on both sides of the cartridge.
●Be careful not to pinch your fingers when opening or
closing the battery cover.
Return the battery compartment locker to the original
position.
Reduced power, distortion and a “stuttering sound” are
signs that the battery needs to be replaced.
Note:
The battery pack can’t be charged via the supplied AC
power adaptor.
Installing or removing Cluster battery
cartridge (Fig. 2 & 5)
CAUTION:
Always switch off the radio before removing the battery
cartridge.
●To insert the battery cartridge, align the tongue on the
battery cartridge with the groove in the housing and
slip it into place.
●To remove the battery cartridge, take the battery out
of the terminal while pressing the buttons on the side
of cartridge.
Return the battery compartment locker to the original
position.
Reduced power, distortion and a “stuttering sound” are
signs that the battery needs to be replaced.
Note:
The battery pack can’t be charged via the supplied AC
power adaptor.
Indicating the remaining battery
capacity (Fig. 6 & 7)
1. Indicator lamps 2.Check button
Only for slide battery cartridges with the indicator
Press the check button on the battery cartridge to
indicate the remaining battery capacity. The indicator
lamps light up for few seconds.
Indicator or lamps
Remaining
capacity
Lighted Off Blinking
75% to 100%
50% to 75%
25% to 50%
0% to 25%
(For LXT battery cartridges only)
Charge the
battery.
(For LXT battery cartridges only)
The battery
may have
malfunctioned.
Note:
●Depending on the conditions of use and the ambient
temperature, the indication may differ slightly from
the actual capacity.
●The first (far left) indicator lamp will brink when the
battery protection system works. (For LXT battery
cartridges only)
Installing the soft bended rod antenna
(Fig. 2 & 8)
Install the soft bended rod antenna as shown in the
figure.
Note:
There is a click in the battery compartment designed to
store the removed antenna.
Using supplied AC power adaptor
(Fig. 9)
Remove the rubber protector and insert the adaptor
plug into the DC IN socket on the front side of the radio.
Plug the adaptor into a standard mains socket outlet.
Whenever the adaptor is used, the battery pack is

9 ENGLISH
automatically disconnected. The AC adaptor should be
disconnected from the main supply when not in use.
OPERATION
This radio has three tuning methods- Scan tuning,
Manual tuning and Memory presets recall.
Selecting a station – DAB
1. Press the Power button to switch on your radio.
2. Select the DAB mode by pressing the Band button.
3. Press the Advanced setting button and rotate the
Volume/Tuning Control/Select knob until “Station List”
is flashing on the screen. Press the Volume/Tuning
Control/Select knob to enter the list of the stations.
4. Rotate the Volume/Tuning Control/Select knob to
scroll through the list of available stations. Press the
knob to select the station.
5. Adjust the desired volume by rotating the Volume/
Tuning Control/Select knob.
Display modes – DAB
Your radio has a range of display options in the DAB
mode:
Press the Info button to cycle through the various
options shown in the following letters (a. to g.).
a. Station name Indicates the station name being
listened to.
b. Program type Indicates the type of station
being listened to. E.g. Pop,
Classics, News, etc.
c. Multiplex name Indicates the name of the DAB
multiplex to which the current
station belongs.
d. Time & date Indicates the current time and
date.
e. Frequency and
channel
Indicates the frequency and
channel number for the currently
tuned DAB station.
f. Bit rate/Audio type Indicates the digital audio bit
rate and audio type for the
currently tuned DAB station.
g. Signal strength Indicates the signal strength for
the currently tuned DAB station.
Finding new stations – DAB
From time to time, new DAB radio stations may become
available. Or you may have moved to a different part of
the country. In this case you may need to activate your
radio to scan for new stations.
To allow the radio to find the available stations, it is
recommended to carry out a full scan of the entire DAB
Band III frequencies.
1. Press the Auto tune button.
2. Your radio will perform a full scan of the DAB
frequencies. As new stations are found, the station
counter on the left side in the display will increase
and stations will be added to the list.
Manual tuning – DAB
Manual tuning allows you to tune your radio to a
particular DAB frequency in Band III. This function can
also be used to assist the positioning of the antenna
or the radio so as to optimize reception for a specific
channel or frequency.
1. Press the Advanced setting button and rotate the
Volume/Tuning Control/Select knob until “Manual
Tune” shown on the display. Press the Volume/Tuning
Control/Select knob to enter the manual tuning mode.
2. Rotate the Volume/Tuning Control/Select knob to
select the desired DAB channel. Press Volume/
Tuning Control/Select knob to confirm the chosen
frequency.
Station order setup – DAB
Your radio has 3 station order settings from which
you can choose. The station order settings are
alphanumeric, ensemble and valid station.
1. Press the Advanced setting button.
2. Rotate the Volume/Tuning Control/Select knob until
“Station order” appearing on the display, then press
the Volume/Tuning Control/Select knob to enter the
setting.
3. Rotate the Volume/Tuning Control/Select knob to
select the following options and press the knob to
confirm the setting.
Alphanumeric Sorts the station list alpha-
numerically 0...9 A...Z.
Ensemble Organizes the station list by DAB
multiplex.
Valid Shows only those stations for which
a signal can be found.
Dynamic Range Control (DRC) – DAB
DRC feature can make quieter sounds easier to hear
when your radio is used in a noisy environment by
reducing the dynamic range of the audio signal. There
are three levels of compression:
DRC 0 No compression applied.
DRC 1/2 Medium compression applied.
DRC 1 Maximum compression applied.

10 ENGLISH
1. Press the Power button to switch on your radio.
2. Press the Band button to select the DAB band.
3. Press the Advanced setting button and rotate the
Volume/Tuning Control/Select knob until “DRC Value”
shown on the display. Then press the Volume/Tuning
Control/Select knob to enter the setting. The display
will show the current DRC value.
4. Rotate the Volume/Tuning Control/Select knob to
select desired DRC setting.
5. Press the Volume/Tuning Control/Select knob to
confirm the setting.
Scan Tuning – FM
1. Press the Power button to turn on the radio.
2. Select the desired waveband by pressing the Band
button. Make sure the soft bended rod antenna has
been well placed for best FM reception. Try to avoid
operating the radio next to a computer screen and
other equipment which will cause interference to the
radio.
3. Press the Auto tune button and the radio will search
and stop automatically when it finds a radio station.
The radio will continue searching for the next
available station unless the operator presses the Auto
tune button to stop the scanning.
4. Rotate the Volume/Tuning Control/Select knob to get
the desired sound level. The LCD display will show
sound level changes.
Note:
In order to use the Volume/Tuning Control/Select
knob to find your desired station, press and hold the
Volume/Tuning Control/Select knob to switch to the
tuning control mode.
5. To turn off the radio, press the Power button.
FM scan zone
When using FM mode, your radio can be set to scan
either local stations or to scan all stations including
distant radio stations.
Manual Tuning – FM
1. Press the Power button to turn on the radio.
2. Press the Band button to select desired waveband.
Adjust the antenna as described above.
3. Rotate the Volume/Tuning Control/Select knob will
change the frequency in the following increment: FM:
0.05 or 0.1MHz.
Note:
In order to use the Volume/Tuning Control/Select
knob to find your desired station, press and hold the
Volume/Tuning Control/Select knob to switch to the
tuning control mode.
4. Keep rotating the Volume/Tuning Control/Select knob
until desired frequency is shown on the display.
5. Rotate the Volume/Tuning Control/Select knob to get
the desired sound level.
6. To turn off the radio, press the Power button.
Display modes – FM
Your radio has a range of display options for FM radio
mode:
Repeat pressing the Info button to cycle through the
different options.
a. Program
station
Indicates the name of the station
being listened to.
b. Radio text Indicates text message such as new
items, etc.
c. Program type Indicates the type of station being
listened to such as Pop, Classic,
News, etc.
d. Time & date Indicates the current time and date.
e. Frequency Indicates the frequency of the FM
signal.
Storing stations in preset memories
(DAB and FM)
There are 5 memory presets for each waveband.
1. Press the Power button to turn on the radio.
2. Tune to the desired station using one of the methods
previously described.
3. Press and hold the desired Preset button until the
preset number shown on the display, for example,
“P2 Saved”. The station is then stored in the selected
Preset button.
4. Repeat this procedure for the remaining presets.
5. Stations stored in the preset memories can be
overwritten by following the procedures described
above.
Recall stations from the preset
memories (DAB and FM)
1. Press the Power button to turn on the radio.
2. Press the Band button to select your desired
waveband.
3. Press the desired Preset button momentarily. The
preset number and station frequency will appear in
the display.
Language options
There are eight language options available in the
radio: English, German, Italian, French, Dutch, Danish,
Norwegian, and Polish.
1. Press Advanced setting button.
2. Rotate the Volume/Tuning Control/Select knob until
“Language” shown on the display. Press the Volume/
Tuning Control/Select knob to enter the setting.

11 ENGLISH
3. Rotate the Volume/Tuning Control/Select knob to
choose your desired language. Press the Volume/
Tuning Control/Select knob to confirm your setting.
Brightness control
The backlight of the display can be adjusted.
1. Press the Advanced setting button.
2. Rotate the Volume/Tuning Control/Select knob until
“Backlight” shown on the display. Press the Volume/
Tuning Control/Select knob to enter the setting.
3. Rotate the Volume/Tuning Control/Select knob to
choose to enable or disable the backlight function,
then press the Volume/Tuning Control/Select knob to
confirm the setting.
System reset
If your radio fails to work correctly, or some digits on
the display are missing or incomplete, carry out the
following procedure.
1. Press the Advanced setting button.
2. Rotate the Volume/Tuning Control/Select knob until
“Factory Reset” shown on the display. Press the
Volume/Tuning Control/Select knob to enter the
setting.
3. Rotate the Volume/Tuning Control/Select knob to
choose “Yes”. Press the Volume/Tuning Control/
Select knob to confirm the setting and a full reset will
be performed.
Software version
1. Press the Advanced setting button.
2. Rotate the Volume/Tuning Control/Select knob
until “SW Version” shown on the display. Press the
Volume/Tuning Control/Select knob to view the
software version installed in the radio.
Micro USB port for software upgrade
Software updates for your radio may be available in the
future.
As software updates become available software and
information on how to update your radio can be found at
Makita website.
AUXILIARY INPUT SOCKET
A 3.5mm Auxiliary input socket is provided at the front
of your radio to permit an audio signal to be fed into the
unit from an external audio device such as a MP3 or CD
player.
1. Connect an external audio source (for example, MP3
or CD player) to the AUX IN socket.
2. Press the Power button to switch on your radio.
3. Repeatedly press and release the Band button until
“AUX 1” is displayed.
4. To have the better sound quality, we recommend
setting the volume to more than two-thirds level on
your audio device and then adjust the volume on the
radio as required.
Note:
Audio cord is not included as standard accessories.
MAINTENANCE
CAUTION:
●Never use gasoline, benzine, thinner, alcohol or the
like. Discoloration, deformation or cracks may result.
SPECIFICATIONS
Power requirements
AC power adaptor DC 12V 1A, center pin positive
Battery Cluster battery: 10.8V
Slide battery: 10.8V - 18V
Frequency coverage
FM 87.50-108 MHz
DAB/DAB+
174.928-239.200 MHz
DAB/DAB+ Channel
block DAB (Band III) 5A-13F
Compatible standard DAB/DAB+
Circuit feature
Loudspeaker 3 inches 8 ohm
Output Power
10.8V: 1.2W x 2
14.4V: 2.2W x 2
18V: 3.5W x 2
Input terminal 3.5mm dia. (AUX IN)
Antenna system DAB/FM:
soft bended rod antenna
Dimension
(L x W x H) in mm 280 x 163 x 302mm
Weight 3.9Kg (without battery)

12 POLSKI
POLSKI
(oryginalna instrukcja)
OBJAŚNIENIA DO WIDOKU
OGÓLNEGO (Rys. 1)
1. Przycisk zasilania
2. Przycisk pasm
3. Przyciskustawieńzaawansowanych
4. Przycisk informacji
5. Przyciskustawieńwstępnych
6. Przycisk automatycznego nastawiania
7. PokrętłoGłośności/Kontrolistrojenia/Wyboru
8. Gniazdo DC
9. Gniazdo AUX
10.WyświetlaczLCD
11.Giętkaantenaprętowa
12. Uchwyt
13.Osłonakomorybaterii(przykrywającykasetę
baterii)
14.Głośnik
15. Blokada komory baterii
16. Port micro USB do aktualizacji
oprogramowania
17. Komora akumulatora (dla akumulatora LXT)
18. Komora akumulatora (dla akumulatora
klastrowego)
19. Komora akumulatora (dla akumulatora CXT)
FUNKCJE
●FM/DAB lub DAB+
● DużywyświetlaczLCDzfunkcjąpodświetlenia
● Strojenieręczne/przywoływaniezapomocą
przycisków programowalnych/strojenie automatyczne
● Pokrętłostrojenia/głośności
●5 programowalnych przycisków do ustawiania stacji
radiowychdlakażdegopasmaczęstotliwości
●Port micro USB do aktualizacji oprogramowania
● Głośnikstereozapewniającyczystebrzmienie
● Ultratrwałaobudowa
● Wodoodpornośćspełniającawymogistopniaochrony
IP64
●Odbiornik radiowy zasilany zarówno przez akumulator
Makita, jak i przez dostarczony zasilacz
SYMBOLE
Poniżejprzedstawionosymbolestosowanewprzypadku
omawianegourządzenia.Przedrozpoczęciemjego
użytkowanianależyupewnićsię,żesąonezrozumiałe.
Przeczytaćinstrukcjęobsługi.
Tylko dla krajów UE.
Zewzględunaobecność
niebezpiecznychczęściwsprzęcie,
zużytysprzętelektrycznyi
elektroniczny, akumulatory i baterie
mogąmiećnegatywnywpływna
środowiskoizdrowieczłowieka.
Nienależywyrzucaćurządzeń
elektrycznych i elektronicznych ani
baterii z odpadami domowymi!
ZgodniezDyrektywąEuropejską
dotyczącązużytegosprzętu
elektrycznego i elektronicznego,
akumulatorówibateriiorazzużytych
akumulatorówibaterii,atakżeich
dostosowania do prawa krajowego,
zużytysprzętelektryczny,bateriei
akumulatorypowinnybyćskładowane
oddzielnie i dostarczane do punktu
selektywnej zbiórki odpadów
komunalnych,działającegozgodnie
zprzepisamidotyczącymiochrony
środowiska.
Wskazujenatosymbolprzekreślonego
koszanakółkachumieszczonyna
urządzeniu.
WAŻNE ZASADY
BEZPIECZEŃSTWA
OSTRZEŻENIE:
Używającelektronarzędzi,należyzawszeprzestrzegać
podstawowychśrodkówostrożnościwceluzmniejszenia
ryzykawystąpieniapożaru,porażeniaprądemoraz
uszkodzeniaciała,włączającponiższe:
1. Przedkorzystaniemzurządzenianależydokładnie
zapoznaćsięzniniejsząinstrukcjąobsługioraz
instrukcjąobsługiładowarki.
2. Czyścićwyłączniesuchąszmatką.
3. Niemontowaćprzyjakimkolwiekźródleciepła,takim
jakgrzejniki,kratkiwylotoweciepłegopowietrza,
piecelubinneurządzenia(równieżwzmacniacze)
wytwarzająceciepło.
4. Stosowaćwyłącznieprzyrządy/akcesoriazalecane
przez producenta.
5. Wyłączyćniniejszeurządzeniepodczasburzyoraz
wprzypadkunieużywaniaprzezdłuższyczas.
6. Akumulatorowy odbiornik radiowy z akumulatorem
wbudowanymluboddzielnymmusibyćładowany
wyłączniezapomocąokreślonejładowarkido
akumulatora.Ładowarkaprzeznaczonadojednego
typuakumulatoramożestwarzaćzagrożenie
wystąpieniapożaruwprzypadkustosowaniajejdo
ładowaniainnegoakumulatora.

13 POLSKI
7. Do zasilania akumulatorowego odbiornika
radiowegonależyużywaćtylkoprzeznaczonych
doniegoakumulatorów.Używanieinnych
akumulatorówmożestwarzaćryzykowystąpienia
pożaru.
8. Gdyakumulatorniejestużywany,należy
zabezpieczyćgoprzedkontaktemzinnymi
metalowymi przedmiotami, takimi jak spinacze,
monety,klucze,gwoździe,wkrętybądźinnemałe
przedmiotymetalowe,któremogąpowodować
zwarcie styków akumulatora. Zwarcie styków
akumulatoragrozipojawieniemsięiskier,
poparzeniamilubpożarem.
9. Należyunikaćkontaktuciałazprzedmiotami
uziemionymi, takimi jak rury, grzejniki, kuchenki
czylodówki.Gdyciałoczłowiekajestuziemione,
wzrastaryzykoporażeniaprądemelektrycznym.
10. Wrazieniewłaściwychwarunkówużytkowania
możedojśćdowyciekuelektrolituzakumulatora.
Unikaćkontaktu.Wrazieprzypadkowegokontaktu,
należyprzemyćskażonąskóręwodą.Wprzypadku
kontaktuelektrolituzoczaminależydodatkowo
zasięgnąćporadylekarza.Płynzakumulatoramoże
powodowaćpodrażnienialubpoparzenia.
11. WtyczkaZASILANIAjestużywanadoodłączania
urządzeniaodzasilaniaipowinnapozostaćzawsze
gotowadoużycia.
12. Nieużywajbateriilubnarzędzia,gdyzostały
uszkodzonebądźzmodyfikowane.Uszkodzone
lubzmodyfikowanebateriemogąwykazywać
nieprzewidywalnezachowanieskutkującepożarem,
wybuchemlubwystąpieniemryzykaobrażeń.
13. Niewystawiajbateriilubnarzędzianadziałanie
ognialubwysokiejtemperatury.Narażeniena
działanieognialubtemperaturypowyżej130°C
możespowodowaćwybuch.
14. Postępujzgodniezwszystkimiinstrukcjamidot.
ładowaniainieładujbateriilubnarzędziapoza
wyznaczonym w instrukcji zakresem temperatur.
Nieprawidłoweładowanielubładowaniew
temperaturzeprzekraczającejokreślonyzakres
możeuszkodzićbaterięispowodowaćryzyko
wystąpieniapożaru.
ZACHOWAĆ INSTRUKCJĘ
OBSŁUGI.
SZCZEGÓŁOWE ZASADY
BEZPIECZEŃSTWA
DOTYCZY AKUMULATORA
1. Przedużyciembaterii,przeczytajwszystkie
instrukcje oraz oznaczenia dot. uwag na (1)
ładowarcedobaterii,(2)bateriachoraz(3)
produkciekorzystającymzbaterii.
2. Nie rozmontowuj baterii.
3. Jeżeliczasużywaniaznaczącosięzmniejszył,
natychmiastprzestańkorzystaćzurządzenia.Może
toskutkowaćprzegrzaniem,powodowaćoparzenia,
anawetprowadzićdowybuchu.
4. Gdyelektrolitdostaniesiędotwoichoczu,przepłucz
jeczystąwodąinatychmiastskonsultujsięz
lekarzem.Możetoskutkowaćutratąwzroku.
5. Nie powoduj zwarcia baterii:
(1) Niedotykajstykówprzypomocyprzewodzących
materiałów.
(2) Unikaj przechowywania baterii w pojemniku
z innymi metalowymi przedmiotami, np.
gwoździami,monetamiitp.
(3) Nienarażajbateriinaoddziaływaniewody
lubdeszczu.Zwarciebateriimożeskutkować
dużymprzepływemnapięcia,przegrzaniem,
możliwymioparzeniamiiuszkodzeniem.
6. Nieprzechowujnarzędziaibateriiwmiejscach,
gdzietemperaturamożeosiągaćlubprzekraczać
50°C (122°F).
7. Niespalajbateriinawet,jeżelisąbardzozniszczone
lubkompletniezużyte.Bateriamożewybuchnąćw
ogniu.
8. Nienakłuwać,ciąć,zgniatać,rzucać,upuszczać
wkładuakumulatoraaniuderzaćtwardym
przedmiotem.Takiepostępowaniemoże
spowodowaćpożar,nadmierneciepłolubwybuch.
9. Nieużywajuszkodzonychbaterii.
10. Abyuniknąćryzyka,należyzapoznaćsięz
instrukcjąobsługibaterii.Maksymalnenatężenie
wyładowaniabateriipowinnobyćwiększelubrówne
8A.
11. Bateria litowo-jonowa podlega wymogom
Prawodawstwa dot. towarów niebezpiecznych.
12. Abyusunąćkasetęakumulatorową,wyjmijjąz
urządzenia,anastępniezutylizujwbezpiecznym
miejscu.Postępujzgodniezmiejscowymi
regulacjamidotyczącymiwyrzucaniabaterii.
13. Używajbateriiwyłączniezproduktamiokreślonymi
przezfirmęMakita.Instalacjabateriiwproduktach
niezgodnychmożeskutkowaćpożarem,
nadmiernymprzegrzewaniemsięlubwyciekiem
elektrolitu.
14. Jeśliurządzenieniejestużywaneprzezdłuższy
czas,należywyjąćakumulatorzurządzenia.
15. Podczasipoużyciuakumulatormożesię
nagrzewać,comożepowodowaćpoparzenialub
oparzenia niskotemperaturowe.
16. Niedotykaćkońcówkiterminalabezpośredniopo
użyciu,ponieważmożebyćnagrzanynatyle,aby
spowodowaćoparzenia.

14 POLSKI
17. Niepozwól,abywióry,kurzlubbruddostałysiędo
styków,otworówirowkówwewkładzieakumulatora.
Możetospowodowaćsłabąwydajnośćlub
uszkodzenieurządzenialubakumulatora.
18. Oileurządzeniepozwalanaużytkowaniew
pobliżuliniiwysokiegonapięcia,nienależyużywać
akumulatorawpobliżuliniiwysokiegonapięcia.
Możetospowodowaćnieprawidłowedziałanielub
uszkodzenieurządzenialubakumulatora.
19. Trzymaj akumulator z dala od dzieci.
OSTRZEŻENIE:
●Niebezpieczeństwo wybuchu, gdy bateria jest
nieprawidłowo wymieniona.
●Wymieniaj tylko na ten sam typ lub jego
ekwiwalent.
●Używaj wyłącznie oryginalnych baterii Makita.
Używanie nieoryginalnych baterii Makita lub
baterii, które zostały zmodyfikowane, może
skutkować wybuchem baterii, a w rezultacie
pożarem, obrażeniami ciała i uszkodzeniami.
Spowoduje to także unieważnienie gwarancji
Makity na narzędzie oraz ładowarkę.
Wskazówki dot. maksymalnej
żywotności baterii
1.Ładujbaterięprzedjejcałkowitymrozładowaniem
się.Zawszezatrzymajurządzenieinaładujbaterię,
gdyzauważyszspadekmocywnarzędziu.
2.Nigdynieładujwpełninaładowanychbaterii.
Nadmierneładowanieskracażywotnośćbaterii.
3.Ładujbaterięwtemperaturzepokojowej10°C-40°C
(50°F-104°F).Pozwól,abygorącabateriaostygła
zanimrozpocznieszjejładowanie.
4.Jeśliakumulatorniejestużywany,należywyjąćgoz
urządzenialubładowarki.
5.Naładujbaterię,jeżeliniebędzieszjejużywaćprzez
dłuższyokresczasu(więcejniżsześćmiesięcy).
CZAS PRACY
Poniższetabeleprzedstawiajączasypracyprzymaksymalnymnaładowaniuakumulatora.
Pojemność
baterii
Napięcie
ak
um
u
l
a
t
o
r
a
NAWYJŚCIUZGŁOŚNIKA=
50mW + 50mW
Jednostka:Godzina(około)
10.8V - 12V maks 14.4V 18V
1.3Ah BL1013
BL1014 7.0
1.5Ah
BL1016 8.0
BL1415N 7.0
BL1815N 8.0
2.0Ah BL1021B 10.0
BL1820B 10.0
3.0Ah BL1430B 12.0
BL1830B 14.0
4.0Ah
BL1041B 21.0
BL1440 19.0
BL1840B 20.0
5.0Ah BL1850B 26.0
6.0Ah BL1460B 25.0
BL1860B 32.0
: Akumulator klastrowy
: Bateria wsuwana
OSTRZEŻENIE:
Używaj wyłącznie baterii wymienionych powyżej. Korzystanie z jakichkolwiek innych baterii może
powodować obrażenia lub pożar.
Uwaga:
● Tabeladotyczącaczasupracynabateriipowyżejjesttylkopoglądowa.Faktycznyczaspracybateriimożesię
różnićwzależnościodtypubaterii,warunkówładowaniaorazśrodowiskaużytkowania.
● Niektórezwyżejwymienionychbateriimogąbyćniedostępnewzależnościodregionuzamieszkania.
● CzaspracyzostałpodanywoparciuopracęwzakresieDAB/DAB+najednymnaładowaniu.

15 POLSKI
INSTALACJA
MONTAŻ LUB DEMONTAŻ
AKUMULATORA WSUWANEGO
(Rys. 2 & 3 & 4)
OSTRZEŻENIE:
Przeddemontażemakumulatoranależyzawsze
wyłączyćodbiornikradiowy.
● Zawszewyłączajurządzenieprzedzamontowaniem
lubwyjęciemakumulatora.
●Podczas instalowania lub wyjmowania akumulatora
mocnotrzymajurządzenieiakumulator.
● Abyzamontowaćakumulator,należywyrównać
występnaakumulatorzezrowkiemwobudowiei
wsunąćgonaswojemiejsce.Akumulatornależy
zawszewsunąćdooporu,domomentujego
zablokowania na miejscu, co jest sygnalizowane
delikatnymkliknięciem.
● Jeśliczerwonywskaźnikwgórnejczęściprzycisku
jestnadalwidoczny,oznaczato,żeniezostałon
całkowiciezablokowany.Należygozamontować
całkowicie,takabyczerwonywskaźnikniebył
widoczny.Wprzeciwnymrazieakumulatormoże
przypadkowowysunąćsięzodbiornikaradiowego,
raniącoperatoralubosobypostronne.
● Podczasmontażuakumulatoranieużywać
nadmiernejsiły.Jeśliniemożnagoswobodnie
wsunąć,prawdopodobniezostałonnieprawidłowo
włożony.
● Abywyjąćakumulator,należyprzesunąćprzycisk
znajdującysięwprzedniejjegoczęściiwysunąć
akumulatorzodbiornikaradiowegolubnacisnąć
jednocześnieprzyciskiznajdującesiępoobujego
bokach.
● Uważaj,abynieprzygnieśćpalcówpodczas
otwieraniaizamykaniaosłonynabaterię.
Przywróćkomoręnaakumulatordopierwotnejpozycji.
Pojawieniesięspadkumocy,zniekształceńizakłóceń
oznaczakoniecznośćwymianyakumulatora.
Uwaga:
Niemożnaładowaćakumulatorazapomocą
dołączonegozasilaczasieciowego.
Wkładanie lub wyjmowanie kasety
akumulatora klastrowego (Rys. 2 & 5)
OSTRZEŻENIE:
Przeddemontażemakumulatoranależyzawsze
wyłączyćodbiornikradiowy.
● Abywłożyćkasetęakumulatora,wyrównajwystępna
akumulatorzezrowkiemwobudowieiwsuńgona
miejsce.
● Abywyjąćkasetęakumulatora,wyjmijakumulatorz
terminala,naciskającprzyciskizbokukasety.
Przywróćkomoręnaakumulatordopierwotnejpozycji.
Pojawieniesięspadkumocy,zniekształceńizakłóceń
oznaczakoniecznośćwymianyakumulatora.
Uwaga:
Niemożnaładowaćakumulatorazapomocą
dołączonegozasilaczasieciowego.
WSKAZUJE STAN NAŁADOWANIA
AKUMULATORA (RYS. 6 & 7)
1. Lampki wskaźnikowe 2. Przycisk kontrolny
Tylko dla wsuwanych wkładów akumulatorowych ze
wskaźnikiem
NacisnąćprzyciskCheck(Sprawdź)naakumulatorze,
abysprawdzićstannaładowaniaakumulatora.Nakilka
sekundzaświecąsiękontrolki.
Lampkiwskaźnikowe
Pozostałobaterii
Zapalony Wyłączony Mruga
75% ~ 100%
50% ~ 75%
25% ~ 50%
0% ~ 25%
(Tylkodlawkładów
akumulatorowych LXT)
Naładujbaterię
(Tylkodlawkładów
akumulatorowych LXT)
Bateriamoże
niedziałać
prawidłowo
UWAGA:
● Wzależnościodwarunkówużywaniaoraz
temperaturyzewnętrznej,wskaźnikmożesię
nieznacznieróżnićodfaktycznejpozostałejilości
zasilania.
● Pierwsza(najdalejpolewej)lampkakontrolnabędzie
migać,gdyaktywnyjestsystemochronyakumulatora.
(TylkodlawkładówakumulatorowychLXT)
Montaż giętkiej anteny (Rys. 2 & 8)
Zamontowaćgiętkąantenęzgodniezrysunkiem.
Uwaga:
Wprzedzialenaakumulatoryznajdujesięmiejsce
przeznaczone na przechowywanie zdemontowanej
anteny.

16 POLSKI
KORZYSTANIE Z ZASILACZA AC
(Rys. 9)
Zdjąćgumowezabezpieczenie,anastępniewsunąć
wtyczkęzasilaczadowejściaprądustałego,
znajdującegosięzprzoduodbiornikaradiowego.
Podłączadapterdostandardowegogniazdka.
Kiedykolwiekużywanyjestadapter,bateriajest
automatycznieodłączana.
Zasilaczsieciowynależyodłączyćodgłównegoźródła
zasilania,gdyniejestużywany.
DZIAŁANIE
Odbiornik radiowy posiada trzy metody strojenia –
strojenieautomatyczne,strojenieręczne,przywoływanie
zapomocąprzyciskówprogramowalnychzpamięcią.
WYBIERANIE STACJI – DAB
1.Naciśnijprzyciskzasilania,abywłączyćradio.
2.WybraćtrybDABpoprzeznaciśnięcieprzyciskuBand
(pasmoczęstotliwości).
3.NacisnąćprzyciskAdvanced(ustawienie
zaawansowane)iobracaćpokrętłemgłośności/
strojenia/wyborudomomentuwyświetleniana
ekraniemigającejopcji„StationList”(listastacji).
Nacisnąćpokrętłogłośności/strojenia/wyboruwcelu
potwierdzenia listy stacji.
4.Obrócićpokrętłemgłośności/strojenia/wyboruw
celuprzewinięcialistydostępnychstacji.Nacisnąć
pokrętłowceluwybraniastacji.
5.Ustawićwymaganypoziomgłośnościpoprzez
obróceniepokrętłagłośności/strojenia/wyboru.
TRYBY WYŚWIETLANIA – DAB
Niniejszy odbiornik radiowy posiada kilka opcji
wyświetlaniadlatrybuDAB:
NacisnąćprzyciskInfo,abyprzewinąćdostępneopcje
wyświetlanewgnastępującychliter(odadog).
a. Station name
(nazwa stacji)
Wskazujenazwęaktualnie
słuchanejstacji.
b. Program type
(typ programu)
Wskazuje typ aktualnie
słuchanejstacji.Np.Pop,
Classics, News itp.
c. Multiplex name
(nazwa multipleksu)
Wskazujenazwę
multipleksu DAB, do
któregonależyobecnie
słuchanastacja.
d. Time & date
(data i godzina)
Wskazujebieżącądatęi
godzinę.
e. Frequency and channel
(częstotliwośćikanał)
Wskazujeczęstotliwość
oraznumerkanałuobecnie
słuchanejstacjinadawanej
w systemie DAB.
f. Bit rate/Audio type
(prędkośćtransmisji
bitów/typ audio)
Wskazujecyfrową
prędkośćtransmisjibitów
oraz typ audio obecnie
słuchanejstacjinadawanej
w systemie DAB.
g. Signal strength
(siłasygnału)
Wskazujesiłęsygnału
obecniesłuchanejstacji
nadawanej w systemie
DAB.
WYSZUKIWANIE NOWYCH STACJI –
DAB
Odczasudoczasumogąpojawiaćsięnowestacje
radiowenadawanewsystemieDAB.Istniejerównież
możliwośćzmianymiejscapobytuwinnejczęścikraju.
Wtakichprzypadkachmożezaistniećkonieczność
ponownegowłączeniastrojeniaodbiornikaradiowegow
celu wyszukania nowych stacji.
Wceluumożliwieniawyszukaniadostępnychstacji
zalecasięprzeprowadzeniepełnegostrojeniapasmaIII
częstotliwościDAB.
1.NacisnąćprzyciskAutotune(strojenie
automatyczne).
2.Odbiornikradiowyprzeprowadzipełnestrojenie
częstotliwościDAB.Powyszukaniunowychstacji
wskazanielicznikastacjiznajdującegosiępolewej
stroniewyświetlaczawzrośnie,astacjezostaną
dodane do listy.
STROJENIE RĘCZNE – DAB
Strojenieręczneumożliwiaprzeprowadzenie
strojeniaodbiornikaradiowegowzakresieokreślonej
częstotliwościwpaśmieIII.Funkcjętęmożnarównież
stosowaćwcelulepszegoustawieniaantenylub
odbiornikaradiowego,takabyzoptymalizowaćodbiór
danegokanałulubczęstotliwości.
1.NacisnąćprzyciskAdvanced(ustawienie
zaawansowane)iobracaćpokrętłemgłośności/
strojenia/wyborudomomentuwyświetleniana
ekranieopcji„ManualTune”(strojenieręczne).
Nacisnąćpokrętłogłośności/strojenia/wyboruwcelu
potwierdzeniatrybustrojeniaręcznego.
2.Obrócićpokrętłemgłośności/strojenia/wyboruw
celuwybraniawymaganegokanałuDAB.Nacisnąć
pokrętłogłośności/strojenia/wyboruwcelu
potwierdzeniawybranejczęstotliwości.

17 POLSKI
USTAWIENIE KOLEJNOŚCI STACJI –
DAB
Niniejszyodbiornikradiowyposiada3rodzajeustawień
kolejnościstacjidowyboru.Dostępneustawienia
kolejnościstacjito:kolejnośćalfanumeryczna,grupowa
orazwgdostępności.
1.NacisnąćprzyciskAdvanced(ustawienie
zaawansowane).
2.Obracaćpokrętłemgłośności/strojenia/wyborudo
momentupojawieniasięnawyświetlaczuopcji
„Stationorder”(kolejnośćstacji),anastępnie
nacisnąćpokrętłogłośności/strojenia/wyboruwcelu
potwierdzenia ustawienia.
3.Obrócićpokrętłemgłośności/strojenia/wyboruwcelu
wybranianastępującychopcji,anastępnienacisnąć
pokrętło,abypotwierdzićustawienie.
Alphanumeric(kolejność
alfanumeryczna)
Sortujelistęstacji
alfanumerycznie 0...9
A...Z.
Ensemble (grupowa) Organizujelistęstacjiwg
multipleksu DAB.
Valid(dostępność) Wskazuje te stacje,
którychsygnałmożna
wyszukać.
KONTROLA DYNAMIKI SYGNAŁU
(DRC) – DAB
FunkcjaDRCumożliwiadopasowaniecichychdźwięków
wceluichlepszejsłyszalnościwprzypadkusłuchania
odbiornikaradiowegowśrodowiskuodużymnatężeniu
hałasupoprzezzredukowaniezakresudynamicznego
sygnałuaudio.Istniejątrzypoziomykompresjizakresu
dynamicznego:
DRC 0 Brak kompresji zakresu dynamicznego.
DRC 1/2 Średniakompresjazakresu
dynamicznego.
DRC 1 Maksymalna kompresja zakresu
dynamicznego.
1.Naciśnijprzyciskzasilania,abywłączyćradio.
2.WybraćpasmoDABpoprzeznaciśnięcieprzycisku
Band(pasmoczęstotliwości).
3.NacisnąćprzyciskAdvanced(ustawienie
zaawansowane)iobracaćpokrętłemgłośności/
strojenia/wyborudomomentuwyświetleniana
ekranieopcji„DRCValue”(wartośćDRC).Następnie
nacisnąćpokrętłogłośności/strojenia/wyboruwcelu
potwierdzeniaustawienia.Nawyświetlaczupojawi
sięaktualnawartośćDRC.
4.Obrócićpokrętłemgłośności/strojenia/wyboruwcelu
wybrania wymaganego ustawienia DRC.
5.Nacisnąćpokrętłogłośności/strojenia/wyboruwcelu
potwierdzenia ustawienia.
STROJENIE AUTOMATYCZNE – FM
1.Włączyćodbiornikradiowy,naciskającprzycisk
Power (zasilanie).
2.Wybraćwymaganepasmoczęstotliwościpoprzez
naciśnięcieprzyciskuBand(pasmoczęstotliwości).
Upewnićsię,żemiękka,giętkaantenazostała
prawidłowoustawionawceluuzyskanianajlepszego
sygnałupasmaczęstotliwościFM.Unikaćustawienia
odbiornikaradiowegowpobliżuekranukomputera
lubinnegosprzętu,mogącegoprzyczynićsiędo
zakłóceniapracyodbiornikaradiowego.
3.NacisnąćprzyciskAutotune(strojenieautomatyczne).
Odbiornik radiowy rozpocznie wyszukiwanie stacji,
a po jej znalezieniu automatycznie zatrzyma
strojenie. Odbiornik radiowy ponownie rozpocznie
wyszukiwanienastępnejdostępnejstacjidopóki
użytkowniknienaciśnieprzyciskuAutotune(strojenie
automatyczne) w celu zatrzymania strojenia.
4.Obrócićpokrętłemgłośności/strojenia/wyboruw
celuustawieniawymaganegopoziomugłośności.
NawyświetlaczuLCDzostaniewyświetlonazmiana
poziomugłośności.
Uwaga:
Wceluwyszukaniawymaganejstacjizapomocą
pokrętłagłośności/strojenia/wyborunależynacisnąći
przytrzymaćpokrętłogłośności/strojenia/wyboru,aby
włączyćtrybstrojenia.
5.Abywyłączyćodbiornikradiowy,należynacisnąć
przycisk Power (zasilanie).
STROJENIE FM
W przypadku korzystania z trybu FM, niniejszy odbiornik
radiowymożnaustawićnastrojeniestacjilokalnych
lubstrojeniewszystkichstacji,włączającodległestacje
radiowe.
STROJENIE RĘCZNE – FM
1.Włączyćodbiornikradiowy,naciskającprzycisk
Power (zasilanie).
2.NacisnąćprzyciskBand(pasmoczęstotliwości)w
celuwybraniawymaganegopasmaczęstotliwości.
Ustawićantenęzgodniezpowyższymopisem.
3.Obracaniepokrętłemgłośności/strojenia/wyboru
powodujeprzyrostczęstotliwościo:
FM: 0.05 lub 0.1MHz.
Uwaga:
Wceluwyszukaniawymaganejstacjizapomocą
pokrętłagłośności/strojenia/wyborunależynacisnąći
przytrzymaćpokrętłogłośności/strojenia/wyboru,aby
włączyćtrybstrojenia.
4.Obracaćpokrętłemgłośności/strojenia/wyborudo
momentuustawieniawymaganejczęstotliwości
wskazanejnawyświetlaczu.

18 POLSKI
5.Obrócićpokrętłemgłośności/strojenia/wyboruwcelu
ustawieniawymaganegopoziomugłośności.
6.Abywyłączyćodbiornikradiowy,należynacisnąć
przycisk Power (zasilanie).
TRYBY WYŚWIETLANIA – FM
Niniejszy odbiornik radiowy posiada kilka opcji
wyświetlaniadlatrybuFM:
Naciskanie kilkukrotne przycisku Info powoduje
przewijanieróżnychopcji.
a. Program station
(stacja programu)
Wskazujenazwęaktualnie
słuchanejstacji.
b. Radio text
(komunikaty radiowe)
Wskazuje komunikaty
tekstowe odbiornika
radiowego, np. nowe pozycje
itp.
c. Program type
(rodzaj programu)
Wyświetlarodzajaktualnie
słuchanejstacji,np.Pop,
Classic, News itp.
d. Time & date
(data i godzina)
Wskazujebieżącądatęi
godzinę.
e. Frequency
(częstotliwość)
Wskazujeczęstotliwość
sygnałuFM.
PROGRAMOWANIE STACJI W
PAMIĘCIACH PRZYCISKÓW
PROGRAMOWALNYCH (DAB I FM)
Odbiornik radiowy posiada 5 przycisków
programowalnychdlakażdegopasmaczęstotliwości.
1.Włączyćodbiornikradiowy,naciskającprzycisk
Power (zasilanie).
2.Ustawićwymaganąstacjęzapomocąjednejz
wcześniejopisanychmetod.
3.NacisnąćiprzytrzymaćwymaganyprzyciskPreset
(przyciskprogramowalny)domomentuwyświetlenia
numeruprzyciskuprogramowalnego,naprzykład:
„P2Saved”(P2zapisany).Stacjazostaniezapisana
pod wybranym przyciskiem Preset (przyciskiem
programowalnym).
4.Powtórzyćpowyższąprocedurędlapozostałych
przycisków programowalnych.
5.Stacjezapisanewpamięciachprzycisków
programowalnychmogąbyćnadpisanezgodniez
powyższąprocedurą.
PRZYWOŁYWANIE STACJI Z PAMIĘCI
PRZYCISKÓW PROGRAMOWALNYCH
(DAB I FM)
1.Włączyćodbiornikradiowy,naciskającprzycisk
Power (zasilanie).
2.NacisnąćprzyciskBand(pasmoczęstotliwości)w
celuwybraniawymaganegopasmaczęstotliwości.
3.NacisnąćnachwilęwymaganyprzyciskPreset
(przycisk programowalny). Numer przycisku
programowalnegoorazczęstotliwośćstacjiradiowej
pojawiąsięnawyświetlaczu.
OPCJE WERSJI JĘZYKOWEJ
Wodbiornikuradiowychdostępnychjestosiemopcjiwer
sjijęzykowej:angielska,niemiecka,włoska,francuska,
holenderska,duńska,norweskaipolski.
1.NacisnąćprzyciskAdvanced(ustawienie
zaawansowane).
2.Obracaćpokrętłemgłośności/strojenia/wyborudo
momentuwyświetleniaopcji„Language”(język)na
wyświetlaczu.Nacisnąćpokrętłogłośności/strojenia/
wyboru w celu potwierdzenia ustawienia.
3.Obrócićpokrętłemgłośności/strojenia/wyboruwcelu
wybraniawymaganegojęzyka.Nacisnąćpokrętło
głośności/strojenia/wyboruwcelupotwierdzenia
ustawienia.
Ustawienie jasności
Istniejemożliwośćustawieniapodświetlenia
wyświetlacza.
1.NacisnąćprzyciskAdvanced(ustawienie
zaawansowane).
2.Obracaćpokrętłemgłośności/strojenia/wyboru
domomentuwyświetleniaopcji„Backlight”
(podświetlenie)nawyświetlaczu.Nacisnąćpokrętło
głośności/strojenia/wyboruwcelupotwierdzenia
ustawienia.
3.Obrócićpokrętłemgłośności/strojenia/wyboru
wceluwybraniaopcjiwłączenialubwyłączenia
funkcjipodświetlenia,anastępnienacisnąćpokrętło
głośności/strojenia/wyboru,abypotwierdzić
ustawienie.
RESETOWANIE SYSTEMU
Wprzypadkunieprawidłowegodziałaniaodbiornika
radiowegolubbrakuwyświetlaniawszystkichcyfr
nawyświetlaczu,należyprzeprowadzićnastępującą
procedurę.
1.NacisnąćprzyciskAdvanced(ustawienie
zaawansowane).
2.Obracaćpokrętłemgłośności/strojenia/wyboru
domomentuwyświetleniaopcji„FactoryReset”
(ustawieniafabryczne)nawyświetlaczu.Nacisnąć
pokrętłogłośności/strojenia/wyboruwcelu
potwierdzenia ustawienia.
3.Obrócićpokrętłemgłośności/strojenia/wyboruw
celuwybraniaopcji„Yes”(tak).Nacisnąćpokrętło
głośności/strojenia/wyboruwcelupotwierdzenia
ustawieniaicałkowitegozresetowaniaustawień.

19 POLSKI
Wersja oprogramowania
1.NacisnąćprzyciskAdvanced(ustawienie
zaawansowane).
2.Obracaćpokrętłemgłośności/strojenia/wyborudo
momentuwyświetleniaopcji„SWVersion”(wersja
oprogramowania)nawyświetlaczu.Nacisnąćpokrętło
głośności/strojenia/wyboruwceluwyświetleniawersji
oprogramowania zainstalowanego w odbiorniku
radiowym.
Port micro USB do aktualizacji
oprogramowania
Wprzyszłośćistniejemożliwośćdostępnościaktualizacji
oprogramowania posiadanego odbiornika radiowego.
NastronieinternetowejfirmyMakitaudostępnianesą
informacjedotyczącedostępnościnowychaktualizacji
oprogramowania oraz sposobu ich przeprowadzenia w
odbiorniku radiowym.
GNIAZDO WEJŚCIA AUDIO
Dodatkowegniazdowejściowe3.5mmzostało
udostępnionewprzedniejczęściradia,abyumożliwić
połączeniesygnałuaudiozzewnętrznymiurządzeniami
audio, takimi jak MP3 I odtwarzacz CD.
1.Podłączzewnętrzneźródłoaudio(np.MP3,
odtwarzacz CD) do gniazda AUX.
2.Naciśnijprzyciskzasilania,abywłączyćradio.
3.NaciśnijipuśćkilkakrotnieprzyciskBand,ażpojawi
się“AUX1”.
4.Abyuzyskaćlepsząjakośćdźwięku,zalecamy
ustawieniegłośnościnapowyżejjednątrzecią
poziomunatwoimurządzeniuaudio,anastępniew
miarępotrzebydostosowaniegłośnościradia.
UWAGA:
Przewódaudioniejestdołączonyjakostandardowe
wyposażenie.
KONSERWACJA
UWAGA:
● Niewolnoużywaćbenzyny,benzenu,
rozpuszczalnika, alkoholu itp. Substancje takie
mogąspowodowaćodbarwienia,odkształcenialub
pęknięcia.
DANE TECHNICZNE
Dane
dotyczące
zasilania
Zasilaczprądu
zmiennego 12V DC 1A,
ś
rodk
owy
wtyk
dodatni
Akumulator
Akumulator klastrowy:
10.8V
Bateria wsuwana:
10.8V - 18V
Zakresczęstotliwości
FM 87.50-108 MHz
DAB/DAB+
174.928-239.200 MHz
DAB/DAB+ Blokada
kanału DAB (pasmo III) 5A-13F
Zgodnośćzestandardem DAB/DAB+
Charakterystyka obwodu
Głośnik 3
cala,
8
omów
Moc
wyjściowa
10.8V: 1.2W x 2
14.4V: 2.2W x 2
18V: 3.5W x 2
Gniazdo
wejścia Śred.3,5mm
(wejścieAUX)
System
antenowy DAB/FM:
giętkaantenaprętowa
Wymiary
(dł.xszer.xwys.) 280 x 163 x 302mm
Masa 3.9Kg (bez akumulatora)

20 MAGYAR
MAGYAR (Eredeti útmutató)
Az általános nézet
részletezése (1. ábra)
1. Power gomb
2. Band gomb
3. Advanced beállítógomb
4. Info gomb
5. Preset gomb
6. Auto tune hangológomb
7. Hangerőszabályzó/Hangoló/Kiválasztógomb
8. DC IN bemenet
9. AUX IN bemenet
10.LCDkijelző
11. Hajlított rúdantenna
12. Fogó
13. Az akkutartó rekesz fedele (az akkukazetta
fedője)
14. Hangszóró
15. Az akkutartó rekesz zárja
16. Micro USB port a szoftver frissítéséhez
17. Akkutartó rekesz (LXT akkumulátorhoz)
18. Akkutartó rekesz (soros akkumulátorhoz)
19. Akkutartó rekesz (CXT akkumulátorhoz)
FUNKCIÓK
●FM/DAB vagy DAB+
● NagyméretűmegvilágítottLCD-kijelző
● Kézi/előreprogramozható/keresőhangolás
● Forgóhangoló-éshangerőszabályzógomb
● 5előreprogramozhatóállomásmindegyik
hullámsávnál
●Micro USB port a szoftver frissítéséhez
●Sztereó hangszóró a jobb hangzás érdekében
●Robusztus kivitel
●IP64 szerint vízálló
●Makita akkumulátorról és a készülékhez mellékelt
hálózatiadapterrőlegyarántüzemeltethető
SZIMBÓLUMOK
Az alábbiakban a készülékkel kapcsolatos
szimbólumokrólolvashat.Fontos,hogyhasználatelőtt
ezekkel tisztában legyen.
Olvassa el a használati útmutatót.
Csak az EU tagországaiban.
A veszélyes alkatrészek miatt az
elhasznált elektromos és elektronikus
berendezések, akkumulátorok és
elemek rossz hatással vannak a
környezetetre és az emberi egészségre.
Az elektromos és
elektronikuskészülékek, elemek nem a
háztartási hulladékba valók!
Az elhasznált elektromos és
elektronikusberendezésekről,valamint
azakkumulátorokróléselemekrőlés
elhasznált az akkumulátorokról és
elemekrőlszólóeurópaiirányelvnek,
valamint a nemzeti jogszabályoknak
valóalkalmazkodásnakmegfelelőenaz
elhasznált elektromos berendezéseket,
elemeket és akkumulátorokat külön
kell tárolni, és az adott település
különgyűjtőhelyérekellszállítani,
akörnyezetvédelmielőírásoknak
megfelelően.
Ezt a berendezésen található áthúzott
kerekes kuka szimbóluma jelzi.
FONTOS BIZTONSÁGI
UTASÍTÁSOK
FIGYELMEZTETÉS:
Elektromos eszközök használata során mindig tartsa be
azalapvetőbiztonságiutasításokat,ígycsökkenthetia
tűzesetek,áramütésésaszemélyisérülésekkockázatát.
Ezek az alábbiak:
1. Használatelőttfigyelmesenolvassaelezta
használatiútmutatótésatöltőutasításait.
2. A készüléket csak száraz ruhával tisztítsa.
3. Akészüléketneszereljebehőforrásokközelébe,
pl.radiátorok,hősugárzók,kályhák,erősítőkstb.,
melyekhőttermelnek.
4. Kizárólag a gyártó által megadott csatolmányokat
és alkatrészeket és kellékeket használja.
5. Viharok esetén, illetve ha hosszabb ideig nem
kívánja használni, a készülék elektromos
csatlakozóját húzza ki a konnektorból.
6. A rádió beépített akkumulátorait és a különálló
akkumulátortkizárólagatöltésükhözelőírt
töltőkészülékkelszabadtölteni.Egybizonyos
akkumulátortípushozhasználhatótöltőmás
akkumulátortípussalvalóhasználatatűzveszélyt
idézhetelő.
7. Az akkumulátoros rádiót kizárólag a számára
készített akkumulátorokkal használja. Bármely
egyébakkumulátorhasználatatűzkockázatával
járhat.
8. Ha az akkumulátor-egységet nem használja, tartsa
távolirodaikapcsoktól,pénzérméktől,kulcsoktól,
szögektől,csavaroktólésmindenegyébolyan
tárgytól, mely a csatolópontokat összekötheti.
Az akkumulátor csatolópontjanak rövidzárlata
Other manuals for DMR110N
2
Table of contents
Languages:
Other Makita Radio manuals

Makita
Makita DMR116 User manual

Makita
Makita DMR114 User manual

Makita
Makita MR004GZ User manual

Makita
Makita XRM02 User manual

Makita
Makita DMR055 User manual

Makita
Makita BMR104 User manual

Makita
Makita MR052 User manual

Makita
Makita BMR100 User manual

Makita
Makita DMR113 User manual

Makita
Makita RM02 User manual

Makita
Makita BMR100 Quick start guide

Makita
Makita Outdoor Adventure ADRM06 User manual

Makita
Makita ADRM13 User manual

Makita
Makita MR002GZ User manual

Makita
Makita DMR110N User manual

Makita
Makita DMR300 User manual

Makita
Makita BMR102 User manual

Makita
Makita DMR104 User manual

Makita
Makita MR051 User manual

Makita
Makita GRM03 User manual