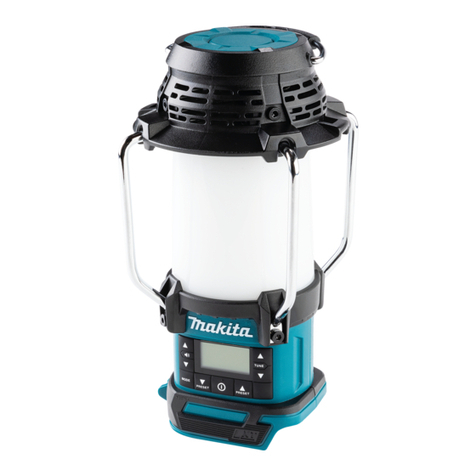
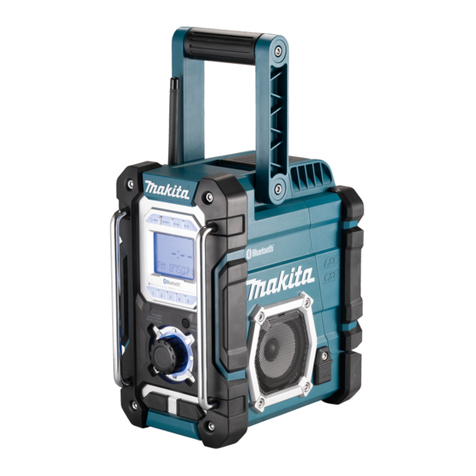
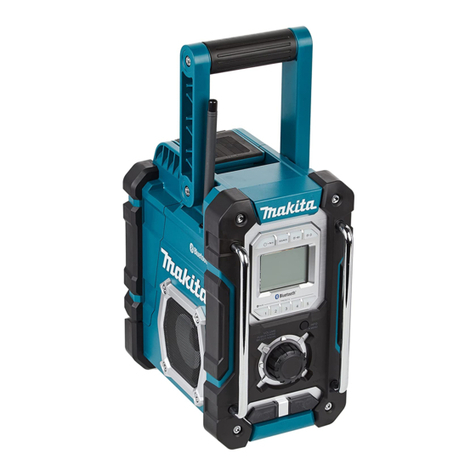
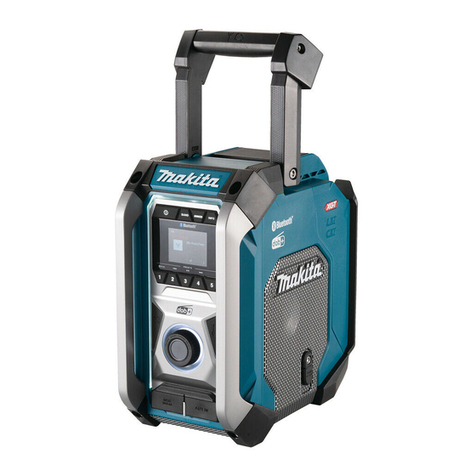
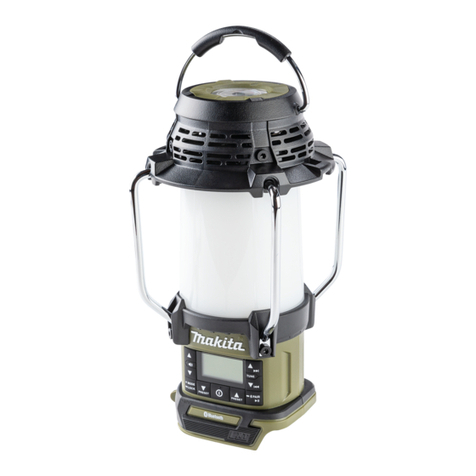
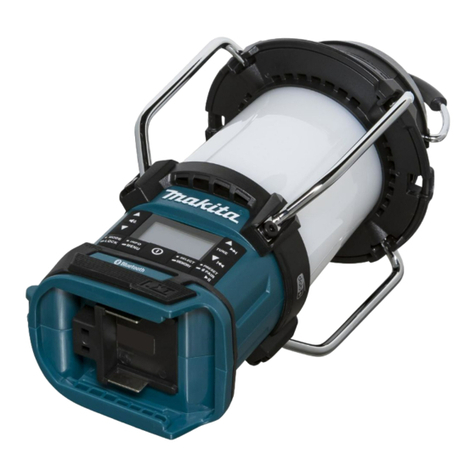
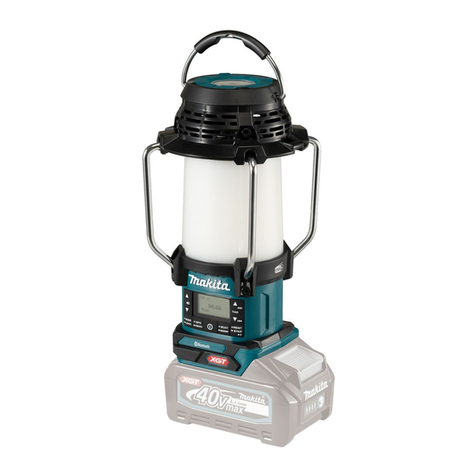
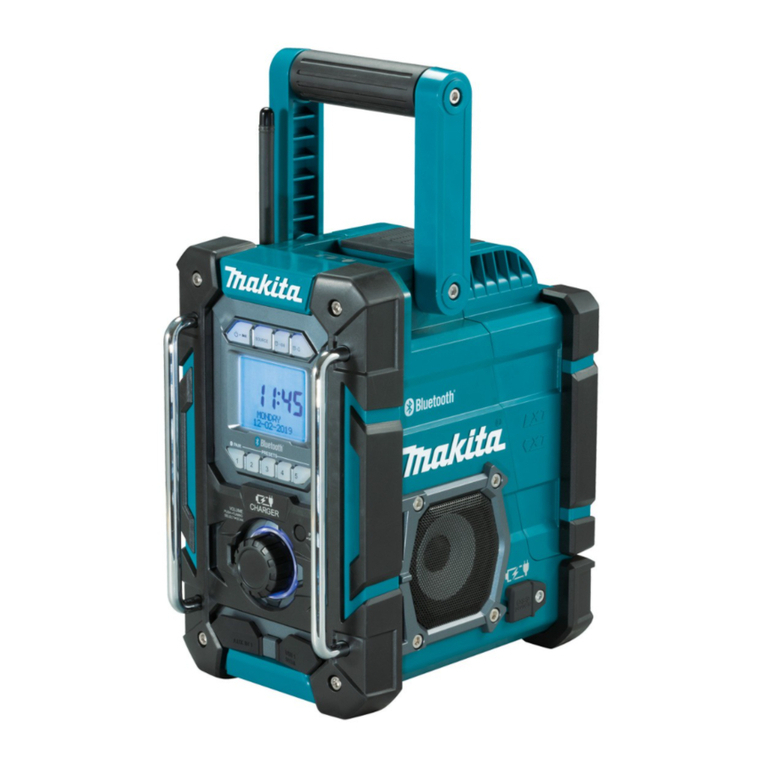
Makita DMR056 User manual

EN Cordless Radio with Lantern Instruction manual 5
FR Radio avec lanterne sans l Manuel d’instructions 14
DE Akku-Radio mit Laterne Betriebsanleitung 24
IT Radio lanterna senza cavi Manuale delle Istruzioni 33
NL Draadloze radio met lantaarn Gebruiksaanwijzing 42
ES Radio con Linterna Inalámbrico Manual de instrucciones 51
PT Radio com lanterna a bateria Manual de instruções 60
DA Trådløs radio med lygte Instruktionsmanual 69
EL Ασύρματο Ραδιόφωνο με Φανάρι Οδηγίες χρήσης 78
TR Fenerli Kablosuz Radyo Kullanma Kılavuzu 89
ZHCN 充电式提灯收音机 使用说明书 98
MS Radio Tanpa Wayar Dengan Lantera Panduan arahan 106
VI Radio Ket Hợp Đèn Lồng Cầm Tay
Hoạt Động Bằng Pin Hướng dẫn sử dụng 115
TH วิทยุไร้สายพร้อมตะเกียง คู่มือการใช้งาน 123
ZHTW 充電式多功能收音機 使用說明書 132
DMR056/
MR009G

2
1
1
4
5
2
3
7 8 9 10 11 14 15 16 18 19176 12 13

3
1
2
1
2
2
4
3
5
DMR056
(LXT)
LXT
MR009G
(XGT)
XGT

4
6

5 ENGLISH
ENGLISH
(Original instructions)
EXPLANATION OF
GENERAL VIEW (Fig. 1)
1. Carrying handle
2. Flashlight
3. Speaker
4. LED Lantern
5. Battery compartment
6. Volume up/down button
7. Mode/Lock button
8. Info/Menu button
9. Power button
10. Select/Memory button
11. Preset/Bluetooth pairing/Play/Pause button
12. Tuning down/Previous track/Rewind button
13. Tuning up/Next track/Fast-forward button
14. Light brightness button
15. Light on/off button/Light mode button
16. Color temperature button
17. USB charging on/off button/Charging LED
indicator
18. USB power supply port
19. Strap buckle
SYMBOLS
The following show the symbols used for the equipment.
Be sure that you understand their meaning before use.
Read instruction manual.
Only for EU countries
Due to the presence of hazardous
components in the equipment, waste
electrical and electronic equipment,
accumulators and batteries may have
a negative impact on the environment
and human health. Do not dispose of
electrical and electronic appliances
or batteries with household waste! In
accordance with the European Directive
on waste electrical and electronic
equipment and on accumulators and
batteries and waste accumulators and
batteries, as well as their adaptation
to national law, waste electrical
equipment, batteries and accumulators
should be stored separately and
delivered to a separate collection
point for municipal waste, operating
in accordance with the regulations
on environmental protection. This
is indicated by the symbol of the
crossed-out wheeled bin placed on the
equipment.
IMPORTANT SAFETY
INSTRUCTIONS
WARNING:
When using this product, basic safety precautions
should always be followed to reduce the risk of re,
electric shock, and personal injury, including the
following:
1. Read this instruction manual and the charger
instruction manual carefully before use.
2. Clean only with dry cloth.
3. Do not install near any heat sources such as
radiators, heat registers, stoves, or other apparatus
(including amplifiers) that produce heat.
4. Only use attachments/accessories specified by the
manufacturer.
5. A battery operated radio with integral batteries or a
separate battery pack must be recharged only with
the specified charger for the battery. A charger that
may be suitable for one type of battery may create a
risk of fire when used with another battery.
6. Use battery operated radio only with specifically
designated battery packs. Use of any other batteries
may create a risk of fire.
7. When battery pack is not in use, keep it away from
other metal objects like: paper clips, coins, keys,
nails, screws, or other small metal objects that can
make a connection from one terminal to another.
Shorting the battery terminals together may cause
sparks, burns, or a fire.
8. Avoid body contact with grounded surfaces such
as pipes, radiators, ranges and refrigerators. There
is an increased risk of electric shock if your body is
grounded.
9. Under abusive conditions, liquid may be ejected
from the battery; avoid contact. If contact
accidentally occurs, flush with water. If liquid
contacts eyes, additionally seek medical help.
Liquid ejected from the battery may cause irritation
or burns.
10. Do not use a battery pack or tool that is damaged
or modified. Damaged or modified batteries may
exhibit unpredictable behaviour resulting in fire,
explosion or risk of injury.
11. Do not expose a battery pack or tool to fire
or excessive temperature. Exposure to fire or
temperature above 130°C (266°F) may cause
explosion.

6 ENGLISH
12. Follow all charging instructions and do not charge
the battery pack or tool outside the temperature
range specified in the instructions. Charging
improperly or at temperatures outside the specified
range may damage the battery and increase the risk
of fire.
13. Do not use the product at a high volume for any
extended period. To avoid hearing damage, use the
product at moderate volume level.
14. (For products with LCD display only) LCD displays
include liquid which may cause irritation and
poisoning. If the liquid enters the eyes, mouth or
skin, rinse it with water and call a doctor.
15. Do not expose the product to rain or wet conditions.
Water entering the product will increase the risk of
electric shock.
16. This product is not intended for use by persons
(including children) with reduced physical, sensory
or mental capabilities, or lack of experience
and knowledge, unless they have been given
supervision or instruction concerning use of the
product by a person responsible for their safety.
Children should be supervised to ensure that they
do not play with the product. Store the product out
of the reach of children.
SAVE THESE INSTRUCTIONS
SPECIFIC SAFETY RULES
FOR BATTERY CARTRIDGE
1. Before using battery cartridge, read all instructions
and cautionary markings on (1) battery charger, (2)
battery, and (3) product using battery.
2. Do not disassemble battery cartridge.
3. If operating time has become excessively shorter,
stop operating immediately. It may result in a risk of
overheating, possible burns and even an explosion.
4. If electrolyte gets into your eyes, rinse them out with
clear water and seek medical attention right away. It
may result in loss of your eyesight.
5. Do not short the battery cartridge:
(1) Do not touch the terminals with any conductive
material.
(2) Avoid storing battery cartridge in a container
with other metal objects such as nails, coins,
etc.
(3) Do not expose battery cartridge to water or
rain. A battery short can cause a large current
flow, overheating, possible burns and even a
breakdown.
6. Do not store and use the tool and battery cartridge
in locations where the temperature may reach or
exceed 50°C (122°F).
7. Do not incinerate the battery cartridge even if it is
severely damaged or is completely worn out. The
battery cartridge can explode in a fire.
8. Be careful not to drop or strike battery.
9. Do not use a damaged battery.
10. To avoid risk, the manual of replaceable the battery
should be read before use.
11. The contained lithium-ion-batteries are subject to
the Dangerous Goods Legislation requirements.
For commercial transports e.g. by third parties,
forwarding agents, special requirement on
packaging and labeling must be observed. For
preparation of the item being shipped, consulting
an expert for hazardous material is required. Please
also observe possibly more detailed national
regulations. Tape or mask off open contacts and
pack up the battery in such a manner that it cannot
move around in the packaging.
12. When disposing the battery cartridge, remove
it from the tool and dispose of it in a safe place.
Follow your local regulations relating to disposal of
battery.
13. Use the batteries only with the products specified
by Makita. Installing the batteries to non-compliant
products may result in a fire, excessive heat,
explosion, or leak of electrolyte. If the tool is not
used for a long period of time, the battery must be
removed from the tool.
14. If the tool is not used for a long period of time, the
battery must be removed from the tool.
15. Do not allow chips, dust, or soil stuck into the
terminals, holes, and grooves of the battery
cartridge. It may result in poor performance or
breakdown of the tool or battery cartridge.
16. Keep the battery away from children.
17. During and after use, the battery cartridge may take
on heat which can cause burns or low temperature
burns.
18. Do not touch the terminal of the tool immediately
after use as it may get hot enough to cause burns.
19. Unless the tool supports the use near a high-
voltage electrical power lines, do not use the battery
cartridge near a high-voltage electrical power lines.
It may result in a malfunction or breakdown of the
tool or battery cartridge.
CAUTION:
Only use genuine Makita batteries. Use of
nongenuine Makita batteries, or batteries that have
been altered, may result in the battery bursting
causing res, personal injury and damage. It will
also void the Makita warranty for the Makita tool and
charger.
7 ENGLISH
OPERATING TIME
* The suitable battery packs for this radio listed as the following table.
* The following table indicates the operating time on a single charge.
Model Battery cartridge Battery
capacity
Unit: Hour (Approximately)
Radio* Lantern (360˚
light coverage)
Flash Light
(torch mode)
DMR056
LXT
(14.4V)
BL1415N 1.5Ah 11 4.0 8.5
BL1430B 3.0Ah 19 7.0 14
BL1440 4.0Ah 30 11 22
BL1460B 6.0Ah 39 15 29
LXT
(18V)
BL1815N 1.5Ah 13 4.5 9.0
BL1820B 2.0Ah 17 6.0 12
BL1830B 3.0Ah 24 8.5 16
BL1840B 4.0Ah 34 12 23
BL1850B 5.0Ah 44 16 30
BL1860B 6.0Ah 53 19 37
MR009G XGT
(36V-40Vmax)
BL4020 2.0Ah 20 13 26
BL4025 2.5Ah 24 16 31
BL4040 4.0Ah 36 24 46
BL4050F 5.0Ah 51 34 66
* AT SPEAKERS OUTPUT=100mW
WARNING:
Only use the battery cartridges listed above. Use of any other battery cartridges may cause injury and/or re.
NOTE:
●Table regarding to the battery operating time above is for reference.
●The actual operating time may differ with the type of the battery, charging condition, or usage environment.
●Some of the battery cartridges listed above may not be available depending on your region of residence.
Tips for maintaining maximum battery
life
1. Charge the battery cartridge before completely
discharged. Always stop tool operation and charge
the battery cartridge when you notice less tool power.
2. Never recharge a fully charged battery cartridge.
Overcharging shortens the battery service life.
3. Charge the battery cartridge with room temperature
at 10°C - 40°C (50°F - 104°F). Let a hot battery
cartridge cool down before charging it.
4. When not using the battery cartridge, remove it from
the tool or the charger.
5. Charge the battery cartridge if you do not use it for a
long period (more than six months).

8 ENGLISH
Recommended cord
connected power source
Model Portable power pack
DMR056 PDC01
MR009G PDC01 / PDC1200
●The cord connected battery pack (s) listed above
may not be available depending on your region of
residence.
●Before using the cord connected battery pack, read
instruction and cautionary markings on them.
INSTALLATION AND POWER
SUPPLY
CAUTION:
●Always switch off the radio before installing or
removing the battery cartridge.
●Be careful not to drop or strike the radio. Broken shell
may slash your finger or stab your body. Damaged
radio may exhibit unpredictable behaviour resulting in
fire, explosion or risk of injury.
●Hold the tool and the battery cartridge firmly when
installing or removing battery cartridge.
IMPORTANT:
●Reduced power, distortion, stuttering sound or screen
backlight flashing are all the signs that the battery
needs to be replaced.
●The battery cartridge is not included as standard
accessories.
Installing or removing the sliding
battery cartridge (Fig. 2-3)
●To install the battery cartridge, align the tongue on
the battery cartridge with the groove in the housing
and slip it into place. Always insert it all the way until
it locks in place with a little click.
●If you can see the red indicator on the upper side of
the button, it is not locked completely. Install it fully
until the red indicator cannot be seen. If not, it may
accidentally fall out of the radio, causing injury to you
or someone around you.
●Do not use force when installing the battery cartridge.
If the cartridge does not slide in easily, it is not being
inserted correctly.
●To remove the battery cartridge, slide it from the radio
while sliding the button on the front of the cartridge.
Indicating the remaining battery
capacity (Fig. 4-5)
1. Indicator lamps 2. Check button
Press the check button on the battery cartridge to
indicate the remaining battery capacity. The indicator
lamps light up for few seconds.
●XGT/LXT battery cartridge
Indicator lamps
Remaining
capacity
Lighted Off Blinking
75% ~ 100%
50% ~ 75%
25% ~ 50%
0% ~ 25%
Charge the battery
The battery
may have
malfunctioned
NOTE:
●Depending on the conditions of use and the ambient
temperature, the indication may differ slightly from
the actual capacity.
●The first (far left) indicator lamp will brink when the
battery protection system works.
Charging with USB power supply port
NOTE:
●Connect only devices which are compatible with DC
5V, 2.4A power source to the USB power supply port.
Otherwise it may cause malfunction to the product.
●Connect the USB cable (not included) with the USB
power supply port of the product. And then connect
the other end of the cable with the device.
●To start charging, press the USB charging on/off
button to enable the charging function. The USB
charging on/off button will light up green.
●When the battery power is low, the screen backlight
will flash until the charging function is turned off.
●If the charging function is turned on without charging,
the USB charging on/off button will flash green, and
the charging function will be automatically turned off
after 30 minutes.
●To stop charging, press the USB charging on/off
button to disable the charging function.
●The maximum volume of the output power speaker
will decrease when your USB is charging.
IMPORTANT:
●Before connecting USB device to the charger, always
backup your data of USB device. Otherwise your data
may lose by any possibility.

9 ENGLISH
●The charger may not supply power to some USB
devices.
●When not using or after charging, remove the USB
cable and close the cover.
●Do not connect this USB socket with your PC
USB port, as it is highly possible that it may cause
breakdown of the units.
LISTENING TO DAB RADIO
Tuning into DAB stations
To tune into DAB radio stations, follow these steps:
1. Turn on the radio using the Power button.
2. Select the DAB radio mode by repeatedly pressing
the Mode button.
3. If this is the first time the DAB radio mode is being
used, the radio will automatically perform a full scan
in order to find all available DAB radio stations.
During the scanning process, as new stations are
detected the station counter will increase and the
stations will be added to the list which is stored in the
radio. The bar graph indicates the progress of the
scan.
4. When scanning is completed, the radio will list all
stations that were found. Use the Tuning up or Tuning
down button to scroll through the list of stations and
press the Select button to tune into a station.
NOTE:
For DAB radio mode, if the radio's reception is not good,
it may be necessary to relocate your radio to a position
giving better reception.
The DAB radio menu
You can open the DAB radio menu by pressing and
holding the Info/Menu button while the radio is in the
DAB radio mode. Use the Tuning up or Tuning down
button to select one of the options and then press the
Select button to conrm your choice.
The radio's default and recommended settings are
indicated using an asterisk.
The DAB radio menu offers the following options:
●[Full Scan]: Select this option to perform a full scan
and store all DAB radio stations that were found in
the station list.
●[Manual tune]: Select this option to manually tune
into a DAB channel/frequency.
●[DRC]: Dynamic Range Control (also known as DRC)
can make quieter sounds easier to hear when your
radio is used in a noisy environment by reducing the
dynamic range of the audio signal.
Select this option and then use the Tuning up or
Tuning down button to highlight the required DRC
setting:
[1]: Maximum compression applied.
[1/2]: Medium compression applied.
[0]: No compression applied.
Press the Select button to confirm the setting.
●[Station order]: Select this option and
subsequently [Alphanumeric] to sort the station list
alphanumerically or select [Ensemble] to sort the
station list by DAB multiplex or select [Valid] to show
only those stations for which a signal can be found.
●[System]: Select this option to go to the system
menu settings and configure the radio (refer to the
chapter "Using the System menu" for details).
●[Back]: Select this option to go back one step in the
radio's menus or return to the previous screen.
Showing DAB information on the
display
When listening to a DAB radio broadcast, repeatedly
press the Info/Menu button to cycle through the following
information on the radio's display:
●Dynamic Label Segment (Scrolling text)
●Program type
●Multiplex name
●Frequency and channel
●Signal error/Strength
●Bit rate/Audio type
●Date
LISTENING TO FM RADIO
Tuning into FM stations
To tune into FM radio stations, follow these steps:
1. Turn on the radio using the Power button.
2. Select the FM radio mode by repeatedly pressing the
Mode button.
3. Press and hold the Tuning up or Tuning down
button to automatically tune into an FM station with
a higher or lower frequency respectively. Your radio
will stop scanning when it finds a station of sufficient
strength. The display will show the frequency of the
signal which has been found. If RDS information is
available, after a few seconds the display will show
the radio station name.
4. Press the Tuning up or Tuning down button to fine-
tune the frequency with steps of 0.05MHz if needed.
5. Repeat the steps 3 and 4 to tune into other radio
stations.
NOTE:
For FM radio mode, if the radio's reception is not good,
it may be necessary to relocate your radio to a position
giving better reception.

10 ENGLISH
The FM radio menu
You can open the FM radio menu by pressing and
holding the Info/Menu button while the radio is in the FM
radio mode. Use the Tuning up or Tuning down button
to select one of the options and then press the Select
button to conrm your choice.
The radio's default and recommended settings are
indicated using an asterisk.
The FM radio menu offers the following options:
●[Scan Zone]: Select this option to configure if the
radio should only look for strong signals (“Local”) or
all signals (“Distant”) when using the automatic tuning
feature.
●[System]: Select this option to go to the system
menu settings and configure the radio (refer to the
chapter "Using the System menu" for details).
●[Back]: Select this option to go back one step in the
radio's menus or return to the previous screen.
Showing FM information on the
display
When listening to a FM radio station that is also
broadcasting RDS data, repeatedly press the Info/Menu
button to cycle through the following information on the
radio's display:
●Radio text
●Program type
●Frequency
●Audio mode
●Date
If no RDS information is available, the radio will be
unable to display the text message and program type.
Presetting stations in DAB and FM
modes
There are 9 memory presets each for DAB and FM
radio. They are used in the same way for each operating
mode.
1. Turn on the radio, then select the DAB or FM radio
mode and Tune to the required radio station as
previously described.
2. Press and hold the Select/Memory button. The
display will show a “Save to Preset” menu.
3. Press the Tuning up or Tuning down button to select
the required Preset number. Then press the Select
button to store the preset station. "Saved" will be
shown on the display indicating the station is stored
under the selected preset number. If another station
has already been stored under the chosen preset
number, that station will be overwritten. Repeat this
procedure as needed for the remaining presets.
Recalling a preset in DAB and FM
modes
1. Turn on the radio and then select the DAB or FM
radio mode using the Mode button.
2. Press the Preset button to display the “Preset Recall”
menu.
3. Select a preset number using the Tuning up or
Tuning down button and then press the Select button
to confirm your choice. The radio will now tune into
the selected preset. If the Select button or any other
button is not pressed, the radio will also tune into the
selected preset after 2 seconds. The chosen preset
number is shown in the upper area of the radio
display.
Using the System menu
The System menu can be used to congure the radio.
Follow these steps to access the system settings:
1. Turn on the radio using the Power button.
2. Press and hold the Info/Menu button to open the
menu for the current mode.
3. Use the Tuning up or Tuning down button to select
[System] and press the Select button to open the
menu.
The System menu offers the following options:
Use the Tuning up or Tuning down button to select
one of the options and then press the Select button to
confirm your choice.
The radio's default and recommended settings are
indicated using an asterisk.
●[Time/Date]: Select this option to set the source
for automatically updating the time and date
and set the time format. The subsequent option
[Auto update] allows you to select a source for
automatically updating the time and date and [Set
format] allows you to select the 12 or 24 hour
format. If the 12 hour clock format is chosen, the
radio will display a 12 hour clock with an AM or PM
indicator.
●[Language]: Select this option to configure the
language in which the radio's menus are shown.
●[Radio Reset]: Select this option to reset the radio
to the default factory settings. After confirmation,
all user settings and preset stations will be erased.
●[SW Upgrade]: Software updates for your radio
may be available in the future. As software updates
become available software and information on
how to update your radio can be found at Makita
website. Select this option to perform a software
upgrade.
●[SW Version]: Select this option to view the
software version of the radio. To exit the software
display, press the Info/Menu button.

11 ENGLISH
●[Back]: Select this option to go back one step in
the radio's menus or return to the previous screen.
LISTENING TO MUSIC VIA
BLUETOOTH STREAMING
You need to pair your Bluetooth device with the radio
before you can auto-link to play/stream Bluetooth
music through the radio. Pairing creates a ‘bond’ so two
devices can recognize each other.
Note:
●To have the better sound quality, we recommend
setting the volume to more than two-thirds level on
your Bluetooth device and then adjust the volume on
the radio as required.
●The radio can memorize up to 8 sets of paired
device, when the memory exceed this amount, the
oldest pairing history will be over written.
Pairing your Bluetooth device for the
rst time
1. Press the Power button to turn on the radio. Press
the Mode button to select Bluetooth mode. The
Bluetooth status icon flashes and "Pairing" appears
on the display to show the radio is discoverable.
2. Activate Bluetooth on your device according to the
device’s user manual to link to the radio. Locate the
Bluetooth device list and select the device with the
name of your radio (With some mobiles which are
equipped with earlier versions than BT 2.1 Bluetooth
device, you may need to input the pass code “0000”).
3. Once connected, there will be a confirmation tone
sound. The Bluetooth icon will cease flashing and
display a check mark next to it. You can simply select
and play any music from your source device. Volume
control can be adjusted from your source device, or
directly from the radio.
4. Use the controls on your Bluetooth-enabled device or
on the radio to play/pause and navigate tracks.
Note:
●If 2 Bluetooth devices, pairing for the first time, both
search for the radio, it will show its availability on both
devices. However, if one device links with this unit
first, then the other Bluetooth device won’t find it on
the list.
●If your Bluetooth device is temporarily disconnected
to the radio, then you need to manually reconnect
your device again to the radio.
●If the name of your radio shows in your Bluetooth
device list but your device cannot connect with it,
please delete the item from your list and pair the
device with the radio again following the steps
described previously.
●The optimal Bluetooth transmission range is
approximately 10 meters (33 feet) in line of sight to
the radio, but a distance up to 30 meters (100 feet) is
possible.
●If Bluetooth connection is lost due to exceeding time
of separation, exceeding the optimum distance,
obstacles or otherwise, reconnecting your device with
the radio may be necessary.
●Physical obstacles, other wireless devices or
electromagnetic devices may affect the connection
quality.
●Bluetooth connectivity performance may vary
depending on the connected Bluetooth devices.
Please refer to the Bluetooth capabilities of your
device before connecting to the radio. All features
may not be supported on some paired Bluetooth
devices.
Playing audio les in Bluetooth mode
When you have successfully connected the radio with
the chosen Bluetooth device you can start to play your
music using the controls on your connected Bluetooth
device.
1. Once playing has started, the volume can be adjusted
both on the radio using the Volume buttons and on
the Bluetooth device using the volume control of the
device.
2. Use the controls on your Bluetooth device to play/
pause and navigate tracks. Alternatively, control the
playback using Play/Pause, Next track, Previous
track buttons on your radio.
3. Press and hold the Fast-forward or Rewind button to
move through the current track. Release the button
when the desired point is reached.
Note:
●Some player applications or devices may not respond
to all of these controls.
●Some mobile phones may temporarily disconnect
from the radio when you make or receive calls. Some
devices may temporarily mute their Bluetooth audio
streaming when they receive text messages, emails
or for other reasons unrelated to audio streaming.
Such behaviour is a function of the connected device
and does not indicate a fault with the radio.
Playing a previously-paired Bluetooth
source device
If your Bluetooth device already paired with the radio
previously, the unit will memorize your Bluetooth device
and it attempts to reconnect with a device in memory
which is last connected. If the last connected device is
not available, the radio will be discoverable.

12 ENGLISH
Disconnecting your Bluetooth device
Press and hold the Bluetooth pairing button for 2-3
seconds until "Pairing" appears on the display or turn
off Bluetooth on your Bluetooth device to disable the
connection.
You can also press the Mode button to select any mode
other than Bluetooth mode to disable the connection.
LED LANTERN/FLASHLIGHT
FUNCTION
1. Press the Light on/off button repeatedly to select
different light modes. This multifunctional LED
lantern/flashlight features 4 different modes, you
can select the suitable light operation mode for each
application.
The 4 light modes are as follows:
Lantern (360˚ light coverage)
Lantern (side-carry mode)
Flashlight (torch mode)
Flashlight (strobe mode)
2. Press the Light brightness button to adjust the
suitable light brightness.
3. Press the Color temperature button to select different
color temperatures.
4. Press and hold the Light on/off button to turn off the
light.
Note:
In side-carry mode, only three sides of the lantern are
lit. When using the strap, the lantern can be positioned
as the side-carry mode to prevent the light from blinding
user's eyes.
MISCELLANEOUS
SETTINGS
Key lock
The key lock function is used to prevent unintentional
operation of the radio.
1. Press and hold the Lock button for 2-3 seconds until
“Keys Locked” appears on the display. All buttons
except the Power button will be disabled.
2. To release the lock, press and hold the Lock button
for 2-3 seconds until “Keys Unlocked” appears on the
display.
Using the strap (Fig. 6)
Using the supplied strap, you can hang the product
in different ways whenever needed. (Refer to the
installation method in Figure 6.)
MAINTENANCE
CAUTION:
●Never use gasoline, benzine, thinner, alcohol or the
like. Discoloration, deformation or cracks may result.
●Do not wash the radio with water.

13 ENGLISH
SPECIFICATIONS
Model DMR056 MR009G
Battery 14.4V & 18V 36V - 40Vmax
Frequency coverage FM: 87.50-108MHz (0.05MHz/step)
DAB/DAB+: 174.928-239.200 MHz
DAB/DAB+ Channel block DAB (Band III) 5A-13F
Compatible standard DAB/DAB+
Antenna system FM/DAB: Built-in antenna
USB output 5V / 2.4A
Loudspeaker 2.25 inches
Output power 14.4V: 2.4W
18V: 3W 36V: 3W
Dimensions (L x W x H) 126 x 129 x 289mm
(with BL1860B)
126 x 166 x 315mm
(with BL4050F)
Weight (without battery) 0.98KG 0.99KG
Bluetooth®
(The Bluetooth®word mark and logos are registered trademarks owned by Bluetooth SIG, Inc.)
Bluetooth Version 5.0 Certied
Bluetooth Proles A2DP/SCMS-T/AVRCP
Transmission Power Power Class 2
Transmission Range
Optimum range: Within 10 meters (33 feet)
Maximum range: Up to 30 meters (100 feet)
(It may vary according to different conditions.)
Bluetooth Codec SBC, AAC
Maximum radio frequency power BT EDR: 3.88dBm BT EDR: 3.90dBm
Operating Frequency 2402MHz ~ 2480MHz

14 FRANÇAIS
FRANÇAIS
(Instructions d’origine)
INTERPRÉTATION DE LA
VUE GÉNÉRALE (Fig. 1)
1. Poignée de transport
2. Lampe de poche
3. Haut-parleur
4. Lanterne LED
5. Compartiment de la batterie/des piles
6. Bouton volume haut/bas
7. Bouton Mode/Verrouillage
8. Bouton Info/Menu
9. Bouton d’Alimentation
10. Bouton Sélectionner/Mémoire
11. Bouton Préréglage/Couplage Bluetooth/
Lecture/Pause
12. Bouton de réglage Tuning bas/Piste
précédente/Rembobiner
13. Bouton de réglage Tuning haut/Piste
suivante/Avance rapide
14. Bouton de luminosité de la lumière
15. Bouton de mise en marche/arrêt de
l’éclairage/bouton du mode d’éclairage
16. Bouton de la température des couleurs
17. Bouton d’activation/désactivation de la charge
USB/Voyant LED de charge
18. Port d’alimentation USB
19. Boucle de sangle
SYMBOLES
Les symboles utilisés pour l'équipement sont afchés
ci-dessous. Soyez sûr de tout comprendre avant toute
utilisation.
Lisez le manuel d’utilisation.
Uniquement pour les pays de l'UE.
En raison de la présence de
composants dangereux dans
l'équipement, les déchets
d'équipements électriques et
électroniques, les accumulateurs et les
piles peuvent avoir un impact négatif sur
l'environnement et la santé humaine.
Ne jetez pas les appareils électriques
et électroniques ou les batteries avec
les ordures ménagères ! Conformément
à la directive européenne sur les
déchets d'équipements électriques et
électroniques et sur les accumulateurs
et piles et les déchets d'accumulateurs
et de batteries, ainsi que leur
adaptation à la législation nationale,
les déchets d'équipements électriques,
de piles et d’accumulateurs doivent
être stockés séparément et livrés à
un point de collecte séparé destiné
aux déchets municipaux, fonctionnant
conformément à la réglementation sur
la protection de l'environnement.
Ceci est indiqué par le symbole de la
poubelle sur roues barrée d'une croix
placée sur l'équipement.
INSTRUCTIONS
IMPORTANTES DE
SECURITÉ
AVERTISSEMENT:
Lors de l’utilisation de ce produit, des précautions de
sécurité de base doivent toujours être suivies pour
réduire le risque d’incendie, d’électrocution et de
blessures corporelles, notamment les suivantes :
1. Lisez ce mode d’emploi attentivement ainsi que le
mode d’emploi du chargeur avant de l’utiliser.
2. Nettoyez avec un chiffon sec.
3. N’installez pas à proximité de sources de
chaleur telles que radiateurs, équipements de
chauffage, poêle ou autres appareils (y compris les
amplificateurs) qui produisent de la chaleur.
4. N’utilisez que les extensions/accessoires spécifiés
par le fabricant.
5. Les batteries utilisées pour les radios, qu’elles
soient intégrées ou séparées, doivent être
rechargées uniquement à l’aide du chargeur de
batterie spécifié. Un chargeur qui convient à un type
de batterie peut créer un risque d’incendie s’il est
utilisé avec une autre batterie.
6. Les radios fonctionnant à l’aide de batteries
doivent être utilisées uniquement avec les batteries
désignées. L’utilisation d’autres batteries peut créer
un risque d’incendie.
7. Lorsque la batterie n’est pas utilisée, veuillez la
tenir éloigner des autres objets métalliques tels que:
les trombones, les pièces de monnaie, les clés, les
clous, les vis ou les autres petits objets métalliques
qui peuvent établir une connexion d’une borne à
un autre. Court-circuiter les bornes de la batterie
peut provoquer des étincelles, des brûlures ou un
incendie.
8. Évitez tout contact corporel avec des surfaces
reliées à la terre telles que les tuyaux, les
radiateurs, les cuisinières et les réfrigérateurs. Il y a
un risque accru de choc électrique si votre corps est
relié à la terre.

15 FRANÇAIS
9. Dans des conditions extrêmes, du liquide peut être
éjecté depuis la batterie; évitez tout contact avec le
liquide. En cas de contact accidentel, rincez avec de
l’eau. Si le liquide entre en contact avec les yeux,
consultez un médecin. Le liquide éjecté depuis la
batterie peut causer des irritations ou des brûlures.
10. N’utilisez pas les batteries d’accumulateurs ou
un appareil qui a été endommagé voire même
modifié. Les batteries endommagées ou modifiées
peuvent présenter un comportement imprévisible
entraînant un incendie, une explosion ou un risque
de blessure.
11. N’exposez pas une batterie ou un appareil au feu
ou à une température excessive. L’exposition au feu
ou à une température supérieure à 130°C (266°F)
peut provoquer une explosion.
12. Suivez toutes les instructions de charge et ne
chargez pas la batterie ou l’appareil en dehors de la
plage de température spécifiée dans les instructions.
La charge incorrecte ou à des températures en
dehors de la plage spécifiée peut endommager la
batterie et augmenter le risque d’incendie.
13. N’utilisez pas le produit à un volume élevé durant
une période prolongée. Pour éviter les dommages
auditifs, utilisez-le produit à un niveau de volume
modéré.
14. (Pour les produits avec affichage à cristaux liquides
seulement) les affichages à cristaux liquides
incluent le liquide qui peut causer de l’irritation et
un empoisonnement. Si le liquide pénètre dans les
yeux, la bouche ou la peau, rincez avec de l’eau et
appelez un médecin.
15. N’exposez pas le produit à la pluie ou à des
environnements humides. L’eau pénétrant dans le
produit augmente le risque de choc électrique.
16. Ce produit n’est pas destiné à être utilisé par des
personnes (y compris des enfants) ayant des
capacités physiques, sensorielles ou mentales
réduites, ou un manque d’expérience et de
connaissances, à moins qu’elles aient reçu une
supervision ou une formation concernant l’utilisation
du produit par une personne responsable pour
leur sécurité. Les enfants doivent être surveillés
pour s’assurer qu’ils ne jouent pas avec le produit.
Entreposez le produit hors de la portée des enfants.
CONSERVEZ SES INSTRUCTIONS
RÈGLES SPÉCIFIQUES
DE SÉCURITÉ POUR LA
CARTOUCHE DE BATTERIE
1. Avant d’utiliser la cartouche de batterie, lisez toutes
les instructions et les avertissements concernant
(1) le chargeur de batterie, (2) la batterie, et (3)
l’équipement utilisant la batterie.
2. Ne démontez pas la cartouche de batterie.
3. Si le temps de fonctionnement devient
excessivement court, cessez immédiatement
l’utilisation. Il peut en résulter un risque de
surchauffe, de brûlures et même d’explosion.
4. Si l’électrolyte pénètre dans vos yeux, rincez-les à
l’eau claire et consultez un médecin immédiatement.
Cela peut entraîner une perte de la vue.
5. Ne court-circuitez pas la cartouche de la batterie:
(1) Ne touchez pas les bornes avec un matériau
conducteur.
(2) Évitez de ranger la cartouche de la batterie
dans un conteneur avec d’autres objets
métalliques tels que des clous, des pièces de
monnaie, etc.
(3) N’exposez pas la cartouche de la batterie à l’eau
ou à la pluie. Un court-circuit de la batterie peut
provoquer un fort courant, une surchauffe, des
brûlures et même une panne.
6. Ne rangez pas l’outil ou la cartouche de la batterie
dans des endroits où la température peut atteindre
ou dépasser 50°C (122°F).
7. N’incinérez pas la cartouche de la batterie
même si elle est sérieusement endommagée ou
complètement usée. La cartouche de la batterie
peut exploser dans un feu.
8. Veillez ne pas laisser tomber ou heurter la batterie.
9. N’utilisez pas de batterie endommagée.
10. Pour éviter tout risque, le manuel de la batterie de
remplacement de la batterie doit être lu avant toute
utilisation.
11. Les batteries lithium-ion sont soumises aux
exigences de la législation sur les marchandises
dangereuses. Pour les transports commerciaux,
par ex. par des tiers, des agents de livraison,
des exigences particulières en matière de
conditionnement et d’étiquetage doivent être
respectées.
Pour la préparation de l’article à expédier, il
est nécessaire de consulter un expert pour les
matières dangereuses. Veuillez également prendre
connaissance des réglementations nationales
éventuellement plus détaillées.
Recouvrez par du scotch ou masquez les contacts
ouverts et emballez la batterie de telle manière
qu’elle ne puisse pas bouger dans l’emballage.
12. Lorsque vous éliminez la cartouche de batterie,
retirez-la de l’appareil et éliminez-la dans un endroit
sûr. Suivez les réglementations locales relatives à
l’élimination des batteries.
13. Utilisez les batteries uniquement avec les produits
spécifiés par Makita. L’installation des batteries

16 FRANÇAIS
dans des produits non conformes peut entraîner un
incendie, une chaleur excessive, une explosion ou
une fuite d’électrolyte. Si l’appareil n’est pas utilisé
pendant une longue période de temps, la batterie
doit y être retirée.
14. Si l’appareil n’est pas utilisé pendant une longue
période de temps, la batterie doit y être retirée.
15. Ne laissez pas de copeaux, de poussière ou de
saleté s’accrocher dans les bornes, trous et rainures
de la cartouche-batterie. Cela peut entraîner de
mauvaises performances ou une panne de l’outil ou
de la batterie.
16. Gardez la batterie hors de la portée des enfants.
17. Pendant et après l’utilisation, la batterie peut
chauffer ce qui peut provoquer des brûlures ou des
gelures à basse température.
18. Ne touchez pas la borne de l’outil immédiatement
après son utilisation car elle peut devenir
suffisamment chaude pour provoquer des brûlures.
19. À moins que l’outil ne prenne en charge l’utilisation
à proximité d’une ligne électrique haute tension,
n’utilisez pas la cartouche-batterie à proximité d’une
ligne électrique haute tension. Cela peut entraîner
un dysfonctionnement ou une panne de l’outil ou de
la cartouche-batterie.
MISE EN GARDE:
N'utilisez que des batteries Makita authentiques.
L'utilisation de batteries Makita non authentiques,
ou des batteries qui ont été modiées, peut
provoquer une explosion de la batterie provoquant
des incendies, des blessures et des dégâts. Cela
annulera également la garantie Makita pour l'outil
Makita et le chargeur.
Conseils pour maintenir la durée de vie
de la batterie au maximum
1. Chargez la cartouche de la batterie avant qu’elle
ne soit complètement déchargée. Arrêtez toujours
le fonctionnement de l’équipement et rechargez la
cartouche de la batterie lorsque vous remarquez que
la puissance de l’équipement est faible.
2. Rechargez jamais une cartouche de batterie qui est
déjà complètement chargée. La surcharge réduit la
durée de vie de la batterie.
3. Rechargez la cartouche de batterie à une
température ambiante de 10°C à 40°C (50°F -
104°F). Laissez la cartouche de batterie chaude se
refroidir avant de la charger.
4. Lorsque vous n’utilisez pas la batterie, retirez-la de
l’outil ou du chargeur.
5. Rechargez la cartouche de batterie si vous ne l’utilisez
pas pendant une longue période (plus de six mois).

17 FRANÇAIS
TEMPS DE FONCTIONNEMENT
* Les blocs de batterie appropriés pour cette radio sont répertoriés dans le tableau suivant.
* Le tableau suivant indique le temps de fonctionnement sur une seule charge.
Modèle Bloc-batterie Capacité de la
batterie
Unité: Heures (Approximative)
Radio*
Lanterne
(couverture
lumineuse à
360˚)
Lampe de
poche (mode
torche)
DMR056
LXT
(14.4V)
BL1415N 1.5Ah 11 4.0 8.5
BL1430B 3.0Ah 19 7.0 14
BL1440 4.0Ah 30 11 22
BL1460B 6.0Ah 39 15 29
LXT
(18V)
BL1815N 1.5Ah 13 4.5 9.0
BL1820B 2.0Ah 17 6.0 12
BL1830B 3.0Ah 24 8.5 16
BL1840B 4.0Ah 34 12 23
BL1850B 5.0Ah 44 16 30
BL1860B 6.0Ah 53 19 37
MR009G XGT
(36V-40Vmax)
BL4020 2.0Ah 20 13 26
BL4025 2.5Ah 24 16 31
BL4040 4.0Ah 36 24 46
BL4050F 5.0Ah 51 34 66
* A LA SORTIE DES HAUT-PARLEURS = 100mW
AVERTISSEMENT:
N’utilisez que les cartouches de batterie énumérées ci-dessus. L'utilisation de toute autre cartouche de
batterie peut causer des blessures et/ou des incendies.
REMARQUE:
●Le tableau concernant la durée de fonctionnement de la batterie ci-dessus est présenté comme référence.
●Le temps de fonctionnement réel peut différer du type de la batterie, de la condition de la charge ou de
l’environnement d’utilisation.
●Certains des cartouches-batterie répertoriés ci-dessus peuvent ne pas être disponibles en fonction de votre région
de résidence.

18 FRANÇAIS
Cordon recommandé de
la source d'alimentation
connectée
Modèle Bloc d'alimentation portable
DMR056 PDC01
MR009G PDC01 / PDC1200
●Le ou les blocs-batterie connectés répertoriés ci-
dessus peuvent ne pas être disponibles en fonction
de votre région de résidence.
●Avant d'utiliser le bloc- batterie, lisez les instructions
et les mises en garde qui s'y trouvent.
INSTALLATION ET
ALIMENTATION FOURNIE
MISE EN GARDE:
●Éteignez toujours la radio avant d’installer et de
retirer le bloc de batterie.
●Prenez garde de ne pas laisser tomber ou cogner
la radio. Le boîtier cassé pourrait vous entailler un
doigt ou provoquer de plus graves blessures. La
radio endommagée pourrait fonctionner de manière
imprévisible, provoquant des risques de blessures,
d’explosion ou d’incendie.
●Tenez fermement l’outil et la cartouche-batterie lors
de l’installation ou du retrait de la batterie.
IMPORTANT:
●Une puissance réduite, une distorsion, un son
saccadé ou le rétroéclairage de l'écran clignotant sont
autant de signes que la batterie doit être remplacée.
●La batterie n’est pas incluse dans les accessoires de
base.
Installation et retrait d’une batterie
coulissante (Fig. 2-3)
●Pour installer la batterie, alignez sa languette sur la
rainure qui se trouve à l’intérieur du logement, puis
faites glisser la batterie pour la mettre en place.
Insérez-la toujours bien à fond, jusqu’à ce qu’elle se
verrouille en émettant un léger déclic.
●Si vous voyez le voyant rouge sur la face supérieure
du bouton, la batterie n’est pas parfaitement
verrouillée. Installez-la à fond, jusqu’à ce que le
voyant rouge ne soit plus visible. À défaut, elle risque
de tomber accidentellement de la radio et de vous
blesser ou de blesser une personne située près de
vous.
●N’appliquez pas une force excessive lors de l’insertion
de la batterie. Si la batterie ne glisse pas aisément,
elle n’est pas insérée correctement.
●Pour retirer la batterie, faites-la glisser hors de la
radio tout en faisant glisser le bouton à l'avant de la
cartouche.
Indication de l’autonomie restante de
la batterie (Fig. 4-5)
1. Voyants de charge de la batterie
2. Bouton de vérification
Appuyez sur le bouton de vérication pour vérier
l’autonomie restante de la batterie. Les voyants
s’allument alors pendant quelques secondes.
●Bloc-batterie XGT/LXT
Indicateurs ou voyants de charge
Capacité
restante
Allumés Eteintes Clignotants
75% ~ 100%
50% ~ 75%
25% ~ 50%
0% ~ 25%
Rechargez la
batterie
La batterie
semble mal
fonctionnée
REMARQUE:
●Selon les conditions d’utilisation et la température
ambiante, les voyants peuvent indiquer une capacité
légèrement différente de la capacité réelle.
●Le premier voyant (le plus à gauche) clignotera
lorsque le système de protection de la batterie
fonctionne.
Rechargement à partir du port USB
REMARQUE:
●Connectez uniquement des appareils compatibles
avec une source d’alimentation CC 5V, 2,4A au
port d’alimentation USB au risque d’entraîner un
dysfonctionnement du produit.
●Connectez le câble USB (non inclus) au port
d’alimentation USB du produit. Et puis connectez
l’autre extrémité du câble à l’appareil.
●Pour démarrer la charge, appuyez sur le bouton
d’activation/désactivation de la charge USB pour
activer la fonction de charge. Le bouton d’activation/
désactivation de la charge USB s’allumera en vert.
●Lorsque la charge de la batterie est faible, le
rétroéclairage de l’écran clignotera jusqu’à ce que la
fonction de charge soit désactivée.

19 FRANÇAIS
●Si la fonction de charge est activée sans qu’il y ait
de charge, le bouton d’activation/désactivation de
la charge USB clignotera en vert et la fonction de
charge sera automatiquement désactivée après 30
minutes.
●Pour arrêter la charge, appuyez sur le bouton
d’activation/désactivation de la charge USB pour
désactiver la fonction.
●Le volume maximum du haut-parleur émettant la
puissance de sortie diminue lors du rechargement à
partir du port USB.
IMPORTANT:
●Avant de brancher votre appareil USB au port USB,
sauvegardez toujours vos données enregistrées sur
l’appareil USB. Dans le cas contraire, vous risquez
de les perdre par accident.
●Il est possible que la radio ne puisse pas alimenter
certains appareils USB.
●Retirez le câble USB et fermez le couvercle lorsque
vous ne l’utilisez pas ou lorsque le chargement est
terminé.
●Ne branchez pas cette prise USB dans le port USB
de votre PC, au risque de provoquer une panne des
appareils.
Écouter la radio DAB
Syntonisation des stations DAB
Pour syntoniser les stations de radio DAB, procédez
comme suit:
1. Allumez la radio à l’aide du bouton d’alimentation.
2. Sélectionnez le mode radio DAB en appuyant
plusieurs fois sur le bouton Mode.
3. Si c’est la première fois que le mode radio DAB
est utilisé, la radio effectuera automatiquement un
balayage complet afin de trouver toutes les stations
de radio DAB disponibles. Durant le processus de
recherche, comme les nouvelles stations seront
détectées, le compteur des stations augmentera et
les stations seront ajoutées à la liste stockée dans la
radio. Le graphique à barres indique la progression
du scan.
4. Une fois la recherche terminée, la radio répertorie
toutes les stations trouvées. Utilisez le bouton de
réglage Tuning haut ou bas pour faire défiler la liste
des stations et appuyez sur le bouton Sélectionner
pour syntoniser la station.
REMARQUE:
Pour le mode radio DAB, si la réception de la radio n'est
pas bonne, il peut être nécessaire de déplacer votre
radio vers un endroit offrant une meilleure réception.
Menu du mode radio DAB
Vous pouvez ouvrir le menu de la radio DAB en
appuyant sur le bouton Info/Menu et en le maintenant
enfoncé lorsque la radio est en mode radio DAB.
Utilisez le bouton de réglage Tuning haut ou Tuning bas
pour sélectionner l'une des options, puis appuyez sur le
bouton Select pour conrmer votre choix.
Les paramètres par défaut et recommandés de la radio
sont indiqués par un astérisque.
Le menu de la radio DAB propose les options suivantes:
●[Full Scan]: sélectionnez cette option pour effectuer
une recherche complète et stocker toutes les stations
de radio DAB trouvées dans la liste des stations.
●[Manual tune]: sélectionnez cette option pour
syntoniser manuellement un canal/une fréquence
DAB.
●[DRC]: le compresseur audio ou Dynamic Range
Control (également connu sous le nom de DRC)
peut rendre les sons plus faibles plus faciles à
entendre lorsque votre radio est utilisée dans
un environnement bruyant en réduisant la plage
dynamique du signal audio.
Sélectionnez cette option, puis utilisez le bouton de
réglage Tuning haut ou Tuning bas pour mettre en
surbrillance le paramètre DRC requis:
[1]: Compression maximale appliquée.
[1/2]: Compression moyenne appliquée.
[0]: Aucune compression appliquée.
Appuyez sur le bouton Select pour confirmer le
réglage.
●[Station order]: sélectionnez cette option et ensuite
[Alphanumeric] pour trier la liste des stations par
ordre alphanumérique ou sélectionnez [Ensemble]
pour trier la liste des stations par multiplex DAB ou
sélectionnez [Valid] pour afficher uniquement les
stations pour lesquelles un signal peut être trouvé.
●[System]: sélectionnez cette option pour accéder au
menu de configuration du système et configurer la
radio (reportez-vous au chapitre « Utilisation du menu
de système » pour plus de détails).
●[Back]: sélectionnez l’option « Back » (retour) pour
revenir dans les menus précédents de la radio ou
revenir à l’écran précédent.
Afchage des informations DAB sur
l'écran
Lors de l'écoute d'une émission de radio DAB, appuyez
à plusieurs reprises sur le bouton Info/Menu pour
parcourir les informations suivantes sur l'écran de la
radio:
●Segment d'étiquette dynamique (texte défilant)
●Type de programme
●Nom du multiplex
●Fréquence et canal
●Erreur de signal/Puissance
●Débit binaire/Type audio
●Date

20 FRANÇAIS
Écouter la radio FM
Syntonisation des stations FM
Pour syntoniser les stations de radio FM, procédez
comme suit:
1. Allumez la radio à l’aide du bouton d’alimentation.
2. Sélectionnez le mode radio FM en appuyant plusieurs
fois sur le bouton Mode.
3. Appuyez et maintenez enfoncé le bouton de
réglage Tuning haut ou Tuning bas pour rechercher
automatiquement une station FM selon un ordre
croissant (Tuning haut) ou décroissant (Tuning bas).
Votre radio arrêtera le balayage lorsqu’elle trouvera
une station suffisamment puissante. L’écran affichera
la fréquence du signal qui a été trouvé. Si les
informations RDS sont disponibles, après quelques
secondes, l’écran affichera le nom de la station de
radio.
4. Appuyez sur le bouton de réglage Tuning haut ou
Tuning bas pour régler avec précision la fréquence
par incréments de 0,05MHz si nécessaire.
5. Répétez les étapes 3 et 4 pour syntoniser d’autres
stations de radio.
REMARQUE:
Pour le mode radio FM, si la réception de la radio n'est
pas bonne, il peut être nécessaire de déplacer votre
radio vers un endroit offrant une meilleure réception.
Menu du mode radio FM
Vous pouvez ouvrir le menu de la radio FM en appuyant
sur le bouton Info/Menu et en le maintenant enfoncé
lorsque la radio est en mode radio FM. Utilisez le bouton
de réglage Tuning haut ou Tuning bas pour sélectionner
l'une des options, puis appuyez sur le bouton Select
pour conrmer votre choix.
Les paramètres par défaut et recommandés de la radio
sont indiqués par un astérisque.
Le menu de la radio FM propose les options suivantes:
●[Scan Zone]: sélectionnez cette option (Zone de
balayage de la bande FM) pour configurer si la radio
ne doit rechercher que des signaux forts (« Local »)
ou tous les signaux (« Distant ») lors de l’utilisation
de la fonction de syntonisation automatique.
●[System]: sélectionnez cette option pour accéder au
menu de configuration du système et configurer la
radio (reportez-vous au chapitre « Utilisation du menu
de système » pour plus de détails).
●[Back]: sélectionnez l’option « Back » (retour) pour
revenir dans les menus précédents de la radio ou
revenir à l’écran précédent.
Afchage des informations FM sur
l'écran
Lorsque vous écoutez une station de radio FM qui
diffuse également des données RDS, appuyez plusieurs
fois sur le bouton Info/Menu pour faire déler les
informations suivantes sur l'écran de la radio:
●Radiotexte
●Type de programme
●Fréquence
●Mode audio
●Date
Si aucune information RDS n'est disponible, la radio
ne pourra pas afcher le message texte et le type de
programme.
Préréglage des stations en modes
DAB et FM
Il y a 9 préréglages en mémoire pour la radio DAB et 9
pour la radio FM. Ils sont utilisés de la même manière
pour chaque mode de fonctionnement.
1. Allumez la radio, puis sélectionnez le mode radio
DAB ou FM et syntonisez la station de radio requise
comme décrite précédemment.
2. Appuyez sur le bouton Sélectionner/Mémoire et
maintenez-le enfoncé. L’écran affichera un menu
« Save to Preset » (Enregister dans un préréglage).
3. Appuyez sur le bouton de réglable Tuning haut
ou Tuning bas pour sélectionner le numéro de
préréglage requis. Appuyez ensuite sur le bouton
Sélectionner pour mémoriser la station préréglée.
« Saved » (Enregistré) s’affichera à l’écran indiquant
que la station est enregistrée sous le numéro de
préréglage sélectionné. Si une autre station a déjà
été enregistrée sous le numéro de préréglage choisi,
cette station sera écrasée. Répétez cette procédure
au besoin pour les préréglages restants.
Rappel d'un préréglage en modes
DAB et FM
1. Allumez la radio, puis sélectionnez le mode radio
DAB ou FM à l’aide du bouton Mode.
2. Appuyez sur le bouton Préréglage pour afficher le
menu « Preset Recall »(Rappel d’un préréglage).
3. Sélectionnez un numéro de préréglage à l’aide du
bouton de réglable Tuning haut ou Tuning bas, puis
appuyez sur le bouton Sélectionner pour confirmer
votre choix. La radio va maintenant syntoniser le
préréglage sélectionné. Si le bouton Sélectionner
ou tout autre bouton n’est pas enfoncé, la radio se
syntonisera également sur le préréglage sélectionné
après 2 secondes sans activité. Le numéro de
préréglage choisi est affiché dans la zone supérieure
de l’écran de la radio.
Other manuals for DMR056
2
This manual suits for next models
1
Table of contents
Languages:
Other Makita Radio manuals

Makita
Makita DMR115B User manual

Makita
Makita BMR101 User manual

Makita
Makita DMR300 User manual

Makita
Makita XRM06 User manual

Makita
Makita BMR100 Quick start guide

Makita
Makita MR004GZ User manual

Makita
Makita XRM10 User manual

Makita
Makita DMR109 User manual

Makita
Makita DMR107 User manual

Makita
Makita DMR110N User manual

Makita
Makita MR005G User manual

Makita
Makita MR004G User manual

Makita
Makita DMR109 User manual

Makita
Makita DMR112W User manual

Makita
Makita DMR102 User manual

Makita
Makita MR006G User manual

Makita
Makita DMR114 User manual

Makita
Makita DMR055 User manual

Makita
Makita DMR110W User manual

Makita
Makita DMR106 User manual