10
30.1.2009
000230
Tomoyasu Kato
Director
Makita Corporation
3-11-8, Sumiyoshi-cho,
Anjo, Aichi, 446-8502, JAPAN
GEA010-1
Paralajmërimet e përgjithshme
për sigurinë e veglës
PARALAJMËRIM Lexoni të gjitha paralajmërimet
dhe udhëzimet për sigurinë. Mosndjekja e
paralajmërimeve dhe udhëzimeve mund të rezultojë në
goditje elektrike, zjarr dhe/ose dëmtim serioz.
Ruajini të gjitha paralajmërimet dhe
udhëzimet për të ardhmen.
GEB021-4
PARALAJMËRIME PËR
SIGURINË E SMERILUESIT
1. Përdorni gjithmonë syze sigurie të mëdha ose
të vogla. Syzet e zakonshme ose syzet e diellit
NUK janë syze sigurie.
2. Mbajeni fort pajisjen.
3. Mos e lini veglën të ndezur. Përdoreni veglën
vetëm duke e mbajtur në dorë.
4. Kjo pajisje nuk është rezistente ndaj ujit,
kështu që mos përdorni ujë mbi sipërfaqen e
materialit të punës.
5. Ajrosni siç duhet mjedisin e punës kur kryeni
veprime smerilimi.
6.
Disa materiale përmbajnë kimikate që mund të jenë
toksike. Kini kujdes që të parandaloni thithjen e
pluhurave dhe kontaktin me lëkurën. Ndiqni të
dhënat e sigurisë nga furnizuesi i materialit.
7. Përdorimi i kësaj vegle për të smeriluar disa
produkte, bojëra dhe drurë mund ta ekspozojë
përdoruesin ndaj substancave të rrezikshme
që përmbajnë pluhur. Përdorni mbrojtëse të
përshtatshme për frymëmarrjen.
8. Sigurohuni që nuk ka krisje ose thyerje te
mbështetësja përpara përdorimit. Krisjet ose
thyerjet mund të shkaktojnë lëndim personal.
RUAJINI KËTO UDHËZIME.
PARALAJMËRIM:
MOS lejoni që njohja ose familjarizimi me produktin (të
fituara nga përdorimi i shpeshtë) të zëvendësojnë
zbatimin me përpikëri të rregullave të sigurisë për
produktin në fjalë. KEQPËRDORIMI ose mosndjekja e
rregullave të sigurisë të dhëna në këtë manual përdorimi
mund të shkaktojnë dëmtime personale serioze.
PËRSHKRIMI I PUNËS
KUJDES:
• Jini gjithnjë të sigurt që vegla është fikur dhe
hequr nga korrenti përpara se ta rregulloni apo t'i
kontrolloni funksionet.
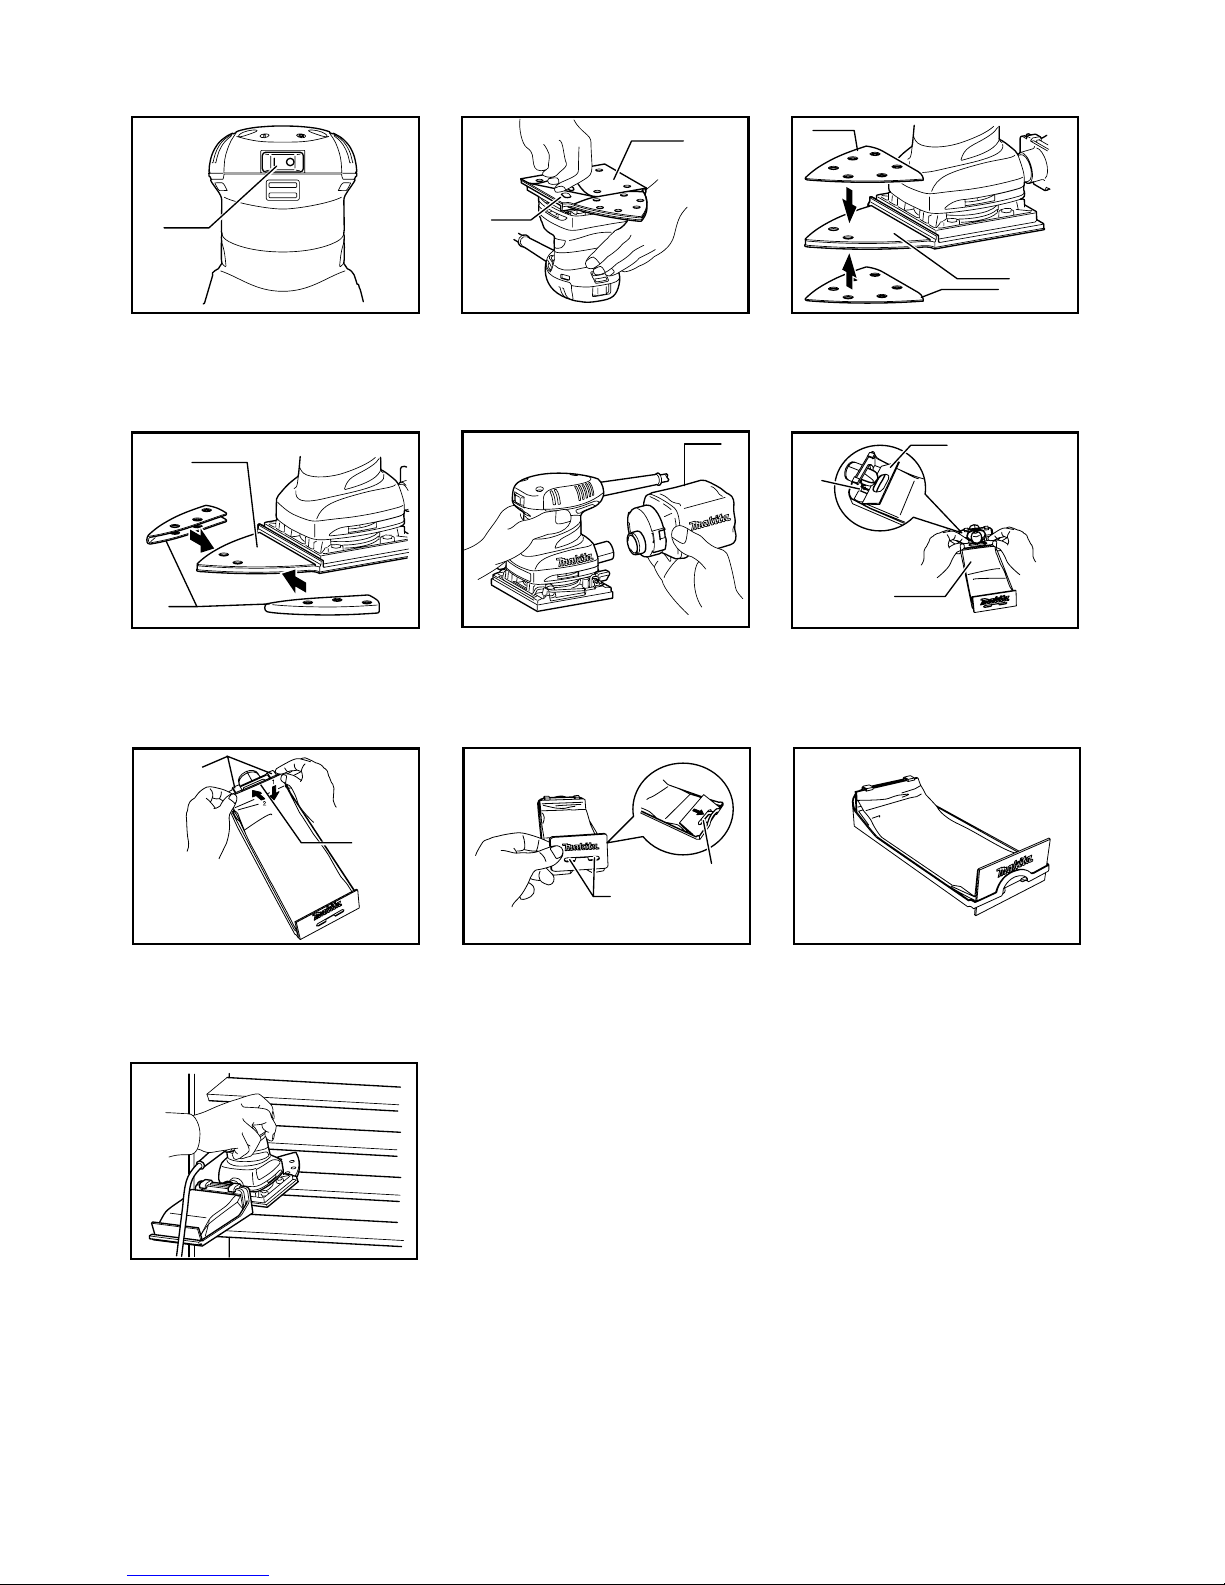
Veprimi i ndërrimit
Fig.1
KUJDES:
• Përpara se të lidhni veglën me korrentin,
kontrolloni gjithmonë që vegla të jetë fikur.
Për të ndezur veglën shtypni anën “I” të çelësit. Për të
ndaluar veglën shtypni anën “O” të çelësit.
MONTIMI
KUJDES:
• Jini gjithnjë të sigurt që vegla është fikur dhe
hequr nga korrenti përpara se të bëni ndonjë punë
mbi të.
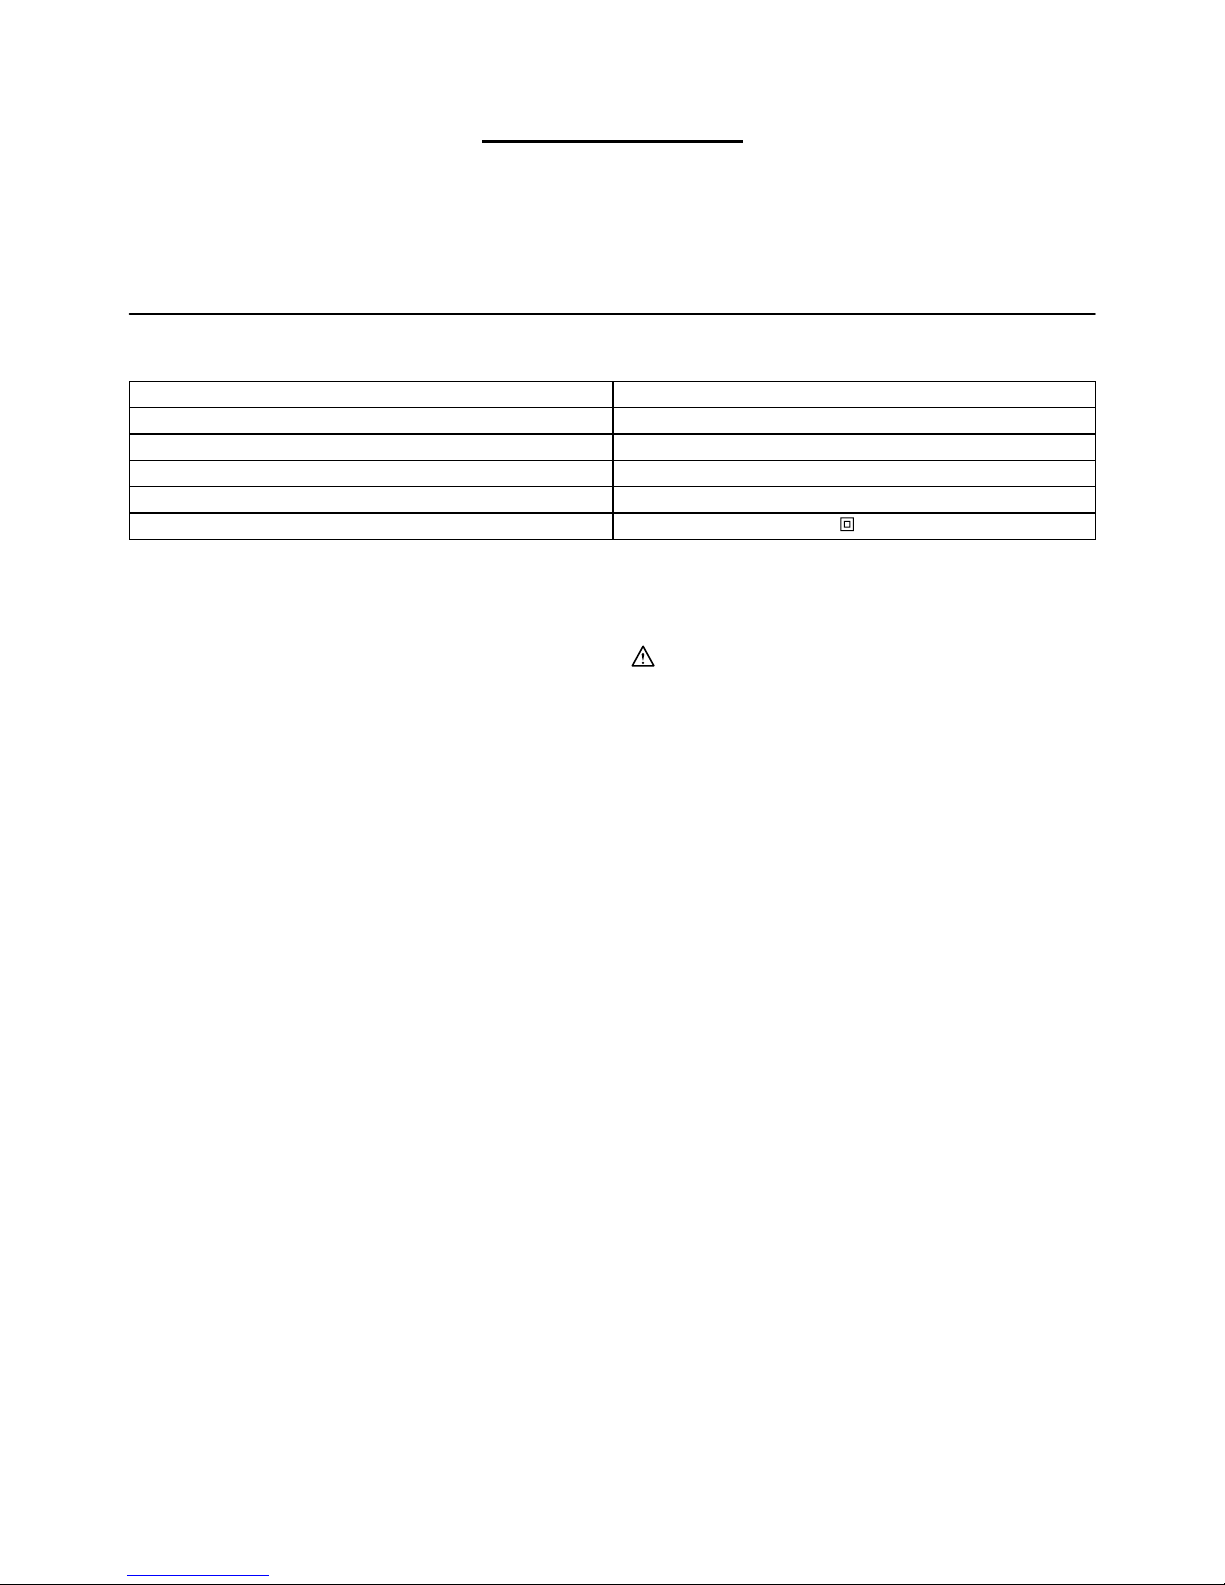
Instalimi ose heqja e letrës abrazive.
SHËNIM:
Me këtë rektifikues përdorni letër smerile Makita me
kapje.
Për të ngjitur letrën smerile:
Fig.2
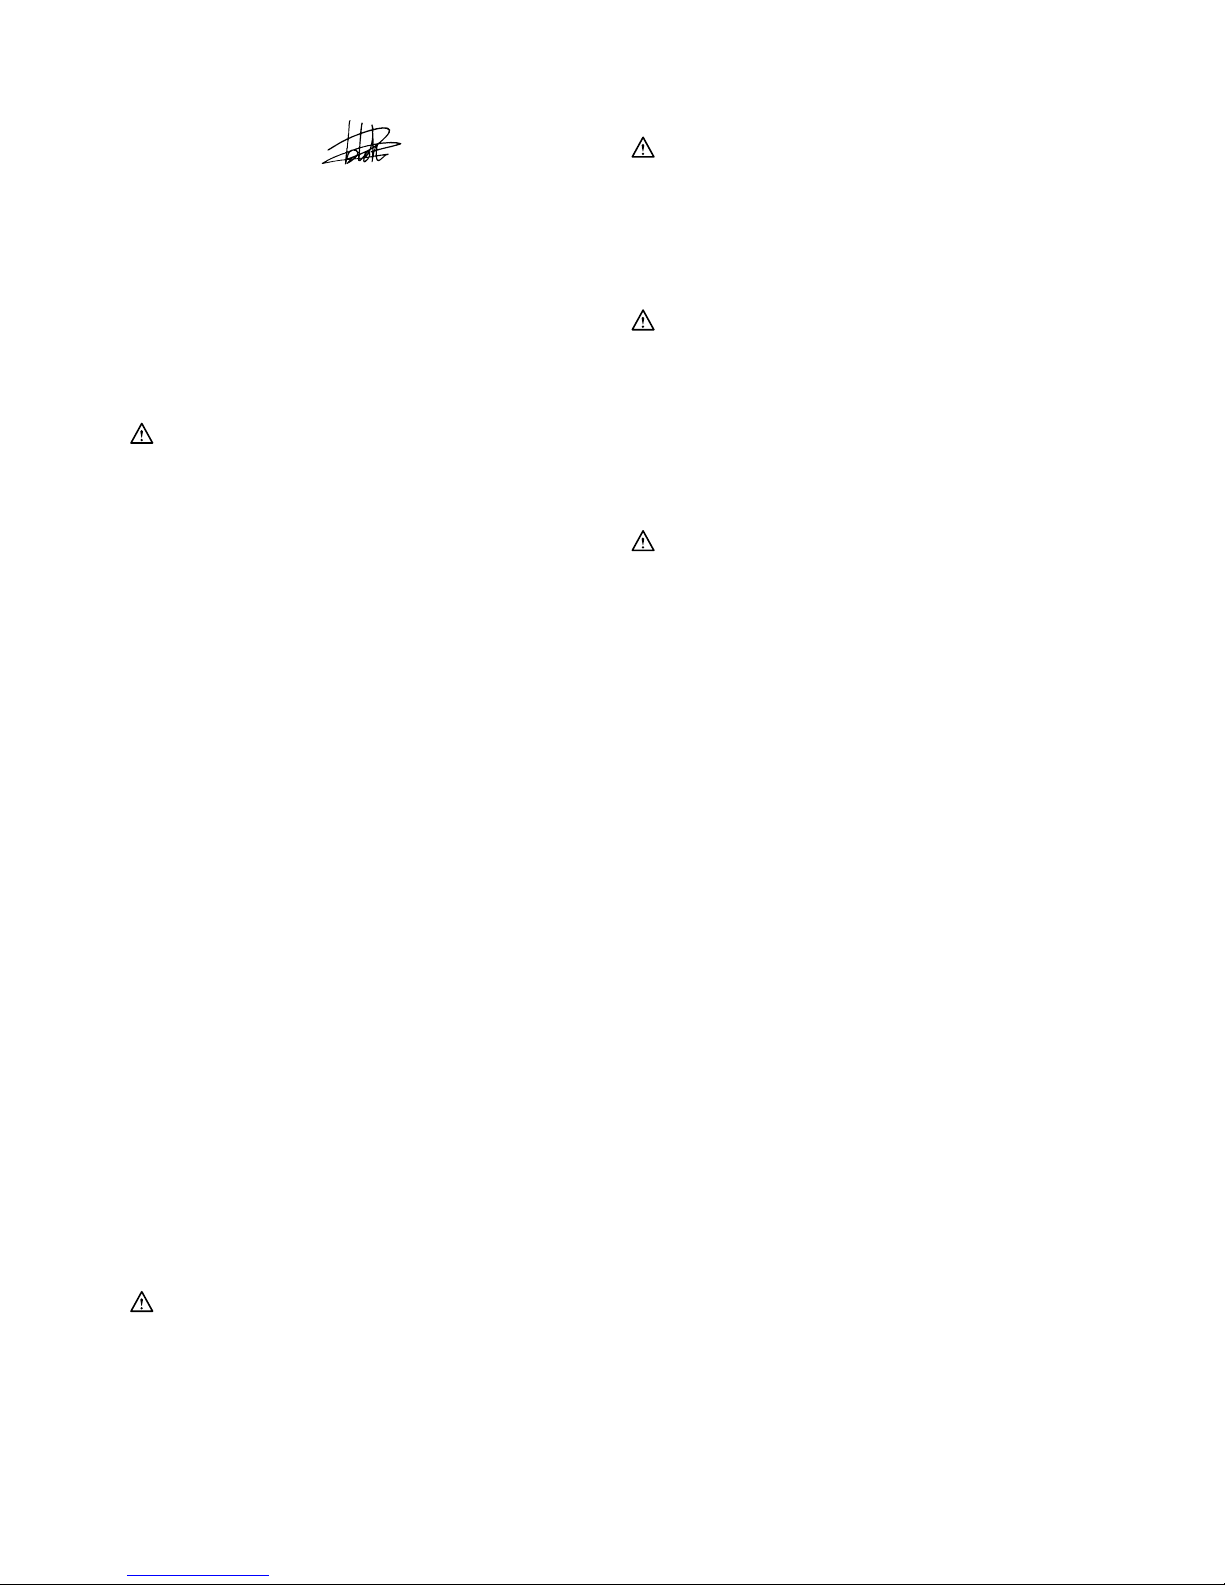
Fig.3
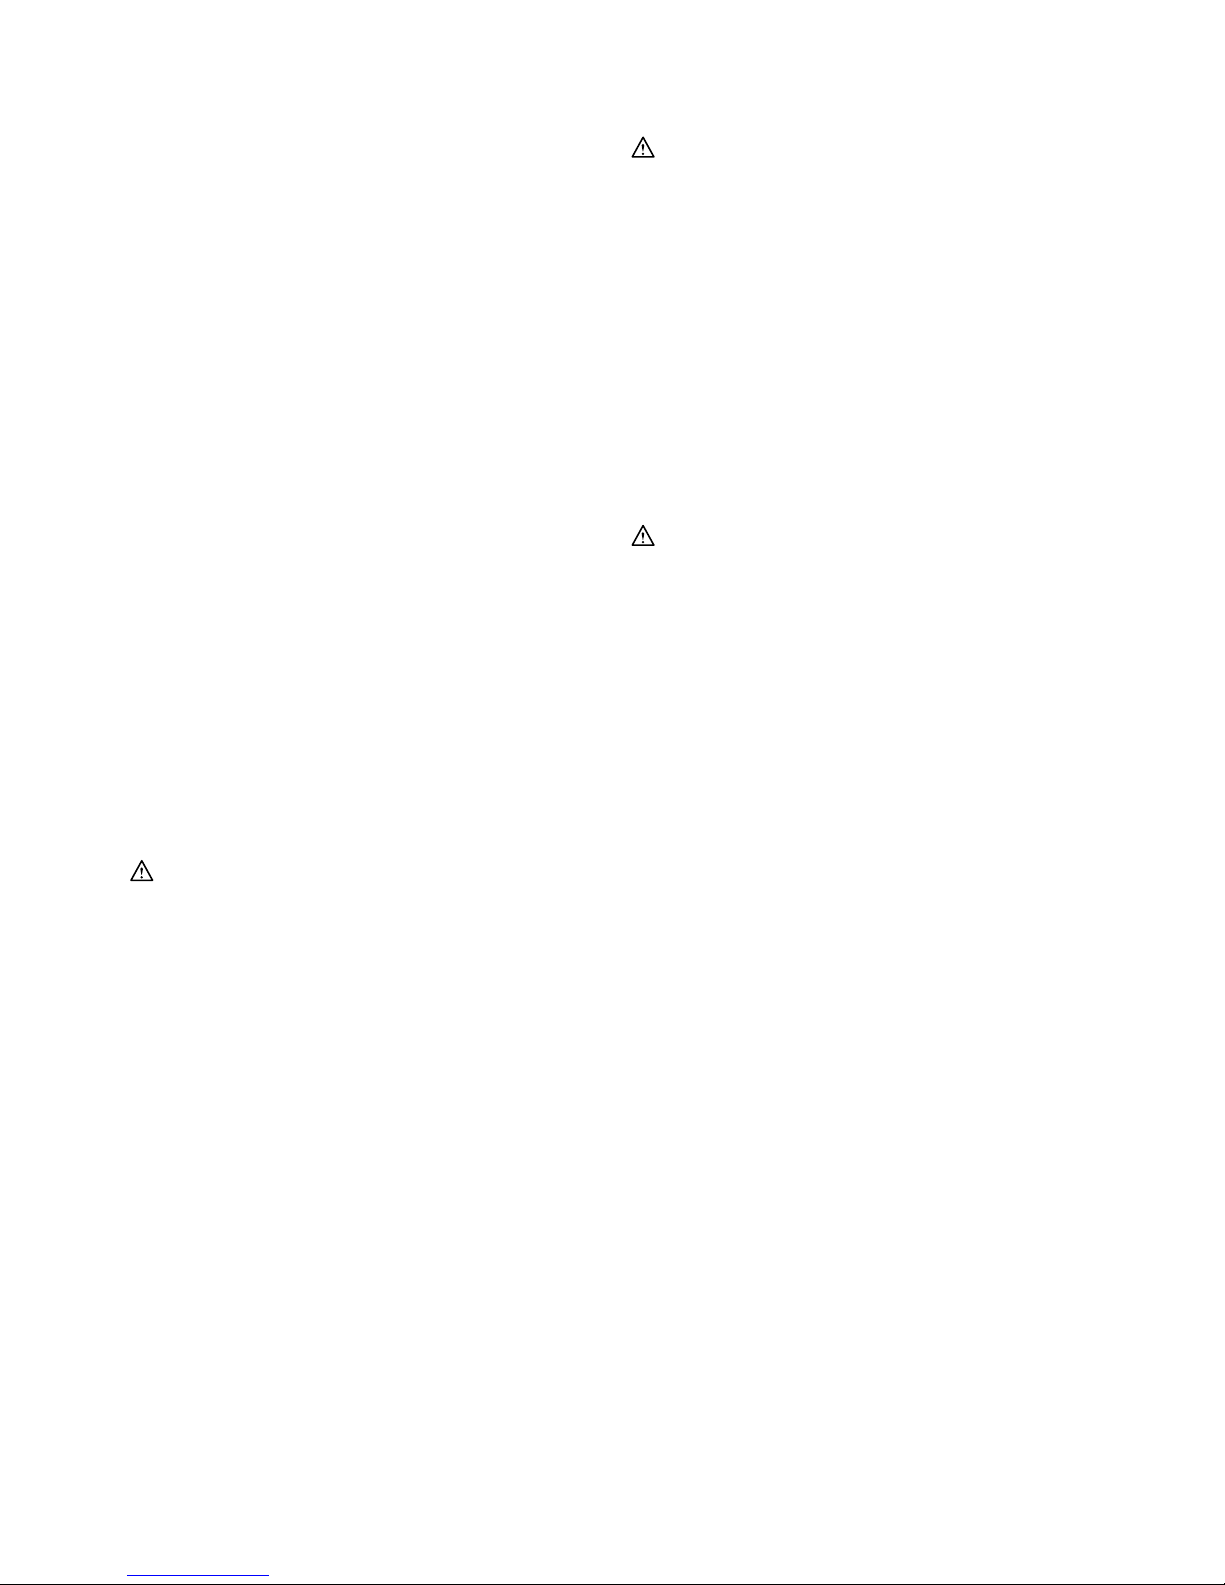
Fig.4
1. Vendoseni veglën kokëposhtë në mënyrë të tillë
që pllaka të jetë në pjesën e sipërme.
2. Pozicionojeni letrën smerile në mënyrë të tillë që
të përshtatet me formën e bazës. Sigurohuni që
të bashkërenditni vrimat e letrës smerile me
vrimat në pllakë (pluhuri do të nxirret nga këto
vrima; ndaj është e rëndësishme që të jenë të
hapura).
3. Shtypeni fort letrën mbi pllakë.
Për të hequr letrën smerile:
1. Vendoseni veglën kokëposhtë në mënyrë të tillë
që letra të jetë në pjesën e sipërme.
2. Duke kapur një cep të letrës smerile, hiqeni nga
pllaka.
SHËNIM:
• Nëse letra smerile është në gjendje të mirë,
ruajeni për përdorim të mëtejshëm.
Kur smeriloni në zona të ngushta, të vështira për t’u
arritur (p.sh. kanate, grila, qepena), ngjisni letrat smerile
në formë koni në fund të pllakës (në majë dhe në fund).
Për të smeriluar skajet e materialeve të holla, palosni
letrën abrazive dhe ngjiteni në anë të pllakës siç
tregohet në figurë.