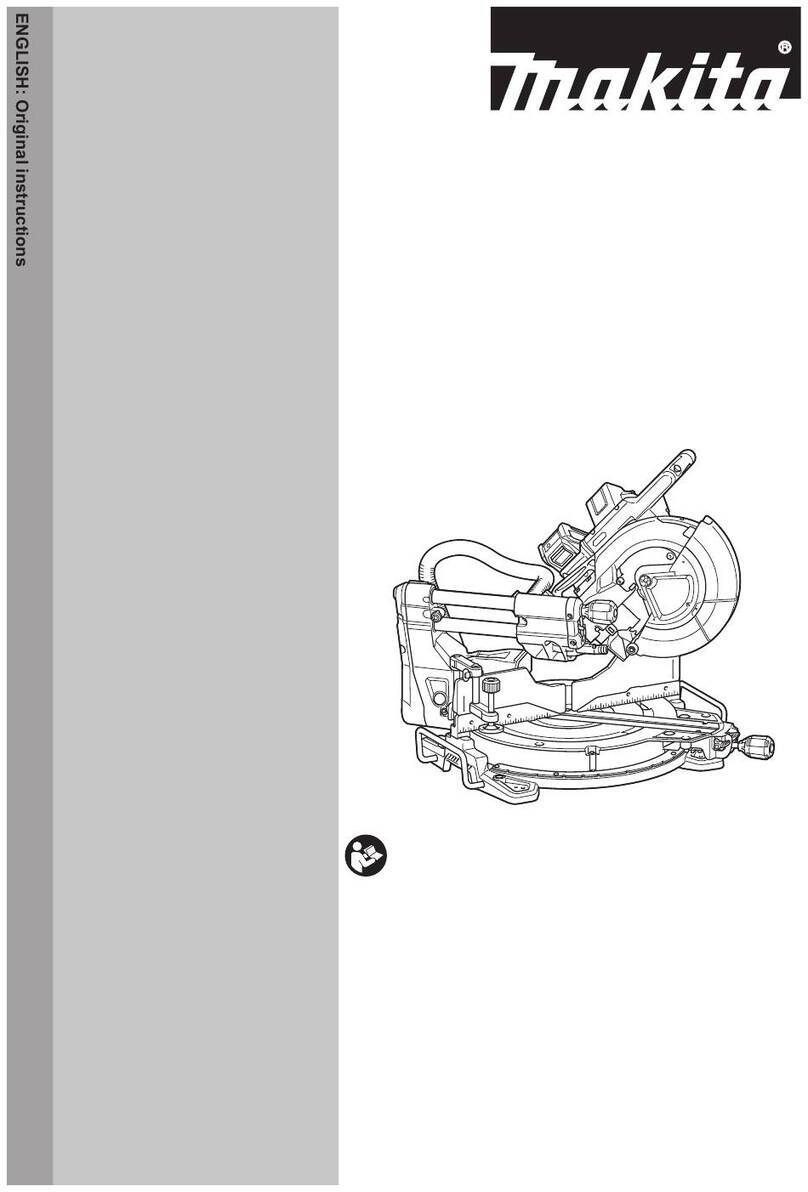
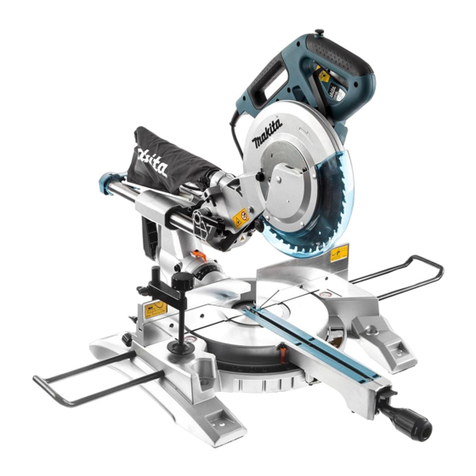
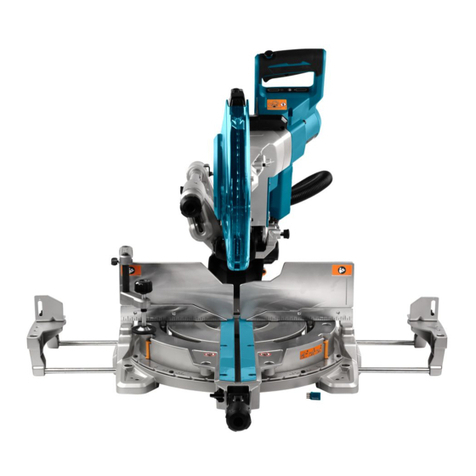
Makita LC1230 User manual

LC1230
EN Metal Cutting Saw INSTRUCTION MANUAL 5
ZHCN 金属型材切割机 使用说明书 12
ID Gergaji Pemotongan Logam PETUNJUK PENGGUNAAN 20
MS Gergaji Pemotongan Logam MANUAL ARAHAN 29
VI
Máy Cắt Kim Loại Để Bàn
Hoạt Động Bằng Động Cơ
Điện
TÀI LIỆU HƯỚNG DẪN 38
TH 46

2
1
1
1
1
1
1
2
1
2
4
3
1
1
2
Fig.1
Fig.2
Fig.3
Fig.4
Fig.5
Fig.6
Fig.7
Fig.8

3
1
2
3
4
1
2
3
1
3
4
2
5
1
2
3
Fig. A Fig. B
A
Fig. C Fig. D
Fig.14
Fig. E Fig. F
Fig. G Fig. H
Fig. I
A
B
A
Fig.15
Fig.9
Fig.10
Fig.11
Fig.12
Fig.13

4
Fig. J Fig. K
Fig.16
1
1
2
Fig.17
Fig.18
Fig.19

5ENGLISH
ENGLISH (Original instructions)
SPECIFICATIONS
Model LC1230
Blade diameter 305 mm
Hole (arbor) diameter 25.4 mm
Max. kerf thickness of the saw blade 2.5 mm
No load speed 1,700 min-1
Dimensions (L x W x H) 516 mm x 306 mm x 603 mm
Net weight 19.2 kg
Safety class /II
• Duetoourcontinuingprogramofresearchanddevelopment,thespecicationshereinaresubjecttochange
withoutnotice.
• Specicationsmaydierfromcountrytocountry.
• WeightaccordingtoEPTA-Procedure01/2014
Cutting capacity
Workpiece shape
A
A
B
A X B
Cuttingangle 90° 115mm 75 mm x 150 mm
100 mm x 100 mm
45° 90mm 85 mm x 85mm
Symbols
Thefollowingshowthesymbolsusedfortheequip-
ment.Besurethatyouunderstandtheirmeaningbefore
use.
Readinstructionmanual.
DOUBLEINSULATION
Wear safety glasses.
Donotplacehandorngersclosetothe
blade.
Toavoidinjuryfromyingdebris,keep
holding the saw head down, after making
cuts,untilthebladehascometoacom-
plete stop.
Foryoursafety,removethechips,small
pieces, etc. from the table top before
operation.
OnlyforEUcountries
Duetothepresenceofhazardouscompo-
nentsintheequipment,usedelectricaland
electronicequipmentmayhaveanegative
impactontheenvironmentandhuman
health.
Do not dispose of electrical and electronic
applianceswithhouseholdwaste!
InaccordancewiththeEuropeanDirective
onwasteelectricalandelectronicequip-
ment and its adaptation to national law,
usedelectricalandelectronicequipment
shouldbecollectedseparatelyand
deliveredtoaseparatecollectionpoint
formunicipalwaste,operatinginaccor-
dancewiththeenvironmentalprotection
regulations.
Thisisindicatedbythesymbolofthe
crossed-outwheeledbinplacedonthe
equipment.
Intended use
Thetoolisintendedforcuttinginmildsteelandstain-
less steel with appropriate saw blades.
Power supply
Thetoolshouldbeconnectedonlytoapowersupplyof
thesamevoltageasindicatedonthenameplate,and
canonlybeoperatedonsingle-phaseACsupply.They
aredouble-insulatedandcan,therefore,alsobeused
fromsocketswithoutearthwire.

6ENGLISH
SAFETY WARNINGS
General power tool safety warnings
WARNING: Read all safety warnings, instruc-
tions, illustrations and specications provided
with this power tool.Failuretofollowallinstructions
listedbelowmayresultinelectricshock,reand/or
seriousinjury.
Save all warnings and instruc-
tions for future reference.
Theterm“powertool”inthewarningsreferstoyour
mains-operated (corded) power tool or battery-operated
(cordless) power tool.
Work area safety
1. Keep work area clean and well lit.Clutteredor
darkareasinviteaccidents.
2. Do not operate power tools in explosive atmo-
spheres, such as in the presence of ammable
liquids, gases or dust.Powertoolscreatesparks
whichmayignitethedustorfumes.
3. Keep children and bystanders away while
operating a power tool.Distractionscancause
youtolosecontrol.
Electrical safety
1. Power tool plugs must match the outlet. Never
modify the plug in any way. Do not use any
adapter plugs with earthed (grounded) power
tools. Unmodiedplugsandmatchingoutletswill
reduceriskofelectricshock.
2. Avoid body contact with earthed or grounded
surfaces, such as pipes, radiators, ranges and
refrigerators.Thereisanincreasedriskofelec-
tricshockifyourbodyisearthedorgrounded.
3. Do not expose power tools to rain or wet con-
ditions. Water entering a power tool will increase
the risk of electric shock.
4. Do not abuse the cord. Never use the cord for
carrying, pulling or unplugging the power tool.
Keep cord away from heat, oil, sharp edges
or moving parts. Damaged or entangled cords
increase the risk of electric shock.
5. When operating a power tool outdoors, use an
extension cord suitable for outdoor use. Use of
acordsuitableforoutdoorusereducestheriskof
electric shock.
6. If operating a power tool in a damp location
is unavoidable, use a residual current device
(RCD) protected supply.UseofanRCDreduces
the risk of electric shock.
7. Use of power supply via an RCD with a rated
residual current of 30 mA or less is always
recommended.
8. Power tools can produce electromagnetic
elds (EMF) that are not harmful to the user.
However,usersofpacemakersandothersimilar
medicaldevicesshouldcontactthemakeroftheir
deviceand/ordoctorforadvicebeforeoperating
this power tool.
9. Do not touch the power plug with wet hands.
10. If the cord is damaged, have it replaced by the
manufacturer or his agent in order to avoid a
safety hazard.
Personal safety
1. Stay alert, watch what you are doing and use
common sense when operating a power tool.
Do not use a power tool while you are tired or
under the inuence of drugs, alcohol or med-
ication.Amomentofinattentionwhileoperating
powertoolsmayresultinseriouspersonalinjury.
2. Use personal protective equipment. Always
wear eye protection.Protectiveequipmentsuch
asadustmask,non-skidsafetyshoes,hardhator
hearingprotectionusedforappropriateconditions
willreducepersonalinjuries.
3. Prevent unintentional starting. Ensure the
switch is in the o-position before connecting
to power source and/or battery pack, picking
up or carrying the tool. Carrying power tools with
yourngerontheswitchorenergisingpowertools
thathavetheswitchoninvitesaccidents.
4. Remove any adjusting key or wrench before
turning the power tool on.Awrenchorakeyleft
attached to a rotating part of the power tool may
resultinpersonalinjury.
5. Do not overreach. Keep proper footing and
balance at all times.Thisenablesbettercontrol
ofthepowertoolinunexpectedsituations.
6. Dress properly. Do not wear loose clothing or
jewellery. Keep your hair and clothing away
from moving parts.Looseclothes,jewelleryor
longhaircanbecaughtinmovingparts.
7. If devices are provided for the connection of
dust extraction and collection facilities, ensure
these are connected and properly used. Use of
dustcollectioncanreducedust-relatedhazards.
8. Do not let familiarity gained from frequent use
of tools allow you to become complacent and
ignore tool safety principles.Acarelessaction
cancausesevereinjurywithinafractionofa
second.
9. Always wear protective goggles to protect
your eyes from injury when using power tools.
The goggles must comply with ANSI Z87.1 in
the USA, EN 166 in Europe, or AS/NZS 1336
in Australia/New Zealand. In Australia/New
Zealand, it is legally required to wear a face
shield to protect your face, too.

7ENGLISH
It is an employer's responsibility to enforce
the use of appropriate safety protective equip-
ments by the tool operators and by other per-
sons in the immediate working area.
Power tool use and care
1. Do not force the power tool. Use the correct
power tool for your application.Thecorrect
powertoolwilldothejobbetterandsaferatthe
rate for which it was designed.
2. Do not use the power tool if the switch does
not turn it on and o.Anypowertoolthatcannot
becontrolledwiththeswitchisdangerousand
mustberepaired.
3. Disconnect the plug from the power source
and/or remove the battery pack, if detachable,
from the power tool before making any adjust-
ments, changing accessories, or storing power
tools.Suchpreventivesafetymeasuresreduce
the risk of starting the power tool accidentally.
4. Store idle power tools out of the reach of chil-
dren and do not allow persons unfamiliar with
the power tool or these instructions to operate
the power tool.Powertoolsaredangerousinthe
handsofuntrainedusers.
5. Maintain power tools and accessories. Check
for misalignment or binding of moving parts,
breakage of parts and any other condition that
may aect the power tool’s operation. If dam-
aged, have the power tool repaired before use.
Manyaccidentsarecausedbypoorlymaintained
power tools.
6. Keep cutting tools sharp and clean.Properly
maintainedcuttingtoolswithsharpcuttingedges
are less likely to bind and are easier to control.
7. Use the power tool, accessories and tool bits
etc. in accordance with these instructions, tak-
ing into account the working conditions and
the work to be performed. Use of the power tool
foroperationsdierentfromthoseintendedcould
resultinahazardoussituation.
8. Keep handles and grasping surfaces dry,
clean and free from oil and grease. Slippery
handlesandgraspingsurfacesdonotallowfor
safehandlingandcontrolofthetoolinunexpected
situations.
9. When using the tool, do not wear cloth work
gloves which may be entangled.Theentangle-
mentofclothworkglovesinthemovingpartsmay
resultinpersonalinjury.
Service
1. Have your power tool serviced by a qualied
repair person using only identical replacement
parts.Thiswillensurethatthesafetyofthepower
tool is maintained.
2. Follow instruction for lubricating and chang-
ing accessories.
Safety instructions for metal cutting
saws
1. Metal cutting saws are intended to cut ferrous
material, they cannot be used with abrasive
cut-o wheels for cutting ferrous material such
as bars, rods, studs, etc.Abrasivedustcauses
movingpartssuchasthelowerguardtojam.
Sparksfromabrasivecuttingwillburnthelower
guardandotherplasticparts.
2. Regularly clean the power tool's air vents.The
motor’sfancandrawthedustinsidethehousing
andexcessiveaccumulationofpowderedmetal
maycauseelectricalhazards.
3. Wear personal protective equipment.
Depending on application, use face shield,
safety goggles or safety glasses. As appro-
priate, wear dust mask, hearing protectors,
gloves and shop apron capable of stopping
small fragments.Theeyeprotectionmustbe
capableofstoppingyingdebrisgeneratedbyvar-
iousoperations.Thedustmaskorrespiratormust
becapableofltratingparticlesgeneratedbyyour
operation.Prolongedexposuretohighintensity
noisemaycausehearingloss.
4. Do not operate the metal cutting saw near
ammable or combustible materials. Sparks
and/orhotdebrisduringcuttingoperationcould
ignite these materials.
5. Always use clamps to support the workpiece.
Never support the workpiece by hand. Do not
use this saw to cut pieces that are too small to
be securely clamped.Ifyourhandisplacedtoo
close to the saw blade, there is an increased risk
ofinjuryfrombladecontact.
6. The workpiece must be stationary and
clamped using the vise. Do not feed the work-
piece into the blade or cut “freehand” in any
way.Unrestrainedormovingworkpiecescouldbe
thrownathighspeeds,causinginjury.
7. Never cross your hand over the intended line
of cutting either in front or behind the saw
blade.Supportingtheworkpiece“crosshanded”
i.e. holding the workpiece to the right of the saw
bladewithyourlefthandorviceversaisvery
dangerous.
8. Do not reach behind the vise stop with either
hand from either side of the saw blade, to
remove scraps, or for any other reason while
the blade is spinning.Theproximityofthespin-
ningsawbladetoyourhandmaynotbeobvious
andyoumaybeseriouslyinjured.
9. Inspect your workpiece before cutting. If
the workpiece is bowed or warped, always
make certain that there is no gap between the
clamped workpiece, vise and vise stop along
the line of the cut. Bent or warped workpieces
cantwistorshiftandmaycausebindingonthe
spinningsawbladewhilecutting.
10. Do not use the saw until the table is clear of all
tools, scraps, etc., except for the workpiece.
Smalldebrisorloosepiecesofferrousorother
objectsonthetablethatcontacttherevolving
blade can be thrown with high speed.

8ENGLISH
11. Cut only one workpiece at a time.Stackedmulti-
pleworkpiecescannotbeadequatelyclampedor
bracedandmaybindonthebladeorshiftduring
cutting.
12. Ensure the power tool is mounted or placed
on a level, rm work surface before use.A
levelandrmworksurfacereducestheriskofthe
powertoolbecomingunstable.
13. Provide adequate support such as blocks, saw
horses, etc. for a workpiece that is wider or
longer than the table top. Workpieces longer or
widerthanthemetalcuttingsawtablecantipifnot
securelysupported.Ifthecut-opieceorwork-
piecetips,itcanliftthelowerguardorbethrown
by the spinning blade.
14. Do not use another person as a substitute for
a table extension or as additional support.
Unstablesupportfortheworkpiececancausethe
bladetobindortheworkpiecetoshiftduringthe
cuttingoperationpullingyouandthehelperinto
the spinning blade.
15. The cut-o piece must not be jammed or
pressed by any means against the spinning
saw blade.Ifconned,i.e.usinglengthstops,the
cut-opiececouldgetwedgedagainsttheblade
andthrownviolently.
16. Always use the vise and properly support the
workpiece considering its shape. For example,
Rodsandchannelshaveatendencytorollorshift
whilebeingcut,causingthebladeto“bite”and
pulltheworkwithyourhandintotheblade.
17. Let the blade reach full speed before contact-
ing the workpiece.Thiswillreducetheriskofthe
workpiece being thrown.
18. If the workpiece or blade becomes jammed,
turn the power tool o. Wait for all moving
parts to stop and disconnect the plug from
the power source and/or remove the battery
pack. Then work to free the jammed material.
Continuedsawingwithajammedworkpiececould
causelossofcontrolordamagetothepowertool.
19. After nishing the cut, release the switch,
hold the saw head down and wait for the blade
to stop before removing the cut-o piece.
Reachingwithyourhandnearthecoastingblade
isdangerous.
20. Hold the handle rmly when making an incom-
plete cut or when releasing the switch before
the saw head is completely in the down posi-
tion.Thebrakingactionofthesawmaycause
thesawheadtobesuddenlypulleddownward,
causingariskofinjury.
21. The outside diameter of the saw blade must be
the specied capacity.Incorrectlysizedaccesso-
riescannotbeadequatelyguardedorcontrolled.
22. The arbour size of saw blade and anges must
properly t the spindle of the power tool. Saw
bladeandangeswitharbourholesthatdonot
matchthemountinghardwareofthepowertool
willrunoutofbalance,vibrateexcessivelyand
maycauselossofcontrol.
23. The rated speed of the accessory must be at
least equal to the maximum speed marked on
the power tool.
24. Do not use the metal cutting saw to cut other
than mild steel or stainless steel.
Additional instructions
1. Never stand on the metal cutting saw.Tipping
overorunintentionalcontactwiththecutting
meanscouldcauseseriousinjury.
2. Never leave the power tool running unat-
tended. Turn the power o. Do not leave tool
until it comes to a complete stop.
3. Do not operate saw without guards in place.
Check blade guard for proper closing before
each use. Do not operate saw if blade guard
does not move freely and close instantly.
Never clamp or tie the blade guard into the
open position.
4. Keep hands out of the path of the saw blade.
Avoid contact with any coasting blade. It can
still cause serious injury.
5. Always secure all moving portions before
carrying the power tool.
6. Check the blade carefully for cracks or damage
before operation. Replace cracked or damaged
blade immediately.
7. Use only anges specied for this tool.
8. Always use undamaged anges and xing
bolt that are of correct diameter for the blade.
Proper anges support the blade thus reduc-
ing the possibility of blade breakage.
9. Make sure the shaft lock is released before
turning the power tool on.
10. Hold the handle rmly. Be aware that the saw
moves up or down slightly during start-up and
stopping.
11. Make sure the blade is not contacting the
workpiece before turning the power tool on.
12. Before using the power tool on an actual work-
piece, let it run for a while. Watch for vibration
or wobbling that could indicate poor installa-
tion or a poorly balanced blade.
13. Stop operation immediately if you notice any-
thing abnormal.
14. Do not attempt to lock the trigger in the “ON”
position.
15. Always use accessories recommended in this
manual. Use of improper accessories such as
abrasive wheels may cause an injury.
16. Some material contains chemicals which may
be toxic. Take caution to prevent dust inhala-
tion and skin contact. Follow material supplier
safety data.
SAVE THESE INSTRUCTIONS.
WARNING: DO NOT let comfort or familiarity
with product (gained from repeated use) replace
strict adherence to safety rules for the subject
product. MISUSE or failure to follow the safety
rules stated in this instruction manual may cause
serious personal injury.

9ENGLISH
INSTALLATION
Positioning the tool
►Fig.1: 1. Hook
When the tool is shipped from the factory, the handle is
locked. Release the handle from the lowered position
byloweringitslightlyandremovingthechainfromthe
hook on the handle.
Boltthetoolwithtwoboltstoalevelandstablesurface
usingtheboltholesprovidedinthetoolbase.Thiswill
helppreventtippingandpossibleinjury.
►Fig.2: 1. Bolt
FUNCTIONAL
DESCRIPTION
CAUTION:
• Alwaysbesurethatthetoolisswitchedoand
unpluggedbeforeadjustingorcheckingfunction
on the tool.
Blade guard
►Fig.3: 1.Bladeguard
Whenloweringthehandle,thebladeguardrisesauto-
matically.Theguardisspringloadedsoitreturnsto
itsoriginalpositionwhenthecutiscompletedandthe
handleisraised.NEVERDEFEATORREMOVETHE
BLADEGUARDORTHESPRINGWHICHATTACHES
TOTHEGUARD.
Intheinterestofyourpersonalsafety,alwaysmaintain
thebladeguardingoodcondition.Anyirregularopera-
tionofthebladeguardshouldbecorrectedimmediately.
Checktoassurespringloadedreturnactionofguard.
NEVERUSETHETOOLIFTHEBLADEGUARDOR
SPRINGISDAMAGED,FAULTYORREMOVED.
DOINGSOISHIGHLYDANGEROUSANDCAN
CAUSESERIOUSPERSONALINJURY.
Ifthebladeguardisespeciallydirty,usethesupplied
socket wrench to loosen the hex bolt holding the center
cover.Loosenthehexboltbyturningitcounterclock-
wiseandraisethebladeguardandcentercover.With
thebladeguardsopositioned,cleaningcanbemore
completelyandecientlyaccomplished.Whencleaning
iscomplete,reverseprocedureaboveandsecurebolt.
Donotremovespringholdingbladeguard.DONOT
DEFEATORREMOVEGUARD.
►Fig.4: 1.Bladeguard
Switch action
CAUTION:
• Beforeplugginginthetool,alwayschecktosee
thattheswitchtriggeractuatesproperlyand
returnstothe“OFF”positionwhenreleased.
• Whennotusingthetool,removethelock-o
buttonandstoreitinasecureplace.Thispre-
ventsunauthorizedoperation.
►Fig.5: 1.Lock-obutton2. Switch trigger
Topreventtheswitchtriggerfrombeingaccidentally
pulled,alock-obuttonisprovided.
Tostartthetool,depressthelock-obuttonandpullthe
switch trigger. Release the switch trigger to stop.
Setting for desired cutting angle
CAUTION:
• Alwaystightenthehexboltsecurelyafter
changingthecuttingangle.
►Fig.6: 1.Graduation2.Lever3. indicator 4.Vise
stop
Tochangethecuttingangle,loosenthelever.Movethe
visestopsothattheindicatorwillpointtothedesired
graduation.Thentightenthelevertosecurethevise
stop.
Dust collection
►Fig.7: 1.Dustbox
CAUTION:
• Donottouchanypartofthedustboxexceptits
handle immediately after operation; it may be
extremelyhotandcouldburnyourskin.
Thistoolisequippedwiththedustboxtocollectdust
andcutchips.Whenthedustboxisfull,holdthehan-
dleofthedustboxandraiseitslightly.Thenpullthe
dustboxoutofthetoolbase.Emptythedustboxofits
contents.
ASSEMBLY
CAUTION:
• Alwaysbesurethatthetoolisswitchedoand
unpluggedbeforecarryingoutanyworkonthe
tool.
Socket wrench storage
►Fig.8: 1. Wrench holder 2. Base
Thesocketwrenchisstoredasshowninthegure.
Whenusingthesocketwrench,pullitoutofthewrench
holder.Afterusingthesocketwrench,returnittothe
wrench holder.

10 ENGLISH
Installing or removing saw blade
►Fig.9: 1.Centercover2. Hex bolt 3. Socket wrench
4.Bladeguard
CAUTION:
• Whenmountingtheblade,makesurethatthe
directionofthearrowonthesurfaceoftheblade
matches the direction of the arrow on the blade
case.
• UseonlytheMakitasocketwrenchprovidedto
installorremovetheblade.Failuretodosomay
resultinovertighteningorinsucienttightening
ofthehexbolt.Thiscouldcauseapersonal
injury.
• Donottouchthebladeimmediatelyafteroper-
ation;itmaybeextremelyhotandcouldburn
yourskin.
Toremovetheblade,usethesocketwrenchtoloosen
thehexboltholdingthecentercoverbyturningitcoun-
terclockwise.Raisethebladeguardandcentercover.
Presstheshaftlocktolockthespindleandusethe
socketwrenchtoloosenthehexboltbyturningcoun-
terclockwise.Thenremovethehexbolt,outerange
and blade.
►Fig.10: 1. Hex bolt 2. Shaft lock 3. Socket wrench
Toinstalltheblade,mounttheinnerange,sawblade,
outerangeandhexboltontothespindleinthatorder.
Tightenthehexboltbyturningclockwisewhilepressing
theshaftlock.Returnthebladeguardandcentercover
totheoriginalposition.Thentightenthehexboltclock-
wisetosecurethecentercover.Lowerthehandleto
makesurethatthebladeguardmovesproperly.
►Fig.11: 1. Carbide-tipped saw blade 2. Hex bolt
3. Spindle 4.Innerange5.Outerange
Securing workpiece
CAUTION:
• Alwayssetthevisenuttotherightfullywhen
securingtheworkpiece.Failuretodosomay
resultininsucientsecuringoftheworkpiece.
Thiscouldcausetheworkpiecetobeejectedor
causedamagetotheblade.
Byturningthevisehandlecounterclockwiseandthen
ippingthevisenuttotheleft,theviseisreleasedfrom
theshaftthreadsandcanbemovedrapidlyinandout.
Togripworkpieces,pushthevisehandleuntilthevise
platecontactstheworkpiece.Flipthevisenuttothe
rightandthenturnthevisehandleclockwisetosecurely
retain the workpiece.
►Fig.12: 1.Viseplate2.Visenut3.Visehandle
Longworkpiecesmustbesupportedbyblocksof
non-ammablematerialoneithersidesothatitwillbe
levelwiththebasetop.
►Fig.13
OPERATION
Cutting operation
CAUTION:
• Neverattempttocutworkpieceslessthan2mm
thick except pipe or workpieces which cannot
besecuredrmlywiththevise.Thepiececuto
maybecaughtbytheblade,causingdangerous
scattering of chips and/or damage to the car-
bide-tips.Possibleseriousinjurymayresult.
• Donotapplyexcessivepressureonthehandle
whencutting.Toomuchpressuremayresult
inoverloadofthemotor,decreasedcutting
eciencyand/ordamagetothecarbide-tipsor
blade itself.
• Toolittlepressureonthehandlemayresultin
moresparksandprematurebladewear.
• Donottouchtheblade,workpieceorcutting
chips immediately after operation; they may be
extremelyhotandcouldburnyourskin.
• Ifthebladestopsduringoperation,makesan
oddnoiseorbeginstovibrate,switchothe
tool immediately. Replace cracked or damaged
blade with a new one.
• Donotcutaluminum,wood,plastics,concrete,
tiles, etc.
• Alwaysusecarbide-tippedsawbladesappro-
priateforyourjob.Theuseofinappropriatesaw
bladesmaycauseapoorcuttingperformance
and/orpresentariskofpersonalinjury.
• Donotreleasethesawheaduncontrolledfrom
thefullydownposition.Uncontrolledsawhead
mayhityouanditwillresultinpersonalinjury.
Holdthehandlermly.Switchonthetoolandwaituntil
thebladeattainsfullspeed.Thenlowerthehandle
gently to bring the blade close to the workpiece. When
theblademakescontact,easeintothecutgentlyat
rst,thengraduallyaddpressureasthecuttingposi-
tionsteadies.Yourpressureonthehandleshouldbe
adjustedtoproducetheminimumamountofsparks.
Whenthecutiscompleted,switchothetoolandWAIT
UNTILTHEBLADEHASCOMETOACOMPLETE
STOPbeforereturningthehandletothefullyelevated
position. If the handle is raised while the blade is still
rotating,thepiececutomaybecaughtbytheblade,
causingdangerousscatteringofchips.Whencutting
only part of the way into a workpiece, raise the handle
whilethebladeisrotating.Switchingoduringthecut
maycausedamagetothecarbide-tipsastheycontact
the workpiece.
Cutting angles
►Fig.14
SecuretheworkpieceintheviseasshownintheFigure
Aandproceedtocutit.Thesawbladelifewillbeshort-
enediftheworkpieceiscutasshownintheFigB.

11 ENGLISH
CAUTION:
• DoNOTcuttheworkpieceasshownintheFig.
Csincethismaycauseittobeejectedfromthe
vise,possiblyresultingininjury.
Thesawbladeissubjectedtogreaterwearwhenthe
areaAintheFig.Biscut.Placeawoodenblockup
against the workpiece as shown in the Fig. D so that the
sawbladewillenterareaAatanangle.Thiswillhelpto
extend the saw blade life.
Theallowablecuttingdimensionsarereducedwhen
awoodenblockisused.Useawoodenblockwhose
dimensionsareequivalenttothemaximumallowable
cuttingdimensionsminusthedimensionsofthework-
piecetobecut.Thiswillfurtherminimizetheshortening
of the saw blade life.
Cutting pipes, squares and channels
►Fig.15
Thesawbladeissubjectedtogreaterwearwhenthe
areasAandBingureFandgureGarecut.Place
awoodenblockupagainsttheworkpieceasshown
ingureHandgureIsothatthesawbladewillenter
areasAandBatanangle.Thiswillhelptominimizethe
shortening of the saw blade life.
Theallowablecuttingdimensionsarereducedwhen
awoodenblockisused.Useawoodenblockwhose
dimensionsareequivalenttothemaximumallowable
cuttingdimensionsminusthedimensionsofthework-
piecetobecut.Thiswillfurtherminimizetheshortening
of the saw blade life.
Cutting rectangles
►Fig.16
SecuretheworkpieceintheviseasshowningureJ,
andproceedtocutit.
CAUTION:
• DoNOTcuttheworkpieceasshowningure
Ksincethismaycauseittobeejectedfromthe
vise,possiblyresultingininjury.
Carrying tool
►Fig.17
Folddownthetoolheadtothepositionwhereyoucan
attachthechaintothehookonthehandle.Graspthe
carrying grip when carrying the tool.
MAINTENANCE
CAUTION:
• Alwaysbesurethatthetoolisswitchedoand
unpluggedbeforeattemptingtoperforminspec-
tion or maintenance.
• Neverusegasoline,benzine,thinner,alcohol
or the like. Discoloration, deformation or cracks
mayresult.
Replacing saw blade
Continuingtouseadullandwornblademaycause
motoroverloadanddecreasedcuttingeciency.
Replace with a new blade as soon as it is no longer
eective.
Replacing carbon brushes
►Fig.18: 1. Limit mark
Removeandcheckthecarbonbrushesregularly.
Replace when they wear down to the limit mark. Keep
thecarbonbrushescleanandfreetoslipintheholders.
Bothcarbonbrushesshouldbereplacedatthesame
time.Useonlyidenticalcarbonbrushes.
Useascrewdrivertoremovethebrushholdercaps.
Takeouttheworncarbonbrushes,insertthenewones
andsecurethebrushholdercaps.
►Fig.19: 1.Screwdriver2.Brushholdercap
TomaintainproductSAFETYandRELIABILITY,repairs,
anyothermaintenanceoradjustmentshouldbeper-
formedbyMakitaAuthorizedServiceCenters,always
usingMakitareplacementparts.
After use
Afteruse,wipeochipsanddustadheringtothetool
withaclothorthelike.Keepthebladeguardclean
accordingtothedirectionsinthepreviouslycovered
sectiontitled“Bladeguard”.Lubricatetheslidingpor-
tionswithmachineoiltopreventrust.
OPTIONAL
ACCESSORIES
CAUTION:
• Theseaccessoriesorattachmentsarerecom-
mendedforusewithyourMakitatoolspecied
inthismanual.Theuseofanyotheraccessories
orattachmentsmightpresentariskofinjuryto
persons.Onlyuseaccessoryorattachmentfor
itsstatedpurpose.
Ifyouneedanyassistanceformoredetailsregard-
ingtheseaccessories,askyourlocalMakitaService
Center.
• Carbide-tippedsawblade
(RefertoourwebsiteorcontactyourlocalMakita
dealerforthecorrectsawbladestobeusedfor
thematerialtobecut.)
• Safetygoggle
• Socketwrench
• Lock-obutton(Switchbutton)
NOTE:
• Someitemsinthelistmaybeincludedinthe
toolpackageasstandardaccessories.They
maydierfromcountrytocountry.

12
中文简体
中文简体 (原本)
规格
型号 LC1230
锯片直径 305 mm
孔(轴)直径 25.4 mm
锯片的最大锯槽厚度 2.5 mm
空载速度 1,700 /min
尺寸(长 ×宽×高) 516 mm ×306 mm ×603 mm
净重 19.2 kg
安全等级 /II
•生产者保留变更规格不另行通知之权利。
•规格可能因销往国家之不同而异。
•重量符合EPTA-Procedure01/2014
切割能力
工件形状
A
A
B
A X B
切割角度 90°115 mm 75 mm x 150 mm
100 mm x 100 mm
45°90 mm 85 mm ×85 mm
符号
以下显示本工具使用的符号。在使用工具之
前请务必理解其含义。
阅读使用说明书。
II类工具
佩带安全眼镜。
请勿将手或手指靠近锯片。
为了避免飞溅的碎片造成人身
伤害,切割后请保持锯片头朝
下,直至锯片完全停止。
为了您的安全,操作前请清除
工作台上的碎片、小切片等。
仅限于欧盟国家
由于本设备中包含有害成分,
因此使用过的电气和电子设备
可能会对环境和人体健康产生
负面影响。
请勿将电气和电子工具与家庭
普通废弃物放在一起处置!
根据欧洲关于废弃电气电子设
备的指令及其国家层面的修订
法案,使用过的电气和电子设
备应当单独收集并递送至城市
垃圾收集点,根据环保规定进
行处置。
此规定由标有叉形标志的带轮
垃圾桶符号表示。
用途
本工具在配备适当的锯片后用于切割软钢和
不锈钢。

13
中文简体
电源
本工具只可连接电压与铭牌所示电压相同的
电源,且仅可使用单相交流电源。本工具双
重绝缘,因此也可用于不带接地线的插座。
安全警告
电动工具通用安全警告
警告: 阅读随电动工具提供的所有安全
警告、说明、图示和规定。不遵照以下所列
说明会导致电击、着火和/或严重伤害。
保存所有警告和说明书以备查
阅。
警告中的术语“电动工具”是指市电驱动(有
线)电动工具或电池驱动(无线)电动工具。
工作场地的安全
1. 保持工作场地清洁和明亮。杂乱和黑暗
的场地会引发事故。
2. 不要在易爆环境,如有易燃液体、气体
或粉尘的环境下操作电动工具。电动工
具产生的火花会点燃粉尘或气体。
3. 操作电动工具时,远离儿童和旁观者。注
意力不集中会使你失去对工具的控制。
电气安全
1. 电动工具插头必须与插座相配。绝不能
以任何方式改装插头。需接地的电动工
具不能使用任何转换插头。未经改装的
插头和相配的插座将降低电击风险。
2. 避免人体接触接地表面,如管道、散热
片和冰箱。如果你身体接触接地表面会
增加电击风险。
3. 不得将电动工具暴露在雨中或潮湿环境
中。水进入电动工具将增加电击风险。
4. 不得滥用软线。绝不能用软线搬运、拉
动电动工具或拔出其插头。使软线远离
热源、油、锐边或运动部件。受损或缠
绕的软线会增加电击风险。
5. 当在户外使用电动工具时,使用适合户
外使用的延长线。适合户外使用的电线
将降低电击风险。
6. 如果无法避免在潮湿环境中操作电动工
具 ,应 使 用 带 有 剩 余 电 流 装 置( RCD)保
护的电源。RCD的使用可降低电击风险。
7. 始终建议通过额定剩余电流为30 mA或
以下的RCD来使用电源。
8. 电动工具会产生对用户无害的电磁场
(EMF)。但是,起搏器和其他类似医
疗设备的用户应在操作本电动工具前咨
询其设备的制造商和/或医生寻求建议。
9. 请勿用湿手触摸电源插头。
10. 如果导线破损,则由制造商或其代理商
更换以避免安全隐患。
人身安全
1. 保持警觉,当操作电动工具时关注所从
事的操作并保持清醒。当你感到疲倦,
或在有药物、酒精或治疗反应时,不要
操作电动工具。在操作电动工具时瞬间
的疏忽会导致严重人身伤害。
2. 使用个人防护装置。始终佩戴护目镜。
防护装置,诸如适当条件下使用防尘面
具、防滑安全鞋、安全帽、听力防护等
装置能减少人身伤害。
3. 防 止 意 外 起 动 。在 连 接 电 源 和 /或电池包、
拿起或搬运工具前确保开关处于关断位
置。手指放在开关上搬运工具或开关处
于接通时通电会导致危险。
4. 在电动工具接通之前,拿掉所有调节钥
匙或扳手。遗留在电动工具旋转零件上
的扳手或钥匙会导致人身伤害。
5. 手不要过分伸展。时刻注意立足点和身
体平衡。这样能在意外情况下能更好地
控制住电动工具。
6. 着装适当。不要穿宽松衣服或佩戴饰品。
让你的头发和衣服远离运动部件。宽松衣
服、佩饰或长发可能会卷入运动部件。
7. 如果提供了与排屑、集尘设备连接用的
装置,要确保其连接完好且使用得当。
使用集尘装置可降低尘屑引起的危险。
8. 不要因为频繁使用工具而产生的熟悉感而
掉以轻心,忽视工具的安全准则。某个粗
心的动作可能在瞬间导致严重的伤害。
9. 使用电动工具时请始终佩带护目镜以免伤
害眼睛。护目镜须符合美国ANSI Z87.1、
欧洲EN 166或者澳大利亚/新西兰的AS/
NZS 1336的规定。在澳大利亚/新西兰,
法律要求佩带面罩保护脸部。

14
中文简体
雇主有责任监督工具操作者和其他近工
作区域人员佩带合适的安全防护设备。
电动工具使用和注意事项
1. 不要勉强使用电动工具,根据用途使用
合适的电动工具。选用合适的按照额定
值设计的电动工具会使你工作更有效、
更安全。
2. 如果开关不能接通或关断电源,则不能
使用该电动工具。不能通过开关来控制
的电动工具是危险的且必须进行修理。
3. 在进行任何调节、更换附件或贮存电动
工具之前,必须从电源上拔掉插头和/或
卸下电池包(如可拆卸)。这种防护性
的安全措施降低了电动工具意外起动的
风险。
4. 将闲置不用的电动工具贮存在儿童所及
范围之外,并且不允许不熟悉电动工具
和不了解这些说明的人操作电动工具。
电动工具在未经培训的使用者手中是危
险的。
5. 维护电动工具及其附件。检查运动部件是
否调整到位或卡住,检查零件破损情况和
影响电动工具运行的其他状况。如有损
坏,应在使用前修理好电动工具。许多
事故是由维护不良的电动工具引发的。
6. 保持切削刀具锋利和清洁。维护良好地
有锋利切削刃的刀具不易卡住而且容易
控制。
7. 按照使用说明书,并考虑作业条件和要
进行的作业来选择电动工具、附件和工
具的刀头等。将电动工具用于那些与其
用途不符的操作可能会导致危险情况。
8. 保持手柄和握持表面干燥、清洁,不得
沾有油脂。在意外的情况下,湿滑的手
柄不能保证握持的安全和对工具的控制。
9. 使用本工具时,请勿佩戴可能会缠结的
布质工作手套。布质工作手套卷入移动
部件可能会造成人身伤害。
维修
1. 由专业维修人员使用相同的备件维修电
动工具。这将保证所维修的电动工具的
安全。
2. 上润滑油及更换附件时请遵循本说明书
指示。
金属型材切割机安全注意事项
1. 金属型材切割机用于切割铁质材料,不可
使用切割砂轮来切割铁质材料,例如钢
筋、铁棒和板墙筋等。磨屑导致下部保
护罩等运动部件卡滞。砂轮切割产生的
火花会烧灼下部保护罩和其他塑料部件。
2. 请定期清洁工具的通风口。电机的风扇
会将灰尘带入外壳,过多的金属粉末累
积会导致电气危害。
3. 请穿戴个人劳防用品。根据应用情况,
请使用面罩、安全护目镜或安全眼镜。
根据情况佩带可防止较小碎片的防尘面
罩、耳罩、手套和车间用的围裙。护目
镜必须具备可以防止多种操作所产生的
飞溅碎片伤害到您的能力。防尘面罩或
呼吸器必须具备可过滤操作中产生的微
粒的能力。长时间的高强度噪音可能会
损伤您的听力。
4. 请勿在易燃或可燃材料附近操作金属型
材切割机。切割作业时产生的火花和/
或灼热碎屑会引燃这些材料。
5. 务必使用夹紧件支撑工件。切勿用手支撑
工件。切勿使用该锯切割体积太小而难以
夹紧的工件。如果手距离锯片过近,会增
加与锯片接触导致受伤的风险。
6. 工件必须静止不动并用虎钳夹紧。切勿
以任何方式将工件向锯片递送或徒手切
割。未固定或移动的工件在高速切割时
会被甩出,导致人身伤害。
7. 切勿将手放在锯片前后所需切割线的上
方。以“双手交叉”(左手握持锯片右
边部分的工件或右手握持锯片左边部分
的工件)的方式固定工件十分危险。
8. 锯片在旋转时,请勿为清理碎屑或出于
任何原因从锯片的任一侧将手伸到虎钳
止动器的后方。旋转的锯片可能会在较
难觉察的情况下接近双手,导致严重的
人身伤害。
9. 切割前请检查工件。如果工件弯曲或扭
曲,请务必确保夹紧的工件、虎钳和虎
钳止动器之间在切割线上没有间隙。弯
曲或扭曲的工件会扭动或晃动,切割时
会对旋转的锯片产生阻力。

15
中文简体
10. 清理干净工作台上除工件以外的任何其
他工具、碎屑后方可使用锯片。工作台
上的小碎片或零散的铁质或其他物体接
触到旋转的锯片时会被高速甩出。
11. 一次仅可切割一个工件。多个工件堆叠
无法被充分夹紧或获得良好支撑,切割
期间会对锯片产生阻力或移位。
12. 使用前,确保在水平、稳固的物体表面安
装或放置电动工具。水平、稳固的工作表
面会降低电动工具变得不稳定的风险。
13. 对于长度或宽度超过工作台的工件,请通
过垫块、锯木架等方式给予充分支撑。如
果未获得充分支撑,长度或宽度超过金属
型材切割机工作台的工件会翻转。如果切
块或工件翻转,它会抬起下部保护罩或被
旋转的锯片甩出。
14. 切勿让他人作为助手替代延展工作台或
令其对工件进行额外支撑。工件支撑不
稳定会导致切割操作期间锯片卡滞或工
件移位,将操作人员和助手拉向旋转的
锯片。
15. 切下的切块不可以任何形式挤压旋转的
锯片。如果受到限制,也即使用纵向制
动器,切块会挤住锯片并被猛烈甩出。
16. 务必考虑工件的形状使用虎钳并给予正
确的支撑。例如,圆棒和槽形工件在切
割时容易滚动或移位,导致锯片被“咬
住”并将工件和手部拉向锯片。
17. 操作锯片接触工件前,请使其达到全速。
此举可降低工件被甩出的风险。
18. 如果工件或锯片被卡住,请关闭电动工
具。等到所有移动的部件停止,然后断
开电源插头和/或取下电池组。然后再
处理卡住的材料。如果在工件被卡住的
情况下继续切割,则会导致电动工具失
控或受损。
19. 结束切割后,松开开关,使锯片头保持向
下,等待锯片完全停止后再移除切块。双
手靠近仍在转动的锯片是十分危险的。
20. 进行不完全切割或在锯片头完全插入下
方之前松开开关时,请牢握把手。锯片
的制动操作会导致锯片头被猛地向下拉
动,存在人身伤害风险。
21. 锯片外直径必须是指定的规格。尺寸不
正确的附件将无法安全操控。
22. 锯片和法兰的轴孔尺寸必须与电动工具
的主轴匹配。与电动工具的安装硬件不
匹配的锯片和法兰(带轴孔)将失去平
衡,振动过度并可能导致失控。
23. 附件的额定速度必须至少等同于电动工
具上标示的最大速度。
24. 请勿使用金属型材切割机切割软钢或不
锈钢以外的材料。
其它注意事项
1. 切勿站在金属型材切割机上。跌倒或意外
接触切割部件会造成严重的人身伤害。
2. 切勿使电动工具在无人照看的情况下运
行。关闭电源。切勿在工具完全停止前
离开工具。
3. 请勿在保护罩未安装到位时操作本锯。
在每次使用之前请检查锯片保护罩是否
正确闭合。如果锯片保护罩无法自由移
动和快速闭合,则请勿使用该锯。切勿
将锯片保护罩置于打开位置。
4. 请勿将手放在锯片移动路径上。请勿接触
仍在转动的锯片。否则会造成严重伤害。
5. 搬动电动工具前请务必固定好所有可以
移动的部件。
6. 操作之前,请仔细检查锯片上是否有裂
缝或损坏。应立即更换有裂缝或损坏的
锯片。
7. 请仅使用本工具指定的法兰。
8. 始终使用适合锯片且直径正确的无损法
兰和固定螺栓。正确的法兰可降低锯片
破裂的危险。
9. 开启电动工具前,请确保松开轴锁。
10. 请牢握把手。请注意在启动和停止期间
锯片会轻微地上下移动。
11. 开启电动工具前,请确认锯片未与工件
接触。
12. 在实际的工件上使用电动工具之前,请
先让工具空转片刻。请注意,振动或摇
摆可能表示安装不当或锯片不平衡。
13. 若发现有任何异常请立即停止操作。
14. 请勿试图将开关扳机锁定在“开启”位置。
15. 请务必使用本说明书中建议的附件。使
用砂轮等不适用的附件可能会导致人身
伤害。
16. 某些材料含有有毒化学物质。小心不要
吸入粉尘,并避免皮肤接触。遵循材料
供应商的安全提示。
请保留此说明书。
警告: 请勿为图方便或因对产品足够熟
悉(由于重复使用而获得的经验)而不严格
遵循相关产品安全规则。使用不当或不遵循
使用说明书中的安全规则会导致严重的人身
伤害。

16
中文简体
安装
配置工具
►图片1: 1. 挂钩
工具出厂时会锁定把手。通过略微降低把手
将其从较低位置松开,并从把手的挂钩上拆
下链条。
用两个螺栓穿过工具基座上的螺栓孔将其固
定在一个平坦稳定的表面。这样可以防止机
器倾覆及可能的人身伤害。
►图片2: 1. 螺栓
功能描述
小心:
•在调节或检查工具功能之前,请务必关
闭工具电源开关并拔下电源插头。
锯片保护罩
►图片3: 1. 锯片保护罩
降下把手时,锯片保护罩会自动升起。当完
成切割抬起把手时,弹簧加力的保护罩会回
到原来的位置。请勿废弃或移除锯片保护罩
或者保护罩上的弹簧。
为了您自身的安全考虑,请妥善保养锯片保
护罩。任何对锯片保护罩不规范的操作都应
立即更正。检查确认保护罩的弹簧可正常工
作。如果锯片保护罩或弹簧已被损坏,出现
故障或被移除,请勿使用该工具。这样做极
其危险并可能造成严重人身伤害。
如果锯片保护罩特别脏,请使用附带的套筒
扳手拧松用来固定中心盖板的六角螺栓。按
逆时针方向拧松六角螺栓,并抬起锯片保护
罩和中心盖板。如此定位锯片保护罩,可以
更彻底和高效地完成清洁。清洁完成后,请
执行与上述相反的步骤,并紧固螺栓。请勿
移除固定锯片保护罩的弹簧。请勿废弃或移
除保护罩。
►图片4: 1. 锯片保护罩
开关操作
小心:
•插上工具电源插头之前,请务必确认
开关扳机能够正常工作,松开时能回
到“OFF”(关闭)位置。
•不使用工具时,请拆下锁止按钮并将
其存放在安全的地方。这样能够防止
未授权操作。
►图片5: 1. 锁止按钮 2. 开关扳机
为避免使用者不小心扣动开关扳机,本工具
采用锁止按钮。
要启动工具时,按下锁止按钮,然后扣动开
关扳机即可。松开开关扳机工具即停止。
设为所需的切割角度
小心:
•在改变切割角度后,请务必拧紧六角
螺栓。
►图片6: 1. 刻度 2. 杆3. 指针 4. 虎钳
止动器
改变切割角度时,请松开杆。移动虎钳止动
器,使指针指向所需的刻度。然后拧紧杆以
紧固虎钳止动器。
集尘
►图片7: 1. 集尘箱
小心:
•操作完成后,请勿立刻触摸集尘箱除
把手外的任何部分,因为其可能会非
常烫,导致烫伤皮肤。
本工具配备有收集灰尘和切屑的集尘箱。集
尘箱装满时,请握住集尘箱的把手并将其略
微抬升。然后将集尘箱从工具基座拉出。清
空集尘箱。

17
中文简体
装配
小心:
•对工具进行任何装配操作前请务必确认
工具已关闭且已拔下电源插头。
套筒扳手的存放
►图片8: 1. 扳手仓 2. 基座
套筒扳手应如图示中存放。使用套筒扳手时,
请将其从扳手仓中取出。使用套筒扳手后,
请将其放回扳手仓。
安装或拆卸锯片
►图片9: 1. 中心盖板 2. 六角螺栓 3. 套筒
扳手 4. 锯片保护罩
小心:
•安装锯片时,请确保锯片表面上的箭头
方向与锯片基座上的箭头方向相吻合。
•请仅使用随附的Makita(牧田)套筒扳
手来安装或拆卸锯片。否则可能会导致
六角螺栓安装过紧或者过松。这样可能
会造成人身伤害。
•操作之后,请勿立刻触摸锯片;其可能
会非常烫,导致烫伤皮肤。
要拆下锯片,请用套筒扳手按逆时针方向转
动固定中心盖板的六角螺栓将其拧松。抬起
锯片保护罩和中心盖板。
按下轴锁锁定主轴,用套筒扳手按逆时针方
向拧松六角螺栓。然后拆下六角螺栓、外法
兰盘和锯片。
►图片10: 1. 六角螺栓 2. 轴锁 3. 套筒扳手
安装锯片时,依次将内法兰盘、锯片、外法
兰盘和六角螺栓安装在主轴上。在按下轴锁
的同时通过顺时针旋转拧紧六角螺栓。将锯
片保护罩和中心盖板放回原来的位置。然后按
顺时针方向拧紧六角螺栓以紧固中心盖板。降
下把手确保锯片保护罩正常移动。
►图片11: 1. 硬质合金锯片 2. 六角螺栓
3. 主轴 4. 内法兰盘 5. 外法兰盘
固定工件
小心:
•固 定 工 件 时 ,请 务 必 完 全 向 右 设 置 虎 钳
螺母。否则,可能无法牢固固定工件。这
可能会导致工件弹出或造成锯片破损。
通过逆时针旋转虎钳把手,然后将虎钳螺母
拨向左边,可将虎钳从轴螺纹中松开,并可
快速移入和移出。要夹住工件,请推动虎钳
把手,直至虎钳板与工件接触。将虎钳螺母
拨向右侧,然后顺时针旋转虎钳把手,以紧
固工件。
►图片12: 1.虎钳板 2.虎钳螺母 3. 虎钳把手
对于较长的工件,必须使用不可燃材料的垫
块支撑两端以使之与工具基座上表面齐平。
►图片13
操作
切割操作
小心:
•不要尝试切割厚度小于2 mm的 工 件( 除
管 子 外 )以 及 无 法 由 虎 钳 紧 固 的 工 件 。切
割掉的部分可能会被锯片夹住,造成碎屑
飞溅的危险和/或损坏碳化尖头的危险。
可能会导致严重的人身伤害。
•切割时,请勿向把手施加过大压力。压
力过大可能导致电机过载,降低切割效
率和/或损坏碳化尖头或锯片自身。
•把手上的压力过小可能导致火花增多和
锯片过早磨损。
•操作之后,请勿立刻触摸锯片、工件或
切屑,因为它们可能会非常烫而导致烫
伤皮肤。
•如果锯片在运行中停止,发出异常噪音
或开始振动,请立即关闭工具。将有裂
缝或损坏的锯片更换为新的。
•请 勿 切 割 铝 制 品 、木 材 、塑 料 、混 凝 土 、瓷
瓦等。
•请始终使用适当的硬质合金锯片进行切
割操作。使用不正确的锯片可能会导致切
割性能不良和/或存在人身伤害的危险。
•请勿将锯片头从完全向下的位置以失控
的方式释放。否则失控的锯片头可能将
您击伤。

18
中文简体
请牢握把手。启动工具并等待锯片到全速运
转后再进行操作。然后,轻轻将把手降低,
使锯片与工件接近。锯片接触时,首先轻轻
开始切割,然后随切割位置稳定逐渐增加压
力。应该调整施加在把手上的压力,以产生
最少量的火花。
切割完成后,关闭工具电源开关,待锯片完全停
止运转时,将把手放回充分抬起的位置。如果在
锯片仍在旋转时抬起把手,切割掉的部分将
被锯片夹住,造成碎屑飞溅的危险。当仅部
分切入工件时,请在锯片旋转时抬起把手。
在切割期间关闭可能导致碳化尖头受损,因
为其与工件接触。
切割角度
►图片14
将虎钳中的工件按图A所示固定,然后对其进
行切割。如果如图B所示切割工件,锯片寿命
将缩短。
小心:
•请勿按图C所 示 切 割 工 件 ,因 为 这 可 能 会
导致其从虎钳中溅出,造成人身伤害。
当切割图B中的区域A时,锯片将受到较大的
磨损。如图D中所示,将木块抵住工件放置,
从而使锯片以一定角度进入区域A。这将有助
于延长锯片寿命。
使用木块时,可允许的切割尺寸降低。使用
尺寸等于最大可允许切割尺寸减待切割工件
尺寸的木块。这将进一步减小锯片寿命的缩
短。
切割管子、方块和槽
►图片15
当切割图F和图G中的区域A和B时,锯片将
受到较大的磨损。如图H和图I中所示,将木
块抵住工件放置,从而使锯片以一定角度进
入区域A和B。这将有助于减小锯片寿命的缩
短。
使用木块时,可允许的切割尺寸降低。使用
尺寸等于最大可允许切割尺寸减待切割工件
尺寸的木块。这将进一步减小锯片寿命的缩
短。
切割矩形
►图片16
将虎钳中的工件按图J所示固定,然后对其进
行切割。
小心:
•请勿按图K所 示 切 割 工 件 ,因 为 这 可 能 会
导致其从虎钳中溅出,造成人身伤害。
搬运工具
►图片17
将工具头折叠到可以将链条连接到把手上挂
钩的位置。搬运工具时请握住搬运把手。
保养
小心:
•检查或保养工具之前,请务必关闭工具
电源开关并拔下插头。
•切勿使用汽油、苯、稀释剂、酒精或类
似物品清洁工具。否则可能会导致工具
变色、变形或出现裂缝。
更换锯片
继续使用变钝或磨损的锯片可能导致电机过
载并降低切割效率。一旦不再有效,请立即
更换新的锯片。
更换碳刷
►图片18: 1. 界限磨耗线
定期拆下碳刷进行检查。在碳刷磨损到界限
磨耗线时进行更换。请保持碳刷清洁并使其
在碳刷夹内能自由滑动。两个碳刷应同时替
换。请仅使用相同的碳刷。
使用螺丝起子拆下碳刷夹盖。取出已磨损的
碳刷,插入新的碳刷,然后紧固碳刷夹盖。
►图片19: 1. 螺丝起子 2. 碳刷夹盖
为了保证产品的安全与可靠性,维修、任何
其他的维修保养或调节需由Makita(牧田)
授权的维修服务中心完成。务必使用Makita
(牧田)的替换部件。
使用后
使用后,用布或类似的工具将附着在工具上
的碎片和锯屑擦掉。根据前面说明过的“锯
片保护罩”部分的指示,保持锯片保护罩清
洁。用机油润滑滑动部件防止生锈。

19
中文简体
选购附件
小心:
•这些附件或装置专用于本说明书所列的
Makita(牧田)电动工具。其他附件或
装置的使用可能会有人身伤害风险。仅
可将附件或装置用于规定目的。
如您需要了解更多关于这些选购附件的信息,
请咨询当地的Makita(牧田)维修服务中心。
•硬质合金锯片
(有关适合切割材料的正确锯片,请参
阅我们的网站或联系当地Makita(牧田)
经销商。)
•安全护目镜
•套筒扳手
•锁止按钮(开关按钮)
注:
•本列表中的一些部件可能作为标准附件
包含于工具包装内。它们可能因销往国
家之不同而异。

20 BAHASA INDONESIA
BAHASA INDONESIA (Petunjuk Asli)
SPESIFIKASI
Model LC1230
Diametermatapisau 305 mm
Diameterlubang(arbor) 25,4 mm
Ketebalanmaks.goresanmatagergaji 2,5 mm
Kecepatan tanpa beban 1.700 min-1
Dimensi(PxLxT) 516 mm x 306 mm x 603 mm
Berat bersih 19,2 kg
Kelas keamanan /II
• Karenakesinambunganprogrampenelitiandanpengembangankami,spesikasiyangdisebutkandisinidapat
berubahtanpapemberitahuan.
• Spesikasidapatberbedadarisatunegarakenegaralainnya.
• BeratmenurutProsedurEPTA01/2014
Kapasitas pemotongan
Bentukbendakerja
A
A
B
A X B
Sudutpemotongan 90° 115mm 75 mm x 150 mm
100 mm x 100 mm
45° 90mm 85 mm x 85mm
Simbol
Berikutiniadalahsimbol-simbolyangdigunakanpada
peralatanini.PastikanAndamemahamiartimasing-
masingsimbolsebelummenggunakanperalatan.
Bacapetunjukpenggunaan.
ISOLASIGANDA
Gunakankacamatapengaman.
Janganmendekatkantanganataujarike
matapisau.
Untukmenghindaricederaakibatdebu
yang beterbangan, tetap tahan kepala
gergajikebawah,setelahmelakukan
pemotongan,sampaimatapisaubenar-
benar berhenti.
DemikeselamatanAnda,buangserpihan
kayu,potongan-potongankecil,dll.dari
atasmejasebelumpengoperasian.
Hanyauntuknegara-negaraUE
Akibatadanyakomponenberbahaya
dalam peralatan, peralatan listrik dan
elektronik bekas dapat memiliki dampak
negatifpadalingkungandankesehatan
manusia.
Janganbuangperalatanlistrikdan
elektronikbersamalimbahrumahtangga!
SesuaidenganPetunjukEropatentang
limbah peralatan listrik dan elektronik dan
penyesuaiannyadenganundang-undang
nasional, peralatan listrik dan elektronik
bekasharusdikumpulkansecaraterpisah
dandikirimketempatpengumpulan
terpisahuntuklimbahkota,beroperasi
sesuaidenganperaturanperlindungan
lingkungan.
Haliniditunjukkandengansimboltempat
sampah bersilang yang ditempatkan pada
peralatan.
Tujuan penggunaan
Mesininidigunakanuntukmemotongbajalunakdan
bajatahankaratdenganmatagergajiyangtepat.
Pasokan daya
Mesinharusterhubungdenganpasokandayalistrik
yangbervoltasesamadenganyangterterapadapelat
nama,danhanyadapatdijalankandenganlistrikAC
fasetunggal.Mesindiisolasigandadanolehsebabitu
dapatdihubungkandengansokettanpakabel.
Other manuals for LC1230
18
Table of contents
Languages:
Other Makita Saw manuals

Makita
Makita 5104S User manual

Makita
Makita JR1000FT User manual

Makita
Makita 5007MG User manual

Makita
Makita SP6000 User manual

Makita
Makita HS6600 User manual

Makita
Makita BJV140 User manual

Makita
Makita LS1216 User manual

Makita
Makita N5900B User manual

Makita
Makita MLT100 User manual

Makita
Makita SP6000 User manual

Makita
Makita 5621RD User manual

Makita
Makita LS1219 User manual

Makita
Makita LS1013 Quick start guide

Makita
Makita JR3020 User manual

Makita
Makita HS7611 User manual

Makita
Makita DSP600ZJ User manual

Makita
Makita GBP01 User manual

Makita
Makita LS1440N User manual

Makita
Makita LS0815FL User manual

Makita
Makita 4390D User manual