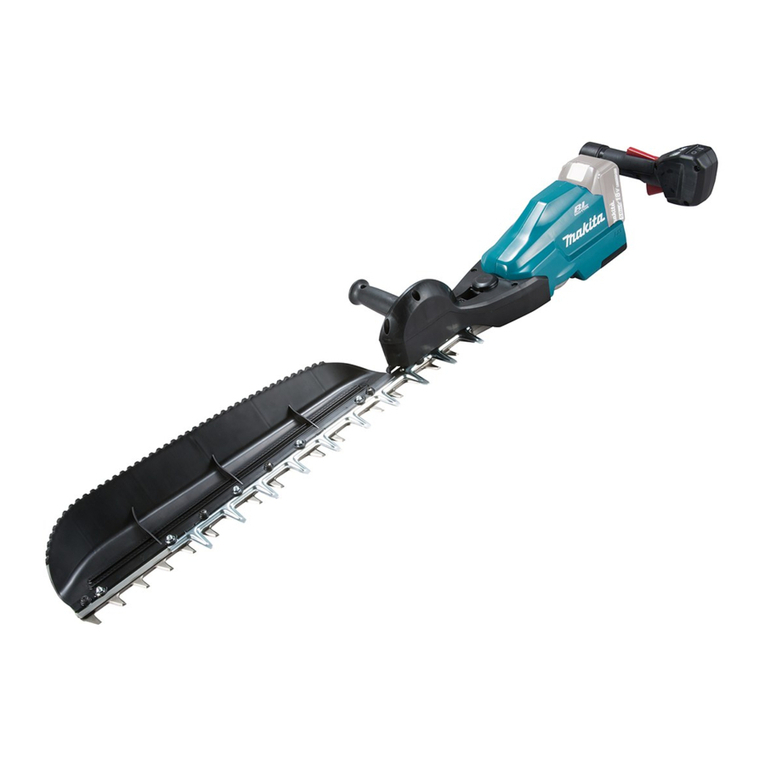
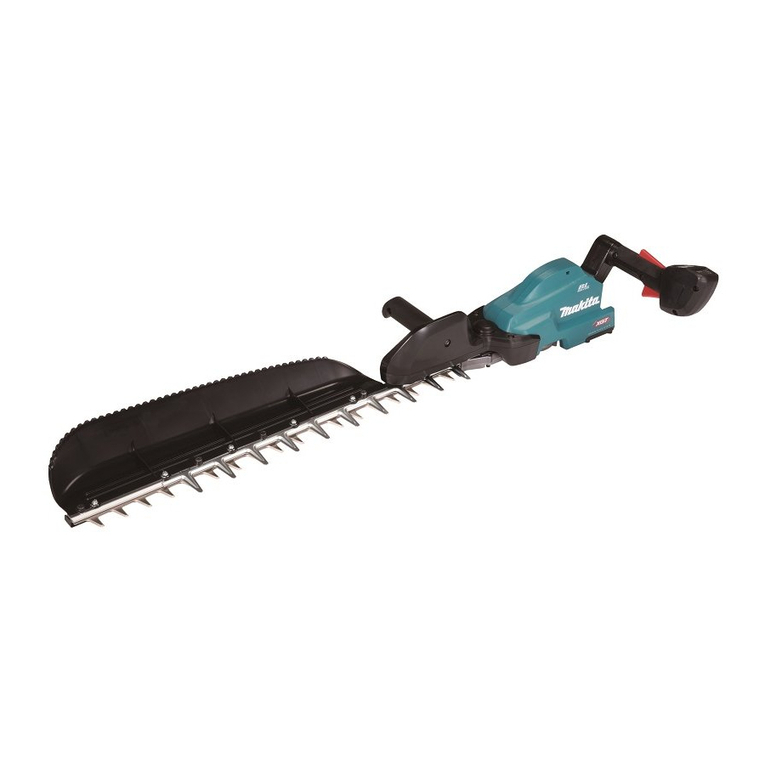
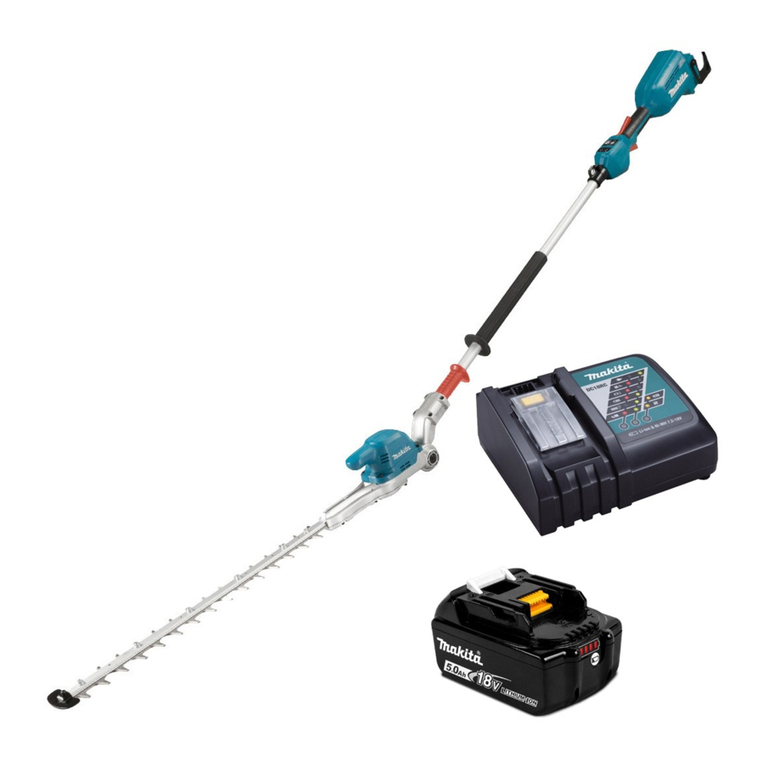
Makita EN422MP User manual

EN422MP
EN Ground Trimmer Attachment INSTRUCTION MANUAL 8
ESMX Accesorio de Corte a Ras de
Piso
MANUAL DE
INSTRUCCIONES 15
PTBR Implemento Aparador de Grama MANUAL DE INSTRUÇÕES 23
ES Accesorio de Corte a Ras de
Piso
MANUAL DE
INSTRUCCIONES 31
ZHCN 剪草/绿篱总成 使用说明书 39
ZHTW 樹籬割草配件 使用說明書 46
KO 예초기 취급 설명서 53
ID Perangkat Tambahan Mesin
Pemotong PETUNJUK PENGGUNAAN 59
MS Alat Tambahan Pemangkas
Tanaman Tanah MANUAL ARAHAN 67
VI 75
TH 82
AR 96
FA 102

2
3
4
5
1
2
6
Fig.1
1
Fig.2
1
2
3
4
Fig.3
2
1
Fig.4
1
Fig.5
1
2
3
4
5
Fig.6
1
Fig.7
Fig.12
3
1
2
Fig.8

3
1
Fig.9
1
3
2
4
Fig.10
1
Fig.11
1
Fig.12
3
1
2
4
Fig.13
Fig.14

4
1
1
Fig.15
1
2
Fig.16
Fig.17
2
3
1
Fig.18
1
2
Fig.19

5
1
3
2
4
Fig.20
2
1
Fig.21
(1)
(2)
Fig.22
1
2
Fig.23
Fig.24
Fig.25
Fig.26

6
Fig.27
Fig.28
Fig.29
Fig.30
Fig.31
Fig.32
1
Fig.33
2
1
Fig.34

7
Fig.35
1 2
3
1
Fig.36
2
1
Fig.37
1
Fig.38

8ENGLISH
ENGLISH (Original instructions)
SPECIFICATIONS
Model: EN422MP
Blade length 250 mm
Overall length 1208 mm
Net weight 2.2 kg
• Duetoourcontinuingprogramofresearchanddevelopment,thespecicationshereinaresubjecttochange
withoutnotice.
• Specicationsmaydierfromcountrytocountry.
Approved power unit
Thisattachmentisapprovedtouseonlywiththefollow-
ingpowerunit(s):
• DUX60Cordlessmultifunctionpowerhead
• DUX18Cordlessmultifunctionpowerhead
• UX01GCordlessmultifunctionpowerhead
WARNING: Never use the attachment with
non-approved power unit. Non-approved combi-
nation may cause serious injury.
Symbols
Thefollowingsshowthesymbolswhichmaybeused
fortheequipment.Besurethatyouunderstandtheir
meaningbeforeuse.
Readandfollowtheinstructionmanual.
DANGER-Keephandsawayfromblade.
Bewareofelectricallines.Riskofelectrical
shock.
Wearprotectivehelmet,eyeandear
protection.
Wearprotectivegloves.
Wearsturdybootswithnon-slipsoles.
Keepbystandersandanimalsatleast15m
(50ft)awayfromthepowertool.
Keeptheareaofoperationclearofall
personsandpets.
Guaranteedsoundpowerlevelaccording
toEUOutdoorNoiseDirective.
SoundpowerlevelaccordingtoAustralia
NSWNoiseControlRegulation.
Intended use
Thisattachmentisdesignedforonlythepurposeof
trimmingshrubs,hedges,andgrassesonthegroundin
conjunctionwithanapprovedpowerunit.Neverusethe
attachmentfortheotherpurpose.Abusingtheattach-
mentmaycauseseriousinjury.
SAFETY WARNINGS
Cordless Pole Hedge Trimmer
Safety Warnings
1. Keep all parts of the body away from the blade.
Do not remove cut material or hold material
to be cut when blades are moving.Blades
continuetomoveaftertheswitchisturnedo.A
momentofinattentionwhileoperatingthehedge
trimmermayresultinseriouspersonalinjury.
2. Carry the hedge trimmer by the handle with the
blade stopped and taking care not to operate
any power switch.Propercarryingofthehedge
trimmerwilldecreasetheriskofinadvertentstart-
ingandresultantpersonalinjuryfromtheblades.
3. When transporting or storing the hedge trim-
Properhandling
ofthehedgetrimmerwilldecreasetheriskof
personalinjuryfromtheblades.
4. When clearing jammed material or servicing
and the battery pack is removed or discon-
nected.Unexpectedactuationofthehedgetrim-
merwhileclearingjammedmaterialorservicing
mayresultinseriouspersonalinjury.
5. Hold the hedge trimmer by insulated gripping
surfaces only, because the blade may contact
hidden wiring.Bladescontactinga“live”wire
maymakeexposedmetalpartsofthehedgetrim-
mer“live”andcouldgivetheoperatoranelectric
shock.

9ENGLISH
6. Keep all power cords and cables away from
cutting area.Powercordsorcablesmaybehid-
deninhedgesorbushesandcanbeaccidentally
cutbytheblade.
7. Do not use the hedge trimmer in bad weather
conditions, especially when there is a risk of
lightning.Thisdecreasestheriskofbeingstruck
bylightning.
8. To reduce the risk of electrocution, never use
the pole hedge trimmer near any electrical
power lines.Contactwithorusenearpowerlines
maycauseseriousinjuryorelectricshockresult-
ing in death.
9. Always use two hands when operating the pole
hedge trimmer.Holdthepolehedgetrimmerwith
bothhandstoavoidlossofcontrol.
10. Always use head protection when operating
the pole hedge trimmer overhead.Fallingdebris
canresultinseriouspersonalinjury.
Additional Safety Instructions
Preparation
1. THIS HEDGE TRIMMER CAN CAUSE SERIOUS
INJURIES. Read the instructions carefully
for the correct handling, preparation, main-
tenance, starting and stopping of the tool.
Become familiar with all controls and the
proper use of the tool.
2. Check the hedges and bushes for foreign
objects, such as wire fences or hidden wiring
before operating the tool.
3. The tool must not be used by children or
young persons under 18 years of age.Young
personsover16yearsofagemaybeexempted
fromthisrestrictioniftheyareundergoingtraining
underthesupervisionofanexpert.
4.
the tool and remove the battery cartridge
immediately.
5. DANGER - Keep hands away from blade.
Contactwithbladewillresultinseriouspersonal
injury.
6. First-time users should have an experienced
user show them how to use the tool.
7. Before operation, examine the work area for
wire fences, stones, or other solid objects.
They can damage the blades.
8. Use the tool only if you are in good physical
condition.Ifyouaretired,yourattentionwillbe
reduced.Beespeciallycarefulattheendofa
workingday.Performallworkcalmlyandcarefully.
Theuserisresponsibleforalldamagestothird
parties.
9. Before starting work, check to make sure that
the tool is in good and safe working order.
must not be used unless fully assembled.
10. Avoid dangerous environment. Don't use the
tool in damp or wet locations or expose it to
rain. Water entering the tool will increase the
risk of electric shock.
Personal protective equipment
1. Work gloves of stout leather are part of the
basic equipment of the tool and must always
be worn when working with it. Also wear
sturdy shoes with anti-skid soles.
2. -
vent hearing loss.
3. Wear protective goggles, safety helmet and
protective gloves to protect yourself from
4. When touching blades or adjusting the blade
angle, wear protective gloves.Bladescancut
barehandsseverely.
Operation
1. Always use two hands to operate the tool.
Usingonehandcouldcauselossofcontroland
resultinseriouspersonalinjury.
2. While operating the tool, always ensure that
the operating position is safe and secure.
Overreaching with the tool, particularly from
a ladder, is extremely dangerous. Do not work
3. Do not simultaneously wear multiple belt har-
nesses and/or shoulder harnesses when oper-
ating the tool.
4. During operation, keep bystanders or animals
at least 15 m away from the tool. Stop the tool
as soon as someone approaches.
5. If cutting tool strikes any object or the tool
starts making unusual noise or vibration,
-
tridge immediately and allow the tool to stop.
And then take the following steps:
• inspect for damage
• check for, and tighten, any loose parts
• have any damaged parts replaced or
repaired with genuine spare parts.
6. Only use the tool for its intended purpose. Do
not use the tool for any other purpose.
7.
cartridge before:
• cleaning or when clearing a blockage,
• checking, carrying out maintenance or
working on the tool,
• adjusting the working position of the
shear blades,
• leaving the tool unattended.
8. Ensure that the tool is correctly located in a
designated working position before starting
the tool.
9. Do not operate the tool with a damaged or
excessively worn shear blades.
10. Always be aware of your surroundings and
stay alert for possible hazards of which you
may not be aware due to the noise of the tool.
11. Be careful not to accidentally contact a metal
fence or other hard objects during operation.
Thebladewillbreakandmaycauseseriousinjury.
12. Avoid unintentional starting. Do not carry the
tool when the battery cartridge is installed
cartridge.

10 ENGLISH
13. Do not grasp the exposed cutting blades or
cutting edges when picking up or holding the
tool.
14. Do not force the tool.Itwilldothejobbetterand
withlesslikelihoodofariskofinjuryattheratefor
whichitwasdesigned.
15. Do not use the tool in the rain or in wet or
very damp conditions.Theelectricmotorisnot
waterproof.
16.
17. Do not operate the tool at no-load
unnecessarily.
18. Before checking the shear blades, taking care
of faults, or removing foreign objects caught
and remove the battery cartridge.
19. Never point the shear blades to yourself or
others.
20. If the blades stop moving due to the stuck of
foreign objects between the blades during
battery cartridge, and then remove the foreign
objects using tools such as pliers.Removing
theforeignobjectsbyhandmaycauseaninjury
forthereasonthatthebladesmaymoveinreac-
tiontoremovingtheforeignobjects.
21. When attaching or removing the blade cover,
be careful not to injure your hands.
Electrical and battery safety
1. Avoid dangerous environment. Don't use the
tool in damp or wet locations or expose it to
rain.Waterenteringthetoolwillincreasetherisk
ofelectricshock.
2.
Thecellmayexplode.Checkwithlocalcodesfor
possiblespecialdisposalinstructions.
3. Do not open or mutilate the battery(ies).
Releasedelectrolyteiscorrosiveandmaycause
damagetotheeyesorskin.Itmaybetoxicif
swallowed.
4. Do not charge battery in rain, or in wet
locations.
5. Do not charge the battery outdoors.
6. Do not handle charger, including charger plug,
and charger terminals with wet hands.
Maintenance and storage
1. When the tool is stopped for servicing, inspec-
the battery cartridge, and make sure all mov-
ing parts have come to a stop. Allow the tool
to cool before making any inspections, adjust-
ment, etc.
2. Always allow the tool to cool down before
storing.
3. When not in use, attach the blade cover to the
tool and store the tool indoors in dry, and high
locked-up place, out of reach of children.
4. Maintain the tool with care. Keep cutting edge
sharp and clean for best performance and to
reduce the risk of injury. Follow instructions
for lubricating and changing accessories.
Keep grips dry, clean, and free from oil and
grease.
5. Check damaged parts. Before further use of
the tool, any part which is damaged should be
carefully checked to determine that it will oper-
ate properly and perform its intended function.
Check for alignment of moving parts, binding
of moving parts, breakage of parts, mounting
operation.Aguardorotherpartthatisdamaged
shouldbeproperlyrepairedorreplacedbyyour
authorizedservicecenter.
6. Use genuine spare parts only.
7. When moving the tool to another location,
including during work, always remove the
battery cartridge and put the blade cover on
the shear blades. Never carry or transport the
tool with the blades running. Never grasp the
blades with your hands.
8. Clean the tool and especially the shear blades
after use, and before putting the tool into stor-
age for extended periods. Lightly oil the shear
blades and put on the blade cover.
9.
cell may explode. Check with local codes for
possible special disposal instructions.
10. Do not open or mutilate the battery(ies).
Released electrolyte is corrosive and may
cause damage to the eyes or skin. It may be
toxic if swallowed.
11. Do not charge battery in rain, or in wet
locations.
SAVE THESE INSTRUCTIONS.
WARNING: DO NOT let comfort or familiarity
with product (gained from repeated use) replace
strict adherence to safety rules for the subject
product. MISUSE or failure to follow the safety
rules stated in this instruction manual may cause
serious personal injury.
PARTS DESCRIPTION
►Fig.1: 1.Bladecover2.Angleadjustmenthandle
3.Cap4.Shearblades5.Slidelever6.Front
grip
ASSEMBLY
WARNING: Before assembling or adjusting
the battery cartridge.Otherwise,themachinemay
startunintentionallyandresultinaninjury.
WARNING: When assembling or adjusting
the equipment, always put it down. Assemblingor
adjustingtheequipmentinanuprightpositionmay
resultinseriousinjury.
WARNING: Follow the warnings and precau-
tions in the chapter “SAFETY WARNINGS” and
the instruction manual of the power unit.

11 ENGLISH
Assembling the attachment
1. Removethecapfromtheattachment.
►Fig.2: 1.Cap
2. Insertthepipeintotheattachmentsothatthehole
onthepipeisalignedwiththeholeontheattachment.
Securelytightentheshortboltrst,andthentightenthe
longbolttoxthepipe.
►Fig.3: 1.Hole2.Pipe3.Bolt(short)4.Bolt(long)
NOTE:Whentighteningthebolts,apply4.0-6.0N•m
astighteningtorque.
Mounting the attachment pipe
CAUTION: Always check that the attachment
pipe is secured after installation.Improperinstal-
lationmaycausetheattachmentfallingofromthe
powerunitandcausepersonalinjury.
Mounttheattachmentpipetothepowerunit.
1. Removethecapfromtheendofthepipe.
►Fig.4: 1.Pipe2.Cap
NOTICE: Do not dispose of the cap since the cap
is necessary for storing the attachment.
2. Turnthelevertowardtheattachment.
►Fig.5: 1. Lever
3. Alignthepinwiththearrowmarkonthepower
unit.Insertthepipeuntilthereleasebuttonpopsup.
Makesurethatthepositionlineisonthetipofthearrow
markonthepowerunit,andthearrowmarkonthe
powerunitandthearrowmarkonthepipearefacing
eachother.
►Fig.6: 1.Releasebutton2.Arrowmarkonthe
powerunit3. Pin 4.Positionline5.Arrow
markonthepipe
4. Turnthelevertowardthepowerunit.
►Fig.7: 1. Lever
Makesurethatthesurfaceoftheleverisparalleltothe
pipe.
NOTICE: Do not tighten the lever without the
attachment pipe inserted.Otherwisethelevermay
tightentheentranceofthedriveshafttoomuchand
damage it.
Toremovethepipe,turnthelevertowardtheattach-
mentandpullthepipeoutwhilepressingdownthe
releasebutton.
►Fig.8: 1.Releasebutton2. Lever 3.Pipe
Installing or removing the shear
blades
CAUTION: When replacing the shear blades,
always wear gloves so that your hands do not
directly contact the blades.
CAUTION: Attach the blade cover before
removing or installing the shear blades.
NOTICE: When replacing the shear blades, do
NOTE:Beforeinstallingorremovingtheshear
blades,unfoldtheattachmentsothattheattachment
isstraighttothepipe.
1. Attachthebladecovertotheshearblades.
►Fig.9: 1.Bladecover
2. Placetheattachmentupsidedown.
3. Remove4boltswiththehexwrench,andremove
theundercover,coverandplate(large).
►Fig.10: 1.Bolt2.Undercover3.Cover4. Plate
(large)
4. Turnthecrankwiththeslottedscrewdriversothat
thecrankispositionedinthedirectionasshowninthe
gure.
►Fig.11: 1.Crank
5. Remove2bolts.
►Fig.12: 1.Bolt
6. Removethefeltpad(short),feltpad(long),plate
(small),andsleeves.
►Fig.13: 1.Feltpad(short)2.Feltpad(long)3. Plate
(small)4.Sleeve
7. Removetheshearbladesfromtheattachment.
►Fig.14
8. Removethebladecover,andthenattachittothe
newshearblades.
9. Removethedustguardfromtheshearblades,
andthenattachitinthepositionshowninthegureon
thenewshearblades.
►Fig.15: 1.Dustguard
10. Inserttheboltremovedinstep5intotheholeon
theshearbladesthroughtheholeonthebladecover.
►Fig.16: 1.Hole2.Bolt
11. Applyasmallamountofgreasetotheperipheryof
thecrank.Attachtheshearbladestotheattachment.
►Fig.17
12. Attachthesleeves,plate(small)totheshear
blades,andthentightenthebolt.
►Fig.18: 1.Bolt2.Plate(small)3.Sleeve
13. Removetheboltinsertedintotheholeonthe
shearbladesinstep10,andthentightenittoxthe
shearblades.
14. Attachthefeltpad(short)andfeltpad(long).
►Fig.19: 1.Feltpad(short)2.Feltpad(long)
15. Attachtheplate(large),cover,andundercover,
andthentighten4bolts.
►Fig.20: 1.Bolt2.Undercover3.Cover4. Plate
(large)
NOTICE: If the shear blades do not operate prop-
erly, the blades are not engaging the crank prop-
erly. Remove the blades and install them again.
NOTICE: If the parts other than the shear blades
such as the crank are worn out, ask Makita
Authorized Service Centers for parts replacement
or repairs.

12 ENGLISH
FUNCTIONAL
DESCRIPTION
CAUTION: Always be sure that the tool is
before adjusting or checking function on the tool.
Adjusting the cutting angle
CAUTION: Always be sure that the tool is
Theangleoftheheadcanbeadjustedin13steps.To
changetheangleofthehead,followthestepsbelow.
1. Holdtheangleadjustmenthandle,andthenadjust
theangleoftheheadwhilepullingtheslidelever,and
thenreleasetheslidelever.
►Fig.21: 1.Slidelever2.Angleadjustmenthandle
2. Movetheheadslightlyuntilitislockedwithaclick.
NOTE:Makesurethattheheadissecurelylocked
beforeoperatingthetool.
OPERATION
WARNING: Follow the warnings and precau-
tions in the chapter “SAFETY WARNINGS” and
the instruction manual of the power unit.
Operating the tool
WARNING: Do not use the tool near any
electrical power lines.Contactingwithpowerlines
orusingthetoolnearpowerlinesmaycauseserious
injuryorelectricshockresultingindeath.
WARNING: Keep hands away from shear
blades.
WARNING: Be extremely careful to maintain
control of the tool at all times. Do not allow the
work vicinity.Failuretokeepcontrolofthetool
couldresultinseriousinjurytothebystanderandthe
operator.
CAUTION: Avoid operating the tool in very
hot weather as much as practicable. When operat-
ing the tool, be careful of your physical condition.
CAUTION: Be careful not to accidentally
contact a metal fence or other hard objects while
trimming.Theshearbladesmaybreakandcause
aninjury.
CAUTION: Be careful not to allow the shear
blades to contact the ground.Thetoolmayrecoil
andcauseaninjury.
CAUTION: Overreaching with a hedge trim-
mer, particularly from a ladder, is extremely
dangerous.Donotworkwhilestandingonanything
wobblyorinrm.
NOTICE: Do not attempt to cut branches thicker
than 10 mm in diameter with the tool.Cutbranches
to10cmlowerthanthecuttingheightusingbranch
cuttersbeforeusingthetool.
►Fig.22: (1)Cuttingheight(2)10cm
NOTICE: Do not cut down dead trees or similar
hard objects.Doingsomaydamagethetool.
Holdthetoolwithbothhandsbyholdingthefronthan-
dleofthepowerunitorthefrontgripoftheattachment
andthereargripofthepowerunit.
►Fig.23: 1.Fronthandle2.Reargrip
Pulltheswitchtriggerwhilepressingthelock-olever,
andthenmovethetoolforward.
►Fig.24
Forbasicoperation,tilttheshearbladestowardthe
trimmingdirectionandmoveitcalmlyandslowlyatthe
speedrateof3to4secondspermeter.
►Fig.25
Tocutahedgesideevenly,cutfromthebottomtotop.
►Fig.26
Whentrimmingtomakearoundshape(trimmingbox-
woodorrhododendron,etc.),trimfromtheroottothe
topforabeautifulnish.
►Fig.27
Whenshearingthegrass,applytheshearbladestothe
grassparalleltotheground,andshearthegrasswitha
righttoleftswingingmovement.
►Fig.28

13 ENGLISH
MAINTENANCE
WARNING: Before inspecting or maintaining
the battery cartridge.Otherwise,themachinemay
startunintentionallyandresultinseriousinjury.
WARNING: When inspecting or maintaining
the equipment, always put it down.Assemblingor
adjustingtheequipmentinanuprightpositionmay
resultinseriousinjury.
WARNING: Follow the warnings and precau-
tions in the chapter “SAFETY WARNINGS” and
the instruction manual of the power unit.
CAUTION: Wear gloves when performing the
inspection or maintenance.
NOTICE: Never use gasoline, benzine, thinner,
alcohol or the like. Discoloration, deformation or
cracks may result.
TomaintainproductSAFETYandRELIABILITY,
repairs,anyothermaintenanceoradjustmentshould
beperformedbyMakitaAuthorizedorFactoryService
Centers,alwaysusingMakitareplacementparts.
Cleaning the tool
Cleanthetoolbywipingodustwithadryclothorone
dippedinsoapywaterandwrungout.
NOTICE: Never use gasoline, benzine, thinner,
alcohol or the like. Discoloration, deformation or
cracks may result.
Shear blade maintenance
Beforetheoperationoronceperhourduringoperation,
applylow-viscosityoil(machineoil,orspray-typelubri-
catingoil)totheshearblades.
►Fig.29
Afteroperation,removedustfrombothsidesofthe
shearbladeswithawiredbrush,wipeitowithacloth
andthenapplylow-viscosityoil(machineoil,orspray-
typelubricatingoil)totheshearblades.
►Fig.30
NOTICE: Do not wash the shear blades in water.
Doingsomaycauserustordamagetothetool.
NOTICE: Dirt and corrosion cause excessive
blade friction and shorten the operating time per
battery charge.
Storage
Attachthebladecovertotheshearbladessothatthe
bladesarenotexposed.Storethetooloutofthereach
ofchildren.Storethetoolinaplacenotexposedto
moistureorrain.
Whenstoringtheattachmentseparatedfromthepower
unit,putthecapontotheendofthepipe.
►Fig.31
Lubricating moving parts
NOTICE: Follow the instruction of the frequency
and amount of grease supplied.Otherwiseinsu-
cientlubricationmaydamagemovingparts.
Drive axle:
Applygrease(MakitagreaseNNo.2orequivalent)
every30hoursofoperation.
►Fig.32
NOTE:GenuineMakitagreasemaybepurchased
fromyourlocalMakitadealer.
Grease lubrication
Interval of lubrication:Every25operatinghours
1. Removetheboltfromtheholeforlubrication.
►Fig.33: 1.Bolt
2. Removethecapfromthegreasevessel.Alignthe
outletofthegreasevesselwiththeholeonthecover,
andthenturnthegreasevesseltoattachtheoutletof
thegreasevesselintothehole.
►Fig.34: 1.Greasevessel2.Hole
3. Applythegreasetothetool(Approximately3gas
aguide).
4. Removethegreasevessel.
5. Tightenthebolt.
Grinding the shear blades
NOTICE: If the shear blades have considerably
deformed by grinding, replace the shear blades
with new ones.
1. Installthebatterycartridgetothetool.
2. Turnonandstartthetoolsothattheupperblade
andlowerbladearepositionedalternately.
►Fig.35
3. Turnothetoolandremovethebatterycartridge
fromthetool.
4. Removethescrewsandnut,andthenremovethe
tipguardfromtheshearblades.
►Fig.36: 1.Screw2.Nut3.Tipguard
5. Settheangleofaleto45°,andgrindtheupper
bladefrom3directionswiththele.
►Fig.37: (1) File (2)45°
CAUTION: Before grinding the shear blades,
battery cartridge is removed from the tool.
6. Placethetoolupsidedown,andthenremovethe
burrsfromtheshearbladeswiththedressingstone.
►Fig.38: 1.Dressingstone
7. Settheangleoftheleto45°,andgrindthelower
bladefrom3directionswiththele.
8. Returnthetooltonormalposition,andthen
removetheburrsfromtheshearbladeswiththedress-
ingstone.

14 ENGLISH
9. Attachthetipguardbytighteningthescrewsand
nut.
TROUBLESHOOTING
Beforeaskingforrepairs,conductyourowninspectionrst.Ifyoundaproblemthatisnotexplainedinthemanual,
donotattempttodismantlethetool.Instead,askMakitaAuthorizedServiceCenters,alwaysusingMakitareplace-
mentpartsforrepairs.
State of abnormality Probable cause (malfunction) Remedy
Motordoesnotstart. -Refertotheinstructionmanualofthepowerunit.
Motorstopssoon. -Refertotheinstructionmanualofthepowerunit.
Motorspeeddoesnotincrease. -Refertotheinstructionmanualofthepowerunit.
Shearbladesdonotmove:
stopthemachineimmediately!
Foreignobjectsarecaughtbetweenthe
shearblades.
Switchothetoolandremovethebatterycartridge,
andthenremovetheforeignobjectsusingtools
suchaspliers.
Thedrivesystemdoesnotwork
correctly.
Askyourlocalauthorizedservicecenterforrepair.
Abnormalvibration:
stopthemachineimmediately!
Shearbladesarebroken,bentorworn. Replacetheshearblades.
Thedrivesystemdoesnotwork
correctly.
Askyourlocalauthorizedservicecenterforrepair.
Shearbladesandmotorcannotstop:
Removethebatteryimmediately!
Electricmalfunction. Removethebatteryandaskyourlocalauthorized
servicecenterforrepair.
OPTIONAL
ACCESSORIES
CAUTION: These accessories or attachments
are recommended for use with your Makita
Theuseofany
otheraccessoriesorattachmentsmightpresentarisk
ofinjurytopersons.Onlyuseaccessoryorattach-
mentforitsstatedpurpose.
Ifyouneedanyassistanceformoredetailsregard-
ingtheseaccessories,askyourlocalMakitaService
Center.
• Shearbladeassembly
• Greasevessel
• Makitagenuinebatteryandcharger
NOTE:Someitemsinthelistmaybeincludedinthe
productpackageasstandardaccessories.Theymay
dierfromcountrytocountry.

15 ESPAÑOL
ESPAÑOL (Instrucciones originales)
ESPECIFICACIONES
Modelo: EN422MP
Longituddelacuchilla 250 mm
Longitudtotal 1208 mm
Pesoneto 2,2kg
• Debidoanuestroprogramacontinuodeinvestigaciónydesarrollo,lasespecicacionesaquídadasestán
sujetasacambiossinprevioaviso.
• Lasespecicacionespuedenvariardepaísapaís.
Unidad motorizada aprobada
Esteaccesorioestáaprobadoparausarseúnicamente
conla(s)siguiente(s)unidad(es)motorizada(s):
• HerramientaMultifuncionalInalámbricaDUX60
• HerramientaMultifuncionalInalámbricaDUX18
• HerramientaMultifuncionalInalámbricaUX01G
ADVERTENCIA: Nunca utilice el accesorio
con una unidad motorizada no aprobada. Una
combinación no aprobada podría ocasionar lesio-
nes graves.
Símbolos
Acontinuaciónsemuestranlossímbolosquepue-
denserutilizadosparaelequipo.Asegúresedeque
entiendesusignicadoantesdeutilizar.
Leaysigaelmanualdeinstrucciones.
PELIGRO:Mantengalasmanosalejadas
delacuchilla.
Tengacuidadoconlaslíneaseléctricas.
Riesgodedescargaeléctrica.
Utiliceuncascoprotectoryprotecciónpara
losojosyoídos.
Utiliceguantesdeprotección.
Utilicebotasresistentesconsuelas
antiderrapantes.
Mantengaalaspersonasyanimales
alrededoraporlomenos15m(50ft)de
distanciadelaherramientaeléctrica.
Mantengaeláreadeoperaciónlibrede
personasymascotas.
Niveldepotenciasonoragarantizadode
acuerdoconlaDirectivaderuidoexterior
delaUE.
Niveldepotenciasonoradeacuerdoconel
ReglamentodecontrolderuidodeNueva
GalesdelSurenAustralia
Uso pretendido
Esteaccesoriohasidodiseñadoconelúnicopropósito
derecortararbustos,setosycéspedarasdepisojunto
conunaunidadmotorizadaaprobada.Nuncauseel
accesorioparaningúnotropropósito.Hacerunmaluso
delaccesoriopuedecausarlesionesgraves.
ADVERTENCIAS DE
SEGURIDAD
Advertencias de seguridad para el
cortasetos de extensión inalámbrico
1. Mantenga todas las partes del cuerpo alejadas
de la cuchilla. No retire el material cortado ni
sostenga el material que va a cortar cuando
las cuchillas estén en movimiento.Lascuchi-
llascontinúanmoviéndosedespuésdeapagarel
interruptor.Unmomentodedistracciónmientras
operaelcortasetospodríaocasionarlesiones
personalesgraves.
2. Lleve el cortasetos por la manija con la cuchi-
lla detenida, y con cuidado de no operar nin-
gún interruptor de alimentación.Eltransporte
adecuadodelcortasetosreduciráelriesgode
unarranqueaccidentalydelesionespersonales
resultantesdelascuchillas.
3. Cuando transporte o almacene el cortasetos,
siempre coloque la cubierta de las cuchillas.
Lamanipulaciónadecuadadelcortasetosdismi-
nuiráelriesgodelesionespersonalesocasiona-
dasporlascuchillas.

16 ESPAÑOL
4. Al retirar material atascado o reparar la uni-
dad, asegúrese de que todos los interruptores
de alimentación estén apagados, y que la
batería esté retirada o desconectada.Laactiva-
cióninesperadadelcortasetosmientrassequita
elmaterialatascadooseledaserviciopodría
resultarenlesionespersonalesgraves.
5. Sujete el cortasetos solamente por las super-
podría entrar en contacto con cableado oculto.
Lascuchillasqueentrenencontactoconuncable
concorrientepodránhacerquelacorrientecircule
porlaspartesmetálicasexpuestasdelcortasetos,
pudiendoocasionarunadescargaeléctricaal
operador.
6. Mantenga todos los cables de alimentación y
cables lejos del área de corte.Loscablesdeali-
mentaciónocablespuedenestarocultosensetos
oarbustos,ypuedencortarseaccidentalmente
conlacuchilla.
7. No utilice el cortasetos en condiciones de mal
clima, especialmente cuando exista riesgo de
rayos.Estodisminuyeelriesgodesergolpeado
porunrayo.
8. Para reducir el riesgo de choque eléctrico,
nunca utilice el cortasetos de extensión cerca
de ningún cable eléctrico.Elcontactocon
cableseléctricososuusocercadeellospuede
causarlesionesgravesodescargaseléctricas,
quepuedencausarlamuerte.
9. Utilice siempre ambas manos cuando opere el
cortasetos de extensión.Sostengaelcortasetos
deextensiónconlasdosmanosparaevitarla
pérdidadecontrol.
10. Utilice siempre protección para la cabeza
cuando opere el cortasetos de extensión por
encima de su cabeza.Losrestosquecaigan
puedenocasionargraveslesionespersonales.
Instrucciones adicionales de
seguridad
Preparación
1. ESTE CORTASETOS PUEDE OCASIONAR
LESIONES GRAVES. Lea atentamente las
instrucciones para el correcto manejo, pre-
paración, mantenimiento, puesta en marcha
y parada de la herramienta. Familiarícese con
todos los controles y con el uso adecuado de
la herramienta.
2. Antes de operar la herramienta, revise los
setos y arbustos para ver que no haya objetos
extraños, tales como cercas de alambre o
cableado oculto.
3. El cortasetos no deberá ser utilizado por niños
ni por personas menores de 18 años.Esta
restricciónpodrápasarseporaltoparapersonas
mayoresde16añossiemprequerecibanlacapa-
citacióncorrespondientebajolasupervisióndeun
experto.
4. En caso de emergencia, apague la herramienta
y retire el cartucho de batería inmediatamente.
5. PELIGRO - Mantenga las manos alejadas de la
cuchilla.Elcontactoconlacuchillapodríaoca-
sionarlesionespersonalesgraves.
6. Un usuario con experiencia deberá enseñar
a los usuarios primerizos cómo manejar la
herramienta.
7. Antes de la operación, examine el área de
trabajo para ver si hay alambrados, piedras u
otros objetos sólidos. Estos pueden dañar las
cuchillas.
8. Utilice el cortasetos sólo si se encuentra en
buena condición física.Siestácansado,su
atenciónseverádisminuida.Seaespecialmente
cuidadosoaltérminodeunajornadalaboral.
Realicetodoeltrabajotranquilaycuidadosa-
mente.Elusuarioseráresponsabledetodoslos
dañosaterceraspersonas.
9. Antes de comenzar el trabajo, revise el cor-
tasetos para asegurarse de que esté en buen
estado y en condiciones seguras de funcio-
namiento. Asegúrese de que los protectores
estén colocados correctamente. El cortasetos
no deberá ser utilizado hasta que se encuentre
totalmente ensamblado.
10. Evite los entornos peligrosos. No utilice la
herramienta en lugares húmedos o mojados
ni la exponga a la lluvia. El agua que ingrese a
la herramienta incrementará el riesgo de des-
carga eléctrica.
Equipo de protección personal
1. Los guantes de trabajo hechos de piel gruesa
forman parte del equipo básico del cortasetos
y deberán usarse siempre que se trabaje con
éste. Utilice también zapatos resistentes con
suelas antiderrapantes.
2. Utilice protección para los oídos tal como
orejeras para evitar la pérdida auditiva.
3. Use gafas protectoras, casco de seguridad y
guantes protectores para protegerse de los
residuos que salgan volando u objetos que
caen.
4. Use guantes protectores cuando toque las
cuchillas o ajuste el ángulo de las cuchillas.
Lascuchillaspodríanprovocarcortadurasgraves
enlasmanosdescubiertas.
Operación
1. Utilice siempre las dos manos para operar la
herramienta.Elusodeunamanopodríacausar
lapérdidadecontrolyprovocarlesionespersona-
lesgraves.
2. Mientras opera la herramienta, asegúrese
siempre de que la posición de operación sea
segura. Trabajar con la herramienta en un
lugar donde no alcance, particularmente desde
una escalera, es extremadamente peligroso.
No trabaje con nada que se tambalee o esté
inestable.
3. Cuando opere la herramienta, no use simultá-
neamente varios arneses de cinturón o arne-
ses para el hombro.
4. Durante la operación, mantenga a las perso-
nas o animales alrededor a por lo menos 15 m
de distancia de la herramienta. Detenga la
herramienta en cuanto alguien se acerque.

17 ESPAÑOL
5. Si la herramienta de corte golpea cualquier
objeto o la herramienta comienza a hacer
ruidos o vibraciones inusuales, apague la
herramienta y retire el cartucho de batería
inmediatamente, y deje que la herramienta se
detenga. Luego, siga los pasos siguientes:
• Inspeccione para ver que no haya algún
daño
• Revise y apriete cualquier pieza suelta
• Reemplace o repare las piezas dañadas
con piezas de repuesto originales.
6. Utilice la herramienta solo para el propósito
para el que fue diseñada. No utilice la herra-
mienta para ningún otro propósito.
7. Apague la herramienta y retire el cartucho de
batería antes de lo siguiente:
• De limpiar o cuando despeje una
obstrucción,
•
trabajar en la herramienta,
• De ajustar la posición de trabajo de las
cuchillas de cizalla,
• Cada vez que vaya a dejar la herramienta
desatendida.
8. Antes de poner en marcha la herramienta,
asegúrese de que la herramienta esté correc-
tamente ubicada en una posición de trabajo
designada.
9. No opere la herramienta con cuchillas de ciza-
lla dañadas o excesivamente gastadas.
10. Esté siempre al tanto de su entorno y man-
téngase alerta a los posibles peligros que
pudiera no percatarse debido al ruido de la
herramienta.
11. Tenga cuidado de no tocar accidentalmente
una cerca de metal u otros objetos duros
durante la operación.Lacuchillaseromperáy
ocasionarunalesióngrave.
12. Evite un arranque accidental. No traslade la
herramienta cuando el cartucho de batería
esté instalado y con el dedo puesto sobre el
interruptor. Asegúrese de que el interruptor se
encuentre apagado cuando instale el cartucho
de batería.
13. Evite tocar las cuchillas o bordes de corte
expuestos cuando levante o sostenga la
herramienta.
14. No fuerce la herramienta.Estopermitiráhacer
mejoreltrabajoconunmenorriesgodelesionesa
lavelocidadparalaquefuediseñada.
15. No utilice la herramienta bajo la lluvia o en
lugares mojados ni en condiciones de mucha
humedad.Elmotoreléctriconoesapruebade
agua.
16. Siempre que utilice la herramienta sosténgala
17. No opere la herramienta sin carga
innecesariamente.
18. Siempre apague la herramienta y retire el car-
tucho de batería antes de revisar las cuchillas
de cizalla, enmendar fallas o retirar objetos
extraños atorados en las cuchillas de cizalla.
19. Nunca apunte las cuchillas de cizalla hacia
usted ni hacia otras personas.
20. Si las cuchillas se dejan de mover a causa de
objetos extraños atorados entre ellas durante
la operación, apague la herramienta, extraiga
el cartucho de batería y luego retire los obje-
tos extraños usando herramientas tales como
pinzas.Elretirarlosobjetosextrañosconlamano
podríaocasionarunalesión,debidoaquelas
cuchillaspuedenmoversealintentarretirarlos.
21. Al colocar o quitar la cubierta de las cuchillas,
tenga cuidado de no lastimarse las manos.
Seguridad eléctrica y de la batería
1. Evite los entornos peligrosos. No utilice la
herramienta en lugares húmedos o mojados ni
la exponga a la lluvia.Elaguaqueingreseala
herramientaincrementaráelriesgodedescarga
eléctrica.
2. No deseche la(s) batería(s) donde haya fuego.
Laceldapodríaexplotar.Consulteloscódigos
localesparaversihayinstruccionesespeciales
relativasaldesecho.
3. No abra ni dañe la(s) batería(s).Loselectrolitos
liberadossoncorrosivosypuedenocasionar
dañosenlosojosolapiel.Éstospuedenser
tóxicossiselleganatragar.
4. No cargue la batería bajo la lluvia ni en lugares
mojados.
5. No cargue la batería en exteriores.
6. No manipule el cargador, incluida la clavija
del cargador, ni los terminales con las manos
mojadas.
Mantenimiento y almacenamiento
1. Cuando la herramienta se detenga para rea-
lizar tareas de mantenimiento, inspección
o almacenamiento, apague la herramienta y
retire el cartucho de batería, y asegúrese de
que todas las piezas móviles se hayan dete-
nido. Permita que la herramienta se enfríe
antes de realizar cualquier inspección, ajuste,
etc.
2. Siempre deje que la herramienta se enfríe
antes de almacenarla.
3. Cuando no se vayan a usar, coloque la
cubierta de las cuchillas a la herramienta y
almacene la herramienta en interiores en un
lugar seco y elevado, cerrado con llave, fuera
del alcance de los niños.
4. Dé mantenimiento cuidadoso a la herramienta.
para lograr un desempeño óptimo y reducir así
el riesgo de lesiones. Siga las instrucciones
para la lubricación y el cambio de los acceso-
rios. Mantenga las empuñaduras secas, lim-
pias, y libres de aceite y grasa.
5. Inspeccione las piezas dañadas. Antes de
continuar usando la herramienta, cualquier
pieza que esté dañada deberá revisarse cuida-
-
cionar debidamente y realizar la función para
las piezas móviles, la unión de las mismas,
roturas de las piezas, montura y cualquier otra
condición que pueda afectar la operación.
Cualquierprotectoropiezadañadadeberárepa-
rarsedebidamenteoreemplazarseensucentro
deservicioautorizado.

18 ESPAÑOL
6. Utilice únicamente piezas de repuesto
originales.
7. Siempre que traslade la herramienta a otro
lugar, aun durante el trabajo, retire el cartucho
de batería y coloque la cubierta de las cuchi-
llas para cubrir las cuchillas de cizalla. Nunca
cargue ni transporte la herramienta con las
cuchillas funcionando. Nunca sostenga las
cuchillas con sus manos.
8. Limpie la herramienta y en especial las cuchi-
llas de cizalla después de usarlas y antes de
almacenar la herramienta por períodos prolon-
gados. Aplique una capa ligera de aceite a las
cuchillas de cizalla y coloque la cubierta de las
cuchillas.
9. No arroje la(s) batería(s) al fuego. La celda
podría explotar. Consulte los códigos locales
para ver si hay instrucciones especiales rela-
cionadas con la disposición.
10. No abra ni dañe la(s) batería(s). Los electroli-
tos liberados son corrosivos y pueden ocasio-
nar daños en los ojos o la piel. Estos pueden
ser tóxicos si se llegan a tragar.
11. No cargue la batería bajo la lluvia ni en lugares
mojados.
GUARDE ESTAS
INSTRUCCIONES.
ADVERTENCIA: NO DEJE que la comodidad
o familiaridad con el producto (a base de utilizarlo
repetidamente) evite que siga estrictamente las
normas de seguridad para dicho producto. El
USO INCORRECTO o el no seguir las normas de
seguridad indicadas en este manual de instruc-
ciones puede ocasionar lesiones graves.
DESCRIPCIÓN DE LAS
PIEZAS
►Fig.1: 1.Cubiertadelascuchillas2.Manijade
ajustedelángulo3.Tapa4.Cuchillasde
cizalla5.Palancadeslizable6.Empuñadura
delantera
MONTAJE
ADVERTENCIA: Antes de ensamblar o
ajustar el equipo, apague el motor y retire el car-
tucho de batería.Delocontrario,lamáquinapodría
ponerseenmarchasinquereryprovocarlesiones.
ADVERTENCIA: Cuando ensamble o ajuste
el equipo, déjelo siempre en el suelo. Elensamble
oajustedelequipoenunaposiciónverticalpodría
ocasionarlesionesgraves.
ADVERTENCIA: Siga las advertencias
y precauciones contenidas en el capítulo
“ADVERTENCIAS DE SEGURIDAD” y el manual
de instrucciones de la unidad motorizada.
Ensamble del accesorio
1. Retirelatapadelaccesorio.
►Fig.2: 1.Tapa
2. Inserteeltubodentrodelaccesoriodemodoque
eloriciodeltuboquedealineadoconeloriciodel
accesorio.Aprietermementeelpernocortoprimero,y
luegoaprieteelpernolargoparajareltubo.
►Fig.3: 1.Oricio2.Tubo3.Perno(corto)4.Perno
(largo)
NOTA:Cuandoaprietelospernos,apliqueunator-
siónde4,0N•m-6,0N•mcomotorsióndeapriete.
Ensamble del aditamento del tubo
PRECAUCIÓN: -
tamento del tubo quede asegurado después de la
instalación.Unainstalaciónincorrectapodríacausar
queeladitamentosedesprendieradelaunidad
motorizadaocasionandoalgunalesiónpersonal.
Ensambleeladitamentodeltuboenlaunidad
motorizada.
1. Retirelatapadelextremodeltubo.
►Fig.4: 1.Tubo2.Tapa
AVISO: No deseche la tapa, ya que hace falta
para guardar el aditamento.
2. Girelapalancahaciaeladitamento.
►Fig.5: 1.Palanca
3. Alineeelpasadorconlamarcadeechaenla
unidadmotorizada.Inserteeltubohastaqueelbotón
deliberaciónaparezca.
Asegúresedequelalíneadeposiciónestéenlapunta
delamarcadeechaenlaunidadmotorizada,yquela
marcadeechaenlaunidadmotorizadaylamarcade
echaeneltuboesténorientadasentresí.
►Fig.6: 1.Botóndeliberación2.Marcadeechaen
launidadmotorizada3.Pasador4.Líneade
posición5.Marcadeechaeneltubo
4. Girelapalancahacialaunidadmotorizada.
►Fig.7: 1.Palanca
Asegúresedequelasuperciedelapalancase
encuentreparalelaaltubo.

19 ESPAÑOL
AVISO: No apriete la palanca sin que el adita-
mento del tubo esté insertado.Delocontrario,la
palancapodríaapretardemasiadolaentradadeleje
detransmisiónydañarla.
Paraextraereltubo,girelapalancahaciaeladitamento
yjaleeltubohaciaafueramientraspresionahacia
abajoelbotóndeliberación.
►Fig.8: 1.Botóndeliberación2.Palanca3.Tubo
Instalación o extracción de las
cuchillas de cizalla
PRECAUCIÓN: Siempre utilice guantes al
reemplazar las cuchillas de cizalla de manera que
sus manos no hagan contacto directo con las
cuchillas.
PRECAUCIÓN: Coloque la cubierta de las
cuchillas antes de extraer o instalar las cuchillas
de cizalla.
AVISO: Cuando reemplace las cuchillas de ciza-
lla, no elimine la grasa de la manivela.
NOTA:Antesdeinstalaroquitarlascuchillasde
cizalla,despliegueelaccesoriodemaneraqueel
accesorioquederectoaltubo.
1. Coloquelacubiertadelascuchillasdecizalla.
►Fig.9: 1.Cubiertadelascuchillas
2. Coloqueelaccesoriobocaabajo.
3. Retirelos4pernosconlallavehexagonalyretire
lasubcubierta,lacubiertaylaplaca(grande).
►Fig.10: 1.Perno2.Subcubierta3.Cubierta4.Placa
(grande)
4. Girelamanivelaconeldestornilladorplano,para
quelamanivelaquedeenladirecciónquesemuestra
enlagura.
►Fig.11: 1. Manivela
5. Retirelosdospernos.
►Fig.12: 1.Perno
6. Retirelaalmohadilladeeltro(corta),laalmohadi-
lladeeltro(larga),laplaca(pequeña)ylosmanguitos.
►Fig.13: 1.Almohadilladeeltro(corta)
2.Almohadilladeeltro(larga)3.Placa
(pequeña)4.Manguito
7. Retirelascuchillasdecizalladelaccesorio.
►Fig.14
8. Retirelacubiertadelascuchillasyluegocoló-
quelaenlasnuevascuchillasdecizalla.
9. Retireelguardapolvodelascuchillasdecizalla,
yluegocolóqueloenlaposiciónquesemuestraenla
guraenlasnuevascuchillasdecizalla.
►Fig.15: 1.Guardapolvo
10. Inserteelpernoretiradoenelpaso5eneloricio
delascuchillasdecizallaatravésdeloriciodela
cubiertadelascuchillas.
►Fig.16: 1.Oricio2.Perno
11. Apliqueunapequeñacantidaddegrasaalaperi-
feriadelamanivela.Coloquelascuchillasdecizallaal
accesorio.
►Fig.17
12. Fijelosmanguitos,laplaca(pequeña)alascuchi-
llasdecizalla,yluegoaprieteelperno.
►Fig.18: 1.Perno2.Placa(pequeña)3.Manguito
13. Retireelpernoinsertadoeneloriciodelascuchi-
llasdecizallaenelpaso10,yluegoapriételoparajar
lascuchillasdecizalla.
14. Coloquelaalmohadilladeeltro(corta)ylaalmo-
hadilladeeltro(larga).
►Fig.19: 1.Almohadilladeeltro(corta)
2.Almohadilladeeltro(larga)
15. Fijelaplaca(grande),lacubiertaylasubcubierta,
yluegoaprietelos4pernos.
►Fig.20: 1.Perno2.Subcubierta3.Cubierta4.Placa
(grande)
AVISO: Si las cuchillas de cizalla no funcionan
correctamente es porque las cuchillas no están
bien embonadas en la manivela. Extraiga las
cuchillas y vuelva a instalarlas.
AVISO: Si las piezas, además de las cuchillas de
cizalla, como la manivela están desgastadas, pida
a los centros de servicio autorizados de Makita
las piezas de reemplazo o su reparación.
DESCRIPCIÓN DEL
FUNCIONAMIENTO
PRECAUCIÓN: Asegúrese siempre de que la
herramienta esté apagada y el cartucho de batería
haya sido extraído antes de realizar cualquier
ajuste o comprobación en la herramienta.
Ajuste del ángulo de corte
PRECAUCIÓN: Asegúrese siempre de apa-
gar la herramienta antes de ajustar el ángulo de
corte.
Elángulodelacabezapuedeajustarseen13pasos.
Paracambiarelángulodelacabeza,sigalospasosa
continuación.
1. Sostengalamanijadeajustedelángulo,y
luegoajusteelángulodelacabezamientrastiradela
palancadeslizable,yluegosueltelapalancadeslizable.
►Fig.21: 1.Palancadeslizable2.Manijadeajuste
delángulo
2. Muevalacabezaunpocohastaquequedeblo-
queadaconunclic.
NOTA:Asegúresedequelacabezaestábienasegu-
radaantesdeoperarlaherramienta.

20 ESPAÑOL
OPERACIÓN
ADVERTENCIA: Siga las advertencias
y precauciones contenidas en el capítulo
“ADVERTENCIAS DE SEGURIDAD” y el manual
de instrucciones de la unidad motorizada.
Operación de la herramienta
ADVERTENCIA: No utilice la herramienta
cerca de ningún cable eléctrico.Elcontactocon
cableseléctricosoelusodelaherramientacerca
deellospuedecausarlesionesgravesodescargas
eléctricas,quepuedencausarlamuerte.
ADVERTENCIA: Mantenga las manos aleja-
das de las cuchillas de cizalla.
ADVERTENCIA: Sea extremadamente cui-
dadoso en mantener el control de la herramienta
en todo momento. No permita que la herramienta
se desvíe hacia usted ni hacia otra persona alre-
dedor.Elnomantenerelcontroldelaherramienta
podríaocasionarlesionesgravesalaspersonas
alrededoryaloperador.
PRECAUCIÓN: Si es posible, evite utilizar
la herramienta cuando haga demasiado calor.
Durante la operación de la herramienta, vigile su
condición física.
PRECAUCIÓN: Tenga cuidado de no tocar
accidentalmente una cerca de metal u otros
objetos duros durante el podado.Lascuchillasde
cizallapodríanromperseyocasionarunalesión.
PRECAUCIÓN: Tenga cuidado de no permitir
que las cuchillas de cizalla hagan contacto con el
suelo.Laherramientapodríaretrocederyocasionar
unalesión.
PRECAUCIÓN: Trabajar con el cortasetos
en un lugar donde no alcance, particularmente
desde una escalera, es extremadamente peli-
groso.Notrabajemientrasestéparadosobreuna
supercietambaleanteopocorme.
AVISO: No intente usar la herramienta para
cortar ramas con un diámetro mayor a 10 mm.
Cortelasramasa10cmmenosquelaalturadecorte
usandoalgúncortadorderamasantesdeusarla
herramienta.
►Fig.22: (1)Alturadecorte(2)10cm(4″)
AVISO: No corte árboles muertos ni otros obje-
tos duros similares.Elhacerlopodríadañarla
herramienta.
Sujetelaherramientaconambasmanossujetandola
manijadelanteradelaunidadmotorizadaolaempuña-
duradelanteradelaccesorioylaempuñaduratrasera
delaunidadmotorizada.
►Fig.23: 1.Manijadelantera2.Empuñaduratrasera
Jaleelgatillointerruptormientrasoprimelapalanca
dedesbloqueo,yluegodesplacelaherramientahacia
adelante.
►Fig.24
Paralaoperaciónbásica,inclinelascuchillasdecizalla
hacialadireccióndelpodadoydesplácelaslentamente
yconcalmaaunritmodevelocidadde3a4segundos
pormetro.
►Fig.25
Paracortarlapartelateraldeunsetodemanerauni-
forme,cortedeabajohaciaarriba.
►Fig.26
Cuandodeseehacerformasredondasalpodar(podar
setosdebojorododendro,etc.),cortedelaraízala
partesuperiorparalograrunresultadoexcelente.
►Fig.27
Alpodarelcésped,coloquelascuchillasdecizallaen
elcéspedparaleloalsuelo,ypodeelcéspedconun
movimientooscilantedederechaaizquierda.
►Fig.28
MANTENIMIENTO
ADVERTENCIA: Antes de inspeccionar o dar
mantenimiento al equipo, apague el motor y retire
el cartucho de batería.Delocontrario,lamáquina
podríaponerseenmarchasinquereryprovocar
lesionesserias.
ADVERTENCIA: Cuando inspeccione o dé
mantenimiento al equipo, déjelo siempre en el
suelo.Elensambleoajustedelequipoenunaposi-
ciónverticalpodríaocasionarlesionesgraves.
ADVERTENCIA: Siga las advertencias
y precauciones contenidas en el capítulo
“ADVERTENCIAS DE SEGURIDAD” y el manual
de instrucciones de la unidad motorizada.
PRECAUCIÓN: Use guantes al realizar la
inspección o dar mantenimiento.
AVISO: Nunca use gasolina, bencina, diluyente
(tíner), alcohol o sustancias similares. Puede que
esto ocasione grietas o descoloramiento.
ParamantenerlaSEGURIDADyFIABILIDADdelpro-
ducto,lasreparaciones,ycualquierotratareademan-
tenimientooajustedeberánserrealizadasencentros
deservicioautorizadosodefábricaMakita,empleando
siemprerepuestosMakita.
Limpieza de la herramienta
Quiteelpolvodelaherramientaconunpañosecoo
humedezcaunpañoenaguayjabónyexprímalopara
limpiarla.
AVISO: Nunca use gasolina, bencina, diluyente
(tíner), alcohol o sustancias similares. Puede que
esto ocasione grietas o descoloramiento.
Other manuals for EN422MP
2
Table of contents
Languages:
Other Makita Trimmer manuals

Makita
Makita DUH501 User manual

Makita
Makita DUR141 User manual

Makita
Makita UH013G User manual

Makita
Makita 3711 User manual

Makita
Makita 3711 User manual

Makita
Makita DRT50 User manual

Makita
Makita RT001GM210 User manual

Makita
Makita DUR365U User manual

Makita
Makita UH013G User manual

Makita
Makita EH561 User manual

Makita
Makita ER2600L User guide

Makita
Makita DUR189RF User manual

Makita
Makita EN5550SH User manual

Makita
Makita DUR141 User manual

Makita
Makita EM2653LH User guide

Makita
Makita DUH501 User manual

Makita
Makita DUR365UPM5 User manual

Makita
Makita XHU02 User manual

Makita
Makita EM4350RH User manual

Makita
Makita UN460WD User manual