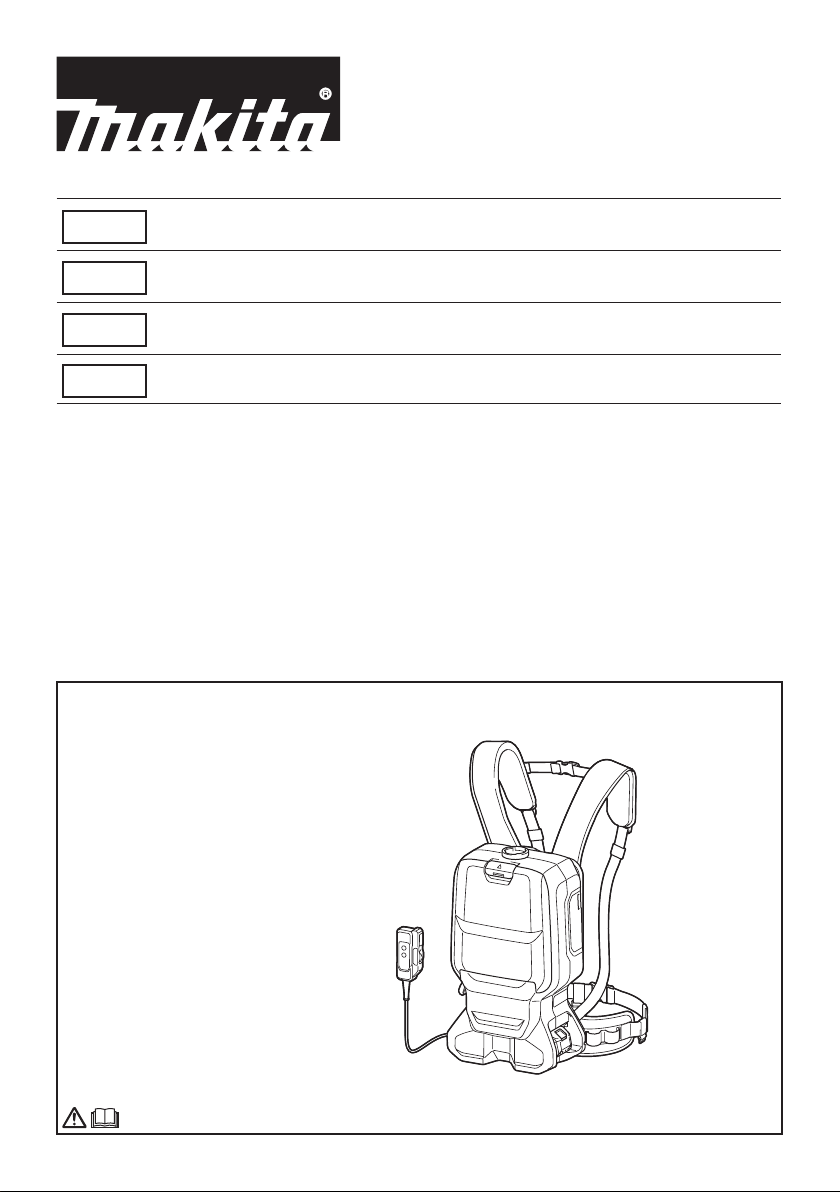
Makita DVC665 User manual

DVC665
EN Cordless Backpack Vacuum
Cleaner INSTRUCTION MANUAL 11
ID Penyedot Debu Ransel
Nirkabel PETUNJUK PENGGUNAAN 24
VI Máy Hút Bụi Đeo Vai Hoạt
Động Bằng Pin TÀI LIỆU HƯỚNG DẪN 38
TH 51

2
1
3
3
Fig.1
1
2
Fig.2
2
1 2
1
Fig.3
1
2
Fig.4
1
2
Fig.5
2
1
Fig.6
1
Fig.7
2

1
Fig.8
Fig.9
1
2
3
Fig.10
1
2
Fig.11
1
2
3
Fig.12
1
2
Fig.13
1
2
3
Fig.14
3

1
2
3
Fig.15
1
2
Fig.16
1
2
3
Fig.17
1
234
Fig.18
1
3
2
4
Fig.19
1
Fig.20
1
2
3
Fig.21
4

1
Fig.22
Fig.23
Fig.24
1
2
Fig.25
1
2
Fig.26
2
1
3
Fig.27
5

1
11
1
4
3
2
Fig.28
Fig.29
Fig.30
2
1
Fig.31
1
Fig.32
1
Fig.33
Fig.34
6

1
Fig.35
21
3
4
Fig.36
2
3
1
Fig.37
1
Fig.38
1
2
2
1
Fig.39
Fig.40
7

1
Fig.41
2
1
Fig.42
1
Fig.43
1
2
2
1
Fig.44
3
1
2
Fig.45
1
2
Fig.46
8

1
Fig.47
2
3
1
Fig.48
Fig.49
1
Fig.50
9

1
Fig.51
1
23
Fig.52
3
2
1
Fig.53
10

11 ENGLISH
ENGLISH (Original instructions)
SPECIFICATIONS
Model: DVC665
Capacity Filter bag 6.0 L
Dust bag 5.5 L
Maximum air volume
(With hose ø28 mm x 1.5 m)
1.8 m3/min
Vacuum 110 hPa
Dimensions (L x W x H)
(excluding the harness)
297 mm x 174 mm x 523 mm
Rated voltage D.C. 36 V
Net weight 6.1 - 6.7 kg
• Duetoourcontinuingprogramofresearchanddevelopment,thespecicationshereinaresubjecttochange
without notice.
• Specicationsmaydierfromcountrytocountry.
• Theweightdoesnotincludeaccessoriesbutbatterycartridge(s).Thelightestandheaviestcombinationweight
oftheapplianceandbatterycartridge(s)areshowninthetable.
Applicable battery cartridge and charger
Battery cartridge BL1815N / BL1820 / BL1820B / BL1830 / BL1830B / BL1840 /
BL1840B / BL1850 / BL1850B / BL1860B
Charger DC18RC/DC18RD/DC18RE/DC18SD/DC18SE/DC18SF/
DC18SH
• Someofthebatterycartridgesandchargerslistedabovemaynotbeavailabledependingonyourregionof
residence.
WARNING: Only use the battery cartridges and chargers listed above.Useofanyotherbatterycartridges
andchargersmaycauseinjuryand/orre.
Symbols
Thefollowingsshowthesymbolsusedfortheequip-
ment.Besurethatyouunderstandtheirmeaningbefore
use.
Read instruction manual.
Ni-MH
Li-ion
OnlyforEUcountries
Donotdisposeofelectricequipmentor
battery pack together with household
wastematerial!Inobservanceofthe
EuropeanDirectives,onWasteElectric
andElectronicEquipmentandBatteries
and Accumulators and Waste Batteries and
Accumulators and their implementation
inaccordancewithnationallaws,electric
equipmentandbatteriesandbattery
pack(s)thathavereachedtheendof
theirlifemustbecollectedseparatelyand
returned to an environmentally compatible
recyclingfacility.
Intended use
Theapplianceisintendedforcollectingdrydust.The
applianceissuitableforcommercialuse,forexamplein
hotels,schools,hospitals,factories,shops,ocesand
rental businesses.
SAFETY WARNINGS
Cordless vacuum cleaner safety
warnings
WARNING: IMPORTANT! READ CAREFULLY
all safety warnings and all instructions BEFORE
USE .Failuretofollowthewarningsandinstructions
mayresultinelectricshock,reand/orseriousinjury.
1. Before use, make sure that this cleaner must
be used by people who have been adequately
instructed on the use of this cleaner.
2. Do not use the cleaner without the lter.
Replace a damaged lter immediately.
3. Do not attempt to pick up ammable materials,
re works, lighted cigarettes, hot ashes, hot
metal chips, sharp materials such as razors,
needles, broken glass or the like.
4. NEVER USE THE CLEANER IN THE VICINITY
OF GASOLINE, GAS, PAINT, ADHESIVES OR
OTHER HIGHLY EXPLOSIVE SUBSTANCES.
TheswitchemitssparkswhenturnedONand
OFF. And so does the motor commutator during
operation. A dangerous explosion may result.

12 ENGLISH
5. Never vacuum up toxic, carcinogenic, com-
bustible or other hazardous materials such
as asbestos, arsenic, barium, beryllium,
lead, pesticides, or other health endangering
materials.
6. Never use the cleaner outdoors in the rain.
7. Do not use close to heat sources (stoves, etc.).
8. Do not block cooling vents. These vents per-
mit cooling of the motor. Blockage should be
carefully avoided otherwise the motor will burn
out from lack of ventilation.
9. Keep proper footing and balance at all times.
10. Do not fold, tug or step on the hose.
11. Stop the cleaner immediately if you notice
poor performance or anything abnormal
during operation.
12. DISCONNECT THE BATTERIES. When not in
use, before servicing, and when changing
accessories.
13. Clean and service the cleaner immediately
after each use to keep it in tiptop operating
condition.
14. MAINTAIN THE CLEANER WITH CARE. Keep
the cleaner clean for better and safer per-
formance. Follow instructions for changing
accessories. Keep handles dry, clean, and free
from oil and grease.
15. CHECK DAMAGED PARTS. Before further use
of the cleaner, a guard or other part that is
damaged should be carefully checked to deter-
mine that it will operate properly and perform
its intended function. Check for alignment of
moving parts, binding of moving parts, break-
age of parts, mounting, and any other condi-
tions that may aect its operation. A guard or
other part that is damaged should be properly
repaired or replaced by an authorized service
center unless otherwise indicated elsewhere
in this instruction manual. Have defective
switches replaced by authorized service cen-
ter. Don’t use the cleaner if switch does not
turn it on and o.
16. REPLACEMENT PARTS. When servicing, use
only identical replacement parts.
17. STORE IDLE CLEANER. When not in use, store
the cleaner indoors.
18. Be kind to your cleaner. Rough handling can
cause breakage of even the most sturdily built
cleaner.
19. Do not attempt to clean the exterior or interior
with benzine, thinner or cleaning chemicals.
Cracks and discoloration may be caused.
20. Do not use cleaner in an enclosed space where
ammable, explosive or toxic vapors are given
o by oil-base paint, paint-thinner, gasoline,
some mothproong substances, etc., or in
areas where ammable dust is present.
21. Do not operate the cleaner while under the
inuence of drugs or alcohol.
22. As a basic rule of safety, use safety goggles or
safety glasses with side shields.
23. Use a dust mask in dusty work conditions.
24. This machine is not intended for use by per-
sons including children with reduced physical,
sensory or mental capabilities, or lack of expe-
rience and knowledge.
25. Children should be supervised to ensure that
they do not play with the cleaner.
26. Never handle batteries and cleaner with wet
hands.
27. Use extreme caution when cleaning on stairs.
28. Do not use the cleaner as a stool or work
bench. The machine may fall down and may
result in personal injury.
Battery tool use and care
1. Recharge only with the charger specied by
the manufacturer.Achargerthatissuitablefor
onetypeofbatterypackmaycreateariskofre
when used with another battery pack.
2. Use power tools only with specically desig-
nated battery packs.Useofanyotherbattery
packsmaycreateariskofinjuryandre.
3. When battery pack is not in use, keep it away
from other metal objects, like paper clips,
coins, keys, nails, screws or other small metal
objects, that can make a connection from one
terminal to another.Shortingthebatterytermi-
nalstogethermaycauseburnsorare.
4. Under abusive conditions, liquid may be
ejected from the battery; avoid contact. If con-
tact accidentally occurs, ush with water. If
liquid contacts eyes, additionally seek medical
help.Liquidejectedfromthebatterymaycause
irritation or burns.
5. Do not use a battery pack or tool that is dam-
aged or modied.Damagedormodiedbatteries
may exhibit unpredictable behaviour resulting in
re,explosionorriskofinjury.
6. Do not expose a battery pack or tool to re or
excessive temperature.Exposuretoreortem-
perature above 130 °C may cause explosion.
7. Follow all charging instructions and do not
charge the battery pack or tool outside the
temperature range specied in the instruc-
tions. Charging improperly or at temperatures
outsidethespeciedrangemaydamagethe
batteryandincreasetheriskofre.
Service
1. Have your power tool serviced by a qualied
repair person using only identical replacement
parts.Thiswillensurethatthesafetyofthepower
tool is maintained.
2. Follow instruction for lubricating and chang-
ing accessories.
3. Keep handles dry, clean and free from oil and
grease.
Important safety instructions for
battery cartridge
1. Before using battery cartridge, read all instruc-
tions and cautionary markings on (1) battery
charger, (2) battery, and (3) product using
battery.
2. Do not disassemble battery cartridge.

13 ENGLISH
3. If operating time has become excessively
shorter, stop operating immediately. It may
result in a risk of overheating, possible burns
and even an explosion.
4. If electrolyte gets into your eyes, rinse them
out with clear water and seek medical atten-
tion right away. It may result in loss of your
eyesight.
5. Do not short the battery cartridge:
(1) Do not touch the terminals with any con-
ductive material.
(2) Avoid storing battery cartridge in a con-
tainer with other metal objects such as
nails, coins, etc.
(3) Do not expose battery cartridge to water
or rain.
A battery short can cause a large current
ow, overheating, possible burns and even a
breakdown.
6. Do not store the tool and battery cartridge in
locations where the temperature may reach or
exceed 50 °C (122 °F).
7. Do not incinerate the battery cartridge even if
it is severely damaged or is completely worn
out. The battery cartridge can explode in a re.
8. Be careful not to drop or strike battery.
9. Do not use a damaged battery.
10. The contained lithium-ion batteries are subject
to the Dangerous Goods Legislation require-
ments.
Forcommercialtransportse.g.bythirdparties,
forwardingagents,specialrequirementonpack-
aging and labeling must be observed.
Forpreparationoftheitembeingshipped,consult-
inganexpertforhazardousmaterialisrequired.
Please also observe possibly more detailed
national regulations.
Tapeormaskoopencontactsandpackupthe
battery in such a manner that it cannot move
around in the packaging.
11. When disposing the battery cartridge, remove
it from the tool and dispose of it in a safe
place. Follow your local regulations relating to
disposal of battery.
12. Use the batteries only with the products
specied by Makita. Installing the batteries to
non-compliantproductsmayresultinare,exces-
siveheat,explosion,orleakofelectrolyte.
13. If the tool is not used for a long period of time,
the battery must be removed from the tool.
SAVE THESE INSTRUCTIONS.
CAUTION: Only use genuine Makita batteries.
Useofnon-genuineMakitabatteries,orbatteriesthat
havebeenaltered,mayresultinthebatterybursting
causingres,personalinjuryanddamage.Itwill
alsovoidtheMakitawarrantyfortheMakitatooland
charger.
Tips for maintaining maximum
battery life
1. Charge the battery cartridge before completely
discharged. Always stop tool operation and
charge the battery cartridge when you notice
less tool power.
2. Never recharge a fully charged battery car-
tridge. Overcharging shortens the battery
service life.
3. Charge the battery cartridge with room tem-
perature at 10 °C - 40 °C (50 °F - 104 °F). Let
a hot battery cartridge cool down before
charging it.
4. Charge the battery cartridge if you do not use
it for a long period (more than six months).
Important safety instructions for
wireless unit
1. Do not disassemble or tamper with the wire-
less unit.
2. Keep the wireless unit away from young chil-
dren. If accidentally swallowed, seek medical
attention immediately.
3. Use the wireless unit only with Makita tools.
4. Do not expose the wireless unit to rain or wet
conditions.
5. Do not use the wireless unit in places where
the temperature exceeds 50°C (122°F).
6. Do not operate the wireless unit in places
where medical instruments, such as heart
pace makers are nearby.
7. Do not operate the wireless unit in places
where automated devices are nearby.Ifoper-
ated,automateddevicesmaydevelopmalfunction
or error.
8. Do not operate the wireless unit in places
under high temperature or places where
static electricity or electrical noise could be
generated.
9. The wireless unit can produce electromagnetic
elds (EMF) but they are not harmful to the
user.
10. The wireless unit is an accurate instrument. Be
careful not to drop or strike the wireless unit.
11. Avoid touching the terminal of the wireless
unit with bare hands or metallic materials.
12. Always remove the battery on the product
when installing the wireless unit into it.
13. When opening the lid of the slot, avoid the
place where dust and water may come into the
slot. Always keep the inlet of the slot clean.
14. Always insert the wireless unit in the correct
direction.
15. Do not press the wireless activation button
on the wireless unit too hard and/or press the
button with an object with a sharp edge.
16. Always close the lid of the slot when
operating.
17. Do not remove the wireless unit from the slot
while the power is being supplied to the tool.
Doingsomaycauseamalfunctionofthewireless
unit.

14 ENGLISH
18. Do not remove the sticker on the wireless unit.
19. Do not put any sticker on the wireless unit.
20. Do not leave the wireless unit in a place where
static electricity or electrical noise could be
generated.
21. Do not leave the wireless unit in a place sub-
ject to high heat, such as a car sitting in the
sun.
22. Do not leave the wireless unit in a dusty or
powdery place or in a place corrosive gas
could be generated.
23. Sudden change of the temperature may bedew
the wireless unit. Do not use the wireless unit
until the dew is completely dried.
24. When cleaning the wireless unit, gently wipe
with a dry soft cloth. Do not use benzine, thin-
ner, conductive grease or the like.
25. When storing the wireless unit, keep it in the
supplied case or a static-free container.
26. Do not insert any devices other than Makita
wireless unit into the slot on the tool.
27. Do not use the tool with the lid of the slot dam-
aged.Water,dust,anddirtcomeintotheslotmay
causemalfunction.
28. Do not pull and/or twist the lid of the slot more
than necessary.Restorethelidifitcomeso
fromthetool.
29. Replace the lid of the slot if it is lost or
damaged.
SAVE THESE INSTRUCTIONS.
FUNCTIONAL
DESCRIPTION
CAUTION: Always be sure that the appli-
ance is switched o and the battery cartridge is
removed before adjusting or checking function on
the appliance.
Installing or removing battery
cartridge
CAUTION: Always switch o the appliance
before installing or removing of the battery
cartridge.
CAUTION: Hold the appliance and the bat-
tery cartridge rmly when installing or removing
battery cartridge. Failure to hold the appliance and
thebatterycartridgermlymaycausethemtoslipo
your hands and result in damage to the appliance and
batterycartridgeandapersonalinjury.
►Fig.1: 1. Red indicator 2. Button 3. Battery cartridge
Toremovethebatterycartridge,slideitfromthe
appliancewhileslidingthebuttononthefrontofthe
cartridge.
Toinstallthebatterycartridge,alignthetongueonthe
battery cartridge with the groove in the housing and slip
it into place. Insert it all the way until it locks in place
withalittleclick.Ifyoucanseetheredindicatoronthe
uppersideofthebutton,itisnotlockedcompletely.
CAUTION: Always install the battery cartridge
fully until the red indicator cannot be seen.Ifnot,
itmayaccidentallyfalloutoftheappliance,causing
injurytoyouorsomeonearoundyou.
CAUTION: Do not install the battery cartridge
forcibly.Ifthecartridgedoesnotslideineasily,itis
not being inserted correctly.
Appliance / battery protection
system
Theapplianceisequippedwithaappliance/battery
protectionsystem.Thissystemautomaticallycutso
powertothemotortoextendapplianceandbatterylife.
Theappliancewillautomaticallystopduringoperation
iftheapplianceorbatteryisplacedunderoneofthe
followingconditions.
Overload protection
When the appliance is operated in a manner that
causesittodrawanabnormallyhighcurrent,theappli-
ance automatically stops without any indication. In this
situation,turntheapplianceoandstoptheapplication
thatcausedtheappliancetobecomeoverloaded.Then
turn the appliance on to restart.
Overheat protection
Whentheapplianceisoverheated,theappliancestops
automatically.Lettheappliancecooldownbeforeturn-
ing the appliance on again.
Overdischarge protection
Whenthebatterycapacitybecomeslow,theappliance
stopsautomatically.Iftheproductdoesnotoperate
evenwhentheswitchesareoperated,removethebat-
teriesfromtheapplianceandchargethebatteries.
Indicating the remaining battery
capacity
Only for battery cartridges with the indicator
►Fig.2: 1. Indicator lamps 2. Check button
Press the check button on the battery cartridge to indi-
catetheremainingbatterycapacity.Theindicatorlamps
lightupforafewseconds.

15 ENGLISH
Indicator lamps Remaining
capacity
Lighted O Blinking
75% to 100%
50% to 75%
25% to 50%
0% to 25%
Charge the
battery.
Thebattery
may have
malfunctioned.
NOTE:Dependingontheconditionsofuseandthe
ambienttemperature,theindicationmaydierslightly
fromtheactualcapacity.
Switch box position
Theswitchboxcanbehookedoneithersideofthe
lower belt. Arrange the cord so that the switch box
comestoyourdesiredside.Topreventthecordfrom
beingdamaged,passthecordthroughthegrooveas
illustrated.
►Fig.3: 1. Groove 2. Cord
Adjusting belts
Thetightnessoftheshoulderbelts,upperandlower
beltscanbeadjusted.Putyourarmsthroughtheshoul-
derbeltsrstthenfastenthelowerandupperbelts.
Totighten,pulltheendofthestrapasillustrated.To
loosen,pulluptheendofthefastener.
Lower belt
►Fig.4: 1.Strap2. Fastener
Shoulder belts
►Fig.5: 1.Strap2. Fastener
Upper belt
►Fig.6: 1.Strap2. Fastener
Carrying hook
Always grab the carrying hook when handling the vac-
uum cleaner body.
►Fig.7: 1. Carrying hook
Stand-by switch
Thestand-byswitchistheswitchtoturnon/othe
wirelessactivationfunction.Thevacuumcleanerisin
thestand-bystateregardlessoftheswitchpositionand
it runs when button is pushed.
►Fig.8: 1.Stand-byswitch
Switch position Status
AUTO I
(ON)
Thevacuumcleanerisinthestand-by
stateandthewirelessactivationfunction
is available.
O
(OFF)
Thevacuumcleanerisinthestand-by
state however the wireless activation
functionisnotavailable.
Switch action
Tostartvacuuming,press buttononce.Thevacuum
cleaner will start in the same suction power when you
turneditopreviously.Whenyoupress button
whilethevacuumcleanerisrunning,thesuctionpower
switches between normal (1) and higher (2) suction
power.Toturnothevacuumcleaner,press button.
►Fig.9
NOTE:Ifyouwanttorunthevacuumcleaneralong
withtheswitchoperationofthetoolconnectedtothe
vacuumcleaner(wirelessactivationfunction),setthe
stand-by switch to “ I (ON)”.
NOTE:Tousethewirelessactivationfunction,nish
thetoolregistrationbeforehand.Referto“WIRELESS
ACTIVATIONFUNCTION”sectionfordetail.
NOTE:Whenusingthewirelessactivationfunc-
tion,youwillnotbeabletostopthevacuuming
by button.
Hose band
Hosebandcanbeusedforholdingthehoseorfree
nozzle.
Tosecurethehosetothevacuumcleanerbody,pass
the hose band through the slot on the body. You can
attach the hose band on either side.
►Fig.10: 1. Hose band 2.Slot3. Hose
Thelooponthelowerbeltcanbeusedforcarrying
nozzlesasillustrated.
►Fig.11: 1. Loop 2.Nozzles
Dust beating system
Dust goes down when you pull the lever or walk with
wearingthecleaner.Thissystemhelpsthecleaner
maintaining the suction power.
►Fig.12: 1. Lever 2. Filter bag/dust bag 3. Board
NOTE:Thisfunctionworkswhenthecleaneris
switchedoandthelterbag/dustbagcontainsa
certainamountofdusttotouchtheboard.
ASSEMBLY
CAUTION: Always be sure that the appli-
ance is switched o and the battery cartridge
is removed before carrying out any work on the
appliance.

16 ENGLISH
Assembling hose
Insertthehosecuintothevacuumcleanerbodyand
turn it clockwise.
►Fig.13: 1.Hosecu2. Vacuum cleaner body
Connecting the tool
Ifthebentpipeassemblyisattachedtothehose,
loosenthesleeveofbentpipeassemblyandremoveit.
►Fig.14: 1. Hose 2. Bent pipe assembly 3.Sleeve
1. Attachthefrontcutothehosefordustextraction.
Whenconnectingthefrontcu,makesurethatitis
securely screwed on the hose.
2. Connectthefrontcutothetool'sextraction
outlet.
►Fig.15: 1.Frontcu2. Extraction outlet 3. Hose
Thefrontcucanbedetachedbyturningitcounter-
clockwise while holding the hose.
NOTE:Alwaysuseasuitablefrontcu.Whenusing
thefrontcu24,attachittothefrontcu22thatis
connected to the hose.
►Fig.16: 1.Frontcu222.Frontcu24
Using as a cleaner
Ifyouwanttousethisproductasacleaner,followthe
below procedures.
NOTICE: If the front cu is attached to the hose,
remove it beforehand.
NOTE:Thebentpipeassembly,extensionwand,and
nozzlesaresuppliedasoptionalaccessoriesinsome
countries.
NOTE:Therearetwotypesofbentpipeassembly;
theoneforslide-typeextensionwandandtheonefor
ring-typeextensionwand.Ifyoupreparethebentpipe
assembly,choosetheoneforyourdesiredextension
wand type.
1. Fastenthesleeveofbentpipeassemblyontothe
hose.
►Fig.17: 1. Hose 2. Bent pipe assembly 3.Sleeve
Toremovethebentpipeassembly,loosenthesleeveof
bentpipeassemblyfromthehose.
2. Twistandinsertthenozzletotheextensionwand.
►Fig.18: 1. Extension wand 2.Freenozzle
3.T-shapenozzle4.T-shapenozzle(slim)
NOTE:Bytwistingthenozzlewhileinserting,thenoz-
zlecanbeattachedtotheextensionwandsecurely.
3. Followtheproceduresbelow,dependingonthe
typeoftheextensionwand:
NOTE:Theslide-typeextensionwandandthering-
type extension wand are not compatible with each
other.Ifyouwanttochangetheslide-typeextension
wandtothering-typeextensionwandorviceversa,
change the bent pipe assembly also.
NOTE:Thefreenozzlecanbeattachedtothebent
pipe assembly directly.
For the slide-type extension wand
Shoulderthevacuumcleanerbodytheninsertthe
extension wand into the bent pipe assembly until it
clicks.Todisconnect,extracttheextensionwandwith
pressing the button.
►Fig.19: 1. Bent pipe assembly 2. Button 3.Slide-
type extension wand 4.Freenozzle
Thelengthofthewandcanbeadjusted.
Withpressingtheslidebutton,adjustthewandlength.
Thelengthislockedwhenreleasingtheslidebutton.
►Fig.20: 1.Slidebutton
For the ring-type extension wand
Shoulderthevacuumcleanerbodythentwistandinsert
theextensionwandintothebentpipeassembly.To
disconnect,twistandextractit.
►Fig.21: 1. Bent pipe assembly 2. Ring-type exten-
sion wand 3.Freenozzle
Thelengthofthewandcanbeadjusted.
Loosentheringonthewandandadjustthewand
length.Tightentheringatyourdesiredlength.
►Fig.22: 1. Ring
Hose hook
Whenyoususpendtheoperation,thehookonthebent
pipeassemblycanbeusedforhangingthewandonthe
lower belt.
►Fig.23
Installing lter bag / dust bag
Optional accessory
CAUTION: Do not use a damaged lter bag.
Always use the vacuum cleaner with the lter bag
properly installed. Otherwise the vacuumed dust
or particles may be exhausted from the cleaner
and they may cause respiratory disease to the
operator.
Installeitherdustbagorlterbagbeforeusingcleaner.
— Dust bag are usable many times repeatedly by
cleaning it out.
— Filterbagisathrow-awaytype.Throwawaythe
entirelterbagwithoutemptyingwhenithas
becomefull.
NOTICE: When the lter bag is already full,
replace with new one. When the dust bag is
already full, empty it.Continuoususewiththelter
bag/dustbagfullresultsinreducedsuctionpower.
NOTICE: To prevent dust from getting into the
motor:
— Make sure that the lter bag/dust bag is
installed before use.
— Do not use a broken or ripped bag.
Otherwise the motor may be broken.
NOTICE: Do not fold the cardboard at its open-
ing when installing the lter bag/dust bag.
NOTICE: The lter bag/dust bag for the cleaner
is an important component for maintaining the
appliance performance. Using non-genuine lter
bag/dust bag may cause smoke or ignition.

17 ENGLISH
NOTE:Whenthelterbag/dustbagisnotinstalledin
thecleaner,thefrontcoverdoesnotclosecompletely.
►Fig.24
1. Unlockthelatchbyliftingthebottomside.Push
thegroovedareatoliftthefrontlatchingside.Pullthe
latch to open the lid.
►Fig.25: 1. Hook 2. Lid
2. Insertthelterbagintotheslitontheuppersideof
the room as illustrated.
►Fig.26: 1.Slit2. Filter bag
Whenusingthedustbag,insertthebrimofthedustbag
into the slit.
►Fig.27: 1.Slit2. Brim 3. Dust bag
3. Aligntheholeofthelterbagwiththehosecu
and push the cardboard portion to the end. Make sure
thattherubberringonthelterbaggoesovertherim
onthehosecu.
►Fig.28: 1.Rubberringonthelterbag2. Rim on
thehosecu3.Cardboardportionofthe
lterbag4.Hosecu
OPERATION
WARNING: Operators shall be adequately
instructed on the use of the vacuum cleaner.
WARNING: This vacuum cleaner is not suit-
able for picking up hazardous dust.
CAUTION: This cleaner is for dry use only.
CAUTION: This cleaner is for indoor use only.
CAUTION: Always insert the battery cartridge
all the way until it locks in place.Ifyoucanseethe
redindicatorontheuppersideofthebutton,itisnot
lockedcompletely.Insertitfullyuntiltheredindicator
cannotbeseen.Ifnot,itmayaccidentallyfallout
oftheappliance,causinginjurytoyouorsomeone
around you.
CAUTION: During operation, be conscious
of the vacuum cleaner on your back. You may
loseyourbalanceifthevacuumcleanerbodybumps
against a wall or the hose is hooked by an obstacles.
1. Shoulderthevacuumcleanerbodyandfas-
tenlowerandupperbelts.Adjustthetightnessas
necessary.
►Fig.29
2. Press
buttontostartvacuuming.Tochange
thesuctionpower,press button while the vacuum
cleanerisrunning.Thesuctionpowerswitchesbetween
normal (1) and higher (2) suction power. Press but-
ton to stop.
►Fig.30
Duringtheoperation,hooktheswitchboxonthelower
belt or the ring.
►Fig.31: 1. Ring 2. Lower belt
3. Replacethelterbagwhenitbecomesfull.Open
thelidandtakeoutthelterbag.Pullthestriponthe
sideoftheopeningtoshutthelterbaganddisposeof
thelterbaginwhole.
►Fig.32: 1.Strip
Whenusingadustbag,takeoutthedustbaganddis-
poseofthedustbyreleasingthelatch.
►Fig.33: 1. Latch
NOTICE: Do not put lter bag/dust bag or other
heavy objects on the lid.Theappliancemayfall
down.
NOTICE: Periodically check the lter bag if it is
full.Continuoususewiththelterbagfullresultsin
reduced suction power.
NOTICE: Do not use an used lter bag.Thelter
bagisdesignedforsingleuse.Usinglterbagrepeat-
edlymaycausecloggingofthelterandresultsin
damagetothecleaner.Ifyouwanttousethebag
repeatedly,useadustbag.
WIRELESS ACTIVATION
FUNCTION
What you can do with the wireless
activation function
Thewirelessactivationfunctionenablescleanand
comfortableoperation.Byconnectingasupportedtool
tothecleaner,youcanrunthecleanerautomatically
alongwiththeswitchoperationofthetool.
►Fig.34
NOTICE: Be sure to refer to the instruction man-
ual of the tool when using the cleaner with wire-
less activation function.
NOTICE: Do not disassemble or tamper with the
wireless unit.
NOTICE: To prevent dust coming into the slot
of the wireless unit, always close the lid securely
during operation and storage.
NOTICE: Do not remove the wireless unit while
the power is being supplied. Doing so may cause a
malfunctionofthewirelessunit.
NOTICE: Do not press the wireless activation
button too hard and/or press the button with an
object with a sharp edge.

18 ENGLISH
NOTE: Wireless activation needs Makita tools
equippedwiththewirelessunit.
NOTE:Priortotheinitialuseofthewirelessactiva-
tionfunctionwitheachtool,thetoolregistrationis
required.Oncetheregistrationisnishedwiththe
tool,there-registrationisnotrequiredunlessitis
cancelled.
NOTE:Beforeregistration,besurethatthewireless
unit is properly inserted.
NOTE: One wireless unit can register up to 10 links
withotherwirelessunits.Ifmorethan10otherwire-
lessunitsareregisteredtoonewirelessunit,theone
registered earliest will be cancelled automatically.
NOTE:Thepositionofthewirelessactivationbutton
varies depending on the tool.
NOTE:Thecleaneralsostartsbypressing button
when the stand-by switch is set to “ I (ON)”.
However the button will not work when the wire-
lessactivationfunctionisused.
Installing the wireless unit
CAUTION: Place the cleaner on a at and
stable surface when installing the wireless unit.
NOTICE: Clean the dust and dirt on the cleaner
before installing the wireless unit. Dust or dirt
maycausemalfunctionifitcomesintotheslotofthe
wireless unit.
NOTICE: To prevent the malfunction caused by
static, touch a static discharging material, such
as a metallic part, before picking up the wireless
unit.
NOTICE: When installing the wireless unit,
always be sure that the wireless unit is inserted
in the correct direction and the lid is completely
closed.
1. Openthelidonthecleanerasshowninthegure.
►Fig.35: 1. Lid
2. Insert the wireless unit to the slot and then close
the lid.
Wheninsertingthewirelessunit,aligntheprojections
with the recessed portions on the slot.
►Fig.36: 1. Wireless unit 2.Projection3. Lid
4. Recessed portion
Whenremovingthewirelessunit,openthelidslowly.
Thehooksonthebackofthelidwillliftthewirelessunit
as you pull up the lid.
►Fig.37: 1. Wireless unit 2. Hook 3. Lid
Afterremovingthewirelessunit,keepitinthesupplied
caseorastatic-freecontainer.
NOTICE: Always use the hooks on the back of
the lid when removing the wireless unit.Ifthe
hooksdonotcatchthewirelessunit,closethelid
completely and open it slowly again.
Tool registration for the cleaner
NOTE: A Makita tool supporting the wireless activa-
tionfunctionisrequiredforthetoolregistration.
NOTE: Finish installing the wireless unit to the tool
beforestartingthetoolregistration.
NOTE:Duringthetoolregistration,donotpullthe
switchtriggeronthetoolorpushthecleaner'sswitch
forvacuuming.
NOTE:Refertotheinstructionmanualofthetool,too.
Ifyouwishtoactivatethecleaneralongwiththe
switchoperationofthetool,nishthetoolregistration
beforehand.
1. Install the wireless units to the cleaner and the
tool,respectively.
2. Install the batteries to the cleaner and the tool.
3. Setthestand-byswitchonthecleanerto“I(ON)”.
►Fig.38: 1.Stand-byswitch
4. Press the wireless activation button on the cleaner
for3secondsuntilthewirelessactivationlampblinksin
green. And then press the wireless activation button on
the tool in the same way.
►Fig.39: 1. Wireless activation button 2. Wireless
activation lamp
Ifthecleanerandthetoolarelinkedsuccessfully,the
wirelessactivationlampswilllightupingreenfor
2 seconds and start blinking in blue.
NOTE:Thewirelessactivationlampsnishblinking
ingreenafter20secondselapsed.Pressthewireless
activation button on the tool while the wireless acti-
vationlamponthecleanerisblinking.Ifthewireless
activationlampdoesnotblinkingreen,pushthewire-
lessactivationbuttonbrieyandholditdownagain.
NOTE:Whenperformingtwoormoretoolregistration
forthecleaner,nishthetoolregistrationonebyone.
Starting the wireless activation
function
NOTE:Finishthetoolregistrationforthecleanerfor
wireless activation.
NOTE: Always place the cleaner so that you can see
thestatusofthewirelessactivationlamp.
NOTE:Refertotheinstructionmanualofthetool,too.
Afterregisteringatooltothecleaner,thecleanerwill
automaticallyrunsalongwiththeswitchoperationof
the tool.
1. Install the wireless units to the cleaner and the
tool,respectively.
2. Install the batteries to the cleaner and the tool.
3. Connectthehoseofthecleanerwiththetool.
►Fig.40
4. Setthestand-byswitchonthecleanerto“I(ON)”.
Thewirelessactivationlampwillblinkinblue.
►Fig.41: 1.Stand-byswitch

19 ENGLISH
5. Push the wireless activation button on the tool
briey.Thewirelessactivationlampwillblinkinblue.
►Fig.42: 1. Wireless activation button 2. Wireless
activation lamp
6. Pulltheswitchtriggerofthetool.Checkifthe
cleaner runs while the switch trigger on the tool is being
pulled.
CAUTION: Always check if the wireless acti-
vation function works before starting a work with
the tool.
Tostopthewirelessactivation,pushthewirelessactiva-
tion button on the tool or set the stand-by switch on the
cleaner to “O (OFF)”.
NOTE:Thewirelessactivationlamponthetoolwill
stopblinkinginbluewhenthereisnooperationfor
2hours.Inthiscase,pressthewirelessactivation
buttons on the tool again.
NOTE:Thecleanerstarts/stopswithadelay.Thereis
a time lag when the cleaner detects a switch opera-
tionofthetool.
NOTE:Thetransmissiondistanceofthewirelessunit
may vary depending on the location and surrounding
circumstances.
NOTE: When two or more tools are registered to one
cleaner,thecleanermaystartrunningevenifyou
don'tpulltheswitchtriggerbecauseotheruseris
usingthewirelessactivationfunction.
Cancelling tool registration for the
cleaner
Performthefollowingprocedurewhencancellingthe
toolregistrationforthecleaner.
1. Install the wireless units to the cleaner and the
tool,respectively.
2. Install the batteries to the cleaner and the tool.
3. Setthestand-byswitchonthecleanerto“I(ON)”.
►Fig.43: 1.Stand-byswitch
4. Press the wireless activation button on the cleaner
for6seconds.Thewirelessactivationlampblinksin
greenandthenbecomered.Afterthat,pressthewire-
less activation button on the tool in the same way.
►Fig.44: 1. Wireless activation button 2. Wireless
activation lamp
Ifthecancellationisperformedsuccessfully,thewire-
lessactivationlampswilllightupinredfor2seconds
and start blinking in blue.
NOTE:Thewirelessactivationlampsnishblinkingin
redafter20secondselapsed.Pressthewirelessacti-
vation button on the tool while the wireless activation
lamponthecleanerisblinking.Ifthewirelessacti-
vationlampdoesnotblinkinred,pushthewireless
activationbuttonbrieyandholditdownagain.
Erasing all tool registrations
Youcanerasealltoolregistrationsfromthecleaneras
follows.
►Fig.45: 1.Stand-byswitch2. Wireless activation
button 3. Wireless activation lamp
1. Install the wireless unit to the cleaner.
2. Install the batteries to the cleaner.
3. Setthestand-byswitchto“I(ON)”.
4. Holddownthewirelessactivationbuttonforabout
6 seconds until the wireless activation lamp blinks in red
(about twice per one second).
5. When the wireless activation lamp starts blinking
inred,releaseyourngerfromthewirelessactivation
button.Thereafter,holddownthewirelessactivation
buttonagainforabout6seconds.
6. When the wireless activation lamp starts blinking
fast(about5timesperonesecond)inred,releaseyour
ngerfromthewirelessactivationbutton.Whenthe
wireless activation lamp lights up in red and later lights
o,alltoolregistrationsareerased.
NOTE:Ifthewirelessactivationlampdoesnotblink
inred,pressthewirelessactivationbuttonbrieyand
try again.

20 ENGLISH
Description of the wireless activation lamp status
►Fig.46: 1. Wireless activation button 2. Wireless
activation lamp
Thewirelessactivationlampshowsthestatusofthewirelessactivationfunction.Refertothebelowtableforthe
meaningofthelampstatus.
Status Wireless activation lamp Description
Color
On
Blinking
Duration
(approximate)
Standby Blue Cleaner:con-
tinuing
Tool:2hours
Waitingforthetoolregistrationorthewirelessactivationfunction
is available.
Thelamponthecleanerblinkswhenthestand-byswitchissetin
“I(ON)”.Thelamponthetoolblinkswhenthewirelessactivation
buttonispushed.Thelamponthetoolwillautomaticallyturno
whennooperationisperformedfor2hours.
When the tool is
running.
Thewirelessactivationofthecleanerisavailableandthetoolis
running.
Tool
registration
Green 20 seconds Readyforthetoolregistration.Searchingthetooltoberegistered.
2 seconds Thetoolregistrationhasbeennished.Thewirelessactivation
lamp will start blinking in blue.
Cancelling/
erasing
tool
registration
Red
(slow:2times/sec.)
20 seconds Readyforthecancellationofthetoolregistration.Searchingthe
tool to be cancelled.
(fast:5times/sec.)
When the
wireless acti-
vation button is
pressed down.
Ready to erase all tool registrations.
2 seconds Thetoolregistrationhasbeencancelled/erased.Thewireless
activation lamp will start blinking in blue.
Others Red 3 seconds Thepowerissuppliedtothewirelessunitandthewirelessactiva-
tionfunctionisstartingup.
O - - Thestand-byswitchisnotsetto“I(ON)”.
Other manuals for DVC665
7
Table of contents
Languages:
Other Makita Vacuum Cleaner manuals

Makita
Makita VC2000L User manual

Makita
Makita DVC265 User manual

Makita
Makita CL105D User manual

Makita
Makita DVC862L User manual

Makita
Makita DRC300 User manual

Makita
Makita DVC750L User manual

Makita
Makita VC3211M User manual

Makita
Makita CL104D User manual

Makita
Makita DRC200 User manual

Makita
Makita DCL181F User manual

Makita
Makita DVC864L User manual

Makita
Makita DCL286F User manual

Makita
Makita VC001GL User manual

Makita
Makita DRC200 User manual

Makita
Makita DVC865L User manual

Makita
Makita DRC300PG2 User manual

Makita
Makita VC001GL User manual

Makita
Makita VC008G User manual

Makita
Makita CL002G User manual

Makita
Makita CL121D User manual