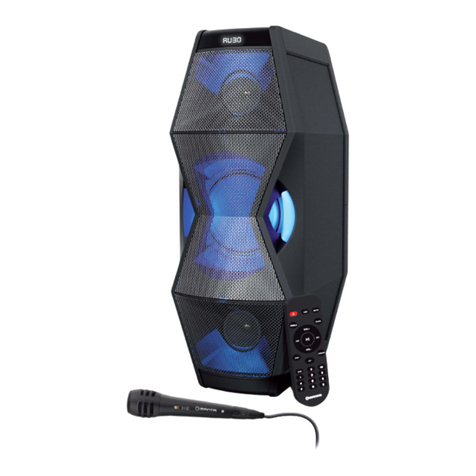
Manta SPK5002 User manual

Karaoke Bluetooth Speaker
Box MONSTER
Model:
SPK5002
Instrukcja obsługi
User’s Manual
Bedienungsanleitung
Manual de usuario
Istruzioni d’uso
Návod k obsluze
Инструкция использования

Instrukcja Obsługi PL
2
NAZWY PRZEŁĄCZNIKÓW
1. Logo Bluetooth
2. Wskaźnik zasilania
3. Wyświetlacz LCD
4. Korekcja dźwięku
5. 2. port USB
6. Pokrętło BASS
7. Pokrętło TREBLE
8. Przycisk Start / Pauza / Parowanie / Skanowanie (Play/Pause/Pair/Scan)
9. Przycisk Następny / Przewijanie do przodu / TUN (Next/Fast Forward/TUN)
10. Przełącznik BASS Włączony / Wyłączony (BASS ON/OFF)
11. Przycisk FUNKCJA / CZUWANIE (FUNCTION/STANDBY)
12. Przycisk FOLDER / 10 / PAMIĘĆ + (FOLD./10/MEM.+)
13. Pokrętło GŁOŚNOŚCI (VOLUME)
14. 2. gniazdo MIKROFON (MIC) typu Jack 6,3 mm
15. 1. gniazdo MIKROFON (MIC) typu Jack 6,3 mm
16. 2. port USB
17. Gniazdo GITARA (GUITAR) typu Jack 6,3 mm
18. Gniazdo AUX IN typu Jack 3,5 mm
19. Pokrętło GŁOŚNOŚĆ MIKROFONU (MIC VOLUME)
20. Pokrętło ECHO MIKROFONU (MIC ECHO)
21. Przycisk Poprzedni / Przewijanie do tyłu / STROJENIE (Previous/Fast
Backward/TUN)
22. Przycisk TRYB P / PAMIĘĆ (P-MODE/MEM.)
23. Włącznik / Wyłącznik (ON/OFF)
24. Przycisk ID3 / ŚWIATŁO (ID3/LIGHT)
25. Przycisk FOLDER / 10 / PAMIĘĆ- (FOLD./10/MEM.-)
26. Pokrętło GŁOŚNOŚĆ GITARY (GUITAR VOLUME)
27. GŁOŚNIKI
28. Pokrywa ze światłem LED
29. GŁOŚNIKI WYSOKOTONOWE
30. WŁĄCZNIK / WYŁĄCZNIK ZASILANIA (POWER ON/OFF)
31. Gniazdo prądu zmiennego
32. Kółka
33. Antena FM

Instrukcja Obsługi PL
3
LOKALIZACJA PRZEŁĄCZNIKÓW
1
2
3
4
56
78
910
11 12
13
14
15161718
19
20
21 22
23
24
25 26
27
28
27
28
29
29
30
31
33
32

Instrukcja Obsługi PL
4
ŹRÓDŁO ZASILANIA
Urządzenie działa bezpośrednio na prąd zmienny.
PODSTAWOWA FUNKCJA
WŁĄCZANIE / WYŁĄCZANIE URZĄDZENIA
Po podłączeniu do zasilania, przełącz WŁĄCZNIK / WYŁĄCZNIK z tyłu urządzenia celem doprowadzenia
zasilania, a następnie przełącz przycisk zasilania z przodu urządzenia w celu jego uruchomienia.
Uwaga: W przypadku nieużywania urządzenia przez dłuższy czas należy wyłączyć urządzenie przyciskiem
z tyłu w celu odcięcia zasilania lub wyjąć przewód zasilania z gniazdka w ścianie.
UWAGA: Gdy urządzenie jest w trybie USB / AUX / BT i nie jest aktywne przez 15 minut, przełączy się ono
automatycznie w tryb czuwania. Aby ponownie włączyć urządzenie, wciśnij Przycisk FUNKCJA /
CZUWANIE lub ponownie podłącz przewód do gniazdka.
Uwaga! Urządzenie czułe na wyładowania elektrostatyczne – produkt może wymagać zresetowania z
powodu nagromadzenia się ładunków elektrycznych, w takim przypadku należy odłączyć urządzenie i
podłączyć je ponownie.
USTAWIANIE TRYBU FUNKCJI
Aby zmienić tryby funkcji, wciśnij przycisk FUNKCJA / CZUWANIE, aby wybrać funkcję
USB1/USB2/BLUETOOTH/AUX.
ZMIANA GŁOŚNOŚCI
1. Użyj pokrętła VOLUME w celu zmniejszenia lub zwiększenia głośności.
2. Użyj pokrętła GUITAR VOL. w celu zmniejszenia lub zwiększenia głośności gitary.
3. Użyj pokrętła MIC VOL. w celu zmniejszenia lub zwiększenia głośności mikrofonu.
FUNKCJA KOREKCJI DŹWIĘKU (EQ)
Urządzenie posiada wbudowany system korekcji dźwięku, umożliwiający korektę pięciu zakresów
częstotliwości (100Hz, 330Hz, 1KHz, 3,3KHz, 10KHz) w celu wyboru ustawienia, które najlepiej odpowiada
stylowi muzyki.
KOREKTA BASU
Użyj pokrętła BASS w celu zmniejszenia lub zwiększenia natężenia basu, które najlepiej odpowiada
danemu stylowi muzycznemu.
SUPER BASS: włącz przycisk BASS w celu uzyskania efektu podwojenia natężenia basu.
KOREKTA WYSOKICH TONÓW
Użyj pokrętła TREBLE w celu zmniejszenia lub zwiększenia natężenia wysokich tonów, które najlepiej
odpowiada danemu stylowi muzycznemu.
KOREKTA EFEKTU ECHA W MIKROFONIE
Użyj pokrętła MIC ECHO w celu zmniejszenia lub zwiększenia efektu echa w mikrofonie, który najlepiej
odpowiada danemu stylowi.

Instrukcja Obsługi PL
5
ŚWIATŁO DISCO
Efekt światła disco działa w trzech trybach, domyślny tryb to niebieskie światło włączone stale, drugi to
niebieskie światło migające w takt muzyki, a ostatni tryb to wyłączenie światła. Aby wybrać pożądany tryb,
wciśnij przycisk ID3 / LIGHT.
System ID3 (wyświetlanie oznaczeń)
Niektóre pliki MP3 mają zakodowane informacje, takie jak nazwa utworu, wykonawca oraz album. Te
informacje nazywane są „znacznikami ID3”.
Wciśnij i przytrzymaj przycisk ID3/LIGHT w celu włączenia lub wyłączenia wyświetlania znaczników ID3.
Gdy oznaczenie znacznika ID3 jest włączone, urządzenie będzie wyświetlać informacje w kolejności
ukazanej poniżej.
NAZWA UTWORU -> NAZWA WYKONAWCY -> NAZWA ALBUMU ->
ID3 WYŁĄCZONE
OBSŁUGA USB
Urządzenie posiada dwa gniazda USB do odtwarzania muzyki.
1. Wciśnij przycisk FUNCTION/STANDBY na urządzeniu aby wybrać tryb „USB1” lub „USB2”.
2. Podłącz nośnik pamięci USB do gniazda USB z przodu urządzenia. Odtwarzanie rozpocznie się
automatycznie od pierwszego utworu.
3. Aby zatrzymać odtwarzanie, wciśnij przycisk PLAY/PAUSE/PAIR/SCAN na urządzeniu. Odtwarzany
obecnie numer utworu oraz jego czas będzie pokazany na wyświetlaczu.
4. Aby wznowić odtwarzanie, ponownie wciśnij przycisk PLAY/PAUSE/PAIR/SCAN.
5. Aby wybrać utwór, wciśnij przycisk /TUN+ lub /TUN- w trakcie odtwarzania do momentu uzyskania
pożądanego utworu na wyświetlaczu. Odtwarzanie rozpocznie się automatycznie.
6. Aby znaleźć określony fragment w trakcie odtwarzania, wciśnij i przytrzymaj przycisk /TUN+ lub
/TUN- celem przewinięcia obecnie odtwarzanego utworu do momentu znalezienia pożądanego
fragmentu, po czym zwolnij przycisk.
7. Aby wybrać utwór, którego numer przekracza 10, wciśnij przycisk FOLD/10/MEM+ lub FOLD/10/MEM-
aby przejść o 10 utworów do przodu/tyłu, a następnie wciśnij przycisk /TUN+ lub /TUN-, aby wybrać
pożądany utwór.
8. Aby wybrać folder (jeśli USB zawiera więcej, niż jeden folder), wciśnij i przytrzymaj przycisk
FOLD/10/MEM+ lub FOLD/10/MEM-, aby przejść o folder do przodu/tyłu, a następnie wciśnij przycisk
/TUN+ lub /TUN-, aby wybrać pożądany utwór.
Ważne: Gniazdo USB służy wyłącznie transferowi danych, nie można wykorzystywać innych
urządzeń za pośrednictwem tego gniazda USB. Nie zaleca się wykorzystywania przedłużacza USB.
ODTWARZANIE Z POWTARZANIEM
Istnieje możliwość ciągłego odtwarzania jednego lub wszystkich utworów na USB.

Instrukcja Obsługi PL
6
Aby powtarzać odtwarzanie jednego utworu
1.Wciśnij przycisk P-MODE/MEM. na urządzeniu w trakcie odtwarzania, na wyświetlaczu pojawi się logo
„ ”, a obecnie odtwarzany utwór będzie powtarzany do momentu wciśnięcia przycisku
PLAY/PAUSE/PAIR/SCAN.
2.Aby anulować odtwarzanie z powtarzaniem, wciśnij przycisk P-MODE/MEM. do momentu, gdy logo „”
zniknie z wyświetlacza.
Aby powtarzać odtwarzanie wszystkich utworów
1.Wciśnij przycisk P-MODE/MEM. na urządzeniu w trakcie odtwarzania, aż na wyświetlaczu pojawi się logo
„ALL” a wszystkie utwory na USB będą powtarzane do momentu wciśnięcia przycisku
PLAY/PAUSE/PAIR/SCAN.
2.Aby anulować odtwarzanie z powtarzaniem, wciśnij przycisk P-MODE/MEM. do momentu, gdy logo
„ ALL” zniknie z wyświetlacza.
Aby powtarzać odtwarzanie foldera (tylko dla USB zawierającego więcej niż jeden
folder)
1. Wciśnij przycisk P-MODE/MEM. na urządzeniu, aż na wyświetlaczu pojawi się logo „ DIR”, a bieżący
folder będzie powtarzany do momentu ponownego wciśnięcia przycisku PLAY/PAUSE/PAIR/SCAN.
2. Aby anulować odtwarzanie z powtarzaniem, wciśnij przycisk P-MODE/MEM. do momentu, gdy logo
„ DIR” zniknie z wyświetlacza.
ODTWARZANIE LOSOWE
Wciśnij przycisk P-MODE/MEM., gdy urządzenie jest w trybie odtwarzania aż do momentu, gdy na
wyświetlaczu pojawi się napis „RAND” –losowe odtwarzanie rozpocznie się automatycznie od następnego
utworu do momentu odtworzenia wszystkich utworów, po czym urządzenie zatrzyma się. Aby anulować
odtwarzanie losowe, wciśnij przycisk P-MODE/MEM. do momentu, gdy napis „RAND” zniknie z
wyświetlacza.
OBSŁUGA RADIA
STROJENIE STACJI RADIOWYCH
1. Wciśnij przycisk FUNCTION/STANDBY na urządzeniu, aby wybrać tryb pracy radia: FM.
2. Znajdź pożądaną stację za pomocą przycisku /TUN+ lub /TUN-, na wyświetlaczu pokazana
będzie częstotliwość radiowa. Przykład: FM 97,10 MHz.
3. Użyj pokrętła VOLUME w celu zmniejszenia lub zwiększenia głośności.
4. Rozłóż antenę na pełną długość i delikatnie zmień położenie urządzenia w celu uzyskania
najlepszego odbioru lub umieść urządzenie w otwartej przestrzeni.
5. Aby wyłączyć radio, wciśnij klawisz FUNCTION, co spowoduje przełączenie na inne funkcje lub
wyłączenie urządzenia.
AUTOMATYCZNE ZAPAMIĘTYWANIE / WYSZUKIWANIE
Aby wyszukać i automatycznie zapisać stacje radiowe w pamięci urządzenia, wciśnij i przytrzymaj przycisk
PLAY/PAUSE/PAIR/SCAN. Każda stacja o wystarczająco silnym sygnale zostanie zapisana w pamięci. Po
zakończeniu wyszukiwania stacji, urządzenie zostanie automatycznie nastrojone na stację numer 1 (P01).
Aby przestawić na kolejną lub poprzednią zapamiętaną stację, wciśnij przycisk FOLD/10/MEM +/-.
Instrukcja Obsługi PL
7
RĘCZNA OBSŁUGA ZAPAMIĘTANYCH STACJI
Istnieje możliwość zapisania w pamięci 30 wybranych stacji radiowych.
1. Użyj klawisza /TUN+ lub /TUN-, aby wybrać pożądaną stację, którą chcesz zapisać w pamięci.
2. Wciśnij przycisk P-MODE/MEM. –na wyświetlaczu ukaże się „P01” wskazując, że zapisujesz stację w
pamięci pod numerem 01. Aby zmienić kolejność zapisanych stacji, wciśnij przycisk FOLD/10/MEM +/-, a
następnie ponownie przycisk P-MODE/MEM. celem zapisania wyboru.
3. Znajdź kolejną stację, powtórz kroki 1 i 2 do momentu zapisania wszystkich pożądanych stacji.
Zaprogramować można do 30 stacji.
4. Aby przełączyć pomiędzy zapisanymi stacjami, użyj przycisku FOLD/10/MEM +/-.
OBSŁUGA BLUETOOTH
1. Wciśnij klawisz FUNCTION/STANDBY, aby przełączyć na funkcję BLUETOOTH – na wyświetlaczu
pojawi się komunikat „BLUETOOTH” i logo Bluetooth zacznie migać.
2. Włącz funkcję Bluetooth, znajdź urządzenie „SPK5002”i połącz się z nim, następnie jeśli wymagane
jest hasło wpisz 0000, logo Bluetooth będzie się świecić a na wyświetlaczu pojawi się komunikat
„CONNECT” – wskazuje to na udane połączenie. Aby rozpocząć odtwarzanie, wciśnij klawisz Start.
3. Użyj pokrętła VOLUME w celu regulacji głośności lub dostosuj głośność urządzenia zewnętrznego do
pożądanego poziomu.
4. Wciśnij i przytrzymaj przycisk PLAY/PAUSE/PAIR w celu rozłączenia Bluetooth.
Uwaga: Bluetooth działa najlepiej w promieniu 10 metrów.
ODTWARZANIE ZE ŹRÓDEŁ ZEWNĘTRZNYCH (AUX-IN)
1. Wciśnij przycisk FUNCTION/STANDBY na urządzeniu, aby wybrać tryb „AUX”.
2. Podłącz urządzenie audio do gniazda AUX IN znajdującego się na przedniej części urządzenia za
pomocą kabla AUX IN.
3. Użyj pokrętła VOLUME w celu regulacji głośności lub dostosuj głośność urządzenia zewnętrznego do
pożądanego poziomu.
4. Steruj odtwarzaną muzyką na podłączonym urządzeniu audio.
OBSŁUGA MIKROFONU
Wejście mikrofonowe jest dostępne we wszystkich trybach.
1. Podłącz mikrofon do gniazda typu jack 6,3 mm oznaczonego MIC znajdującego się na przedniej części
urządzenia.
2. Użyj pokrętła MIC VOL. w celu zmniejszenia lub zwiększenia głośności mikrofonu.
OBSŁUGA GITARY
Wejście gitary jest dostępne we wszystkich trybach.
1. Podłącz gitarę do gniazda typu jack 6,3 mm oznaczonego Guitar znajdującego się na przedniej części
urządzenia.
2. Użyj pokrętła GUITAR VOL. w celu zmniejszenia lub zwiększenia głośności gitary.

Instrukcja Obsługi PL
8
Uwaga!
Konstrukcja produktu i parametry techniczne mogą ulec zmianie bez
wcześniejszego powiadomienia. Dotyczy to przede wszystkim parametrów
technicznych, oprogramowania oraz podręcznika użytkownika. Niniejszy
podręcznik użytkownika służy ogólnej orientacji dotyczącej obsługi produktu.
Producent i dystrybutor nie ponoszą żadnej odpowiedzialności tytułem
odszkodowania za jakiekolwiek nieścisłości wynikające z błędów w opisach
występujących w niniejszej instrukcji użytkownika.
Prawidłowa utylizacja urządzenia.
To oznaczenie informuje, że produktu nie należy utylizować wraz z
odpadami z gospodarstw domowych w całej Unii Europejskiej. Aby
uniknąć ewentualnych szkód dla środowiska i człowieka
spowodowanych niekontrolowaną utylizacją odpadów, należy
poddawać je odpowiedzialnemu odzyskowi w celu zadbania o
zrównoważone ponowne wykorzystanie surowców materiałowych.
Aby zwrócić wykorzystane urządzenie, należy skorzystać z
odpowiednich systemów zwrotu i zbiórki odpadów lub
skontaktować się ze sprzedawcą urządzenia. W takim punkcie
istnieje możliwość poddania wyrobu odzyskowi w sposób
bezpieczny dla środowiska.

Instrukcja Obsługi PL
9
NAMES OF CONTROLS
1. Bluetooth Logo
2. Power Indicator
3. LCD Display
4. EQ Controls
5. USB Port 2
6. BASS Control
7. TREBLE Control
8. Play/Pause/Pair/Scan Button
9. Next/Fast Forward/TUN- Button
10. BASS ON/OFF Switch
11. FUNCTION/STANDBY Button
12. FOLD./10/MEM.+ Button
13. VOLUME Control
14. 6.3mm MIC Jack 2
15. 6.3mm MIC Jack 1
16. USB Port 2
17. 6.3mm GUITAR Jack
18. 3.5mm AUX IN Jack
19. MIC VOLUME Control
20. MIC ECHO Control
21. Previous/Fast Backward/TUN- Button
22. P-MODE/MEM. Button
23. ON/OFF Switch
24. ID3/LIGHT Button
25. FOLD./10/MEM.- Button
26. GUITAR VOLUME Control
27. SPEAKERS
28. LED Light Cover
29. TWEETERS
30. POWER ON/OFF Switch
31. AC Socket
32. Wheels
33. FM Antenna

Instrukcja Obsługi PL
10
LOCATION OF CONTROLS
1
2
3
4
56
78
910
11 12
13
14
15161718
19
20
21 22
23
24
25 26
27
28
27
28
29
29
30
31
33
32

Instrukcja Obsługi PL
11
POWER SOURCE
This unit works with direct AC.
BASIC FUNCTION
TURNING THE UNIT ON/OFF
After connecting the power, switch the power ON/OFF button on the rear cabinet to turn on the power, then
switch the power button on the front cabinet to turn the unit ON/OFF.
Note: If you don’t use the unit for a long time, switch the power ON/OFF button on the rear cabinet to cut off
the AC power supply or disconnect the AC power cord from the household wall outlets.
NOTE: In USB/ AUX/BT mode when the unit is not providing the main function for 15 minutes, the unit will
automatically switch into standby mode. To turn on the unit again, press FUNCTION/STANDBY button or
replug the unit.
ESD hints –The product maybe reset or not reset to operation of control due to electrostatic discharge, just
switch off and reconnect again.
SETTING THE FUNCTION MODE
To change the function modes, press the FUNCTION/STANDBY button to choose
USB1/USB2/BLUETOOTH/AUX function.
ADJUSTING THE VOLUME
1. Rotate the VOLUME knob on the unit to increase or decrease the music volume.
2. Rotate the GUITAR VOL. knob on the unit to increase or decrease the guitar volume.
3. Rotate the MIC VOL. knob on the unit to increase or decrease the microphone volume.
EQUALIZER (EQ) FUNCTION
This unit has a built-in equalizer system, adjust the EQ bar by five frequencies (100Hz, 330Hz, 1KHz,
3.3KHz, 10KHz) on unit to select a setting that best matches the music style.
BASS ADJUSTMENT
Rotate the BASS knob on unit to increase or decrease the bass effect that best matches the music style.
SUPER BASS: switch the BASS button on to increase to double bass effect.
TREBLE ADJUSTMENT
Rotate the TREBLE knob on unit to increase or decrease the treble effect that best matches the music
style.
MICROPHONE ECHO ADJUSTMENT
Rotate the MIC ECHO knob on unit to increase or decrease the microphone echo effect that best matches
the style.
DISCO LIGHT
There are three modes of the disco light effect, default mode is blue light turn on steadily, the second mode
is blue light flashing to the music beat, the last mode is to turn off the light. Press the ID3/LIGHT button to
choose your desired mode.

Instrukcja Obsługi PL
12
ID3 (show tag) System
Some MP3 files are encoded with information such as the name of the song, the artist, and the album.
Together, this information is called an "ID3 tag".
Press and hold the ID3/LIGHT button on unit to turn the ID3 tag display on or off. When the ID3 tag
display is on, the unit will display tag information in the order shown below.
USB OPERATION
This unit provides two USB port for music playback.
1. Press the FUNCTION/STANDBY button on unit to select “USB1” or “USB2” mode.
2. Connect the USB memory stick to the USB port found on the front of the unit. Playback will start
automatically from Track 1.
3. To pause playback, press the PLAY/PAUSE/PAIR/SCAN button on unit. The current track No. and play
time will show on the display.
4. To resume playback, press the PLAY/PAUSE/PAIR/SCAN button again.
5. To select a desired track, press the /TUN+ or /TUN- button respectively during playing until the
desired track appears on the display. The unit will start play automatically.
6. To search for a particular passage during playback, press and hold the /TUN+ or /TUN- button to
scan the current playing track at high speed until desired point (passage) appears, then release the
button for normal playback mode.
7. To select a song which track number exceeds 10, press the FOLD/10/MEM+ or FOLD/10/MEM- button
each time to skip forward/backward 10 tracks, then press the /TUN+ or /TUN- button to select
desired track.
8. To select a desired folder (if the USB contains more than one folder), press and hold the FOLD/10/MEM+
or FOLD/10/MEM- button each time to skip forward/backward a folder, then press the /TUN+ or /TUN-
button to select desired track.
Important: The USB port is intended for data transfer only, other devices cannot be used with this
USB connection. The use of USB extension cords is not recommended.
REPEAT PLAY
You can play one track or all tracks on the USB repeatedly.
To repeat a Single Track
1. Press P-MODE/MEM. button on unit during play, the display will show a “” logo and the current
track will be played over an over again till you press the PALY/PAUSE/PAIR/SCAN button on unit.
2.To cancel repeat play, press P-MODE/MEM. button on unit until “ ” logo disappears from the display.
To repeat all the Tracks
1. Press P-MODE/MEM. button on unit until the “ ALL”logo shows steadily on the display, all tracks on
the USB will be played over and over again till you press the PALY/PAUSE/PAIR/SCAN button on
unit.
2. To cancel repeat play, press the P-MODE/MEM. button on unit until “ ALL” logo disappears from the
display.

Instrukcja Obsługi PL
13
To repeat the folder (only for USB which contains more than one folder)
1. Press the P-MODE/MEM. button on unit until “DIR”logo show steadily on the display, the
current folder will be repeated over and over again till you press the PALY/PAUSE/PAIR/SCAN
button on unit.
2. To cancel repeat play, press the P-MODE/MEM. button on unit until “ DIR”logo disappears
from the display.
RANDOM PLAY
Press the P-MODE/MEM. button on unit in play mode till the “RAND” shows steadily on the display, the
random play will start from next track automatically, until all tracks are played over and then it will stop.
Press the P-MODE/MEM. button on unit again until the “RAND” disappears from the display to cancel.
RADIO OPERATION
TUNING RADIO STATIONS
1. Press the FUNCTION/STANDBY button on unit to select the radio mode: FM.
2. Tune to desired station by pressing /TUN+ or /TUN- button, the display will show the band
frequency. Example: FM 97.10 MHz.
3. Rotate the VOLUME knob on unit to increase or decrease volume.
4. Extend Pig Tail Antenna to its full length and gently move the unit back and forth to get the best
reception, or place the unit in an open location.
5. To turn off the radio, press the FUNCTION button to switch to other functions or switch off the unit.
AUTO PRESET MEMORY / SCAN
To search for and automatically save stations to preset memory, press and hold the
PLAY/PAUSE/PAIR/SCAN button. Any station with a strong enough signal will be saved to preset memory.
After the unit finishes scanning, the unit will automatically tune to preset station number 1 (P01). To tune to
the next or previous preset station, press FOLD/10/MEM +/- button.
MANUAL PRESET MEMORY OPERATION
You may pre-store 30 radio stations in memory for your preference.
1. Press /TUN+ or /TUN- button to select the desired station that you want to save as a preset.
2. Press the P-MODE/MEM. button on unit, “P01”will flash on the display to indicate that you are saving the
station as preset memory 01, to change the preset memory sequence, press the FOLD/10/MEM +/-
button on unit, then press P-MODE/MEM. button again to enter.
3. Search another station, repeat steps (1) & (2) until all desired stations stored. Up to 30 FM stations can
be programmed.
4. Press the FOLD/10/MEM +/- button to switch between the stored stations.
BLUETOOTH OPERATION
1. Press the FUNCTION/STANDBY button on unit to switch to BLUETOOTH function, the LCD will
display “BLUETOOTH” and the acrylic transparent Bluetooth logo will flash at high speed.
2. Turn on the Bluetooth function on the device, scan the unit “SPK5002”and connect, then input the
password 0000 if required, the acrylic transparent Bluetooth logo keeps light up and the display will

Instrukcja Obsługi PL
14
show “CONNECT” to indicate connection done. Press Play to start playback.
3. Rotate the VOLUME knob on the unit or adjust the volume on the external device to increase or
decrease the music volume to your desired level.
4. Press and hold the PLAY/PAUE/PAIR button to disconnect Bluetooth.
Note: The Bluetooth works best within 10 meters.
AUX-IN OPERATION
1. Press the FUNCTION/STANDBY button on unit to select “AUX” mode.
2. Connect your audio device to the AUX IN jack found on the front of the unit with an AUX IN cable.
3. Rotate the VOLUME knob on the unit or adjust the volume on the external device to increase or
decrease the music volume to your desired level.
4. Control playback with your audio device.
MIC JACK OPERATION
Microphone input is available in all modes.
1. Connect your microphone to the 6.3mm MIC jack found on the front of the unit.
2. Rotate the MIC VOL. knob on the unit to increase or decrease the microphone volume.
GUITAR JACK OPERATION
Guitar input is available in all modes.
1. Connect your guitar to the 6.3mm Guitar jack found on the front of the unit.
2. Rotate the GUITAR VOL. knob on the unit to increase or decrease the guitar volume.

Instrukcja Obsługi PL
15
NAMEN DER STEUERELEMENTE
1. Bluetooth Logo
2. Betriebsanzeige
3. LCD-Anzeige
4. EQ-Steuerung
5. 2. USB-Schnittstelle
6. Bassregler (Tiefenregler)
7. Höhenregler
8. Start-/Pause-/Pairing-/Scan-Schaltfläche (Play/Pause/Pair/Scan)
9. Weiter- / Schnellvorlauf- / TUN-Taste (Next/Fast Forward/TUN)
10. BASS an / BASS aus Taste (BASS ON/OFF)
11. FUNKTIONS- / STANDBY-Taste (FUNCTION/STANDBY)
12. ORDNER / 10 / SPEICHER + (FOLD./10/MEM.+)
13. Lautstärkeregler (VOLUME)
14. 2. Buchse MIKROFON (MIC), Jack 6,3 mm
15. 1. Buchse MIKROFON (MIC), Jack 6,3 mm
16. 2. USB-Schnittstelle
17. 2. Buchse GITARRE (GUITAR), Jack 6,3 mm
18. AUX IN Buchse, Jack 3,5 mm
19. Mikrofon-Lautstärkeregler (MIC VOLUME)
20. Mikrofon-Echolautstärkeregler (MIC ECHO)
21. Zurück- / Rückspul- / TUN-Taste (Previous/Fast Backward/TUN)
22. P-MODE- / MEM-Taste (P-MODE/MEM.)
23. Ein-/Ausschalter (ON/OFF)
24. ID3- / LICHT-Taste (ID3/LIGHT)
25. ORDNER / 10 / SPEICHER + (FOLD./10/MEM.+)
26. Gitarre-Lautstärkeregler (GUITAR VOLUME)
27. LAUTSPRECHER
28. LED-Lichtabdeckung
29. Hochtonlautsprecher
30. EIN-/ AUSSCHALTER (POWER ON/OFF)
31. AC-Buchse
32. Räder
33. FM-Antenne

Instrukcja Obsługi PL
16
ANBRINGUNG DER BEDIENUNGSELEMENTE
1
2
3
4
56
78
910
11 12
13
14
15161718
19
20
21 22
23
24
25 26
27
28
27
28
29
29
30
31
33
32

Instrukcja Obsługi PL
17
VERSORGUNGSQUELLE
Das Gerät arbeitet mit direkter Wechselstromversorgung.
GRUNDFUNKTIONEN
GERÄT EIN-/AUSSCHALTEN
An Stromversorgung anschließen, EIN-/AUSSCHALTER an der Rückwand verschieben, damit das
Gerät mit Strom eingespeist wird, anschließend Betriebstaste an der Vorderseite umschalten und das
Gerät in Betrieb setzen.
Achtung: Wenn das Gerät längere Zeit über nicht benutzt wird, Gerät mit dem Schalter an der Rückwand
von der Versorgung trennen oder Netzkabelstecker aus der Netzanschlussbuchse oder der Wandsteckdose
ziehen.
ACHTUNG: Wenn das Gerät im USB / AUX / BT-Modus über 15 Minuten lang inaktiv ist, schaltet es
automatisch in den Standby-Modus um. Das Gerät kann mit der FUNKTIONS- / STANDBY-Taste oder
Wiederanschluss an Stromversorgung erneut eingeschaltet werden.
ACHTUNG! Gerät empfindlich gegen elektrostatische Entladungen – bei zu hoher Konzentration
elektrostatischer Ladungen muss das Gerät zurückgesetzt werden; zu diesem Zweck ist es von der
Netzversorgung zu trennen und wieder anzuschließen.
EINSTELLUNG DES FUNKTIONSMODUS
Die Taste FUNKTION / STANDBY betätigen, um Funktion auf USB1/USB2/BLUETOOTH/AUX zu ändern.
LAUTSTÄRKE EINSTELLEN
1. Lautstärke der Audiowiedergabe mit dem Drehknopf VOLUME lauter oder leiser schalten.
2. Mit dem Drehknopf GUITAR VOL. Gitarren-Lautstärke lauter oder leiser schalten.
3. Mit dem Drehknopf MIC VOL. Mikrofon-Lautstärke lauter oder leiser schalten.
EQUALIZER-FUNKTION (EQ)
Das Gerät hat ein integriertes Equalizer-System, mit dem fünf Frequenzbereiche (100Hz, 330Hz, 1KHz,
3,3KHz, 10KHz) je nach gewähltem Musikstil entsprechend korrigiert werden können.
ANPASSUNG VON BASS
Mit dem Drehknopf BASS kann man den Bass je nach gewähltem Musikstil verstärken oder senken.
SUPER BASS: Taste BASS für doppelte Bass-Verstärkung betätigen.
ANPASSUNG VON HÖHEN
Mit dem Drehknopf TREBLE kann man die Höhen je nach gewähltem Musikstil verstärken oder senken.
ANPASSUNG DER MIKROFON-ECHOEINSTELLUNGEN
Mit dem Drehknopf MIC ECHO kann man den Echo-Effekt je nach gewähltem Musikstil verstärken oder
senken.
DISCO-LICHT
Das Disco-Licht gibt es in drei Modi: Standardmodus - blaues Dauerlicht, zweiter Modus: blaues, zum Takt
der Musik pulsierendes Licht, letzter Modus: kein Licht. Gewünschten Modus mit ID3 / LIGHT wählen.

Instrukcja Obsługi PL
18
ID3-tag-Anzeige
Bei manchen MP3's wurden Informationen zum Titel, Künstler und Album eincodiert. Diese Informationen
werden als „ID3-Tags” bezeichnet.
Taste ID3/LIGHT drücken und festhalten, sodass die ID3-tag-Anzeige ein- oder ausgeschaltet wird. Ist die
ID3-tag-Anzeige an, wird das Gerät die Informationen in angegebener Reihenfolge anzeigen.
TITEL -> KÜNSTLER -> ALBUM -> ID3 AUS
USB
Das Gerät besitzt zwei Schnittstellen zur Musikwiedergabe von einem USB-Medium.
1. Funktions-/STANDBY-Taste am Gerät drücken und Modus „USB1” oder „USB2” auswählen.
2. USB-Medium an der Schnittstelle an der Gerätvorderseite anschließen. Die Musikwiedergabe wird vom
ersten Titel automatisch gestartet.
3. Wiedergabe mit der Taste PLAY/PAUSE/PAIR/SCAN stoppen. An der Anzeige erscheint die Nummer
und Spielzeit des gerade gespielten Titels.
4. Wiedergabe mit der Taste PLAY/PAUSE/PAIR/SCAN fortsetzen.
5. Titel mit /TUN+ oder /TUN- während der Widergabe drücken bis das gewünschte Track gespielt
wird. Die Wiedergabe startet automatisch.
6. Um das gewünschte Fragment während der Wiedergabe zu finden, Taste /TUN+ oder /TUN-
drücken und festhalten, sodass bis zum gewünschten Fragment vorgespult wird, anschließend Taste
loslassen.
7. Um einen Titel mit der Nummer höher als 10, auszuwählen, Taste FOLD/10/MEM+ oder FOLD/10/MEM-
drücken, sodass die Titel um 10 vorgespult/zurückgespult werden, anschließend /TUN+ oder /TUN-
drücken und gewünschten Titel auswählen.
8. Um einen Folder auszuwählen (wenn auf dem USB mehr als ein Ordner vorhanden ist), Taste
FOLD/10/MEM+ oder FOLD/10/MEM- drücken und festhalten,sodass zum nächsten/vorherigen Ordner
übergegangen wird, anschließend Taste /TUN+ oder /TUN- drücken und gewünschten Titel
auswählen.
Wichtig: Die USB-Schnittstelle dient ausschließlich der Datenübertragung; an der USB-Schnittstelle
dürfen keine anderen Geräte angeschlossen werden. Keinen UBS-Verlängerungskabel benutzen.
AUTOMATISCHE WIEDERHOLUNG
Es besteht die Möglichkeit einen oder alle auf dem USB abgespeicherten Titel automatisch abzuspielen.
Einen Titel wiederholen
1. Während der Wiedergabe Taste P-MODE/MEM. am Gerät drücken, an der Anzeige erscheint „ ”
und der aktuell abgespielte Titel wird solange wiederholt bis die Taste PLAY/PAUSE/PAIR/SCAN
betätigt wird.
2.Zum Ausschalten der Wiederholfunktion Taste P-MODE/MEM. drücken bis das Logo „ ” von der
Anzeige gelöscht wird.
Alle Titel wiederholen
1. Während der Wiedergabe Taste P-MODE/MEM. am Gerät drücken, an der Anzeige erscheint
„ ALL” und alle Titel auf dem USB werden solange wiederholt bis die Taste
PLAY/PAUSE/PAIR/SCAN betätigt wird.

Instrukcja Obsługi PL
19
1. Zum Ausschalten der Wiederholfunktion Taste P-MODE/MEM. drücken bis das Logo „ ALL” von der
Anzeige gelöscht wird.
Ordner wiederholen (nur wenn auf dem USB mehr als ein Ordner abgespeichert ist)
1. Taste P-MODE/MEM. am Gerät drücken bis das Logo „ DIR” erscheint, der Ordner wird bis
zum erneuten Betätigen der Taste PLAY/PAUSE/PAIR/SCAN wiederholt abgespielt.
2. Zum Ausschalten der Wiederholfunktion Taste P-MODE/MEM. drücken bis das Logo „ DIR” von der
Anzeige gelöscht wird.
ZUFALLSWIEDERGABE
Wenn das Gerät sich im Wiedergabemodus befindet Taste P-MODE/MEM. drücken bis auf der Anzeige
„RAND” erscheint – die Zufallswiedergabe startet beim nächsten Titel automatisch und läuft solange bis alle
Titel abgespielt wurden, danach hält das Gerät an. Zum Ausschalten der Zufallswiedergabe Taste P-
MODE/MEM. drücken bis das Logo „RAND” von der Anzeige gelöscht wird.
RADIO
SENDER EINSTELLEN
1. Funktions-/STANDBY-Taste am Gerät drücken und Betriebsmodus auswählen: FM.
2. Gewünschten Sender mit /TUN+ oder /TUN- aussuchen, in der Anzeige erscheint die
Senderfrequenz. Beispiel: FM 97,10 MHz.
3. Lautstärke der Audiowiedergabe mit dem Drehknopf VOLUME lauter oder leiser schalten.
4. Antenne ganz in die Länge schieben und das Gerät für besseren Empfang leicht verschieben oder im
offenen Raum stellen.
5. Radio mit der Taste FUNCTION abschalten, dadurch werden andere Funktionen betätigt oder das
Gerät abgeschaltet.
AUTOMATISCHE SPEICHERUNG / SCAN
Die Taste PLAY/PAUSE/PAIR/SCAN drücken und festhalten, um Sender auszusuchen und automatisch zu
speichern. Jeder Sender mit entsprechend starken Signal wird gespeichert. Nachdem die Sendersuche
abgeschlossen wird, wird das Gerät automatisch auf den Sender 1 (P01) abgestimmt. Den nächsten oder
vorherigen gespeicherten Sender mit der Taste FOLD/10/MEM +/- aufrufen.
MANUELLE BEDIENUNG GESPEICHERTER SENDER
Im Gerät können 30 gewählte Sender abgespeichert werden.
1. Mit der Taste /TUN+ oder /TUN- gewünschten Sender wählen und speichern.
2. Taste P-MODE/MEM.drücken –in der Anzeige erscheint „P01” - der Sender wird unter 01
abgespeichert. Die Reihenfolge abgespeicherter Sender wird mit der Taste FOLD/10/MEM +/-, und
anschließend durch Tastendruck P-MODE/MEM. geändert.
3. Nächsten Sender suchen, Schritte 1 und 2 wiederholen, bis alle gewünschten Sender gespeichert
worden sind. Im Gerät können 30 Sender gespeichert werden.
4. Mit der Taste FOLD/10/MEM +/- kann zwischen gespeicherten Sendern geschaltet werden.
BLUETOOTH
1. Taste FUNCTION/STANDBY drücken, um die BLUETOOTH-Funktion zu aktivieren –in der
Anzeige erscheint „BLUETOOTH” und das Bluetooth-Logo beginnt zu blinken.

Instrukcja Obsługi PL
20
2. Bluetooth einschalten, Gerät „SPK5002”suchen und Verbindung herstellen, sollte ein Passwort
notwendig sein, 0000 eingeben, das Bluetooth-Logo leuchtet auf, wenn in der Anzeige erscheint
„CONNECT” erscheint, war die Verbindung erfolgreich. Wiedergabe mit der Taste Start beginnen.
3. Mit dem Drehknopf VOLUME Lautstärke einstellen oder die Lautstärke des externen Gerätes auf
gewünschten Pegel einstellen.
4. Taste PLAY/PAUSE/PAIR drücken und festhalten, um die Bluetooth-Verbindung aufzulösen.
Achtung: Die Bluetooth-Funktion ist am effizientesten im Abstand von max. 10 m.
WIEDERGABE AUS EXTERNEN QUELLEN (AUX-IN)
5. Funktions-/STANDBY-Taste am Gerät drücken und „AUX”-Modus auswählen.
6. Gerät an AUX IN-Buchse an der Gerätvorderseite mit einem AUX IN-Kabel anschließen.
7. Mit dem Drehknopf VOLUME Lautstärke einstellen oder die Lautstärke des externen Gerätes auf
gewünschten Pegel einstellen.
8. Musik-Wiedergabe mit dem angeschlossenen Audiogerät steuern.
MIKROFON
Der Mikrofon-Anschluss ist in allen Modi verfügbar.
3. Mikrofon an die mit MIC gekennzeichnete Jack-Buchse 6,3 mm an der Gerätvorderseite anschließen.
4. Mikrofon-Lautstärke mit dem Drehknopf MIC VOL. lauter oder leiser schalten.
GITARRE
Der Gitarren-Anschluss ist in allen Modi verfügbar.
1. Gitarre an die mit Guitar gekennzeichnete Jack-Buchse 6,3 mm an der Gerätvorderseite anschließen.
2. Mit dem Drehknopf GUITAR VOL. Gitarren-Lautstärke lauter oder leiser schalten.
Table of contents
Languages:
Other Manta Speakers manuals

Manta
Manta SPK11GO User manual

Manta
Manta SPK516 User manual

Manta
Manta PA6528D User manual

Manta
Manta MM290 User manual

Manta
Manta SPK204FM User manual

Manta
Manta SoundStage MM5400 User manual

Manta
Manta SPK216 User manual

Manta
Manta SPK95008 User manual

Manta
Manta SPK1001 User manual

Manta
Manta SPK418 User manual

Manta
Manta SPK614 User manual

Manta
Manta SPK903 User manual

Manta
Manta SPK202 User manual

Manta
Manta PHANTOM SPK5450 User manual

Manta
Manta SPK95019 User manual

Manta
Manta SPK5025 NIKE User manual

Manta
Manta SPK901 User manual

Manta
Manta SPK207 User manual

Manta
Manta SPK5020 User manual

Manta
Manta SPK421 User manual