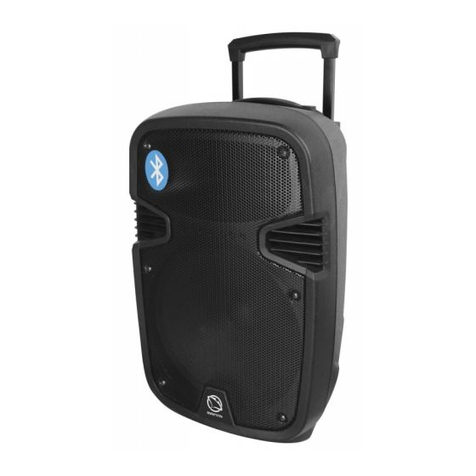
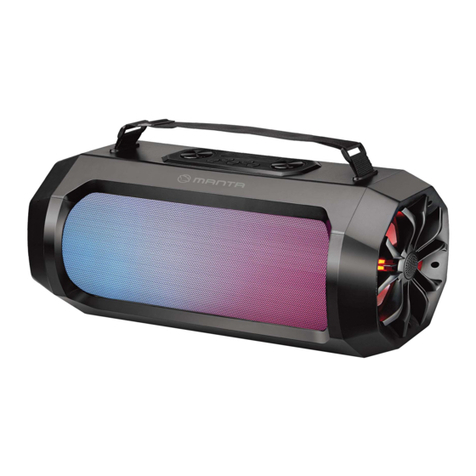
Manta SPK614 User manual

SPK614
Bluetooth Speaker
INSTRUKCJA OBSŁUGI
USER’S MANUAL
MANUAL DE USUARIO
MANUAL DE USUÁRIO
BEDIENUNGSANLEITUNG


PL – SPK614
1
INFORMACJE DOTYCZĄCE BEZPIECZEŃSTWA I OSTRZEŻENIA
DEFINICJE SYMBOLI
NIEBEZPIECZEŃSTWO – Oznacza wystąpienie ryzykownej sytuacji, która – jeśli nie uniknie się jej – może
doprowadzić do śmierci lub poważnych obrażeń, jeśli jej się nie uniknie. Ten symbol pojawia się tylko w skrajnych
przypadkach.
OSTRZEŻENIE – Oznacza potencjalnie ryzykowną sytuację, która może doprowadzić do śmierci lub poważnych
obrażeń.
UWAGA – Oznacza potencjalnie ryzykowną sytuację, która – jeśli nie uniknie się jej – może doprowadzić do lekkich/
umiarkowanych obrażeń lub uszkodzić produkt/mienie. Ostrzega również przed niebezpiecznymi działaniami.
Błyskawica zakończona strzałką w trójkącie równobocznym ma za zadanie ostrzec użytkownika
o izolowanych elementach we wnętrzu urządzenia, pod napięciem wystarczająco wysokim, by
stanowić ryzyko porażenia elektrycznego dla ludzi.
OSTRZEŻENIE: W CELU ZMINIMALIZOWANIA RYZYKA PORAŻENIA ELEKTRYCZNEGO, NIE USUWAJ
POKRYWY (LUB TYLNEJ OBUDOWY). WEWNĄTRZ NIE MA ELEMENTÓW PODLEGAJĄCYCH
KONSERWACJI PRZEZ UŻYTKOWNIKA. NAPRAWY ZLECAJ WYKWALIFIKOWANEMU PERSONELOWI.
Wykrzyknik w trójkącie równobocznym ma za zadanie poinformować użytkownika o istotnych
pouczeniach dotyczących użytkowania i konserwacji (napraw), zawartych w niniejszej instrukcji.
ZAPOZNAJ SIĘ Z CAŁĄ INSTRUKCJĄ PRZED UŻYCIEM URZĄDZENIA
Zawsze postępuj zgodnie z podstawowymi środkami ostrożności podczas korzystania z niniejszego systemu
głośników Bluetooth z Mikrofonem, zwłaszcza w obecności dzieci.
UWAGI DOTYCZĄCE BEZPIECZEŃSTWA
1. Przeczytaj niniejszą Instrukcję Obsługi przed przystąpieniem do podłączenia bądź użytkowania urządzenia.
2. Utrzymuj instrukcję w dobrym stanie. Przestrzegaj wszystkich ostrzeżeń. Postępuj zgodnie z zaleceniami.
3. Zachowaj instrukcję, na wypadek gdyby w przyszłości wystąpiła potrzeba odniesienia się do jej treści.
4. Urządzenie nie powinno być narażone na zalanie i zachlapanie, należy unikać stawiania na nim naczyń
zawierających płyny, na przykład wazonów. Używaj jedynie w suchych miejscach.
5. Źródła otwartego ognia, takie jak świece, nie mogą być stawiane na urządzeniu.
6. Należy dopilnować, aby dzieci nie wykorzystywały urządzenia do zabawy.
7. Nie należy utrudniać wentylacji przez zasłanianie otworów wentylacyjnych.
8. Upewnij się, że urządzenie jest podłączone do gniazda zasilającego o parametrach: AC 100-240 V 60/50 Hz.
Użycie wyższego napięcia może doprowadzić do niewłaściwej pracy urządzenia lub pożaru. Wyłącz urządzenie
przed odłączeniem go od sieci, w celu całkowitego wyłączenia go.
9. Nie podłączaj/odłączaj kabla zasilającego do/od gniazda mokrymi dłońmi.
10. Jeśli wtyczka nie pasuje do twojego gniazda, nie wciskaj jej na siłę.
11. Używaj części zapasowych wskazanych przez producenta.
12. Zamontuj urządzenie zgodnie z instrukcjami producenta.
13. Umieść urządzenie w przewiewnym miejscu. Rozstaw system na płaskiej, twardej i stabilnej powierzchni. Nie
narażaj go na działanie temperatur powyżej 40°C. Zadbaj o zachowanie odległości przynajmniej 30 cm od tylnej
i górnej części urządzenia, oraz 5 cm z ze wszystkich pozostałych stron.
14. Naciskaj przyciski urządzenia delikatnie. Naciskanie ich zbyt mocno może uszkodzić urządzenie.
PL – SPK614
2
15. Utylizuj zużyte baterie w sposób bezpieczny dla środowiska.
16. Przed przesuwaniem lub czyszczeniem, zawsze upewnij się, że urządzenie jest odłączone od sieci elektrycznej.
Czyść wyłącznie na sucho.
17. W czasie burzy lub w wypadku dłuższej przerwy w użyciu, urządzenie należy odłączyć od prądu.
18. Niniejsze urządzenie nie posiada elementów podlegających konserwacji przez użytkownika. Nie podejmuj
się naprawy urządzenia. Jedynie wykwalifikowany personel może dokonywać napraw. Zabierz produkt do
wybranego punktu serwisowego urządzeń elektrycznych w celu dokonania przeglądu i naprawy.
19. NIGDY nie pozwól nikomu, w szczególności dzieciom, wkładać czegokolwiek do dziur, gniazdek i wszelkich
innych otworów w obudowie urządzenia, ponieważ grozi to śmiertelnym porażeniem elektrycznym.
20. Nie zawieszaj produktu na ścianie lub suficie.
21. Nie stawiaj go w pobliżu telewizorów, głośników i innych urządzeń generujących silne pole magnetyczne.
22. Nie pozostawiaj urządzenia bez nadzoru, kiedy jest używane.
UWAGA: Aby całkowicie odłączyć system, gdy nie będzie używany przez dłuższy czas, wyjmij wtyczkę
z kontaktu.
PORADNIK OBSŁUGI URZĄDZENIA
1. PRZYCISK KOREKTOR/TRYB P
2. PRZYCISK /-10/TUN.-
3. PRZYCISK /+10/TUN.+
4. PRZYCISK /BT/SCAN
5. PRZYCISK ZMNIEJSZAJĄCY POZIOM
GŁOŚNOŚCI
6. PRZYCISK ZWIĘKSZAJĄCY POZIOM GŁOŚNOŚCI
7. PRZYCISK FUNKCJA/ /Oświetlenie
8. GŁOŚNIKI
9. WEJŚCIE AUX
10. GNIAZDO USB
11. GNIAZDO ŁADOWANIA USB
12. POKRYWA GNIAZDA USB
13. WSKAŹNIK PAROWANIA
14. WSKAŹNIK POZIOMU NAŁADOWANIA
15. WYŚWIETLACZ LCD
16. UCHWYT
17. GŁOŚNIKI PASYWNE
18. GNIAZDO ZASILAJĄCE
19. PRZYCISK WŁĄCZ/WYŁĄCZ
20. POKRYWA GNIAZDA ZASILAJĄCEGO

PL – SPK614
3
PIERWSZE KROKI
ŹRÓDŁO ZASILANIA
Urządzenie jest zasilane akumulatorem kwasowo-ołowiowym (pojemność akumulatora to 4000 mAh). Naładuj
urządzenie do końca, zanim użyjesz go po raz pierwszy. Odłącz kabel zasilający od gniazda, aby używać urządzenia
z naładowanym w pełni akumulatorem. Podłączenie kabla zasilającego inicjuje ładowanie akumulatora. Wskaźnik
LED świeci na czerwono podczas ładowania; gdy akumulator jest naładowany, wskaźnik zmienia kolor na zielony.
Gdy poziom mocy akumulatora będzie niski, wskaźnik LED zabłyśnie na czerwono.
Ostrzeżenie: Nie wymieniaj akumulatora; jedynie wysoko wykwalifikowany personel może dokonać tej operacji.
INSTRUKCJA OBSŁUGI
FUNKCJE PODSTAWOWE
WŁĄCZANIE/WYŁĄCZANIE URZĄDZENIA
Naciśnij przycisk WŁĄCZ/WYŁĄCZ, aby włączyć/wyłączyć urządzenie.
UWAGA: W trybie USB/Bluetooth/AUX, gdy urządzenie nie jest używane dłużej niż 15 minut, automatycznie
przejdzie w tryb czuwania. Naciśnij przycisk FUNKCJA/ /Oświetlenie, aby uruchomić urządzenie ponownie.
Pamiętaj, że ustawienie niskiego poziomu dźwięku w źródle sygnału audio może zostać rozpoznane jako „brak
sygnału audio”; wpłynie to na zdolność urządzenia do wykrywania sygnału i również może spowodować przejście
w tryb czuwania. Jeśli do tego dojdzie, uruchom ponownie źródło transmisji sygnału audio albo zwiększ głośność
źródła sygnału w celu wznowienia odtwarzania.
Wyładowania Elektrostatyczne – Urządzenie może uruchomić się ponownie lub całkiem wyłączyć z powodu
wyładowań elektrostatycznych; wyłącz je wówczas i uruchom ponownie.
USTAWIENIE TRYBU PRACY
Aby zmienić tryb pracy, naciśnij kilkakrotnie przycisk FUNKCJA/ /Oświetlenie, w celu wybrania pomiędzy
funkcją USB/BT/AUX/Radio.
REGULACJA POZIOMU DŹWIĘKU
Naciśnij przycisk lub , aby zwiększyć lub zmniejszyć poziom głośności.
FUNKCJA KOREKCJI DŹWIĘKU
Urządzenie posiada wbudowany system korekcji dźwięku, Naciśnij przycisk KOREKTOR/TRYB P na urządzeniu, aby
wybrać ustawienie najlepiej dopasowane do odtwarzanej muzyki: FLAT, POP, CLASSIC, JAZZ i ROCK
EFEKTY ŚWIETLNE
Jest 5 efektów oświetlenia DISCO LED. Naciśnij i przytrzymaj przycisk OŚWIETLENIE, aby wybrać odpowiedni efekt.
L-1: W trybie zwykłym, niebieska dioda LED będzie stale włączona po dokonaniu wyboru.
L-2: Niebieska dioda LED będzie migała.
L-3: Czerwona dioda LED będzie stale włączona.
L-4: Czerwona dioda LED będzie migała.
L-5: 7 kolorów diod LED będzie migało.
Naciśnij jeszcze jeden raz, aby wyłączyć.
Podłużny pasek świetlny będzie świecił na niebiesko/czerwono w trybie stałego oświetlenia LED; pasek będzie
migał w trybie migania LED.

PL – SPK614
4
FUNKCJA RADIA FM
STROJENIA RADIA FM
1. Przyciśnij przycisk FUNCTION/ /LIGHT aby wybrać funkcję Radia FM.
2. Przyciśnij przycisk /+10/TUN.+ lub /-10/TUN.- aby wybrać oczekiwane częstotliwości, częstotliwości pojawią
się na wyświetlaczy urządzenia. Jeżeli odbierany będzie sygnał stereo na wyświetlaczy pojawi się hasło ST.
3. Przyciśnij lub aby dopasować poziom głośności do oczekiwanego.
4. Rozwiń antenę radia do jej pełnej długości i poprowadź z dala od innych urządzeń elektrycznych. Zapewni to
lepszy odbiór.
AUTOMATYCZNE STROJENIE
W celu automatycznego strojenia i zapisania stacji radiowych przyciśnij i przytrzymaj przycisk /BT/SCAN. Każda
odnaleziona przez urządzenie stacja o mocnym sygnale zostanie zapisana w pamięci urządzenia. Po zakończonym
skanowaniu całego pasma urządzenia zapisze stacje na kolejnych miejscach zaczynając od nr. 1.
RĘCZNE STROJENIE
Można ustawić stacje radiowe ręcznie na dowolnych miejscach, w dowolnej kolejności.
1. Przyciśnij /+10/TUN.+ lub /-10/TUN.- aby wybrać stację i zapisać w pamięci urządzenia.
2. Przyciśnij i przytrzymaj EQ/P-MODE, “P01” zacznie mrugać na wyświetlaczu aby pokazać kolejność –
miejsce proponowanego zapisu stacji. Aby zmienić miejsce zapisu przyciśnij i przytrzymaj /+10/TUN.+
lub /-10/TUN.-
3. W celu zapisania kolejnej stacji należy powtorzyć kroki 1 i 2. Możliwe jest zapisanie 30 stacji.
ŁADOWANIE USB
Niniejsze urządzenie posiada port ładowania 5V 1A USB do ładowania smartfonów. Podłącz kabel USB smartfonu
do portu ŁADOWANIA USB w celu naładowania.
OBSŁUGA USB
Niniejsze urządzenie posiada port USB do odtwarzania muzyki.
1. Naciśnij przycisk FUNKCJA/ /Oświetlenie na urządzeniu, aby wybrać tryb USB.
2. Podłącz pamięć USB do wejścia USB w górnej części urządzenia. Odtwarzanie rozpocznie się automatycznie od
pierwszego utworu.
3. Aby zatrzymać odtwarzanie, naciśnij przycisk /BT/SCAN na urządzeniu. Czas odtwarzania zacznie migać
na wyświetlaczu.
4. Aby wznowić odtwarzanie, ponownie naciśnij przycisk /BT/SCAN na urządzeniu.
5. Aby wybrać konkretny utwór, naciskaj przycisk /+10/TUN.+ lub
/10/TUN.
podczas odtwarzania, aż
poszukiwany utwór pojawi się na wyświetlaczu. Urządzenia automatycznie go odtworzy.
6. Aby przejść do konkretnego miejsca utworu podczas odtwarzania, naciśnij i przytrzymaj przycisk
lub , aby przewinąć aktualny utwór ze zwiększoną prędkością, aż dotrzesz do
poszukiwanego miejsca utworu; puść przycisk, żeby powrócić do normalnego trybu odtwarzania.
7. Aby wybrać utwór o numerze wyższym niż 10, naciśnij przycisk /BT/SCAN, by wstrzymać odtwarzanie, a
następnie naciśnij i przytrzymaj przycisk /+10 lub /-10, aby przeskoczyć o 10 utworów w przód lub w tył.
Ważne: Wejście USB służy jedynie do transferu danych; inne urządzenia nie mogą być używane przez
połączenie USB. Użycie przedłużaczy USB nie jest zalecane. Nie odłączaj urządzenia USB podczas
odtwarzania lub odczytywania pamięci.
/+10/TUN.+
/-10/TUN.-

PL – SPK614
5
POWTARZANIE
Możesz powtarzać odtwarzanie jednego utworu lub wszystkich utworów z pamięci USB.
Aby Powtarzać Pojedynczy Utwór
1. Naciśnij i przytrzymaj przycisk KOREKTOR/TRYB P na urządzeniu podczas odtwarzania, a wyświetlacz
pokaże„ ”i aktualnie odtwarzany utwór będzie powtarzany.
2. Aby anulować powtarzanie, naciśnij i przytrzymaj przycisk KOREKTOR/TRYB P na urządzeniu, aż „ ” zniknie
z wyświetlacza.
Aby powtarzać wszystkie Utwory
1. Naciśnij i przytrzymaj przycisk KOREKTOR/TRYB P na urządzeniu, aż „ ” będzie stale widoczny na
wyświetlaczu; wszystkie utwory z pamięci USB będą powtarzane.
2. Aby anulować powtarzanie, naciśnij i przytrzymaj przycisk KOREKTOR/TRYB P na urządzeniu, aż„ ”zniknie
z wyświetlacza.
Aby powtarzać folder (jedynie w przypadku pamięci USB zawierającej więcej niż jeden folder)
1. Naciśnij i przytrzymaj przycisk KOREKTOR/TRYB P na urządzeniu, aż napis„ FOLDER”będzie stale widoczny
na wyświetlaczu; wszystkie utwory z aktualnie używanego folderu będą powtarzane.
2. Aby anulować powtarzanie, naciśnij i przytrzymaj przycisk KOREKTOR/TRYB P na urządzeniu, aż napis „
FOLDER”zniknie z wyświetlacza.
ODTWARZANIE LOSOWE
Podczas odtwarzania, naciśnij i przytrzymaj przycisk KOREKTOR/TRYB P na urządzeniu, aż napis „RAND” będzie
stale widoczny na wyświetlaczu; od następnego utworu, odtwarzanie będzie losowe. Naciśnij ponownie przycisk
KOREKTOR/TRYB P na urządzeniu, aż napis„RAND”zniknie z wyświetlacza, aby anulować.
OBSŁUGA BLUETOOTH
1. Naciśnij przycisk FUNKCJA/OŚWIETLENIE na urządzeniu, aby przejść do trybu BLUETOOTH, wyświetlacz
pokaże„bt”a wskaźnik parowania zacznie szybko migać.
2. Włącz tryb Bluetooth, znajdź urządzenie o nazwie„SPK614”i połącz się z nim, następnie wpisz hasło 0000, jeśli
będzie wymagane; wskaźnik parowania będzie świecił po udanym połączeniu, a wyświetlacz będzie pokazywał
„bt”. Naciśnij Play, aby rozpocząć odtwarzanie.
3. Naciśnij przycisk lub na urządzeniu lub dopasuj głośność na urządzeniu zewnętrznym, aby zwiększyć lub
zmniejszyć głośność do wymaganego poziomu.
4. Naciśnij i przytrzymaj przycisk ODTWARZANIE/WSTRZYMANIE/BT, aby wyłączyć Bluetooth.
Uwaga: Bluetooth działa najlepiej w zasięgu 10 metrów na otwartej przestrzeni.
OBSŁUGA WEJŚCIA AUX
1. Naciśnij przycisk FUNKCJA/OŚWIETLENIE na urządzeniu, aby wybrać tryb„AUX”.
2. Podłącz swoje urządzenie audio kablem AUX do wejścia AUX w górnym panelu urządzenia (kabel audio nie jest
dołączony do zestawu)
3. Naciśnij przycisk lub na urządzeniu lub dopasuj głośność na urządzeniu zewnętrznym, aby zwiększyć lub
zmniejszyć głośność do wymaganego poziomu.
4. Steruj odtwarzaniem przy pomocy swojego urządzenia zewnętrznego.

PL – SPK614
6
SPECYFIKACJA TECHNICZNA
OGÓLNA
Wymagane zasilanie AC100-240V~60/50Hz
Pobór energii 35W
Akumulator 12V 4,0Ah kwasowo-ołowiowy
Moc wyjściowa 25W X 2 (RMS)
Wejście AUX 3,5 mm
Temperatura pracy +5°C – +35°C
BLUETOOTH
System komunikacji Standard Bluetooth wersja 2.1+EDR
Zasięg odbioru 10 metrów (przy braku przeszkód)
Kompatybilne profile Bluetooth Akumulator Advanced Audio Distribution Profile (A2DP)
AKCESORIA
Instrukcja Obsługi x 1szt.
Kabel zasilający x 1szt.
Uwaga:W celu ich ciągłego ulepszania, specyfikacje podlegają zmianom bez uprzedniej informacji o ich
wprowadzeniu.
Częstotliwość FM 87.5-108 MHz

EN – SPK614
7
SAFETY INFORMATION AND WARNINGS
SYMBOL DEFINITIONS
DANGER – Indicates an imminently hazardous situation, which, if not avoided, will result in death or serious injury.
This symbol appears only in the most extreme situations.
WARNING – Indicates a potentially hazardous situation which could result in death or serious injury.
CAUTION – Indicates a potentially hazardous situation, which, if not avoided, may result in minor/moderate injury
or product/property/damage. It also warns against unsafe practices
The lightning flash with arrowhead symbol, within an equilateral triangle is intended to alert the
user to the presence of insulated ‘dangerous voltage’ within the product’s enclosure that may be of
sufficient magnitude to constitute a risk of electric shock to persons.
WARNING: TO REDUCE THE RISK OF ELECTRIC SHOCK DO NOT REMOVE COVER (OR BACK), NO USER
SERVICEABLE PARTS INSIDE REFER SERVICING TO QUALIFIED SERVICE PERSONNEL
The exclamation point within an equilateral triangle is intended to alert the user to the presence of
important operating and maintenance (servicing) instructions in the literature accompanying the
appliance.
READ ALL INSTRUCTIONS BEFORE USE
Always follow basic safety precautions when using this Bluetooth speaker system with Microphone, especially
when children are present.
SAFETY INSTRUCTIONS
1. Read this Instruction Manual before you attempt to connect or operate the appliance.
2. Keep these instructions in good condition. Heed all warnings. Follow all instructions.
3. Save this Instruction Manual for future reference.
4. The apparatus shall not be exposed to dripping or splashing and no objects filled with liquids, such as vases, shall
be placed on the product. Dry location use only.v
5. No naked flame source, such as candles, should be placed on the product.
6. Children should be supervised to ensure that they do not play with the appliance.
7. Ventilation should not be impeded by covering the ventilation openings.
8. Ensure that the unit is plugged into an AC 100-240V 60/50Hz power outlet. Using higher voltage may cause the
unit to malfunction or even fire catching. Turn off the unit before unplugging it from power source to completely
switch it off.
9. Do not plug/ unplug the power plug into/from an electrical outlet with wet hands.
10. If the power plug does not fit into your outlet, do not force the plug into an electrical socket if it does not fit.
11. Use replacement parts, which are specified by the manufacturer.
12. Install the unit in accordance with the manufacturer’s instructions.
13. Place the unit where there is good ventilation. Place the system on a flat, hard and stable surface. Do not expose
to temperatures above 40°C. Allow at least 30 cm clearance from the rear and the top of the unit and 5 cm from
each side.
14. Press the buttons of the unit gently. Pressing them too hard can damage the unit.
15. Dispose of used batteries in an environmental-responsible manner.

EN – SPK614
8
16. Always ensure that the product is unplugged from the electrical outlet before moving or cleaning. Clean it with
dry cloth only.
17. Unplug the product during lightning, storms or when it will not be used for long periods of time.
18. This product has no user-serviceable parts. Do not attempt to repair this product yourself. Only qualified service
personnel should perform servicing.Take the product to the electronics repair shop of your choice for inspection
and repair.
19. NEVER let anyone, especially children, push anything into holes, slots or any other openings in the unit’s casing
as this could result in a fatal electric shock.
20. Don’t mount this product on a wall or ceiling.
21. Do not place the unit near TVs, speakers and other objects that generate strong magnetic fields.
22. Do not leave the unit unattended when it is in use.
NOTE:To disconnect the system completely if it not to be used for a long time, remove the AC power plug
from the wall outlet.
GUIDE TO THE APPLIANCE
1. EQ/P-MODE BUTTON
2. /-10/TUN.- BUTTON
3. /+10/TUN.+ BUTTON
4. /BT/SCAN BUTTON
5. VOLUME - BUTTON
6. VOLUME + BUTTON
7. FUNCTION/ /Light BUTTON
8. SPEAKERS
9. AUX IN JACK
10. USB PORT
11. USB CHARGE PORT
12. USB COVER
13. PAIR INDICATOR
14. CHARGE INDICATOR
15. LCD DISPLAY
16. HANDLE
17. PASSIVE SPEAKERS
18. AC SOCKET
19. POWER ON/OFF BUTTON
20. AC COVER

EN – SPK614
9
GETTING STARTED
POWER SOURCE
This unit works with rechargeable lead-acid battery (the battery capacity 4000mAh). Fully charge the unit before
using the product for the first time. Unplug the AC Power cord from the AC socket to work on the battery pack after
fully charged. Plugging the AC Power cord while the battery pack is attached initiates the charging of this battery,
the charge LED indicator lights red during charging, when the battery is fully charged the indicator will turn to
green. When the unit is with low battery, the LED indicator will flash in red.
Warning: Do not change the battery, only high-qualified personnel can perform this operation.
OPERATION INSTRUCTION
BASIC FUNCTION
TURNING THE UNIT ON/OFF
Press the power ON/OFF button on the rear cabinet to switch the unit on/off.
NOTE: In USB/Bluetooth/AUX mode, when the unit is not providing the main function for around 15 minutes, the
unit will automatically switch into standby mode. Press the FUNCTION/ /Light button to turn on the unit again.
Please note that low volume setting in the audio source may be recognized as“no audio signal”, this will affect the
capability of signal detection from the device and can also originate an automatic switch into standby mode. If
this happens please reactivate the audio signal transmission or increase the volume setting on the audio source
player in order to resume playback.
Electrostatic Discharge hints –The unit may reset or may not reset to normal operation mode due to electrostatic
discharge, just switch it off and reconnect again.
SETTING THE FUNCTION MODE
To change the function modes, press the FUNCTION/ /Light button repeatedly to choose USB/BT/AUX/Radio
ADJUSTING THE VOLUME
Press the or , button to increase and decrease volume.
EQUALIZER EQ FUNCTION
This unit has a built-in equalizer system, press the EQ/P-MODE button to select a setting that best matches the
music style: FLAT, POP, CLASSIC, JAZZ, and ROCK.
FLASHING LIGHT
There are 5 modes for the DISCO LED lighting. Press and hold the LIGHT button to choose the light modes.
L-1: By default mode, blue LED will be on constantly when it is selected.
L-2: Blue LED will be on flashing mode.
L-3: Red LED will be on constantly.
L-4: Red LED will be on flashing mode.
L-5: 7 colors LED will be on flashing mode.
Press one more time to turn off.
The straight light bar will light when the Blue/Red LED on constantly, the bar will keep flashing when LED in
flashing mode.
function.

EN – SPK614
10
RADIO OPERATION
TUNING TO A RADIO STATION
1. Press the FUNCTION/ /LIGHT button on unit to select the FM FUNCTION.
2. Press the /+10/TUN.+ button or /-10/TUN.- to tune to a desired station, the station frequency will show on
the display. Example: FM 87.80 MHz. If the radio receive Stereo signal, ”ST”indicator will show on the display.
3. Press the or button to increase and decrease volume to a comfortable level.
4. Extend FM ANTENNA to its full length and gently move the unit back and forth to get the best reception, or place
the unit in an open location.
AUTO PRESET MEMORY / SCAN
To search for and automatically save stations to preset memory, press and hold the /BT/SCAN button on unit.
Any station with a strong enough signal will be saved to preset memory. After the unit is finished scanning, the
unit will automatically tune to preset station number 1 (P01).To tune to the next preset station, press and hold the
/+10/TUN.+ button on unit. To tune to the previous station, press and hold the /-10/TUN.- button.
MANUAL PRESET MEMORY OPERATION
You may choose stations to save in preset memory so that you can tune directly to these stations quickly.
1. Press the /+10/TUN.+ button or /-10/TUN.- button to select the desired station that you want to save
as a preset.
2. Press and hold the EQ/P-MODE button,“P01”will flash on the display to indicate that you are saving the station as
preset memory 01, to change the preset memory sequence, press and hold the /+10/TUN.+ button or /-10/
TUN.- button. Then press and hold the EQ/P-MODE button again to enter.
3. To save another station, repeat steps (1) & (2). You may save up to 30 FM stations.
To tune to preset stations, press and hold the /+10/TUN.+ button or /-10/TUN.- button.
USB CHARGING
This unit provides a 5V 1A USB charging port for charging your smart phone. Connect the USB cable of your smart
phone to the USB CHARGE port for charging.
USB OPERATION
This unit provides one USB port for music playback.
1. Press the FUNCTION/ /Light button on unit to select USB mode.
2. Plug the USB memory stick to the USB port on top of the unit. Playback will start automatically from Track 1.
3. To pause playback, press the /BT button on unit. The playing time will flash on the display.
4. To resume playback, press the /BT button again.
5. To select a desired track, press the /+10 or /-10 button respectively during playing until the desired track
appears on the display. The unit will start play automatically.
6. To search for a particular passage during playback, press and hold the /+10 or /-10 button to scan the
current playing track at high speed until desired point (passage) appears, then release the button for normal
playback mode.
7. To select a song which track number exceeds 10, press the /BT button to pause playback, then press and hold
the /+10 or /-10 button each time to skip forward/backward 10 tracks.
Important: The USB port is intended for data transfer only, other devices cannot be used with this USB
connection. The use of USB extension cords is not recommended. Don’t plug the USB from the unit when
playing or reading the USB device.

EN – SPK614
11
REPEAT PLAY
You can play one track or all tracks on the USB repeatedly.
To Repeat a Single Track
1. Press and hold the EQ/P-MODE button on unit during play, the display will show “ ” and the current track will
be played over an over again.
2. To cancel repeat play, press and hold the EQ/P-MODE button on unit until“ ”disappears from the display.
To repeat all the Tracks
1. Press and hold the EQ/P-MODE button on unit until the “ ” shows steadily on the display, all tracks on the
USB will be played over and over again.
2. To cancel repeat play, press and hold the EQ/P-MODE button on unit until“ ” disappears from the display.
To repeat the folder (only for USB which contains more than one folder)
1. Press and hold the EQ/P-MODE button on unit until “ FOLDER” shows steadily on the display, the current
folder will be repeated over and over again.
2. To cancel repeat play, press and hold the EQ/P-MODE button on unit until “ FOLDER” disappears from the
display.
RANDOM PLAY
Press and hold the EQ/P-MODE button on unit in play mode till the “RAND” shows steadily on the display, the
random play will start from next track automatically. Press the EQ/P-MODE button on unit again until the“RAND”
disappears from the display to cancel.
BLUETOOTH OPERATION
1. Press the FUNCTION/LIGHT button on unit to switch to BLUETOOTH function, the LCD will display“bt” and the
pair indicator will flash at high speed.
2. Turn on the Bluetooth function on the device, scan the unit “SPK614” and connect, then input the password
0000 if required, the pair indicator keep light up to indicate connection done, and the display will show“bt”. Press
Play to start playback.
3. Press the or button on the unit or adjust the volume on the external device to increase or decrease the
music volume to your desired level.
4. Press and hold the PLAY/PAUSE/BT button to disconnect Bluetooth.
Note: The Bluetooth works best within 10 meters in open air.
AUXIN OPERATION
1. Press the FUNCTION/LIGHT button on unit to select the“AUX”mode.
2. Connect your audio device to the AUX IN jack on the top panel of the unit with an AUX IN cable.(audio cable is
not included)
3. Press the or button on the unit or adjust the volume on the external device to increase or decrease the
music volume to your desired level.
4. Control the playback with your audio device.

EN – SPK614
12
TECHNICAL SPECIFICATIONS
GENERAL
Power Requirements AC100-240V~60/50Hz
Power Consumption 35W
Battery Pack 12V 4.0Ah Lead-acid battery
Power output 25W X 2 (RMS)
AUX in jack 3,5 mm
Work temperature +5°C – +35°C
BLUETOOTH
Communication system Standard Bluetooth wersja 2.1+EDR
Reception Range 10 meter (line-of-sight distance)
Compatible Bluetooth profiles Advanced Audio Distribution Profile (A2DP)
ACCESSORIES
Instruction Manual x 1pc
AC Cord x 1pc
Note: Specifications are subject to change for continuous improvement without prior notice.
Frequency FM 87.5-108 MHz

ES – SPK614
13
INDICACIONES DE SEGURIDAD Y ADVERTENCIAS
SIGNIFICADO DE LOS SÍMBOLOS
PELIGRO - Indica un riesgo muy serio que puede producir lesiones graves e incluso causar la muerte. Este símbolo
aparece únicamente en las situaciones más extremas.
ADVERTENCIA - Indica un posible riesgo que puede producir lesiones graves e incluso causar la muerte.
CUIDADO - Indica un posible riesgo que puede producir lesiones menores o causar daños materiales o daños en
el producto. Además, advierte de prácticas peligrosas.
El símbolo de un rayo con una punta de flecha, dentro de un triángulo equilátero, advierte al usuario
acerca de los elementos aislados en la carcasa del producto que tienen la tensión suficiente para
producir una descarga eléctrica.
ADVERTENCIA: PARA REDUCIR EL RIESGO DE DESCARGA ELÉCTRICA, NO ABRIR LA TAPA (O LA PARTE
TRASERA). EL DISPOSITIVO NO CONTIENE ELEMENTOS ADECUADOS PARA EL MANTENIMIENTO
REALIZADO POR EL USUARIO, CAULQUIER REPARACIÓN DEBE SER REALIZADA POR EL PERSONAL
CUALIFICADO
Signo de exclamación dentro de un triángulo equilátero indica información acerca del
funcionamiento y mantenimiento del dispositivo, especialmente relevante para el usuario,
contenida en la documentación adjunta al dispositivo.
LEA TODAS LAS INSTRUCCIONES ANTES DE UTILIZAR EL DISPOSITIVO
Siempre siga todas las indicaciones de seguridad durante el uso del sistema de altavoces Bluetooth con Micrófono,
especialmente si los niños están cerca.
INDICACIONES DE SEGURIDAD
1. Lea el manual de usuario antes de intentar de conectar o utilizar el dispositivo.
2. Mantenga el manual en buen estado. Presta atención a todas las advertencias. Siga todas las instrucciones.
3. Guarde el manual de usuario por si tuviera que consultarlo en el futuro.
4. El aparato no deberá exponerse a goteos ni salpicaduras. No coloque ningún recipiente con agua sobre el
dispositivo. Use el dispositivo solamente en los lugares secos.
5. No coloque las fuentes de llama abierta, como por ejemplo las velas, sobre el dispositivo.
6. No permita a los niños jugar con el dispositivo.
7. No obstruya la ventilación cubriendo los orificios de ventilación.
8. Asegúrese de que el dispositivo esté conectado a la toma de corriente de CA 100-240 V 60/50 Hz. Usar el voltaje
más alto puede resultar en la avería e incluso en fuego. Para apagar el dispositivo completamente, apáguelo
antes de desconectarlo de la toma de corriente.
9. No conecte/desconecte la clavija con las manos mojadas.
10. Si la clavija no cabe en el enchufe, no use la fuerza para introducirla.
11. Use solo las piezas de recambio recomendadas por el fabricante.
12. Instala el dispositivo según las indicaciones del fabricante.
13. Coloque el dispositivo en un lugar de buena ventilación. Coloque el sistema sobre la superficie dura, plana y
estable. No exponga el dispositivo a temperaturas superiores a 40 °C. Se recomienda mantener al menos 30 cm
de espacio libre por encima y detrás del dispositivo, además de 5 cm a ambos lados.
14. Pulse los botones del dispositivo ligeramente. Pulsar los botones con demasiada fuerza puede causar daños en
el dispositivo.

ES – SPK614
14
15. Deshágase de las pilas usadas de manera respetuosa con el medio ambiente.
16. Siempre asegúrase de que el dispositivo esté desconectado del tomacorriente antes de moverlo o limpiarlo.
Limpie el dispositivo solo con un paño seco.
17. Desconecta el dispositivo de la toma de corriente durante las tormentas o cuando no se lo va a usar por un
periodo de tiempo largo.
18. El dispositivo no contiene ningunos componentes que puedan ser reparados por el usuario. No intente reparar
este producto. Cualquier reparación debe ser realizada por el personal cualificado. Para realizar cualquier
reparación o verificación del dispositivo, póngase en contacto con una empresa especializada en reparaciones
electrónicas.
19. NUNCA permita que cualquier persona, niños en particular, introduzca cosas en los orificios, ranuras u otros tipos
de aberturas localizadas en la carcasa del dispositivo. Hacerlo puede resultar en una descarga eléctrica.
20. No instale el dispositivo en la pared o el techo.
21. No coloque el dispositivo cerca de los televisores, altavoces u otros objetos que generan un fuerte campo
magnético.
22. No deje el dispositivo sin supervisión durante su uso.
ATENCIÓN: Si no va a utilizar el dispositivo por un periodo de tiempo largo, desconéctelo completamente
desenchufando el cable de la toma de la pared.
INDICACIONES DE USO
DEL DISPOSITIVO
1. ECUALIZADOR/MODO P
2. BOTÓN /-10 /TUN.-
3. BOTÓN /+10 /TUN.+
4. BOTÓN /BT/SCAN
5. BOTÓN DEL VOLUMEN -
6. BOTÓN DEL VOLUMEN +
7. BOTÓN FUNCIÓN/ /ILUMINACIÓN
8. ALTAVOCES
9. ENTRADA AUX IN
10. ENTRADA USB
11. PUERTO DE CARGA USB
12. TAPA DEL PUERTO USB
13. INDICADOR DE EMPAREJAMIENTO
14. INDICADOR DE CARGA
15. PANTALLA LCD
16. MANGO
17. ALTAVOCES PASIVOS
18. ENCHUFE DE CA
19. BOTÓN DE ENCENDIDO/APAGADO
20. TAPA DEL ENCHUFE DE CA

ES – SPK614
15
PRIMEROS PASOS
FUENTE DE ALIMENTACIÓN
El dispositivo cuenta con una batería de plomo-ácido recargable (la batería tiene la capacidad de 4000 mAh).
Cargue el dispositivo completamente antes de usarlo por primera vez. Después de cargar la batería por completo,
desenchufe el cable de la toma de corriente para utilizar la batería. Enchufar el cable de alimentación de CA inicia
la carga de la batería. El indicador LED se ilumina de color rojo durante la carga y cuando la carga está completa,
se pone verde. Cuando la batería está baja, el indicador LED se ilumina de color rojo.
Advertencia: Solo el personal cualificado debe cambiar la batería, no intente hacerlo por si mismo.
INDICACIONES DE USO
FUNCIONES BÁSICAS
ENCENDER/APAGAR EL DISPOSITIVO
Pulse el botón ENCENDIDO/APAGADO situado en la parte trasera del dispositivo para encenderlo o apagarlo.
ATENCIÓN: En el modo USB/Bluetooth/AUX, el dispositivo pasará al modo de espera automáticamente si no se
realiza ninguna acción. Pulse el botón FUNCIÓN/ /ILUMINACIÓN para encender el dispositivo.
Por favor, recuerde que el volumen bajo de la fuente de entrada audio puede reconocerse como„no hay señal de audio”,
lo que afectará la capacidad del dispositivo de detectar la señal y resultará en la entrada en el modo de espera. Si lo
sucede, reinicie la transmisión de la señal o suba el volumen de la fuente de la señal para reanudar la reproducción.
Descargas electrostáticas – es posible que el dispositivo se reinicie o apague completamente por causa de las
descargas electrostáticas. En tal caso, apáguelo y reinícielo.
CAMBIAR LOS MODOS DE FUNCIONAMIENTO
Para cambiar los modos de funcionamiento, pulse FUNCIÓN/ /ILUMINACIÓN varias veces y elija una de las
siguientes funciones: USB/BT/AUX/Radio.
AJUSTE DE VOLUMEN
Pulse el botón o para subir o bajar el volumen.
FUNCIÓN DE ECUALIZADOR DE SONIDO
El dispositivo cuenta con un sistema de ecualizador de sonido incorporado. Pulse el botón ECUALIZADOR/MODO
P para seleccionar el ajuste más apropiado para música reproducida: FLAT, POP, CLASSIC, JAZZ y ROCK.
EFECTOS DE ILUMINACIÓN
Hay 5 efectos de iluminación DISCO LED. Mantenga pulsado el botón ILUMINACIÓN para seleccionar el efecto
deseado.
L-1 En el modo normal, el indicador LED azul se iluminará permanentemente tras seleccionar esta opción.
L-2 El indicador LED azul parpadeará.
L-3 El indicador LED rojo se iluminará permanentemente.
L-4 El indicador LED rojo parpadeará.
L-5 Parpadearán 7 colores del indicador LED.
Vuelva a pulsar para apagar.
La barra de luz se iluminará de azul o rojo en el modo de iluminación LED permanente. La barra parpadeará en el
modo de parpadeo de LED.

ES – SPK614
16
CARGA USB
El dispositivo cuenta con un puerto de carga USB de 5 V 1 A para cargar su smartphone. Conecte el cable USB de
su smartphone al puerto de carga USB para cargarlo.
FUNCIONAMIENTO DE USB
El dispositivo cuenta con una entrada USB para reproducir música.
1. Pulse el botón FUNCIÓN/ /ILUMINACIÓN en el dispositivo para seleccionar el modo USB.
2. Conecte la memoria USB a la entrada USB situada en la parte superior del dispositivo. La reproducción se iniciará
automáticamente, desde la primera pista de audio.
3. Para pausar la reproducción, pulse el botón /BT en el dispositivo. El tiempo de repreducción transcurrido
parpadeará en la pantalla.
4. Para reanudar la reproducción, vuelva a pulsar el botón /BT en el dispositivo.
5. Para seleccionar la pista deseada, pulse el botón /+10 o/-10 varias veces durante la reproducción hasta que
la pista deseada aparezca en la pantalla. El dispositivo iniciará la reproducción automáticamente.
6. Para encontrar un fragmento específico de la pista durante la reproducción, mantenga pulsado el botón /+10
o/-10 para escanear la pista a alta velocidad hasta que el fragmento deseado aparezca y después, suelte el
botón para reanudar la reproducción.
7. Para seleccionar una pista de número superior a 10, pulse el botón /BT para pausar la reproducción y después,
mantenga pulsado el botón /+10 o/-10 para saltar 10 pistas atrás o adelante.
Importante: La entrada USB sirve solo para la transferencia de datos. No se puede conectar otros
dispositivos a la entrada USB. No se recomienda usar los cables de extensión USB. No desconecte el USB
del dispositivo durante la transferencia de datos.
REPRODUCCIÓN REPETIDA DE PISTAS
Es posible la reproducción repetida de pistas o de una sola pista de la memoria USB.
Repetición de una sola pista
1. Mantenga pulsado el botón ECUALIZADOR/MODO P en el dispositivo durante la reproducción.“ ” aparecerá
en la pantalla y la pista actual se reproducirá repetidamente.
2. Para cancelar la reproducción repetida, mantenga pulsado el botón ECUALIZADOR/MODO P en el dispositivo
hasta que„ „ desaparezca de la pantalla.
Reproducción repetida de todas las pistas
1. Mantenga pulsado el botón ECUALIZADOR/MODO P en el dispositivo hasta que„ „ aparezca en la pantalla.
Todas las pistas de la memoria USB se reproducirán repetidamente.
2. Para cancelar la reproducción repetida, mantenga pulsado el botón ECUALIZADOR/MODO P en el dispositivo
hasta que„ „ desaparezca de la pantalla.
Para repetir la reproducción de la carpeta (únicamente en el caso de memoria USB que contenga más
que una carpeta)
1. Mantenga pulsado el botón ECUALIZADOR/MODO P en el dispositivo hasta que„ FOLDER”aparezca en la
pantalla. Todas las pistas de esta carpeta se reproducirán repetidamente.
2. Para cancelar la reproducción repetida, mantenga pulsado el botón ECUALIZADOR/MODO P en el dispositivo
hasta que„ FOLDER”desaparezca de la pantalla.

ES – SPK614
17
REPRODUCCIÓN ALEATORIA
Mantenga pulsado el botón ECUALIZADOR/MODO P en el dispositivo hasta que„RAND”aparezca en la pantalla. La
reproducción aleatoria se iniciará automáticamente desde la siguiente pista. Para cancelar, vuelva a pulsar el botón
ECUALIZADOR/MODO P en el dispositivo hasta que„RAND”desaparezca de la pantalla.
FUNCIÓN BLUETOOTH
1. Pulse el botón FUNCIÓN/ILUMINACIÓN en el dispositivo para seleccionar la función BLUEOOTH. En la pantalla
LCD aparecerá„bt” y el indicador de emparejamiento parpadeará rápidamente.
2. Active la función Blueooth en su aparato, busque el dispositivo „SPK614” y conéctelo. Después, introduzca la
contraseña 0000, si es necesario. Tras la conexión correcta, el indicador de emparejamiento se iluminará y la
pantalla mostrará„bt”. Pulse Play para iniciar la reproducción.
3. Pulse el botón o en el dispositivo o ajuste el volumen del dispositivo externo para subir o bajar el volumen
de música reproducida.
4. Mantenga pulsado el botón REPRODUCIR/PAUSAR/BT para desactivar Bluetooth.
ATENCIÓN: Para obtener el mejor funcionamiento de la función Bluetooth, la distancia máxima entre los
dispositivos debe de ser de 10 metros y sin obstáculos.
USO DE LA ENTRADA AUX
1. Pulse el botón FUNCIÓN/ILUMINACIÓN en el dispositivo para seleccionar el modo„AUX”.
2. Conecte su dispositivo audio a la entrada AUX situada en la parte superior del altavoz usando el cable AUX (no
suministrado).
3. Pulse el botón o en el dispositivo o ajuste el volumen del dispositivo externo para subir o bajar el volumen
de música reproducida.
4. Controle la reproducción a través de su dispositivo audio.
ESPECIFICACIONES TÉCNICAS
GENERAL
Requisitos de alimentación AC100-240V~60/50Hz
Consumo de energía 35W
Batería 12V 4.0Ah de plomo-ácido
Potencia de salida 25W X 2 (RMS)
Entrada AUX 3,5 mm
Temperatura de funcionamiento +5°C – +35°C
BLUETOOTH
Sistema de comunicación Bluetooth estándar versión 2.1+EDR
Alcance de recepción 10 metros (sin obstáculos)
Advanced Audio Distribution Profile (A2DP) Perfiles Bluetooth compatibles
ACCESORIOS
Manual de usuario x 1 unidad
Cable AC x 1 unidad
ATENCIÓN: Debido al desarrollo contínuo del producto, es posible que los cambios en especificaciones
sean introducidos sin aviso previo.

PT – SPK614
18
INFORMAÇÕES SOBRE A SEGURANÇA E ADVERTÊNCIAS
DEFINIÇÕES DOS SÍMBOLOS
PERIGO – Indica a presença de uma situação de risco que, se não for evitada, poderia levar à morte ou lesões
graves. Este símbolo aparece apenas em casos extremos.
ADVERTÊNCIA – Indica a presença de uma potencialmente situação perigosa que pode causar morte ou lesões graves.
ATENÇÃO – Indica a presença de uma potencialmente situação perigosa que, se não for eliminada, pode causar
lesões leves/moderadas ou danar o produto/a propriedade. Adverte também contra ações perigosas.
Um relâmpago com flecha no triângulo equilátero serve para advertir o utilizador sobre elementos
isolados no interior do aparelho sob tensão suficientemente alta para causar risco de choques
elétricos para as pessoas.
ADVERTÊNCIA: A FIM DE REDUZIR OS RISCOS DE CHOQUES ELÉTRICOS, NÃO REMOVA A TAMPA
(OU O PAINEL TRASEIRO). NO INTERIOR, NÃO HÁ ELEMENTOS DE MANUTENÇÃO PELO UTILIZADOR.
ENCARREGUE AS REPARAÇÕES A UM PESSOAL QUALIFICADO.
Um ponto de exclamação no triângulo equilátero serve para informar sobre instruções importantes
de utilização e manutenção (reparações), contidas neste manual.
ANTES DE USAR LEIA TODO O MANUAL
Sempre siga as precauções durante a utilização deste sistema de altifalantes Bluetooth com Microfone, sobre
tudo, na presença das crianças.
NOTAS SOBRE A SEGURANÇA
1. Leia este Manual de Instruções antes de conectar ou utilizar o aparelho.
2. Mantenha o Manual em bom estado. Respeite todas as advertências. Siga todas as instruções.
3. Guarde o manual para consultas futuras.
4. O aparelho não pode estar exposto a gotejamento e salpicos, evite colocação de recipientes com líquidos nele,
p.ex. vasos. Utilize o aparelho apenas em locais secos.
5. Não coloque no aparelho as fontes de fogo aberto, por exemplo, velas.
6. Vigile que as crianças não utilizem o aparelho como brinquedo.
7. Não bloqueia a ventilação cobrindo os orifícios de ventilação.
8. Certifique-se de que o aparelho está ligado com a tomada de alimentação do seguintes parâmetros: AC 100-240
V 60/50 Hz. Uma tensão inadequada pode levar ao funcionamento incorreto do aparelho ou a um incêndio.
Desligue o aparelho antes da sua desconexão da rede para desabilitar por completo.
9. Não conecte/desconecte o cabo de alimentação com/da tomada com as mãos molhadas.
10. Se a ficha não encaixar na tomada, não a pressione à força.
11. Utilize peças sobressalentes indicados pelo fabricante.
12. Instale o aparelho de acordo com as instruções do fabricante.
13. Mantenha o aparelho num local ventilado. Coloque o sistema numa superfície chata, dura e estável. Não
exponha o aparelho a temperaturas superiores a 40°C. Preste atenção que a distância na parte traseira e da parte
superior do aparelho seja de pelo menos 30 cm e 5 cm por cada lado do aparelho.
14. Pressione os botões do aparelho suavemente. Uma pressão muito forte pode danar o aparelho.
15. Elimine as pilhas gastas de maneira ecológica.
Table of contents
Languages:
Other Manta Speakers manuals

Manta
Manta HARD BEAT User manual

Manta
Manta PA6528D User manual

Manta
Manta SPK1001 User manual

Manta
Manta SPK5012 User manual

Manta
Manta Surfer MM4500 User manual

Manta
Manta SPK9209 User manual

Manta
Manta SPK5019 User manual

Manta
Manta PHANTOM SPK5450 User manual

Manta
Manta Power Audio SPK5032 User manual

Manta
Manta SPK9419 User manual

Manta
Manta SPK5025 NIKE User manual

Manta
Manta SPK905 User manual

Manta
Manta SPK406 User manual

Manta
Manta HELIOS User manual

Manta
Manta SPK402 User manual

Manta
Manta SPK5020 User manual

Manta
Manta SPK202FM User manual

Manta
Manta SoundStage MM5400 User manual

Manta
Manta SPK408 User manual

Manta
Manta Power Audio SPK9X User manual