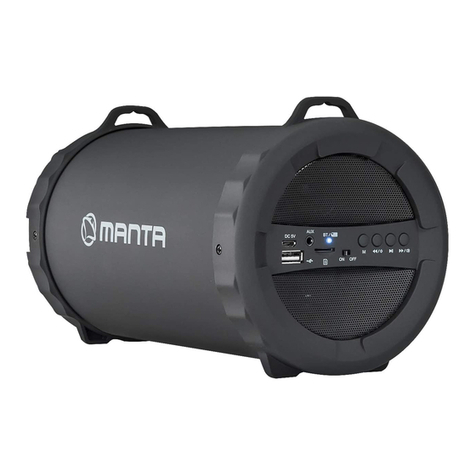
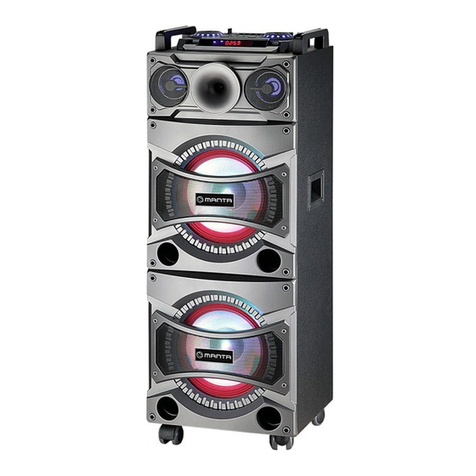
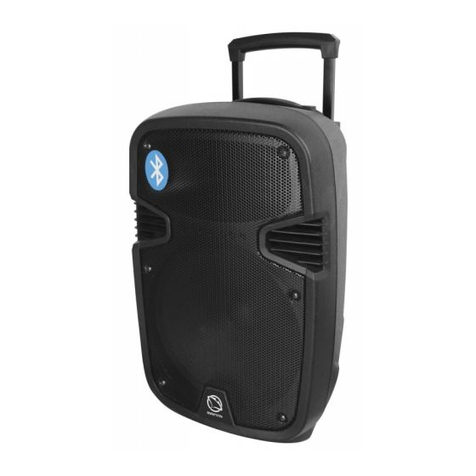
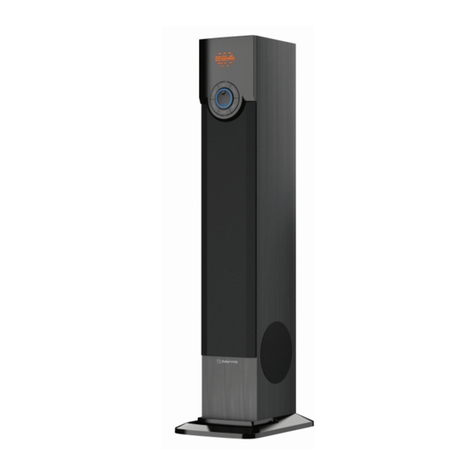
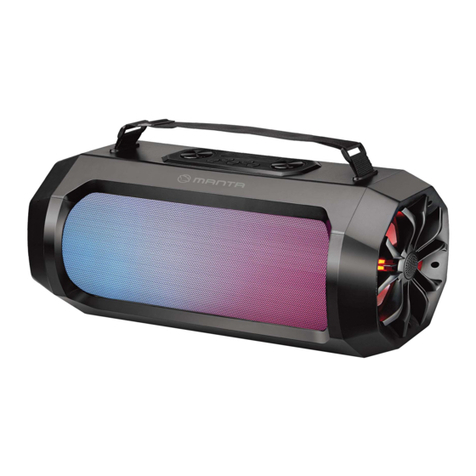
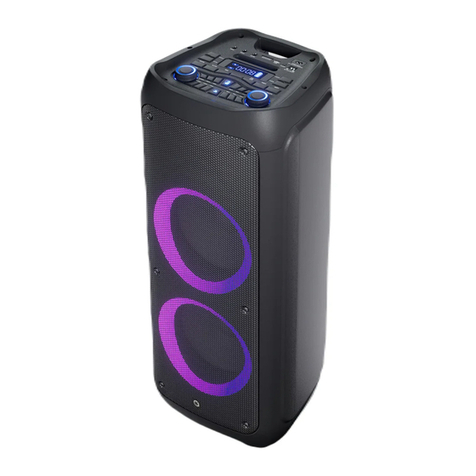
Manta SPK95019 User manual

BLUETOOTH SPEAKER
Model:
SPK95019
Instrukcja obsługi
User’s Manual
Bedienungsanleitung
Manual de usuario
Istruzioni d’uso
Návod k obsluze
Инструкция использования

Instrukcja Obsługi PL
2
NAJWAŻNIEJSZE INFORMACJE DOTYCZĄCE BEZPIECZEŃSTWA
Prosimy o uważne zapoznanie się z niniejszą instrukcją obsługi przed
rozpoczęciem użytkowania urządzenia. Należy stosować się do wytycznych
dotyczących bezpiecznego użytkowania oraz zachować instrukcję obsługi, aby
móc powrócić do niej w przyszłości.
1. Zabezpieczenie przewodu zasilającego: Upewnij się, że przewód zasilający nie
znajduje się w przejściu lub nie jest przyciśnięty przez żadne ciężkie przedmioty.
Zwróć szczególną uwagę na wtyczkę, przewód, a także gniazdo zasilające
znajdujące się na urządzeniu. Nie należy ciągnąć za przewód zasilający urządzenia.
2. Wentylacja: Aby zapobiec przegrzaniu urządzenia, należy umieścić je w
przewiewnym miejscu. NIE NALEŻY przykrywać urządzenia ani umieszczać na nim
żadnych przedmiotów. Urządzenie powinno być ustawione w odległości co
najmniej 10 centymetrów od ściany. NIE NALEŻY ustawiać urządzenia na łóżku,
sofie, dywanie ani w innych miejscach ograniczających przepływ powietrza.
3. Demontaż urządzenia: NIE NALEŻY demontować elementów urządzenia.
Dotknięcie wewnętrznych komponentów urządzenia grozi porażeniem.
4. Niepokojący zapach: Jeżeli urządzenie wydziela jakikolwiek niepokojący zapach,
należy natychmiast odłączyć je od gniazdka. Nie należy ponownie włączać
urządzenia, dopóki nie zostanie naprawione przez wykwalifikowanego
pracownika centrum serwisowego.
5. Uwaga: urządzenie jest zasilane prądem o napięciu i częstotliwości:
100–240V, 50–60 Hz.
6. Uwaga: Nie należy wystawiać urządzenia na kontakt z jakąkolwiek cieczą, a
także umieszczać urządzenia w pobliżu naczyń z wodą.

Instrukc ja Obsługi PL
3
OPISFUNKCJI PILOTA
1. Czuwanie
2. Głośność urządzenia +/-
3. Przycisk wyboruMenu -/+
4. Przycisk wyciszenia
5. Poprzedni/VOL-
6. Odtwarzanie/pauza
7. Przycisk sygnału wejściowego
8. Przycisk wyboruMenu
9. Przycisk powtarzania
10. Następny/VOL+
Zasięg pilota
Uwaga:
Pomiędzy pilotem a urządzaniem nie powinny znajdować się żadne większe
obiekty.

Instrukcja Obsługi PL
4
OPIS FUNKCJI PANELU STEROWANIA
1. Wyświetlacz LED
2. FUNKCJE -/+
3. MIC: Wejście mikrofonu
4. GUITAR: Wejście gitary
5. POWER/INPUT: Przełącznik ZASILANIE/USB/WEJŚCIE LINIOWE/BLUETOOTH/FM
6. Przycisk wyboru Menu
7. SD/USB: wejście SD/USB. Podłączając jakiekolwiek urządzenie należy zwrócić
szczególną uwagę na ułożenie wtyczki względem gniazda. Ładowarka USB 5V 1A.
8. Poprzedni utwór
9. Play/Pause
10.Wejście liniowe
11. Dioda LED
Światło CZERWONE wskazuje na ładowanie urządzenia.
Światło ZIELONE wskazuje, że urządzenie zostało w pełni naładowane.
12. Interfejs zasilanie DC 15V
13. Następny utwór
14. VOLUME-/+: Regulacja głośności urządzenia.
1
23456713
12
11
10
9
87
14

Instrukcja Obsługi PL
5
PODSTAWOWE OPERACJE
1. Włączanie urządzenia
Przytrzymaj przycisk STANDBY na panelu sterowania/pilocie przez kilka sekund,
urządzenie włączy się i zapali się dioda LED. Jeżeli urządzenie znajduje się w trybie
czuwania (STANDBY) przez długi czas, wyłączy się automatycznie. Aby ponownie włączyć
urządzenie, wystarczy nacisnąć przycisk STANDBY na panelu sterowania/pilocie.
2. Wybór trybu wejściowego
Aby dokonać wyboru trybu wejściowego, należy nacisnąć przycisk wyboru trybu
wejściowego na pilocie lub przycisk sygnału wejściowego na przednim panelu sterow-
ania.
3. Wyciszanie urządzenia
Aby wyciszyć urządzenie, należy nacisnąć raz przycisk wyciszenia na pilocie. Aby
wyłączyć wyciszenie, należy nacisnąć przycisk ponownie.
4. Dostosowywanie głośności na pilocie
Naciśnij przycisk VOL +/- na pilocie, aby dostosować głośność urządzenia.
5. Regulacja głośności na urządzeniu
Przekręć pokrętło w lewo, aby zmniejszyć głośność lub w prawo, aby ją zwiększyć.
6. FUNCTION pokrętło
Przekręcić pokrętło w lewo lub w prawo, aby ustawić inny efekt dla
wszystkich opcji (światło, kolory lub dźwięk) pod przyciskiem MENU.
7. Wybór Menu
Naciśnij przycisk MENU na panelu sterowania lub pilocie, aby wybrać BT,1U,2U,DL,
EC,BO,BA (łącznie 7 opcji), a następnie przekręć pokrętło FUNCTION+/-, by
dokonać wyboru opcji.
(TB=tony wysokie, 1U=głośność mikrofonu, 2U=głośność gitary, DL=opóźnienie,
EC=echo, BO=tryb światła, BA=tony niskie).
8. Powtarzanie
Podczas odtwarzania, naciśnij przycisk powtarzania na pilocie jeden raz, aby
powtarzać odtwarzany obecnie utwór. Aby wyłączyć powtarzanie, wciśnij ponownie
przycisk powtarzania.
9. PREV/NEXT (poprzedni/następny)
Za pomocą przycisków PREV/NEXT można wybrać konkretne utwory z listy
odtwarzania.
10. Ładowarka USB
Moc wyjściowa ładowarki USB do telefonów komórkowych wynosi 5V 1A.

Instrukcja Obsługi PL
6
Bluetooth:
Naciśnij przycisk INPUT na panelu sterowania lub pilocie, aby wybrać tryb
Bluetooth. Jednocześnie przejdź do ustawień Bluetooth telefonu, tabletu lub innego
urządzenia audio z technologią Bluetooth i wybierz „SPK95019“. Oba urządzenia
nawiążą połączenie przez Bluetooth. Aby sterować urządzeniem za pomocą
telefonu, tabletu, itp., prosimy pobrać aplikację „Discolor DJ“.
Po tym jak urządzenia nawiążą łączność poprzez Bluetooth, uruchom aplikację
„Discolor DJ“ w telefonie, tablecie, itp., a następnie wciśnij przycisk Bluetooth.
Umożliwi to sterowanie pięcioma trybami pracy urządzenia za pomocą telefonu:
muzyka, światło, karta SD/USB, Bluetooth oraz korektor graficzny. Aby wyłączyć
aplikację, należy nacisnąć przycisk „wyjdź“.
Aby sterować urządzeniem za pomocą telefonu komórkowego, należy pobrać
oraz zainstalować aplikację „Discolor DJ”
Po uruchomieniu aplikacji „Discolor DJ” na ekranie głównym
znajduje się 6 głównych funkcji:
1. Odtwarzaniemuzyki przez Bluetooth
2. Ustawienia koloru, jasności oraz trybu pracy oświetlenia
3. Odtwarzanie muzyki z nośnika USB
4. Ustawienia połączenia Bluetooth
5. Korektor graficzny, ustawienia głośności muzyki, mikrofonu
oraz gitary.
6. Wyciszenie wejścia liniowego

Instrukc ja Obsługi PL
7
(1)Ustawienia połączenia Bluetooth:
Wybierz ikonę
, aby przejść do ekranu ustawień połączenia Bluetooth,
następnie wybierz opcję „Discolor DJ BLE", aby połączyć urządzenie z głośnikiem.
(2)Odtwarzanie muzyki przez Bluetooth
Wybierz ikonę , aby przejść do ekranu odtwarzania muzyki przez Bluetooth.
Wybierz opcję „Pick songs to play”, aby wybrać utwory, które zostaną
odtworzone, następnie zatwierdź wybór przyciskiem „Done”, aby powrócić do
ekranu odtwarzania muzyki. Podczas odtwarzania możesz zatrzymywać i
wznawiać odtwarzanie, przejść do kolejnego lub poprzedniego utworu, regulować
głośność dźwięku, ustawić powtarzanie utworów, a także wybrać opcję
odtwarzania losowego utworuzlisty.Wybierz „Back”, aby powrócić do ekranu
głównego.
(2)Ustawienia koloru, jasności oraz trybu pracy oświetlenia
Wybierz ikonę , aby przejść do ekranu ustawień oświetlenia. Na tym
ekranie możesz wybrać kolor wyświetlany przez głośnik oraz dostosować jasność
oświetlenia. Aby powrócić do ekranu głównego, wybierz „Discolor DJ” w lewym
górnym rogu.
Opcja „Profiles” pozwala na ustawienie jednego z 12 zaprogramowanych trybów
migania światła. Aby powrócić do ustawień koloru i jasności, wybierz opcję „Light”
znajdującą się w lewym górnym rogu ekranu.

Instrukc ja Obsługi PL
8
(3) Odtwarzanie muzyki z nośnika USB
Po podłączeniu nośnika USB do głośnika, wybierz ikonę , aby przejść do
trybu odtwarzania muzyki z nośnika USB. W tym trybie możesz wybierać i
odtwarzać utwory znajdujące się na nośniku USB. Wybierz „Play”, aby przejść do
ekranu odtwarzania, gdzie jest możliwe odtwarzanie oraz zatrzymywanie muzyki,
wybór poprzedniego oraz kolejnego utworu, a także regulacja głośności. Wybierz
opcję „List”, aby wrócić do listy utworów na nośniku, wybierz „Back”, aby wrócić
do ekranu głównego.
(4) Korektor graficzny, dostosowywanie głośności muzyki, mikrofonu oraz gitary
Wybierz ikonę , aby przejść do ekranu ustawień dźwięku. Na tym ekranie
możliwe jest dostosowanie głośności muzyki, mikrofonu oraz gitary, a także wybór
jednego z czterech już ustawionych trybów korektora dźwięku: Pop, Classical, Jazz
oraz Rock. Możesz także wybrać opcję G-Eq, aby uruchomić graficznykorektor
dźwięku, pozwalający na wybór własnych ustawień.
(5)Wyciszenie wejścia liniowego
Wybierz ikonę , aby przejść do ekranu wejścia liniowego. Kliknięcie ikony
wycisza muzykę, ponowne kliknięcie ikony włącza dźwięk. Wybierz
opcję „Back”, aby powrócić do ekranu głównego.

Instrukcja Obsługi PL
9
Uwaga!
Konstrukcja produktu i parametry techniczne mogą ulec zmianie bez
wcześniejszego powiadomienia. Dotyczy to przede wszystkim parametrów
technicznych, oprogramowania oraz podręcznika użytkownika. Niniejszy
podręcznik użytkownika służy ogólnej orientacji dotyczącej obsługi produktu.
Producent i dystrybutor nie ponoszą żadnej odpowiedzialności tytułem
odszkodowania za jakiekolwiek nieścisłości wynikające z błędów w opisach
występujących w niniejszej instrukcji użytkownika.
Prawidłowa utylizacja urządzenia.
To oznaczenie informuje, że produktu nie należy utylizować wraz z
odpadami z gospodarstw domowych w całej Unii Europejskiej. Aby
uniknąć ewentualnych szkód dla środowiska i człowieka
spowodowanych niekontrolowaną utylizacją odpadów, należy
poddawać je odpowiedzialnemu odzyskowi w celu zadbania o
zrównoważone ponowne wykorzystanie surowców materiałowych.
Aby zwrócić wykorzystane urządzenie, należy skorzystać z
odpowiednich systemów zwrotu i zbiórki odpadów lub
skontaktować się ze sprzedawcą urządzenia. W takim punkcie
istnieje możliwość poddania wyrobu odzyskowi w sposób
bezpieczny dla środowiska.

10
IMPORTANT SAFETY MEASURES
Beforeusing thismachine,pleaseread all thesafetyand operationinstructions.
Meanwhile,pleaseobservealltheinstructionsabout safeoperation. Thesesafety
andoperationinstructionsshouldbekept for reference.
1. Protectionofpower supplywire: Make surethatthepower supply wire
isnot trampedand pressedbyheavyobjects. Payspecial attentiontothepower
plug, supplywireand theoutlet onthemachine.DO NOTpull or drag thepower
supplywire.
2. Ventilation: Thisset must beput inventilatedplace. DO NOTput disk onit
or clothtocover it. Thedistanceawayfromthewall shouldnot belessthan10
centimetres. DO NOTput this set onthebed,sofa,carpet orother objectswith
similar surfacefor the sakeof good ventilation.
3. Casing Dismantling:DONOTdismantle thecasing. If one touchesthe inner
components,heor she willprobablyget seriouselectric shock.
4. Unusual smell: Whenyoudiscover unusual smell or smoke,cut thepower
supplyimmediatelyand pull out theplug from theoutlet onthewall. Contact the
vendor or thenearrepairing centre.
5. Attention: This set appliestoAC100-240V/50-60Hzpower supply.
6.Itisforbiddentoput articles full withliquidontheunit,and avoidliquidintothe
unit toleadtotrouble,e.g. vase.
User’s Manual EN

11
REMOTE CONTROL DESCRIPTIONS
1. Standby
2.Master volume +/-
3.Menu selecting -/+ button
4.Mute button
5. Previous/VOL-
6.Play/ Pause
7.Signal input button
8.Menu selecting button
9.Repeat button
10.Next/VOL+
Operation range of the remote control
Notice:
There should be no big obstacle between
the remote control and the main unit.
User’s Manual EN

12
PANEL DESCRIPTIONS
1.LED display
2.FUNCTION -/+
3.MIC: Microphone signal input.
4.GUTAR:Guitar input
5.POWRE/INPUT:POWER/USB/SD/LINE IN/BLUETOOTH input switch
button.
6.Menu selecting button
7.SD/USB: SD/USB card input, please pay attention to the direction When
inserting the card. USB charge power out 5V 1A.
8.Previous song
9.Play/Pause
10.Line input
11.LED light (Red - charging,Green - fully charged)
RED Charging indicator light.
GREEN Fully charged indicator light.
12.DC 15V electhcize interface
13.Next song
14.VOLUME-/+:Master volume adjustment.
BASIC OPERATION
1.Switching theunit ON
HoldtheSTANDBYbuttonon the panel/remotecontrol downfor a fewseconds
and theunit willturnon,illuminating theLED light.Iftheunit has beenin
STANDBY mode for a long time, it will turn off automatically. To switch the
unit on again, just press the STANDBY button on the panel/remote control.
User’s Manual EN
1
23456713
12
11
10
9
87
14

13
2.Input mode selection
You can select the input mode by pressing the input mode selection button on the
remote control or you can press the signal input selection button on the front panel.
3.Mute
To mute the unit, press the mute button once on the remote control. To cancel
the mute option, press the mute button again.
4. Volume adjustment on the remote control Press the VOL +/- button on the
remote control to adjust the volume.
5. Volume adjustment on the unit
Turn the dial anticlockwise to decrease the volume and clockwise to increase the
volume.
6. FUNCTION DIAL
Twist the dial left or right to adjust the different effect for all options((light,colors or
volume) under the MENU button.
7.MENU SELECTION
Press the MENU button on the panel or remote control to choose TB,1U,2U,DL,
EC,BO,BA(total 7 options) and then turnFUNCTION+/- to select your option.
(tb- Treble,1U- Mic volume, 2U - Guitar volume, dl -Delay, EC- Echo, bO - Light
modes, BA- Bass) When you select one option then twist the FUNCTION dial on
the front panel or press -/+ on remote control to adjust each option effect.
8.Repeat
During playing status, press the repeat button on the remote control once to
repeat playing the current track .To cancel the repeat option press the repeat
button again.
9.PREV/NEXT
By pressing PREV/NEXT you can select a specific song from the play list.
10. USB Charge
USB charge power out 5V 1A for mobile phones.
Bluetooth:
Press the INPUT button on the panel/remote control to select Bluetooth mode.
Simultan eously open the Bluetooth setting on your phone, tablet or any other Bluetooth
enabled audio device and select "SPK95019". The unit and device will then connect
via Bluetooth. To control the device via your phone, tablet etc. please download the
app "Discolor DJ".
User’s Manual EN

14
Once the unit and device are connected via Bluetooth, open the "Discolor DJ"
app on your phone, tablet etc. and press the Bluetooth button. This will enable
you to control the following five modes on the device from your phone: Music,
Light, USB/SD Card, Bluetooth and Equalizer. To cancel the app, press the exit
button.
To control the device via your phone, please find and click
the app " Discolor DJ ". Open the APP "Discolor DJ" in your
phone, there have 6 function block on main page :
1.Bluetooth Music play
2.Light control colours, brightness and light flash mode
3.USB card play
4.Control Bluetooth connect
5.Equalizer,volume adjustment for music, Microphone
and guitar.
6.Line In input - mute
(1) Control Bluetooth connect :
Press
enter into Control Bluetooth connect page, then click "Discolor
DJ BLE" to connect with the speaker.
(2) Bluetooth Music play
Press and enter into Bluetooth Music play page, Press "Pick songs to play"
to Pick Song page to choose the song you want to play, press "Done" to back to
Bluetooth Music play page, also you can operate pause, play, backward, forward,
volume adjustment, repeat, random play. Press "Back" to main page.
(3) Light control colours, brightness and colour change mode
Press enter into Light control page, you can select any colour to show the
light colour on the speaker, as well as adjust the brightness of the light. To go
back to main page, press "Discolor DJ " on the left corner.
Press "Profiles" to enter into Light Flash mode page, you can choose total 12 well
set-up light flash modes. To back to Light Control page, press "Light" on the left
corner.
User’s Manual EN

15
(4) USB cardplay
Wheninserting USBcardonthespeaker, press enter intoUSBCard
playpage, youcan choosethesong and playmusic inUSBcard, press "Play"
toenter intoplaycontrol page,youcan operate pause, play, backward, forward,
volumeadjustment. Press"List" tobacktoUSBlist page, press "Back"to
mainpage.
(5)Equalizer,volumeadjustment for music, Microphoneand guitar
Press
enter intoSound Set page to adjust volume for Music, Microphone
andGuitar,italsohave4 well set-up EQ modes: Pop, Classical, Jazz andRock for
choose, youalsocan pressG-Eqtographic equalizer toset up your preference
equalizespecification.
(6)LineIninput - mute
Press
enter intoLineINinput page, press
tomute music, press
tocontinueplay. Press"Back"tomainpage.
User’s Manual EN

16
Note!
Product design and Technical parameters may be change without notice.
This mainly concerns parameters technical, software and user manual
present. User’s Manual is a general orientation on service product.
Manufacturer and distributor do not assume any responsibility as
compensation for any inaccuracies errors in the descriptions appearing in
this user manual.
Correct Disposalof this product.
This marking indicates that this product should not be
disposed with other household wastes throughout the EU.
To prevent possible harm to the environment or human
health from uncontrolled waste disposal, recycle it
responsibly to promote the sustainable reuse of material
resources. To return your used device, please use the return
and collection systems or contact the retailer where the
product was purchased. They can take this product for
environmental saferecycling.
User’s Manual EN

17
WICHTIGSTE SICHERHEITSANGABEN
LesenSie sich bittedievorliegendeBedienungsanleitung vor dem ersten
Gebrauch des Geräts aufmerksam durch. Beachten Sie bitte die Anweisungen für
densicherenGebrauchund bewahrenSiedieBedienungsanleitung auf,umauch
in der Zukunft darauf zurückgreifen zu können.
1. Absicherung desVersorgungskabels: VergewissernSie sich,dasssichdas
Versorgungskabel nicht ineinem Durchgangsbereich befindet oder durchkeine
schweren Gegenstände zugedrückt ist. Achten Sie besonders auf den Stecker, das
Kabel, sowie auch auf die Versorgungsbuche am Gerät. Ziehen Sie niemals am
Versorgungskabel des Geräts.
2. Lüftung: Um dieÜberhitzung des Geräts zu vermeiden, sollte es an einem
luftigen Ort platziert werden. Das Gerät DARF NICHT zugedeckt werden und es
dürfen keine Gegenstände darauf abgestellt werden. Der Abstand zwischen dem
Gerät und der Wand sollte mindestens 10 cm betragen. Das Gerät DARF NICHT
auf Bett, Sofa, Teppich oder an einem anderen Luftzufuhr einschränkenden Ort
platziert werden.
3. Demontage des Geräts: es DÜRFEN KEINE Elemente des Geräts demontiert
werden. Bei Berührung von inneren Komponenten des Geräts besteht
Stromschlaggefahr.
4. Beunruhigender Geruch: Setzt das Gerät einen beunruhigenden Geruch frei,
danntrennenSieessofort vonder Netzsteckdose. Esdarfnichtwieder
eingeschaltet werden,bevor es voneinemqualifiziertenFachmannseines
Servicecenters repariert wordenist.
5. Achtung: das Gerät wird mit Strom mit einer Spannung und Frequenz von:
100–240V, 50–60 Hz versorgt.
6. Achtung: Das Gerät niemals darf niemals dem Kontakt mit Flüssigkeiten
ausgesetzt oder in der Nähe von Wassergefäßen platziertwerden.
Bedienungsanleitung DE

18
BESCHREIBUNG DER FERNBEDIENUNGSFUNKTIONEN
1. Wachen
2. Lautstärke des Geräts +/-
3. Menüwahltaste -/+
4. Stummtaste
5. Vorheriger/VOL-
6. Wiedergabe/Pause
7. Eingangssignaltaste
8. Menüwahltaste
9.Wiederholtaste
10. Nächster/VOL+
Reichweite der Fernbedienung
Infrarotsensor
Achtung:
Zwischen der Fernbedienung und dem Gerät sollten sich keine größeren Objekte
befinden
Bedienungsanleitung DE

19
BESCHREIBUNG VON FUNKTIONENDESBEDIENPULTS
1. LED-Anzeige
2. FEATURES - / +
3. MIC: Mikrofoneingang
4. GITARRE: Gitarren-Eingang
5. POWER / INPUT: Schalter POWER / USB / LINE IN / Bluetooth / FM
6. Wählen Sie im Menü der Schaltfläche
7. SD / USB-Eingang SD / USB. Wenn jede Verbindungsvorrichtung sollte mit der
Buchse besondere Aufmerksamkeit auf die Ausrichtung des Steckers zu bezahlen.
Ladegerät USB 5V 1A.
8. Vorheriger Titel
9. Wiedergabe / Pause
10. Zeile
11. LED
Rotes Licht zeigt die Ladevorrichtung .
Grünes Licht zeigt an, dass das Gerät vollständig geladen ist.
12. Schnittstelle DC 15V
13. Nächster Titel
14. VOLUME - / +: Stellen Sie die Lautstärke des Gerätes.
HAUPTVORGÄNGE
1. Einschalten des Geräts
HaltenSiedieSTANDBY-Tasteaufdem Bedienpult/der Fernbedienung einige
Sekunden lang gedrückt, das Gerät schaltet ein und die LED-Diodegeht an.Befindet
sich das Gerät über längere Zeit im Wartebetrieb (STANDBY), dann schaltet es
automatisch ab. Um das Gerät wieder einzuschalten, drücken Sie aufdieSTANDBY-
Taste aufdemBedienpult/aufder Fernbedienung.
Bedienungsanleitung DE
1
23456713
12
11
10
9
87
14

20
2. Wahl des Eingangsmodus
Um den Eingangsmodus auszuwählen, drückenSie auf die Eingangsmoduswahltaste
auf der Fernbedienung oder auf die Signaleingangstaste auf dem vorderen Bedien-
pult.
3. Gerät stumm schalten
Um das Gerät stumm zu schalten, drücken Sie einmal auf die Stummtaste auf der Fern-
bedienung. Um die Austastung auszuschalten, drücken Sie wiederholt auf die Taste.
4. Lautstärkeanpassung auf der Fernbedienung
Drücken Sie die VOL +/- Taste auf der Fernbedienung, um die Lautstärke des
Geräts anzupassen.
5. Lautstärkeanpassung am Gerät
Drehen Sie den Drehknopf nach links, um die Lautstärke zu reduzieren oder nach
rechts, um sie zu erhöhen.
6. Funktionsknopf
Drehen Sie den Regler nach links oder rechts einen anderen Effekt für alle Option-
en (Licht, Farbe oder Ton) unter der MENU-Taste eingestellt werden.
7. Menü-Wahl
Drücken Sie auf die MENU-Taste auf dem Bedienpult oder auf der Fernbedienung, um
TB,1U,2U,DL,EC,BO,BA auszuwählen (insgesamt 7 Optionen), und anschließend auf
die FUNCTION +/- Taste, um eine Option auszuwählen. (TB = Höhen, 1 HE = Lautstärke
des Mikrofons, = 2U die Lautstärke der Gitarre, DL = Verzögerung, EC = Echo, BO =
Modus Licht, BA = Bass).
8. Wiederholen
Drücken Sie beim Wiedergeben einmal auf die Wiederholtaste auf der
Fernbedienung, um den aktuell wiedergegebenen Titel zu wiederholen. Um das
Wiederholen auszuschalten, drücken Sie nochmals die Wiederholtaste.
9. PREV/NEXT (vorheriger/nächster)
Über die PREV/NEXT Tasten können konkrete Titeln aus der Wiedergabeliste
ausgewählt werden.
10. USB-Ladegerät
Ausgangsleistung des USB-Ladegeräts für Mobiltelefone beträgt 5V 1A.
Bedienungsanleitung DE
Table of contents
Languages:
Other Manta Speakers manuals

Manta
Manta HARD BEAT User manual

Manta
Manta rainbow eye MA417 User manual

Manta
Manta SPK209 User manual

Manta
Manta San Diego User manual

Manta
Manta EXPEDITION User manual

Manta
Manta SPK905 User manual

Manta
Manta MM3000 User manual

Manta
Manta SPK203 User manual

Manta
Manta SPK5026 NIKE 2 User manual

Manta
Manta SPK5000 User manual

Manta
Manta MM1580 User manual

Manta
Manta SPK207 User manual

Manta
Manta SPK95008 User manual

Manta
Manta PHANTOM SPK5450 User manual

Manta
Manta PA6528D User manual

Manta
Manta SoundStage MM5400 User manual

Manta
Manta MM291 User manual

Manta
Manta SPK12GO User manual

Manta
Manta SPK204FM User manual

Manta
Manta Power Audio SPK5032 User manual