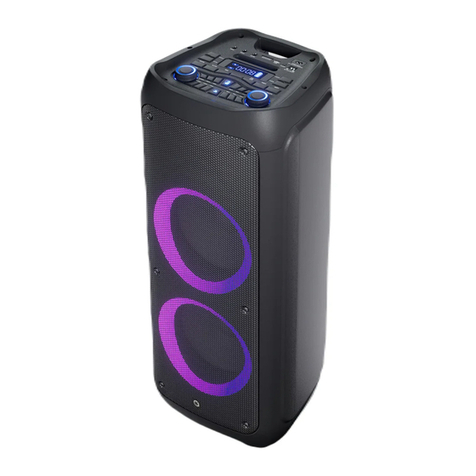
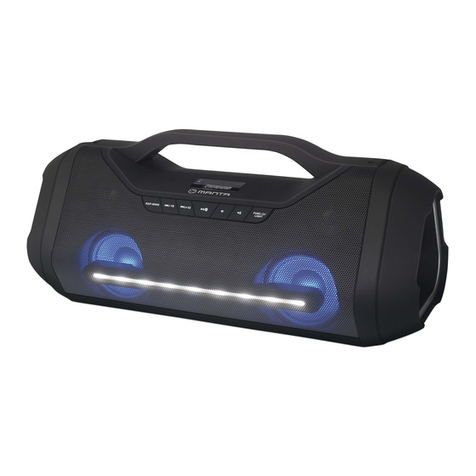
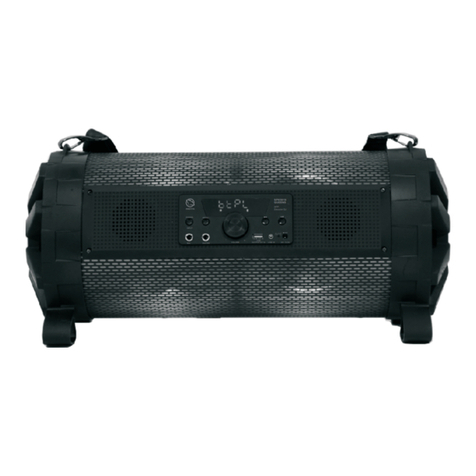
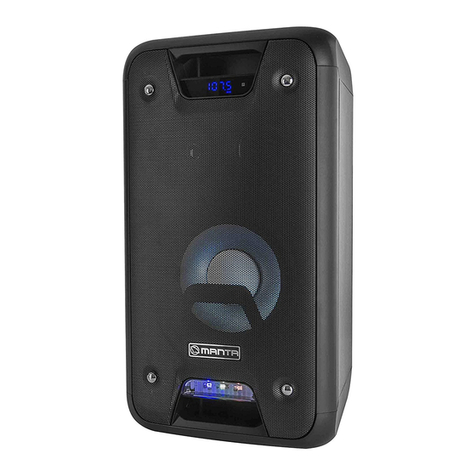
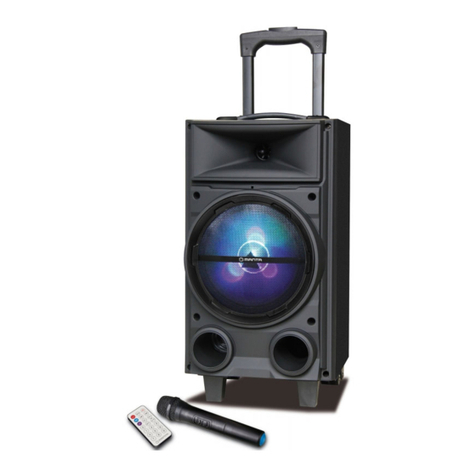
Manta SPK95008 User manual

SPEAKER
Model:
SPK95008
Instrukcja obsługi
User’s Manual
Bedienungsanleitung
Manual de usuario
Istruzioni d’uso
Návod k obsluze
Инструкция использования

Instrukcja Obsługi PL
2
PROFESJONALNY SYSTEM GŁOŚNIKÓW AKTYWNYCH
Przed podłączeniem systemu prosimy o uważne przeczytanie
niniejszej instrukcji.
Dziękujemy za zakup systemu głośników aktywnych Manta. Przed
przystąpieniem do użytkowania montażu prosimy o uważne
przeczytanie instrukcji.
WAŻNE ŚRODKI BEZPIECZEŃSTWA
Przed przystąpieniem do użytkowania urządzenia prosimy o
przeczytanie wszystkich instrukcji obsługi i BHP. Należy zastosować
się do zaleceń zawartych w niniejszej Instrukcji oraz zachować
dokument Instrukcji do późniejszego wykorzystania.
1. Upewnij się, że przewód zasilający podłączony do urządzenia nie
utrudnia ruchu. Nie ustawiaj ciężkich obiektów na przewodzie
zasilającym, ponieważ może on ulec uszkodzeniu. Wyjmując
przewód z gniazda zawsze mocno chwyć za wtyczkę, zamiast za
kabel. Należy unikać stosowania przedłużaczy.
2. Wentylacja: Urządzenie należy ustawić w dobrze wentylowanym
pomieszczeniu i zachować odstęp ok. 10 cm od innych obiektów. Nie
wolno zakrywać urządzenia materiałami ani kocami. Nie ustawiać
urządzenia na łóżku, sofie czy dywanie, ponieważ spowoduje to
zastawienie otworów wentylacyjnych.
3. Demontaż obudowy: NIE WOLNO demontować obudowy.
Wewnątrz obudowy nie ma żadnych części, których można użyć. W
razie konieczności zleć naprawę personelowi centrum serwisowego.
4. W przypadku gdy urządzenie wydziela zapach lub dym, należy
bezzwłocznie wyłączyć zasilanie elektryczne. Urządzenie należy
oddać do serwisu w miejscu, w którym zostało zakupione.
Instrukcja Obsługi PL
3
Uwaga: Niniejszy system zasilany jest napięciem 230V AC, 50 Hz.
Upewnij się, że zasilanie w domu jest takie jak wyżej.
SPECYFIKACJA PRODUKTU:
● Pilot zdalnego sterowania
● Wejścia mikrofonowe
● Ekran LED wyświetlacza
● Wejście na karty SD/USB
● 6 pasmowy equalizer graficzny
● Regulacja siły głosu funkcji X-BASS (podbicie tonów niskich)
● Zakres częstotliwości: 40Hz~20KHz
● Impedancja: 4 Ω
● Czułość:93dB}3dB
INSTRUKCJA OBSŁUGI FUNKCJI NA PANELU PRZEDNIM
TRYB: Przycisk USB/SD/LINE (wejście audio)
Klawisz odtwarzania NEXT (NASTĘPNY).
Klawisz odtwarzania PREV (POPRZEDNI).
EQUALIZER.
Gniazdo wejścia USB.
Gniazdo kart SD.
Gałka regulacyjna MIC BASS (tony niskie mikrofonu).
Gałka regulacyjna MIC TREBLE (tony wysokie mikrofonu)
Gałka regulacyjna MIC VOLUME (siła głosu mikrofonu).
Regulacja X-BASS (podbicie niskich tonów).
Wyświetlacz LED.
WYŁĄCZNIK ZASILANIA.
Gniazdo wejścia MICROPHONE.
Gałka regulacyjna opóźnienia mikrofonu.
Gałka regulacyjna pogłosu mikrofonu.
GŁÓWNA REGULACJA SIŁY GŁOSU.

Instrukcja Obsługi PL
4
PILOT ZDALNEGO STEROWANIA
Przycisk STABDBYdla MP3
Przycisk USB/SD/LINE (wejście audio)
Przycisk prev/FM CH (poprzedni/kanał
FM) dla MP3
Przycisk play/pause (odtwarzanie/pauza)
dla MP3
Tuner radiowy FM
Przycisk next/FM CH (następny/kanał FM)
dla MP3
Przycisk Repeat (Powtarzaj) dla MP3
Przycisk Stop (Zatrzymaj) dla MP3
Przycisk zwiększania siły głosu dla MP3
Przycisk zmniejszania siły głosu dla MP3
Przycisk Mute (Wycisz)
Przycisk equalizera dla MP3
Przycisk liczbowy dla MP3
INSTRUKCJA OBSŁUGI FUNKCJI NA PANELU TYLNYM
1. WEJŚCIE AUDIO: Gniazdo wejścia sygnału audio DVD/TV lub
innego odtwarzac za AV AUX.
2. Przełącz na AUDIO INPUT (WEJŚCIE AUDIO) i wybierz LED.
3. Wejście AC: AC220V.
INSTRUKCJA UŻY TKOWANIA
1. Podłącz kable sygnałowe zgodnie z instrukcją podłączenia na
panelu tylnym.

Instrukcja Obsługi PL
5
2. Aby zapewnić prawidłową wartość napięcia podłącz kabel źródła
elektronic znego i włącz zasilanie.
3. Przy pomocy klawiszy wyreguluj system zgodnie ze swoimi
preferencjami audio.
SCHEMAT POŁĄCZEŃ NA PANELU TYLNYM
ŚRODKI OSTROŻNOŚCI
Celem uniknięcia problemów eksploatacyjnych lub poważnego
uszkodzenia urządzenia należy zastosować się do poniższych
zaleceń:
1. W czasie odłączania kabla od gniazda zasilania, należy c hwycić za
wtyczkę, a nie za kabel.
LED
AC2 3 0 V5 0 Hz

Instrukcja Obsługi PL
6
2. Podczas pracy urządzenia audio powinny być umieszczone z
daleka od urządzeń grzewczych.
3. Nie wolno podejmować prób naprawy lub modyfikacji urządzenia.
4. Nie wolno dotykać części wewnętrznych, ponieważ może to
skutkować porażeniem elektrycznym lub uszkodzeniem urządzenia.
5. Jeżeli urządzenie nie będzie używane przez dłuższy czas należy
wyjąć wtyczkę z gniazda zasilania.
6. Upewnić się, że produkt audio został umieszczony w miejscu
suchym i wentylowanym, oraz że pozostawiono wokół niego 20 cm
wolnej przestrzeni.
Ostrzeżenie: Urządzenia nie wolno wystawiać na działanie deszczu
lub wilgoci, ani też ustawiać naczyń zawierających płyny, takich jak
kubek czy wazon, na urządzeniu lub ponad nim.
TYPOWE USTERKI I SPOSOBY ICH USUWANIA
Objaw:
Lampka nie świeci się i nie ma dźwięku:
Wtyczka jest podłączona nieprawidłowo. Rozwiązanie - Włączyć
wtyczkę do gniazda zasilania
Zasilanie głośnika nie zostało włączone. Rozwiązanie - Użyć
przycisku zasilania.
Lampka się świeci ale brak dźwięku:
1. Kable podłączone nieprawidłowo. Rozwiązanie - Wyłączyć
zasilanie i sprawdzić gniazdo jack, aby się upewnić że odpowiedni
sygnał audio połączony jest z odpowiednim gniazdem jack.
2. Sygnał audio nie jest przesyłany do głośników. Rozwiązanie -
Sprawdzić czy sygnał audio przesyłany jest do wszystkich głośników.

Instrukcja Obsługi PL
7
Jeżeli problem utrzymuje się po wykonaniu odnośnej procedury, jak
wyżej, należy skontaktować się z serwisem lub z profesjonalnym
technikiem elektrykiem, celem naprawy urządzenia. Nie wolno
podejmować próby otwierania urządzenia; w przeciwnym wypadku
nie odpowiadamy za skutki jego otwarcia.
Uwaga!
Konstrukcja produktu i parametry techniczne mogą ulec zmianie bez
wcześniejszego powiadomienia. Dotyczy to przede wszystkim parametrów
technicznych, oprogramowania oraz podręcznika użytkownika. Niniejszy
podręcznik użytkownika służy ogólnej orientacji dotyczącej obsługi produktu.
Producent i dystrybutor nie ponoszą żadnej odpowiedzialności tytułem
odszkodowania za jakiekolwiek nieścisłości wynikające z błędów w opisach
występujących w niniejszej instrukcji użytkownika.
Prawidłowa utylizacja urządzenia.
To oznaczenie informuje, że produktu nie należy utylizować wraz z
odpadami z gospodarstw domowych w całej Unii Europejskiej. Aby
uniknąć ewentualnych szkód dla środowiska i człowieka
spowodowanych niekontrolowaną utylizacją odpadów, należy
poddawać je odpowiedzialnemu odzyskowi w celu zadbania o
zrównoważone ponowne wykorzystanie surowców materiałowych.
Aby zwrócić wykorzystane urządzenie, należy skorzystać z
odpowiednich systemów zwrotu i zbiórki odpadów lub
skontaktować się ze sprzedawcą urządzenia. W takim punkcie
istnieje możliwość poddania wyrobu odzyskowi w sposób
bezpieczny dla środowiska.

Users Manual EN
8
Before using this machine, please read all the safety and oper-
ating instructions. Please adhere to all the instructions herein,
and save this information in a safe place for future use.
1. Please ensure the power cord for this unit is out of the path
of foot traffic. Do not place heavy objects on the power cord
as it will cause damage to the cord. Always firmly grasp the
plug and pull the plug from the power supply, never yank the
cable in order to pull out the plug. Avoid the use of an exten-
sion cable.
2. Ventilation: This unit should be placed in a well ventilated sp-
ace where it has no less than 10cm ventilation space on eith-
er side of it. Do not cover the unit with a cloth or blanket. Do
not put it on a bed, sofa, or carpet as this will stifle the ventil-
ation of the unit.
3. Casing Dismantling: DO NOT dismantle the casing . There
are no usable parts inside the unit. Make use of a service
center in order to have your unit repaired.
IMPORTANT SAFETY MEASURES
Thank you for purchasing the MANTA active
speaker system. Please read the manual care-
fully before operating.

9
● Remote control
● Microphone inputs
● LED display screen
● USB/SD card input slot
● 6 band graphic equalizer
● -Bass volume control
● Fre.response:40Hz~20KHz
● Impedance:4Ω
● Senstivity:93dB±3dB
PRODUCT SPECIFICATIONS:
4. Should the unit emit any smell or smoke, immediately turn
off the power supply. Take the unit to the service center from
which you bought it for repairs.
Attention: This set applies to AC 220V 50Hz power supply.
Please ensure that the power supply of your home
or venue you wish to use the unit has the same po-
wer supply as that stipulated above.
Users Manual EN

10
MODE: USB/SD/LINE(Audio input) button
NE T play key.
PREV play key.
EQUALIZER.
USB input jack.
SD CARD input jack.
MIC BASS control knob.
MIC TREBLE control knob.
MIC VOLUME control knob.
-BASS control.
LED display.
POWER SWITCH.
MICROPHONE input jack.
MIC delay control knob.
MIC echo control knob.
MASTER VOLUME.
Mp3 standby
USB/SD/LINE (Audio input)
button
Mp3 prev/FM CH- button
Mp3 play/pause button/
FM tuner
Mp3 next/FM CH+ button
Mp3 repeat button
Mp3 stop button
Mp3 volume up button
Mp3 volume down button
Mute button
Mp3 equalizer button
Mp3 number button
FRONT PANEL FUNCTIONINSTRUCTION
REMOTE CONTROL
Users Manual EN

11
1. AUDIO INPUT: DVD/TV or other AU AV player audio signal
input jack.
2. Switch for AUDIO INPUT, and switch for LED.
3. AC input: AC220V.
1. Connect the signal cables according to the back panel conn-
ection instruction.
2. To ensure the correct voltage, insert electronic source cable
and turn on the power switch button.
3. Adjust function keys to your personal audio preference.
BACK PANEL FUNCTIONINSTRUCTION
BACK PANEL CONNECTIONDIAGRAM
USE INSTRUCTION
LED
AC230V50Hz
Users Manual EN

12
In order to prevent operating problems or serious damage to the
device, please comply with the following remarks:
1. Hold the electric outlet while pulling out the plug. Do not pull
the wire.
2. Operating audio appliances should be kept away from heati-
ng facilities.
3. Do not attempt to fix or revise the circuit.
4. Do not touch the internal parts as this may cause an electric
shock or serious damage to the device.
5. Pull out the plug if not in use for long.
6. Ensure the audio product is placed in a ventilated and dry a-
rea with about 20mm of space around the unit.
Warning: Do not expose this appliance to rain or moisture or
place any vessel containing liquids such as a cup or
a vase on or above the appliance.
Symptom
1. Plug is not well connected Insert the plug into electric outlet
1. Cable misconnected
2. Audio signal is not transmitted
to speaker
If the problem exists after performing the related procedures above, please
refer to the appointed service agent or professional technician to fix the
appliance. Do not attempt to open the cover otherwise we assume no
responsibility.
2. Speaker power button is not turned on Turn on the button
Check all the speakers if there
is audio signal output
Turn off the power and check the input
jack to ensure proper audio signal is
connected to the relevant input jack
No
Function Light
& No Sound
Function
Light on but
No Sound
Possible Problem Solution
PRECAUTION
TROUBLESHOOTING
Users Manual EN

13
Note!
Product design and Technical parameters may be change without notice. This
mainly concerns parameters technical, software and user manual present. User’s
Manual is a general orientation on service product. Manufacturer and distributor
do not assume any responsibility as compensation for any inaccuracies errors in
the descriptions appearing in this user manual.
Correct Disposal of this product.
This marking indicates that this product should not be
disposed with other household wastes throughout the EU.
To prevent possible harm to the environment or human
health from uncontrolled waste disposal, recycle it
responsibly to promote the sustainable reuse of material
resources. To return your used device, please use the return
and collection systems or contact the retailer where the
product was purchased. They can take this product for
environmental safe recycling.
Users Manual EN

Bedienungsanleitung DE
14
WICHTIGE SICHERHEITS MAßNAHMEN
Lesen Sie bitte vor Beginn der Nutzung des Geräts alle
Bedienungsanleitungen und Arbeitsschutzanweisungen durch. Die in
der vorliegenden Anleitung enthaltenen Hinweise sind einzuhalten
und das Dokument der Anleitung für späteren G ebrauch
aufzubewahren.
1. Vergewissern Sie sich, dass das ans G erät angeschlossene
Stromversorgungskabel ein freies Bewegen in der Nähe des Geräts
nicht einschränkt. Stellen Sie keine sc hweren Gegenstände auf dem
Versorgungskabel ab, da es zu seiner Beschädigung führen könnte.
Halten Sie beim Herausziehen des Netzkabels aus der Steckdose
immer fest am Stecker und nicht am Kabel selbs t.
Verlängerungsl eitungen sind zu vermeiden.
2. Lüftung: Das Gerät is t in einem gut gelüfteten R aum und im
Abstand von ca. 10 cm v on anderen Gegens tänden abzustellen. Das
Gerät darf nic ht mit Stoffen oder Decken verdeckt werden. Stellen
Sie das Gerät nic ht auf einem Bett, Sofa oder Teppich ab, da es zur
Verdeckung von Lüftungsöffnung en führen wird.
3. Demontage des Gehäuses: das Gehäuse DARF NICHT
auseinandergebaut werden. Im Inneren des Gehäuses befinden sich
keine Teile, die benutzt werden könnten. Bei Bedarf beauftragen Sie
Fachleute einer Kundenservicestelle mit der ggf. notwendigen
Reparatur.
4. Setzt das Gerät Geruc h oder Ra uch frei, dann i st di e
Stromversorgung unverzüglich abzuschalten. Das Gerät is t an der
Stelle zur Wartung zu übergeben, an der es erworben worden ist.
Achtung: Dieses Sys tem wird mit 220 V AC, 50 Hz Spannung
versorgt. Vergewissern Sie sich, dass die Spannung bei I hnen
zu Hause mit der vorstehend angegebenen übereinstimmt.

15
SPEZIFIKATION DES PRODUKTS:
● Fernbedienung
● Mikrofonbuchsen
● LED-Bildschirm des Dis plays
● Eingang für SD-/USB-K arten
● graphischer 6-Band Equalizer
● Lautstärkeeinstellung der X-BASS-Funktion (Höhereinstellung von
niedrigen Tönen)
● Frequenzbereich: 40Hz~20KHz
● Impedanz: 4 Ω
● Empfi ndlichkeit: 93dB}3dB
BEDIENUNGSANLEITUN G FÜR FUNKTIONEN AM FRONTPANEEL
MODUS: USB/SD/LINE Taste (Audio-Eingang)
Wiedergabetaste NEXT ( NÄCHSTER).
Wiedergabetaste PREV ( VORHERIGER).
EQUALIZER.
USB-Eingangsbuchse.
SD-Kartenfach.
Einstellknopf MIC BASS (niedrig e Mikrofontöne).
Einstellknopf MIC TREBLE (hohe Mikrofontöne)
Einstellknopf MIC VOLUME (Mikrofonlautstärke) .
X-BASS Reglung (Höhereinstellung v on niedrigen Tönen).
LED-Display.
STROMVERSORGUNGSAUSSCHALTER.
Eingangsbuchse MICROPHONE.
Einstellungsdrehknopf für Mikrofonverspätung.
Einstellungs drehknopf des Mikrofonnachhalls.
HAUPTEINSTELLUNG LAUTSTÄRKE.
Bedienungsanleitung DE

16
FERNBEDIENUNG
Warten für MP3
USB/SD/LINE Taste (Audio-Eingang)
prev/FM CH Taste (vorheriger/FM-
Channel) für MP3
play/pause Taste (Wiedergabe/Pause)
für MP3
FM-Radiotuner
next/FM CH Taste (nächster/FM-
Channel) für MP3
Repeat Taste (Wiederholen) für MP3
Stop Taste (Stoppen) für MP3
Lautstärkeerhöhungstaste für MP3
Lautstärkereduzierungstaste für MP3
Mute Taste (Ton aus)
Equalizer Taste für MP3
Zahlentaste für MP3
BEDIENUNGSANLEITUNG FÜR FUNKTIONEN AM HINTEREN PANEEL
1. AUDIO EINGANG: Eingangsbuchse des Signals des Audio DVD/TV
oder eines anderen AV AUX Wiedergabegeräts.
2. Schalten Sie auf AUDIO INPUT (AUDIO EINGANG) um und wählen
Sie LED.
3. AC-Eingang: AC220V.
BEDIENUNGSANLEITUNG
1. Schließen Sie die Signalkabel am hinteren Paneel gemäß
Bedienungsanleitung an.
2. Um einen korrekten Spannungswert zu gewährleisten, schließen
Sie das Kabel der elektronischen Quelle an und schalten Sie die
Stromversorgung ein.
Bedienungsanleitung DE

17
3. Stellen Sie das System mit Hilfe von Tasten gemäß Ihren Audio-
Präferenzen ein.
VERBINDUNGSSCHEMA AM HINTEREN PANEEL
VORSICHTSMAßNAHMEN
Um Betriebsprobleme oder eine ernsthafte Beschädigung des
Geräts zu vermeiden, sind die nachstehenden Hinweise einzuhalten:
1. Ziehen Sie beim Trennen des Netzkabels von der
Stromversorgungsdose nicht am Kabel, sondern am Stecker.
2. Audiogeräte im Betrieb sollten weit von Heizungsgeräten platziert
sein.
LED
AC2 3 0 V5 0 Hz
Bedienungsanleitung DE

18
3. Es dürfen keine Re paratur- oder Abänderungsv ersuche des G eräts
unternommen werden.
4. Innenteile dürfen nic ht berührt werden, da es Stromschlag oder
Beschädigung des Geräts zur Folge haben kann.
5. Sollte das Gerät über einen läng eren Zeitraum nicht benutzt
werden, dann ziehen Sie seinen Stecker aus der
Stromversorgungs dose heraus.
6. Vergewissern Sie sich, dass das Audioprodukt an einer trockenen
und gut gelüfteten Stelle aufg estellt worden ist, und dass um das
Gerät herum 20 cm Freiraum gelassen worden ist.
Bedienungsanleitung DE

Manual de usuario SP
19
IMPORTANTES MEDIDAS DE SEGURIDAD
Antes de empezar a usar el dispositiv o, por favor, lean atentamente
todoslosmanualesdeuso yseguridad.Seguirestric tamentelas
recomendaciones contenidas enesteManual yguardar las
Instrucciones para su us o posterior.
1. Asegurarse que el cable de alimentación conectado al dispositivo
nodificultaelmovimiento. Nocolocar objetos pesados sobreel
cable, porque puede sufrir daños. Desenchufar tirando del conector
y no del cable. Evi tar el uso de prolonga dores.
2. Ventilación: Colocar eldispositivo enunlugar bienventilado, a
unadistancia deal menos 10cmdeotros objetos. Nocubrircon
telas o mantas. No dejar sobre la cama, s ofá o alfombra, para no
obstaculizar los orificios de ventilación.
3. Desmontaje de carcasa: QUEDA PROHIBIDO desmontar la carcasa.
Dentro de la carcasa, no hay elementos que puedan ser utilizados. Si
fuese necesario, reparar solamente en un taller autorizado.
4. Si sale humo u olor extraño del dispositivo, desconectar
inmediatamente la corriente. Entregar el dispositivo al luga r, donde
fue comprado.
Atención: este sis tema s e debe conectar a corriente eléctrica 220V
AC, 50 Hz. Comprobar las características del circuito eléctrico local.
ESPECIFICACIÓN DEL PRODUCTO:
Mando remoto
Entrada de micrófono
Pantalla LED
Slot para tarjeta SD/puerto USB
Ecualizador gráfico de 6 frecuencias
Ajuste de potencia de función X - BASS (amplificación de
tonos bajos)

20
Rango de frecuencias: 40Hz~20KHz
Impedancia: 4 Ω
Sensibilidad: 93dB/3dB
INSTRUCCIONES DE USO DE FUNCIONES DEL PANEL FRONTAL
MODO: Botón USB/SD/LINE (entrada audio)
Botón de reproducción NEXT (SIGUIENTE).
Botón de reproducción PREV (ANTERIOR). ECU-
ALIZADOR.
Puerto de entrada USB.
Slot para tarjeta SD.
Perilla de ajuste MIC BASS (tonos bajos del micrófono).Perilla
de ajuste MIC TREBLE (tonos altos del micrófono)Perilla de
ajuste MIC VOLUME (volumen del micrófono).Ajuste X-BASS
(amplificación de tonos bajos).
Pantalla LED.
INTERRUPTOR DE CORRIENTE.
Puerto de entrada del MICRÓFONO.
Perilla de ajuste de retraso del micrófono.
Perilla de ajuste de eco del micrófono.
AJUSTE PRINCIPAL DE VOLUMEN.
INSTRUCCIONES DE USO DE FUNCIONES DEL PANEL POSTERIOR
1. ENTRADA AUDIO: Enchufe de entrada de señal audio DVD/TV u
otro reproductor AV AUX.
2. Conmutador AUDIO INPUT (ENTRADA AUDIO) y elegir LED.
3. Entrada AC: AC220V.
Manual de usuario SP
Table of contents
Languages:
Other Manta Speakers manuals

Manta
Manta MM80 User manual

Manta
Manta MIAMI SPK416 User manual

Manta
Manta Power Audio SPK5032 User manual

Manta
Manta SPK555 User manual

Manta
Manta SPK614 User manual

Manta
Manta OREGON User manual

Manta
Manta HARD BEAT User manual

Manta
Manta rainbow eye MA417 User manual

Manta
Manta SPK1001 User manual

Manta
Manta SPK406 User manual

Manta
Manta SPK9207 User manual

Manta
Manta SPK5002 User manual

Manta
Manta SPK216 User manual

Manta
Manta SPK11GO User manual

Manta
Manta SPK204FM User manual

Manta
Manta SPK5020 User manual

Manta
Manta MM3000 User manual

Manta
Manta MM291 User manual

Manta
Manta Surfer MM4500 User manual

Manta
Manta SPK407 User manual