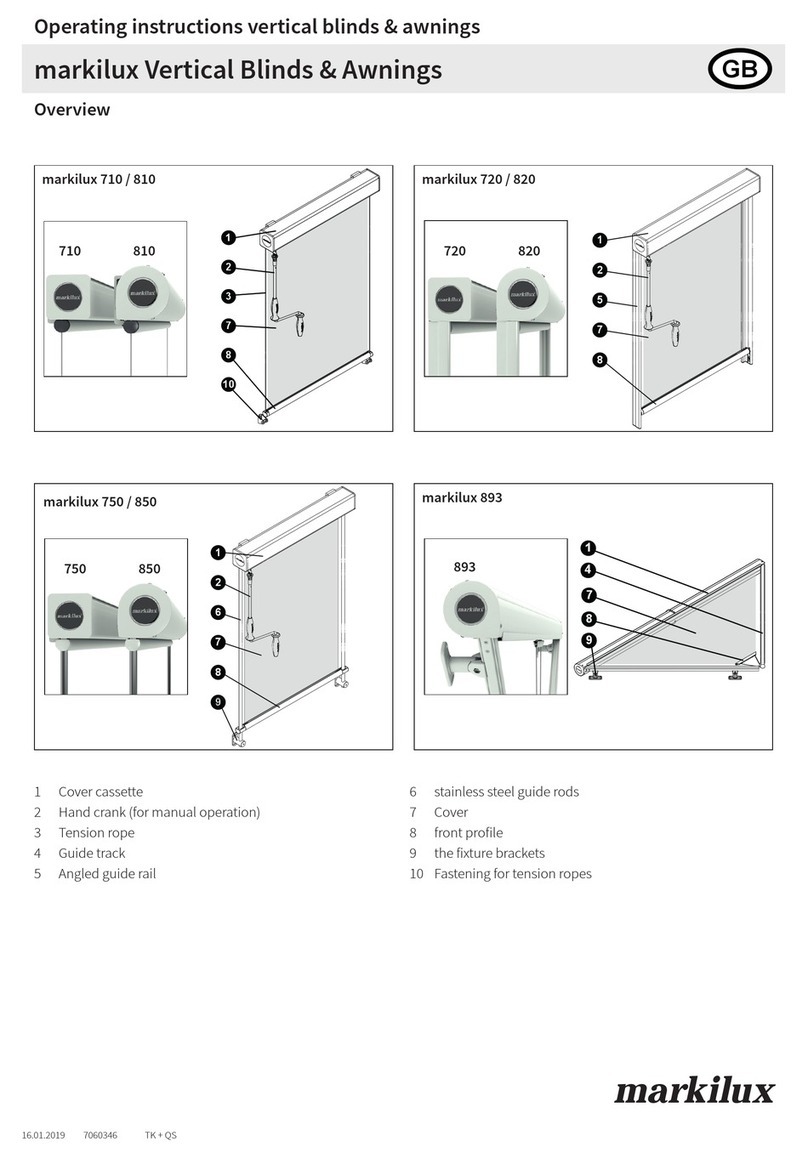
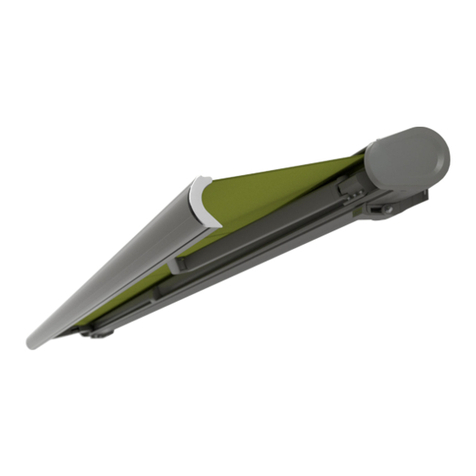
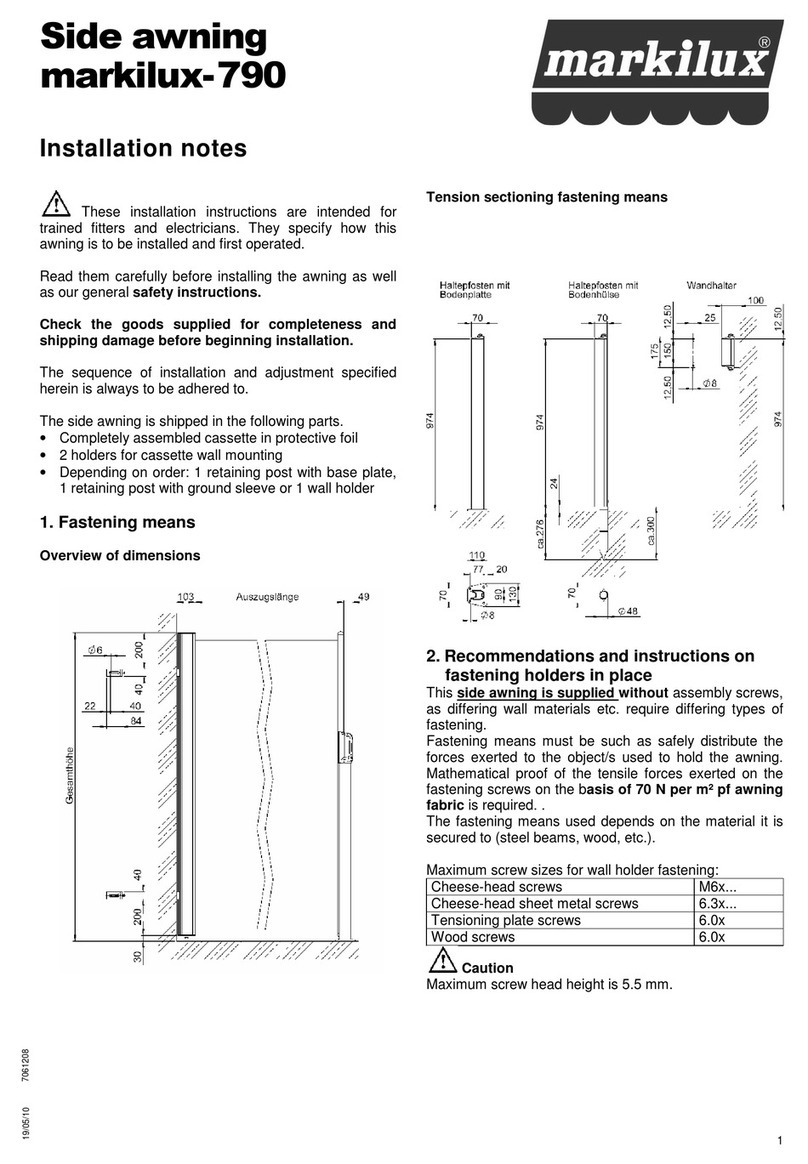
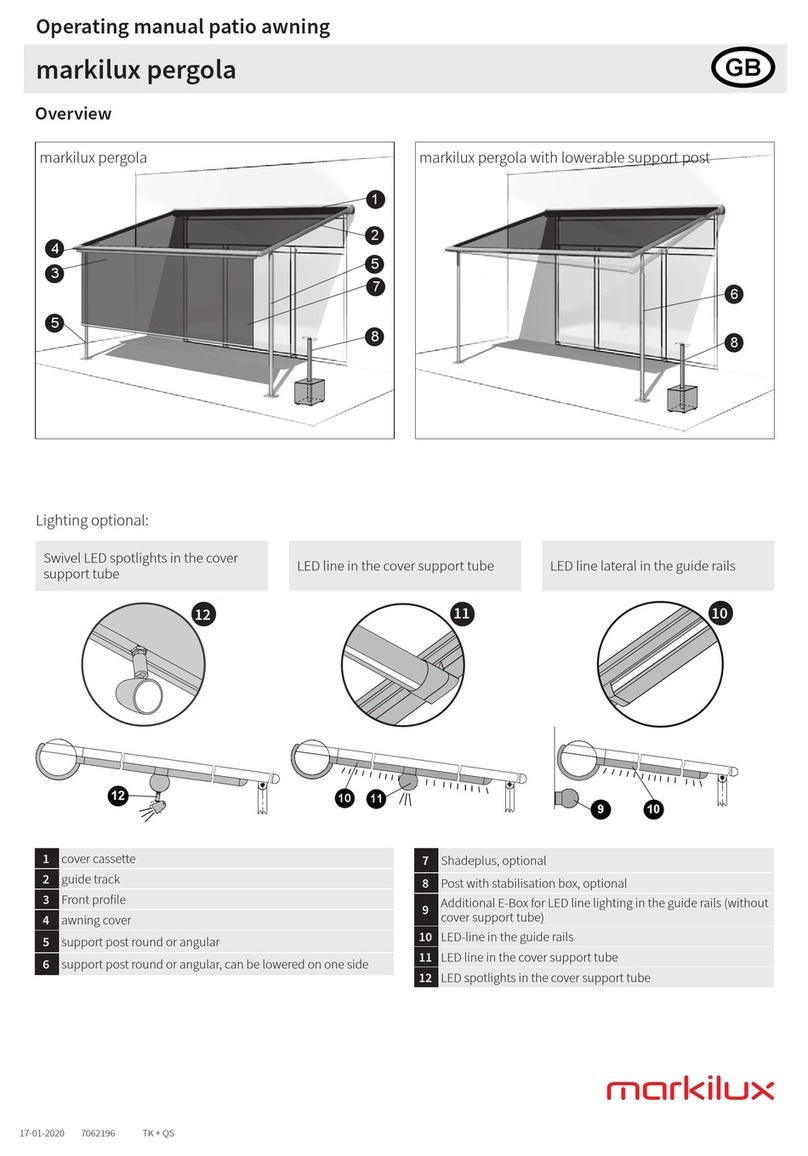
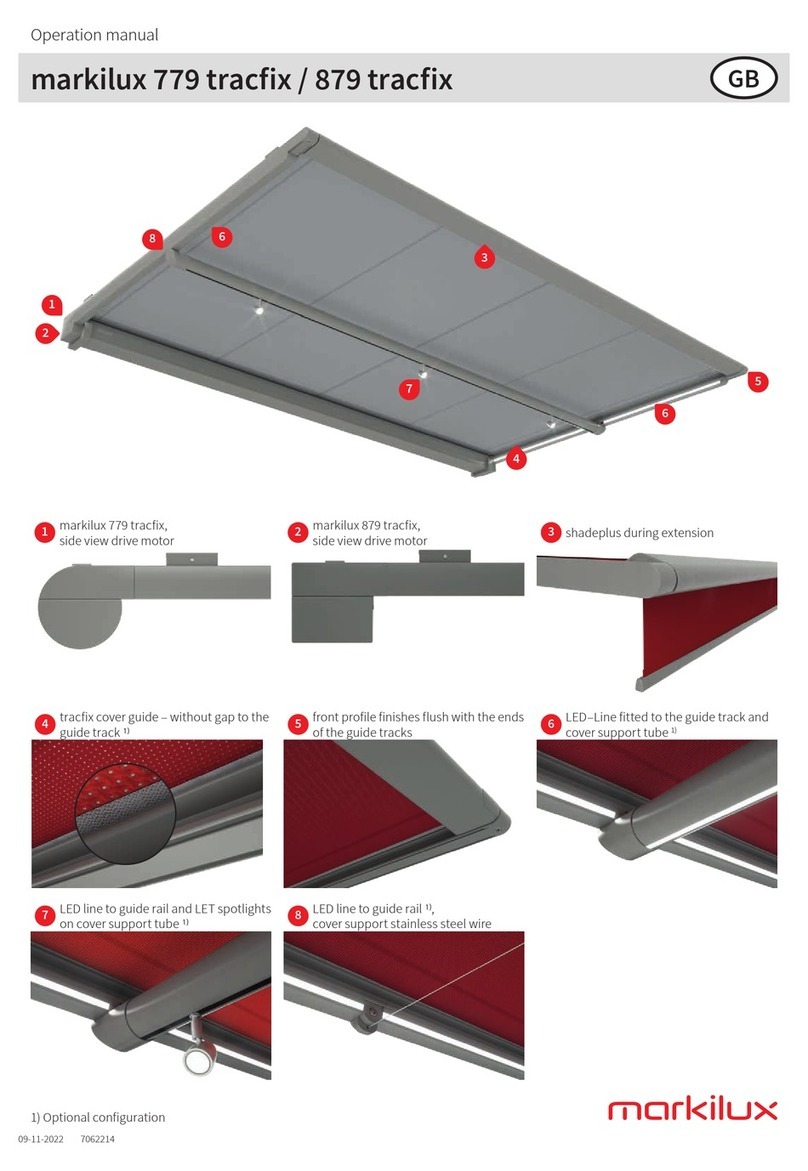
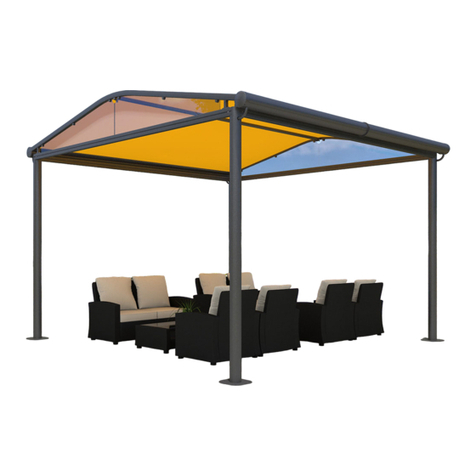
Markilux 8800 tracfix User manual

1
markilux
Mounting instructions conservatory awning
overview
Table of contents
markilux 8800 / 8800 tracx
1
2
3
4
5
Scope of the Delivery
This conservatory awning is delivered with the cassette fully pre-assembled, a front prole and 1 pair of guide
tracks in protective foil. The drive belts have been matched to the cover length in the factory. The number of xture
brackets depends on the awning size and xture type, see sales literature.
markilux safety instructions
markilux mounting instructions Page
1. Overviews and xing types 5
1.1. Mounting types and mounting brackets 5
1.2 Mounting systems 5
1.3 Mounting bracket 6 - 7
1.4 Dimension overviews and xture dimensions 8
1.4.1 Bottom xture (xture method 11) 8
1.4.2 Face xture (xture type 12) 9
1.4.3 Track xture (xture type 32) 10 - 11
1.4.4 Track xture on conservatory rafters (xture type 33) 2
1.4.5 Reveal xture (xture type 16) 12
2. Fitting the brackets (e.g. bottom xture) 13
3. Awning installation 14
4. What to do if the awning has no tension in the middle position? 17
5. The course taken by the drive belt 17
6. Motor 18
6.1 Motor connection 18
6.2 Motor connection data markilux 8800 / 8800 tracx 18
6.3 Motor connection data coupled unit markilux 8800 / 8800 tracx - optional 19
7. Fixing the cassette coupling bracket (e.g. bottom xture) - optional 19
8. Coupling single awnings - optional 19 - 21
markilux handover declaration
1 Cassette
2 Guide track
3 cover support tube
4Front prole
5 Awning cover
02-06-2014 7061438 TK + QS


markilux safety instructions
Important information for the installation of markilux awnings
markilux
If the awning construction has to be pulled up into a higher area with
rope support, then the awning has
• to be taken out of the package,
• should be connected with pull ropes in such a way that these
cannot slip out,
• are to be pulled up up evenly in an horizontal position.
The same also applies for awning deinstallation.
Working at heights increases the risk of falling.
Appropriate climbing aids and safety rails are to be used whilst
installing the awning.
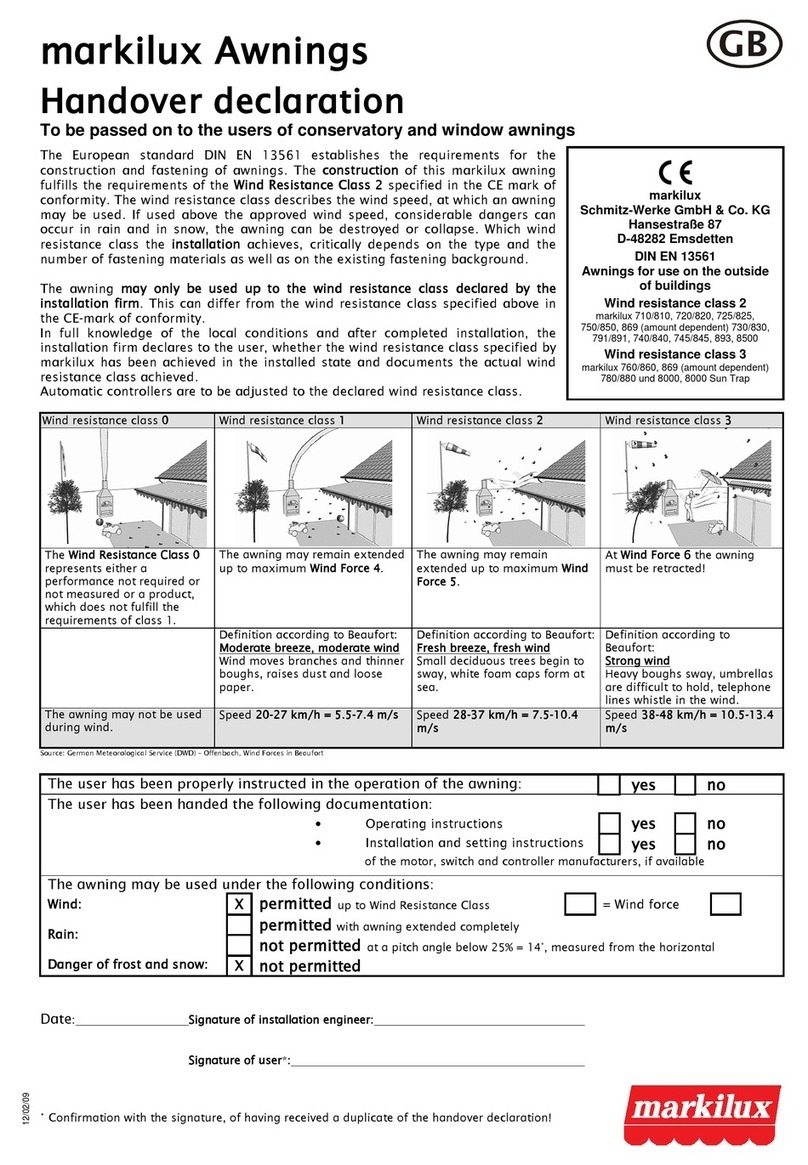
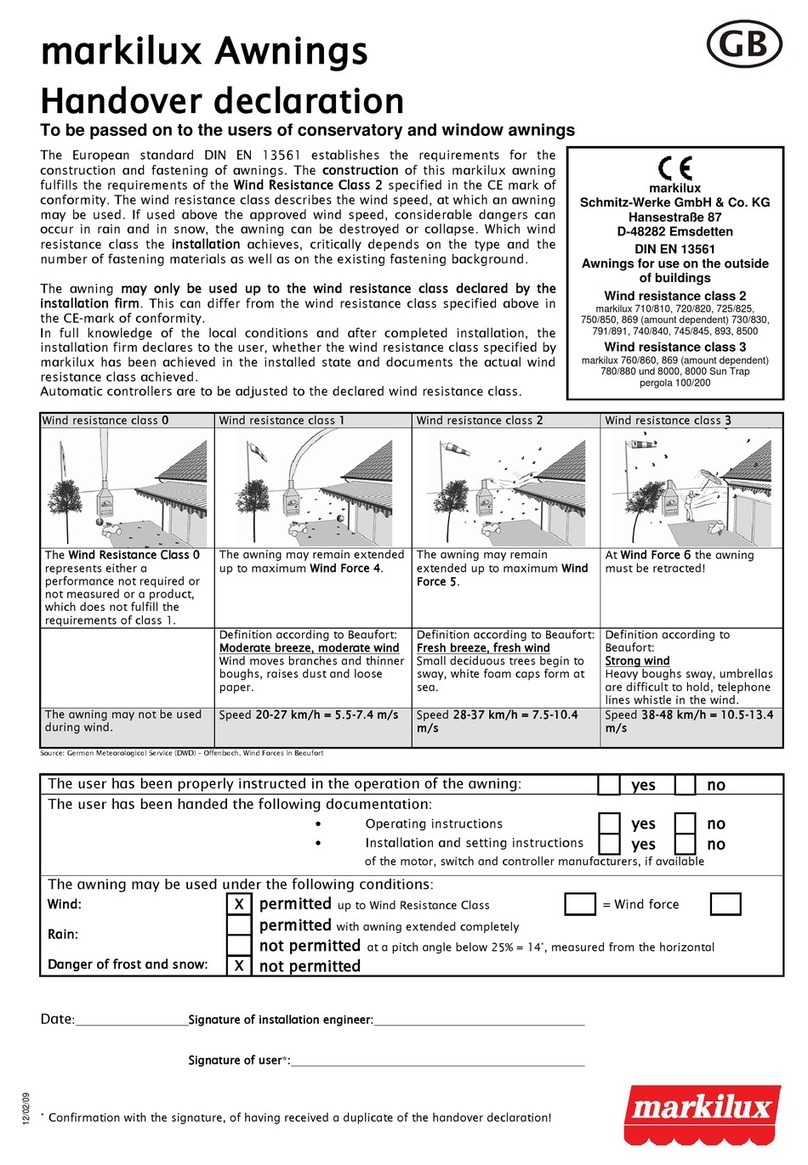
5. Wind resistance classes
markilux
Schmitz-Werke GmbH & Co. KG
Hansestraße 87
D-48282 Emsdetten
DIN EN 13561
Awnings for exterior applications
wind resistance class 2
markilux folding-arm awnings
markilux 710/810, 720/820, 725/825,
750/850, 730/830, 740/840, 745/845,
893, 869/869 zip/889/889 zip
(depending on size), 8850
wind resistance class 3
markilux 760/860, 620 zip, 660 zip,
680 zip, 780/880, 8800/8800 zip,
869/869 zip/889/889 zip (depending
on size), pergola 110/210
The awning fullls the requirements of the wind resistance class
specied in the CE conformity marking (explanations see „handover
declaration“).
In assembled condition, it only fullls these requirements if...
• ... the awning is mounted in accordance with the type and number
of consoles recommended by the manufacturer.
• ... the instructions of the xing material manufacturer regarding the
used dowels were followed during the assembly.
• ... the installation of folding-arm awnings was carried out
considering the
1.Who is allowed to t markilux awnings?
The markilux installation instructions are to a qualied mechanic who
has skilled knowledge in following domains:
• Occupational and operational safety and accident prevention
regulations
• Handling of ladders and scaffoldings
• Handling and transport of long and heavy component parts
• Handling of tools and machines
• Fixture device placement
• Assessment of building materials
• Commissioning and operation of the product
If any one of these qualications is not existent, a qualied installation
rm must be engaged.
Electrical works: electrical installations must be carried out by
a certied electrician according to VDE 0100. The enclosed
installation instructions of the supplied electronic devices are to be
observed.
We recommend installation be carried out by at least two people.
Larger awnings may require three persons.
2. Before beginning the installation it is to be checked, ...
• does the number and type of xture brackets match the order?
• do the specications made with the order concerning the fastening
background correspond with the actual fastening background at
hand (only for folding-arm awnings)?
If irregularities which may affect the safety of the unit or its users are
determined, then the installation must not be undertaken.
3. Reading and passing on the instructions
The security and attachment notes as well as the operation manuals
are to be read and observed!
The markilux operating guide, as well as the setting instructions of the
motor, switch and controller manufacturers are to be handed over to
the user with a written conrmation and tted wind class (see
handover declaration). He is to be comprehensively informed about
the safety and usage information of the awning. With nonobservance
and improper operation, the awning can suffer damage and accidents
can occur.
4. Working at greater heights
www.markilux.com
8. Uncontrolled operation
When working in the range of travel of the awning (see gure:
example folding-arm awning) the automatic control has to be
deactivated. There is a risk of crushing body parts and falling.
Additionally, the installer must ensure that the unit cannot be
unintentionally operated during works. The power supply should be
disconnected i.e. by removing or turning off safety fuses and/or
removing the power cables and motor socket gear. For works on
manually operated units the crank should be removed and stored
safely.
If awnings are operated by more than one person, an override locking
device (controlled circuit breakers from outside) must be installed so
that any retraction or extension of the awning is not possible.
9. Proper intended use
10. Crush and shear zones
The servo gear unit of folding-arm awnings (marking by label)
must not be dismantled. It is under great tension!
If the awning cloth or the gear have to be changed, kindly enquire
before about the instructions „What is to be done, if the servo gear
unit has to be dismantled?.
7. Folding arm awnings with servo gear for hand crank
6. Partly assembled awnings
In case of awnings that come partly-assembled from the factory
– e.g. coupled folding-arm awnings without cover - the spring-
loaded parts (see gure: Example folding-arm awning) are secured
against unintentional opening. These securing means must be remo-
ved only after the complete assembly.
The labelled awning parts are under spring tension and can pose an
high injury risk.
0-14°
Awnings may only be used according to the purpose dened in the operation manual. Alterations like rebuilding or enlargements which are not
intended by the manufacturer may only be carried out with the manufacturers written approval.
Additional awning burdens by means of object attachments or or rope wearing can result in damage or dropping of the awning and are
therefore not allowed.
The awning must not be subjected to high temperatures, heavy vibrations, jarring or heavy mechanical stress.
A build up of snow behind the awning can be avoided by installation of snow stoppers (snow collecting grid or the like).
min. 50 cm
Depending on the type of awning there are crush and shear zones, e.g. between front prole and cassette and between moving parts.
Items of clothing or limbs can be grabbed by the unit and pulled in. (see gure: example folding-arm awning.)
If the awning is installed at a height less than 2.5 metres above accessible trafc ways, then the awning may only be operated by a pushbutton
switch which enables the moving parts to be viewed. Electric controls, radio-controlled motors with click in-switches are not permitted for such
installations.

5
www.markilux.com
1.1 Mounting types and mounting brackets
1. Overviews and xing types
11 12
76061.L
76062.R
(76180.)
76017.
76063.L
76064.R
(76181.) 76046.
14 16
76046.
76061.L
76062.R
(76180.)
76077. L
76078. R
(76180.) 76053.
21 22
76061.L
76062.R
(76180.)
76049.
76049.
76063.L
76064.R
(76181.)
31 32
76017. 76017.
76046.76046.
33 41
76735. 76735.
76063.L
76064.R
(76181.)
76052.
51 61
76046.
76052.
76063.L
76064.R
(76181.) 76046.
76067.L
76068.R
(76198.)
71 81
76067.L
76068.R
(76198.) 76052.
76067.L
76068.R
(76198.) 76046.
76052.
markilux mounting instructions
Individual bracket combinations - see "Fixtures, ttings and accessories" in the sales documentation. Please note the minimum quantity in
accordance with the width and extension! Mounting Type 11, 14, 16, 21, 31, 32: from a xture width (MA) of 601 cm an cassette support
assembly, 76183., is required!
1.2 Mounting systems Attention!
Basically the following is applicable for all mounting systems:
1. The mounting material manufacturers (e.g. Fischer, Hilti, Upat, etc.) offer different mounting systems
according to the undersurface. If the conditions for the mounting are met according to DIN EN 13561, the wind resistance
class 3 for the mounting can be conrmed to the user.
Mounting material is not delivered, as different undersurfaces (e.g. concrete, lime sand stone, autoclaved aerated concrete,
etc.) require different types of mounting material
3. IMPORTANT: The brackets must be aligned with each other! When subsurfaces are uneven, the clearances are to be
checked using a cord pulley and if required compensated accordingly. Due to the horizontal mounting of the folding-arm
awning and the perpendicular t of the mounting brackets, the smooth functioning of the folding-arm awning is guaranteed.

6
www.markilux.com
Face xture bracket assembly,
pitch adjustment range
5 to 45°
Face xture bracket assembly,
pitch adjustment range
5 to 45°
Cassette coupling bracket
assembly, face xture bracket,
pitch adjustment range
5 to 45°
left right
face xture
76063. 76064. 76181.
40
126
Bottom xture bracket
assembly
for mounting onto a frame
40
126
Bottom xture bracket assem-
bly for mounting onto a frame
Cassette coupling bracket
assembly for mounting onto
a frame
left right for coupling point
76061. 76062. 76180.
235—535
Raised cassette xture bracket
assembly
foot can be moved up to 45°
backwards, head of cassette
xture bracket can be tilted
forwards up to 45°
235—535
Raised cassette xture bracket
assembly
foot can be moved up to 45°
backwards, head of cassette
xture bracket can be tilted
forwards up to 45°
235—535
Raised cassette xture bracket
assembly
foot can be moved up to 45°
backwards, head of cassette
xture bracket can be tilted
forwards up to 45°
left, for mounting onto frame right, for mounting onto frame coupling point for mounting
onto frame
76067. 76068. 76198.
38
132
100
Cassette support assembly
for mounting onto frame
140
132
38
Cassette support assembly for
mounting onto frame
Cassette coupling bracket
assembly for track xture, rigid
Höhe 100 mm height 140 mm Fixture type 31 and 32
76183. 76184. 76069.
Accessories
Storm safety bracket assembly
for the cassette (recommen-
ded in windy locations and as
an additional safety measure
for the cassette)
29
20
34
Diagonal tensioning kit
(2 wire tensioners, 1 support
wire)
270
60
Bracket assembly for light/
wind/rain sensor
76197. 71790. 76050.
wall sealing prole
30
44
40
Angle bracket to prevent
deection of the cover support
tube for bracket height 100
mm
131- 381
Support assembly to prevent
deection of the cover support
tube, can be shortened to
between 70 and 320 mm
(with clamp plate)
available by the metre
assembly example: see face
xture with wall sealing prole
for assembly example refer
to section "Installation dimen-
sions"
for assembly example
Installation dimensions
77780. 76065. 71780.
bracket assembly for cover
support tube
coupling bracket assembly for
cover support tube
Storm security device assem-
bly / track slider
76019. 76059. 76235.
108
Bottom xture assembly right
reveal 76076
and
left 76077.
76076. + 76077.
1.3 Mounting brackets
Cassette xture brackets

7
www.markilux.com
70
40
Track bracket assembly for
track xture, rigid
track bracket assembly for
track xture
refer to section "Installation
dimensions"
available by the metre,
undrilled
max. length 6 m
76017. 76013.
9
85
110
40
20
10
Fixture dimensions of adjus-
table top track brackets
9
110
40
85
Track bracket assembly with
adjustable head
9
110
40
85
Track bracket assembly with
adjustable head
Höhe 100 mm height 140 mm
refer to section "Installation
dimensions"
refer to section "Installation
dimensions"
76046. 76048.
9
60
45
85
110
Track bracket assembly with
adjustable foot plate
spacer plate for track bracket
60
110
9
85
10
8,5
adjustable foot plate for track
bracket assembly
Höhe 100 mm 110 x 40 x 10 mm
refer to section "Installation
dimensions"
76199. 78570. 78165.
9
85
40
110
Double track bracket assembly
with adjustable head
Universal track bracket
assembly
9
40
110
Track bracket assembly for
transom xture
Höhe 100 mm Höhe 100 mm Höhe 100 mm
refer to section "Installation
dimensions"
refer to section "Installation
dimensions"
refer to section "Installation
dimensions"
76191. 76054. 76055.
9
85
40
110
Double track bracket assembly
with adjustable head
Track bracket assembly with
adjustable head
Double track bracket assembly
with adjustable head
height 140 mm height 100 - 500 mm height 100 - 500 mm
refer to section "Installation
dimensions"
refer to section "Installation
dimensions"
refer to section "Installation
dimensions"
76192. 76047. 76193.
Universal track bracket
assembly
Track bracket assembly with
adjustable head and foot
Double track bracket assembly
with adjustable head and foot
height 140 - 500 mm height 200 - 500 mm height 200 - 500 mm
refer to section "Installation
dimensions"
refer to section "Installation
dimensions"
refer to section "Installation
dimensions"
76053. 76045. 76194.
vario-V bracket assembly for
track xture
Flat bracket assembly for
lateral track xture with adjus-
table head
Retaining plate
refer to section "Installation
dimensions"
refer to section "Installation
dimensions"
110 x 60 mm
76052. 76049. 78158.
30
110
9
Track bracket assembly for
track xture directly on the
conservatory rafters
110
50
85
65
50
15
25
Ø
9
Mounting bracket
without mounting screws
Mounting bracket assembly
76099. Mounting bracket
incl. mounting screws as an
addition to xture type 32
76735. 76098. 76099.
Track bracket

8
www.markilux.com
M = overall awning width
H= projection
FW = width between xing points
MA = xture width = awning width between xture points
S = cross section
1= cassettebottom xture bracket
2 = track bracket with adjustable head
3= from an extension (H) of 401 cm an additional track bracket with
adjustable head is required
4= from a xture width (MA) of 601 cm an cassette support assembly,
76183., is required
1.4 Dimension overviews and xture dimensions
1.4.1 Bottom xture
Overview of dimensions, see chapter 1.3.1 - 1.3.3. Respective information on the mounting dimensions of other
mounting types (see chapter 1.1) can be found in our sales documentation.
Overview of dimensions markilux 8800 / 8800 tracx
0
+
0$ %$
208
21
105
70
116
37
84
210
H
min. 100
max. 1000
30
MA
BA
60
50
187
M
76061.
76062.
(76180.)
76017.
A
A
S A-A
Fixture type 11
5= cover support tube (the required quantity can be found in the size
grid in our sales documentation)
6= from a xture width of (MA) 451 cm an additional support bracket (or
adjustable support bracket) for awnings with cover support tube is
required
76061. = bottom xture bracket assembly, rigid, left
76062. = bottom xture bracket assembly, rigid, right
76180. = cassette coupling bracket assembly
76017. = track bracket for track-only xture, rigid
measurements in mm

9
www.markilux.com
1.4.2 Face xture
0
+
0$ %$
37
116 60
70
105
H
210
187
16
204
84
AX
MA
30
50
BA
min. 100
max. 1000
A
A
S A-A
76063.
76064.
(76181.)
76046.
M
W
WAX
5° 26
10° 32
15° 37
20° 43
25° 47
30° 50
35° 52
40° 53
45° 53
Overview of dimensions markilux 8800 / 8800 tracx
Fixture type 12
M = overall awning width
H= projection
FW = width between xing points
MA = xture width = awning width between xture points
W= pitch
AX = distance cassette - wall
S = cross section
1= face xture cassette bracket
2 = track bracket with adjustable head
3= from an extension (H) of 401 cm an additional track bracket (for
xture types 22, 41, 51) is required
4= from a xture width (MA) of 451 cm an additional cassette coupling
bracket is required
5= cover support tube (the required quantity can be found in the size
grid in our sales documentation)
76063. = face xture cassette bracket assembly, pitch adjustable from 5°to
45°,left
76064. = face xture bracket assembly, pitch adjustable from 5°to 45°, right
76181. = coupling cassette bracket assembly, face xture, pitch adjustable
from 5°to 45°
76046. = track bracket assembly with adjustable head, height 100 mm
measurements in mm

10
www.markilux.com
1.4.3 Track-only xture
0
+
0$ %$
37
105
208
116
70
60
210
H
187
84
21
min. 100
max. 1000
30
50MA
BA
76046.
76046.
M
S A-A
A
A
min. 300
max. 400
Overview of dimensions markilux 8800 / 8800 tracx
Fixture type 32
M = overall awning width
H= projection
FW = width between xing points
MA = xture width = awning width between xture points
S = cross section
1 = track bracket with adjustable head
2 = track bracket with adjustable head
3= from a xture width (MA) of 601 cm an cassette support assembly,
76183., is required
4= from a xture width (MA) of 451 cm an additional cassette/casing
support is required
5= cover support tube (the required quantity can be found in the size
grid in our sales documentation)
6= from a xture width of (MA) 451 cm an additional support bracket (or
adjustable support bracket) for awnings with cover support tube is
required
76046. = track bracket assembly with adjustable head, height 100 mm
measurements in mm

11
www.markilux.com
100
HH
MA = BA MA = BA
M M
45
MB = 300
45
MB = 300
HT
M = overall awning width
FW = width between xing points = MA
MA = awning xture width = BA
BR = bracket xture range
HT = bracket
HH = xture bracket height
HT 76191. 76192. 76193. 76194.
HH 105 145 105 to 505 205 to 505
dimensions in mm
Fixture dimensions with additional mounting bracket assembly 76099.
for xture type 32
M
BC
MA
50
29 6
50
50
50
M
50
69
31
BC
MA
1415
~14
14
15
29 6
50
~14
50
M
50
75
BC
MA
14
15
29 6
50
~14
A-A: V1 A-A: V2 A-A: V3
85
25
9
110
15
65
9
6
50
50
H
min. 100
max. 1000
A
125
105
76099.
228
187
min. 300
max. 400
A
76099.
76099.
76099.
76099.
M = overall awning width
MA = awning xture width = order width
A-A = in cross section
BC = awning width between xture points
H= projection
76099. = mounting bracket assembly with mounting screws
V1, V2, V3 = variant 1, 2 and 3
dimensions in mm
Installation dimensions for xture type 32 with double track bracket for single units

12
www.markilux.com
1.4.4 Track-only xture on conservatory rafters
Fixture type 33
84
208
37
105
110
H
187
21
min. 100
max. 1000
A
A
C
min. 300
max. 400
C
30
15
30
105
R7,50
125
60116
MA
BA
M
A-A
76735.
50
dimensions in mm
M = overall awning width
MA = awning xture width = order witdth = M minus 100 mm
A-A = in cross section
FW = width between xing points
H= projection
76735. = track bracket assembly for track xture directly on the
conservatory rafter
C = detailed drawing
from a xture width (MA) of 601 cm an cassette support assembly,
76183., is required
1.4.5 Reveal xture
Fixture type 16
76077.
76078.
(76180.)
BA
37
105
84
A
116
MA
76054.
A-A
M
76046.
25
B
min. 100
max. 1000
A
76054.
208
18721
210
H
60
B
M = overall awning width
MA = awning xture width = order witdth = M minus 100 mm
A-A = in cross section
FW = width between xing points
H= projection
B = detailed view
76077. = bottom xture left reveal
76078. = bottom xture right reveal
76180. = coupled cassette bracket for bottom xture
76046. = track bracket with adjustable head 100 mm
76054. = universal track bracket assembly height 100 mm
from a xture width (MA) of 601 cm an cassette support assembly,
76183., is required
dimensions in mm

13
www.markilux.com
3. Awning installation
1
4
2
35
667
1. Unpack awning from the box (pay
attention to marking "top"). Do not
remove the protective foil (1) of the front
prole and the transport belt xings (3
- adhesive strips, 4 - Styrofoam wedges)
from the guide tracks (2).
2. Fit the cassette (5) to the bottom
xture bracket (6) you have already
tted.
3. Tighten the SW 5 allen key size
cheese-head screws in the clamp plate
(7) of the bottom xture brackets (6).
9
8
2
10
2
13
12
11
4. Unscrew the countersunk head screw
(8) at the left side cheek and remove the
inspection cover (9).
5. Place the left guide track (2) the on
track bracket (10) and clip it in place; do
not screw it down tight yet.
6. Slide the guide track prole (2) about
2 to 3 cm over the rollers of the front pro-
le bogey onto the end cap (11).
Remove the tape holding the drive belt
in place (adhesive strip) from the guide
track prole. The lug-end of the drive
belt (12) must be fed over the belt roller
(13).
2. Fitting the brackets (e.g. bottom xture)
1
MA
MA
1
MA
22
MA
1. Hold the cassette bracket
(1) in place, mark the drill
holes at axial distance from
one another and drill (M8
screws).
Attention! All brackets
must be aligned with each
other!
2. Fix the bottom xture
cassette brackets in place(1).
3. Hold the track brackets (2)
in place [from H = 401 cm,
also (3)], mark the xing
points at axial distance from
one another and drill the
holes (M8 screws).
Attention! Observe
respective gure under
chapter 1.3.1 to 1.3.3!
4. Fix the track brackets (2) in
place. Measure all brackets
diagonally!!

14
2
15
14
16 2
10
6a. Attention! For awnings with
tracx system, the cover has to be
threaded in the plastic track (15) with the
"zip" (14) for the function of the tracx
system, before the guide track (2) of the
awning is slid onto to end cap, as
described under point 6.
7. Push the guide track prole (2) up to
the stop and secure with a SW 6 Allen
key cheese-head screw (16). If the guide
track prole has to be loosened or
removed: Unscrew the cylindrical head
screw SW 6 (15) about 15 mm and
loosen the connection by means of
beating lightly on the screw head!
8. Tighten the jaws of the track bracket
(10) SW 6 Allen key.
18
17
12
18
17
12
17
9. Lift the lug-end of the drive belt (12)
up. Guide the assembly aid (17)
between the fabric roller (18) and the
rear of the cassette with the thicker part
facing up.
10. Push assembly aid (17) through
and guide around the fabric roller (18).
11. Push the lug-end of the drive belt
(12) through the slot in the assembly aid
(17). Attention! Do not twist transport
bands!
19
17
12
18
19
12
18
12. Pull the assembly aid back out (17).
In so doing the drive belt (19) is guided
around the underside of the fabric roller
(18). Detach the lug-end of the drive belt
(12) from the assembly aid.
13. Attention! The drive belt has to
be passed around the fabric roller a
second time, so push the assembly aid
through again and repeat paragraphs 9.
to 12.
14. Slip the lug-end of the drive belt (12)
underneath the rst wrap of drive belt
(19) and insert it into the keyway in the
fabric roller (18).
18
19
1
21
20
42
22
15. Attention! Ensure that the belt
rolls up cleanly on itself on the fabric
roller (18). Do not twist the drive belt
(19)! Repeat points 3. to 15. at the right
side.
16. Remove protective foil (1) from the
front prole (20). Pull off sealing cap (21)
from the projection prole (right and left).
17. Remove the remaining poystyrene
blocks holding the drive belt in place (4)
from the guide track prole (2) (on both
the right and left).

15
www.markilux.com
22
19 20
19
22
22
19
18. Pull the free end of the drive belt with
uffy velcro (19) towards the front prole
(20) and connect it to the red end of the
velcro strip (22) (right and left track
prole).
19. Attention! The coloured end of
the velcro strip (22) must be in line with
the uffy velcro end of the drive belt (19)
and they must be connected over their
entire surfaces.
20. Carefully pull the drive belt (19)
around the tensioning module with the
help of the velcro strip (22) (see chapter
5 - course taken by the drive belt) While
doing this, the drive belt must be held
slightly under tension at both ends.
Avoid forced or jerky pulling actions
(both right and left).
19
19
23
219 18
13
21. Pull the drive belt (19) tight. Do not
cut off the loose end of the drive belt
(both right and left).
22. By pulling the drive belt (19) out of
the guide track (2), put pressure on the
tensioning module until the split-pin (23)
can be withdrawn easily (on both the
right and left). The awning is now under
tension.
23. At the inspection openings check
transport bands (19) for twisting and
correct seating on the fabric roller (18)
and the belt rollers (13).
13
19 2
24
2
24
26
25
24. Check transport bands (19) in the
track proles (2) for twisting and correct
seating on the belt rollers (13).
25. For awnings with cover support tube:
Establish positions for the cover support
tube brackets (24) (on both the right and
left). Clip the left cover support tube
bracket to the guide track (2) and rmly
tighten the jaws of the bracket with a SW
6 spanner.
26. Push the cover support tube (25)
onto the screw (26) of the bracket (24).

16
www.markilux.com
25
24
26
2
d1
d1
27. Slide the pin (26) of the right cover
support tube bracket (24) into the cover
support tube (28). Clip the bracket (24)
to the guide track (2) and tighten the
clamping jaws of the bracket with an SW
6 spanner.
28. Measure the awning diagonally (d1)
and align, as otherwise smooth functio-
ning is not guaranteed.
Attention! It is important that the
guide tracks are parallel. The max.
xture tolerance (in particular for the
tracx function) is 3 mm as otherwise
smooth operation cannot be guaranteed.
Subsequently tighten all screws of the
xture brackets.
29. Extend and retract the awning for
functional testing.
Attention! The lower end position is
not programmed for the standard
motor without radio. Take care that the
extension prole does not damage the
conservatory when moving the awning.
Make sure you stop before. See also
point 6. motor drive.
18
19 18
12
Attention! If the awning cloth has
enough tension in central position, see
chapter 4. What is to be done, if.... If the
position of the drive belt is incorrect, see
paragraphs 30. to 32.
30. Check the position of the drive belt
(19) on the fabric roller (18) when the
awning is retracted. Ideally, the fabric
roller will be in the position shown. The
transport band envelops the fabric roller
with 1.5 wrappings.
31. If, when the rst wrap of the drive
belt has been unwound, the lug in the
drive belt (12) is in the upper area of the
fabric roller (18), then trouble-free
operation of the awning is still guaran-
teed.
18
21 20
9
8
32. Should there be no drive belt left on
the fabric roller (18), paragraphs 9. to
15. have to be repeated. For this
purpose the gas piston has to be
secured again as described in chapter 4
"What to do, if....".
33. Roll up the drive belt together with
the length of velcro, insert it into the front
prole (20) and put on the end cap (21)
(on both the right and the left).
34. On both end caps x the inspection
covers again (9) using the countersunk
head screws (8).

17
www.markilux.com
5. The course taken by the drive belt
4. What to do if the awning has no tension in the middle position?
19
23
2
By pulling the drive belt (19) out of the guide track (2), bring
the hole in the internal gas piston into convergence with that
of the guide track and re-insert the split-pin (23) (on both the
right and the left). The drive belts are now now longer under
tension and the gas pistons are held securely in position. Now
tighten the drive belts as described in chapter 3, paragraph 21
and tension the awning again as in paragraph 22.
5 = cassette
12 = belt roller
18 = fabric roller
19 = drive belt
20 = projection prole

18
www.markilux.com
6. Motor drive
6.1 Motor connection
The electrical connection for the motor drive and/or control system connection is to be carried out according to the
instructions of the manufacturer of the motor and control system. Modications, especially concerning the motor,
the control system and the connecting supply lines require authorisation in writing.
The installation and adjustion instructions are to be observed. They can be found at the motor cable or accompany
the awning. RTS motors carry an additional note on setting the motor at the motor cable. The inbuilt motor switches
off on reaching a rated performance for the upper limit position (reduced torque auto-stop function).
Attention! The lower limit position has to be adjusted in accordance with the motor instructions for a
standard motor (stop on reaching a particular awning position: point stop). This setting is not set in the
factory.
The lower limit position is preset for RTS motors.
Instructions for further electric components are inside the belonging package.
Attention!
The rolling up of the fabric on the fabric roller from below
during retraction could lead to damage to the awning. Should
you need to change the end stops, it is indispensable to pay
attention to the sense of rotation!
Sense of rotation during retraction:
6.2 Motor connection data markilux 8800 / 8800 tracx
1808
130 58
26
Cable outlet for motor operation:
markilux 8800 / 8800
tracx
wireless (433 MHz) U = 230 V~ / 240 W, 50 Hz, I = 1.0 A
with radio IO technology (868 - 870 MHz) U = 230 V~ / 240 W, 50 Hz, I = 1.1 A
wired U = 230 V~ / 246 W, 50 Hz, I = 1.2 A
measurements in mm

19
markilux
Mounting instructions conservatory awning
markilux 8800 / 8800 tracx coupled units
02-06-2014 7061442 TK + QS
Attention! Observe the technical instructions as for the single unit!
7. Fixing the coupling bracket (example bottom xture)
Place the brackets as described in the instructions for the single unit. The middle brackets are to be xed as follows:
1. The coupling bracket is
centred directly at the coup-
ling spot of the awning!
Hold the bottom coupling
bracket (1), mark the drill
holes at axial distance from
one another and drill (screws
M 8).
Attention! All brackets
must be aligned with each
other!
MA = awning xture width
2. Fix coupling bracket (1). 3. Hold the track brackets (2),
mark the xing points at axial
distance from one another
and drill the holes (M8
screws). A second track
bracket has to be tted from
an extension of 401 cm.
4. Fix the track brackets (2) in
place. Measure all brackets
diagonally!!
8. Couple single awnings
1
2
1
3
4
6
3
5
4
75 75
1. Unscrew the raised head screws (1)
and remove the inspection cover (2).
2. Fix the drive awning (3) in the bottom
xture bracket (4). The bottom coupling
bracket has to be aligned centred.
3. Align the drive awning (3) in such a
way that the coupling point of the casset-
tes (5) is in the middle of the bottom
coupling bracket (4).
[dimensions in mm]
6.3 Motor connection data coupled unit markilux 8800 / 8800 tracx
markilux 8800 / 8800
tracx
wireless (433 MHz) U = 230 V~ / 290 W, 50 Hz, I = 1.25 A
with radio IO technology (868 - 870 MHz) U = 230 V~ / 290 W, 50 Hz, I = 1.50 A
wired U = 230 V~ / 260 W, 50 Hz, I = 1.15 A

20
www.markilux.com
6
min. 50
7
3
89
10
6
4. Tighten the SW 5 cylinder head
screws at the clamp plate (6) of the
brackets to secure the drive awning.
5. Fit the awning to be coupled (7) to the
bottom couple bracket with a clearance
of 50 mm to the drive awning (3). Slightly
lift the fabric roller (8) and push the
awning to be coupled onto the socket (9)
and the pincher carriages (10) of the
drive awning (3).
6. Tighten the SW 5 cylinder head
screws (6) at the clamp plate of the
brackets fo secure the awning to be
coupled.
11
13
12
12 5
11
15
14
15
14
18
7
17
16
7. Push the coupling track (11) via the
track rollers (12) onto the auf den
cassette coupling bracket (5) until the
stop. While doing this, guide the lug-end
of the drive belt (13) into the cassette as
described for single units.
Attention! Do not twist transport
bands! See point 7a for tracx system.
7a. Attention!
For awnings with tracx system:
Thread the cover of both awnings with
the "zip" (14) in the respective plastic
tracks (15) [in the guide track (11)].
Subsequently attach the guide tracks
and x them.
11 = guide track with inside plastic track
(15)
8. Fix the coupling track by tightening
the SW 5 threaded pin (16). Turn the
fabric roller of the coupled awning (7)
until the roller tube grooves (17) of the
cloths are aligned with each other.
Tighten one of the four SW 5 threaded
pins (18) that are offset by 90° in the fab-
ric roller of the coupled awning (7).
This manual suits for next models
1
Table of contents
Other Markilux Accessories manuals

Markilux
Markilux 710 User manual

Markilux
Markilux Markant User manual

Markilux
Markilux 790 Quick start guide

Markilux
Markilux Syncra uno User manual

Markilux
Markilux 740 User manual

Markilux
Markilux 6000 User manual

Markilux
Markilux pergola 110 User manual

Markilux
Markilux 710 User manual

Markilux
Markilux 990 User manual

Markilux
Markilux 1700 User manual
Popular Accessories manuals by other brands

Hioki
Hioki 9279 instruction manual

Honeywell
Honeywell RPW317 Instruction leaflet

Hytronik
Hytronik HIM31 Installation and instruction manual

HYDAC International
HYDAC International CS1000 Series instruction manual

Sygonix
Sygonix 2336766 operating instructions

Byron
Byron BY201F Installation and operation instruction