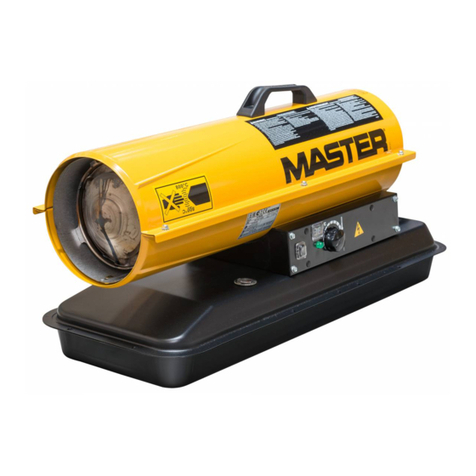
Master BV 400 Manual

4035.188 Edition 19 Rev. 2
BV 400
USER AND MAINTENANCE BOOK
en
LIBRETTO USO E MANUTENZIONE
it
BEDIENUNGS- UND WARTUNGSANLEITUNG
de
MANUAL DE INSTRUCCIONES PARA EL USO Y MANTENIMIENTO
es
MANUEL D’UTILISATION ET DE MAINTENANCE
fr
HANDLEIDING VOOR GEBRUIK EN ONDERHOUD
nl
MANUAL DE USO E MANUTENÇÃO
pt
VEJLEDNING OM BRUG OG VEDLIGEHOLDELSE
da
KÄYTTÖ- JA HUOLTO-OHJE
HEFTE FOR BRUK OG VEDLIKEHOLD
no
ANVÄNDAR- OCH UNDERHÅLLSHANDBOK
sv
INSTRUKCJA OBSŁUGI I KONSERWACJI
pl
РУКОВОДСТВО ПО ЭКСПЛУАТАЦИИ И ТЕХНИЧЕСКОМУ ОБСЛУЖИВАНИЮ
ru
PŘÍRUČKA PRO POUŽITÍ A ÚDRŽBU
cs
HASZNÁLATI ÉS KARBANTARTÁSI KÉZIKÖNYV
hu
PRIROČNIK Z NAVODILI ZA UPORABO IN VZDRŽEVANJE
sl
KULLANIM VE BAKIM K
i
TAPÇIĞI
tr
KNJIŽICA O UPORABI I ODRŽAVANJU
hr
NAUDOJIMO IR PRIEŽIŪROS KNYGELĖ
lt
LIETOŠANAS UN TEHNISKĀS APKOPES GRĀMATIŅA
lv
KASUTUS- JA HOOLDUSJUHEND
et
MANUAL DE UTILIZARE ŞI ÎNTREŢINERE
ro
PRÍRUČKA PRE POUŽITIE A ÚDRŽBU
sk
НАРЪЧНИК ЗА ИЗПОЛЗВАНЕ И ПОДДРЪЖКА
bg
КЕРІВНИЦТВО З ЕКСПЛУАТАЦІЇ Й ТЕХНІЧНОГО ОБСЛУГОВУВАННЯ
uk
KNJIŽICOM O UPOTREBI I ODRŽAVANJU
bs
ΕΓΧΕΙΡΙΔΙΟ ΧΡΗΣΗΣ ΚΑΙ ΣΥΝΤΗΡΗΣΗΣ
el
使用和维护手册
zh
ПАЙДАЛАНУ ЖӘНЕ ТЕХНИКАЛЫҚ ҚЫЗМЕТ КӨРСЕТУ ЖЕТЕКШІЛІГІ
kk
Dantherm S.p.A.
Via Gardesana 11, -37010-
Pastrengo (VR), Italy
Dantherm S.p.A.
Виа Гардесана 11, 37010
Пастренго (Верона), Италия
Dantherm Sp. z o.o.
ul. Magazynowa 5A,
62-023 Gądki, Poland
Dantherm Sp. z o.o.
ул. Магазинова, 5A,
62-023 Гадки, Польша
Dantherm LLC
ul. Transportnaya - 22 ownership 2,
142802, STUPINO, Moscow region, Russia
ООО «Дантерм»
Ул. Транспортная, владение 22/2,
142802, г.Ступино, Московская обл., РФ
Dantherm China LTD
Unit 2B, 512 Yunchuan Rd.,
Shanghai, 201906, China
Dantherm China LTD
Юньчуань роад, 512, строение 2В,
Шанхай, 201906, Китай
Dantherm SP S.A.
C/Calabozos, 6 Polígono Industrial, 28108
Alcobendas (Madrid) Spain
Dantherm SP S.A.
Ц/Калабозос, 6 Полигоно Индустриал,
28108 Алкобендас (Мадрит) Испания

TECHNICAL DATA TABLE - TABELLA DATI TECNICI - TECHNISCHE DATENTABELLE
- TABLA DE DATOS TÉCNICOS - TABLEAU DES DONNÉES TECHNIQUES - TABEL
TECHNISCHE GEGEVENS - TABELA DE DADOS TÉCNICOS - TEKNISK DATATABEL
- TEKNISTEN TIETOJEN TAULUKKO - TABELL FOR TEKNISKE DATA - TABELL
MED TEKNISKA EGENSKAPER - TABELA DANYCH TECHNICZNYCH - ТАБЛИЦЕ
ТЕХНИЧЕСКИХ ДАННЫХ - TABULKA TECHNICKÝCH ÚDAJŮ - MŰSZAKI ADATOK
TÁBLÁZATA - TEHNIČNI PODATKI - TEKNİK VERİLER TABLOSUNDA - TABLICI
S TEHNIČKIM PODACIMA - TECHNINIŲ DUOMENŲ LENTELĖJE - TEHNISKO
DATU TABULA - TEHNILISTE ANDMETE TABEL - TABELUL CU DATE TEHNICE -
TABUĽKA TECHNICKÝCH ÚDAJOV - ТАБЛИЦА ТЕХНИЧЕСКИ ДАННИ - ТАБЛИЦІ
ТЕХНІЧНИХ ДАНИХ - TABELI SA TEHNIČKIM PODACIMA - ΠΙΝΑΚΙΔΑ ΤΩΝ
ΤΕΧΝΙΚΩΝ ΣΤΟΙΧΕΙΩΝ - 技术参数 - ТЕХНИКАЛЫҚ КӨРСЕТКІШТЕР КЕСТЕСІ
MODEL BV 400
80 kW-кВт
68.800 kcal/h-ккал/ч
273.000 Btu/h-БТЕ/ч
110 kW-кВт
94.600 kcal/h-ккал/ч
375.000 Btu/h-БТЕ/ч
6,3 kg/h-кг/ч 8,4 kg/h-кг/ч
DIESEL-KEROSENE
дизель-керосин
150 l-л
6.200 m³/h-м³/ч
~220-240 V-В (-15% ÷ +10%) 50 Hz-Гц 6,8 A 1,43 kW-кВт
200 kg-кг
1.75 GpH 60°S DANFOSS
900 kPa-кПа
9 bar-бар
1.600 kPa-кПа
16 bar-бар
IMPORTANT: In order to have a correct function you must use an electrical generator in class G3 or more (frequency variation ±1%, ten-
sion variation ±2%). The maximum power of electrical generator must be three time the nominal power of device that you must connect.

1
2
34
56
8
9
7
10
11 12
BA
B
A
13
14
B A
PICTURES - FIGURE - ABBILDUNGEN - FIGURAS - FIGURES - FIGUREN
- FIGURAS - FIGURER - KUVAT - FIGURER - FIGUR - RYSUNKI - РИСУН-
КИ - OBRÁZKY - ÁBRÁK - SLIKE - ŞEKİLLER - SLIKE - PAVEIKSLĖLIAI -
ATTĒLI - JOONISED - IMAGINI - OBRÁZKY - ФИГУРА - МАЛЮНКИ - SLIKE
- ΕΙΚΟΝΕΣ - 图 - СУРЕТТЕР

PICTURES - FIGURE - ABBILDUNGEN - FIGURAS - FIGURES - FIGUREN
- FIGURAS - FIGURER - KUVAT - FIGURER - FIGUR - RYSUNKI - РИСУН-
КИ - OBRÁZKY - ÁBRÁK - SLIKE - ŞEKİLLER - SLIKE - PAVEIKSLĖLIAI -
ATTĒLI - JOONISED - IMAGINI - OBRÁZKY - ФИГУРА - МАЛЮНКИ - SLIKE
- ΕΙΚΟΝΕΣ - 图 - СУРЕТТЕР
1
2
34
56
8
9
7
10
11 12
BA
B
A
13
14
B A

NOTE:_______________________________________________________________
______________________________________________________________________
______________________________________________________________________
______________________________________________________________________
______________________________________________________________________
______________________________________________________________________
______________________________________________________________________
______________________________________________________________________
______________________________________________________________________
______________________________________________________________________
______________________________________________________________________
______________________________________________________________________
______________________________________________________________________
______________________________________________________________________
______________________________________________________________________
______________________________________________________________________
______________________________________________________________________
______________________________________________________________________
______________________________________________________________________
______________________________________________________________________
______________________________________________________________________
______________________________________________________________________
______________________________________________________________________
______________________________________________________________________
______________________________________________________________________
______________________________________________________________________
______________________________________________________________________
______________________________________________________________________

en
it
de
es
fr
nl
pt
da
no
sv
pl
ru
cs
hu
sl
tr
hr
lt
lv
et
ro
sk
bg
uk
bs
el
zh
IMPORTANT: READ AND UNDERSTAND THIS MANUAL PRIOR TO
ASSEMBLING, STARTING UP OR CONDUCTING MAINTENANCE ON THIS
HEATER. USING THE HEATER INCORRECTLY CAN CAUSE SERIOUS
INJURY. KEEP THIS MANUAL FOR FURTHER REFERENCE.
1. DESCRIPTION
This series of heaters is particularly suited to
heating medium to large-sized rooms or areas.
Thanks to a heat exchanger, indirect heaters
(PIC. 1) separate combustion gases from the
hot air released into the environment. This way
it is possible to introduce a ow of clean hot
air in the area that needs to be heated up and
direct exhaust fumes outside.
These heaters have been designed in line with
the most recent safety, operating and duration
criteria. The safety devices ensure the machine
always operates correctly.
2. SAFETY INFORMATION
WARNINGS
IMPORTANT: This air heater has
been designed for mobile and temporary
professional applications. It has not been
designed for domestic use nor for thermal
comfort of human.
IMPORTANT: This appliance is not
suitable for use by persons (including
children) with reduced physical, sensory
and mental capacities or with lack of ex-
perience or knowledge unless supervised
by a person responsible for their safety.
Children must be supervised to make sure
they do not play with the appliance.
DANGER: Suocation by carbon
monoxide can be fatal.
The rst symptoms of suocation by carbon
monoxide are similar to those of u with
headache, light-headedness and/or nausea.
These symptoms could be caused by the
faulty functioning of the heater. IF THESE
SYMPTOMS OCCUR, GO OUTDOORS
IMMEDIATELY and have the heater repaired
by a technical service centre.
►►2.1. REFUELLING:
►2.1.1. Personnel appointed to carry out
refuelling must be qualied and fully fa-
miliar with this manual and current regu-
lations on how to refuel heaters safely.
►2.1.2. Only use the type of fuel specied
on the heater’s identication plate.
►2.1.3. Before refuelling, turn o the heater
and wait for it to cool down.
►2.1.4. The fuel storage deposit tanks must
be located in a separate facility or build-
ing.
►2.1.5. All fuel tanks must be kept at a mini-
mum distance from the heater, in accor-
dance with current safety regulations.
►2.1.6. Fuel must be stored in areas where
the oor surface does not allow under-
neath dripping, or any other leakage
which may ignite the fuel.
►2.1.7. Fuel must be stored in accordance
with current safety regulations.
►►2.2. SAFETY:
►2.2.1. Never use the heater in areas with
petrol, paint solvents or other highly am-
mable vapours.
►2.2.2. Comply with all local legislation
and current regulations when using the
heater.
►2.2.3. Heaters used near tarpaulins, cur-
tains or other similar covering materials
must be kept at a safe distance. It is ad-
vised to use re-proof covering material.
►2.2.4. Only use heaters in well-ventilated
areas. Set-up a suitable open and venti-
lated area, with the purpose of introduc-
ing fresh air from outdoors, in compli-
ance with the current safety standards.
►2.2.5. Heaters must be powered only with
the correct voltage and frequency values
as specied on the heater’s identication
plate.
►2.2.6. Only use suitable earthed exten-
sion cable.
►2.2.7. The recommended safety distanc-
es between heaters and ammable sub-
stances are: front output = 2,5 m; side/
top/rear output = 1,5 m.
►2.2.8. Avoid re hazards by placing the
hot or functioning heater on a at level
surface.
►2.2.9. Always keep animals at a safe dis-
tance.
►2.2.10. Disconnect the heater from the
main power supply when not in use.

en
it
de
es
fr
nl
pt
da
no
sv
pl
ru
cs
hu
sl
tr
hr
lt
lv
et
ro
sk
bg
uk
bs
el
zh
►2.2.11. When controlled by a thermostat,
the heater can turn on at any time.
►2.2.12. Never use the heater in frequently
used rooms or in bedrooms.
►2.2.13. Never block the heater’s air inlet
or the air outlet (front).
►2.2.14. Never move, handle, refuel or con-
duct maintenance on the heater when it is
hot or when connected to the power sup-
ply or when in operation.
►2.2.15. Only use original kit/hose to direct
air ow (in and out) (where applicable).
►2.2.16. Keep heater’s hot parts at as safe
distance from inammable materials (in-
cluding the power supply cable).
►2.2.17. If the power supply cable is dam-
aged, it must be replaced by a technical
service centre, in order to prevent further
risks.
3. UNPACKING
WARNING: The packaging material is not
a toy. Keep the plastic bag out of the reach
of children; danger of suocation!
►3.1. Remove all packaging materials used
to wrap and deliver the heater and dispose
them in compliance with current regulations.
►3.2. If the heater is placed on a moving
platform, make sure it is moved gently.
►3.3. Check for any damage that might have
happened during transport. If the heater
looks damaged, immediately inform the
dealer from which it was purchased.
4. ASSEMBLY
These heaters are tted with wheels, a handle
and a chimney depending on the model (PIC.
2). These parts, which come with the relative
nuts and bolts, are in the heater’s packaging.
5. FUEL
WARNING: The heater only works with
DIESEL or KEROSENE.
In order to avoid explosions or any re hazards,
use only diesel or kerosene fuel.
Never use petrol, naphtha, paint solvents, alco-
hol or any other highly inammable fuels.
Non-toxic, anti-freeze additives can be used in
case of very low temperatures.
It is advisable to use winter diesel below 5°C.
6. OPERATING PRINCIPLES
A. Combustion chamber and burner, B. Fan,
C. Motor, D. Pump, E. Tank, F. Chimney.
The pump draws fuel from the tank and brings
it to the operating pressure. The fuel is brought
to the nozzle that sprays it into the combustion
chamber. The combustion is carried out with a
mix of air and fuel and the ow of air generated
is pushed outside via the rotation of the fan. In
direct models combustion products ow together
with heated air. In indirect models combustion
products are directed outside through the
chimney. A series of sensors connected to an
electronic control board constantly keep the
correct operation of the heater monitored and
stops the cycle in the event of anomalies.
7. OPERATION
WARNING: Carefully read the “SAFETY
INFORMATION” before switching on the
heater.
►►7.1. SWITCHING ON THE HEATER:
►7.1.1. Follow all the safety instructions.
►7.1.2. Check if there is any fuel in the tank.
►7.1.3. Close the tank cap (FIG. 3).
►7.1.4. Connect the power plug to the mains
(PIC. 4) (SEE VOLTAGE IN “TECHNICAL
DATA TABLE”).
►7.1.5. Set the “ON/OFF” switch to “FLAME”
(A PIC. 5). The heater should turn on within a
few seconds. If the heater does not start, refer
to paragraph “12. “TROUBLESHOOTING”.
►7.1.6. Maximum power is achieved by setting
the power switch to “DOUBLE FLAME” (B
PIC. 5).
►7.1.7. The heater can be used in ventilation
mode, which is activated by setting the ON/
OFF switch to “FAN” (A PIC. 5).
►7.1.8. For models with a room thermostat,
check the set temperature (PIC. 6).
PLEASE NOTE: IF THE HEATER SWITCHES
OFF DUE TO LACK OF FUEL, TOP UP THE
TANK AND RESET THE HEATER (SEE PAR.
7.2.).
IMPORTANT: In indirect models,
combustion products are directed outside
through suitable chimney. CARRY OUT
THE CHIMNEY IN ACCORDANCE WITH
CURRENT SAFETY REGULATIONS AND
FOLLOW THE INSTRUCTIONS IN THE
RELEVANT SECTION OF THE MANUAL.
en
it
de
es
fr
nl
pt
da
no
sv
pl
ru
cs
hu
sl
tr
hr
lt
lv
et
ro
sk
bg
uk
bs
el
zh
►►7.2. RESETTING THE HEATER:
The appliance stops when an anomaly occurs.
The reset button turns on with a steady red light
(PIC. 7), it means the heater needs to be reset.
To reset the heater, press the reset button all
the way down (PIC. 8). Identify and remove
the cause that stopped the appliance (for
instance, obstruction of air intake and/or outlet,
total block of the fan, etc.). Please contact an
appointed service center for assistance in case
it is impossible to solve the problem.
►►7.3. SWITCHING OFF THE HEATER:
Set the “I/0” button to “0” (A PIC. 5). Flames
extinguish and the fan keeps on working until
the combustion chamber has fully cooled down.
Do not pull the plug out until the cooling
cycle has totally ended.
8. CLEANING THE FILTERS
THE FILTERS MAY NEED TO BE CLEANED
DEPENDING ON THE QUALITY OF THE
FUEL USED.
►►8.1. FUEL TANK FILTER (PIC. 9):
►8.1.1. Remove tank (A) cap.
►8.1.2. Take out the lter (B) from the tank.
►8.1.3. Clean the lter (B) with clean fuel,
without damaging it.
►8.1.4. Put the lter (B) back in the tank.
►8.1.5. Close cap (A).
►►8.2. INTAKE FILTER, (PIC. 10)
DEPENDING ON THE MODEL:
►8.2.1. Remove the cup (A).
►8.2.2. Take out the lter (B) from the cup.
Keep gaskets for later use.
►8.2.3. Clean the lter (B) with clean fuel,
without damaging it.
►8.2.4. Put the lter (B) back in the cup.
►8.2.5. Put the glass (A) back on and
reassemble the gaskets correctly.
►►8.3. FUEL PUMP FILTER:
See the preventive maintenance schedule.
9. STORAGE AND TRANSPORT
WARNING: Before moving the appliance,
the heater must be stopped (SEE PAR. 7.3.)
and disconnected from the power supply
by pulling out the plug (PIC. 11), wait for
a complete cool down and close the tank
cap properly to prevent fuel leakage. Keep
the heater in horizontal and stable position
during transport.
IN ORDER TO KEEP THE HEATER IN
THE BEST POSSIBLE CONDITIONS, WE
RECOMMEND TO FOLLOW THE BELOW
PROCEDURE:
►9.1. Empty the fuel by removing the drain
cap at the bottom of the tank (PIC. 12).
Dispose the fuel in an appropriate container
in accordance with the current safety
regulations.
►9.2. To remove any residual remaining, pour
clean fuel and rinse the tank again.
►9.3. Close the drain cap and the tank cap.
►9.4. In order to keep the heater in the best
possible conditions, we recommend placing
it in a dry and safe place.
10. CONNECTING THE ROOM
THERMOSTAT
In models with a thermostat connection,
remove the cap connected to the appliance
and connect the room thermostat (optional)
(SEE PIC. 13-14).

en
it
de
es
fr
nl
pt
da
no
sv
pl
ru
cs
hu
sl
tr
hr
lt
lv
et
ro
sk
bg
uk
bs
el
zh
WARNING: BEFORE PERFORMING ANY MAINTENANCE OR REPAIRS, UNPLUG HEATER
FROM THE MAIN POWER SUPPLY AND MAKE SURE THE HEATER IS TOTALLY COOL.
11. PREVENTIVE MAINTENANCE SCHEDULE
COMPONENT MAINTENANCE FREQUENCY MAINTENANCE PROCEDURE
Fuel tank Clean once a year or as required Empty and rinse the tank with clean
fuel (SEE PAR. 9.)
Filters Clean or replace once a year or as
required (make sure they are intact)
Clean the lters (SEE PAR. 8.)
Fuel pump lter Clean or replace once a year or as
required (make sure they are intact)
Contact a service centre
Electrodes Clean as required Contact a service centre
Fan Clean as required Contact a service centre
Combustion
chamber
Clean as required Contact a service centre
12. TROUBLESHOOTING
PROBLEM POSSIBLE CAUSE POSSIBLE SOLUTION
The heater does
not start or does
not operate
1. Starter switch in “OFF” (0)
position
2. No power supply
3. Power supply cable
interrupted
4. Electronic control board
blocked or malfunctioning
5. Incorrect setting of the room
thermostat (if present)
6. No fuel
7. External substances or dirt
in the fuel circuit
1. Set the “ON/OFF” switch to “FLAME” (A
PIC. 5)
2a. Insert the power plug into the mains
socket correctly (PIC. 4)
2b. Check voltage of your electric supply
system
3. Contact a service centre
4a. Reset the heater (SEE PAR. 7.2.)
4b. Contact a service centre
4c. Contact a service centre
5. Set the room thermostat to a temperature
higher than the working environment
temperature (PIC. 6)
6. Top up fuel and reset heater
7a. Empty, rinse and rell the tank
7b. Rinse the lters (SEE PAR. 8.)
7c. Contact a service centre
Smoke while
operating
1. External substances or dirt
in the fuel circuit
2. Obstructed inlet air vent
3. Incorrect air supply
1a. Empty and rell the tank with clean fuel
1b. Rinse fuel lters
1c. Contact a service centre
2. Remove all air vent obstructions
3. Adjust the air damper below the fan, in
the rear part of the heater (to the left, the
damper closes; to the right, the damper
opens)
The heater does
not turn o
1. Faulty electronic system 1. Contact a service centre

FLUE CONNECTIONS DIAGRAM - SCHEMA DI FISSAGGIO - HINWEISE
FÜR DEN SCHORNSTEINBAU - ESQUEMA DE FIJACIÓN - SCHÉMA DE
FIXAGE - BEVESTIGINGSSCHEMA - ESQUEMA DE FIXAÇÃO - FASTSPÆN-
DINGSSKEMA - KIINNITYSKAAVIO - FESTESKJEMA - MONTERINGSSCHE-
MA - SCHEMAT MOCOWANIA - СХЕМА КРЕПЛЕНИЯ - SCHEMAT MONTAŻU
PRZYŁĄCZA KOMINOWEGO - RÖGZÍTÉSI RAJZ - SHEMA ZA PRITRJEVANJE
- SABİTLEME ŞEMASI - SHEMA PRIČVRŠĆIVANJA - TVIRTINIMO SCHEMA
- NOSTIPRINĀŠANAS SISTĒMA - KINNITAMISE SKEEM - SCHEMĂ DE FIXA-
RE - SCHÉMA ZAPOJENIA DYMOVODU - СХЕМА ЗА ЗАКРЕПВАНЕ - СХЕМА
КРІПЛЕННЯ - ŠEMA PRIČVRŠĆIVANJA - ΣΧΗΜΑ ΣΤΕΡΕΩΣΗΣ - 固定装置示意图 -
БЕКІТУ СҮЛБЕСІ
A
AØ > 150 mm-мм

DUCTING INSTRUCTIONS - INDICAZIONI PER LA CANALIZZAZIONE - HINWEI-
SE FÜR DEN SCHORNSTEINBAU - INDICACIÓN PARA LA CANALIZACIÓN - INDI-
CATIONS POUR LA CANALISATION - AANWIJZINGEN VOOR DE KANALISERING
- INDICAÇÕES PARA A CANALIZAÇÃO - ANVISNINGER TIL KANALISERING
- KANAVOINTIOHJEET - INDIKASJONER FOR KANALISERING - ANVISNINGAR
FÖR KANALISERING - ZALECENIA ODNOŚNIE MONTAŻU INSTALACJI KOMI-
NOWEJ - УКАЗАНИЯ ДЛЯ КАНАЛИЗАЦИИ - SCHÉMA ZAPOJENÍ KOUŘOVODU
- ÚTMUTATÓ CSŐRENDSZER KIÉPÍTÉSÉHEZ - NAVODILA ZA KANALIZIRANJE
- KANALİZASYON TALİMATLARI - INDIKACIJE ZA SPROVOĐENJE U CIJE-
VI - NURODYMAI DĖL ORO IŠLEIDIMO - CAURUĻVADU INDIKĀCIJAS - TORU
PAIGALDAMISE JUHEND - INDICAŢII PRIVIND DIRECŢIONAREA - SCHÉMA
ZAPOJENIA DYMOVODU - УКАЗАНИЯ ЗА КАНАЛИЗАЦИЯТА - ВКАЗІВКИ З
ВИКОНАННЯ КАНАЛІВ - INDIKACIJE ZA SPROVOĐENJE U CIJEVI - ΟΔΗΓΙΕΣ
ΓΙΑ ΤΗ ΔΙΟΧΕΤΕΥΣΗ - 管道设置说明 - КӘРІЗ ЖҮЙЕСІНЕ АРНАЛҒАН НҰСҚАУЛАР
AB
C
D
B
AB
C
D
E
A> 1 m-м
B≥ 1 m-м
CAs short as possible - Il piu corto possibile - Die kürzestmögliche - Tan corto como sea posible - Le plus
court possible - Zo kort mogelijk - O mais curto possível - Så kort som muligt - Mahdollisimman lyhyt - Kor-
test mulig - Så kort som möjligt - Możliwie jak najkrótszy - Nasadka kominowa - Как можно короче - Co
možná nejkratší - Lehető legrövidebb - Najkrajše - Mümkün olduğunca kısa - Što su kraće moguće - Kiek
įmanoma trumpesnis - Pēc iespējas īsākas - Võimalikult lühike - Cât mai scurt posibil - Pokiaľ možno čo
najkratšie - Възможно най-късият - Найбільш короткий шлях, по можливості - Što su kraće moguće -
Όσο πιο μικρό γίνεται - 尽量短 - Мүмкіндігінше қысқарақ
D> 5°
EWindproof terminal - Terminale antivento - Windschutzanschluss - Terminal antiviento - Terminal anti-
vent - Windkerend eindpunt - Terminal antivento - Vindafskærmning - Tuulenpitävä terminaali - Vindtett
terminal - Vindskyddat rörslut - Nasadka kominowa - Ветрозащитный наконечник - Koncový díl proti
větru - Szélálló csatlakozás - Terminal proti vetru - Rüzgar geçirmez terminal - Završni dio otporan na
vjetar - Apsaugojantis nuo vėjo terminalas - Vēja aizsardzības termināls - Tuulekindel tagumine osa - Ter-
minal anti-vânt - Koncový diel proti vetru - Терминално устройство за предпазване от вятър - Кінцевий
пристрій для захисту димоходу від вітру - Završni dio otporan na vjetar - Αντιανεμικό τερματικό - 防风
终端 - Желден қорғайтын ұштық

ELECTRODES REGULATION - REGOLAZIONE ELETTRODI - REGULIERUNG DER
ELEKTRODEN - REGULACIÓN DE LOS ELECTRODOS - REGULATION DES ELEC-
TRODES - AFSTELLING ELEKTRODEN - REGULAÇÃO DE ELÉTRODOS - REGULE-
RING AF ELEKTRODER - ELEKTRODIEN SÄÄTÖ - REGULERING AV ELEKTRODER
- ELEKTRODREGLERING - REGULACJA ELEKTROD - РЕГУЛЯЦИЯ ЭЛЕКТРОДОВ
- NASTAVENÍ ELEKTROD - AZ ELEKTRÓDÁK BEÁLLÍTÁSA - NASTAVITEV ELE-
KTROD - ELEKTROT AYARI - REGULIRANJE ELEKTRODA - ELEKTRODŲ REGU-
LIAVIMAS - ELEKTRODU REGULĒŠANA - ELEKTROODIDE REGULEERIMINE
- REGLAREA ELECTROZILOR - NASTAVENIE ELEKTRÓD - РЕГУЛИРАНЕ ЕЛЕК-
ТРОДИ - РЕГУЛЮВАННЯ ЕЛЕКТРОДОВ - KONTROLA ELEKTRODE - ΡΥΘΜΙΣΗ
ΗΛΕΚΤΡΟΔΙΩΝ - 电极规定 - ЭЛЕКТРОДТАРДЫ РЕТТЕУ
A
B
C
A3 mm-мм
B6 mm-мм
C3 mm-мм

WIRING DIAGRAMS - SCHEMI ELETTRICI - SCHALTPLÄNE - ESQUEMAS
ELÉCTRICOS - SCHEMAS ELECTRIQUES - ELEKTRISCHE SCHEMA’S - ESQUE-
MAS ELÉCTRICOS - ELEKTRISKE SKEMAER - SÄHKÖKAAVIOT - KOPLINGS-
SKJEMA - ELEKTRISKA KOPPLINGSSCHEMAN - SCHEMATY ELEKTRYCZNE
- ЭЛЕКТРИЧЕСКИЕ СХЕМЫ - ELEKTRICKÁ SCHÉMATA - VILLANYBEKÖTÉSI
RAJZOK - ELEKTRIČNE SHEME - ELEKTR EMALARI - ELEKTRIČNE SH-
EME - ELEKTROS SCHEMOS - ELEKTRISKĀS SHĒMAS - ELEKTRISKEEMID
- SCHEME ELECTRICE - ELEKTRICKÉ SCHÉMY - ЕЛЕКТРИЧЕСКИ СХЕМИ
- ЕЛЕКТРИЧНІ СХЕМИ - ELEKTRIČNE ŠEME - ΗΛΕΚΤΡΙΚΑ ΣΧΕΔΙΑ - 线路图 -
ЭЛЕКТРЛІ СҮЛБЕЛЕР
M1 Motor ventilation
M2 Motor combustion
RRelay
IN Switch
FU Fuse
DE Deviator
LI Light
FO Photores
TA Ambient thermostat
IG Igniter
FPH Filter pre-heater
TP Thermostat oscillation
EV1 Electrovalve NC
EV2 Electrovalve NA
TS Thermostat overheating
TR Thermostat heating
LLine
NNeutral

CE CONFORMITY CERTIFICATE
CE CONFORMITY CERTIFICATE - DICHIARAZIONE DI CONFORMITÀ CE - EG-KON-
FORMITÄTSERKLÄRUNG - DECLARACIÓN DE CONFORMIDAD CE - DECLARATION DE
CONFORMITE CE - EG-CONFORMITEITVERKLARING - DECLARAÇÃO DE CONFORMIDA-
DE CE - EU-OVERENSSTEMMELSESERKLÆRING - EY-VAATIMUSTENMUKAISUUSVA-
KUUTUS - CE-SAMSVARSERKLÆRING - EG-FÖRSÄKRAN OM ÖVERENSSTÄMMELSE
- DEKLARACJA ZGODNOŚCI WE - ДЕКЛАРАЦИЯ О СООТВЕТСТВИИ СЕ - PROHLÁŠENÍ
O SHODĚ CE - EK MEGFELELŐSÉGI NYILATKOZAT - IZJAVA O SKLADNOSTI IN
OZNAKA CE - CE UYGUNLUK BEYANI - IZJAVA CE O SUKLADNOSTI - ES ATITIKTIES
DEKLARACIJA - EK ATBILSTĪBAS - DEKLARĀCIJA - EÜ VASTAVUSDEKLARATSIOON -
DECLARAŢIE DE CONFORMITATE CE - PREHLÁSENIE O ZHODE CE - ДЕКЛАРАЦИЯ ЗА
СЪВМЕСТИМОСТ СЕ - ДЕКЛАРАЦІЯ ВІДПОВІДНОСТІ CE - IZJAVA CE O PRIKLADNOSTI
ΔΗΛΩΣΗ ΣΥΜΜΟΡΦΩΣΗΣ CE - CE 符合性声明
DANTHERM S.p.A. Via Gardesana 11, -37010- Pastrengo (VR), ITALY
Product: - Prodotto: - Produkt: - Producto: - Produit: - Product: - Produto: - Produkt: - Tuote: - Produkt: - Produkt:
- Produkt: - Изделие: - Výrobek: - Termék: - Izdelek: - Ürün: - Proizvod: - Gaminys: - Ierīce: - Toode: - Produsul:
- Výrobok: - Продукт: - Виріб: - Proizvod: - Προϊόν: - 产品:
BV 400
We declare that it is compliant with: - Si dichiara che è conforme a: - Es wird als konform mit den folgenden
Normen erklärt: - Se declara que está en conformidad con: - Nous déclarons sa conformité à: - Hierbij wordt
verklaard dat het product conform is met: - Declara-se que está em conformidade com: - Vi erklærer at produktet
er i overensstemmelse med: - Vakuutetaan olevan yhdenmukainen: - Man erklærer at apparatet er i overens-
stemmelse med: - Härmed intygas det att produkten är förenlig med följande: - Oświadcza się, że jest zgodny z: -
Заявляем о соответствии требованиям: - Prohlašuje se, že je v souladu s: - Kijelentjük, hogy a termék megfe-
lel az alábbiaknak: - Izpolnjuje zahteve: - Aşağıdaki standartlara uygun olduğunu beyan ederiz: - Izjavljuje se
da je u skladu s: - Pareiškiame, kad atitinka: - Tiek deklarēts, ka atbilst: - Käesolevaga deklareeritakse, et toode
vastab: - Declarăm că este conform următoarelor: - Prehlasuje sa, že je v súlade s: - Декларира се че отговаря
на: - Відповідає вимогам: - Izjavljuje se da je u skladu s: - Δηλώνουμε ότι είναι σύμφωνο με: - 兹证明符合:
2014/30/EU, 2014/35/EU
EN 62233:2008, EN 61000-3-2:2014, EN 61000-3-3:2013, EN 55014-1:2006/
A2:2011, EN 55014-2:2015, EN 60335-1:2012/A11:2014, EN 60335-2-
102:2016
Pastrengo, 2019
Stefano Verani (Member of the Board)

NOTE:_______________________________________________________________
______________________________________________________________________
______________________________________________________________________
______________________________________________________________________
______________________________________________________________________
______________________________________________________________________
______________________________________________________________________
______________________________________________________________________
______________________________________________________________________
______________________________________________________________________
______________________________________________________________________
______________________________________________________________________
______________________________________________________________________
______________________________________________________________________
______________________________________________________________________
______________________________________________________________________
______________________________________________________________________
______________________________________________________________________
______________________________________________________________________
______________________________________________________________________
______________________________________________________________________
______________________________________________________________________
______________________________________________________________________
______________________________________________________________________
______________________________________________________________________
______________________________________________________________________
______________________________________________________________________
______________________________________________________________________

►en - DISPOSAL OF THE PRODUCT
-This product has been designed and manufactured with top-quality materials and components, which can be re-cycled and re-used.
-When a crossed-wheely bin symbol is attached to the product, it means that the product is protected by the, 2012/19/UE European
Directive.
-Please obtain information regarding the local dierentiated collection system for electrical and electronic products.
-Respect local Standards in force and do not dispose of old products as normal domestic waste. Correct disposal of the product helps
to prevent possible negative consequences for health, the environment and mankind.
►it - SMALTIMENTO DEL PRODOTTO
-Questo prodotto è stato progettato e fabbricato con materiali e componenti di alta qualità, che possono essere riciclati e riutilizzati.
-Quando ad un prodotto è attaccato il simbolo del bidone con le ruote segnato da una croce, signica che il prodotto è tutelato dalla
Direttiva Europea 2012/19/UE.
-Si prega di informarsi in merito al sistema locale di raccolta dierenziata per i prodotti elettrici ed elettronici.
-Rispettare le norme locali in vigore e non smaltire i prodotti vecchi nei normali riuti domestici. Il corretto smaltimento del prodotto
aiuta ad evitare possibili conseguenze negative per la salute dell’ambiente e dell’uomo.
►de - ENTSORGUNG DES PRODUKTS
-Dieses Produkt wurde unter Verwendung von Qualitätsmaterialien und -bauteilen entwickelt und hergestellt, die recycelt und wieder
verwendet werden können.
-Ist ein Produkt gekennzeichnet durch die Mülltonne mit Rädern und einem Kreuz, wird hier angezeigt, dass dieses Produkt durch die
europäische Direktive 2012/19/UE überwacht ist.
-Es wird gebeten, sich über die vor Ort bestehende Mülltrennung bezüglich elektrischer und elektronischer Produkte zu informieren.
-Die vor Ort geltenden Vorschriften zur Müllentsorgung müssen eingehalten werden und alte Produkte dürfen nicht zusammen mit
dem Hausmüll entsorgt werden. Die ordnungsgemäße Entsorgung des Produkts hilft mögliche negative Folgen für Gesundheit und
Umwelt zu vermeiden.
►es - ELIMINACIÓN DEL PRODUCTO
-Este producto ha sido diseñado y fabricado con materiales y componentes de alta calidad que se pueden reciclar y reutilizar.
-Cuando en el producto se encuentra el símbolo del contenedor con las ruedas tachado con una cruz, signica que el producto está
tutelado por la Directiva europea 2012/19/UE.
-Se ruega informarse acerca del sistema local de recogida selectiva para los productos eléctricos y electrónicos.
-Respete las normas locales vigentes y no elimine los productos viejos junto con los residuos domésticos normales. La eliminación
correcta del producto ayuda a evitar posibles consecuencias negativas para la salud del ambiente y del hombre.
►fr - SE DÉBARRASSER DE VOTRE PRODUIT USAGÉ
-Ce produit a été conçu et fabriqué avec des matériaux et des composants de haute qualité, qui peuvent être recyclés et utilisés de
nouveau.
-Lorsque le symbole d’une poubelle à roue barrée est appliqué à un produit, cela signie que le produit est couvert par la Directive
Européenne 2012/19/UE.
-Veuillez vous informer du système local de séparation des déchets électriques et électroniques.
-Veuillez agir selon les règles locale set ne pas jeter vos produits usagés avec les déchets domestiques usuels. Jeter correctement
votre produit usagé aidera à prévenir les conséquences négatives potentielles contre l’environnement et la santé humaine.
►nl - VERWIJDERING VAN HET PRODUCT
-Dit product werd ontworpen en gemaakt met hoogwaardige materialen en componenten, die gerecycleerd en herbruikt kunnen
worden.
-Wanneer op een product het symbool van de afvalbak op wielen met een kruis erdoor is aangebracht, betekent dit dat het product
valt onder de Europese Richtlijn 2012/19/UE.
-Gelieve inlichtingen in te winnen betreende het plaatselijke systeem voor gedierentieerde inzameling van elektrische en
elektronische toestellen.
-Respecteer de plaatselijke normen die van kracht zijn, en verwijder de oude toestellen niet als gewoon huishoudelijk afval. Een
correcte verwijdering van het product helpt om mogelijke negatieve gevolgen voor de gezondheid van mens en milieu te voorkomen.
►pt - ELIMINAÇÃO DO PRODUTO
-Este produto foi projetado e fabricado com materiais e componentes de alta qualidade que podem ser reciclados e reutilizados.
-Quando for axado em um produto o símbolo do bidão com rodas marcado com uma cruz, signica que o produto é protegido pela
Diretiva Europeia 2012/19/UE.
-Solicitamos informar-se sobre o sistema local de recolha diferenciada para os produtos elétricos e eletrónicos.
-Respeitar as normas locais em vigor e não eliminar os produtos antigos como normais detritos domésticos. A correta eliminação do
produto ajuda a evitar possíveis consequências negativas para a saúde do ambiente e do homem.

NOTE:_____________________________________________________________
____________________________________________________________________
____________________________________________________________________
____________________________________________________________________
____________________________________________________________________
____________________________________________________________________
____________________________________________________________________
____________________________________________________________________
____________________________________________________________________
____________________________________________________________________
____________________________________________________________________
____________________________________________________________________
____________________________________________________________________
____________________________________________________________________
____________________________________________________________________
____________________________________________________________________
____________________________________________________________________
____________________________________________________________________
____________________________________________________________________
____________________________________________________________________
____________________________________________________________________
____________________________________________________________________
____________________________________________________________________
____________________________________________________________________
____________________________________________________________________
____________________________________________________________________
____________________________________________________________________
____________________________________________________________________
____________________________________________________________________
____________________________________________________________________
____________________________________________________________________
____________________________________________________________________
____________________________________________________________________
____________________________________________________________________
____________________________________________________________________
____________________________________________________________________
____________________________________________________________________
____________________________________________________________________
____________________________________________________________________
____________________________________________________________________
____________________________________________________________________
____________________________________________________________________
____________________________________________________________________
Table of contents
Other Master Power Tools manuals

Master
Master Heat Gun HG-801D Series User manual

Master
Master 10008 User manual

Master
Master S 48 pias User manual

Master
Master PROHEAT STC User manual

Master
Master B 130 Manual

Master
Master BV 500-13 Manual

Master
Master BS 12-A solid User manual

Master
Master DG307 Instruction Manual

Master
Master PROHEAT STC PH-1600 User manual

Master
Master FPC90 User manual

Master
Master FVS25 User manual

Master
Master HG D Series User manual

Master
Master EC-200 User manual

Master
Master PROHEAT STC PH-1600 User manual

Master
Master EH 4 User manual

Master
Master B35CEL Manual

Master
Master 17 Instruction manual

Master
Master HG-201A User manual

Master
Master VARITEMP VT-752C User manual

Master
Master BLP 15 kW M User manual