Master Heat Gun HG-801D Series User manual

MA
S
TER
®
™
Assembled in U.S.A. using foreign and domestic components
Instruction Manual
Please read, understand and keep this
manual for future reference.
Por favor lea, comprenda y guarde este
manual para futura referencia.
MASTER HEAT GUN®
MASTER VARITEMP®
HEAT GUN
-CAUTION-
HIGH TEMPERATURE AT
NOZZLE. RUN ON ‘COLD’
BEFORE TURNING OFF.

3
2
Important Safety Instructions
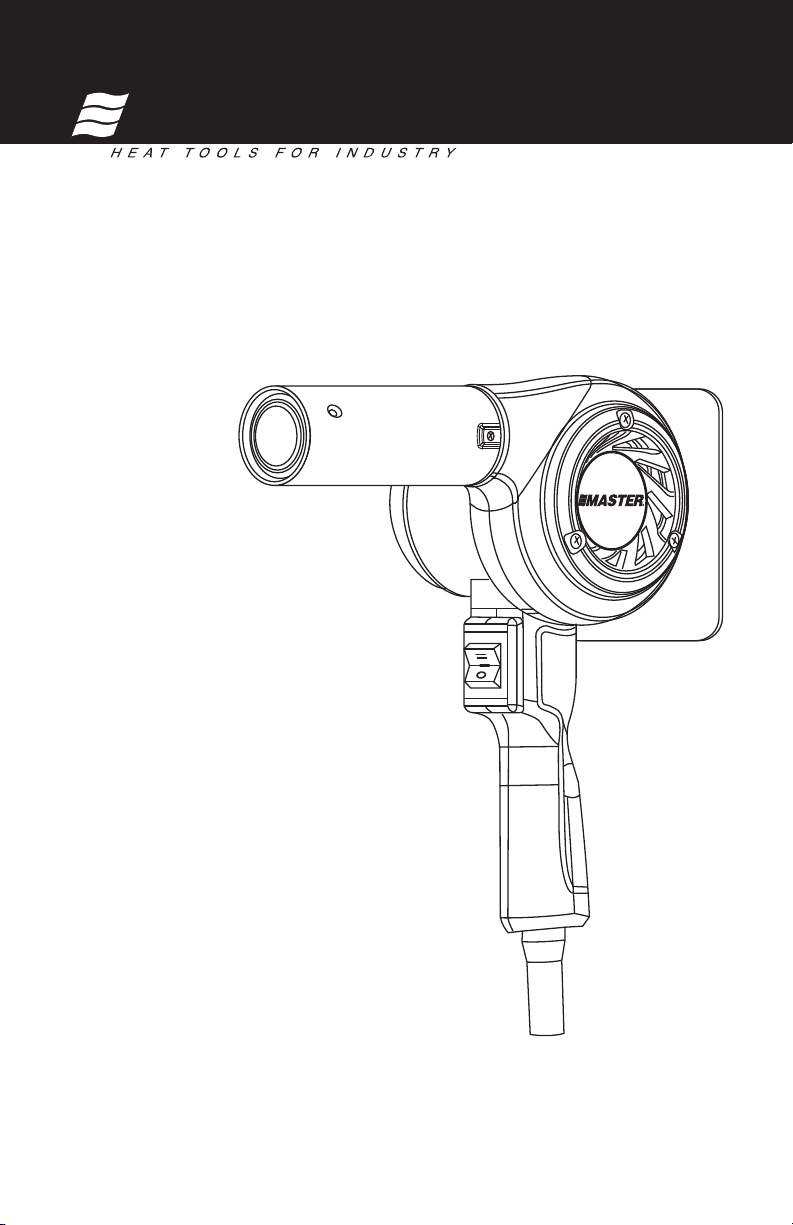
Our Master Heat Gun® and Master Varitemp® Heat Gun feature a heavy
duty, industrial quality design, with industry leading heat and airow, that
gets any job done faster.
To reduce the risk of re or explosion, electric shock and the
injury to persons, read and understand all instruction included
in this manual. Be familiar with the controls and proper usage of
equipment.
• Withaheatgun,aswithallotherheat
tools, keep a re extinguisher handy
and observe all sensible re precautions.
• Keepguninconstantmotion. Do not
stop or dwell in one spot.
• Useextremecautioniftheotherside
of the material being scraped is not
accessible, such as house siding. The
hidden side could catch re if it becomes
too hot. Some buildings contain highly
ammable materials behind siding, oors,
facia, soffit boards and other panels.
Check these areas before applying heat
and do not use a heat tool if ammable
materials are present or if you are unsure
of the hidden material.
• Donotusenearsurfaceswithcracks
or near metal pipes or ashing. Heat
may be conducted behind the work
surface and ignite hidden material. The
ignition of hidden materials may not be
readily apparent and can result in property
damage and injury.
• Donotuseelectrictoolinthe
presences of ammable liquids or
gases.
• Donotusenearcombustiblematerials
such as dry grass, leaves and paper which
can scorch and catch re.
IMPORTANT SAFETY INSTRUCTION
WARNINGThis heat gun produces
extreme high temperatures (as high as
1400ºF). It must be used with caution to
prevent combustible materials from igniting.
Indicates a hazardous situation, if not avoided could result in death or serious injury.
ImportantSafetyInformation•Readallsafetyinformationbeforeoperating
equipment. Save these instructions.
ImportantSafetyInformation•Readallsafetyinformationbeforeoperating
equipment. Save these instructions
• Thenozzlebecomesveryhot. Do not
lay the heat gun on ammable surfaces
when operating the gun or immediately
after shutting the gun off. Always set the
heat gun on a at surface so that the
nozzle tip is directed upward and away
from the supporting surface.
• Donottouchthenozzle until the tool has
cooled.
• Donotusethegunasahairdryer.
• Toolsandpaintscrapingsbecomevery
hot. To avoid burns, use work gloves
when scraping.
• Alwaystreatthehotairunitswiththe
same respect as an open ame.
• Donotworkinwetareasorexposethe
heat gun to rain.
• Guardagainstelectricshockby
preventing body contact with grounded
surfaces such as pipes, radiators, ranges,
aluminum ladders or other grounded
devices.
• Donotabusetheelectriccord. Never
carry the heat gun by the cord or yank on
the cord to disconnect it from the power
supply. Keep the electric cord away from
heat, oil and sharp edges.
• Useextensioncordsratedforoutdoor
use. If an extension cord is damaged or
otherwise unsuitable for use, replace it
with a new cord.
• Disconnectheatgunfrompower
supply when not in use. Store indoors in
a dry place and out of reach of children.
• Keepworkareawelllightedandclean.
• Donotoverreach,especiallywhen
working on ladders. Keep proper footing
and balance at all times. Be certain
ladders being used are sturdy, stable and
on a rm surface and erected at a safe
working angles.
• Avoidpowerlines
• Keepmovableitemssecureandsteady
while scraping.
• Alwaysuseprotectiveeyewearwhen
working.
PERSONSREMOVINGPAINTSHOULD
FOLLOWTHESEGUIDELINES:
WARNING Extreme care should
be taken when stripping paint. The
peelings, residue and vapors of paint
may contain lead, which is poisonous.
Any paint applied before 1950 is likely
to contain lead. Any paint manufactured
before 1977 may contain lead. Once
the paint is deposited on the surface,
hand-to-mouth contact can result in the
ingestion of lead. Exposure to even
low levels of lead can cause irreversible
brain and nervous system damage.
Young unborn children are particularly
vulnerable to lead poisoning.
Before beginning any paint removal
process, you should determine whether
the paint you are removing contains
lead. This can be done by your local
health department or by a professional
who uses a paint analyzer to check the
lead content of the paint to be removed.
LEAD-BASEDPAINTSHOULDONLY
BEREMOVEDBYAPROFESSIONAL
ANDSHOULDNOTBEREMOVED
USINGAHEATGUN.
WARNING This product when used
for soldering and similar application, can
expose you to LEAD, which is known to
the State of California to cause cancer
and birth defects and other reproductive
harm.
• Stayalertandusecommonsense
when operating any tools.
• Usecautionwhenoperatingthehot
air gun. Keep the hot air gun moving as
excessive heat will generate fumes which
can be inhaled by the operator.
• Keepfoodanddrinkoutofthework
area. Wash hands, arms and face and
rinse mouth before eating or drinking. Do
not smoke or chew gum or tobacco in the
work area.
• Movetheworkpieceoutdoors.If this
is not possible, keep the work area well
ventilated. Open the windows and put an
exhaust fan in one of them. Be sure the
fan is moving the air from inside to outside.
• Removeorcoveranycarpets,rugs,
furniture, clothing, cooking utensils and
air ducts.
• Placedropclothsintheworkareato
catch any paint chips or peelings. Wear
protective clothing such as extra work
shirts, overalls and hats.
• Workinoneroomatatime.Furnishings
should be removed or placed in the center
of the room and covered. Work areas
should be sealed off from the rest of the
dwelling by sealing doorways with drop
cloths.
• Children,pregnantorpotentially
pregnant women and nursing mothers
should not be present in the work area
until the work is done and all cleanup is
complete.
• Wearadustrespiratororaduallter
(dust and fume) respirator mask which
has been approved by the Occupational
Safety and Health Administration (OSHA),
the National Institute of Safety and Health
(NIOSH), or the United States Bureau
of Mines. These masks and replaceable
lters are readily available at major
hardware stores. Be sure the mask ts.
Beards and facial hair may keep masks
from sealing properly. Change lters often.
DISPOSABLEPAPERMASKSARENOT
ADEQUATE.

5
4
4. To turn heat gun
off after use, move
switch to “I” position.
Run on cold for
approximately three
minutes. This will
allow the heat gun to cool down and the
nozzle to become cool to the touch.
5. Move switch to
"O" position.
1. Plug heat gun into properly rated outlet.
2. Move rocker switch to “II” position. (VT
Models, turn heat control to desired
heat setting). Heat
gun will come up
to full operating
temperature in
approximately two
minutes.
3. Adjustable stand
is provided to allow
nozzle to be rotated
from almost horizontal
to vertical position.
ImportantSafetyInformation•Readallsafetyinformationbeforeoperating
equipment. Save these instructions
Important Safety Instructions Repair and Maintenance Instructions
• Cleanupallremovedpaintanddust
by wet mopping the oors. Use a wet
cloth to clean all walls, sills and any other
surface where paint or dust is clinging. DO
NOTSWEEP,DRYDUSTORVACUUM.
Use a high phosphate detergent or
trisodium phosphate (TSP) to wash and
mop areas.
• Attheendofeachworksessionput
the paint chips and debris in a double
CLEANING
REPAIR AND MAINTENANCE INSTRUCTIONS
TO OPERATE HEAT GUN
MASTER HEAT GUN® REPLACEMENT PARTS (HG/VT MODELS)
5-20P
G
W
All repairs and maintenance must be
performed by a qualied repair technician
who is experienced with the repair of electric
tools, a qualied service organization, or
Master Appliance Corp.’s Repair Department.
Please contact Master’s Customer Service
Department for genuine Master Appliance
replacement parts or for repair service.
Unplug heat gun before cleaning. To clean
outside of tool, use only a mild soap and
damp cloth. Do not use other cleaning
agents, turpentine, gasoline, lacquer or paint
thinner, or other solvents that may contain
Master Heat Gun® replacement parts
and accessories are engineered and
manufactured to precise MASTER
APPLIANCE specication. Replacement
parts and accessories from other
manufacturers are not produced to these
precise specications and therefor may
cause difficulties with or actually cause
damage to your Master Heat Gun®. Master
Appliance cannot assume responsibility
or liability for difficulties or damage
resulting from the use of any other brand of
replacement parts or accessories with your
Master Heat Gun®.
chemicals which are harmful to plastics and
other insulating materials. Never immerse
tool in a liquid or allow a liquid to enter inside
the tool. Make sure all vents and openings
are free and clear of debris.
NOTICE:When heat gun is used in an
enclosed container, such as a shrink tunnel
or special enclosure, ambient air must be
allowed to pass into the heat gun and there
must be an outlet of equal size for the heated
air to pass out of the enclosure also. Total
enclosure will cause damage or possible
failure to the heat gun due to the extreme
heat generated.
plastic bag, close it with tape or twist ties,
and dispose of properly.
• Removeprotectiveclothingandwork
shoes in the work area to avoid carrying
dust into the rest of the dwelling. Wash
work clothes separately. Wipe shoes off
with a wet rag that is then washed with
the work clothes. Wash hair and body
thoroughly with soap and water.
SPECIFICATIONS
Size ...........10”Lx5-1/4”Wx9-1/2”H
Nozzle opening .............1-3/16” dia.
Nozzle shield length ...........4-7/8" L
Average air velocity 3400 FPM at ambient
Average air volume ...27 CFM at ambient
Net weight (with stand)3.7lbs.(D-models)
. . . . . . . . . . . . . . . . . . . . 2.8 lbs. (T-models)
Cord Length ....................6 Ft. L
-CAUTION-
HIGHTEMPERATURE AT
NOZZLE.RUN ON ‘COLD’
BEFORETURNING OFF.
-ADVERTENCIA-
ALTATEMPERATURAEN LA
BOQUILLA.ANTES DE
APAGARLAHERRAMIENTA.
ALASORTIE.
DUBEC OPÉRER À ‘COLD’
AVANTDE FERMER
-CAUTION-
HIGHTEMPERATURE AT
NOZZLE.RUN ON ‘COLD’
BEFORETURNING OFF.
-ADVERTENCIA-
ALTATEMPERATURAEN LA
BOQUILLA.ANTES DE
APAGARLAHERRAMIENTA.
ALASORTIE.
DUBEC OPÉRER À ‘COLD’
AVANTDE FERMER
4
3
2
1
5
6
7
8
9
Model °F °C Voltage Amps Was Element
HG-201D/T 400 204 120 5 600 30087
HG-301D/T 800 426 120 12 1440 30085
HG-501D/T 1200 649 120 14.5 1740 30083
HG-801D* 1400 760 120 18.5 2220 30082
HG-202D/T 400 204 220 3 660 30088
HG-302D/T 800 426 220 6 1320 30086
HG-502D/T 1200 649 220 9 1980 30084
* Required 20A outlet, equipped with NEMA 5-20P Plug
Temperature
Master Heat Gun®
Replacement
Model °F °C Voltage Amps Was Element
VT-751D 100-1200 38-649 120 14.5 1740 30083
VT-752D 100-1200 38-649 220 9 1980 30084
Temperature
Master Varitemp® Heat Gun
Replacement
Model °F °C Voltage Amps Was Element
HG-201D/T 400 204 120 5 600 30087
HG-301D/T 800 426 120 12 1440 30085
HG-501D/T 1200 649 120 14.5 1740 30083
HG-801D* 1400 760 120 18.5 2220 30082
HG-202D/T 400 204 220 3 660 30088
HG-302D/T 800 426 220 6 1320 30086
HG-502D/T 1200 649 220 9 1980 30084
* Required 20A outlet, equipped with NEMA 5-20P Plug
Temperature
Master Heat Gun®
Replacement
Model °F °C Voltage Amps Was Element
VT-751D 100-1200 38-649 120 14.5 1740 30083
VT-752D 100-1200 38-649 220 9 1980 30084
Temperature
Master Varitemp® Heat Gun
Replacement
-CAUTION-
HIGHTEMPERATURE AT
NOZZLE.RUN ON ‘COLD’
BEFORETURNING OFF.
-ADVERTENCIA-
ALTATEMPERATURAEN LA
BOQUILLA.ANTES DE
APAGARLAHERRAMIENTA.
ALASORTIE.
DUBEC OPÉRER À ‘COLD’
AVANTDE FERMER
WARNING-ToReduceTheRisk
Of Fire Or Electric Shock, Connect To
GroundedOutlet.DoNotExposeTo
Rain Or Moisture. Store Indoors; Read
Instruction Manual Before Using.
CAUTION-HIGHTEMPERATURE
ATNOZZLE.RUNONCOLDBEFORE
TURNINGOFF.

6
HG-801D • • • •
HG-201D/T
HG-301D/T
HG-501D/T
HG-202D/T • • • • • •
HG-302D/T
HG-502D/T
VT-751D
VT-752D • • • • • •
30202
Solder
Preform
51309
Pinpoint
Model
Aachments
51543
Spreader
51544
7/8 Reducer
51542
Glass
Protector
A-160-HG
A-170-HG
Shrink Tube
Item No. Part No. Description
1 35153 Blower wheel
2 30071 Stand kit (D Models)
2 30072 Stand kit (T Models)
3 30073 Motor 120V
3 30074 Motor 220-240V
4 30075 Switch Bezel Kit (3 pos)
4 30076 Switch Bezel Kit (MC)
5 30077 Nozzle Shield Kit
6 30078 Grille Kit
7 30079 Cordset Kit 120V 15amp (-00)
7 30080 Cordset Kit 120V 20amp (-01)
7 30081 Cordset Kit 220V UL/CUL (-02)
8 30082 Element Kit, HG-801D (120V)
8 30083 Element Kit, HG-501D & T/VT-751D (120V)
8 30084 Element Kit, HG-502D / VT-752D (220V)
8 30085 Element Kit, HG-301D & T (120V)
8 30086 Element Kit, HG-302D (220V)
8 30087 Element Kit, HG-201D & T (120V)
8 30088 Element Kit, HG-202D & T (220V)
9 30089 Element Connector
9 30090 Element Connector 20 amp
10 30091 Handle Kit (D Models)
11 30092 VT- Knob Kit
12 30093 Circuit Board Kit VT-751D (120V)
12 30094 Circuit Board Kit VT-752D (220V)
13 30095 Housing Plastic (T Models)
14 30096 Grounding Kit (T Models)
MASTER HEAT GUN®Replacement Parts (HG/VT Models)
Attachments
-CAUTION-
HIGHTEMPERATURE AT
NOZZLE.RUN ON ‘COLD’
BEFORETURNING OFF.
-ADVERTENCIA-
ALTATEMPERATURAEN LA
BOQUILLA.ANTES DE
APAGARLAHERRAMIENTA.
ALASORTIE.
DUBEC OPÉRER À ‘COLD’
AVANTDE FERMER
11 8
2
14
9
1
3
7
6
13
12
10
5
4
If you’re looking for quality power tools, visit our website.
This manual suits for next models
13
Other Master Power Tools manuals

Master
Master S 48 pias User manual

Master
Master RS 30 Manual

Master
Master B 130 Manual

Master
Master HG-201A User manual

Master
Master PROHEAT STC PH-1600 User manual

Master
Master VARITEMP VT-752C User manual

Master
Master BV 500-13 Manual

Master
Master 10008 User manual

Master
Master BS 12-A solid User manual

Master
Master Proheat PH-1000 User manual

Master
Master BV 400 Manual

Master
Master VT D Series User manual

Master
Master FPC90 User manual

Master
Master PROHEAT STC User manual

Master
Master B35CEL Manual

Master
Master BLP 15 kW M User manual

Master
Master BLP Series Manual

Master
Master EM-007 User manual

Master
Master RW 160 User manual

Master
Master ULTRATORCH UT-50 User manual