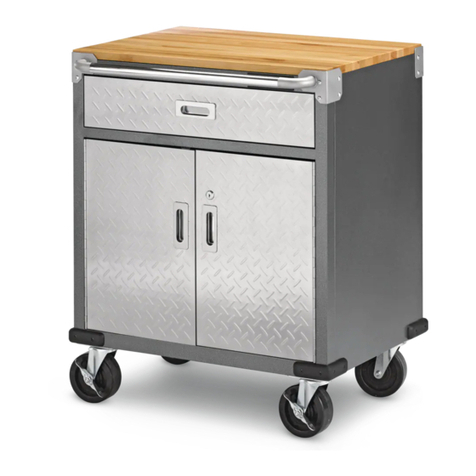
MasterCraft 068-0002-6 User manual

continuation tabs
IMPORTANT:
Please read this manual carefully before assembling
and using this work centre and save it for reference.
INSTRUCTION
MANUAL
BUTCHER BLOCK TOP WORK CENTRE
Model no. 068-0002-6

headline bars
continuation tabs
notes
warnings
headline bars
continuation tabs
notes
warnings
model no. 062-3582-8 | contact us 1-800-689-9928

TABLE OF CONTENTS
2
3
5
6
17
Safety
Parts List
Exploded View
Assembly Instructions
Warranty
NOTE:
If any parts are missing or damaged, or if you have any questions,
please call our toll-free helpline at 1-800-689-9928.
SAVE THESE INSTRUCTIONS
This manual contains important safety and operating instructions.
Read all instructions and follow them with use of this product.
1
TABLE OF CONTENTS

SAVE THESE INSTRUCTIONS
This manual contains important safety and operating instructions.
Read all instructions and follow them with use of this product.
2
headline bars
continuation tabs
notes
warnings
headline bars
continuation tabs
notes
warnings
model no. 068-0002-6 | contact us 1-800-689-9928
• To reduce the risk of serious injury, read the following safety
instructions before assembling and using the cabinet.
• This cabinet is intended for domestic, indoor use only.
• The cabinet should be positioned on a level surface.
• Any assembly or maintenance of the cabinet must be carried
out by adults only.
• Arrange for necessary manpower when assembling and moving
the cabinet.
• Check all the nuts and bolts periodically for tightness.
When required, tighten them again.
• Use a slightly damp, soft cloth to clean the cabinet.
• Do not stand on the cabinet and do not use it as a scaffold.
• Do not exceed the weight limit specified for this cabinet.
Maximum wood board load: 430 lb (195.4 kg)
Maximum bottom panel load: 90 lb (40 kg)
Maximum middle shelf load: 70 lb (31.8 kg)
Maximum drawer load: 40 lb (18 kg)
Maximum pegboard load: 88 lb (40 kg)
Maximum top cantilever shelf: 33 lb (15 kg)
Maximum cabinet load: 871 lb (396 kg)
SAFETY
headline bars
continuation tabs
notes
warnings
headline bars
continuation tabs
notes
warnings
model no. 062-3582-8 | contact us 1-800-689-9928

3
PARTS LIST
No.
1
2
3
4
5
6
7
8
9
10A
10E
11A
11B
11C
11D
11E
12
13
14
15
16
17
18-A
18-B
No.
19
20
21
22
24
25
26
28
29-1
29-2
29-3
29-4
30
42
57
61
27
60
55
27-B
55-A
100
101
102
103
104
105
106
107
Description
Push Bar
Corner Protector
Screwdriver
Key (attached to the front frame)
Drawer Mat
Wrench
Magnet
Pegboard
Top Cantilever Shelf Back Panel
Top Cantilever Shelf Base Panel
Top Cantilever Shelf Left Panel
Top Cantilever Shelf Right Panel
Top Cantilever Shelf Mat
M4 x 30L Screw
Bumper
M4 x 12L Screw
M4 Washer
Mounting Strap
M6 x 50L Screw
M8 Washer
Wall Anchor
1/2" (12.7 mm) Curved
1" (2.5 cm) Curved
1" (2.5 cm) Straight
1 1/2" (3.8 cm) Straight
2" (5.1 cm) Double Prong
4" (10.2 cm) Curved Double Prong
2" (5.1 cm) Plier Holder
2" (5.1 cm) Multi-tool Holder
Description
Solid Hardwood Top
Front Frame
Back Frame
Left Side Panel
Right Side Panel
Middle Shelf
Base Panel
Middlle Panel
Door
Small Drawer Front Panel
Small Drawer Body
Large Drawer Front Panel
Large Drawer Left Panel
Large Drawer Right Panel
Large Drawer Back Panel
Large Drawer Base Panel
Wheel With Brake
Wheel W/O Brake
M8 Washer
M8 x 18L Screw
M4 x 10L Screw
M4 x 8L Screw
Pegboard Support Bar Left
Pegboard Support Bar Right
Qty.
1
1
1
1
1
1
1
1
1
2
2
2
2
2
2
2
2
2
4
4
80
80
1
1
Qty.
1
2
1
2
4
1
2
1
1
1
1
1
1
16
4
2
2
2
2
2
2
4
4
4
4
2
2
2
1
PARTS LIST

4
headline bars
continuation tabs
notes
warnings
headline bars
continuation tabs
notes
warnings
model no. 068-0002-6 | contact us 1-800-689-9928
headline bars
continuation tabs
notes
warnings
headline bars
continuation tabs
notes
warnings
model no. 062-3582-8 | contact us 1-800-689-9928
PARTS LIST
101
104
107
1" (2.5 cm)
Curved
2" (5.1 cm)
Double
Prong
2" (5.1 cm)
Multi-tool
Holder
14 M8
M4 x 8L
Pegboard Support Bar Right
18-B
17
100
103
106
1/2" (12.7 mm)
Curved
1 1/2" (3.8 cm)
Straight
2" (5.1 cm)
Plier
Holder
Mounting Strap
60
Wall Anchor
55-A
M4 x 30L
42
M8 x 18L15
M4 x 12L61
Screw M6 x 50L
55
M4 x 10L16
Pegboard Support Bar Left
18-A
M4 Washer
27
M8 Washer
27-B
M8X20 pcs
102
105
1" (2.5 cm)
Straight
4" (10.2 cm)
Curved Double
Prong

5
EXPLODED VIEW
11A
17
11B
11D
11C
11E
10E
10A
17
6

6
headline bars
continuation tabs
notes
warnings
headline bars
continuation tabs
notes
warnings
model no. 068-0002-6 | contact us 1-800-689-9928
headline bars
continuation tabs
notes
warnings
headline bars
continuation tabs
notes
warnings
model no. 062-3582-8 | contact us 1-800-689-9928
ASSEMBLY INSTRUCTIONS
Fig. A
1
Fig. B
ASSEMBLY PREPARATION
• Begin the assembly of this cabinet on a clean, level surface.
• Remove all items from the box and ensure that all parts listed on page 3 are
present.
• When installing parts that have more than one screw, tighten all screws by
hand before finishing tightening them with the provided screwdriver (21).
If a power screwdriver is used, keep on a low torque setting.
WARNING
Some parts may have sharp edges. To avoid injury, wearing gloves is recommended during assembly.
ASSEMBLY INSTRUCTIONS
1. Open both boxes, locate and remove
the cardboard box containing the Solid
Hardwood Top (Part 1). Set the other parts
to the side.
When assembling this item, place the
Solid Hardwood Top upside down on the
cardboard to avoid scratching the top
surface (Fig. A).
2. Install Back Frame (Part 3) to
Solid Hardwood Top (Part 1)
[Use the Wrench (Part 25) for this step]
Place the Back Frame (Part 3) onto the
Solid Hardwood Top (Part 1), as shown in
Fig. B, and use two Screws (Part 15) and
two Washers (Part 14) and Wrench (Part
25) to fasten. Attach the "Top" of the Back
Frame (Part 3), as indicated by the
attached sticker, to the Solid Hardwood
Top (Part 1) (the Solid Hardwood Top has
no set front or back end) (Fig. B).
Note: Ensure the back and side are flush with the Solid Hardwood Top. When assembling a part,
do not tighten any screws completely until all screws for that part have been partially screwed in.

7
ASSEMBLY INSTRUCTIONS
3.
Install Right Side Panel (Part 5)
Attach Right Side Panel (Part 5) to
Back Frame (Part 3) making sure
the "Top" of Right Side Panel (Part
5) is on the Solid Hardwood Top
(Part 1). Use three Screws (Part 16)
and Screwdriver (Part 21) to fasten
(Fig. C).
4. Install Middle Panel (Part 8)
Attach the Middle Panel (Part 8) to
the Back Frame (Part 3) and Solid
Hardwood Top (Part 1), as shown in
Fig. D, making sure the "Top" of
Middle Panel (Part 8) is attached on
the Solid Hardwood Top (Part 1).
Again, the “Top” is indicated by a
sticker on one of the vertical
columns. Use three Screws (Part
16) and Screwdriver (Part 21) to
fasten (Fig. D).
Fig. C
Fig. D

8
headline bars
continuation tabs
notes
warnings
headline bars
continuation tabs
notes
warnings
model no. 068-0002-6 | contact us 1-800-689-9928
headline bars
continuation tabs
notes
warnings
headline bars
continuation tabs
notes
warnings
model no. 062-3582-8 | contact us 1-800-689-9928
ASSEMBLY INSTRUCTIONS
5.
Install Left Side Panel (Part 4)
Attach Left Side Panel (Part 4) to
Back Frame (Part 3), making sure
the "Top" of Left Side Panel (Part
4) is on the Solid Hardwood Top
(Part 1). Use three Screws (Part 16)
and Screwdriver (Part 21) to fasten
(Fig. E).
6.
Install the Front Frame (Part 2)
A: Align the "Top" of the Front
Frame (Part 2) to the Solid
Hardwood Top (Part 1). The other
screw holes will align with the Left
and Right Side Panels (Part 4 and
5) and Middle Panel (Part 8).
B: Use nine Screws (Part 16) and
Screwdriver (Part 21) to fasten the
Front Frame (Part 2) to the Left and
Right Side Panels (Part 4 and 5)
and Middle Panel (Part 8).
C: Make sure the four edges of the
Cabinet are aligned, then fasten
the Front Frame (Part 2) to the
Solid Hardwood Top (Part 1) by
using two Washers (Part 14) and
two Screws (Part 15) with Wrench
(Part 25) (Fig. E).
Fig. E
Fig. F
Note:
The Key (Part 22) is attached to the
front frame (Part 2). Please take out the
Key (Part 22) before installing the front
frame (Part 2).

9
ASSEMBLY INSTRUCTIONS
7. Install the Base Panel (Part
7) and Wheels (Part 12 13)
A: Fit the Bottom Panel (Part 7)
between the Back Frame (Part 3)
and Front Frame (Part 2) as shown
in Fig G. Line up the screw holes
and use eight Screws (Part 16) and
Screwdriver (Part 21) to fasten it.
B: Attach Wheels (Part 12 and 13)
using the Wrench (Part 25) to
tighten. Make sure that the Wheels
w/o Brakes (Part 13) are on the
Left Panel (Part 4), and Wheels with
Brakes (Part 12) are on the Right
Panel (Part 5) (Fig. G).
8. Install the Bumpers (Part 57)
Attach Bumpers (Part 57) to the
bottom four corners of the Cabinet.
Use 16 Screws (Part 42) and
Screwdriver (Part 21) to fasten.
Then, rotate/ stand the cabinet
upright (Fig. H).
Fig. G
Fig. H

10
headline bars
continuation tabs
notes
warnings
headline bars
continuation tabs
notes
warnings
model no. 068-0002-6 | contact us 1-800-689-9928
headline bars
continuation tabs
notes
warnings
headline bars
continuation tabs
notes
warnings
model no. 062-3582-8 | contact us 1-800-689-9928
ASSEMBLY INSTRUCTIONS
9. Install the Corner Protectors
(Part 20), Push Bar (Part 19) and
Magnet (Part 26)
A: Attach the Corner Protectors
(Part 20) to the front and back top
corners of the Left Side (Part 4)
using 12 Screws (Part 16) and
Screwdriver (Part 21) to tighten.
B: Attach the Push Bar (Part 19) to
the top of the Right Side Panel (5)
using 12 Screws (Part 16) and
Screwdriver (Part 21) to tighten.
C: Use four Screws (Part 16) and
Screwdriver (Part 21) to fasten the
Magnets (Part 26) on the Front
Frame (Part 2) (Fig. I).
10. Assemble the Small Drawers
(Part 10)
A: Fold up all three panels of the
Small Drawer Body (Part 10E) and
use four Screws (Part 17) and
Screwdriver (Part 21) to attach the
back panel to the left and right side
panels (Fig. J and Fig. K).
B: Insert the Small Drawer Body
(Part 10E) into the Small Drawer
Front Panel (Part 10A) and use
seven Screws (Part 17) and
Screwdriver (Part 21) to tighten
(Fig. L).
C: Repeat A and B to assemble the
other small drawer.
Fig. I
Fig. K
10E
17
Fig. L
10A
17
Fig. J
10E

ASSEMBLY INSTRUCTIONS
11. Assemble Large Drawer Side
Panels (Part 11C and 11B)
Fit and attach Large Drawer Side
Panels (Part 11C and 11B) one at a
time, into the back of the stainless
steel Large Drawer Front (Part 11A).
Make sure the Drawer Side Panels are
placed in all the way making contact
with the rear of the Large Drawer
Front Panel (Part 11A). Line up the
screw holes and use four Screws (Part
17) and Screwdriver (Part 21) to
tighten them (Fig. M).
12. Assemble the Large Drawer
Base Panel (Part 11E)
Insert the Large Drawer Base Panel
(Part 11E) between the two sides and
into the back of the Large Drawer
Front Panel (Part 11A). Use nine
Screws (Part 17) and Screwdriver
(Part 21) to tighten (Fig. N).
13. Assemble the Larger Drawer
Back Panel (Part 11D)
Attach the Large Drawer Back Panel
(Part 11D) to the rest of the assem-
bled drawer. Use seven Screws (Part
17) and Screwdriver (Part 21) to
tighten. Once you have the Large
Drawer assembled, repeat Steps 11 to
13 to assemble the other Large
Drawer. You should have two Large
Drawers and two Small Drawers (Fig.
O).
Fig. M
17
11C
11B
11A
Fig. N
17
11E
Fig. O
11D
17
11

12
headline bars
continuation tabs
notes
warnings
headline bars
continuation tabs
notes
warnings
model no. 068-0002-6 | contact us 1-800-689-9928
headline bars
continuation tabs
notes
warnings
headline bars
continuation tabs
notes
warnings
model no. 062-3582-8 | contact us 1-800-689-9928
ASSEMBLY INSTRUCTIONS
14. Place the Drawers
A: Pull out the sliders completely,
then attach the drawer to the
sliders. Make sure the square
holes on the drawer side panels
are lined up and the drawer is
hooked onto the sliders completely
(Fig. P and Fig. Q).
B: Use four Screws (Part 17) and
Screwdriver (Part 21) to secure the
drawer, then put the Drawer Mat
(Part 24) into the drawer (Fig. R).
Repeat above steps to place other
drawers.
Note:
Do not tighten any screws completely
until all the drawers are adjusted well.
Fig. Q
Fig. R
The oval hole at the front of the slider allows for the gaps
between the drawers to be adjusted. Make the adjustments
once all the drawers are installed.
Fig. P
Note: Pull out the ball
bearing track completely
before you attach drawer.

13
ASSEMBLY INSTRUCTIONS
15. Install the Middle Shelf
(Part 6)
Place the Middle Shelf (Part 6) in
the unit at the desired height and
ensure that all four corners are
secured on the hooks on the Front
and Back Frames (Part 2 and 3)
(Fig. S).
16. Install the Door (Part 9)
Attach the Door (Part 9) to the right
side of the Cabinet. Use five
Screws (Part 16) and Screwdriver
(Part 21) to fasten (Fig. T).
Fig. S
Fig. T

14
headline bars
continuation tabs
notes
warnings
headline bars
continuation tabs
notes
warnings
model no. 068-0002-6 | contact us 1-800-689-9928
headline bars
continuation tabs
notes
warnings
headline bars
continuation tabs
notes
warnings
model no. 062-3582-8 | contact us 1-800-689-9928
ASSEMBLY INSTRUCTIONS
18. Install Pegboard Support
Bars (Part 18-A) and (Part
18-B)
A: Please take off four screws from
the back corner protector and four
screws from the back corner of push
bar. as shown in Fig. V: total 8 pcs.
B: Attach Pegboard Suport Bar Left
(Part 18-A) to the left back of the
work centre using Screwdriver (Part
21) and four of the Screws (Part 16)
removed in Step A. Attach Pegboard
Suport Bar Right (Part 18-B) to the
right back of the work centre using
Screwdriver (Part 21) and four of the
Screws (Part 16) removed in Step A.
Note:
Do not fully tighten the screws. This will help you make any adjustments to alignment later.
17. Install the Top Cantilever Shelf
A: Attach the Top Cantilever Shelf Left Panel (Part 29-3) and the Top Cantilever Shelf
Right Panel (Part 29-4) to Top Cantilever Shelf Base Panel (Part 29-2). Use six Screws
(Part 16) and Screwdriver (Part 21) to tighten.
B: Attach the Top Cantilever Shelf Back Panel (Part 29-1) to the Top Cantilever Shelf
Right Panel (Part 29-4) and Left Panel (Part 29-3) and Base Panel (Part 29-2). Use
nine Screws (Part 16) and Screwdriver (Part 21) to tighten.
A B
Fig. V
Fig. U

15
ASSEMBLY INSTRUCTIONS
19. Install Pegboard (Part 28)
Attach the Pegbord (Part 28) to the
support bars by lining up the screw
holes, and use six Screws (Part 16)
and Screwdriver (Part 21) to
tighten (Fig. W).
20. Install Top Cantilever Shelf
(Part 29)
A: Please take off left and right
back side of Top Cantilever Shelf
(Part 29) screws, total four screws
(Part 16).
B: Attach Top Cantilever Shelf (Part
29) to the top of the Pegboard
Support Bars by lining up the
screw holes, and using the
removed four Screws (Part 16) and
Screwdriver (Part 21) to tighten.
Attach Top Cantilever Shelf (Part
29) to the top of the Pegboard (Part
28) using two Screws (Part 17) and
Screwdriver (Part 21) to tighten.
Put the Mat (Part 30) into the Top
Cantilever Shelf (Part 29) (Fig. X).
Note:
Do not fully tighten the screws. This
will help you make any adjustments for
alignment later.
Fig. W
Fig. X

21. Install Mounting Straps
(Part 60)
A: Remove two Screws (Part 16)
from the Pegboard Support Bars
(Part 18-A and 18-B). These
screws will no longer be used.
B: Attach the Mounting Straps (Part
60) to the sides of Pegboard (Part
18-A and 18-B), using two
Washers (Part 27) with two Screws
(Part 61) and Screwdriver (Part 21) to tighten.
C: Drill two holes in the wall with a 5/16" drill bit, and
insert two Wall Anchors (Part 55-A) into the holes.
D: Attach the free end of the Mounting Straps (Part 60) to
the wall using two Screws (Part 55), two Washers (Part
27-B) and Screwdriver (Part 21) to tighten.
Stainless Steel Maintenance:
These parts have an fingerprint-resistant finish. Do not use traditional stainless
steel cleaners on this unit. Lightly wipe off once a month with clean warm water
and a soft cloth (preferably a microfibre cloth). This is the safest formula to prevent
new stains from appearing over time and manage unwanted fingerprints or grease
marks. Remember to always wipe in the direction of the surface grain (NEVER
ACROSS) and always use a lint-free cloth. Once the surface is clean, thoroughly
wipe dry with a soft, absorbent cloth.
16
headline bars
continuation tabs
notes
warnings
headline bars
continuation tabs
notes
warnings
model no. 068-0002-6 | contact us 1-800-689-9928
headline bars
continuation tabs
notes
warnings
headline bars
continuation tabs
notes
warnings
model no. 062-3582-8 | contact us 1-800-689-9928
ASSEMBLY INSTRUCTIONS
Fig. Y
60
55-A
27-B
55
61
27

17
WARRANTY
This Mastercraft®product carries a one (1) year warranty from the date of the original
retail purchase, against defects in material and workmanship. Subject to the condi-
tions and limitations described below, this product, if returned to us with proof of
purchase within the stated warranty period and if covered under this warranty, will be
repaired or replaced (with the same model, or one of equal value or specification), at
our discretion. We will bear the cost of any repair or replacement and any costs of
labour relating thereto.
This warranty is subject to the following conditions and limitations:
a. a bill of sale verifying the purchase and purchase date must be provided;
b. this warranty will not apply to any product or part thereof which is worn or broken
or which has become inoperative due to abuse, misuse, accidental damage, neglect or
lack of proper installation, operation or maintenance (as outlined in the applicable
owner's manual or operating instructions) or which is being used for industrial, profes-
sional, commercial or rental purposes;
c. this warranty will not apply to normal wear and tear or to expendable parts or acces-
sories that may be supplied with the product which are expected to become inopera-
tive or unusable after a reasonable period of use;
d. this warranty will not apply to routine maintenance and consumable items such as,
but not limited to, fuel, lubricants, vacuum bags, blades, belts, sandpaper, bits, fluids,
tune-ups or adjustments;
e. this warranty will not apply where damage is caused by repairs made or attempted
by others (i.e., persons not authorized by the manufacturer);
f. this warranty will not apply to any product that was sold to the original purchaser as
a reconditioned or refurbished product (unless otherwise specified in writing);
g. this warranty will not apply to any product or part thereof if any part from another
manufacturer is installed therein or any repairs or alterations have been made or
attempted by unauthorized persons;
h. this warranty will not apply to normal deterioration of the exterior finish, such as, but
not limited to, scratches, dents, paint chips, or to any corrosion or discolouring by heat,
abrasive and chemical cleaners; and
i. this warranty will not apply to component parts sold by and identified as the product
of another company, which shall be covered under the product manufacturer's
warranty, if any.

Additional Limitations
This warranty applies only to the original purchaser and may not be
transferred. Neither the retailer not the manufacturer shall be liable for
any other expense, loss or damage, including, without limitation, any
indirect, incidental, consequential or exemplary damages arising in
connection with the sale, use or inability to use this product.
Notice to Consumer
This warranty gives you specific legal rights, and you may have other
rights, which may vary from province to province. The provisions
contained in this warranty are not intended to limit, modify, take away
from, disclaim or exclude any statutory warranties set forth in any applica-
ble provincial or federal legislation.
Made in China
Imported by
Mastercraft Canada Toronto, Canada M4S 2B8
headline bars
continuation tabs
notes
warnings
Other manuals for 068-0002-6
1
Table of contents
Languages:
Other MasterCraft Tools Storage manuals