Matrix SETU VGFX User manual

Documentation Disclaimer
Matrix Comsec reserves the right to make changes in the design or components of the product as
engineering and manufacturing may warrant. Specifications are subject to change without notice.
Copyright
All rights reserved. No part of this manual may be copied or reproduced in any form or by any means without
the prior written consent of Matrix Comsec.
Version 2
Release date: February 5, 2011
http://arttel.ru

Table of Contents i
Contents
Introduction .................................................................................................... 1
Know Your SETU VGFX ................................................................................... 2
Before You Start ................................................................................................ 4
Installing SETU VGFX .................................................................................... 7
Mounting SETU VGFX on Wall ......................................................................... 7
Connecting SETU VGFX ................................................................................... 8
Switching ON SETU VGFX ............................................................................... 9
Accessing Web JEEVES .............................................................................. 11
Configuring SETU VGFX ............................................................................. 15
Region Selection ............................................................................................. 15
Date and Time Settings ................................................................................... 17
Daylight Saving Time (DST) Mode .................................................................. 19
Port Parameters-SIP ....................................................................................... 21
Port Parameters-FXO ...................................................................................... 25
Port Parameters-FXS ...................................................................................... 29
Port Parameters-Mobile .................................................................................. 32
Mobile Network Selection ................................................................................ 35
Routing Groups ............................................................................................... 36
Destination Number Determination Method .................................................... 42
Destination Port Determination Method .......................................................... 50
Network Port Parameters ................................................................................ 68
Default the SETU VGFX .................................................................................. 74
Restore SE Password ..................................................................................... 75
Checking the Status ........................................................................................ 76
Test Call .......................................................................................................... 82
Appendix ....................................................................................................... 83
Features at Glance .......................................................................................... 83
System Commands ......................................................................................... 85
http://arttel.ru
Matrix SETU VGFX Quick Start 1
Introduction
Thank you for choosing Matrix SETU VGFX! Please read the instruction in this
quick start to install this feature reached system.
This Quick Start is meant to help you to install the basic features and parameters of
SETU VGFX. For detailed information on installing and programming, please refer
'SETU VGFX V1 System Manual' provided to you on the CD-ROM.
http://arttel.ru

2 Matrix SETU VGFX Quick Start
Know Your SETU VGFX
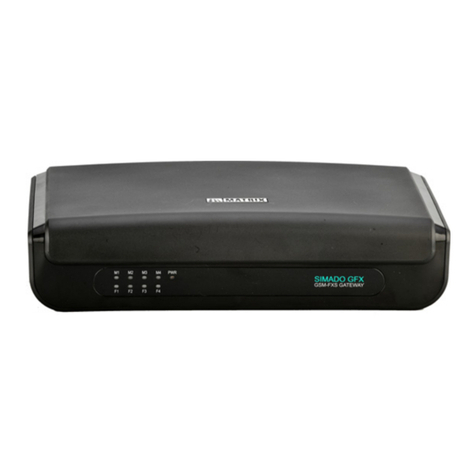
SETU VGFX has 1 WAN Port, 2 FXO Ports, 2 FXS Ports, 4 Mobile Ports, 9 SIP
Trunks, Antenna Connecter, a Power Socket and 10 LEDs.
SETU VGFX also supports 3G module for voice. When 3G module is installed in the
system:
1. RCOC- When Busy will not work.
2. Frequency Band Selection not required.
3. Current calls will be disconnected if Call Waiting Service is not disabled in the
SIM Card. Disable Call Waiting in SIM Card before inserting it in SETU VGFX.
http://arttel.ru

Matrix SETU VGFX Quick Start 3
SETU VGFX is available in three different configurations:
1. SETU VGFX8422: supports 9 SIP Trunks, 4 Mobile Ports, 2 FXO Ports and 2
FXS Ports. This is the default configuration of SETU VGFX.
2. SETU VGFX8404: supports 9 SIP Trunks, 4 Mobile Ports and 4 FXS Ports.
3. SETU VGFX8440: supports 9 SIP Trunks, 4 Mobile Ports and 4 FXO Ports.
This Quick Start is written with reference to the default configuration. The term
SETU VGFX refers to SETU VGFX8422, unless otherwise specified.
LEDs:
There are total 10 LEDs in SETU VGFX. These LEDs are labeled as M1, M2, M3,
M4, P1, P2, P3, P4, STS and PWR as shown in the figure below. These LEDs
indicate the status of ports, various events occurring on the ports and also the error
conditions.
All LEDs are of dual colour (Red/Green) except Power LED which is of single colour
(Red). Power (PWR) and Status (STS) LEDs are non-programmable whereas all
port LEDs are programmable.
By default, LEDs labeled as M1, M2, M3 and M4 show status of Mobile Ports. LEDs
labeled as P1 and P2 show status of FXO Ports and P3 and P4 show status of FXS
Ports.
Port LEDs can be programmed for showing the status of SIP Trunks also. You can program LEDs
for showing status of maximum 8 SIP Trunks simultaneously. (Refer “Checking the Status” for
more details)
http://arttel.ru

4 Matrix SETU VGFX Quick Start
Before You Start
Verify Package Contents
Make sure that all the above mentioned components are present when you open
the Sales Kit of SETU VGFX. In case any of the part is missing or damaged, contact
the source from where you have purchased your SETU VGFX.
Get your Internet Connection Ready
To install SETU VGFX, you must have:
1. Broadband Internet connection from an ISP to make and receive calls through
public internet. If you want to make calls within your network, you do not need
an internet connection.
2. Connection from an Internet Telephony Service Provider (ITSP) to activate your
SIP Trunks. You do not need an ITSP connection for making Peer to Peer calls.
Get your Network Information Ready
Ask your LAN Administrator/ISP for:
1. IP Address
2. Subnet Mask
http://arttel.ru

Matrix SETU VGFX Quick Start 5
3. Gateway Address
4. DNS Address
5. DNS Domain Name
Ask your ITSP for:
1. SIP ID/User ID
2. Authentication User ID (in most cases it is same as SIP ID)
3. Authentication Password
4. Registrar Server Address
5. Registrar Server Port
6. Outbound Proxy Server Address
7. Outbound Proxy Server Port
To install SETU VGFX, you should also have:
1. An active SIM card/s from GSM service provider.
2. Analog trunk line from Public Switched Telephone Network (PSTN).
http://arttel.ru

Matrix SETU VGFX Quick Start 7
Installing SETU VGFX
Take proper precautions while installing SETU VGFX to reduce the risk of fire,
electric shock and injury to the system as well as the person using it. (Refer
Installation Precautions and Safety Instructions under “Pre-Installation Tips” topic in
the System Manual)
3.3V Battery: SETU VGFX contains 3.3V DC Manganese Lithium Battery (ML 2032-
Rechargable) of diameter 20 (-0.2)mm and height 3.2 (-0.3)mm. Battery location is marked as
‘B1’ on the left hand-side of J5 jumper on the Board. Battery should be replaced only by
authorized dealers of Matrix.
Mounting SETU VGFX on Wall
SETU VGFX should be installed at the airy, dust free and moisture free place.
• Select a suitable place on the wall for mounting SETU VGFX.
• Put the mounting template on the wall and mark the nail hole on the wall.
• Drill a hole of appropriate size.
• Insert the screw and tighten it leaving the screw head a few millimeters
protruded of the wall.
• Check the strength of the nail.
• Hang SETU VGFX on the wall.
http://arttel.ru

8 Matrix SETU VGFX Quick Start
Connecting SETU VGFX
Connect SETU VGFX as shown below:
• Place SETU VGFX at a suitable place where it can be provided with proper
power supply.
• Connect Ethernet (WAN) Port of SETU VGFX to the LAN Switch/Network of the
Enterprise.
• Connect PSTN line to the FXO Port of SETU VGFX or connect FXO Ports of
SETU VGFX to the FXS Ports of the PBX.
• Connect telephone instruments to the FXS Ports of SETU VGFX or connect
FXS Ports of SETU VGFX to the FXO Ports of the PBX.
• Connect Antenna to SETU VGFX.
• Insert SIM Card into the Mobile Port of SETU VGFX to register with GSM
network.
• Connect Power Socket of SETU VGFX to the power supply using 12V DC, 2A
power adaptor.
http://arttel.ru

Matrix SETU VGFX Quick Start 9
Switching ON SETU VGFX
After connecting SETU VGFX as shown above, switch ON the power supply.
At Power ON, Power LED will turn ON (Continuous Red). Initialization process will
start and LED sequence of all other LEDs during initialization process is shown in
the table given below:
Red color text (Bold) indicates that led will glow red and Green color text (Bold+Italic) indicates
that led will glow green.
During initialization, Mobile Port LEDs (M1, M2, M3 and M4) will display following error/
event/status:
System Status STS P1 P2 P3 P4 M1 M2 M3 M4 Time in MS
Power ON -
UBOOT
OFF ON OFF OFF OFF OFF OFF OFF OFF
Kernel UP & LED
Driver Loaded
OFF ON ON OFF OFF OFF OFF OFF OFF
Application Load OFF ON ON ON OFF OFF OFF OFF OFF 200ms
VOPP Program
Download Success
OFF ON ON ON ON OFF OFF OFF OFF 200ms
All Init Done,
System goes Live
ON ON ON ON ON ON ON ON ON 1000 ms
OFF OFF OFF OFF OFF OFF OFF OFF OFF 1000 ms
ON OFF OFF OFF OFF OFF OFF OFF OFF 1000 ms
OFF OFF OFF OFF OFF OFF OFF OFF OFF 1000 ms
(Continuous
Last 2 steps)
LED Status - Cadence (in msec)
(1 cadence is of 4000msec)
Colour Event/State/Status
500ms On- 500ms Off Green GSM Initialization
500ms On - 500ms Off Red PUK required
500ms On- 500ms Off - 500ms On-500ms Off-
500msOn-1500ms Off (3 Blinks)
Red SIM PIN Required
500ms On - 500ms Off -
500ms On - 2500ms Off (2 Blinks)
Red SIM PIN Wrong
500ms On - 3500ms Off (1 Blink) Red SIM Absent
1sec On - 1sec Off Red GSM network absent
http://arttel.ru

10 Matrix SETU VGFX Quick Start
During initialization, System LED (STS) will display following error/events/status:
During normal functioning, FXS/FXO/Mobile Port LEDs will display following error/
events/status:
During Off-Hook state, FXS Port LED glows continuous Red. However, if the system is in
programming mode, the LED of the port used to enter programming mode will glow continuous
Green. After exiting programming mode, it turns Red again (displaying Off-Hook event).
You can program Port LEDs for showing the status of SIP Trunks. For example, if
you are using only two Mobile Ports then you can program the other two Mobile Port
LEDs for showing the status of SIP Trunks. (Refer “Checking the Status” for more
details)
LED Status Colour Comment
Continuous On Red VoPP program download fail
1sec On - 1sec Off Green SETU VGFX started successfully.
Network link is Up.
SIP stack is Up.
CDR buffer is not full.
500 ms on - 500ms off -
500 ms on - 500ms off (4 Blinks)
Green Network link is down.
SIP stack is down.
CDR buffer is not full.
500 ms on - 500ms off -
500 ms on - 1500ms off (3 Blinks)
Green Network link is Up.
SIP stack is down.
CDR buffer is not full.
500 ms on - 500ms off -
500 ms on - 500ms off (4 Blinks)
Red Network link is down.
SIP stack is down.
CDR buffer is full.
1sec On - 1sec Off Red Network link is up.
SIP stack is down.
CDR buffer is full.
500 ms on - 500ms off -
500 ms on - 1500ms off (3 Blinks)
Red Network link is up.
SIP stack is up.
CDR buffer is full.
LED Status Colour Event/State/Status
Continuous OFF - Port Idle/Disable
400ms On - 200ms Off -
400ms On - 3000ms Off (2 Blinks)
Red Incoming Ring Event
Continuous On Red Off-Hook Event
Continuous On Green Speech
http://arttel.ru

Matrix SETU VGFX Quick Start 11
Accessing Web JEEVES
You can program all the parameters of SETU VGFX using Web JEEVES. A few
network port parameters such as IP Address, Subnet Mask, Connection Type, etc.
necessary to set up the system, can also be programmed by using a telephone
instrument.
You might need to change the network port parameters in most cases to make
SETU VGFX a part of your network and to access the Web JEEVES. In such cases,
it is recommended that you connect telephone instrument to the FXS Port and
change network port parameters using telephone instrument and subsequently
access Web JEEVES to configure rest of the system. To access Web JEEVES,
follow the steps given below:
1. To access Jeeves of SETU VGFX, it must be connected to a computer. The
computer may be a standalone PC or a PC in a LAN.
2. Also SETU VGFX and the computer must be in the same Subnet and their IP
Addresses should be different.
3. Obtain from your LAN administrator, the IP Address and the Subnet mask of the
standalone PC/ LAN PC from which you wish to access the Web JEEVES.
4. The default IP Address and Subnet mask of SETU VGFX are 192.168.001.176
and 255.255.255.000 respectively.
5. Change the IP Address of SETU VGFX, if it is conflicting with the IP Address of
the PC to which it is connected or with any device on the LAN. Similarly, assign
the Subnet of the PC to SETU VGFX, if it is not the same. To do this:
• Pick up the handset of analog phone connected to SETU VGFX and dial
#19-1234. You will get programming tone. (#19 is the default programming
access code and 1234 is the default SE Password.)
• Change IP address by issuing command: 11-IP Address-#*
Where,
IP address is of 12 digits in XXX.XXX.XXX.XXX format. Each octet is of
three digits ranging from 001 to 254.
http://arttel.ru

12 Matrix SETU VGFX Quick Start
For example,
To program IP address 192.168.1.120, enter the command
11-192168001120-#*.
• Change Subnet Mask by issuing command: 12-Subnet Mask-#*
Where,
Subnet Mask is of 12 digits in XXX.XXX.XXX.XXX format. Each octet is of
three digits. Valid range is 0, 128, 192, 224, 240, 248, 252, 254 and 255.
For example,
To program Subnet Mask 255.255.254.0, enter the command
12-255255254000-#*.
SETU VGFX restarts as soon as IP Address or Subnet Mask is changed.
6. Exit programming mode by issuing command: 00#*
7. Open web browser of the computer connected to SETU VGFX.
8. Enter IP Address of SETU VGFX in the address bar of the web browser. The
Login Page will open.
http://arttel.ru

Matrix SETU VGFX Quick Start 13
9. Enter the default SE Password 1234 in the Login Page. The Home Page of
SETU VGFX Web JEEVES will open. The feature links appear on the left side
panel.
10. Now you can program all the parameters of SETU VGFX by clicking on the
appropriate feature links.
After Switching ON the SETU VGFX, the SE is advised to program it in the following
sequence:
1. Region Selection (Region/Country Code)
2. Date and Time Settings
3. Daylight Savings Time Mode
4. Port Parameters- SIP
5. Port Parameters-FXO
6. Port Parameters-FXS
7. Port Parameters-Mobile
8. Mobile Network Selection
9. Routing Groups
10. Destination Number Determination Method for all Port types
11. Destination Port Determination Method for all Port types
12. Network Port Parameters
http://arttel.ru
Other manuals for SETU VGFX
1
Table of contents
Other Matrix Gateway manuals

Matrix
Matrix SETU ATA211 SIP-FXS-FXO User guide

Matrix
Matrix SETU VGFX User manual

Matrix
Matrix SETU VFX88L User guide

Matrix
Matrix SIMADO GFX44 User guide

Matrix
Matrix SETU VFX88L User manual

Matrix
Matrix SETU VFX User manual

Matrix
Matrix SETU VFXTH User guide

Matrix
Matrix SIMADO GFX44 User guide

Matrix
Matrix SETU VFXTH User manual

Matrix
Matrix simado gfx11 User guide
Popular Gateway manuals by other brands

Wi-Tek
Wi-Tek WI-IOT110 installation guide

ADTRAN
ADTRAN NetVanta 1355 Specifications

Westell Technologies
Westell Technologies 7500 installation guide

SolarEdge
SolarEdge SE1000 installation guide

IntesisBox
IntesisBox LON-KNX installation manual

Edgewater Networks
Edgewater Networks EdgeMarc 6400LF2 quick start guide