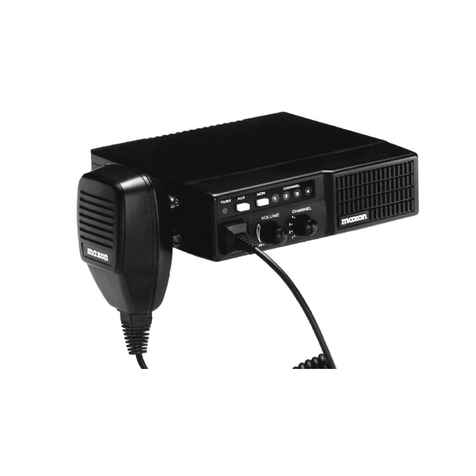
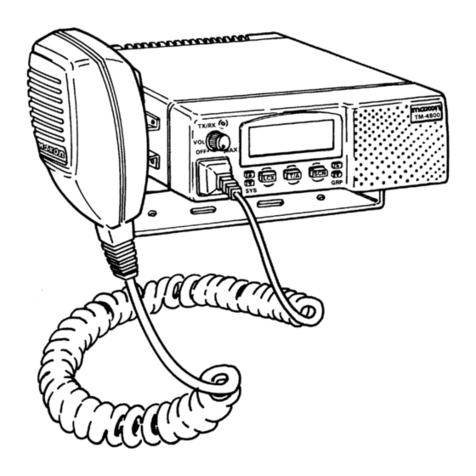
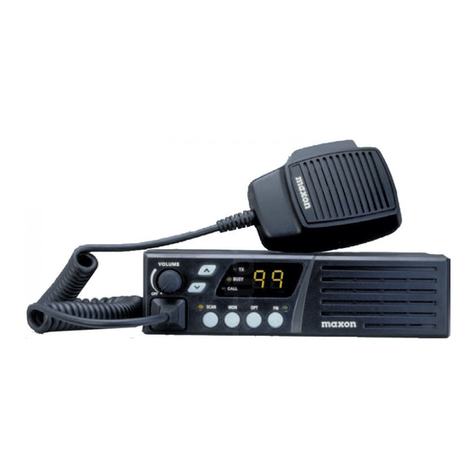
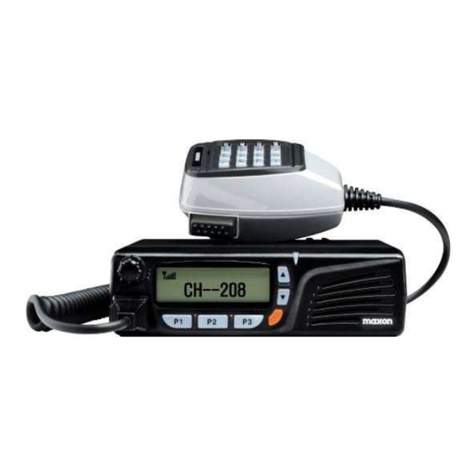
Maxon EM-4800 User manual

Model EM-4800
800 MHz
EDACS®/GE-MARC®
Mobile Radio
Operating Instructions

NOTICE!
Repairs to this equipment should be made only by an authorized
service technician or at a facility designated by the supplier. Any
repairs, alterations or substitutions of recommended parts made by
the user to this equipment not approved by the manufacturer could
void the user's authority to operate the equipment in addition to
the manufacturers warranty.
NOTICE!
The software contained in this device is copyrighted. Unpublished
rights are reserved under the copyright laws of the United States.
FCC LICENSING
This unit may or may not require a specific FCC license to operate.
The FCC requires that all transmitters in the conventional and some
trunked systems to be licensed by the Federal Communications
Commission. Some trunked operations now are exempt from indi-
vidual licensing requirements but may be operated in a licensed
system.
Consult your Maxon Dealer regarding specific licensing infor-
mation (Form 571), or contact the Federal Communications
Commission via phone: 888-CALLFCC (1-888-225-5322) or
through an FCC District office near you.
These operating instructions are published by Maxon America, Inc.,
without any warranty. Improvements and changes necessitated by typo-
graphical errors, inaccuracies of current information, or improvements to
programs and/or equipment may be made by Maxon America Inc. at any
time and without notice. Such changes will be incorporated into revisions
or new editions of this manual. No part of this manual may be reproduced
or transmitted in any form or by any means, electronic or mechanical,
(including photocopying and recording) for any purpose without the
sexpress written permission of Maxon America, Inc.
Copyright September 1997 - Maxon America, Inc.
TABLE OF CONTENTS
Safety Information 1
Safe Driving Recommendations
for Mobile Radio Users 3
Operating Procedures 4
Introduction 6
Front Panel Controls 7
LCD Indicators 9
Display Messages 10
Alert Tones 10
EDACS Operation
Turning On the Radio 13
Receiving a Call 13
Sending a Call 15
SCAT Operation 16
Conventional Failsoft 17
Scan Operation 17
DTMF Microphone Operation 19
GE-MARC Operation
Turning On the Radio 25
Receiving a Call 25
Sending a Call 26
DTMF Microphone Operation 28
Scan Operation 34
Direct Mode 35

TABLE OF CONTENTS, Continued
Conventional Mode Operation
Turning On the Radio 37
Sending a Message 37
Receiving a Message 37
Squelch Adjustment 37
Sending a Manually Entered Interconnect Call
(Using the Optional DTMF Microphone) 38
Scan Operation 39
Maintenance and Basic Care 42
Operator's Radio Setup 44
Warranty Statement 45
EDACS and GE-MARC are registered
trademanes of Ericsson Inc.

SAFETY INFORMATION
The operator of any mobile radio should be aware of certain
hazards common to the operation of vehicular radio trans-
missions. Possible hazards are:
Explosive Atmospheres: Just as it is dangerous to fuel a vehicle
with the motor running, be sure to turn the radio OFF while
fueling the vehicle. Do not carry containers of fuel in the
trunk of the vehicle when the radio is mounted in the trunk.
Interference To Vehicular Electronic Systems: Electronic fuel
injection systems, electronic anti-skid braking systems, elec-
tronic cruise control systems, etc. are typical of the types of
electronic devices that may malfunction due to the lack of
protection from radio frequency energy present when trans-
mitting. If the vehicle contains such equipment, consult the
dealer for the make of vehicle and enlist his aid in determining
if such electronic circuits perform normally when the radio is
transmitting.
Dynamite Blasting Caps: Dynamite blasting caps may be
caused to explode by operating a radio within 500 feet of the
caps. Always obey the "Turn Off Two Way Radio" signs
posted where dynamite is being used. When transporting
blasting caps in your vehicle:
a) Carry the blasting caps in a closed metal box with a soft
lining.
b) Leave the radio OFF whenever the blasting caps are
being put into or removed from the vehicle.
Radio Frequency Energy: To prevent burns or related physical
injury from radio frequency energy, do not operate the trans-
mitter when anyone outside of the vehicle is within two feet
of the antenna. 1

2
SAFETY INFORMATION, Continued
CAUTION
Before jump starting, charging or changing the vehicle battery, remove the
10A fuse located in the red lead. This will insure that the radio is protected
from damage during the battery charging process. Replace fuse when charging
is completed.
Liquefied Petroleum (LP) Gas Powered Vehicles: Mobile radio
installations in vehicles powered by liquefied petroleum gas
(with the LP gas container in the trunk or other sealed-off
space within the interior of the vehicle) must conform to
the National Fire Protection Association standard (NFPA 58)
which requires that:
a) The space containing the radio equipment shall be
isolated by a seal from the space containing the LP
gas container and its fittings.
b) Outside filling connections shall be used for the LP
gas container.
c) The LP gas container shall be vented to the outside
of the vehicle.

SAFE DRIVING RECOMMENDATIONS
FOR MOBILE RADIO USERS*
Exercise caution when using a mobile radio. Become familiar
with information on the safe operation of a mobile radio:
• Keep both hands on the steering wheel and the micro-
phone in its cradle whenever the vehicle is in motion.
• Place calls only when the vehicle is stopped. Use recall
dialing to speed the time it takes to place a call.
• When talking from a moving vehicle is unavoidable,
drive in the slower lane and keep conversations brief.
• If conversation requires taking notes or complex
thought, stop the vehicle in a safe place - then continue
the call.
* As recommended by the AAA (American Automobile Association)
3

OPERATING PROCEDURES
Two-way FM radio systems must be operated in accordance
with the Rules and Regulations of the Federal Communica-
tions Commission (FCC). Operators of two-way radio equip-
ment must be thoroughly familiar with the rules that apply
to the intended type of radio operation. Following these rules
will help to eliminate confusion, assure the most efficient
use of existing radio channels, and result in a smoothly
functioning radio network. When using this two-way radio,
remember these rules:
1) It is a violation of FCC Rules to interrupt any distress
or emergency message. As the radio operates in much
the same way as a telephone "party line," always listen
to make sure that the line is clear before sending
messages. If someone is sending an emergency
message - such as reporting a fire, or asking for help
in an accident - KEEP OFF THE AIR! Emergency calls
have priority over all other messages.
2) Use of profane or obscene language is prohibited by
federal law.
3) It is against the law to send false call letters, or a false
distress or emergency message.
4) The FCC requires that conversations be kept brief
and confined to business. To save time, use coded
messages whenever possible.
5) Using a radio to send personal messages (except in an
emergency) is a violation of the FCC Rules.
6) It is against Federal Law to repeat or otherwise make
known anything overheard on the radio. Conversations
between others sharing a channel must be regarded as
confidential. 4

5
OPERATING PROCEDURES, Continued
7) The FCC requires the operator to identify himself at
certain times by means of call letters. Refer to the rules
that apply to the particular type of operation for the
proper procedure.
NOTE: The GE-MARC and EDACS trunking environments
have automatic identification features built in and do not
require the user to identify by means of call letters.
8) No changes or adjustments shall be made to the equip-
ment except by an authorized or certified electronics
technician.
OPERATING TIPS
Operating the radio in low areas of terrain or while under
power lines or bridges will reduce the effective range of two-
way radios. These areas should be avoided whenever possible.
In areas where transmission or reception is poor, insure that
the antenna is vertical (particularly if a glass mount antenna
is used). Moving a few yards in another direction or moving
to higher ground may also help improve radio communica-
tion.

6
INTRODUCTION
The EM-4800 is a synthesized, microprocessor-based, FM
mobile which provides reliable two-way communications in
the Enhanced Digital Access Communications System (EDACS)
trunking environment, GE-MARC trunking system and conven-
tional communications systems.
In the EDACS or trunked system mode, the user selects a
communications system and group. Channel selection is
transparent to the user and is controlled via digital communi-
cation with the system controller. This provides advanced
programmable features and fast access to communication
channels.
In the conventional mode, the user selects a channel and
communicates directly on that channel. A system refers
to a set of channels. A channel is a transmit /receive radio
frequency pair.
The exact operation of the radio will depend on the operating
mode, the radio programming and the particular radio system.
Most features described in this manual may be enabled or
disabled through programming. Consult the system administra-
tor for the particular features that are programmed into the
radio.
This manual provides instructions for operating in either of the
three systems (EDACS, GE-MARC, conventional). A separate
section is provided for each system with a complete set of
instructions for operating the radio within that system.

INTRODUCTION, Continued
NOTE: This radio allows the operator to switch between an
EDACS, GE-MARC and conventional system. Special attention
should be given to the system selected and the operating
characteristics of the radio while working within that system.
FRONT PANEL CONTROLS
The operating controls are located on the radio's front panel:
a) Power On-Off / Volume control f) CLearRbutton
b) TX/RX LED g) SCaNbutton
c) Liquid Crystal Display (LCD) h) SYStem select button
d) HOMe button i) Up /Down control
e) SPeCial call button j) Microphone connector
The radio's LCD provides seven alphanumeric characters to
show the selected system/group, operational mode of the
radio, and radio status indicators. A dual color indicator lamp
glows red when the radio is transmitting (TX) and green when
receiving a signal (RX).
An optional DTMF microphone is available to permit manual
telephone interconnect calls, storing of numbers, etc. Informa-
tion on DTMF microphone operation is detailed within this
manual. 7
bc
a
g
jihfed

FRONT PANEL CONTROLS, Continued
POWER ON/OFF-VOLUME KNOB: Provides
power to radio, adjusts receiving volume and
powers off the radio.
GROUP/CHANNEL SELECT BUTTON: Scrolls
through the group or channel lists (depending
upon programming) and provides selection from
scan list, phone list, system, etc.)
SYSTEM SELECT BUTTON: Used with select
buttons above, permits selection of the desired
programmed system.
SCAN ON/OFF BUTTON: Toggles scan operation
on and off; also provides lockout of a selected
group or channel from the scan list when used
with the SYS button.
CLEAR BUTTON: When in the EDACS or
GE-MARC radio system, the CLeaRbutton
is used to exit the special call mode and return
to the normal system/group display. When in
the conventional radio system, pressing this
button will enable monitoring of the channel.
HOME BUTTON: Automatically selects a desired
group and /or system.
SPECIAL CALL: Places the radio in Special Call
mode, allowing individual and interconnect
calls to be made in an EDACS or GE-MARC
system.
VOL
OFF••MAX
SYS
CLR
SCN
!
!
HOM
SPC
8

LCD INDICATORS
The 7-character alphanumeric display identifies the selected
system/group, operating modes or error conditions. There
are also status indicators (defined below):
SYS Indicates the number of the current system in
an EDACS, GE-MARC or conventional system.
GRP Indicates the number of the current group in an
EDACS or GE-MARC system.
LOCK This indicator will only be present when the
optional DTMF microphone is used. When
displayed, the keypad is locked on the DTMF
microphone to prevent accidental transmission.
BUSY Indicates when the radio receives a call, when a
conventional channel is in use or when transmitting
on a trunked channel.
PHONE In EDACS or GE-MARC systems, the PHONE and
status flags will appear to indicate the radio is placed in
the special call mode.
CALL Indicates an individual call in EDACS or GE-MARC
systems.
SCAN Indicates scan is enabled.
Indicates a trunked group or conventional channel
is scan enabled.
Indicates the radio is in a special call or interconnect
mode. Also illuminates when PHONE is displayed.
9
"
#
#

DISPLAY MESSAGES
During radio operation, various messages are displayed on
the LCD. Typical messages include radio operation (radio
in programming mode) and error messages (radio failure).
MESSAGE DESCRIPTION
NC Out of range - no connection between radio
and system site. Incorrect system selected,
radio is out of coverage area, etc.
AGENCY Indicates an agency call.
ALLCALL Indicates an all call message.
INDV Indicates an individual call.
CONV FS Conventional failsoft - displays when a failure
of the EDACS system occurs. All communica-
tions will be in conventional mode.
PROGRAM Indicates radio is in the programming mode.
SYN LOC Indicates that the synthesizer is unable to load
and lock on the channel properly.
ALERT TONES
The radio generates a number of alert tones (beeps) to indicate
various events or operating conditions. These alert tones can
be enabled or disabled by programming. Function is described
below assuming tones are programmed.
Power-up: A single tone will sound on power-up after the radio
passes a self test.
Carrier Control Timer: If the programmed time for continuous
transmission is exceeded, five short high-pitched warning
tones followed by a single, long low-pitched tone will be
heard. The transmitter will shut down shortly after the alert
10

ALERT TONES, Continued
tones are heard, interrupting communications. Release and
re-key the P-T-T button to maintain communications. This will
reset the carrier control timer and turn the transmitter back on.
Key Press: A short low-pitched tone sounds to indicate a
button has been pressed.
TRUNKED OPERATION TONES - Out-Of-Range:
EDACS: A single low-pitched tone will sound immediately
after the P-T-T button is pressed, indicating the radio is out
of range of the repeater. The radio will try to place a call for
a short period (3 seconds) after the initial attempt. The radio
will generate a second low-pitched tone when it gives up
trying to place the call. The system may be off the air or the
radio may require servicing if the radio is within the calling
range and these tones are heard.
GE-MARC: Five beeps will sound shortly after the P-T-T button
is pressed when the radio is out of range of the repeater or the
radio is inoperative. If the "Call Retry" is active, the radio will
try the channel at twenty second intervals for five minutes.
TRUNKED OPERATION TONES - System Busy:
EDACS: Three short, medium-pitched tones will sound when
the P-T-T button is pressed to indicate that the receiving party
is already engaged in another call or the system is busy and
its queue is full. You must re-key later to access the system.
GE-MARC: A low pitched tone will sound when the P-T-T
button is pressed to indicate that all channels are busy.
11

ALERT TONES, Continued
TRUNKED OPERATION TONES - Clear To Talk:
A short burst tone indicates that the radio has acquired a
channel and the user may proceed to talk.
TRUNKED OPERATION TONES - Available System:
A short low-pitched tone indicates the radio is attempting
to connect to the first available repeater. A 2-second, high-
pitched pulsing tone indicates when a repeater is available
and the radio is attempting connection.
TONES IN A CONVENTIONAL SYSTEM - Receive Only Channel:
A warbling tone sounds when a transmit attempt is made on
a receive only channel.
12

TURNING ON THE RADIO
Rotate the power on/off-volume control clockwise, out of
detent, to turn on the radio. A short beep (if enabled through
programming) indicates the radio is ready for operation. The
display will show the last selected system and group.
If communication with the system's control channel cannot be
established in the EDACS trunked environment, the NC (out of
range) message will be displayed. You may find it necessary to
move to another location or select another trunking system to
re-establish the control channel link for trunked mode opera-
tions.
The radio will automatically transmit a "log-in" message when
turned on or whenever the radio roams into a new system
when changing the group selection. This "log-in" message
includes the logical ID and the group ID for that radio.
RECEIVING A CALL
Turn on the radio as directed above. Adjust the power on/off-
volume control clockwise to the desired audio level. Select the
desired system by pressing the SYS button and then using the
!"or #button to scroll to the desired system. Only systems
programmed can be selected.
Select the desired group by pressing the !"or #button. Only
groups programmed can be selected. The radio is now ready
to receive calls.
NOTE: To move quickly through system or group selections,
press and hold the !or #button.
13

EDACS OPERATION
RECEIVING A CALL, Continued
Individual Call
If an individual call (directed only to your radio) is received,
the radio unsquelches on the assigned group. The BUSY icon
will light. If programmed, the individual call receive tones
(one high-pitched followed by one low-pitched tone) will
sound and the originator's ID (dependent upon programming)
is displayed for a short time.
To answer the call, press the P-T-T button and begin talking
if caller's ID is still in display. If caller's ID is no longer in the
display, press the SPC button to display caller's ID, then press
P-T-T and begin talking.
Group Call
When the radio receives a group call, it unsquelches on the
assigned channel and the BUSY icon appears.
If programmed, the group call receive tone (a single tone) will
sound. The group name originator's ID (if programmed) will
be shown in display.
Interconnect Call
When the radio receives an interconnect call (a telephone call
directed to your radio), the radio unsquelches on the assigned
channel and BUSY displays.
If programmed, the interconnect call receive tones (one
high-pitched followed by one low-pitched tone) will sound.
The PHONE and will be displayed. Press the P-T-T button
and begin talking.
14
#

15
EDACS OPERATION
SENDING A CALL
Turn the radio on and select the desired system and group.
Ensure that no one is transmitting on the selected system and
group and that the radio is in a service area. If the BUSY icon
is showing on the LCD, place your call later.
Press and hold the P-T-T button. The radio will perform the
necessary signaling required to obtain a communications
channel. If the signaling is unsuccessful, the radio will sound
the appropriate alert tone(s).
When the channel has been acquired, the red TX indicator
lights and the BUSY icon is displayed. If programmed, the
clear to talk tone will sound.
Hold the microphone about 3 inches from your mouth and
speak normally into the microphone. Release the P-T-T button
to listen for a reply.
Sending A Special Call
Press the SPC button to place the radio into the special call
mode and access a pre-programmed alphanumeric list of
individual call or interconnect numbers. If programmed, the
special call alphanumeric list will be displayed. The PHONE
and icon will be displayed.
Use the !or #button to scroll through the special call list.
Once the desired individual/interconnect call number is
displayed, press and hold the P-T-T button to initiate the call.
The radio performs the necessary signaling required to obtain
a working channel.
#

16
EDACS OPERATION
SENDING A CALL, Continued
Sending A Special Call, Continued
Individual Call: When the signaling is successfully completed,
BUSY is displayed and the clear to talk tone sounds. Speak
directly into the microphone. Release the P-T-T button to listen
for a reply.
Interconnect Call: When the signaling is successfully
completed, BUSY is displayed and the proper DTMF tones will
be sent and heard at the speaker. When someone
answers, press the P-T-T button and speak directly into the
microphone. Release the P-T-T button to listen for a reply.
NOTE: Messages cannot be received when the P-T-T button
is pressed.
If the signaling is unsuccessful, the radio will remain in the
special call mode and sound the appropriate alert tone(s).
To return to the normal system/group, press the CLR button to
exit the special call mode.
SCAT OPERATION
A Single Channel Autonomous Trunking (SCAT) System
operates with the same set of features as a standard EDACS
system. The only significant user change relates to the BUSY
icon. Since only one channel (operating as both control and
working channel) exists in a SCAT system, the BUSY icon
will be displayed when the SCAT channel is in the working
channel mode. When the transmission on the channel is
completed, the BUSY icon will disappear to indicate the
return of SCAT control channel signaling.
Table of contents
Other Maxon Radio manuals

Maxon
Maxon SD-171E Operator's manual

Maxon
Maxon S1 PMR446 User manual

Maxon
Maxon SP-310 User manual

Maxon
Maxon MBR-400 User manual

Maxon
Maxon MCB-10A User manual

Maxon
Maxon SP-130 Series User manual

Maxon
Maxon MBR-400 User manual

Maxon
Maxon SL7000 User manual

Maxon
Maxon MCB-100 WXD User manual

Maxon
Maxon CM10 User manual

Maxon
Maxon TJ-3000 Series User manual

Maxon
Maxon SL-70W Series User manual

Maxon
Maxon SP-200 Series User manual

Maxon
Maxon SP-510 User manual

Maxon
Maxon SP-120 Series User manual

Maxon
Maxon MDP-6000 Series User manual

Maxon
Maxon SL100K User manual

Maxon
Maxon SD-270 Series User manual

Maxon
Maxon SD170EX Series User manual

Maxon
Maxon SM5402 User manual