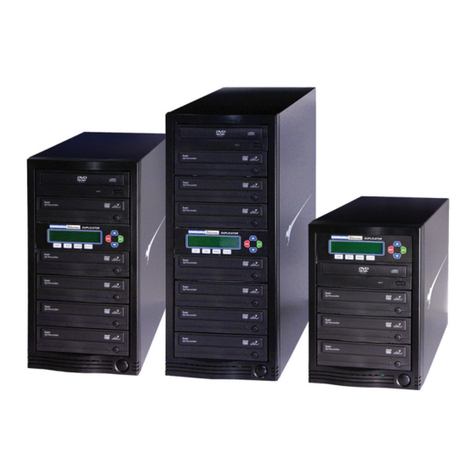
MediaFORM Vantage Series Manual

Vantage Series
Operator’s Guide

Vantage Series
Operator’s Guide
Document Revision: 110102
Page 1
Copyright Notice
Copyright ©1996-2002 by MediaFORM Inc. All rights reserved.
This manual and the accompanying illustrations may not be copied, reproduced,
electronically transmitted, or translated into another language, in whole, or in part,
without the written consent of MediaFORM Inc.
MediaFORM, SCRIBE, CD2CD, CD2CD PRO, CD-5400L, CD-5908, CD-
5916, CD 3701, CD-3703, CD-3706, Axiom, cdDIRECTOR, AP-1301, Easi-
DAT and Easi-AUDIO are trademarks of MediaFORM Inc.
Other trademarks referred to are the property of their respective trademark or
registered trademark holders.
Warranty
MediaFORM Inc. warrants to the original purchaser that the equipment that you have purchased is free from
defects in materials and workmanship, for a period of time as follows:
Duplicator Electronics & Mechanical Parts 1 year
CD-R/RW Recorders 1 year
Signature III Inkjet CD Printer 1 year
Spectrum Thermal Transfer CD Printer 6 months limited warranty
This warranty is applicable when the warranty registration has been completed and returned to MediaFORM Inc.
within a reasonable period of time following the purchase and the warranty is NOT transferable. This warranty
does not apply to malfunctions caused by misuse, negligence, accident, or alteration, nor is MediaFORM Inc.
responsible for consequential damages related to the use of this equipment.
This warranty is made in lieu of any other warranty expressed or implied.
CD-R/RW Recorder And Printer Warranty Policy
Individual CD-R/RW recorder and printer manufacturers are responsible for the products they provide. As a
convenience, MediaFORM Inc. will honor any service issue related to a defective recorder or printer while under
its respective manufacturer’s warranty providing that the recorder or printer has been purchased from
MediaFORM Inc. either directly or indirectly. MediaFORM Inc. assumes no responsibility for products NOT
purchased through MediaFORM Inc.
Piracy
The copying of audio, video, or software without the permission of the copyright holder is illegal. MediaFORM
Inc. accepts no responsibility for the copyright use or misuse of this equipment. It is the sole responsibility of the
user to ensure that the legal rights of copyright in duplicating and printing are respected.
MediaFORM, Inc.
122 Oscar Way
Chester Springs, PA 19425
Tel.: (610) 458-9200
Fax.: (610) 458-9554
Email: info@mediaform
www: http://www.mediaform.com

Vantage Series
Operator’s Guide
Document Revision: 110102
Page 2
Table of Contents
ABOUT MEDIAFORM INC..................................................................................................................................... 5
WHAT TO EXPECT FROM YOUR MEDIAFORM DUPLICATION SYSTEM ..................................................................... 5
ABOUT THIS MANUAL........................................................................................................................................... 5
INSTALLING THE VANTAGE................................................................................................................................ 6
WHAT’S IN THE BOX ................................................................................................................................................. 6
OPTIONS..................................................................................................................................................................... 6
PACKING MATERIALS................................................................................................................................................. 7
THE BEST PLACE TO PUT THE VANTAGE .................................................................................................................. 7
SAFETY PRECAUTIONS............................................................................................................................................... 7
LOCATION OF VANTAGE COMPONENTS (24X CD-2000-8)........................................................................................ 8
Front View............................................................................................................................................................ 8
Rear View............................................................................................................................................................ 8
LOCATION OF VANTAGE COMPONENTS (24X CD-2000-8)....................................................................................... 9
Front View............................................................................................................................................................ 9
Rear View............................................................................................................................................................ 9
LOCATION OF VANTAGE COMPONENTS (24X CD-2000-4 SPECTRUM2).................................................................. 10
Front View.......................................................................................................................................................... 10
Rear View.......................................................................................................................................................... 10
LOCATION OF VANTAGE COMPONENTS (2000-4) .................................................................................................... 11
Front View.......................................................................................................................................................... 11
Rear View.......................................................................................................................................................... 11
LOCATION OF VANTAGE COMPONENTS (2000-4 INKJET)......................................................................................... 12
Rear View.......................................................................................................................................................... 12
LOCATION OF VANTAGE COMPONENTS (DVD 2000-8)........................................................................................... 13
Front View.......................................................................................................................................................... 13
Rear View.......................................................................................................................................................... 13
LOCATION OF VANTAGE COMPONENTS (DVD 2000-4)........................................................................................... 14
Front View.......................................................................................................................................................... 14
Rear View.......................................................................................................................................................... 14
LOCATION OF CD-R/RW RECORDER PARTS AND CONTROLS ................................................................................. 15
MediaFORM SmartDRIVE 24X ...................................................................................................................... 15
LOCATION OF DVD-R/RW RECORDER PARTS AND CONTROLS.............................................................................. 16
Pioneer A04 DVD R/RW.................................................................................................................................. 16
INSTALLING THE PRINTER SUPPORT......................................................................................................................... 17
Attaching The PDS (printer docking station) To The Vantage................................................................... 17
INSTALLING THE PRINTER................................................................................................................................ 18
WHAT’S IN THE BOX (SPECTRUM2 THERMAL TRANSFER)...................................................................................... 18
MOUNTING THE PRINTER......................................................................................................................................... 18
MAKING THE CONNECTION...................................................................................................................................... 19
INSTALLING FIRE WIRE CABLES .................................................................................................................... 20
STARTING THE VANTAGE FOR THE FIRST TIME....................................................................................... 22
POWER CONNECTION AND SETTINGS....................................................................................................................... 22
STARTING UP........................................................................................................................................................... 22

Vantage Series
Operator’s Guide
Document Revision: 110102
Page 3
ALIGNING THE PRINTER.................................................................................................................................... 23
APPLICATION STARTUP..................................................................................................................................... 25
STARTING THE VANTAGE APPLICATION ................................................................................................................... 25
VANTAGE APPLICATION LAYOUT............................................................................................................................. 26
VANTAGE STARTUP............................................................................................................................................. 27
SETTINGS EDITOR................................................................................................................................................ 28
APPLICATION TEMP FOLDER .................................................................................................................................... 28
CD IMAGES DEFAULT FOLDER ................................................................................................................................ 28
CD LABELS DEFAULT FOLDER ................................................................................................................................ 29
PRINTER DRIVER...................................................................................................................................................... 29
COMMUNICATION SERIAL PORTS ............................................................................................................................. 29
DATA IMAGE EDITOR.......................................................................................................................................... 30
CREATING A DATA DISC IMAGE................................................................................................................................. 30
Image Toolbar................................................................................................................................................... 31
Selecting CD Capacity..................................................................................................................................... 31
Adding Files and Folders................................................................................................................................. 32
Static and Dynamic Content ........................................................................................................................... 33
Removing Files And Folders........................................................................................................................... 33
Removing Files And Folders........................................................................................................................... 34
Saving The Current Disc Image File.............................................................................................................. 34
Loading An Existing Script File....................................................................................................................... 37
AUDIO IMAGE EDITOR........................................................................................................................................ 38
Image Toolbar................................................................................................................................................... 39
Adding Tracks................................................................................................................................................... 40
Removing Tracks.............................................................................................................................................. 40
Changing A UPC Code.................................................................................................................................... 41
Changing ISRC Codes And Copy Prohibit Flags......................................................................................... 42
Inserting, Editing And Removing Silence...................................................................................................... 43
Inserting, Editing And Removing Subindexes .............................................................................................. 44
Saving The Current Audio Disc Image.......................................................................................................... 45
Loading An Existing Audio Disc Image.......................................................................................................... 46
JOB MANAGER TAB.............................................................................................................................................. 47
QUEUED JOBS........................................................................................................................................................... 47
ARCHIVE ONLY ........................................................................................................................................................ 49
COPY AND/OR VERIFY.............................................................................................................................................. 51
RELAY-MODE JOB .................................................................................................................................................... 53
PRINT ONLY ............................................................................................................................................................. 55
IMAGE FILE PATH (OPTIONAL IF ONLY PRINTING IS DESIRED) .................................................................................... 57
LABEL FILE PATH (OPTIONAL IF LABEL IS NOT REQUIRED)......................................................................................... 57
MAKING COPIES (RELAY MODE) ............................................................................................................................. 58
COPY PROTECTION (OPTIONAL)................................................................................................................................ 59
QUANTITY (REQUIRED) ............................................................................................................................................ 60
PRIORITY (REQUIRED).............................................................................................................................................. 60
ARCHIVE.................................................................................................................................................................. 60
MEDIA TYPE (REQUIRED) ......................................................................................................................................... 61
JOBS IN PROGRESS.................................................................................................................................................... 61
FINISHED JOBS ......................................................................................................................................................... 61

Vantage Series
Operator’s Guide
Document Revision: 110102
Page 4
RECORDING SPEED (REQUIRED)............................................................................................................................... 61
CREATING .PRN FILES (SPECTRUM2 PRINTER).......................................................................................... 62
CREATING .PRN FILES (INKJET PRINTER) ................................................................................................... 63
PRINTING IN RELAY MODE............................................................................................................................... 64
SUBMITTING A JOB.................................................................................................................................................. 64
SUBMITTING JOBS................................................................................................................................................ 65
The Production Process.................................................................................................................................. 66
DUPLICATING EXISTING CDS........................................................................................................................... 67
CREATING AN IMAGE FILE....................................................................................................................................... 67
RECORDING AN IMAGE FILE .................................................................................................................................... 69
APPENDIX A: CREATING DISC LABELS WITH OTHER SOFTWARE ...................................................... 70
INSTALLING THE SOFTWARE (SPECTRUM THERMAL TRANSFER)............................................................................. 70
For Windows 98................................................................................................................................................ 70
For Windows NT 4.0 Workstation.................................................................................................................. 72
INSTALLING THE SOFTWARE (SIGNATURE PRINTERS).............................................................................................. 73
For Windows 98................................................................................................................................................ 73
CREATING AND USING DISC LABELS ....................................................................................................................... 74
Producing The Printer Image File (Spectrum Thermal Transfer) .............................................................. 74
Producing The Printer Image File (Signature Printers)............................................................................... 75

Vantage Series
Operator’s Guide
Document Revision: 110102
Page 5
About MediaFORM Inc.
Thank you for purchasing MediaFORM’s Vantage autoloading CD
duplication system. MediaFORM manufactures a wide variety of software
and audio duplication and production equipment, including manual and
fully automatic CD and DVD duplicators and printers. We hope you will
consider us for all of your production needs.
What To Expect From Your MediaFORM Duplication System
Your MediaFORM Vantage CD or DVD duplication system is
professionally designed and manufactured to give you years of trouble free
operation. To avoid accidental damage to your new duplication system,
please read and understand this manual thoroughly before operating the
unit.
About This Manual
This manual is written for both novice and experienced users. Please read
through this Operator’s Guide from beginning to end before using the unit.
Once having read the manual, follow along chapter by chapter. This will
provide the necessary understanding of your new Vantage CD or DVD
duplication system.

Vantage Series
Operator’s Guide
Document Revision: 110102
Page 6
Installing The Vantage
Carefully remove the Vantage CD or DVD duplication system from the
shipping container. Inspect the contents and verify them against the packing
slip. Report any errors in shipping as soon as possible.
What’s In The Box
Your Vantage is a complete duplication system containing all necessary
components. The package includes:
•Vantage CD or DVD duplication system
•Power cord
•Three threaded metal aligner spikes
•One threaded metal spindle spike
•Operator’s Guide
•MediaFORM Product & Warranty Registration card
Options
•CD label printers: Supported models include the Spectrum2, Spectrum,
and Signature IV

Vantage Series
Operator’s Guide
Document Revision: 110102
Page 7
Packing Materials
Please retain the original box and packaging in the event that the unit
requires future servicing. This will help to reduce the possibility of damage
occurring in transit.
The Best Place To Put The Vantage
The best operating location for the Vantage duplication system is in a
climate controlled area, free of dirt, dust, humidity, excessive heat, and
electronic or electromagnetic interference. Room temperature should be
between 65 and 75 degrees Fahrenheit, or between 18 and 23 degrees
Celsius. Place the Vantage on a solid, steady work surface and allow
sufficient room for all incidental work materials. Provide at least six inches
of clearance on all sides of the unit for ventilation.
Safety Precautions
The system is shipped with a three-prong power connector and must be
used with a properly grounded AC receptacle. DO NOT try to defeat the
third “ground” prong. All computer peripherals must be properly grounded
and the Vantage is no exception. The use of a power conditioner such as an
Uninterruptible Power Supply (UPS), or a surge protector is highly
recommended. The minimum required size is 400VA.
Repairs or alterations should only be attempted by authorized factory
trained technicians. MediaFORM reserves the right to void the warranty if
unauthorized service is performed.

Vantage Series
Operator’s Guide
Document Revision: 110102
Page 8
Location Of Vantage Components (24X CD-2000-8)
Front View
Rear View
(shown with Spectrum2 printer)
(optional)
PRINTER
ALIGNER
COM2 of PC
COM1 of PC

Vantage Series
Operator’s Guide
Document Revision: 110102
Page 9
Location Of Vantage Components (24X CD-2000-8)
Front View
Rear View
(shown with old style printer doc)
(optional)
(shown with horizontal SCSI configuration)

Vantage Series
Operator’s Guide
Document Revision: 110102
Page 10
Location Of Vantage Components (24X CD-2000-4 Spectrum2)
Front View
Rear View
Input Spindle 2Input Spindle 1
Output Spindle
To COM2 of PC
To COM1 of PC

Vantage Series
Operator’s Guide
Document Revision: 110102
Page 11
Location Of Vantage Components (2000-4)
Front View
Rear View
INPUT
SPINDLE 2
INPUT SPINDLE 1
OUTPUT SPINDLE
SCSI 1

Vantage Series
Operator’s Guide
Document Revision: 110102
Page 12
Location Of Vantage Components (2000-4 inkjet)
Rear View 24X CD-R
DVD-R Inkjet
To COM2 of PC
To COM2 of PC

Vantage Series
Operator’s Guide
Document Revision: 110102
Page 13
Location Of Vantage Components (DVD 2000-8)
Front View
Rear View
(optional)
PRINTER
ALIGNER
SPINDLE
To COM2 of PC
To COM1 of PC

Vantage Series
Operator’s Guide
Document Revision: 110102
Page 14
Location Of Vantage Components (DVD 2000-4)
Front View
Rear View
INPUT
SPINDLE 2
INPUT SPINDLE 1
OUTPUT
SPINDLE
To COM2 of PC
To COM1 of PC

Vantage Series
Operator’s Guide
Document Revision: 110102
Page 15
Location Of CD-R/RW Recorder Parts And Controls
MediaFORM SmartDRIVE 24X
Legend
1) Disc tray - Discs are loaded and removed from this tray. Pressing the eject button will open the
tray when the power to the Vantage is switched on.
2) Read and write status LEDs - These indicators light up when the recorder is reading or writing.
3) Eject button - This button is used to manually open or close the disc tray.
4) Emergency eject pinhole - In the event that the disc tray will not open by pressing the eject button
insert the tip of a large paper clip into this hole and push.

Vantage Series
Operator’s Guide
Document Revision: 110102
Page 16
Location Of DVD-R/RW Recorder Parts And Controls
Pioneer A04 DVD R/RW
Legend
1) Disc Tray - Discs are loaded and removed from this tray. Pressing the eject button will open the
tray when the power to the Vantage is switched on.
2) Headphone Jack – Connect headphones here.
3) Volume Control Knob – This controls the volume level of the headphones.
4) Disc Indicator – Light indicates presence of disc in drive.
5) Ventilation Slot – Do not block.
6) Ventilation Slot – Do not block.
7) Eject Button – This button is used to manually open the disc tray.
8) Emergency Eject Pinhole – In the event that the disc tray will not open by pressing the eject
button, insert the tip of a large paper clip into this hole.

Vantage Series
Operator’s Guide
Document Revision: 110102
Page 17
Installing The Printer Support
The printer support bracket must be installed before the printer is installed. The bracket
attaches with six fasteners and extends from the back of the unit as depicted below.
Attaching The PDS (printer docking station) To The Vantage
•Loosen the screws from the back of the unit about half way, if already in
place. Align the slots of the bracket with the mounting screws on the
rear of the unit. Slide the bracket down over the mounting screws.
Fasten the bracket in place by tightening the screws clock-wise.

Vantage Series
Operator’s Guide
Document Revision: 110102
Page 18
Installing The Printer
Before operating the Vantage, the printer must be properly mounted and
aligned. In addition, please familiarize yourself with the documentation
included with the Spectrum2 thermal CD printer.
What’s In The Box (Spectrum2 Thermal Transfer)
Your Spectrum2 CD printer package includes:
•Spectrum2 printer
•Power cord
•Parallel printer cable
•Printer user guide
•Spectrum2 Designer software and printer driver CD
•Printer ribbon
•MediaFORM Product & Warranty Registration card
•Serial Cable
•Mounting Brackets
Mounting The Printer
•Install the ribbon as shown in the Spectrum2’s documentation.
•From the rear of the Vantage, gently place the printer on the top deck of
the unit, so that it rests between the four guides. The printer bracket will
support the overhang.
•Do not tighten down the guides yet since the precise placement of the
printer must first be determined.

Vantage Series
Operator’s Guide
Document Revision: 110102
Page 19
Making The Connection
•Make sure the printer power switch is set to the off position.
•Connect the supplied parallel printer cable to the printer port on the back
of the Spectrum2 and to the parallel port on the back of the host
computer.
•Connect the supplied serial cable to the serial port on the back of the
Spectrum2 and to COM1 on the back of the host computer.
•Connect one end of the power cord to the VAC Out on the Spectrum2
and the other to the wall power outlet.
•Install the ribbon as shown in the Spectrum2’s documentation.
Table of contents
Other MediaFORM Disc Duplicator manuals
