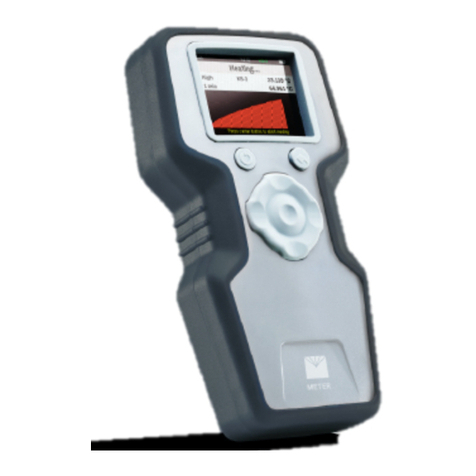
METER SC-1 User manual

SC-1

i
TABLE OF CONTENTS
1. Introduction.............................................................................................. 1
2. Operation ...................................................................................................2
2.1 Configuring ................................................................................................2
2.2 Taking a Measurement...............................................................................4
2.2.1 Measurement Considerations..........................................................4
2.2.2 Measurement Process .....................................................................5
2.3 Saving Data.............................................................................................. 10
2.4 Viewing Data ............................................................................................ 11
2.5 Downloading Data.................................................................................... 11
2.6 Erasing Data ............................................................................................ 14
3. System....................................................................................................... 16
3.1 Specifications.......................................................................................... 16
3.2 SC-1 Sensor Head.................................................................................... 17
3.3 SC-1 Controller ........................................................................................ 19
3.3.1 Tabs ............................................................................................... 19
3.3.2 Modes ............................................................................................ 23
3.4 Leaf Porometer Utility.............................................................................. 24
3.5 Theory...................................................................................................... 29
4. Service....................................................................................................... 33
4.1 Calibration ............................................................................................... 33
4.1.1 Verification Process....................................................................... 33
4.1.2 Calibration Process........................................................................ 35
10711-16
6.30.2020

ii
4.2 Maintenance............................................................................................ 41
4.2.1 Install Batteries ............................................................................. 41
4.2.2 Clean Sensor Head......................................................................... 41
4.2.3 Replace Leaf Pads.......................................................................... 44
4.3 Troubleshooting ....................................................................................... 45
4.4 Customer Support.................................................................................... 48
4.5 Terms and Conditions .............................................................................. 49
Index ................................................................................................................. 50


1
1. INTRODUCTION
Thank you for choosing the SC-1 Leaf Porometer from METER Group.
The SC-1 measures stomatal conductance, which is a function of the density, size, and
degree of opening of plant pores. The SC-1 measures stomatal conductance by putting the
conductance of a leaf in series with two known conductance elements and comparing the
relative humidity (RH) measurements between them. This manual describes the functions of
the SC-1 and how to make high-quality stomatal conductance measurements.
Verify all SC-1 Leaf Porometer components are included and appear in good condition:
• SC-1 sensor head (Section3.2)
• SC-1 controller (Section3.3)
• USB-to-serial cable
• USB drive with Leaf Porometer Utility (attached to manual cover)
• Calibration plate
• Bottle of deionized (DI) water
• Bottle of desiccant
(molecular sieve desiccant, 812 mesh)
• Dispensing cap
•Tweezers
• Leaf pads
• Bead retention screens
•Teflon filters
• Calibration filter papers
(Whatman®filter paper, grade #3)
• Spare hinge pin
• Short hinge pin
• White fluoropolymer agitation beads
(McMaster-Carr®PTFE balls, 1/8 in, part #9660K13)
The SC-1 was shipped without batteries to preserve battery life and prevent damage to the
instrument. Install four AA batteries in the SC-1 controller prior to use.

2
OPERATION
2. OPERATION
Please read all instructions before operating the SC-1 Leaf Porometer to ensure it performs
to its full potential.
PRECAUTIONS
METER instruments are built to the highest standards, but misuse or neglect may damage
the device and possibly void the manufacturer’s warranty. Before using the SC-1, follow the
recommended user instructions and arrange proper protections to safeguard the instrument
from damage.
2.1 CONFIGURING
Before taking measurements, configure the SC-1 system date, time, and units to ensure
accurate timestamps and measurements readings. The date and time can also be changed
using the Leaf Porometer Utility (Section3.4). The units can be changed at any time on the
Measurement tabs (Section3.3.1).
Use the following steps to configure the SC-1 controller prior to readings.
1. Turn on the SC-1 controller.
2. Press MENU to navigate to the Configuration tab (Figure1).
Figure1 Configuration tab
3. Use UP and DOWN to highlight Date.
4. Press ENTER.
The system date appears in the center of the screen in a day/month/year format
(Figure2). Arrows appear above and below the first value, indicating the value can be
edited.

3
SC-1
Figure2 Select current date on the Date screen
5. Use UP and DOWN to change the first number. Holding down the arrow buttons will scroll
quickly between values.
6. Press ENTER to move to the next value or ESC to return to the previous value. Repeat
step5 until the correct date is selected.
7. After the last value is changed, press ENTER to return to the Configuration tab.
8. Use DOWN to highlight Time.
9. Press ENTER.
The system time appears in the center of the screen, in 24-h format (Figure3). Arrows
appear above and below the first value.
Figure3 Select current time on the Time screen
10. Use UP and DOWN to change the value.
11. Press ENTER to move to the next value or ESC to return to the previous value. Repeat
step10 to select the accurate time.
12. After the last number is changed, press ENTER to return to the Configuration tab.
13. Use DOWN to highlight Units.
14. Press ENTER to scroll through the options.
NOTE: The SC-1 default is millimoles per meters squared seconds (mmol/[m2s].)
The units can also be changed at any time on the Measurement tab.
15. Press MENU to return to the Measurement tab.

4
OPERATION
2.2 TAKING A MEASUREMENT
Before using the SC-1, install the batteries (Section4.2.1) and set the date and time
(Section2.1). Review factors that may affect measurements (Section2.2.1) and follow the
measurement process closely (Section2.2.2).
2.2.1 MEASUREMENT CONSIDERATIONS
Leaf stomatal conductance depends on the amount of shade and sunlight the leaf receives,
its age, and its position on the plant. To obtain a plant stomatal conductance average, take
a variety of readings from different positions on the plant. The average will be proportional
to the type of readings taken. For example, if the plant receives 70% sunlight, take seven
readings from the sunny part and three from the shady part. Do not make repeated
measurements on the same spot on a single leaf.
NOTE: Prolonged exposure (>2 min) to low RH conditions induces stomatal closure in most plant species. The
SC-1 Auto mode measures stomatal conductance in 30 s, so the presence of the desiccated leaf clip should not cause
stomatal closure unless multiple measurements are made in quick succession on the same location of the same leaf.
Average readings can also be taken for a field of plants. For example, readings from a leaf on
the same place of each stalk of corn in a field would give an average for that field.
While taking measurements or storing the sensor, avoid chemical fumes (e.g., alcohol,
gasoline, or volatile organics). Fumes can be extremely harmful to the sensor (Section4.3).
The following factors will affect measurements taken by the SC-1:
• Light: Stomatal conductance readings vary in different lights. Readings taken on overcast
days, in shadow, or in shade generally have lower conductances than those taken in
greaterlight.
• Temperature:Temperature also affects stomatal conductance readings. For most plants,
extreme temperatures (very hot or very cold) will cause photosynthesis to slow down or
stop and the stomata will narrow or close.
• Relative Humidity: RH at the leaf surface will affect readings. Stomata open more widely as
RH increases.
• Carbon Dioxide: An increase in carbon dioxide (CO2) causes the stomata to close, while a
decrease causes them to open. Exhaling CO2directly onto the plant will adversely affect
readings, particularly in growth chambers or greenhouses.
Additionally, METER recommends always using desiccant to take readings. If operators wish
to make readings without desiccant, METER recommends doing so at an ambient RH of
<30%. Follow these exceptions when measuring without desiccant:
• Remove the desiccant chamber from the sensor head and do not cover the hole in the
sensor head. Keep fingers away from the diffusion path when taking measurements.
• Recalibrate the sensor without desiccant (Section4.1).
• Allow equilibration between measurements at ambient RH by opening the clip and shaking
the sensor head to mix the air in the diffusion path.

5
SC-1
• Discard the first reading in Auto mode.This first reading always reads low. Begin recording
data with the second measurement.
NOTE: This is not an issue while using the desiccant chamber.
2.2.2 MEASUREMENT PROCESS
Prior to taking a measurement, perform the following tasks for best results.
1. Confirm the weather will be clear of precipitation and wait for dew or other water to
evaporate.
2. Ensure sensor head is clean and free of dirt and pollen (Section4.2.2). Use a dry swab
to clear out debris from the sensor head instead of blowing on it, which can affect the
stomatal conductance reading.
3. Firmly connect the sensor head cable to the SC-1 controller.
4. Equilibrate the sensor head to ambient temperature.
This may take 10 min or longer if the temperature of the SC-1 is very different from
the sampling environment (e.g., from a cool air-conditioned room to a hot outdoor
environment). Thermal disequilibrium will cause inaccurate measurements.
Holding the sensor head in the correct manner during the measurement is very
important for maintaining thermal equilibrium. Figure4 illustrates the correct way to
hold the sensor head.
Figure4 Correct way to hold the sensor head
Also prior to taking measurements, add desiccant to the desiccant chamber using the
following steps. METER recommends fresh desiccant be used for each day of measurement.
NOTE: Early versions of the SC-1 sensor block do not have the desiccant chamber because the discontinued sensors
in those models did not require it. However, current sensors require the use of the desiccant chamber for best results.
1. Unscrew the black detachable dessicant chamber from the bottom of the aluminum
sensor block (Figure5).

6
OPERATION
Figure5 Filling desiccant chamber
2. Fill the chamber with molecular sieve desiccant approximately three-quarters full.
3. Screw the desiccant chamber back to the sensor head. Ensure the chamber is screwed
in far enough to compress the o-ring on the desiccant chamber and create a good
vaporseal.
Use the following steps to take a measurement:
1. Turn the SC-1 controller on.
2. Press MENU to navigate to the Configuration tab (Figure6).
Figure6 Toggle between Auto and Manual modes
3. Use the UP and DOWN arrows to navigate to Mode (Figure6).
4. Press ENTER to select Auto.
NOTE: See Section3.3.2 for explanations of Auto and Manual modes.
5. Press MENU to return to the Measurement tab (Figure7).

7
SC-1
Figure7 Measurement tab before beginning a reading
6. Press ENTER to begin a reading.
The SC-1 will check the initial conductance and the absolute values of the RH sensors
prior to beginning a reading. It is common to need to equilibrate the sensor due to one of
these issues. The status bar on the right shows progress toward equilibration as a black
bar dropping toward the EQU pointer.
If a warning appears that Initial conductance is too high (Figure8), equilibrate the
humidity in the sensor head by closing the leaf clip and allowing the desiccant to dry
the air in the measurement path. Hold the sensor in a vertical orientation and shake the
sensor head briskly side to side to accelerate the process. Generally speaking, the faster
the shake, the faster the sensor head equilibrates. The bead will bounce between the
screen and the Teflon filter, effectively mixing the air in the measurement path.
NOTE: The presence of the bead does not affect the stomatal conductance measurement as long as the bead
does not move during the measurement. Keep the leaf clip oriented with the black desiccant chamber down
during measurements. Do not invert the leaf clip during a measurement or the bead will rest on the screen and
distort the diffusion of water vapor from the leaf through the diffusion path.
Figure8 Warning screen for high initial conductance
Once the humidity in the measurement chamber has equilibrated, the porometer checks
the absolute value of the RH sensors. If either sensor is above 10% RH, a second warning
screen will appear indicating High RH Reading (Figure9). Shake the sensor head to help
the desiccant scrub the remaining water vapor from the measurement chamber.

8
OPERATION
Figure9 Warning screen for high RH reading
The total shake down period should be approximately 50 s. If it takes longer than 75 s to
equilibrate, the SC-1 may have a problem. Refer to Section4.3.
7. Once the measurement chamber has dried and equilibrated, the Measurement tab will
display a prompt to insert the leaf (Figure10).
Figure10 Prompt to place sensor head on the leaf
8. Choose to measure adaxial (the top of the leaf) or abaxial (the bottom of the leaf)
conductance, depending on plant type and desired data.
9. Orient the leaf appropriately for the measurement. The dessicant chamber must always
be oriented down (Figure11).
ABAXIAL (BOTTOM) ADAXIAL (TOP)
Figure11 Leaf orientation during adaxial or abaxial conductance measurements

9
SC-1
10. Squeeze the leaf clip, quickly slide the leaf inside, and allow it to close gently.
NOTE: It is critical to slip the leaf clip onto a leaf within 5 s of opening the clip or unacceptable errors may be
introduced into the conductance measurement.
The sensor head must remain still during measurement.
When measuring small needles or leaves, insert them into the sensor as shown in
Figure12. Multiple needles or small leaves (including blades of grass) may be needed to
adequately cover the sensor aperture for an accurate measurement. It may be necessary
to remove the leaves or needles from the plant to arrange them over the opening in the
diffusion path. Complete readings of removed leaves within 2 min of removal (prior to
stomatal closure) for an accurate measurement.
NOTE: The SC-1 may not be appropriate for all needle types. Highly sclerified, angular needles will prevent a
good seal over the diffusion path and the reading will be compromised.
Figure12 Measuring small leaves
The reading will begin once the leaf clip has been opened and closed. A progress bar
will indicate the reading is underway, and a countdown timer in the top right will appear
(Figure13).
Figure13 Measurement tab during reading
11. Once the measurement is complete, remove the leaf clip from the leaf and close it to
start equilibration for the next measurement.
12. Choose to save, annotate, or discard the data (Section2.3).

10
OPERATION
The SC-1 can measure the stomatal conductance beyond its recommended range of 0 to
500 mmol/(m2s). Between 500 mmol/(m2s) and 6,000 mmol/(m2s), a ≈ symbol appears to
the left of the reading. If the stomatal conductance reaches a value greater than or equal to
6,000 mmol/(m2s), an ∞symbol appears in place of the measurement.
2.3 SAVING DATA
In Auto mode, the option to save data appears as soon as the timer has expired. In Manual
mode, data can be saved at any time during the reading. These steps explain how to save
data in either mode.
1. In Auto mode, the Select Method screen appears at the completion of the measurement
(Figure14).
In Manual mode, press ENTER at any time to access the Select Method screen.
Figure14 Choose to save, annotate, or discard data
2. Use UP and DOWN to move the radio button selection to Save, Annotate, or Discard.
a. Save will save the reading as-is.
b. Discard will not save the reading and will return to the Measurement tab.
c. Annotate will bring up the Annotate screen to give the data a file name (Figure15).
Figure15 Annotate screen
3. Use UP and DOWN to change the character of each space (A-Z, 0-9, or special characters
., -,‘, #, or space). Holding down the arrow buttons will scroll quickly between values.
4. Press ENTER to move to the next character. Repeat until the last character, pressing
ENTER to reach the end of the row.

11
SC-1
2.4 VIEWING DATA
To view prior test results, use the following steps:
1. Press MENU to navigate to the Data tab (Figure16).
Figure16 Data tab
2. Press ENTER to select View.
3. Scroll through the list of saved tests using UP and DOWN (Figure17).
Figure17 View data screen
Each entry shows the time acquired, stomatal conductance or resistance value (in the
unit set as the default), and its annotation (if saved with one). Data must be downloaded
to see more detailed information (Section2.5)
4. Press ESC to return to the Data tab.
2.5 DOWNLOADING DATA
METER recommends using the Leaf Porometer Utility (Section3.4) to download data.
This function transfers all saved measurement data on the SC-1 to a computer. Follow
steps1 through 9to download data.
NOTE: Leaf Porometer Utility is compatible with Microsoft® Windows® 98 and newer. See Section3.4 for more details.
1. Connect the serial end of the USB-to-serial cable to the SC-1 controller.
2. Connect the USB end of the cable to an available USB port on the computer.

12
OPERATION
3. Open Leaf Porometer Utility (Figure18).
Figure18 Leaf Porometer Utility application
4. Choose the appropriate communication port from the from the Use computer
communication port dropdown on the main window (Figure19).
Figure19 Leaf Porometer Utility main window
5. Click Download.
The Save Leaf Porometer Data window appears (Figure20).
Figure20 Choose file name and location on the Save Leaf Porometer Data window
6. Name the data file.

13
SC-1
7. Select the location and the format of the file.
The file can be saved as one of the following:
Microsoft Excel® Workbook (*.xls)
Text (tab delimited) (*.txt)
CSV (comma delimited) (*.csv)
Raw data (comma delimited) (*.txt)
8. Click Save to download.
A progress bar shows the status of the download process (Figure21).
Figure21 Download status
Press Cancel to cancel the download at any time. The software will not save any
downloaded data.
9. Navigate to the saved file location and open the file to view the data.
Data are organized in the same way regardless of format. The measurement record will be
divided into eight columns:
• Measurement time
• Stomatal conductance or resistance
• Temperature (in degrees Celsius or Fahrenheit)
• Sample ID (if saved with measurement)
• Sensor head serial number
• Calibration number
• Leaf Sensor %RH
• Filter Sensor %RH

14
OPERATION
In all file types, scan records (saved from the Diagnostics screen) are interleaved with the
normal data records and can be identified by the annotation Scan. Scan records have four
additional columns:
• Leaf Sensor RH (in percent RH)
• Leaf Sensor Temperature (in degrees Celsius or Fahrenheit)
• Filter Sensor RH (in percent RH)
• Filter Sensor Temperature (in degrees Celsius or Fahrenheit)
Data can also be downloaded through the SC-1 controller or a terminal program, if the
Leaf Porometer Utility is not functioning properly. Contact Customer Support for more
information.
2.6 ERASING DATA
Data can be erased using the SC-1 controller or the Leaf Porometer Utility.
Data cannot be erased one measurement at a time. This feature erases all data from the
SC-1 permanently and it cannot be recovered!
To erase all stored data from SC-1 using the SC-1 controller:
1. Press MENU to navigate to the Data tab.
2. Use UP or DOWN to highlight Erase.
3. Press ENTER.
The following warning will appear (Figure22).
Figure22 Warning confirming to erase all stored data
4. To return to the Data tab and leave stored data intact, press ESC.
To erase data from memory, press ENTER. Erasing... will be displayed as data is being
removed, which usually takes about 6 s.
WARNING: This will delete all data permanently.
When the process is complete, the Data menu will reappear.

15
SC-1
To erase all stored data using the Leaf Porometer Utility (Section3.4) :
1. Connect the serial end of the USB-to-serial cable to the SC-1 controller.
2. Connect the USB end of the cable to an available USB port on the computer.
3. Open Leaf Porometer Utility (Figure23).
Figure23 Leaf Porometer Utility main window
4. Choose the appropriate communication port from the Use computer communication
port dropdown on the main screen.
5. Click Erase (Figure23).
6. Click OK (Figure24).
WARNING: This will delete all data on the SC-1 permanently.
Figure24 Erase data confirmation dialog
7. A progress bar shows the status of the erase process.

16
SYSTEM
3. SYSTEM
This section describes the SC-1 Leaf Porometer components and theory.
3.1 SPECIFICATIONS
MEASUREMENT SPECIFICATIONS
Stomatal Conductance
Range 0 to 1,000 mmol/(m2s)
Resolution 0.1 mmol/(m2s)
Accuracy ±10% of measurement from 0 to 500 mmol/(m2s)
NOTE: The SC-1 can measure higher than 500 mmol/(m2s) and detect relative stomatal conductance change in
the high range, but absolute accuracy becomes unverifiable past 500 mmol/(m2s).
Measurement Time
30 s
PHYSICAL SPECIFICATIONS
Controller Dimensions
Length 15.8 cm (6.2 in)
Width 9.5 cm (3.8 in)
Height 3.3 cm (1.3 in)
Sensor Head Dimensions
Length 12.0 cm (4.7 in)
Width 2.5 cm (1.0 in)
Height 5.5 cm (2.2 in)
Sensor Aperture Diameter
6.35 mm (0.25 in)
Sensor Cable Length
1.2 m (4 ft)
Table of contents
Other METER Measuring Instrument manuals

METER
METER APOGEE SQ-521 User manual
METER
METER AQUALAB TDL User manual
METER
METER APOGEE SU-221 User manual

METER
METER AQUALAB PAWKIT User manual

METER
METER AQUALAB TDL User manual
METER
METER AQUALAB 3 User manual
METER
METER AQUALAB VSA User manual
METER
METER ATMOS 22 User manual
METER
METER ACCUPAR LP-80 User manual
METER
METER PROCHECK User manual
