METER AQUALAB User manual

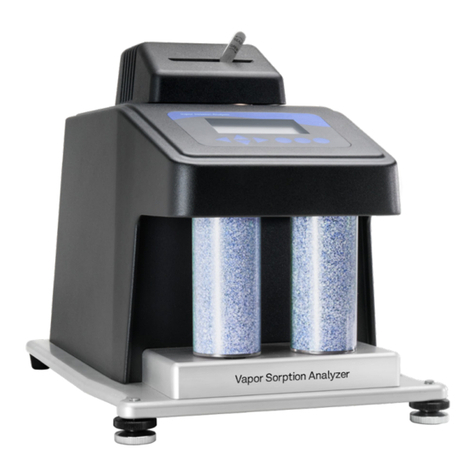
AQUALAB© VSA

i
TABLE OF CONTENTS
1. Introduction.............................................................................................. 1
2. About the VSA..........................................................................................2
2.1 Moisture Sorption Isotherms ..................................................................... 2
2.2 Measurement Method................................................................................3
2.3 Specifications............................................................................................4
2.4 User Interface and Menus..........................................................................5
2.4.1 Isotherm Tab ....................................................................................6
2.4.2 Measurement Tab ............................................................................7
2.4.3 Configuration Tab.............................................................................7
2.4.4 Data Tab......................................................................................... 15
3. Theory........................................................................................................ 18
3.1 Combining DVS and DDI in One Instrument ............................................. 19
3.2 Hysteresis................................................................................................ 20
3.3 Nonequilibrium........................................................................................ 22
3.4 Matrix Changes........................................................................................ 22
3.5 Working Isotherms................................................................................... 23
3.6 Isotherm Models...................................................................................... 24
3.7 Uses for Moisture Sorption Isotherms ..................................................... 25
4. Installation.............................................................................................. 27
5. Cleaning and Maintenance ............................................................ 31
5.1 Desiccant Replacement........................................................................... 31
5.2 Sample Chamber Cleaning....................................................................... 34
13832-07
2.2022

ii
5.2.1 Cleaning Kit ................................................................................... 34
5.2.2 Cleaning Procedure........................................................................ 35
5.3 Capacitance Filter Replacement.............................................................. 36
5.4 Maintenance Packages............................................................................ 37
6. Verification and Calibration........................................................ 38
6.1 Water Activity Verification ....................................................................... 38
6.1.1 Verification Standards ................................................................... 38
6.1.2 Verification of Calibration .............................................................. 39
6.2 Linear Offset ............................................................................................ 41
6.3 Adjusting for Weight Measurement Offset............................................... 42
6.4 Restore Factory Defaults ......................................................................... 43
6.5 Isotherm Standard Comparison............................................................... 44
7. Running a Test....................................................................................... 46
7.1 Becoming Familiar with Stages................................................................ 46
7.2 Moisture Analysis Toolkit Software.......................................................... 46
7.3 Running a Moisture Sorption Isotherm Test............................................. 46
7.4 Using DDI to Investigate Glass Transition ................................................ 53
7.5 Creating a Working Isotherm ................................................................... 53
7.6 Editing a Running Isotherm Test .............................................................. 54
7.7 Running a Water Activity Test .................................................................. 55
8. Sample Preparation........................................................................... 56
8.1 Coated and Dried Samples....................................................................... 57
8.2 Low Water-Emitting Samples .................................................................. 57
8.3 Volatile Samples ..................................................................................... 58
8.4 Low Water Activity ................................................................................... 58

9. Service....................................................................................................... 59
9.1 Troubleshooting ....................................................................................... 59
9.2 Customer Support.................................................................................... 64
9.3 Repair ...................................................................................................... 65
9.4 Terms and Conditions .............................................................................. 65
Index ................................................................................................................. 67


1
1. INTRODUCTION
Thank you for choosing the AQUALAB Vapor Sorption Analyzer (VSA) from METER Group.
The VSA is an automatic isotherm generator from the world leaders in water activity
measurement. The VSA is the only automatic isotherm generator that can generate
isotherms using both the Dynamic Vapor Sorption (DVS) method, which generates
equilibrium isotherms, and the Dynamic Dew Point Isotherm (DDI) method, which generates
dynamic isotherms. By combining both methods in one instrument, the VSA makes it
possible to investigate both dynamic matrix changes due to water sorption and the kinetics
of those changes. This manual details VSA operation and provides information on the
capabilities of the VSA.
This manual includes instructions for setting up your VSA which includes setting up an
isotherm test, running a test, collecting data, and analyzing data. Please read the manual
before operating the VSA to ensure the instrument performs to its full potential.
METER provides this manual to aid the end user in understanding the basic concepts of
moisture sorption isotherms, enabling them to use our instruments with confidence. METER
has made every effort to ensure the content of this manual is correct and scientifically sound.
Verify all VSA components are included and appear in good condition:
• AQUALAB VSA Isotherm Generator main unit
• Calibration certificate
• Power cord
• USB cable
• 2 stainless steel sample cups
• 3 refillable desiccant tubes
• 2 bottles (1 for water; 1 for air)
• AQUALAB Cleaning Kit
• Three vials each of the following verification standards solutions:
0.920 aw2.33 mol/kg NaCl
0.760 aw6.00 mol/kg NaCl
0.500 aw8.57 mol/kg LiCl
0.250 aw13.41 mol/kg LiCl
• Moisture Analysis Toolkit Software Package with registration key
• 1 2-g NIST traceable weight
• Tweezers
NOTE: Please keep your original instrument shipping box. If the VSA needs to be returned to METER, it must be
shipped in the original packaging.

2
ABOUT THE VSA
2. ABOUT THE VSA
The VSA Isotherm Generator is an automatic moisture sorption isotherm generator that can
generate both dynamic and equilibrium moisture sorption isotherms.
2.1 MOISTURE SORPTION ISOTHERMS
A moisture sorption isotherm defines the relationship between water activity (aw) and
moisture content at a given temperature. This relationship is complex and unique for each
product due to different interactions (colligative, capillary, and surface effects) between the
water and the solid components at different moisture contents. An increase in awalmost
always accompanies an increase in water content, but in a nonlinear fashion. Moisture
sorption isotherms are sigmoidal in shape for most foods, although foods that contain large
amounts of sugar or small soluble molecules have a J-type isotherm curve shape.
Isotherms provide information about product quality and safety. A few uses for
isotherms include:
1. Monolayer moisture content determination.
2. Determine critical water activity or moisture content.
3. Limits for crispness, hardness, and flow properties.
4. Optimize moisture contents at a safe water activity that maximizes moisture and avoids
over drying.
5. Determine shelf-life and storage stability of a product.
6. Predict packaging requirements based on sorption properties of a product.
7. Determine kinetics of sorption and water vapor diffusion coefficients
8. Determine the equilibrium water activity of a mixture of dry ingredients.
9. Determine the degree of crystallinity of powders.
10. Determine the level of amorphous material in a product.
11. Determine critical water activities for phase transitions.
12. Determine the relationship between water activity and glass transition temperature.
13. Determine the relationship between water activity and crystallization.
14. Determine hysteresis levels for a product.
15. Determine the moisture sensitivity of a product.
16. Determine the equilibrium moisture content at a given water activity.
17. Allow rapid moisture content determination from water activity analysis through an
isotherm curve.

3
AQUALAB VSA
2.2 MEASUREMENT METHOD
The VSA is the only automatic isotherm generator that can create isotherms using both
dynamic and static methods. The VSA uses the Dynamic Dew Point Isotherm (DDI) method
to produce dynamic isotherms and a controlled humidity and balance system, commonly
referred to as Dynamic Vapor Sorption (DVS), to produce static or equilibrium isotherms.
The DDI method for dynamic isotherms is a water activity and gravimetric analysis method
that controls neither water content nor water activity, but dries or wets the sample and
measures water activity and water content during the wetting or drying process. The VSA
determines water content by weighing the sample using a high precision magnetic force
balance and water activity with METER’s patented chilled-mirror dew point sensor. The VSA
imposes drying of the sample by flowing dry air from a desiccant tube across the sample
and wetting of the sample by saturating the air with water before it enters the chamber to
flow across the sample. The VSA water reservoir mounts to the temperature controlled lower
block to ensure humidity saturation and minimize temperature fluctuation.
The DVS method for static or equilibrium isotherms consists of tracking sample weight
change as the sample is exposed to different controlled humidities. The sample is held at
each humidity for a preset time interval or until a steady state weight change is achieved,
the goal being to achieve equilibrium between the sample water activity and the controlled
humidity. Customers typically choose several humidity levels to preset during the set
up process. The instrument then tracks equilibrium progress at each humidity level and
automatically steps to the next humidity when equilibrium requirements are achieved.
Weight change versus time data is recorded allowing for determining kinetics of sorption
for each humidity level. Using less stringent equilibrium settings for weight change or
setting a reduced time interval at each step can speed up the isotherm test, but may give
nonequilibrium results. In addition, setting smaller steps in humidity increase the data
resolution of the isotherm, but at the expense of much longer test times.
The VSA is a stand-alone instrument with an integrated pump system that eliminates the
need for an external gas cylinder, however you can use an external gas source if desired.The
instrument consists of a case which houses the power supply, air pump, balance, temperature
controlled sample chamber, sensor block, sensor and temperature control electronics, water
reservoir, and desiccant supply. Setup is as simple as plugging the instrument in, installing the
desiccant tubes, and filling the water reservoir. Test parameters can be set using an on-board
interface or using a connected computer and VSA software package.

4
ABOUT THE VSA
2.3 SPECIFICATIONS
MEASUREMENT SPECIFICATIONS
Water Activity
Range 0.030–0.95 aw (3%–95% RH)
Resolution 0.0001 aw (0.01% RH)
±0.001 aw(0.1% RH) for volatiles setting
Accuracy ±0.005 at 25 °C
Temperature
Range 15–50 °C
Resolution 0.01 °C
Accuracy ±0.1 °C
Adjustment Increment 1 °C
Read Time
~5 min
Isotherm Methods
Dynamic Dew Point Isotherm (DDI) and Static (DVS)
External Gas
7 psi max
Mass Resolution
0.5 mg
PHYSICAL SPECIFICATIONS
Case Dimensions
Length 38.1 cm (15.0 in)
Width 26.7 cm (10.5 in)
Height 30.5 cm (12.0 in)
Case Material
POLYLAC PA-765 (ABS) with fire retardant
Sample Cup Capacity
14 mL (0.47 fl oz)

5
AQUALAB VSA
Weight
14.9 kg (33.0 lb)
Display
64 × 128 graphical
Operating Temperature
Minimum 4 °C
Typical 23 °C
Maximum 50 °C
Operating Environment
0%–90% RH noncondensing
Data Communications
USB
Power
110–220 VAC 50/60 Hz
COMPLIANCE
Manufactured under ISO 9001:2015
EM ISO/IEC 17050:2010 (CE Mark)
2.4 USER INTERFACE AND MENUS
The AQUALAB VSA is a standalone instrument with arrows and three buttons useful for
navigating menus and beginning tests. There are four tabs at the top of the display screen,
the Isotherm, Measurement, Configuration, and Data tabs. These tabs indicate the four
menus. The button icons on the display change to show the available actions for the screen
(Table1).

6
ABOUT THE VSA
Table1 AQUALAB VSA button icons
Icon Name Action
Enter Accepts the current action
CANCEL Ends the current action
MENU Switches between the Isotherm, Measurement, Configuration, and
Data tabs
SAVE Saves a setting or a reading
OK Accepts the input from the user
GRAPH Shows graph view
WIZARD Brings up Test Setup Wizard
AUDIO OFF Silences beeping
AUDIO ON Enables beeping
2.4.1 ISOTHERM TAB
The Isotherm tab is the main screen and displays each time the VSA turns on. If the Isotherm
tab screen does not appear, refer to Section9.1 for troubleshooting. Operators can initiate
a new test from this screen by pressing the wizard icon (third button from right). If a test is
already running, this screen displays the latest test values including water activity, weight or
% moisture content and temperature. Pressing the second button activates the chart view.
Figure 1 Isotherm tab

7
AQUALAB VSA
2.4.2 MEASUREMENT TAB
The Measurement tab allows you to take water activity readings of the sample in the sample
chamber when not running a test. Pushing the right or left arrow keys changes the display
to a temperature equilibration screen that shows the temperature difference between the
sample temperature and the lid temperature.
Figure 2 Measurement tab
2.4.3 CONFIGURATION TAB
The Configuration tab allows the operator to view various configuration options. Pressing the
up and down arrows moves through the configuration options, while pressing the right and
left arrows allow the operator to page through the options.
Figure 3 Configuration tab menu

8
ABOUT THE VSA
2.4.3.1 CALIBRATION
Highlight “Calibration” and press the Enter button to open the Calibration menu where you
can make either a water activity or weight adjustment.
For more details on weight and water activity calibration procedures refer to Section6. You
may also reset the calibration to the factory defaults by highlighting the Defaults option in
the calibration menu and pressing Enter.
Figure 4 Calibration option
2.4.3.2 VOLATILES
The instrument gives accurate readings on most samples when the default volatiles
setting is “Off.” When reading with volatiles off the chilled mirror method is used by default.
However, samples with certain volatiles in high enough concentrations may give inaccurate
water activity values. This is because the volatiles condense on the mirror during the reading
process, but do not evaporate from the mirror as water does. The concentration of volatiles
that causes interference is variable and matrix dependent.
The most effective method to determine if volatiles are a problem is to compare dew point
readings to capacitance readings. If the dew point readings are more than 0.02 higher than
the capacitance readings, volatiles are likely a problem and it is recommended that the
volatiles setting be switched to On. When you turn the volatiles setting on, the instrument
only uses the capacitive relative humidity sensor for water activities measurements and
isotherm tests. All other operations and features are the same, including measurement
times and adjusting for linear offset. Press Enter to toggle the volatiles setting on and off.
2.4.3.3 WEIGHT REFERENCE
Weight reference is the reference used when calculating the percent change in weight of the
sample. This can be based on the initial weight of the test, the starting weight of the stage
or the minimum weight during the test. Use this reference anytime you are calculating a
percent weight.

9
AQUALAB VSA
2.4.3.4 BASIS
The VSA generates water activity values and corresponding sample weights during moisture
desorption and resorption.To complete the isotherm, the sample weights must be translated
into moisture contents. Moisture content can be calculated in different ways and reported with
a variety of different units. The basis parameter allows the reporting of moisture content in two
different ways, percent moisture on a wet basis and percent moisture on a dry basis.
Equation 1
Equation 2
For food applications, moisture contents are reported on a wet basis.
A simple equation converts between the wet and dry basis.
Equation 3
Equation 4
2.4.3.5 DATE
The VSA has an internal calendar and clock that allow it to record the time and date of each
water activity reading. Press Enter with the Date option highlighted to set the date in the
instrument. Press the left and right arrows to change between the month, day and year. Press
the up or down arrows to change any of the individual values.
Figure 5 Date screen

10
ABOUT THE VSA
2.4.3.6 TIME
Pressing Enter with the Time option highlighted allows you to set the current local time.
Press the up or down arrows to change any of the individual values. Press the left or right
buttons to change between hour and minutes. The hour setting automatically changes
between AM and PM.
Figure 6 Time screen
2.4.3.7 awSETTINGS
Settings related to water activity measurements can be updated here. These include default
system temperature, temperature equilibration tolerance, and beeps.
Figure 7 awSettings screen
2.4.3.8 TEMPERATURE
This setting determines the temperature that the instrument maintains during water activity
measurements. It is also the temperature that the instrument returns to after completing
a test. The default temperature is 25 °C. Press the Enter button to change the temperature
setting. You can set the VSA anywhere between 15 and 60 °C in 0.1 °C intervals. Use the up
and down arrows to set the VSA to your desired temperature.

11
AQUALAB VSA
2.4.3.9 TEMP EQ
Temperature Equilibration Tolerance or “Temp Eq” sets the maximum difference allowed
between the lid and the sample. This lid to sample temperature difference must be less
than the Temp Eq in order to start a water activity measurement. If a sample is out of this
range, the VSA waits for the sample to equilibrate prior to beginning the water activity
measurement. 4 °C is the default setting.
2.4.3.10 BEEPS
Indicates the number of audible beeps after a water activity measurement is completed. You
can set this value to off (0), 4, or infinity (∞).
2.4.3.11 REGIONAL FORMATTING
Allows you to configure how the VSA displays information. You may choose the temperature
scale (Celsius vs Fahrenheit), the date display (mm/dd/yy vs. dd/mm/yy), the hour format
(12 vs 24 hour) and the language. Press Enter to switch the setting.
Figure 8 Regional formatting screen
2.4.3.12 ADMIN SETTINGS
Allows you to create an administrator password as well as add, edit and delete additional
users. The Admin option allows the administrator to grant or block access to some or all of
the configuration options.
For example, if the administrator wanted to make sure that all samples were read at 25 °C
the administrator would set their temperature to 25 °C and then would lock all other users
out of that Configuration screen. This is accomplished by entering the Access function and
selecting the desired option to toggle it on and off. Additionally you can lock and unlock
all of them at once. (For example, if you do not want an individual changing the instrument
measurement temperature, the administrator can lock that function for that individual.)
Administrators can lock the calibration, temperature, temperature equilibration, sensor
selection, mode, date/time, region, password, autosave, number of beeps, contrast, and
delete functions.

12
ABOUT THE VSA
2.4.3.13 USER SETUP
Users can be added, edited or deleted from this screen. To add a user, press the Enter button
with the “New” highlighted. To edit or delete a user, choose the target user and press Enter.
When creating a new user, an alphabet screen appears where you can enter a name using
lower case, upper case and accents.
Figure 9 User screen
NOTE: User setup is not required for instrument operation. It is available for users wanting to be compliant with
21 CFR Part 11 or who want to maintain the settings they have selected.
2.4.3.14 AUTO RESTART
Auto restart enables the instrument to automatically resume the currently running test if
there is a power failure of any kind. Press Enter to toggle auto restart between on and off.
METER recommends this be set to on to prevent data loss. Note: Restart tests with a new
sample if power outages last more than 30 minutes.
2.4.3.15 LIGHTING
Turns the lighting in the desiccant tube area on or off.
2.4.3.16 EXTERNAL GAS
Enables or disables the use of external gas. When External Gas is On, the external gas serves
as the air source for sample desiccation and wetting. When External Gas is Off the internal
pump uses ambient air as the air source.
NOTE: When you use the external gas,it exhausts into the atmosphere.Be sure to provide adequate ventilation and
safety measures while using an external gas supply with the instrument. Do not use combustible or hazardous gases.
To turn external gas on, highlight “External Gas: Off” and press Enter. The External Gas
screen appears.

13
AQUALAB VSA
Figure 10 External Gas screen to turn on gas
To start using external gas, remove the external gas plug from the back of the VSA and insert
the desired gas source. Adjust the external gas pressure until it is between 5 and 35 kPa
(0.7 to 5 psi). The VSA hides the Check Mark until the gas is within the acceptable pressure
range. Press the Check Mark to enable external gas or escape to cancel.
NOTE: When selecting a gas source, choose a gas supply with a filter system that eliminates oil and other
particulates to help prolong the life of your VSA. Make sure to keep the external gas plug to use when you remove
the external gas source.
If the external gas is turned on in the Configuration tab and you want to turn it off, pressing
Enter causes the External Gas screen to appear.
Figure 11 External Gas screen to turn off gas
To stop using external gas, turn off the external gas source and remove the external gas
tubing and adapters from the back of the instrument. Reinstall the external gas plug and
then press the Check Mark to disable external gas or the X to return to the Configuration tab
without changing the setting.
2.4.3.17 CONTRAST
Allows adjustment to the screen contrast. Viewing the screen from a sitting versus a
standing position may require contrast adjustment for the best visibility in that position.

14
ABOUT THE VSA
Figure 12 External Gas screen to turn off gas
2.4.3.18 DIAGNOSTICS
The Diagnostics screen provides you with detailed information about all the sensors in the
instrument. Refer to Section9.1 for details on what kind of values you should expect for each
sensor. Press up or down to page between the different Diagnostics screens.
Figure 13 Diagnostics screen menu
The scale icon on the bottom of the second screen allows you to zero the balance so that
you can take weight readings via the diagnostic screen. The icon labeled “Act” toggles the
actuator system on and off. With the lid open, pressing this button causes the weigh pan and
actuator cylinder to alternatively rise and fall if working properly.
On startup, the pump is turned on and flows dry air into the chamber to monitor the
desiccating capacity of the tubes. The number button on the bottom screen allows you to
switch between the two desiccant tubes. If you press the number button with the arrow

15
AQUALAB VSA
to the left, it switches to the left desiccant tube (#1). If you press the number button with
the arrow to the right, it switches to the right desiccant tube (#2). Any time you press the
desiccant tube button, the pump turns on and blows dry air into the chamber to monitor the
desiccating capacity of the tubes.
The weight calibration value is the current calibration applied to balance readings. A value of
one means no weight calibration is applied. The dew point and capacitance RH sensor offset
values are the current linear offsets applied to water activity readings for the respective
sensor type. A value of zero means that the VSA applied no water activity offset.
2.4.3.19 ABOUT
The About screen provides important information including the serial number and firmware
code version of your instrument.
2.4.4 DATA TAB
The Data tab allows you to view detailed information about the test stored in the memory.
You can view data as a list, view detailed data point information, and graph all or individual
stages. You can also delete the data in the memory.
Figure 14 Data tab
2.4.4.1 VIEW
This selection brings you to a screen where you can decide how to view the data. View the
whole test at once by selecting All or view an individual stage. Once the desired portion of
the test is selected, choose to graph the data by pressing the graph icon or press the Enter
icon to view summary information of each data record. Use the Moisture Analysis Toolkit to
download test data to a computer (Section7.2).
Table of contents
Other METER Measuring Instrument manuals
METER
METER TEROS 06 User manual

METER
METER SC-1 User manual
METER
METER AQUALAB PAWKIT User manual
METER
METER SI-400 Series User manual
METER
METER ACCUPAR LP-80 User manual
METER
METER ATMOS 22 User manual
METER
METER VARIOS User manual

METER
METER G3 User manual
METER
METER PROCHECK User manual
METER
METER AQUALAB TDL User manual
