manuals.online logo
Brands
  1. Home
  2. •
  3. Brands
  4. •
  5. Metra Electronics
  6. •
  7. Automobile Accessories
  8. •
  9. Metra Electronics 70-7306 User manual

Metra Electronics 70-7306 User manual

Other Metra Electronics Automobile Accessories manuals

Metra Electronics 99-6540 User manual

Metra Electronics

Metra Electronics 99-6540 User manual

Metra Electronics 99-8223 User manual

Metra Electronics

Metra Electronics 99-8223 User manual

Metra Electronics iBeam TE-AHD7M User manual

Metra Electronics

Metra Electronics iBeam TE-AHD7M User manual

Metra Electronics 99-4000 User manual

Metra Electronics

Metra Electronics 99-4000 User manual

Metra Electronics 88-00-3302 User manual

Metra Electronics

Metra Electronics 88-00-3302 User manual

Metra Electronics 99-5807 User manual

Metra Electronics

Metra Electronics 99-5807 User manual

Metra Electronics 99-7392B User manual

Metra Electronics

Metra Electronics 99-7392B User manual

Metra Electronics 95-6545B User manual

Metra Electronics

Metra Electronics 95-6545B User manual

Metra Electronics MITO-01 User manual

Metra Electronics

Metra Electronics MITO-01 User manual

Metra Electronics 95-3527 User manual

Metra Electronics

Metra Electronics 95-3527 User manual

Metra Electronics 95-3023HG User manual

Metra Electronics

Metra Electronics 95-3023HG User manual

Metra Electronics 99-7952 User manual

Metra Electronics

Metra Electronics 99-7952 User manual

Metra Electronics 95-8223 User manual

Metra Electronics

Metra Electronics 95-8223 User manual

Metra Electronics 95-7866B User manual

Metra Electronics

Metra Electronics 95-7866B User manual

Metra Electronics 99-8208 User manual

Metra Electronics

Metra Electronics 99-8208 User manual

Metra Electronics 99-9401 User manual

Metra Electronics

Metra Electronics 99-9401 User manual

Metra Electronics 99-7503 User manual

Metra Electronics

Metra Electronics 99-7503 User manual

Metra Electronics 95-8904B User manual

Metra Electronics

Metra Electronics 95-8904B User manual

Metra Electronics 99-7609G User manual

Metra Electronics

Metra Electronics 99-7609G User manual

Metra Electronics 98-5999 User manual

Metra Electronics

Metra Electronics 98-5999 User manual

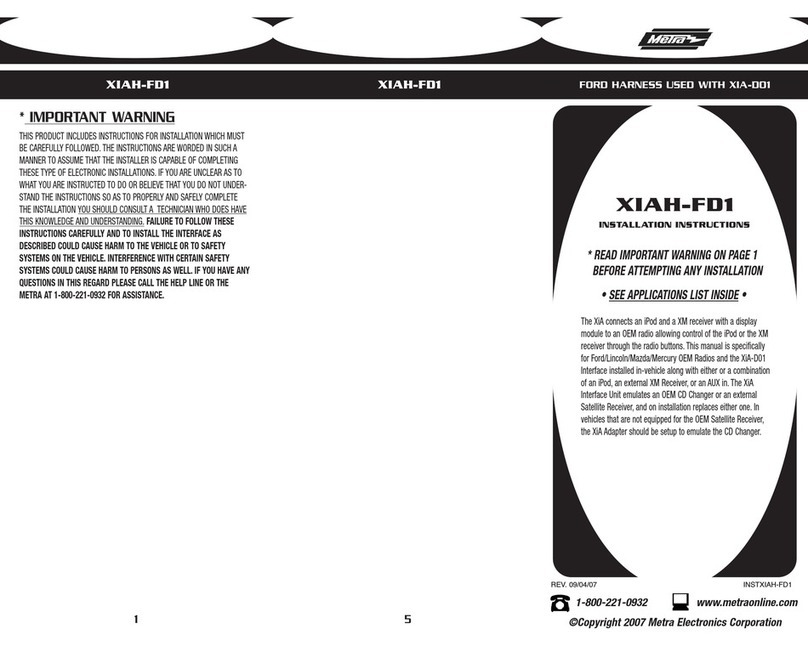
Metra Electronics XIAH-FD1 User manual

Metra Electronics

Metra Electronics XIAH-FD1 User manual

Metra Electronics 99-8214TB User manual

Metra Electronics

Metra Electronics 99-8214TB User manual

Metra Electronics 98-9306 User manual

Metra Electronics

Metra Electronics 98-9306 User manual

Metra Electronics 99-9014HG User manual

Metra Electronics

Metra Electronics 99-9014HG User manual

Popular Automobile Accessories manuals by other brands

Magneti Marelli AC161 Installation instruction

Magneti Marelli

Magneti Marelli AC161 Installation instruction

FDI uEZ GUI Start here

FDI

FDI uEZ GUI Start here

JCROffroad JT Install instructions

JCROffroad

JCROffroad JT Install instructions

Rostra VOXXElectronics 250-1930 owner's guide

Rostra

Rostra VOXXElectronics 250-1930 owner's guide

TOP VEHICLE TECH GR3FORD5 installation manual

TOP VEHICLE TECH

TOP VEHICLE TECH GR3FORD5 installation manual

Safe Fleet PRIME DESIGN AR-2000-BLK manual

Safe Fleet

Safe Fleet PRIME DESIGN AR-2000-BLK manual

Skoda Fabia Combi 5J Fitting instructions

Skoda

Skoda Fabia Combi 5J Fitting instructions

Camcar 40077 Al Mounting instructions

Camcar

Camcar 40077 Al Mounting instructions

Camcar 40089 AL Mounting instructions

Camcar

Camcar 40089 AL Mounting instructions

Impac Tradesman 2000 installation manual

Impac

Impac Tradesman 2000 installation manual

DVB OFFROAD BRSB-01 installation manual

DVB

DVB OFFROAD BRSB-01 installation manual

Safari Snorkel SS385HF installation guide

Safari Snorkel

Safari Snorkel SS385HF installation guide

ULTIMATE SPEED 279746 Assembly and Safety Advice

ULTIMATE SPEED

ULTIMATE SPEED 279746 Assembly and Safety Advice

SSV Works DF-F65 manual

SSV Works

SSV Works DF-F65 manual

ULTIMATE SPEED CARBON Assembly and Safety Advice

ULTIMATE SPEED

ULTIMATE SPEED CARBON Assembly and Safety Advice

Witter F174 Fitting instructions

Witter

Witter F174 Fitting instructions

WeatherTech No-Drill installation instructions

WeatherTech

WeatherTech No-Drill installation instructions

TAUBENREUTHER 1-336050 Installation instruction

TAUBENREUTHER

TAUBENREUTHER 1-336050 Installation instruction

manuals.online logo
manuals.online logoBrands
  • About & Mission
  • Contact us
  • Privacy Policy
  • Terms and Conditions

Copyright 2025 Manuals.Online. All Rights Reserved.

The World’s best kits.®MetraOnline.com © COPYRIGHT 2019 METRA ELECTRONICS CORPORATION REV. 8/29/19 INST70-7306
INSTALLATION INSTRUCTIONS
70-7306
70-7306
HARNESS FEATURES
• Wiring harness for installation of an aftermarket radio
• Provides power and four speakers
• Retains balance and fade
• Provides NAV outputs (speed sense)
• Pre-wired ASWC-1 harness (ASWC-1 sold separately)
• Retains the factory AUX-IN jack
• Retains the factory backup camera
OPTIONAL ACCESSORIES (sold separately)
Steering Wheel Control Interface: ASWC-1
12V TO 6V Step-Down: AX-CAM6V
TOOLS REQUIRED
• Crimping tool and connectors, or solder gun,
solder, and heat shrink
• Tape • Wire cutter • Zip ties
TABLE OF CONTENTS
Connections ............................................................2
Hyundai / Kia (without NAV, with Display radio)
Wiring Harness 2017-up†
APPLICATIONS
Hyundai
Elantra 2017-up
Sonata 2017-up
Sonata Hybrid 2018-up
Kia
Forte / Forte 5 / Forte Koup 2017-up
Sedona 2017-up
Sorento 2017-up
OPTIONAL ACCESSORIES (sold separately)
Steering Wheel Control Interface: ASWC-1
12V TO 6V Step-Down: AX-CAM6V
TOOLS REQUIRED
• Crimping tool and connectors, or solder gun,
solder, and heat shrink
• Tape • Wire cutter • Zip ties
TABLE OF CONTENTS
Connections ............................................................2
APPLICATIONS
Hyundai
Elantra 2017-up
Sonata 2017-up
Sonata Hybrid 2018-up
Kia
Forte / Forte 5 / Forte Koup 2017-up
Sedona 2017-up
Sorento 2017-up
† Display radio is an Android Auto / Apple CarPlay radio
Visit MetraOnline.com for more detailed information about the product and up-to-date vehicle
specific applications
HARNESS FEATURES
• Wiring harness for installation of an aftermarket radio
• Provides power and four speakers
• Retains balance and fade
• Provides NAV outputs (speed sense)
• Pre-wired ASWC-1 harness (ASWC-1 sold separately)
• Retains the factory AUX-IN jack
• Retains the factory backup camera
Hyundai / Kia (without NAV, with Display radio)
Wiring Harness 2017-up†
† Display radio is an Android Auto / Apple CarPlay radio
Visit MetraOnline.com for more detailed information about the product and up-to-date vehicle
specific applications
The World’s best kits.®MetraOnline.com © COPYRIGHT 2019 METRA ELECTRONICS CORPORATION REV. 8/29/19 INST70-7306
INSTALLATION INSTRUCTIONS
70-7306
70-7306
CONNECTIONS
CONNECTIONS
From the 70-7306 harness to the aftermarket radio:
• Connect the (2) Black wires, the Black wire labeled “camera ground”, and also
the Black wire from the AX-CAM6V (sold separately), to the ground wire.
• Connect the (2) Yellow wires to the battery wire.
• Connect the Red wire to the accessory wire.
• Connect the Red wire labeled “6V camera power” to the Blue/Red wire from
the AX-CAM6V (sold separately).
• Connect the Blue wire to the power antenna turn-on wire.
• Connect the Orange wire to the illumination wire, if applicable.
• Connect the White wire to the left front positive speaker wire.
• Connect the White/Black wire to the left front negative speaker wire.
• Connect the Gray wire to the right front positive speaker wire.
• Connect the Gray/Black wire to the right front negative speaker wire.
• Connect the Green wire to the left rear positive speaker wire.
• Connect the Green/Black wire to the left rear negative speaker wire.
• Connect the Purple wire to the right rear positive speaker wire.
• Connect the Purple/Black to the right rear negative speaker wire.
The following (1) wire is only for a multimedia/navigation radio that requires this wire.
• Connect the Blue/Pink wire to the speed sense wire.
• If retaining the factory AUX-IN jack is desired, connect the Red & White RCA jacks to the
AUX-IN jacks.
• Connect the Yellow RCA jack to the jack designated for a backup camera input.
12-pin pre-wired ASWC-1 harness:
This harness is to be used along with the ASWC-1 (sold separately) to retain steering wheel
audio controls. If the ASWC-1 is not being used, disregard this harness. If it is to be used,
please refer to the ASWC-1 instructions for radio connections and programming. Disregard
the harness that comes with the ASWC-1.
Black - Ground
Blue/Red - To 70-7306 (red wire labeled 6V camera power)
Blue/White - To accessory power or reverse trigger
AX-CAM6V WIRING
Black - Ground
Blue/Red - To 70-7306 (red wire labeled 6V camera power)
Blue/White - To accessory power or reverse trigger
AX-CAM6V WIRING