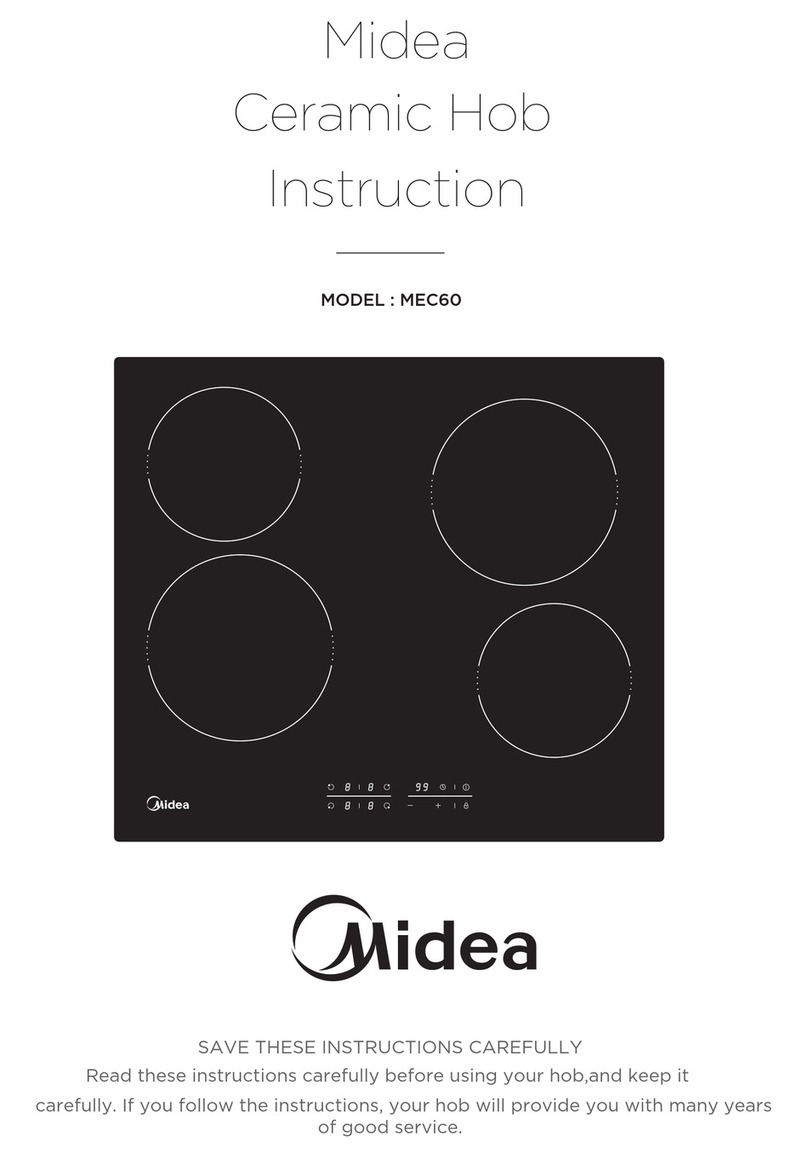
Midea MC-HF605 Specification sheet


Safety Warnings
Your safety is important to us. Please read this
information before using your cooktop.
Installation
Electrical Shock Hazard
Disconnect the appliance from the mains
electricity supply before carrying out any work or
maintenance on it.
Connection to a good earth wiring system is
essential and mandatory.
Alterations to the domestic wiring system must
only be made by a qualified electrician.
Failure to follow this advice may result in
electrical shock or death.
Cut Hazard
Take care - panel edges are sharp.
Failure to use caution could result in injury or
cuts.
Important safety instructions
Read these instructions carefully before installing
or using this appliance.
2

No combustible material or products should be
placed on this appliance at any time.
Please make this information available to the
person responsible for installing the appliance as
it could reduce your installation costs.
In order to avoid a hazard, this appliance must be
installed according to these instructions for
installation.
This appliance is to be properly installed and
earthed only by a suitably qualified person.
This appliance should be connected to a circuit
which incorporates an isolating switch providing
full disconnection from the power supply.
Failure to install the appliance correctly could
invalidate any warranty or liability claims.
Operation and maintenance
Electrical Shock Hazard
Do not cook on a broken or cracked cooktop. If
the cooktop surface should break or crack,
switch
the appliance off immediately at the mains power
supply (wall switch) and contact a qualified
technician.
Switch the cooktop off at the wall before cleaning
or maintenance.
Failure to follow this advice may result in
electrical shock or death.
3

Health Hazard
This appliance complies with electromagnetic
safety standards.
However, persons with cardiac pacemakers or
other electrical implants (such as insulin pumps)
must consult with their doctor or implant
manufacturer before using this appliance to make
sure that their implants will not be affected by
the electromagnetic field.
Failure to follow this advice may result in death.
Hot Surface Hazard
During use, accessible parts of this appliance will
become hot enough to cause burns.
Do not let your body, clothing or any item other
than suitable cookware contact the Ceramic glass
until the surface is cool.
Metallic objects such as knives, forks, spoons and
lids should not be placed on the hob surface since
they can get hot
Keep children away.
Handles of saucepans may be hot to touch. Check
saucepan handles do not overhang other cooking
zones that are on. Keep handles out of reach of
children.
Failure to follow this advice could result in burns
and scalds.
Cut Hazard
The razor-sharp blade of a cooktop scraper is
4

exposed when the safety cover is retracted. Use
with extreme care and always store safely and
out of reach of children.
Failure to use caution could result in injury or
cuts.
Important safety instructions
Never leave the appliance unattended when in
use. Boilover causes smoking and greasy
spillovers that may ignite.
Never use your appliance as a work or storage
surface.
Never leave any objects or utensils on the
appliance.
Do not place or leave any magnetisable objects
(e.g. credit cards, memory cards) or electronic
devices (e.g. computers, MP3 players) near the
appliance, as they may be affected by its
electromagnetic field.
Never use your appliance for warming or heating
the room.
After use, always turn off the cooking zones and
the cooktop as described in this manual (i.e. by
using the touch controls). Do not rely on the pan
detection feature to turn off the cooking zones
when you remove the pans.
Do not allow children to play with the appliance
or sit, stand, or climb on it.
5

Do not store items of interest to children in
cabinets above the appliance. Children climbing
on the cooktop could be seriously injured.
Do not leave children alone or unattended in the
area where the appliance is in use.
Children or persons with a disability which limits
their ability to use the appliance should have a
responsible and competent person to instruct
them in its use. The instructor should be satisfied
that they can use the appliance without danger to
themselves or their surroundings.
Do not repair or replace any part of the appliance
unless specifically recommended in the manual.
All other servicing should be done by a qualified
technician.
Do not use a steam cleaner to clean your cooktop.
Do not place or drop heavy objects on your
cooktop.
Do not stand on your cooktop.
Do not use pans with jagged edges or drag pans
across the Ceramic glass surface as this can
scratch the glass.
Do not use scourers or any other harsh abrasive
cleaning agents to clean your cooktop, as these
can scratch the Ceramic glass.
If the supply cord is damaged, it must be replaced
by the manufacturer, its service agent or similarly
6

qualified persons in order to avoid a hazard.
This appliance is intended to be used in
household and similar applications such as: -staff
kitchen areas in shops, offices and other working
environments; -farm houses; -by clients in hotels,
motels and other residential type environments;
-bed and breakfast type environments.
WARNING: The appliance and its accessible parts
become hot during use.
Care should be taken to avoid touching heating
elements.
Children less than 8 years of age shall be kept
away unless continuously supervised.
This appliance can be used by children aged from
8 years and above and persons with reduced
physical, sensory or mental capabilities or lack of
experience and knowledge if they have been
given supervision or instruction concerning use of
the appliance in a safe way and understand the
hazards involved.
Children shall not play with the appliance.
Cleaning and user maintenance shall not be made
by children without supervision.
WARNING: Unattended cooking on a hob with fat
or oil can be dangerous and may result in fire.
NEVER try to extinguish a fire with water, but
switch off the appliance and then cover flame e.g.
with a lid or a fire blanket.
7

WARNING: Danger of fire: do not store items on
the cooking surfaces.
Warning: If the surface is cracked, switch off the
appliance to avoid
the possibility of electric shock, for hob surfaces
of glass-ceramic or similar material which protect
live parts
A steam cleaner is not to be used.
The appliance is not intended to be operated by
means of an external timer or separate
remote-control system.
8

Congr a t ula t ions on the pur chase of your new Ceram ic Hob.
We recom m end t hat you spend som e tim e to read t his I nst ruct ion / I nstallat ion
Manual in order t o fully understand how t o install correctly and operat e it.
For inst allat ion, please read t he inst allat ion sect ion.
Read all t he safet y instructions carefully before use and keep this I nst ruct ion /
I nst allat ion Manual for future reference.
Product Overview
Top Vie w
Cont r ol Pa ne l
9
1. Max. 1200 W zone
2. Max. 1800 W zone
3. Max. 1200 W zone
4. Max. 1800 W zone
5. Glass plate
6. ON / OFF
7. Control panel
1. ON/OFF control
2. Power regulating controls
3. Keylock control
4. Timer regulating controls

Product Information
The m icrocom put er cer am ic cooker hob can m eet differ ent k inds of cuisine
dem ands because of resistance wire heating, m icro- com puterized control and
m ulti- power select ion, really t he opt im al choice for m oder n fam ilies.
The ceram ic cooker hob centers on cust om ers and adopt s personalized design.
The hob has safe and reliable per form ances, m ak ing your life com fort able and
enabling t o fully enj oy t he pleasure from life.
Before using your New Ceramic Hob
• Read t his guide, taking special not e of t he ‘Safet y Warnings’ section.
• Rem ove any prot ect ive film that m ay st ill be on your ceram ic hob.
Using the Touch Controls
• The cont rols respond t o t ouch, so you don’t need t o apply any pressure.
• Use the ball of your finger, not it s tip.
• You will hear a beep each t im e a touch is regist ered.
• Make sure t he cont rols are always clean, dry, and t hat t here is no object ( e.g.
a ut ensil or a clot h) covering t hem . Even a t hin film of wat er m ay m ak e t he
controls difficult t o operate.
Choosing the right Cookware
Do not use cookware with j agged edges or a curved base.
10

Mak e su r e t h a t t h e b a se o f y o u r p an i s sm oo t h , si t s f lat a g ai n st t h e g l ass, an d i s
the sam e size as the cooking zone. Always cent re your pan on the cooking zone.
Always lift pans off t he ceram ic hob – do not slide, or t hey m ay scrat ch t he glass.
Using your Ceramic Hob
To st a r t cook in g
• Aft er power on, the buzzer beeps once, all the indicators light up for 1 second
then go out , indicating that the ceram ic hob has ent ered t he st ate of st andby
m ode.
1. Touch the ON/ OFF cont rol. all the indicat ors
show “-“
2. Place a suit able pan on t he cooking zone that
you wish to use.
• Make sure t he bot t om of the pan and t he surface
Of t he cooking zone are clean and dry.
11

3. Touching the heat ing zone selection control
(e.g. zone 3# )
4. Select a heat set t ing by touching t he “ -“ or
“ + ” cont r ol.
• I f you don’t choose a heat set ting wit hin 1
m inut e, t he ceram ic hob will autom at ically
swit ch off. You w ill need t o st art again at
st ep 1.
• You can m odify t he heat set ting at any tim e
during cooking.
• By holding down eit her of these but t ons, the
value will adj ust up or down.
W he n you ha ve finished cook ing
1. Touching the heat ing zone selection control t hat
you wish to swit ch off (e.g. zone 3# )
2. Turn the cooking zone off by scrolling down t o “ 0 “ or t ouching “ - “ and
” + ” cont r ol t oget her.
12
OR

4. Beware of hot surfaces
“ H” w ill show w hich cooking zone is hot t o t ouch. I t will disappear w hen the
surface has cooled down to a safe tem perature. I t can also be used as an energy
saving function if you want t o heat fur t her pans, use t he hotplat e t hat is st ill hot.
Locking the Controls
• You can lock t he controls t o prevent unintended use (for exam ple children
accidentally t urning t he cooking zones on).
• When the cont rols are locked, all the controls except the ON/ OFF cont rol are
disabled.
To lo ck t h e con t r ols
Touch t he keylock cont rol. The t im er indicat or w ill show “ Lo
“
To un lock t h e con t r ols
1. Make sure t he ceram ic hob is turned on.
2. Touch and hold the keylock cont rol for a w hile.
3. You can now st art using your ceram ic hob.
When t he hob is in t he lock m ode, all t he cont rols are disable ex cept the
ON/ OFF , y ou can alway s t urn t he ceram ic hob off with t he ON/ OFF
control in an em ergency, but you shall unlock t he hob first in t he next
operat ion
3. Turn t he whole cooktop off by t ouching t he ON/ OFF cont rol.
13

Ove r- Tem pe ra t ur e Pr ot e ct ion
A t em perat ur e sensor equipped can m onit or t he t em perat ur e inside the ceram ic
hob. When an excessive t em per at ure is m onit ored, t he ceram ic hob will st op
operat ion aut om at ically.
Residual Heat W a rning
When t he hob has been operat ing for som e t im e, t here will be som e residual
heat . The let t er “ H ” appear s t o w ar n you t o keep away fr om it .
Au t o Sh ut dow n
Anot her safet y feat ure of t he hob is aut o shut down. This occurs whenever you
forget to swit ch off a cooking zone. The default shutdown tim es are shown in
the t able below:
Pow er le vel 1 2 3 4 5 6 7 8 9
D e fa ult w o rk in g t im e r
( hour)
8 8 8 4 4 4 2 2 2
Using the Timer
You can use t he t im er in t w o different ways:
• You can use it as a m inut e m inder. I n this case, the t im er will not t urn any
cook ing zone off when t he set tim e is up.
• You can set it to turn one cooking zone off or m ore than one aft er the set t im e
is up.
• You can set the t im er for up t o 99 m inutes.
Using t he Tim e r a s a M in ut e M in de r
I f y ou a r e n ot se le ct in g a ny co ok in g zo ne
1. Make sure the cooktop is turned on.
Not e: you can use t he m inut e m inder even if you’re not select ing any
cooking zones.
2. Touch t he tim er control, t he tim er indicat or show “ - -”
14

3. Adj ust t he t im er set t ing by t ouch t he “ - “ or “ + ”
cont rols. The m inute m inder indicat or w ill st art
flashing and will show in the t im er display.
Hin t: Touch t he “ - “ or “ + ” cont rol of t he t im er
once to decrease or increase by 1 m inut e.
Touch and hold t he “ - “ or ” + ” control of t he tim er t o decrease or
incr ease by 10 m inut es.
I f t he set ting t im e exceeds 99 m inut es, t he t im er will aut om at ically
ret ur n t o 0 m inute.
4. Tou ching t he” - “ and “ + ” t oget her , t he t im er is cancelled, and t he” - - “ w ill
show in t he m inute display.
5. When t he t im e is set , it will begin t o count down
im m ediat ely. The display will show t he rem aining
t im e and t he t im er indicator will flash for 5 seconds.
6. Buzzer will beep for 30 seconds and t he t im er indicat or
shows “ - - “ when the set ting t im e finished.
Se t t in g t h e t im e r t o t u rn one cooking zone off
1. Touching the heat ing zone selection control
(e.g. zone 3# )
15

2. Touch t he tim er control, t he tim er indicat or
show “ 1 0”
3. Set the tim e by t ouching t he cont rol of t he t im er
Hin t: Touch t he “ - “ or “ + ” cont rol of t he t im er
once will decrease or increase by 1 m inute.
Touch and hold the “ - “ or “+ ” cont rol of the t im er will decrease or
incr ease by 10 m inut es.
I f t he set ting t im e exceeds 99 m inut es, t he t im er will aut om at ically
ret ur n t o 0 m inute.
4. Tou ching t he “ - ” and “ + ” t oget her, t he t im er is cancelled, and t he w ill show
“ - - ” in the m inut e display.
5. When t he t im e is set , it will begin t o count
dow n im m ediat ely. The display will show t he
rem aining t im e and t he t im er indicat or flash
for 5 seconds.
NOTE: The red dot next to power level indicator
will illum inate indicating that zone is select ed.
16

Se t t in g t h e t im e r t o t u r n m or e t h a n o n e cook i n g z o n e
off
1. I f m ore than one heat ing zone use this funct ion, t he t im er indicat or will show
t he lowest tim e.
( e.g. zone 3# set ting t im e of 10m inutes, z on e 4 # se t t i n g t i m e o f 5 m i n u t e s,
t he t im er indicat or show s “ 5” .)
NOTE: The red dot next to power level indicator will flash。
2. When cook ing t im er expir es, t he cor responding
cook ing zone will be swit ch off aut om at ically.
NOTE: I f you want t o change t he t im e after the t im er is set , you have t o st art
from st ep 1
Cooking Guidelines
Cook ing Tips
• When food com es t o t he boil, reduce t he power set t ing.
• Using a lid will reduce cooking t im es and save energy by retaining t he heat.
• Minim ise t he am ount of liquid or fat to reduce cooking t im es.
• St art cooking on a high setting and reduce the set t ing when t he food has
heated through.
Sim m erin g, cooking rice
• Sim m ering occurs below boiling point, at around 85˚C, wh en bu bbles ar e j ust
rising occasionally t o t he surface of t he cooking liquid. I t is the key t o delicious
17
(set to 5 minutes) (set to 15 minutes)

soups and t ender st ews because t he flavours develop wit hout overcooking the
food. You should also cook egg- based and f lourt hick ened sauces below boiling
point .
• Som e t ask s, including cooking rice by t he absorpt ion m et hod, m ay require a
setting higher t han t he lowest setting t o ensure t he food is cooked properly in
t he t im e recom m ended.
Searing st eak
To cook j uicy flavoursom e steaks:
1. St and the m eat at r oom tem perat ure for about 20 m inutes before cooking.
2. Heat up a heavy- based frying pan.
3. Brush bot h sides of t he st eak w it h oil. Dr izzle a sm all am ount of oil int o t he
hot pan and t hen lower the m eat onto t he hot pan.
4. Turn t he steak only once during cooking. The exact cooking t im e will depend
on t he t hickness of the st eak and how cooked you want it. Tim es m ay vary
from about 2 – 8 m inutes per side. Press the steak to gauge how cooked it
is – t he firm er it feels t he m ore ‘well done’ it will be.
5. Leave the st eak t o rest on a warm plate for a few m inut es to allow it to relax
and becom e t ender before serv ing.
For st ir - frying
1. Choose an ceram ic com pat ible flat -based w ok or a large frying pan.
2. Have all t he ingredient s and equipm ent ready. Stir- frying should be quick. I f
cooking large quant it ies, cook t he food in several sm aller bat ches.
3. Pr eheat t he pan br iefly and add t w o t ablespoon s of oil.
4. Cook any m eat first , put it aside and keep warm .
5. St ir-fry the veget ables. When they are hot but st ill crisp, t urn the cooking
zone t o a lower set t ing, return t he meat to the pan and add your sauce.
6. St ir t he ingr edient s gent ly t o m ake sure t hey are heat ed t hr ough.
7. Ser ve im m ediat ely.
Heat Settings
H e at se t t in g Su it a b ilit y
1 - 2 • delicat e w arm ing for sm all am ount s of food
• m elt ing chocolat e, but ter, and foods that burn quickly
• gent le sim m er ing
• slow warm ing
3 - 4 • reheat ing
• rapid sim m ering
• cooking rice
18

5 - 6 • pancakes
7 - 8 • saut eing
• cooking past a
9• st ir- frying
• searing
• bringing soup t o the boil
• boiling water
Care and Cleaning
W ha t ? How ? I m por t a nt !
Everyday soiling on
glass ( fingerprints,
m ark s, st ains left by
food or non- sugary
spillovers on the glass)
1. Sw it ch t he power to t he
cookt op off.
2. Ap ply a cook t op clean er
w hile t he g lass is st ill w ar m
(but not hot! )
3. Rinse and wipe dry wit h a
clean clot h or paper tow el.
4. Sw it ch t he power to t he
cookt op back on.
• When t he power t o t he cookt op is
sw it ched off, ther e will be no ‘hot
su rf ace’ indicat ion but t he
cook in g zone m ay st ill b e hot !
Take ex tr em e care.
• Heavy- dut y scour er s, som e
nylon scourers and
harsh/ abrasive cleaning agent s
m ay scr at ch t he glass. Alw ay s
r ead t h e lab el t o ch eck if y ou r
cleaner or scourer is suit able.
• Never leave cleaning r esidue on
the cook top: the glass m ay
becom e st ained.
Boilov ers, m elt s, and
hot sugar y spills on
the glass
Rem ov e t hese im m ediat ely
wit h a fish slice, palet te knife
or razor blade scraper suit able
for ceram ic glass cooktops,
but beware of hot cooking
zone surfaces:
1. Sw it ch t he power to t he
cookt op off at t he wall.
2. Hold t he blade or ut ensil at
a 30° angle and scrape t he
soiling or spill t o a cool area
of t he cookt op.
3. Clean t he soiling or spill up
wit h a dish cloth or paper
tow el.
4. Follow steps 2 to 4 for
‘Ever yday soiling on glass’
above.
• Rem ov e st ain s left by m elt s and
sugary food or spillover s as soon
as possible. I f left t o cool on t he
glass, they m ay be difficult to
r em ov e or ev en per m an en t ly
dam age the glass surface.
• Cut hazard: w hen t he safet y
cover
is r et r act ed, t he blade in a
scraper
is r azor - sharp. Use w it h ex t rem e
car e and always stor e safely and
out of reach of childr en.
19
Other manuals for MC-HF605
2
Table of contents
Other Midea Hob manuals

Midea
Midea NA64H3010AK User manual

Midea
Midea MEC64 User manual

Midea
Midea MEC-30 User manual

Midea
Midea MC-HT341 User manual

Midea
Midea MC-HV848 User manual

Midea
Midea MIH740F238K0 User manual

Midea
Midea MC-HV868 User manual

Midea
Midea MI60T User manual

Midea
Midea MIH700F031K1 User manual

Midea
Midea EN600C4 User manual

Midea
Midea MIH740F129K2 User manual

Midea
Midea MC-CH6002 User manual
Midea
Midea MIH 616AC User manual

Midea
Midea MC-HF605 User manual

Midea
Midea MC-HT572B User manual

Midea
Midea MC-IF7222CCD User manual

Midea
Midea MI60S User manual

Midea
Midea MHR 604 FX G User manual
Midea
Midea ESK 1875 IX Herd User manual

Midea
Midea MI90F User manual