manuals.online logo
Brands
  1. Home
  2. •
  3. Brands
  4. •
  5. Mocka
  6. •
  7. Indoor Furnishing
  8. •
  9. Mocka Eclipse User manual

Mocka Eclipse User manual

mocka.co.nz I mocka.com.au I PO BOX 18, Pinkenba QLD 4008
ASSEMBLY I N S TRUCTION S
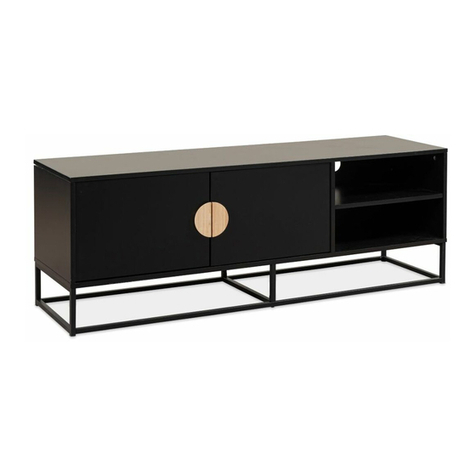
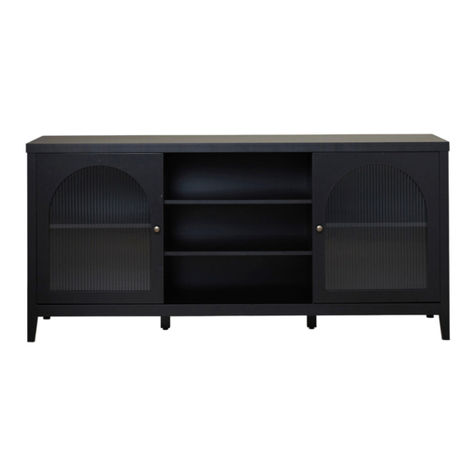
Eclipse
Two Door Cabinet
Thank you for your purchase.
Please follow the instructions below for correct assembly
WARNING: Any furniture that is not anchored to a wall has the potential to tip over in certain
circumstances, i.e. if a child attempts to climb up on the furniture or in the event of an earth-
quake. Accordingly, we recommend that all furniture is anchored to a wall. We supply a free safety
wall anchor with all furniture sold and we recommend these are used to prevent your product
tipping. The fixing device provided should fit most wall types, but please note that dierent wall
materials may require dierent fixing devices from those supplied.
For quicker assembly, we recommend the
use of a power drill on a low-speed setting.
.
Phillips & Flathead screwdrivers
Wall Strap
x2
Z
washer
Y
wall
x1
X
anchor
safety
WV
strap x1 x1
screw wall
x1
screw
x8
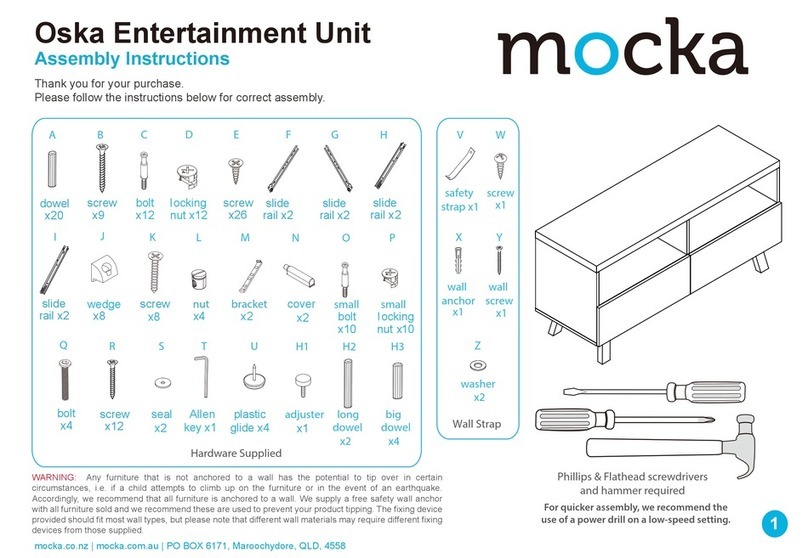
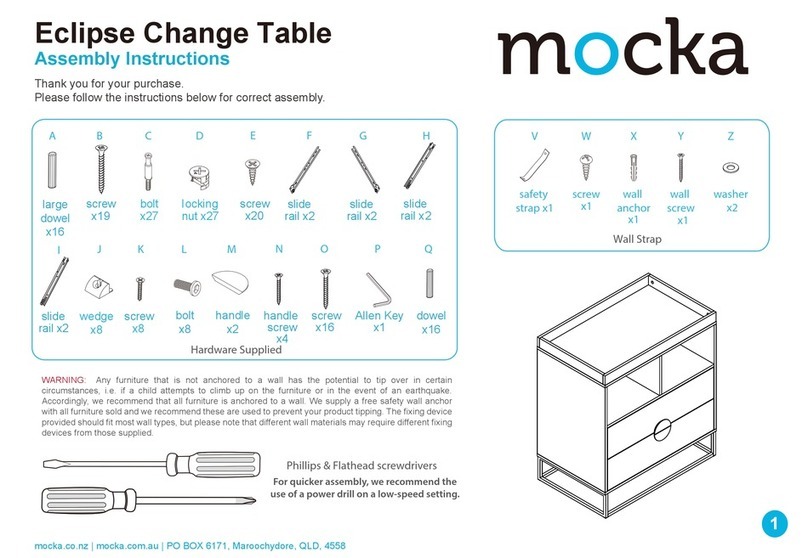
A B C D EFG
J K L M N
I
dowel
x12
screw
x4
Hardware Supplied
bolt
x8 x9
screw
x24
screw
nut x8
locking
wedge
x8 x8
bolt
Allen
Key
x1
screw
x2
screw
hinge
H
x4
buffer
plate
x2
handle
x2
handle
screw
x4
O
plug
shelf
x4
P
1
Eclipse
mocka.co.nz I mocka.com.au I PO BOX 18, Pinkenba QLD 4008
ASSEMBLY I N S TRUCTION S
2
Two Door Cabinet
2
Insert 4x bolts (C) into panel [1] and tighten with a screwdriver. Insert 4x bolts (C) into panels [3] and [4]. Tighten with a screwdriver.
1
3
4
C
C
C
C
C
C
C
C
Eclipse
Two Door Cabinet
mocka.co.nz I mocka.com.au I PO BOX 18, Pinkenba QLD 4008
ASSEMBLY I N S TRUCTION S
Attach panels [3] and [4] to panel [6] with 4x dowels (A) and secure
with 4x locking nuts (D). Tighten with a screwdriver.
3 4
Attach panels [5] together with connect sticks [13]. Slide panels [5]
down along the grooves between the panels [3] and [4].
D
D
D
D
A
A
A
A
4
3
6
4
3
5
5
13
D
mocka.co.nz I mocka.com.au I PO BOX 18, Pinkenba QLD 4008
ASSEMBLY I N S TRUCTION S
Eclipse
Two Door Cabinet
5 6
Attach panel [1] to panels [3] and [4] with 4x dowels (A) and secure
with 4x locking nuts (D). Tighten with a screwdriver.
Carefully turn the unit over. Slide panel [5] down along the grooves
between panels [3] and [4] as shown.
3
A
A
AD
D
D
1
3
4
5
4
Eclipse
Two Door Cabinet
mocka.co.nz I mocka.com.au I PO BOX 18, Pinkenba QLD 4008
ASSEMBLY I N S TRUCTION S
Attach panel [2] to panels [3] and [4] with 4x dowels (A) and secure
with 4x screws (B). Tighten with a screwdriver.
Attach panel [7] to panels [8] and [9] secure with 8x bolts (L).
Tighten with an Allen Key (I).
7 8
A
A
A
B
B
B
B
7
7
8
8
9
9
L
L
L
L
L
L
L
L
L
I
B
2
3
4
Eclipse
Two Door Cabinet
mocka.co.nz I mocka.com.au I PO BOX 18, Pinkenba QLD 4008
ASSEMBLY I N S TRUCTION S
Attach panels [8] to panel [2] and secure with 6x screws (E).
Tighten with a screwdriver.Attach panel [10] to panel [1] secure
with 2x screws (H) and 3x screws (E). Tighten with a screwdriver.
Attach 2x hinges (G) to panel [11] using 4x screws (F), and attach 1x
handle (M) to panel [11] and secure with 2x screw (N).
Tighten with a screwdriver.
109 Door x2
M
NN
F
FF
FF
F
G
G
G
Tighten the
screws 90%..
11
E
E
E
E
E
E
E
8
8
2
E
E
E
H
H
10
1
E
H
11
Eclipse
Two Door Cabinet
mocka.co.nz I mocka.com.au I PO BOX 18, Pinkenba QLD 4008
ASSEMBLY I N S TRUCTION S
Attach hinges on panels [11] to panels [3] and [4] and secure with 16x
screws (F). Tighten with a screwdriver. Attach 2x buer plates (P) to
panel [6] as shown. Ensure the doors open and close easily.
Insert 4x shelf plugs (O) into the unit at the desired height for
the shelves and rest the shelf panel [12] onto them. Ensure the
shelves are balanced and stable.
12
33
4
6
Door x2
O
O
F
F
F
NOTE: If the doors are
uneven or there is a gap
in the middle, loosen or
tighten the screw on the
door hinge until they are
sitting flush.
11
11
P
12
4
13
Eclipse
Two Door Cabinet
mocka.co.nz I mocka.com.au I PO BOX 18, Pinkenba QLD 4008
ASSEMBLY I N S TRUCTION S
Attach 8x wedges (J) into the corners of the back of the unit and secure
with 8x screws (K). Tighten with a screwdriver. Attach 1x safety strap (V)
to the top of the back side of the unit as shown using 1x washer (Z) and
1x screw (W). Tighten with a screwdriver.
Once assembled lift furniture into place, do not drag. Use a drill to create
a small hole lining up with the top of the safety strap (V). Fasten to the wall
using 1x washer (Z), 1x wall anchor (X) and 1x wall screw (Y). Ensure unit is
balanced and steady before use.
14
5
5
V
Z
W
X
Y
Z
VJ
K
J
J
J
J
J
J
J
K
K
K
K
K
K
K
Z
W
anchor
wall
screw
strap
washer
J
K
15
Eclipse
Two Door Cabinet
mocka.co.nz I mocka.com.au I PO BOX 18, Pinkenba QLD 4008
ASSEMBLY I N S TRUCTION S
Attach 2x hinges (G) to panel [14] using 4x screws (F), and attach 1x
handle (M) to panel [14] and secure with 2x screw (N).
Tighten with a screwdriver.
16
MM
MM
MM
Eclipse
Two Door Cabinet
mocka.co.nz I mocka.com.au I PO BOX 18, Pinkenba QLD 4008
ASSEMBLY I N S TRUCTION S
2. 3.
HOW TO ADJUST THE HINGES TO
ALIGN THE DOORS IF NEEDED.
STEP 1
Open the door.
3.
STEP 3
Adjuse the flush between door panel and side panel
1. 2.
3.
1. 2.
MOVE DOOR OUTWARD
by turning this screw
counter-clockwise
STEP 4
Adjuse the Gap beteen door panel and side panel
1.
STEP 2
Adjuse the door panelsupward or downward
Loosen this screw a bit. MOVE DOOR
BACK OR FORTH Re-tighten this screw.
Panel
Door
Unscrew 2 screws in round
holes loosen 2 screws in oval
holes a bit.
MOVE DOOR UPWARD
OR DOWNWARD
Tighten 2 screws in oval
holes. Screw in 2 screws in
round holes
KEEP DOOR IN
RIGHT POSITION MOVE DOOR OUTWARD
by turning this
screw clockwise

Other manuals for Eclipse

7

Other Mocka Indoor Furnishing manuals

Mocka Lewis User manual

Mocka

Mocka Lewis User manual

Mocka Essentials 3 Cube User manual

Mocka

Mocka Essentials 3 Cube User manual

Mocka Aspen User manual

Mocka

Mocka Aspen User manual

Mocka Zara User manual

Mocka

Mocka Zara User manual
Mocka Porto User manual

Mocka

Mocka Porto User manual

Mocka Porto User manual

Mocka

Mocka Porto User manual

Mocka Addi Six Drawer - Wide User manual

Mocka

Mocka Addi Six Drawer - Wide User manual

Mocka Mischa Coffee Table User manual

Mocka

Mocka Mischa Coffee Table User manual

Mocka Eros Bedside Table User manual

Mocka

Mocka Eros Bedside Table User manual

Mocka Tahoe Four Drawer User manual

Mocka

Mocka Tahoe Four Drawer User manual

Mocka Savannah User manual

Mocka

Mocka Savannah User manual

Mocka Taylor User manual

Mocka

Mocka Taylor User manual

Mocka Nyla Bedside Table User manual

Mocka

Mocka Nyla Bedside Table User manual

Mocka Hamptons User manual

Mocka

Mocka Hamptons User manual

Mocka Blair User manual

Mocka

Mocka Blair User manual
Mocka Macrame Hanging Shelf User manual

Mocka

Mocka Macrame Hanging Shelf User manual

Mocka Chelsea Four Drawer User manual

Mocka

Mocka Chelsea Four Drawer User manual

Mocka Dahlia User manual

Mocka

Mocka Dahlia User manual

Mocka Hamptons Coffee Table User manual

Mocka

Mocka Hamptons Coffee Table User manual

Mocka Betti Bobbin Tallboy User manual

Mocka

Mocka Betti Bobbin Tallboy User manual

Mocka Vigo Entertainment Unit User manual

Mocka

Mocka Vigo Entertainment Unit User manual

Mocka Jack User manual

Mocka

Mocka Jack User manual

Mocka Theo User manual

Mocka

Mocka Theo User manual

Mocka Neva Change Table User manual

Mocka

Mocka Neva Change Table User manual

Popular Indoor Furnishing manuals by other brands

Whalen SPLS-TU48CD Instruction booklet

Whalen

Whalen SPLS-TU48CD Instruction booklet

Office Star Products SPACE FLEX 88 Series operating instructions

Office Star Products

Office Star Products SPACE FLEX 88 Series operating instructions

Furniture of America CM7132F Assembly instructions

Furniture of America

Furniture of America CM7132F Assembly instructions

Compatico CMP808W-30 operating instructions

Compatico

Compatico CMP808W-30 operating instructions

AKANTE MONOLITH CT700 Assembly instructions

AKANTE

AKANTE MONOLITH CT700 Assembly instructions

Thomasville Breslyn SPLS-BRLD-TV manual

Thomasville

Thomasville Breslyn SPLS-BRLD-TV manual

Ballard Designs MB401 quick start guide

Ballard Designs

Ballard Designs MB401 quick start guide

LDI Spaces SAFCO Rumba 2049 Assembly instructions

LDI Spaces

LDI Spaces SAFCO Rumba 2049 Assembly instructions

BRW LOFT B156-KOM1K/55 Assembly

BRW

BRW LOFT B156-KOM1K/55 Assembly

Lightolier FS03 specification

Lightolier

Lightolier FS03 specification

POCO SANTA FE Assembly instructions

POCO

POCO SANTA FE Assembly instructions

FourStarGroup 11222236F manual

FourStarGroup

FourStarGroup 11222236F manual

Living Spaces 246103 owner's manual

Living Spaces

Living Spaces 246103 owner's manual

American Signature VCF WA-8215-KB Assembly instructions

American Signature

American Signature VCF WA-8215-KB Assembly instructions

Furniture of America FGI-1993C24 Assembly instructions

Furniture of America

Furniture of America FGI-1993C24 Assembly instructions

Hillsdale Furniture AIDEN 1757-330 manual

Hillsdale Furniture

Hillsdale Furniture AIDEN 1757-330 manual

Next Portofino 872614 Assembly instructions

Next

Next Portofino 872614 Assembly instructions

Enwork SKYLINE installation guide

Enwork

Enwork SKYLINE installation guide

manuals.online logo
manuals.online logoBrands
  • About & Mission
  • Contact us
  • Privacy Policy
  • Terms and Conditions

Copyright 2025 Manuals.Online. All Rights Reserved.