manuals.online logo
Brands
  1. Home
  2. •
  3. Brands
  4. •
  5. Mocka
  6. •
  7. Indoor Furnishing
  8. •
  9. Mocka Eclipse Change Table User manual

Mocka Eclipse Change Table User manual

Eclipse Change Table
Assembly Instructions
Thank you for your purchase.
Please follow the instructions below for correct assembly.
mocka.co.nz | mocka.com.au | PO BOX 6171, Maroochydore, QLD, 4558
1
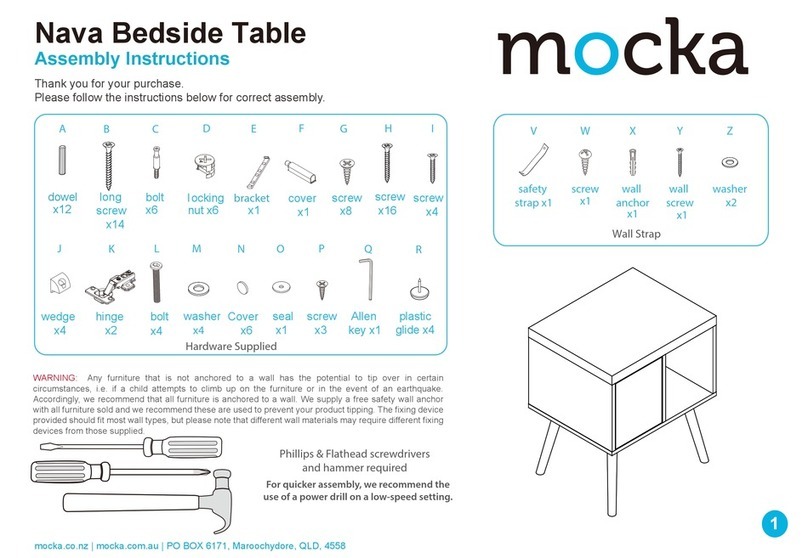
Wall Strap
x2
washer
Z
Y
wall
anchor
x1
X
safety
strap x1
WV
screw
x1
wall
screw
x1
WARNING: Any furniture that is not anchored to a wall has the potential to tip over in certain
circumstances, i.e. if a child attempts to climb up on the furniture or in the event of an earthquake.
Accordingly, we recommend that all furniture is anchored to a wall. We supply a free safety wall anchor
with all furniture sold and we recommend these are used to prevent your product tipping. The fixing device
provided should fit most wall types, but please note that different wall materials may require different fixing
devices from those supplied.
For quicker assembly, we recommend the
use of a power drill on a low-speed setting.
bolt
x27
x8
A B C D E F G H
JKL M
I
Hardware Supplied
large
dowel
x16
Q
dowel
x16
screw
x20
slide
rail x2
slide
rail x2
slide
rail x2
slide
rail x2
locking
nut x27
screw
x19
wedge
x8
screw
Phillips & Flathead screwdrivers
bolt
x8
handle
x2
N
handle
screw
x4
screw
x16
Allen Key
x1
O P
Eclipse Change Table
Assembly Instructions
mocka.co.nz | mocka.com.au | PO BOX 6171, Maroochydore, QLD, 4558
2
12
Insert 9x bolts (C) into panel [1] and tighten with a screwdriver. Insert 4x bolts (C) into panels [3] and [4].Tighten with a screwdriver.
Attach 2x slide rails (F) and 2x slide rails (G) to panels [3] and
[4] as shown and secure with 12x screws (E). Tighten with
a screwdriver.
.
G
CR
E
F
CL
E
C
C
C
C
C
C
C
E
E
E
E
E
EE
E
E
E
E
E
F
F
G
G
C
C
C
C
C
C
3
1
3
4
3
3
Eclipse Change Table
Assembly Instructions
mocka.co.nz | mocka.com.au | PO BOX 6171, Maroochydore, QLD, 4558
3
3 4
Attach panel [5] to panel [6] with 2x large dowels (A) and
secure with 3x screws (B). Tighten with a screwdriver.
Attach panels [3] and [4] to panel [6] with 4x large dowels (A) and
secure with 4x locking nuts (D). Tighten with a screwdriver.
B
B
B
A
A
A
AD
D
D
D
3
5
3
6
3
6
3
3
3
4
A
D
Eclipse Change Table
Assembly Instructions
mocka.co.nz | mocka.com.au | PO BOX 6171, Maroochydore, QLD, 4558
4
65
Slide panel [7] down along the grooves between the panels [3]
and [4] to form the back of the unit as shown.
Insert 4x bolts (C) into panels [8] and tighten with a screwdriver. Attach
panels [8] to panels [9] with 8x dowels (Q) and secure with 4x locking
nuts (D). Tighten with a screwdriver.
C
x2
C
D
D
D
Q
Q
Q
Q
D
3
73
8
3
8
3
8
3
9
3
9
3
3
3
4
Eclipse Change Table
Assembly Instructions
mocka.co.nz | mocka.com.au | PO BOX 6171, Maroochydore, QLD, 4558
5
7 8
Attach panel [1] to panels [8] and [9] with 8x dowels (Q) and
secure with 10x screws (B). Tighten with a screwdriver.
Attach panel [1] to panels [3], [4] and [5] with 6x large dowels (A) and
secure with 9x locking nuts (D). Tighten with a screwdriver.
Q
QQ
Q
Q
B
B
BB
B
B
D
D
D
D
D
D
D
B
B
B
B
3
9
3
9
3
8
3
8
3
1
3
1
3
5
3
3
3
4
A
A
A
A
Eclipse Change Table
mocka.co.nz | mocka.com.au | PO BOX 6171, Maroochydore, QLD, 4558
6
910
Assembly Instructions
Slide panel [10] down along the grooves between the panels [3]
and [4] to form the back of the unit as shown.
Attach panel [2] to panels [3] and [4] with 4x large dowels (A) and
secure with 6x screws (B). Tighten with a screwdriver.
B
B
B
A
B
B
B
A
A
3
10
3
33
3
3
4
3
4
3
2
Attach panels [11] to panels [12] and panels [13] and secure
with 8x bolt (L). Tighten with an Allen Key (P).
Attach panels [12] to panel [2] as shown using 6x screws (O).
Tighten with a screwdriver.
Eclipse Change Table
Assembly Instructions
mocka.co.nz | mocka.com.au | PO BOX 6171, Maroochydore, QLD, 4558
7
1211
LP
LL
L
L
L
LL
L
O
O
O
O
O
O
O
11
11
12
12
13
13 3
2
3
12
3
12
Attach panels [16], [17] and panel [18] to panels [14] and [15]
and secure with 10x locking nuts (D). Tighten with a screwdriver.
Eclipse Change Table
Assembly Instructions
mocka.co.nz | mocka.com.au | PO BOX 6171, Maroochydore, QLD, 4558
8
14 Drawers x213
Insert 10x bolts (C) into panels [14] and [15]. Tighten with
a screwdriver.
CC
C
C
C
CC
C
C
CDD
D
D
D
3
15
3
14
3
16 3
18
3
17
3
14
3
15
Attach panels [16], [17], [18], [19] and [20] together as shown using
10x screws (O). Tighten with a screwdriver.
Eclipse Change Table
Assembly Instructions
mocka.co.nz | mocka.com.au | PO BOX 6171, Maroochydore, QLD, 4558
9
16 Drawers x215 Drawers x2
Slide panels [19] along the grooves between the side
panels [16] and [17] as shown.
OO
O
OO
3
16 3
16
3
17 3
17
3
19
3
19
3
20
3
14
3
15
3
14
3
15
Attach 2x handles (M) to panels [14] and [15] and secure with 4x
handle screws (N). Tighten with a screwdriver.
Eclipse Change Table
Assembly Instructions
mocka.co.nz | mocka.com.au | PO BOX 6171, Maroochydore, QLD, 4558
10
1817Drawers x2
Attach slide rail (I) and slide rail (H) to the underside of the side
panels [16] and [17] as shown. Secure with 8x screws (E) and
tighten with a screwdriver.
H
E
E
E
E
I
M
M
N
N
N
N
3
16
3
17
3
14
3
15
3
14
3
15
Tighten the
screws 90%..
Tighten the
screws 90%..
Attach 8x wedges (J) into the corners of the back of the
unit and secure with 8x screws (K). Tighten with a screwdriver.
Attach 1x safety straps (V) to the top of the back side of the unit as
shown using 1x washers (Z) and 1x screws (W). Tighten with a
screwdriver.
J
J
K
K
Eclipse Change Table
Assembly Instructions
mocka.co.nz | mocka.com.au | PO BOX 6171, Maroochydore, QLD, 4558
11
2019
Insert the assembled drawers into the corresponding compartments
as shown. Ensure the drawers slide easily along the rails.
V
Z
W
3
15
3
14
3
7
3
10
V
Z
W
You’re done, enjoy!
Eclipse Change Table
Assembly Instructions
mocka.co.nz | mocka.com.au | PO BOX 6171, Maroochydore, QLD, 4558
12
2221
Once assembled lift furniture into place, do not drag. Use a drill to
create a small hole lining up with the top of the safety strap (V).
Fasten to the wall using 1x washers (Z), 1x wall anchor (X) and
1x wall screw (Y). Ensure unit is balanced and steady before use.
X
Y
Z
wall
anchor
screw
strap
washer
Eclipse Change Table
Assembly Instructions
mocka.co.nz | mocka.com.au | PO BOX 6171, Maroochydore, QLD, 4558
13
23
After installation, if the two handles are not aligned, loosen the screws
in the back, adjust the two handles to align them, and then tighten the
screws back up.
M
M
M
M
M
M

Other Mocka Indoor Furnishing manuals

Mocka Edmond User manual

Mocka

Mocka Edmond User manual
Mocka Watson Coffee Table User manual

Mocka

Mocka Watson Coffee Table User manual

Mocka Parker Desk User manual

Mocka

Mocka Parker Desk User manual

Mocka Maisie Scalloped Six Drawer User manual

Mocka

Mocka Maisie Scalloped Six Drawer User manual

Mocka Marlow Six Drawer-Wide User manual

Mocka

Mocka Marlow Six Drawer-Wide User manual

Mocka Hamptons Three Drawer User manual

Mocka

Mocka Hamptons Three Drawer User manual

Mocka Taylor User manual

Mocka

Mocka Taylor User manual

Mocka Blake Series User manual

Mocka

Mocka Blake Series User manual

Mocka Eros Entertainment Unit User manual

Mocka

Mocka Eros Entertainment Unit User manual

Mocka Urban Tallboy User manual

Mocka

Mocka Urban Tallboy User manual

Mocka Zack User manual

Mocka

Mocka Zack User manual

Mocka Kirra Coffee Table User manual

Mocka

Mocka Kirra Coffee Table User manual

Mocka Addi Six Drawer - Wide User manual

Mocka

Mocka Addi Six Drawer - Wide User manual

Mocka Zander Coffee Table User manual

Mocka

Mocka Zander Coffee Table User manual

Mocka Ladder Shelf User manual

Mocka

Mocka Ladder Shelf User manual

Mocka Sadie User manual

Mocka

Mocka Sadie User manual

Mocka Asta Recline User manual

Mocka

Mocka Asta Recline User manual

Mocka Georgia Console Table User manual

Mocka

Mocka Georgia Console Table User manual

Mocka Essentials Entertainment Unit User manual

Mocka

Mocka Essentials Entertainment Unit User manual

Mocka Easton User manual

Mocka

Mocka Easton User manual

Mocka Hamptons User manual

Mocka

Mocka Hamptons User manual

Mocka Blair User manual

Mocka

Mocka Blair User manual

Mocka Sadie User manual

Mocka

Mocka Sadie User manual

Mocka Kennedy Three Drawer User manual

Mocka

Mocka Kennedy Three Drawer User manual

Popular Indoor Furnishing manuals by other brands

SouthShore 3159A-234 Assembly instructions

SouthShore

SouthShore 3159A-234 Assembly instructions

JAXSUNNY HG61X0813 user manual

JAXSUNNY

JAXSUNNY HG61X0813 user manual

mlmeble ORLANDO 01 Assembly instructions

mlmeble

mlmeble ORLANDO 01 Assembly instructions

HJH office RACER VINTAGE Assembly instructions

HJH office

HJH office RACER VINTAGE Assembly instructions

Dorel Home Products 4024259 Assembly instructions

Dorel Home Products

Dorel Home Products 4024259 Assembly instructions

Frontgate St Martin 68486 quick start guide

Frontgate

Frontgate St Martin 68486 quick start guide

BLACK RED WHITE SPIDO SREG 1d2s Assembly manual

BLACK RED WHITE

BLACK RED WHITE SPIDO SREG 1d2s Assembly manual

Glorious CD BOX 180 Smart Series Assembly instructions

Glorious

Glorious CD BOX 180 Smart Series Assembly instructions

Birlea SANTIAGO 3 Assembly instructions

Birlea

Birlea SANTIAGO 3 Assembly instructions

KMART NURSERY CLOTHES RACK instruction manual

KMART

KMART NURSERY CLOTHES RACK instruction manual

Coaster 193498B1 Assembly instructions

Coaster

Coaster 193498B1 Assembly instructions

Home affaire ROMA Assembly instructions

Home affaire

Home affaire ROMA Assembly instructions

Sylvania QUICKTRONIC T8 user manual

Sylvania

Sylvania QUICKTRONIC T8 user manual

Alice's Home BROOKLYN IBKLSB140 Assembly instructions

Alice's Home

Alice's Home BROOKLYN IBKLSB140 Assembly instructions

VECELO KHD-XF-NT06-BRN Assembly instructions

VECELO

VECELO KHD-XF-NT06-BRN Assembly instructions

POVISON TS1050WS installation instructions

POVISON

POVISON TS1050WS installation instructions

Builders One Framed Cabinet care guide

Builders One

Builders One Framed Cabinet care guide

Monoprice 30904 installation guide

Monoprice

Monoprice 30904 installation guide

manuals.online logo
manuals.online logoBrands
  • About & Mission
  • Contact us
  • Privacy Policy
  • Terms and Conditions

Copyright 2025 Manuals.Online. All Rights Reserved.