manuals.online logo
Brands
  1. Home
  2. •
  3. Brands
  4. •
  5. Mocka
  6. •
  7. Indoor Furnishing
  8. •
  9. Mocka Chelsea Tallboy Drawers User manual

Mocka Chelsea Tallboy Drawers User manual

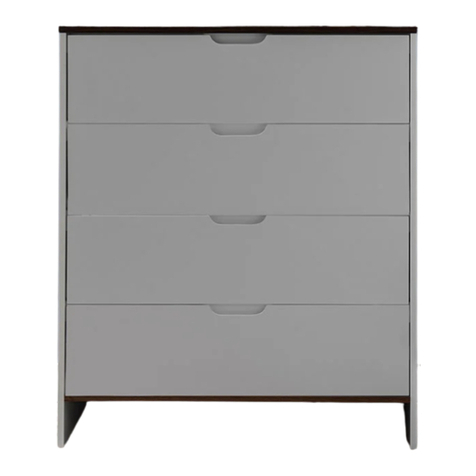
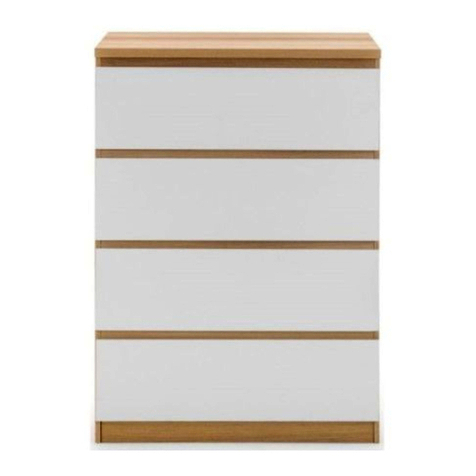
Chelsea Tallboy Drawers
Assembly Instructions
Thank you for your purchase.
Please follow the instructions below for correct assembly.
mocka.co.nz | mocka.com.au | PO BOX 6171, Maroochydore, QLD, 4558
1
Wall Strap
x4
washer
Z
Y
wall
anchor
x2
X
safety
strap x2
WV
screw
x2
wall
screw
x2
WARNING: Any furniture that is not anchored to a wall has the potential to tip over in certain
circumstances, i.e. if a child attempts to climb up on the furniture or in the event of an earthquake.
Accordingly, we recommend that all furniture is anchored to a wall. We supply a free safety wall anchor
with all furniture sold and we recommend these are used to prevent your product tipping. The fixing device
provided should fit most wall types, but please note that different wall materials may require different fixing
devices from those supplied.
For quicker assembly, we recommend the
use of a power drill on a low-speed setting.
bolt
x15
x12
nut
x4
A B C D E F G HJ
KLM N
I
O
Hardware Supplied
P
dowel
x36
screw
x60
slide
rail x6
slide
rail x6
slide
rail x6
slide
rail x6
locking
nut x15
screw
x4
Long
Allen Bolts
x12
screw
x32 bolt
x28
locking
nut x28
small small
x4
Q R
allen
key x1
plastic
glide x4
Phillips & Flathead screwdrivers
and hammer required
wedge
S
dowel
x4
screw big
Chelsea Tallboy Drawers
Assembly Instructions
mocka.co.nz | mocka.com.au | PO BOX 6171, Maroochydore, QLD, 4558
2
12
Insert 4x bolts (C) into panel [3] and 4x bolts (C) into panel [4]. Attach 5x slide rails (G)
to panel [4] and secure with 15x small screws (E). Attach 5x slide rails (F) to panel [3]
and secure with 15x small screws (E). Tighten with a screwdriver.
G
CR
E
E
EE
EE
EE
EE
E
C
C
C
C
G
E
E
E
E
E
E
E
E
E
E
F
CL
E
FC
C
C
E
EG
E
E
F
4
3
FLIP
5
5
F
F
F
F
G
G
G
G
Attach 1x slide rail (G) to the side of panel [5] and secure with 3x
small screws (E). Flip panel [5] over, attach 1x slide rail (F) and
secure with 3x small screws (E). And tighten with a screwdriver.
.
E
E
E
E
E
E
E
E
E
E
E
EF
CL
E
G
CR
E
C
Chelsea Tallboy Drawers
Assembly Instructions
mocka.co.nz | mocka.com.au | PO BOX 6171, Maroochydore, QLD, 4558
3
3 4
C
D
6
6
53
A
A
A
A
D
D
A
A
A
D
D
22
7
7
6
8
9
9
D
Insert 1x bolt (C) into panel [6]. Attach panel [6] to panel [5] and
secure with 1x locking nut (D). Tighten with a screwdriver.
Insert 10x dowels (A) into the panels [3]. Attach panels [6], [7], [8], [22] and
[9] to the panel [3] and secure with 4x Locking nuts (D). Tighten with a
screwdriver.
Chelsea Tallboy Drawers
Assembly Instructions
mocka.co.nz | mocka.com.au | PO BOX 6171, Maroochydore, QLD, 4558
4
65
Slide panel [10] between the grooves of panels [9] to form the back
of the unit, as shown.
Insert 10x dowels (A) into the ends of panels [6], [7], [8], [22] and [9]. Attach
panel [4] to the unit and secure with 4x locking nuts(D). Tighten with a
screwdriver.
10
9
4
A
A
A
A
DA
D
D
D
A
A
D
922
6
7
7
8
9
9
Chelsea Tallboy Drawers
Assembly Instructions
mocka.co.nz | mocka.com.au | PO BOX 6171, Maroochydore, QLD, 4558
5
7 8
Slide panel [10] between the grooves of panels [3] and [4] to form the back
of the unit, as shown.
Attach the legs [11] to panel [2] with 4x big dowels (S) and 4x nuts as shown.
Secure with 4x long Allen bolts (N). Tighten with a Allen key(Q). Attach 4x
plastic glides (R) to the end of legs.
10
4
3M
S
×
M
R
R
R
R
M
N
Q
S
S
S
N
N
2
11
11
11
11
M
M
Chelsea Tallboy Drawers
mocka.co.nz | mocka.com.au | PO BOX 6171, Maroochydore, QLD, 4558
6
910
Assembly Instructions
Attach panel [2] to the panels [3] and [4] with 4x dowels (A) and secure
with 4x screws (B). Tighten with a screwdriver.
Slide panel [10] between the grooves of panels [3] and [4] to form the
back of the unit, as shown.
A
A
B
B
B
B
4
3
2
10 4
3
Chelsea Tallboy Drawers
Assembly Instructions
mocka.co.nz | mocka.com.au | PO BOX 6171, Maroochydore, QLD, 4558
7
1211
Insert 6x bolts (C) into panel [1]. Tighten with a screwdriver. Attach panel [1] to the unit with 8x dowels (A) and secure with 6x
locking nuts (D). Tighten with a screwdriver.
C
C
C
C
C
C
1
1
A
A
A
A
A
D
D
DD
5
4
3
D
A
A
Chelsea Tallboy Drawers
Assembly Instructions
mocka.co.nz | mocka.com.au | PO BOX 6171, Maroochydore, QLD, 4558
8
13 14
Insert 4x small bolts (O) into panel [12]/[13]. Secure panels [14], [15] to
panel [12]/[13] with 4x small locking nuts (P). Tighten with a screwdriver.
Slide panel [16] down along the grooves between panels [14] and [15] to
form the base of the drawer.
Attach panel [17] to panels [14] and [15] using 4x screws (L). Now attach
1x slide rail (I) to panel [15] and 1x slide rail (H) to panel [14] as shown.
Secure with 4x small screws (E) and tighten with a screwdriver.
Drawers x2
O
O
OO
PP
P
P
13
12
13
12
14
15
16
14
15
E
E
E
E
15
14
15
14
L
L
LL
H
I
17
Chelsea Tallboy Drawers
Assembly Instructions
mocka.co.nz | mocka.com.au | PO BOX 6171, Maroochydore, QLD, 4558
9
15 16
Insert 5x small bolts (O) into panel [18]. Secure panels [14], [15] and
[19] to panel [18] with 1x dowel (A) and 5x small locking nuts (P).
Tighten with a screwdriver. Slide panel [20] down along the grooves
between panels [14] and [15] to form the base of the drawer.
Attach panel [21] to panels [14] and [15] using 6x screws (L). Now attach
1x slide rail (I) to panel [15] and 1x slide rail (H) to panel [14] as shown.
Secure with 4x small screws (E) and tighten with a screwdriver.
O
O
O
OO
PP
P
P
P
A
18
14
15
19
18
20
14
15
LL
LL
LL
E
E
E
E
15
14
H
I
21 15
14
Drawers x4
Chelsea Tallboy Drawers
Assembly Instructions
mocka.co.nz | mocka.com.au | PO BOX 6171, Maroochydore, QLD, 4558
10
17 18
Insert the assembled drawers into the unit ensuring they slide smoothly
along the rails.
Attach 12x wedges (J) into the corners of the back of the unit and secure with
12x screws (K). Tighten with a screwdriver. Attach 2x safety strap (V) to the
top of the back side of the unit as shown using 2x washer (Z) and 2x screw
(W). Tighten with a screwdriver.
J
K
J
K
J
J
J
K
J
J
K
J
K
J
K
J
K
10
10
10
13
12
18
18
18
18
J
J
J
V
W
Z
V
W
Z
screw
strap
washer
Chelsea Tallboy Drawers
Assembly Instructions
mocka.co.nz | mocka.com.au | PO BOX 6171, Maroochydore, QLD, 4558
11
19 20
Once assembled lift furniture into place, do not drag. Use a drill to create a
small hole lining up with the top of the safety strap (V). Fasten to wall using
2x washer (Z), 2x wall plug (X) and 2x screw (Y). Ensure unit is balanced
and steady before use.
X
Y
Z
X
Y
Z
wall
plug
screw
strap
washer
You’re done, enjoy!

Other Mocka Indoor Furnishing manuals

Mocka Nava Buffet User manual

Mocka

Mocka Nava Buffet User manual

Mocka Marlow Six Drawer-Wide User manual

Mocka

Mocka Marlow Six Drawer-Wide User manual

Mocka Zander Buffet User manual

Mocka

Mocka Zander Buffet User manual

Mocka Kata User manual

Mocka

Mocka Kata User manual

Mocka Marlow Four Drawer User manual

Mocka

Mocka Marlow Four Drawer User manual

Mocka Zander User manual

Mocka

Mocka Zander User manual

Mocka Eliza Buffet User manual

Mocka

Mocka Eliza Buffet User manual

Mocka Zara User manual

Mocka

Mocka Zara User manual

Mocka Aspen Wardrobe User manual

Mocka

Mocka Aspen Wardrobe User manual

Mocka Leia User manual

Mocka

Mocka Leia User manual

Mocka Hudson Kids Chairs User manual

Mocka

Mocka Hudson Kids Chairs User manual

Mocka Alexandria Change Table User manual

Mocka

Mocka Alexandria Change Table User manual

Mocka Milton Medium Plant Stand User manual

Mocka

Mocka Milton Medium Plant Stand User manual

Mocka Canyon User manual

Mocka

Mocka Canyon User manual

Mocka Zander Entertainment unit User manual

Mocka

Mocka Zander Entertainment unit User manual

Mocka Eden Corner Shelf User manual

Mocka

Mocka Eden Corner Shelf User manual

Mocka Kids Rocking Horse User manual

Mocka

Mocka Kids Rocking Horse User manual

Mocka Daisy Entertainment Unit User manual

Mocka

Mocka Daisy Entertainment Unit User manual

Mocka Locka User manual

Mocka

Mocka Locka User manual

Mocka Kids House Hanger User manual

Mocka

Mocka Kids House Hanger User manual

Mocka Olwyn User manual

Mocka

Mocka Olwyn User manual

Mocka Jesse Three Drawer User manual

Mocka

Mocka Jesse Three Drawer User manual

Mocka Sadie User manual

Mocka

Mocka Sadie User manual

Mocka Aspen User manual

Mocka

Mocka Aspen User manual

Popular Indoor Furnishing manuals by other brands

Next MADSEN 459164 Assembly instructions

Next

Next MADSEN 459164 Assembly instructions

Nex BRONX 458933 Assembly instructions

Nex

Nex BRONX 458933 Assembly instructions

KoolMore KM-OKS-UCRCAB installation manual

KoolMore

KoolMore KM-OKS-UCRCAB installation manual

Westwood Design WOODLAND ADVENTURES DP-CR-3101NR-ELM Assembly instruction

Westwood Design

Westwood Design WOODLAND ADVENTURES DP-CR-3101NR-ELM Assembly instruction

Safavieh Furniture Josie ACC5706 quick start guide

Safavieh Furniture

Safavieh Furniture Josie ACC5706 quick start guide

agape Seppia Assembly instructions

agape

agape Seppia Assembly instructions

burmeier Regia Care Bed instruction manual

burmeier

burmeier Regia Care Bed instruction manual

neighbor Haven Assembly guide

neighbor

neighbor Haven Assembly guide

Twin-Star International Bell'O EC6449LC22 Assembly instructions

Twin-Star International

Twin-Star International Bell'O EC6449LC22 Assembly instructions

Furinno FNAJ-11109 Assembly instruction

Furinno

Furinno FNAJ-11109 Assembly instruction

Style selections KITCHEN ISLAND LWS42KC quick start guide

Style selections

Style selections KITCHEN ISLAND LWS42KC quick start guide

Kettler elba Grande 0393161-0200 Assembly instructions

Kettler

Kettler elba Grande 0393161-0200 Assembly instructions

Homelegance 1570GYF/GY-3 Assembly instruction

Homelegance

Homelegance 1570GYF/GY-3 Assembly instruction

Argos Athina 1000 Wall Unit Assembly instructions

Argos

Argos Athina 1000 Wall Unit Assembly instructions

American Signature IA34-412D Assembly instructions

American Signature

American Signature IA34-412D Assembly instructions

Renderi WSD-CC-2042 Assembly instructions

Renderi

Renderi WSD-CC-2042 Assembly instructions

Safavieh Furniture Kerensa BED8000A-F manual

Safavieh Furniture

Safavieh Furniture Kerensa BED8000A-F manual

ROOMS TO GO MIYO 9252-C1BK Assembly instructions

ROOMS TO GO

ROOMS TO GO MIYO 9252-C1BK Assembly instructions

manuals.online logo
manuals.online logoBrands
  • About & Mission
  • Contact us
  • Privacy Policy
  • Terms and Conditions

Copyright 2025 Manuals.Online. All Rights Reserved.