manuals.online logo
Brands
  1. Home
  2. •
  3. Brands
  4. •
  5. Mocka
  6. •
  7. Indoor Furnishing
  8. •
  9. Mocka Hobart Six Drawer User manual

Mocka Hobart Six Drawer User manual

Phillips & Flathead screwdrivers and hammer required
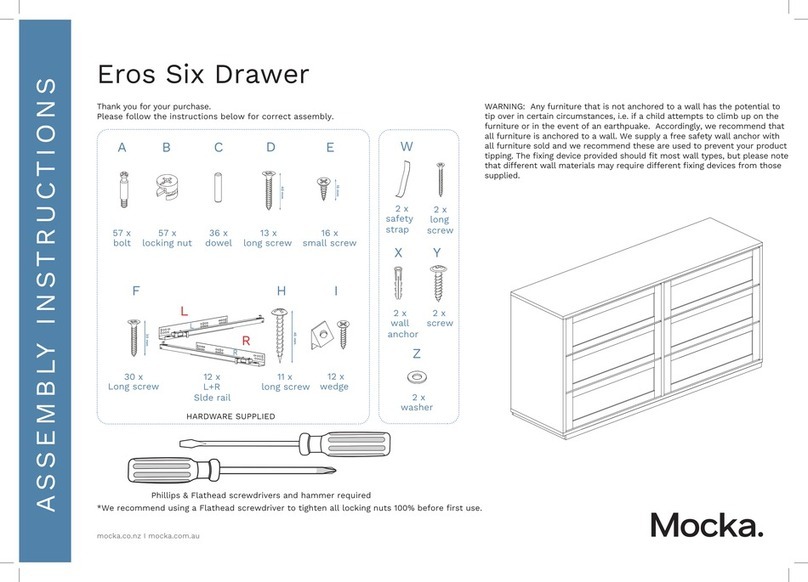
Assembly Instructions
Thank you for your purchase.
Please follow the instructions below for correct assembly.
1
X
Z
Y
W
safety
strap
x1
screw
x1
long
screw
x1
wall
anchor
x1
washer
x1
mocka.co.nz | mocka.com.au
B
ACDEF
GH
12 mm
Hardware Supplied
*We recommend using a Flathead screwdriver to tighten all locking nuts 100% before first use.
WARNING: Any furniture that is not anchored to a wall has the potential
to tip over in certain circumstances, i.e. if a child attempts to climb up on
the furniture or in the event of an earthquake. Accordingly, we
recommend that all furniture is anchored to a wall. We supply a free
safety wall anchor with all furniture sold and we recommend these are
used to prevent your product tipping. The fixing device provided should
fit most wall types, but please note that different wall materials
may require different fixing devices from those supplied.
bolt
x48
locking
nut x 48
dowel
x20
small
screw x48
I
L + R
slide rail
x12
L + R
slide rail
x12
screw x 30
Hobart Six Drawer
40 mm
long
screw x 10
handle
x 6
J
K
shelf
plug x1
long
screw x1
30 mm
medium
2
12
Hobart Six Drawer
Assembly Instructions
Thank you for your purchase.
Please follow the instructions below for correct assembly.
mocka.co.nz | mocka.com.au
A
1
Insert 10 x bolts (A) into panel [1] . Tighten with a screwdriver.
A
A
A
A
A
E
E
E
E
A
A
E
E
3
G
G
G
G
G
Attach 3 x left slide rail (G) topanel [3] and secure with 6 x small screw (E).
Tighten with a screwdriver.
Attach 3 x right slide rail (G) to panel [4] and secure with 6 x small screw (E).
Insert 4 x bolt (A) into panel [3] and [4].
A
A
A
A
YW
G
G
G
EE
EE
EE
A
A
4
3
34
Hobart Six Drawer
Assembly Instructions
Thank you for your purchase.
Please follow the instructions below for correct assembly.
mocka.co.nz | mocka.com.au
G
G
Tighten with a screwdriver.
Insert 4 x bolts (A) into panels [5] .
G
G
G
G
G
G
EE
EE
E
E
EE
EE
E
E
A
A
A
A
5
5
Attach 3 x left slide rail (G) and 3 x right slide rail (G) to panel [5] and secure
with 12 x small screws
(E).
5
4
6
6
B
B
C
C
C
C
B
B
Insert 4 x dowel (C) into panel [6]. Attach panels [6] to panels [4] and [5]
and secure with 4 x locking nuts (B). Tighten with a screwdriver.
B
4
56
Hobart Six Drawer
Assembly Instructions
Thank you for your purchase.
Please follow the instructions below for correct assembly.
mocka.co.nz | mocka.com.au
5
4
6
6
B
B
C
C
C
C
B
B
Insert 4 x dowel (C) into panel [6]. Attach panel [6] to panels [3] and [5]
and secure with 4 x locking nuts (B). Tighten with a screwdriver.
B
3
7
7
2
3
4
5
D
D
DD
D
D
DD
D
D
C
C
C
C
C
C
Insert 6 x dowels (C) into panels [3], [4] and [5] .Attach panels [3],
[4], [5] and [7] to panel [2] and secure with 10 x long screws (D).
5
78
Hobart Six Drawer
Assembly Instructions
Thank you for your purchase.
Please follow the instructions below for correct assembly.
mocka.co.nz | mocka.com.au
2
3
4
K
KJ
8
8
8
8
4 legs [8] to the base of panel [2].
Tighten with a screwdriver.
Attach 1 x long screw (K) to centre support (J) as shown. Firmly screw
3
4
5
7
7
9
10
10
Slide panels [9] and [10] between the grooves on panels [3] and [4] and [7]
to form theback of the unit as shown.Tighten with a screwdriver.
6
910
Hobart Six Drawer
Assembly Instructions
Thank you for your purchase.
Please follow the instructions below for correct assembly.
mocka.co.nz | mocka.com.au
C
3
4
5
1
C
BB
BB
CC
B
BB
BB
CC
Insert 6 x dowels (C) into panel [1]. Attach panel [1] to panels [3],[4] and [7]
and secure with 10 x locking nuts (B). Tighten with a screwdriver.
7
7
Drawers (x6)
BB
B
B
A
AA
A
11
12
13
Tighten with a screwdriver.
Insert 24 xbolts (A) into panel [11] .Attach panels [12] and [13] to panel
[11] secure with 24 xlocking nuts (B).
7
11 12
Hobart Six Drawer
Assembly Instructions
Thank you for your purchase.
Please follow the instructions below for correct assembly.
mocka.co.nz | mocka.com.au
Drawers (x6)
B
A12
13
Drawers (x6)
14
15
Insert 6 x bolts (A) into panel [11] .Slide panels [15] between the
Attach panel [14] to panel [11] and secure with 6 x locking nuts (B).
grooves on panels [12] and [13] to form the base of the drawer as shown.
11
F
F
F
F
F
12
15 14
16
13
Tighten with a screwdriver.
Attach panel [16] to panels and [12], [13] and [14] secure with 30 x medium
screws (F).
8
13 14
Hobart Six Drawer
Assembly Instructions
Thank you for your purchase.
Please follow the instructions below for correct assembly.
mocka.co.nz | mocka.com.au
Drawers (x6)
E
E
E
H
H
11
I
Attach 12 x slide rails (H) to panels [12] and [13] and secure with 24 x small
screw (E). Insert 6 x handles (I) into panel [11] .
I
13
12
Once assembled lift furniture into place, do not drag. Use a drill to create
a small hole lining up with the top of the safety strap (W). Fasten to wall
using wall anchor (X), washer (Z) and screw. Ensure the unit is balaced
and steady before use. You’re done, enjoy!
X
Z
x1
wall
screw
wall
anchor
wall
screw
Washer
Strap

Other Mocka Indoor Furnishing manuals

Mocka Kai User manual

Mocka

Mocka Kai User manual
Mocka Hamptons User manual

Mocka

Mocka Hamptons User manual

Mocka Sadie Buffet User manual

Mocka

Mocka Sadie Buffet User manual

Mocka Hugo Bedside Table User manual

Mocka

Mocka Hugo Bedside Table User manual

Mocka Zara User manual

Mocka

Mocka Zara User manual

Mocka Blair User manual

Mocka

Mocka Blair User manual

Mocka Alta User manual

Mocka

Mocka Alta User manual

Mocka Luka Velvet Queen Bed User manual

Mocka

Mocka Luka Velvet Queen Bed User manual

Mocka Kent User manual

Mocka

Mocka Kent User manual

Mocka Denham Bedside Table User manual

Mocka

Mocka Denham Bedside Table User manual

Mocka Asta rocker User manual

Mocka

Mocka Asta rocker User manual

Mocka Inca Tallboy User manual

Mocka

Mocka Inca Tallboy User manual

Mocka Jesse User manual

Mocka

Mocka Jesse User manual

Mocka Cove User manual

Mocka

Mocka Cove User manual

Mocka Genevieve User manual

Mocka

Mocka Genevieve User manual

Mocka Adele Chair User manual

Mocka

Mocka Adele Chair User manual

Mocka Rupert User manual

Mocka

Mocka Rupert User manual

Mocka Oslo Bedside Table User manual

Mocka

Mocka Oslo Bedside Table User manual

Mocka Hobart Storage Cot User manual

Mocka

Mocka Hobart Storage Cot User manual

Mocka Locka User manual

Mocka

Mocka Locka User manual
Mocka Jesse Buffet User manual

Mocka

Mocka Jesse Buffet User manual

Mocka Addi Six Drawer - Wide User manual

Mocka

Mocka Addi Six Drawer - Wide User manual

Mocka Milton Tall Plant Stand User manual

Mocka

Mocka Milton Tall Plant Stand User manual

Mocka Kennedy Three Drawer User manual

Mocka

Mocka Kennedy Three Drawer User manual

Popular Indoor Furnishing manuals by other brands

expand furniture REVEAL KING BED Assembly instruction

expand furniture

expand furniture REVEAL KING BED Assembly instruction

Furniture of America CM2902 Assembly instructions

Furniture of America

Furniture of America CM2902 Assembly instructions

Next 393722 Assembly instructions

Next

Next 393722 Assembly instructions

Forest garden TREE SEAT quick guide

Forest garden

Forest garden TREE SEAT quick guide

LDI Safco Rumba 2050 Assembly instructions

LDI

LDI Safco Rumba 2050 Assembly instructions

liftup RAIZER II user manual

liftup

liftup RAIZER II user manual

MWBS studio Assembly instructions

MWBS

MWBS studio Assembly instructions

Gami H66-MOKA 250 Assembly instructions

Gami

Gami H66-MOKA 250 Assembly instructions

modway EEI-6352 Assembly instructions

modway

modway EEI-6352 Assembly instructions

Woltra SILKEBORG SI-85 Assembly instructions

Woltra

Woltra SILKEBORG SI-85 Assembly instructions

Trasman 6017A Bo8 Assembly manual

Trasman

Trasman 6017A Bo8 Assembly manual

Regency MKTBX22 instructions

Regency

Regency MKTBX22 instructions

Lifetime 0130 Assembly instructions

Lifetime

Lifetime 0130 Assembly instructions

burgbad Eqio smart M1229 FITTING INSTRUCTIONS AND OPERATING MANUAL

burgbad

burgbad Eqio smart M1229 FITTING INSTRUCTIONS AND OPERATING MANUAL

Trasman 1745 CHIC Assembly manual

Trasman

Trasman 1745 CHIC Assembly manual

HEPRO G-Standard operating instructions

HEPRO

HEPRO G-Standard operating instructions

Cello Capri instruction manual

Cello

Cello Capri instruction manual

Sunnydaze Decor CRO-126 manual

Sunnydaze Decor

Sunnydaze Decor CRO-126 manual

manuals.online logo
manuals.online logoBrands
  • About & Mission
  • Contact us
  • Privacy Policy
  • Terms and Conditions

Copyright 2025 Manuals.Online. All Rights Reserved.