Modena FF 4210ES Owner's manual

User
Manual Book
Deep Fryer
FF 4210ES, FF 4520ED, FF 4520ES

2
Thank you for your trust in choosing MODENA products for your household needs. With your
satisfaction as our priority, we constantly aim to deliver stylishly designed products equipped
with state-of-the-art technology to assist you in your daily activities.
This is your guidebook containing everything you need to know about our product. Please reach
out to us if you need further assistance or other information via our Customer Care or our
official website www.modena.com.

3
CONTENTS
Page
INTRODUCTION
2
-
Part 1
: Structure Schematic Diagram
4
-
Part 2
: Precaution
5
-
Part 3
: Installation
6
-
Part 4
: How to Use
6
-
Part 5
: Cleaning & Maintenance
7
-
Part 6
: Troubleshooting
8
-
Part 7
: Specification
8

4
A. Structure Schematic Diagram
FF 4210ES / FF 4520ES
FF 4520ED
The pictures are a general overview and is not necessarily the same as the product you receive.
Feautures and completeness depends on the type of products.
B. Structural & Functional Features
1. Stainless steel body.
2. High-potency heating elements.
3. Thermostatic function, sturdy and durable.
Part 1: Structure Schematic Diagram

5
All the information and guidelines of this manual book comply with certain applicable regulations, which come from
our long-term accumulated knowledge and experience as well as current project development situations.
Limited to some special structures, additional specified items or new technology changes, the actual usage
situation might be some different from what stated in this manual book. Should you have any question, please do
not hesitate to contact MODENA.
For safety purpose and operation efficiency, it is highly recommended to read the manual book carefully before any
operation of the appliance, particularly before starting up the appliance.
MODENA declines any responsibility in the event users do not follow the instructions or guidelines stated
here.
We have the full authority to reserve the further technical changes of the device, in the scope of further
performance improvement characteristic development.
Warning
Any self-modification, wrong installation, adjustment or maintenance can lead to properly loss or casualty.
Please contact MODENA Call Center for any adjustment or maintenance.
For your safety sake, please keep the machine away from any liquid, gas or other object, which is flammable or
explosive.
This appliance should not be operated by those who have physiological, perceptual or mental disabilities or
those who have insufficient experience or knowledge (including children). Only in conditions of being given
sufficient supervise & guarantee of personal safety, as well as proper instructions & guidance, those who were
mentioned above can make some particular operation of this device.
Keep children away from this appliance.
Preserve this manual book safely. When passing on/selling the device to a third party, the manual book must
be handed over along with the appliance. All users operate the device complying with the manual book and
related safety guidelines.
Keep the appliance away from flammable and explosive gas, liquid or object.
If the appliance is placed near walls, partitions or kitchen furniture and the like, it is suggested to make these
facilities with non-combustible material, otherwise cover them with non-combustible heat-resistant material and
pay attention to fire prevention regulations
This appliance shall be grounded to ensure safety.
Special Note
1.
This product needs to be operated by trained cook.
2.
Do not disassemble or self-modify the appliance. Disassambling and self-modification may cause casualty.
3.
Before cleaning, unplug and cut off the power supply.
4.
Do not spray water directly onto the product during cleaning. Water may conduct electricity, which may cause
electric shock.
5.
Do not pat the appliance or put any heavy objects onto it. Irregular operation may cause damage and danger.
6.
High temperature may cause burns. Do not touch the appliance with hands directly due to high temperature
during or after operation.
7.
Do not use extra power supply that not marked on the product.
8.
Do not use electric knife that not conforming to safety standard.
9.
To prevent from damages, disconnect the power cord immediately when near the thunder zone.
10.
Do not destroy the surfaces of appliance and enamel hob with hard or sharp objects.
11.
After operating, cut off the power supply.
12.
All the maintenance work should be done by authorized technicians. Contact MODENA Call Center for
maintenance.
13.
If the power cord is damaged, please contact MODENA Call Center for replacement. The power cord must be
Part 2: Safety Precaution

6
replaced with the new one with flexible and oil-resistant outer jacket or with the set purchased on MODENA.
A.
Transportation and Storage
During transportation, the appliance should be carefully handled and do not put it upside down to prevent from
damaging to the shell and inside. The appliance should be stored in a ventilated room without corrosive gas. If it
needs to be stored in open air temporarily, make sure to stay dry.
B.
Notice for Installment
1.
The supply voltage should comply with the working voltage of the appliance.
2.
The fixed arrangement of wire should be equipped with all-poles disconnect switch, with the open distance of
each panel is at a minimum of 3mm. Do not put items in front of the switches.
3.
The appliance is equipped with the grounding at the back. This should be connected to the proper grounding
wire by with the copper wire which no less than 1.55m2.
4.
Before installation, check that whether the connection is loose, whether the voltage is normal and whether the
safety grounding is reliable.
5.
Keep the appliance away from flammable and explosive gas, liquid or object.
6.
Installation should be operated by professional.
7.
The appliance should be placed in a flat area and kept a minimum distance of 10cm away from the objects on
both sides and 20cm at the back (e.g. walls, windows, etc).
1.
Before operating, check for the power supply installation and make sure the power supply voltage
corresponds with the working voltage of the appliance.
2.
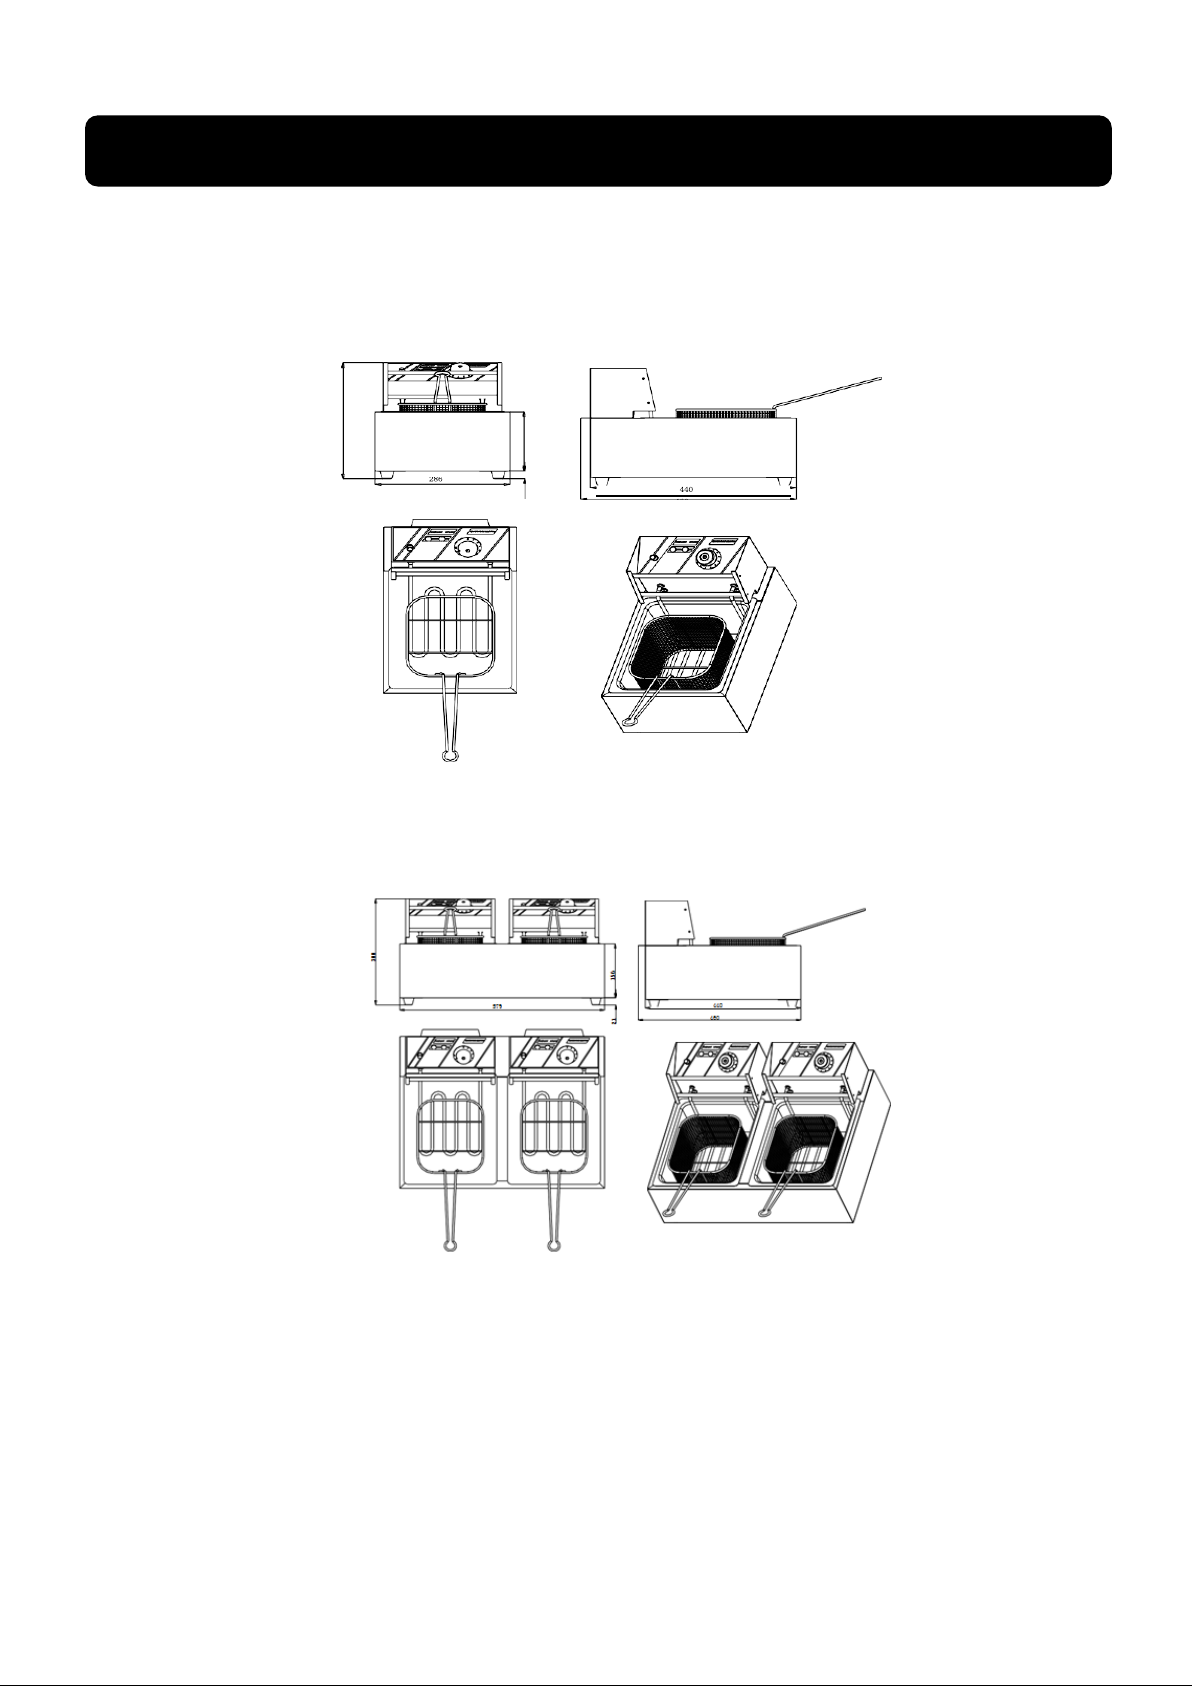
During operation, oil level in tank should be between MAX and MIN.
3.
Warning: It may cause fire hazard if the oil level is lower than the MIN level.
4.
Turn on the appliance, the green indicator illuminates, at this time, the appliance is energized. Rotate the
thermostat clockwise to make desired temperature value align with the red dot, the yellow indicator
illuminates, which indicates that the heating elements start heating up the oil in tank. When the desired
tempreature is reached, the thermostat will cut off the power supply automatically with the yellow indicator off.
The heating elements stop working. Once the temperature lowers down, the thermostat will connect the power
supply automatically. The yellow indicator illuminates and the heating elements restart working, the oil
temperature rises. The procedure circulates to ensure the oil temperature keep constant in the set range.
5.
The cover is designed for tank cleaning and heat preservation. When using the cover, pay attention that there
should not be any water on the cover. If the water drops into the hot oil in tank, it may cause injuries due to
splashing.
6.
This appliance is equipped with baskets for smaller food. There is a hook and handle on the basket. During
operation, immerse the basket body into the oil. When the food is cooked, lift up the basket and hang it to the
slot up front the tank to drain off the excessive oil. For larger food, put it directly into the tank to fry.
7.
After oeprating, turn the thermostat counter clockwise to limit position and cut off the power supply to ensure
safety.
8.
To remove the oil in tank, please have the work done after the oil temperature cools down to room
temperature. Cut off the power supply and take out the oil partition in tank. Then, pull out the control box and
turn backward, at this moment, the heating elements are standing upward, you can remove the box
completely and lay it on a clean area. Remove the tank to clean.
9.
For safety and durability, users should remove the residues in tank and dirt on heating elements regularly to
keep the tank and elements in long-term clean state.
10.
The oil partition in tank is designed for heating element protection. During frying, the partition shall be put into
the tank.
Part 3: Installation
Part 4: How to Use

7
11.
Note: The control box is equipped with TEMP limiter, which operating temperature is 230±7℃while the
manual reset temperature is <170℃. Also, an “overheat protection reset button” is provided at the front. It
activates to protect the appliance once the oil is over-temperature. For reuse, press the reset button to reset
for the appliance to be used normally.
12.
Use fresh vegetable oil instead of the used oil.
Load for frying at one time should not exceed the following data (for meat):
FF 4210ES / FF 4520ED
FF 4520ED
0.8kg/tank
1.6kg/tank
Catatan:
1. Load of non-meat for once shall be less, as a limit, no oil should spill over during frying.
2. Food that is overloded or too wet may have an effect n excessive boiling.
3. Load for frying in the table is based on normal oil capacity
A.
Routine Inspection
It is necessary to check the appliance daily.
Check the machine regularly can avoid serious accident.
Stop using if iser can tell that there are some problems in the circuit or the appliance. Check the appliance before
and after using.
Before using:
Is the appliance tilted?
Is the control panel damaged?
Is the power cord aged, broken or damaged?
During using:
Is there strange color?
Is the temperature out of control or any electric leaking?
B.
Cleaning & Maintenance
1.
Disconnect the power supply before cleaning the appliance in case of any electric shock accidents.
2.
After operating, clean the hobs, body surfaces and power cord with wet cloth containing non-corrosive
detergent. DO NOT spray or soak the water directly to the appliance to avoid electric shock.
3.
Turn off the thermostat and power switch after operating.
4.
If not going to use the appliance at any time, turn off the thermostats and power switch.
5.
If the appliance is not used for a long time, clean it completely and store it in a well-ventilated warehouse with
no corrosive gases.
Part 5: Cleaning & Maintenance

8
Problems
Possible Causes
Recommended Action
Plugged to power socket but the
power indicator does not
illuminate..
1. The fuse of power switch is cut.
2. The plug is not connected.
1. Replace with a proper fuse.
2. Fasten the power cord and
re-plug.
The green and yellow indicators
illuminate simultaneously but the
oil temperature does not rise.
1. Connection of heating element
is loose.
2. The heating element burns out.
1. Fasten the connection and
screws on both ends.
2. Replace the heating
elements.
The yellow indicator is always
illuminate and the oil temperature
keeps rising without control.
1. The thermostat is
malfunctioning.
1. Replace the thermostat.
Oil temperature control is normal
but the indicator does not
illuminate.
1. The indicator burns out.
1. Replace the indicator.
Once the temeprature is too high,
the indicator does not illuminate.
1. The temperature limiter
activates.
2. The thermostat is out of control.
1. Manually reset the “overheat
protection reset button”.
2. Check the thermostatic
circuit or replace the
thermostat.
FF 4210ES
FF 4520ED
FF 4520ES
Electric Fryer
Electric Fryer
Electric Fryer
Electric
Electric
Electric
Stainless steel
Stainless steel
Stainless steel
1 Burner
2 Burners
2 Burners
1 Tank
2 Tanks
1 Tank
Capacity: 5.5 Liters
Capacity: 2 x 5.5 Liters
Capacity: 11 Liters
Power: 2.5 kW/220-240 V
Power: 2 x 2.5 kW/220-240 V
Power: 5 kW/220-240 V
Burner power: 2.5 kW
Burner power: 2 x 2.5 kW
Burner power: 5 kW
Product Dimension
Product Dimension
Product Dimension
Length: 290 mm
Length: 580 mm
Length: 550 mm
Width: 460 mm
Width: 460 mm
Width: 460 mm
Height: 310 mm
Height: 310 mm
Height: 310 mm
Weight: 4.6 Kg
Weight: 9 Kg
Weight: 9 Kg
Specifications of this appliance may change without notice to improve the quality of the product.
Pictures in this manual are schematic and may not match your product exactly. Values stated on the machine
labels or in the documentation accompanying it are obtained in laboratory in accordance with the relevant
standards. Depending on operational and environmental conditions of the appliance, values may vary.
Part 6: Troubleshooting
Part 7: Specification

11/20
This manual suits for next models
2
Table of contents
Other Modena Fryer manuals

Modena
Modena FT 6930G Owner's manual

Modena
Modena FF Series User manual

Modena
Modena FF 1251 GF Owner's manual

Modena
Modena FF 4120GS Owner's manual

Modena
Modena FF 2141EF Owner's manual

Modena
Modena AF 2510 BEBL Owner's manual

Modena
Modena FF 1050 ETSS Owner's manual

Modena
Modena FF 1061ES Owner's manual

Modena
Modena FF 1061GT Owner's manual