©2021 Moen Incorporated
We offer limited warranty and lifetime maintenance
for Moen products, which are all manufactured with
high standards of workmanship.
The period of warranty shall start from the date of
purchase of the product (according to the invoice or
receipt issued by Moen distributors) and shall cover
a period of the following: the warranty period for
ceramic parts is 5 years, non-ceramic parts, such as
water fittings, flush valve, toilet cover, etc. is 3 years.
This warranty is your coverage against material
and workmanship malfunction or defects in Moen
products or components (Pipe kit etc.). During the
warranty period, we offer free maintenance and
changing of malfunctioned products or product
components. Moen’s after sales service liability is
limited to the maintenance of faulty items and does
not cover your other losses caused by product
malfunction, except for otherwise stipulated by law.
Cosmetic damages (scratches, dents, etc.) and
malfunction or defects caused by abuse or improper
maintenance is not covered by this warranty.
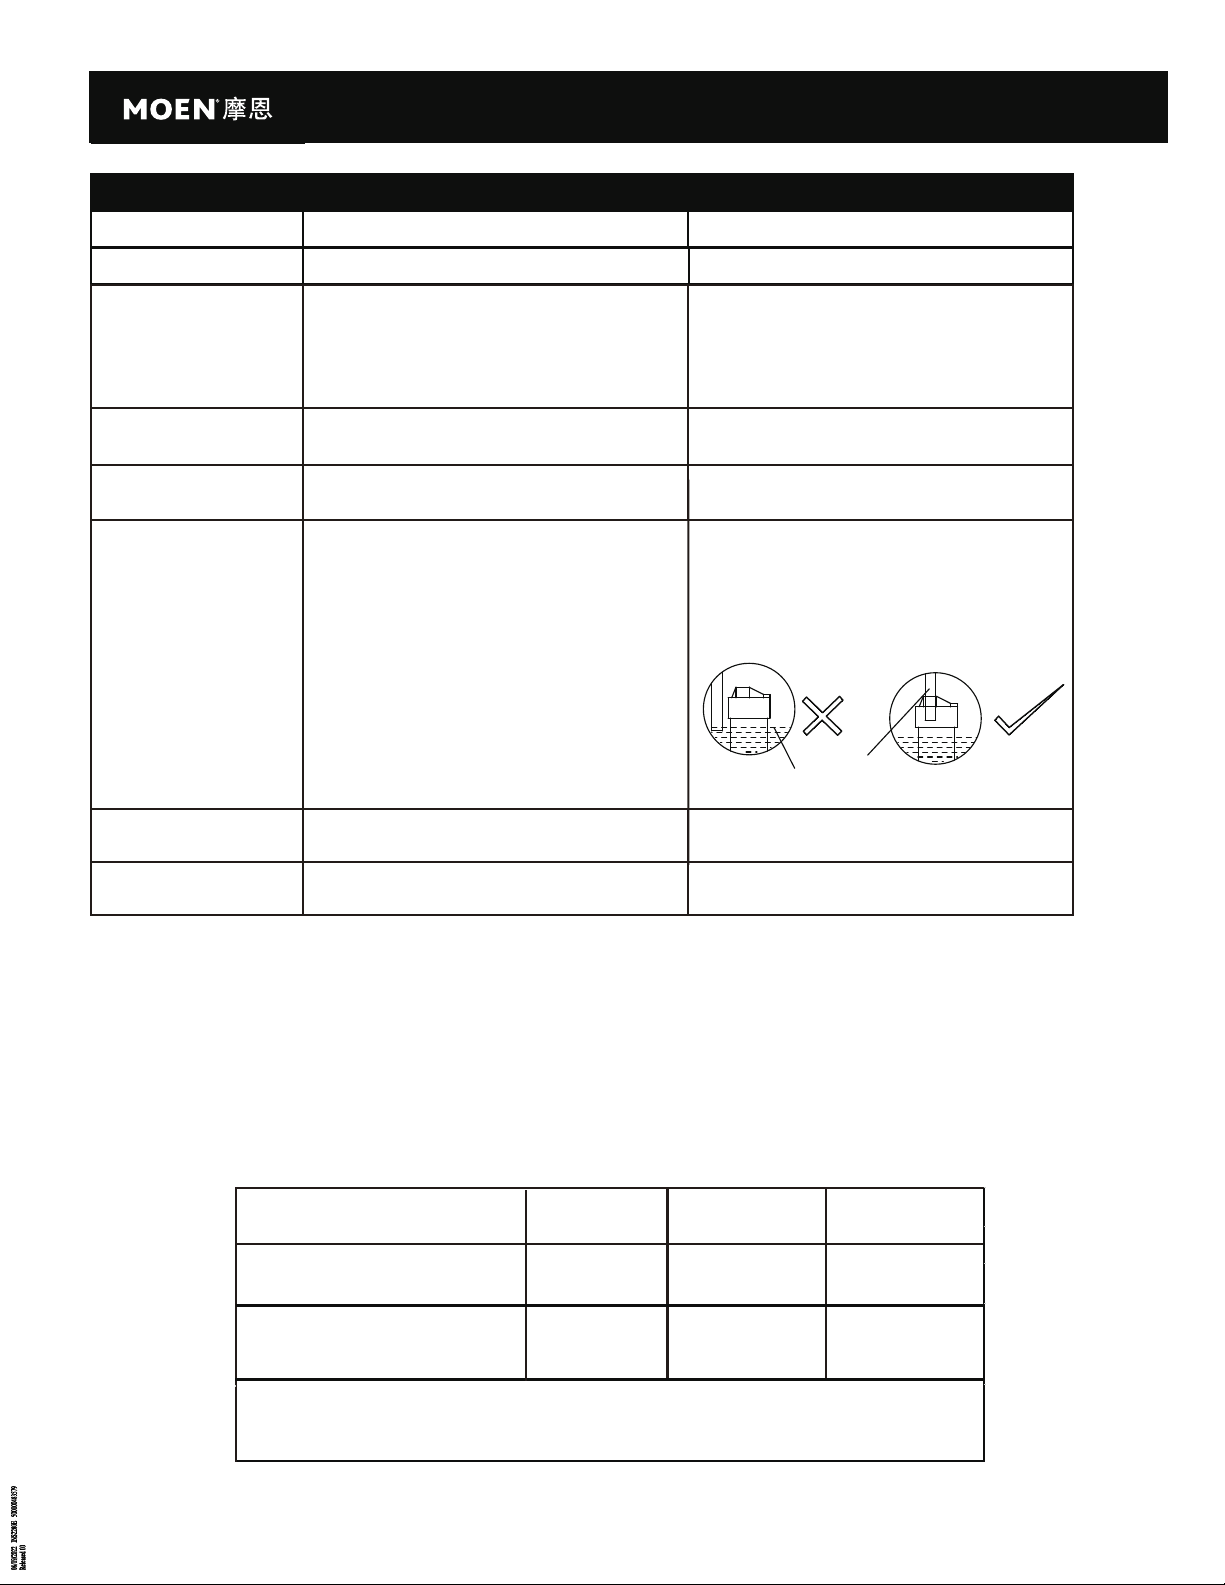
Although the warranty period remains valid, in case
of the following conditions (1) - (5), the maintenance
cost (material cost and labor cost) shall still be
charged as the case may be:
1. Corresponding warranty card and valid invoice
cannot be presented;
2. Faults were caused by the incompliance with
the instructions and precautions provided in the
user’s manual;
3. Damages and faults were caused by self-actuated
dismantling, repair and refit;
4. Faults and damages were caused by external
factors such as force majeure;
5. Damages were caused by transportation,
unloading and extrusion, etc.
This warranty is valid for the original consumers
only (including hotel use), and excludes industrial
and commercial use of the product (except for hotel
use). This card is only responsible for product
maintenance rather than any other liabilities.
In the event that the product requires maintenance
but exceeds the warranty period, or that the product
is not covered by this warranty, labor cost and
material cost shall be charged as the case may be.
Please call 400-630-8866 or contact local dealer for
any question.
摩恩产品是在高质量标准及生产工艺下制造的,摩恩承诺
为消费者购买的洁具产品提供有期限免费保修及终身维修
服务。
材质为陶瓷的部件免费保修期为5年,非陶瓷材质部件,
如水箱内的水件、冲洗阀、坐便器盖板等免费保修期为3
年。均自消费者购买日(以摩恩产品分销商开具的发票或
收据上载明日期为准)起计。
免费保修范围为产品及产品配件(落水以及溢水等)由于
材质及工艺原因而造成的故障或损坏。免费保修期内,我
们将无偿为您提供修理服务及更换发生故障的产品或产品
配件。摩恩的售后服务责任仅限于对故障产品的修理,而
不延及您因产品故障而发生的其他损失,法律另有规定的
除外。
您需了解:产品外观碰伤、刻划痕迹,以及滥用及不正当
保养所导致的故障或损坏,均不属于免费保修范围。即使
在免费保修期内,属下列(1)-(5)情况之一的,需酌
情收取修理费用:
1. 不能出示相符的保修卡和有效购买凭证情况的,
2. 未按使用说明书告知的使用方法和注意事项造成的故
障,
3. 自行拆卸、维修、改装所造成的故障和损坏,
4. 由于不可抗力等外部原因引起的故障和损坏,
5. 由于运输、搬卸、挤压等造成的损坏。
对于保修期外或不在保修范围内的产品,如需维修,摩恩
将酌情收取上门费、人工费及材料费。
本保修条款仅对原始消费者和酒店行业的购买者有效,并
不适用于本产品在工业,商业,贸易和非酒店行业的使
用。
如对本保修条款内容有任何疑问,请拨打400 630 8866
咨询热线,或向当地分销商咨询。
产品售后保修条款 MOEN LIMITED WARRANTY
合格证
产品名称
检验员
生产日期
摩恩(上海)厨卫有限公司
MOEN (SHANG HAI)KITCHEN&BATH CO.,LTD
No. 399 Fute North RD, China (Shanghai) Pilot Free Trade Zone,
Shanghai 200131 P.R. China
中国(上海)自由贸易试验区富特北路399号
邮编:200131
Compliance Certification
Inspector
Product Name
Date of Production
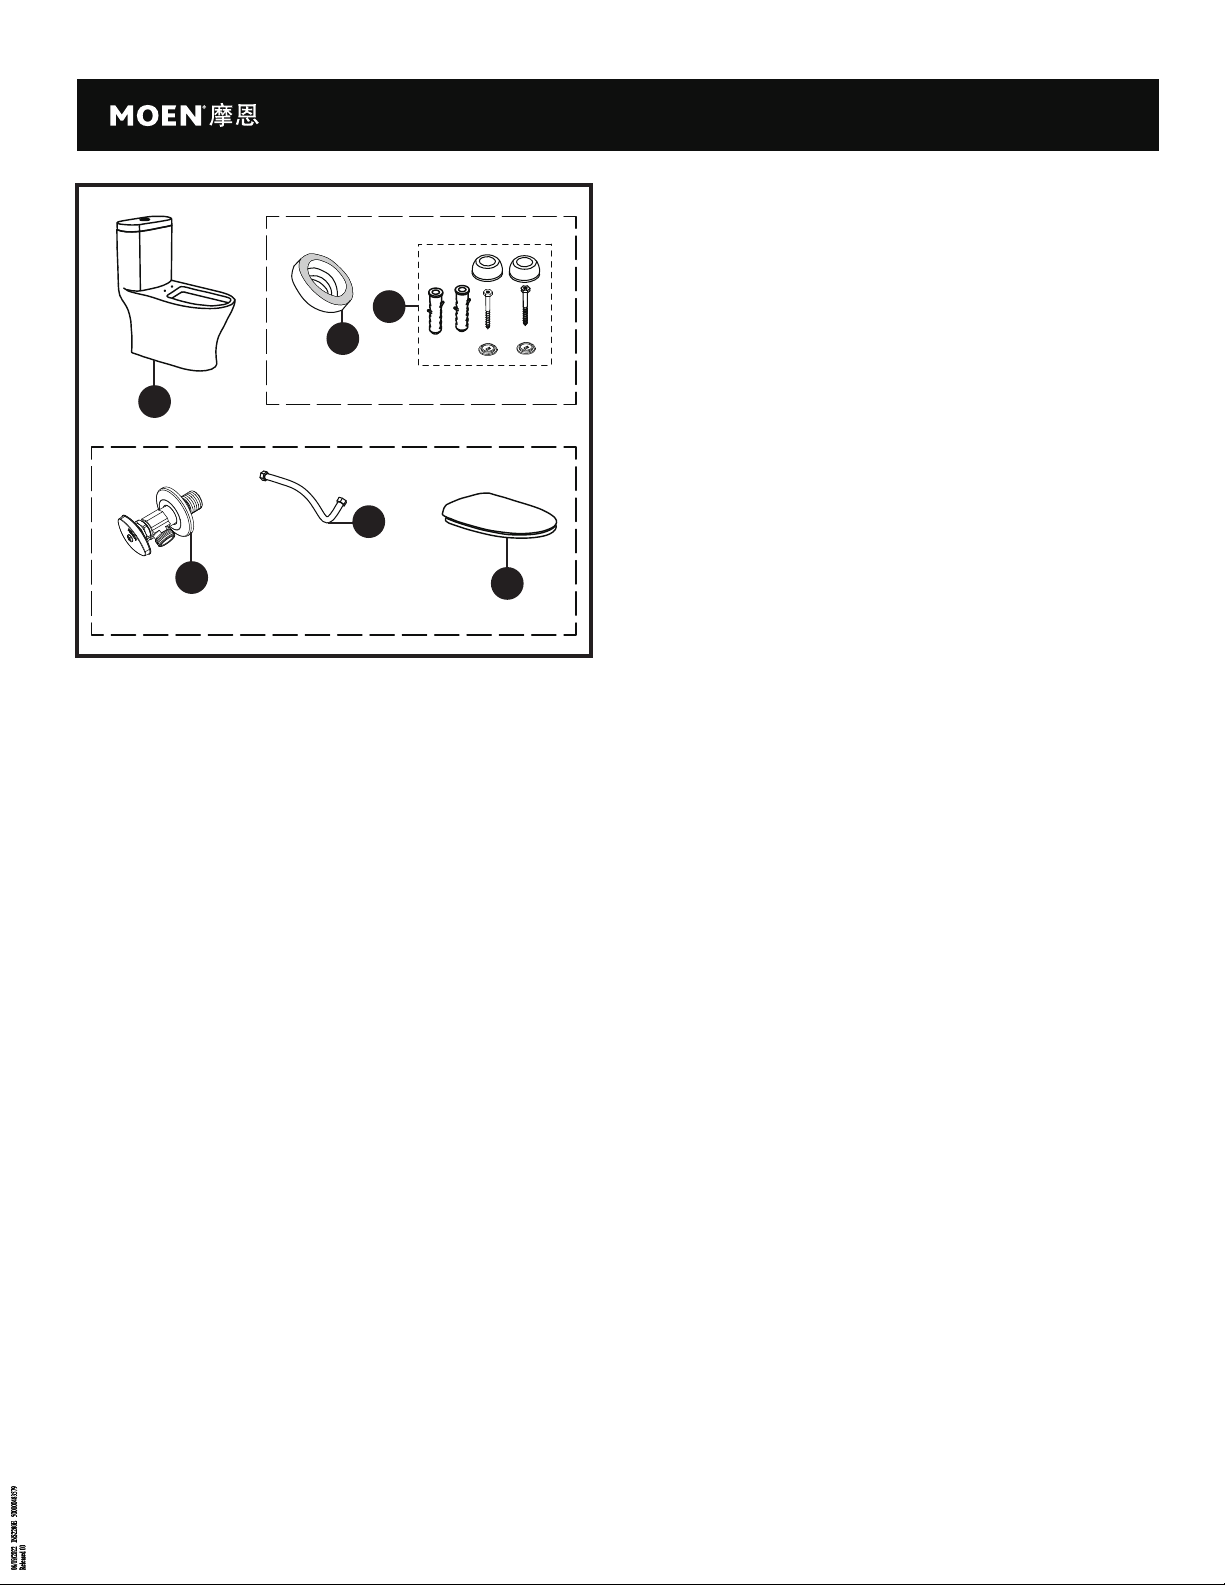
连体陶瓷坐便器
One-Piece Ceramic
Toilet