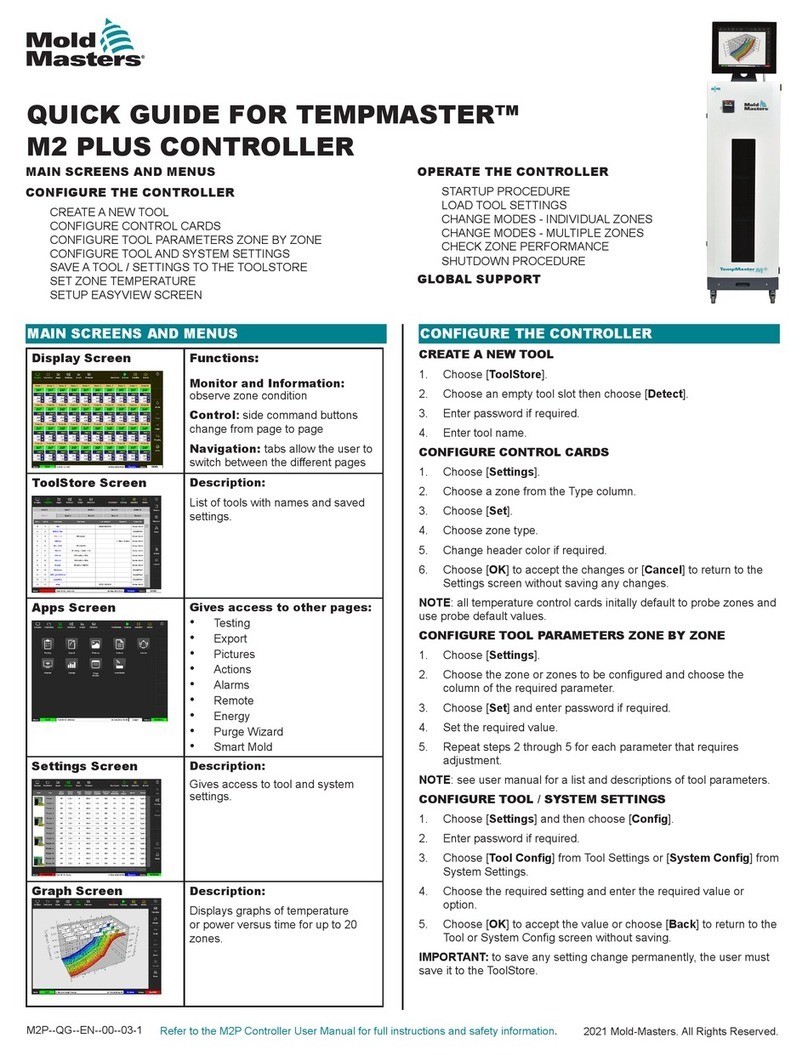
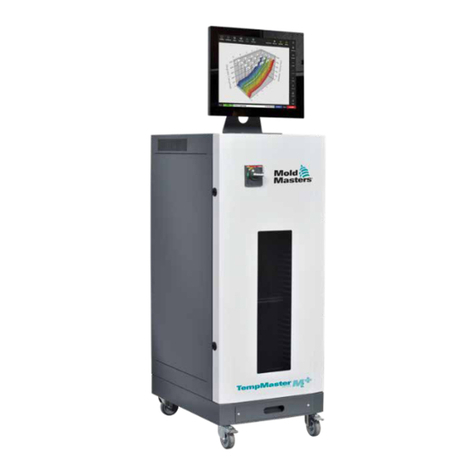
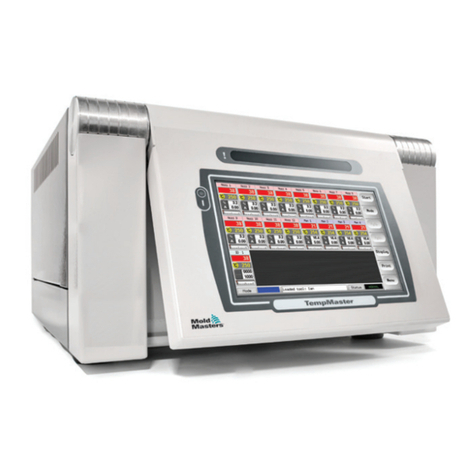
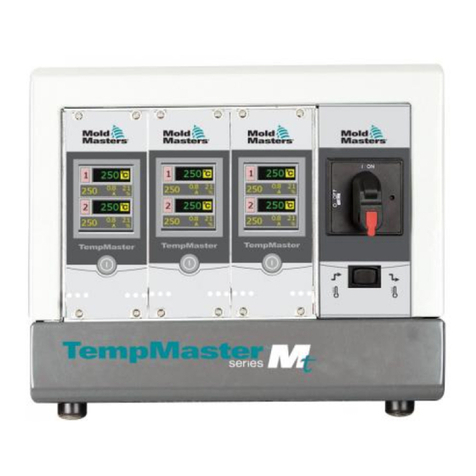
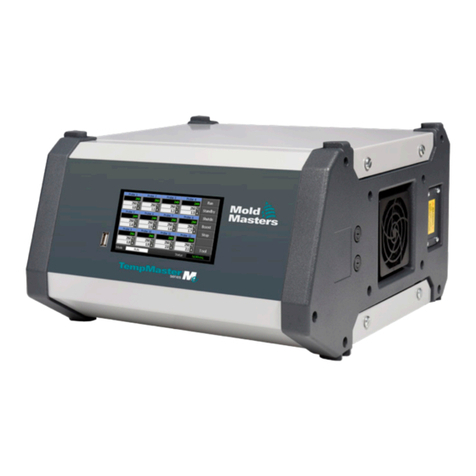
Mold-Masters TempMaster M1 Plus Series User manual

User Manual
version 6
Original Instrucons


REMOVE AND KEEP THIS
SHEET SOMEWHERE SAFE
Every machine leaves our factory with two levels of
password protection. We recommend that you remove
this sheet in order to establish your own security.
User Password - unix
System Password - linux


Contents
Section 1 - Introduction ...................................................1-1
1.1 Intended Use ......................................................................................................1-1
1.2 Release Details ..................................................................................................1-1
1.3 Warranty Details .................................................................................................1-1
1.4 Returned Goods Policy.......................................................................................1-1
1.5 Movement or Resale of Mold-Masters Products or Systems .............................1-1
1.6 Copyright ............................................................................................................1-2
1.7 Units of Measure and Conversion Factors .........................................................1-2
Section 2 - Global Support ..............................................2-1
2.1 Corporate Oces................................................................................................2-1
2.2 International Representatives.............................................................................2-2
Section 3 - Safety..............................................................3-1
3.1 Introduction.........................................................................................................3-1
3.2 Safety Hazards ...................................................................................................3-2
3.3 Operational Hazards...........................................................................................3-5
3.4 General Safety Symbols.....................................................................................3-7
3.5 Wiring Check ......................................................................................................3-8
3.6 Lockout Safety....................................................................................................3-9
3.7 Electrical Lockout .............................................................................................3-10
3.7.1 Energy Forms and Lockout Guidelines....................................................3-11
3.8 Grounded Earth Connection.............................................................................3-12
3.9 Disposal............................................................................................................3-12
3.10 M1 Plus Controller User Hazards ...................................................................3-13
3.10.1 Operational Environment.......................................................................3-13
Section 4 - Overview ........................................................4-1
4.1 Specication .......................................................................................................4-1
4.2 The Controller Cabinet .......................................................................................4-2
4.2.1 Controller Modules.....................................................................................4-2
4.2.2 Thermocouple Inputs .................................................................................4-2
4.2.3 Central Processor Units (CPUs)................................................................4-2
4.2.4 Output Triacs .............................................................................................4-2
4.2.5 Power Supply.............................................................................................4-2
4.3 Screen Layout ....................................................................................................4-3
4.4 Main Page ..........................................................................................................4-4
4.4.1 Monitoring..................................................................................................4-4
4.5 Main Page – Display Options .............................................................................4-5
4.6 Main Page - Start, Stop and More Options.........................................................4-6
4.7 More Pages ........................................................................................................4-7
4.8 The User Interface..............................................................................................4-9
v
© 2021 Mold-Masters (2007) Limited. All Rights Reserved. M1 Plus Controller User Manual

Section 5 - Setup ..............................................................5-1
5.1 Introduction.........................................................................................................5-1
5.2 Setup the Console ..............................................................................................5-2
5.2.1 Create a First Tool .....................................................................................5-2
5.2.2 Setup Tool Parameters ..............................................................................5-2
5.2.3 Congure System Settings ........................................................................5-2
5.2.4 Setup Operating Parameters.....................................................................5-2
5.3 Create the First Tool ...........................................................................................5-2
5.4 Cards That May Be Detected .............................................................................5-3
5.5 Congure the Control Cards...............................................................................5-4
5.5.1 Set Zone Types..........................................................................................5-4
5.6 Precongured Setup Values ...............................................................................5-5
5.7 Congure the Controller .....................................................................................5-6
5.8 Global Parameters..............................................................................................5-7
5.9 Save the Congured Settings.............................................................................5-9
5.10 Set the Tool Parameters .................................................................................5-10
5.11 Tool Parameters..............................................................................................5-11
5.12 Set the Operating Parameters........................................................................5-13
5.12.1 Choose Zones .......................................................................................5-13
5.12.2 Set Probe and Manifold Temperatures ..................................................5-14
5.12.3 Save Settings to the Tool Bank..............................................................5-16
5.12.4 Setup Other Utilities...............................................................................5-16
5.12.5 Utilities Parameters................................................................................5-17
5.13 Password Security..........................................................................................5-20
5.13.1 Edit the System Password.....................................................................5-20
5.13.2 Edit the User Password .........................................................................5-20
5.13.3 Set the Password Timer.........................................................................5-20
5.13.4 Password Override ................................................................................5-20
5.14 Password Options ..........................................................................................5-21
5.14.1 Password Enabled.................................................................................5-21
5.14.2 Password Disabled................................................................................5-21
5.14.3 Password Active Times..........................................................................5-21
5.15 Password Application Table............................................................................5-22
5.16 Congure a Printer .........................................................................................5-23
5.17 More Utilities Function Buttons.......................................................................5-24
5.17.1 Export ....................................................................................................5-24
5.17.2 Exit.........................................................................................................5-24
5.17.3 Quad IO ................................................................................................5-24
Section 6 - Operation .......................................................6-1
6.1 Isolate the Controller ..........................................................................................6-1
6.1.1 Switch On ..................................................................................................6-1
6.1.2 Switch O (Shutdown) ...............................................................................6-1
6.2 Control Modes for All Zones ...............................................................................6-2
6.3 Change or Set Zone Temperatures ....................................................................6-4
6.4 Change Modes ...................................................................................................6-5
6.5 Control for Individually Selected Zones ..............................................................6-6
6.6 More About Boost Mode .....................................................................................6-6
6.6.1 Manual Boost Display................................................................................6-6
vi
M1 Plus Controller User Manual
© 2021 Mold-Masters (2007) Limited. All Rights Reserved.

6.6.2 Remote Boost Display ...............................................................................6-7
6.7 More About Zone Slaving ...................................................................................6-7
6.8 Purge Function ...................................................................................................6-7
6.8.1 Mechanical Purge......................................................................................6-7
6.8.2 Chemical Purge .........................................................................................6-8
6.8.3 Congure Purge Parameters.....................................................................6-9
6.8.4 Preset Purge Parameters ..........................................................................6-9
6.8.5 Record a Color Purge Cycle....................................................................6-10
6.9 Check Zone Settings ........................................................................................6-10
6.10 Graph a Zone’s Past Performance .................................................................6-11
6.11 Alarms.............................................................................................................6-13
6.11.1 Mode Window ........................................................................................6-13
6.11.2 Status Window .......................................................................................6-14
6.11.3 Identify Zone Alarms ..............................................................................6-14
6.11.4 Beacon and Sounder Extension ............................................................6-15
6.12 Card Indicators ...............................................................................................6-15
6.13 Training and Demonstration Mode .................................................................6-15
6.13.1 About Demo Mode.................................................................................6-15
6.13.2 Select Demo Mode ................................................................................6-16
6.13.3 Deselect Demo Mode ............................................................................6-17
6.14 Use the ToolStore Page..................................................................................6-18
6.15 Create a New Tool ..........................................................................................6-19
6.16 Rename an Existing Tool................................................................................6-20
6.17 Load Tool Settings Locally..............................................................................6-22
6.18 Save Tool Settings (Remotely) .......................................................................6-23
6.18.1 Overwrite with Saved Settings...............................................................6-23
6.18.2 Save Old and New Settings...................................................................6-24
6.19 Delete a Tool...................................................................................................6-25
6.20 Backup Tool Settings ......................................................................................6-26
6.20.1 Backup All Tools.....................................................................................6-26
6.20.2 Backup One Selected Tool Setting ........................................................6-27
6.21 Restore Tool Settings .....................................................................................6-28
6.21.1 Restore All Tools ....................................................................................6-28
6.21.2 Restore a Single Tool.............................................................................6-29
6.22 QCIO - 4-Channel Input / Output Card ...........................................................6-30
6.22.1 Inputs.....................................................................................................6-30
6.22.2 Outputs ..................................................................................................6-31
6.22.3 Default Input / Output Selection and Connector Pin Table ....................6-32
Section 7 - Maintenance...................................................7-1
7.1 Print Out Facility .................................................................................................7-1
7.2 Export Facility .....................................................................................................7-2
7.3 Check Touchscreen Alignment ...........................................................................7-4
7.4 Self Diagnostic Tests ..........................................................................................7-5
7.4.1 Change Test Parameters ...........................................................................7-6
7.5 Run a Self Diagnostic Test .................................................................................7-6
7.6 System Diagnosis Results..................................................................................7-8
7.7 Interpret the Test Results....................................................................................7-8
7.7.1 Satisfactory Test ........................................................................................7-8
7.7.2 Unsatisfactory Test ....................................................................................7-8
vii
© 2021 Mold-Masters (2007) Limited. All Rights Reserved. M1 Plus Controller User Manual

7.8 Service and Repair The Controller ...................................................................7-10
7.8.1 Replacement Parts ..................................................................................7-10
7.8.2 Cleaning and Inspection ..........................................................................7-10
7.9 Upgrade the Software.......................................................................................7-10
7.9.1 Preparation ..............................................................................................7-10
7.9.2 Procedure ................................................................................................7-11
7.10 Fuses and Overcurrent Protection..................................................................7-11
7.10.1 Replacement Fuses...............................................................................7-11
7.10.2 Supplementary Fuses............................................................................7-11
7.10.3 Controller Card Fuses............................................................................7-12
Section 8 - Troubleshooting ............................................8-1
8.1 Individual Controller Card Diagnostics ...............................................................8-1
8.2 Fault and Warning Messages .............................................................................8-2
8.3 System Warning Messages ................................................................................8-5
8.4 Other Issues .......................................................................................................8-5
Section 9 - Hot Runner Controller Wiring Details..........9-1
9.1 Three Phase Designation - Star / Delta Option ..................................................9-1
9.1.1 Set Power Rail to Star Conguration.........................................................9-2
9.1.2 Set Power Rail to Delta Conguration .......................................................9-3
9.2 Filter Option ........................................................................................................9-4
9.3 Alarm Output / Auxiliary Input .............................................................................9-4
9.4 USB Port.............................................................................................................9-4
9.5 Standard Tool Connections ................................................................................9-5
9.6 Touchscreen Schematic .....................................................................................9-7
Index ......................................................................................I
viii
M1 Plus Controller User Manual
© 2021 Mold-Masters (2007) Limited. All Rights Reserved.


The purpose of this manual is to assist users in the integration, operation
and maintenance of the M1 Plus controller. This manual is designed to cover
most system congurations. If you need additional information specic to your
system please contact your representative or a Mold-Masters oce whose
location can be found in the “Global Support” section.
1.1 Intended Use
The M1 Plus Series controller together with the MTS console is an electrical
distribution and control device designed as a multi-channel temperature
controller for use in hot runner plastic molding equipment. It uses feedback
from thermocouples within the nozzles and manifolds to give precise
closed-loop temperature control, and it is designed to be safe during
normal operation. Any other uses would fall outside the engineered intent
of this machine which may be a safety hazard and would void any and all
warranties.
This manual is written for use by skilled persons who are familiar with
injection molding machinery and their terminology. Operators should be
familiar with plastic injection molding machines and the controls of such
equipment. Maintenance persons should have sucient understanding of
electrical safety to appreciate the dangers of 3-phase supplies. They should
know how to take appropriate measures to avoid any danger from electrical
supplies.
1.2 Release Details
Table 1-1 Release Details
Document Number Release Date Version
M1P-UM-EN-00-05-10 July 2019 5-10
M1P-UM-EN-00-06 January 2021 6
1.3 Warranty Details
For current warranty information please refer to the documents available from
our website: https://www.moldmasters.com/support/warranty or contact your
Mold-Masters representative.
1.4 Returned Goods Policy
Please do not return any parts to Mold-Masters without pre-authorization and
a return authorization number supplied by Mold-Masters.
Our policy is one of continuous improvement and we reserve the right to alter
product specications at any time without giving notice.
1.5 Movement or Resale of Mold-Masters
Products or Systems
This documentation is intended for use in the country of destination for which
the product or system was purchased.
Mold-Masters takes no responsibility for documentation of products or
systems if they are relocated or resold outside the intended country of
destination, as stated on the accompanying invoice and/or waybill.
Section 1 - Introduction
1-1INTRODUCTION
© 2021 Mold-Masters (2007) Limited. All Rights Reserved. M1 Plus Controller User Manual
1.6 Copyright
© 2020 Mold-Masters (2007) Limited. All Rights Reserved. Mold-Masters®
and the Mold-Masters logo are trademarks of Mold-Masters.
1.7 Units of Measure and Conversion Factors
NOTE
The dimensions given in this manual are from original manufacturing
drawings.
All values in this manual are in S.I. units or subdivisions of these units.
Imperial units are given in parenthesis immediately after the S.I. units.
Table 1-2 Units of Measure and Conversion Factors
Abbreviation Unit Conversion Value
bar Bar 14.5 psi
in. Inch 25.4 mm
kg Kilogram 2.205 lb
kPa Kilopascal 0.145 psi
gal Gallon 3.785 l
lb Pound 0.4536 kg
lbf Pound force 4.448 N
lbf.in. Pound force inch 0.113 Nm
l Litre 0.264 gallon
min Minute
mm Millimeter 0.03937 in.
mΩ Milli Ohm
N Newton 0.2248 lbf
Nm Newton Meter 8.851 lbf.in.
psi Pound per square inch 0.069 bar
psi Pound per square inch 6.895 kPa
rpm Revolutions per minute
s Second
°Degree
°CDegree Celsius 0.556 (°F -32)
°FDegree Fahrenheit 1.8 °C +32
1-2
M1 Plus Controller User Manual
INTRODUCTION
© 2021 Mold-Masters (2007) Limited. All Rights Reserved.


Section 2 - Global Support
2.1 Corporate Ofces
2-1GLOBAL SUPPORT
© 2021 Mold-Masters (2007) Limited. All Rights Reserved. M1 Plus Controller User Manual

ASIAN HEADQUARTERS
CHINA/HONG KONG/TAIWAN
Mold-Masters (KunShan) Co, Ltd
Zhao Tian Rd
Lu Jia Town, KunShan City
Jiang Su Province
People’s Republic of China
tel: +86 512 86162882
fax: +86 512-86162883
JAPAN
Mold-Masters K.K.
1-4-17 Kurikidai, Asaoku Kawasaki,
Kanagawa
Japan, 215-0032
tel: +81 44 986 2101
fax: +81 44 986 3145
GLOBAL HEADQUARTERS
CANADA
Mold-Masters (2007) Limited
233 Armstrong Avenue
Georgetown, Ontario
Canada L7G 4X5
tel: +1 905 877 0185
fax: +1 905 877 6979
SOUTH AMERICAN
HEADQUARTERS
BRAZIL
Mold-Masters do Brasil Ltda.
R. James Clerk Maxwel,
280 – Techno Park, Campinas
São Paulo, Brazil, 13069-380
tel: +55 19 3518 4040
UNITED KINGDOM & IRELAND
Mold-Masters (UK) Ltd Netherwood
Road
Rotherwas Ind. Est.
Hereford, HR2 6JU
United Kingdom
tel: +44 1432 265768
fax: +44 1432 263782
EUROPEAN
HEADQUARTERS
GERMANY /
SWITZERLAND
Mold-Masters Europa GmbH
Neumattring 1
76532 Baden-Baden, Germany
tel: +49 7221 50990
fax: +49 7221 53093
INDIAN HEADQUARTERS
INDIA
Milacron India PVT Ltd. (Mold-
Masters Div.)
3B,Gandhiji Salai,
Nallampalayam, Rathinapuri
Post, Coimbatore T.N. 641027
tel: +91 422 423 4888
fax: +91 422 423 4800
USA
Mold-Masters Injectioneering
LLC, 29111 Stephenson
Highway, Madison Heights, MI
48071, USA
tel: +1 800 450 2270 (USA
only) tel: +1 (248) 544-5710
fax: +1 (248) 544-5712
Mold-Masters Regional Offices
AUSTRIA / EAST &
SOUTHEAST EUROPE
Mold-Masters Handelsges.m.b.H.
Pyhrnstrasse 16
A-4553 Schlierbach
Austria
tel: +43 7582 51877
fax: +43 7582 51877 18
ITALY
Mold-Masters Italia
Via Germania, 23
35010 Vigonza (PD)
Italy
tel: +39 049/5019955
fax: +39 049/5019951
CZECH REPUBLIC
Mold-Masters Europa GmbH
Hlavni 823
75654 Zubri
Czech Republic
tel: +420 571 619 017
fax: +420 571 619 018
KOREA
Mold-Masters Korea Ltd. E
dong, 2nd floor, 2625-6,
Jeongwang-dong, Siheung
City, Gyeonggi-do, 15117,
South Korea
tel: +82-31-431-4756
korea@moldmasters.com
FRANCE
Mold-Masters France
ZI la Marinière,
2 Rue Bernard Palissy
91070 Bondoufle, France
tel: +33 (0) 1 78 05 40 20
fax: +33 (0) 1 78 05 40 30
MEXICO
Milacron Mexico Plastics Services
S.A. de C.V.
Circuito El Marques norte #55
Parque Industrial El Marques
El Marques, Queretaro C.P. 76246
Mexico
tel: +52 442 713 5661 (sales)
tel: +52 442 713 5664 (service)

2.2 International Representatives
Corporate Ofces - continued
2-2
M1 Plus Controller User Manual
GLOBAL SUPPORT
© 2021 Mold-Masters (2007) Limited. All Rights Reserved.
Mold-Masters Regional Offices (cont.)
SPAIN
Mold-Masters Europa GmbH
C/ Tecnología, 17
Edificio Canadá PL. 0 Office A2
08840 – Viladecans
Barcelona
tel: +34 93 575 41 29
TURKEY
Mold-Masters Europa GmbH
Merkezi Almanya Türkiye
İstanbul Şubesi
Alanaldı Caddesi Bahçelerarası
Sokak No: 31/1
34736 İçerenköy-Ataşehir
Istanbul, Turkey
tel: +90 216 577 32 44
fax: +90 216 577 32 45
SINGAPORE*
Mold-Masters Singapore PTE. Ltd.
No 48 Toh Guan Road East
#06-140 Enterprise Hub
Singapore 608586
Republic of Singapore
tel: +65 6261 7793
fax: +65 6261 8378
*Coverage includes Southeast
Asia, Australia, and New Zealand
Mold-Masters International Representatives
Argentina
Sollwert S.R.L.
La Pampa 2849 2∫ B
C1428EAY Buenos Aires
Argentina
tel: +54 11 4786 5978
fax: +54 11 4786 5978 Ext.
Denmark*
Englmayer A/S
Dam Holme 14-16
DK – 3660 Stenloese
Denmark tel: +45 46 733847
fax: +45 46 733859
*Coverage includes Norway
and Sweden
Israel
ASAF Industries Ltd. 29 Habanai
Street
PO Box 5598 Holon 58154 Israel
tel: +972 3 5581290
fax: +972 3 5581293
Russia
System LLC
Prkt Marshala Zhukova 4
123308 Moscow
Russia
tel: +7 (495) 199-14-51
Belarus
HP Promcomplect
Sharangovicha 13
220018 Minsk
tel: +375 29 683-48-99
fax: +375 17 397-05-65
Finland**
Oy Scalar Ltd.
Tehtaankatu
10 11120 Riihimaki
Finland
tel: +358 10 387 2955
fax: +358 10 387 2950
**Coverage includes Estonia
Portugal
Gecim LDA
Rua Fonte Dos Ingleses, No 2
Engenho
2430-130 Marinha Grande
Portugal
tel: +351 244 575600
fax: +351 244 575601
Slovenia
RD PICTA tehnologije d.o.o.
Žolgarjeva ulica 2
2310 Slovenska Bistrica
Slovenija
+386 59 969 117
Bulgaria
Mold-Trade OOD
62, Aleksandrovska
St. Ruse City
Bulgaria
tel: +359 82 821 054
fax: +359 82 821 054
Greece
Ionian Chemicals S.A.
21 Pentelis Ave.
15235 Vrilissia, Athens
Greece
tel: +30 210 6836918-9
fax: +30 210 6828881
Romania
Tehnic Mold Trade SRL
Str. W. A Mozart nr. 17 Sect. 2
020251 Bucharesti
Romania
tel: +4 021 230 60 51
fax : +4 021 231 05 86
Ukraine
Company Park LLC
Gaydamatska str., 3, office 116
Kemenskoe City Dnipropetrovsk
Region 51935, Ukraine
tel: +38 (038) 277-82-82

Section 3 - Safety
3.1 Introduction
Please be aware that the safety information provided by Mold-Masters
does not absolve the integrator and employer from understanding and
following international and local standards for safety of machinery. It is the
responsibility of the end integrator to integrate the nal system, provide
necessary e-stop connections, safety interlocks and guarding, to choose the
appropriate electrical cable for the region of use and to ensure compliance
with all relevant standards.
It is the responsibility of the employer to:
• Properly train and instruct its personnel in the safe operation of
equipment, including the use of all the safety devices.
• Provide its personnel with all necessary protective clothing, including such
items as a face shield and heat resistant gloves.
• Ensure the original and continuing competence of personnel caring for,
setting up, inspecting and maintaining injection molding equipment.
• Establish and follow a program of periodic and regular inspections of
injection molding equipment to ensure it is in safe operating condition and
proper adjustment.
• Ensure that no modications, repairs or rebuild of portions are made
to the equipment that reduces the level of safety existing at time of
manufacture or remanufacture.
3-1SAFETY
© 2021 Mold-Masters (2007) Limited. All Rights Reserved. M1 Plus Controller User Manual
3.2 Safety Hazards
WARNING
Also refer to all machine manuals and local regulations and codes for safety
information.
The following safety hazards are most commonly associated with injection molding
equipment. See European Standard EN201 or American Standard ANSI/SPI B151.1.
Refer to the illustration of hazard areas below when reading the Safety Hazards Table 3-1
on page 3-3.
Figure 3-1 Injection molding machine hazard areas
Top view with guards removed
Front view with guards removed
210 5
3
Top View with Guards Removed
25
91
4
769
8
Front View with Guards Removed
1. Mold area
2. Clamping mechanism area
3. Area of movement of
core and ejector drive
mechanisms outside areas
1 and 2
4. Machine nozzle area
5. Plasticating and / or
injection unit area
6. Feed opening area
7. Area of the heater bands
of the plasticizing and / or
injection cylinders
8. Parts discharge area
9. Hoses
10. Area inside the guards and
outside the mold area
3-2
M1 Plus Controller User Manual
SAFETY
© 2021 Mold-Masters (2007) Limited. All Rights Reserved.

Table 3-1 Safety Hazards
Hazard Area Potential Hazards
Mold Area
Area between the
platens.
See Figure 3-1 area 1
Mechanical Hazards
Crushing and / or shearing and / or impact hazards caused by:
• Movement of the platen.
• Movements of the injection barrel(s) into the mold area.
• Movements of cores and ejectors and their drive mechanisms.
• Tie bar motion.
Thermal Hazards
Burns and / or scalds due to operating temperature of:
• The mold heating elements.
• Material released from/through the mold.
Clamping
Mechanism Area
See Figure 3-1 area 2
Mechanical Hazards
Crushing and / or shearing and / or impact hazards caused by:
• Movement of the platen.
• Movement of the drive mechanism of the platen.
• Movement of the core and ejector drive mechanism.
Movement of
Drive Mechanisms
Outside the Mold
Area and Outside
the Clamping
Mechanism Area
See Figure 3-1 area 3
Mechanical Hazards
Mechanical hazards of crushing, shearing and / or impact caused by the
movements of:
• Core and ejector drive mechanisms.
Nozzle Area
The nozzle area is
the area between the
barrel and the sprue
bushing.
See Figure 3-1 area 4
Mechanical Hazards
Crushing, shearing hazards and / or impact hazards caused by:
• Forward movement of the plasticizing and / or injection unit including
nozzle.
• Movements of parts of the power-operated nozzle shuto and their
drives.
• Over pressurization in the nozzle.
Thermal Hazards
Burns and or scalds due to operating temperature of:
• The nozzle.
• Material discharging from the nozzle.
Plasticizing and / or
Injection Unit Area
Area from the adapter
/ barrel head / end cap
to the extruder motor
above the sled
including the carriage
cylinders.
See Figure 3-1 area 5
Mechanical Hazards
Crushing, shearing and / or drawn-into hazards caused by:
• Unintentional gravity movements e.g. for machines with plasticizing
and / or injection unit positioned above the mold area.
• The movements of the screw and / or the injection plunger in the
cylinder accessible through the feed opening.
• Movement of the carriage unit.
Thermal Hazards
Burns and / or scalds due to operating temperature of:
• The plasticizing and / or injection unit.
• The heating elements e.g. heater bands.
• The material and / or vapors discharging from the vent opening, feed
throat or hopper.
Mechanical and / or Thermal Hazard
• Hazards due to reduction in mechanical strength of the plasticizing and
/ or injection cylinder due to overheating.
Feed Opening
See Figure 3-1 area 6
Pinching and crushing between injection screw movement and housing.
Safety Hazards - continued
3-3SAFETY
© 2021 Mold-Masters (2007) Limited. All Rights Reserved. M1 Plus Controller User Manual
Table 3-1 Safety Hazards
Hazard Area Potential Hazards
Area of the Heater
Bands of the
Plasticizing and / or
Injection Cylinders
See Figure 3-1 area 7
Burns and / or scalds due to operating temperature of:
• The plasticizing and / or injection unit.
• The heating elements e.g. heater bands.
• The material and / or vapors discharging from the vent opening, feed
throat or hopper.
Parts Discharge Area
See Figure 3-1 area 8
Mechanical Hazards
Accessible Through the Discharge Area
Crushing, shearing and / or impact hazards caused by:
• Closing movement of the platen.
• Movements of cores and ejectors and their drive mechanisms.
Thermal Hazards
Accessible through the discharge area
Burns and or scalds due to operating temperature of:
• The mold.
• Heating elements of the mold.
• Material released from / through the mold.
Hoses
See Figure 3-1 area 9
• Whipping action caused by hose assembly failure.
• Possible release of uid under pressure that can cause injury.
• Thermal hazards associated with hot uid.
Area Inside the
Guards and Outside
the Mold Area
See Figure 3-1 area
10
Crushing and / or shearing and / or impact hazards caused by:
• Movement of the platen.
• Movement of the drive mechanism of the platen.
• Movement of the core and ejector drive mechanism.
• Clamp opening movement.
Electrical Hazards • Electrical or electromagnetic disturbance generated by the motor
control unit.
• Electrical or electromagnetic disturbance that can cause failures in the
machine control systems and adjacent machine controls.
• Electrical or electromagnetic disturbance generated by the motor
control unit.
Hydraulic
Accumulators
High pressure discharge.
Power Operated
Gate
Crush or impact hazards caused by the movement of the power operated
gates.
Vapors and Gases Certain processing conditions and / or resins can cause hazardous fumes
or vapors.
Safety Hazards - continued
3-4
M1 Plus Controller User Manual
SAFETY
© 2021 Mold-Masters (2007) Limited. All Rights Reserved.

3.3 Operational Hazards
WARNINGS
• Refer to all machine manuals and local regulations and codes for safety
information.
• The equipment supplied is subjected to high injection pressures and high
temperatures. Ensure that extreme caution is observed in the operation
and maintenance of the injection molding machines.
• Only fully trained personnel should operate or maintain equipment.
• Do not operate the equipment with unconned long hair, loose clothing
or jewelry, including name badges, neckties, etc. These may get caught
in the equipment and can cause death or serious injury.
• Never disable or bypass a safety device.
• Ensure that the protective guards are placed around the nozzle to
prevent the material from splashing or drooling.
• A burn hazard exists from material during routine purging. Wear heat-
resistant personal protective equipment (PPE) to prevent burns from
contact with hot surfaces or splatter of hot material and gases.
• Material purged from machine may be extremely hot. Ensure protective
guards are in place around the nozzle to prevent material from
splashing. Use proper personal protective equipment.
• All operators should wear personal protective equipment, such as face
shields and use heat resistant gloves when working around the feed
inlet, purging the machine or cleaning the gates of the mold.
• Remove purged material from the machine immediately.
• Decomposing or burning material could result in noxious gases being
emitted from the purged material, feed inlet or mold.
• Ensure proper ventilation and exhaust systems are in place to help
prevent inhalation of harmful gases and vapors.
• Consult manufacturer’s Material Safety Data Sheets (MSDS).
• Hoses tted to the mold will contain high or low temperature uids or air
under high pressure. The operator must shut down and lockout these
systems as well as relieving any pressure before performing any work
with these hoses. Regularly inspect and replace all exible hoses and
restraints.
• Water and / or hydraulics on the mold may be in close proximity to
electrical connections and equipment. Water leakage may cause an
electrical short circuit. Hydraulic uid leakage may cause a re hazard.
Always keep water and / or hydraulic hoses and ttings in good condition
to avoid leaks.
• Never perform any work on the mold machine unless the hydraulic pump
has been stopped.
• Check frequently for possible oil leaks / water leaks. Stop the machine
and make repairs.
3-5SAFETY
© 2021 Mold-Masters (2007) Limited. All Rights Reserved. M1 Plus Controller User Manual
Operational Hazards - continued
WARNING
• Make sure that the cables are connected to the correct motors. Cables
and motors are clearly labeled. Reversing the cables can result in
unexpected and uncontrolled motion causing a safety risk or damage
to the machine. A crushing hazard exists between the nozzle and mold
melt inlet during carriage forward motion.
• A possible shearing hazard exists between the edge of the injection
guard and the injection housing during injection.
• The open feed port could present a hazard to a nger or a hand
inserted during operation of the machine.
• The electric servo motors could overheat presenting a hot surface which
could cause burns to someone touching it.
• The barrel, barrel head, nozzle, heater bands and mold components are
hot surfaces which could result in burns.
• Keep ammable liquids or dust away from the hot surfaces as they
could ignite.
• Follow good housekeeping procedures and keep oors clean to prevent
slips, trips and falls due to spilled material on the work oor.
• Apply engineering controls or hearing conservation programs as
necessary to control noise.
• When doing any work on the machine that requires moving and lifting
the machine, ensure that lifting equipment (eyebolts, fork lift truck,
cranes, etc.) will have sucient capacity to handle mold, auxiliary
injection unit or Hot Runner weight.
• Connect all lifting devices and support the machine using a crane of
adequate capacity before commencing work. Failure to support the
machine can result in severe injury or death.
• Mold cable from the controller to the mold must be removed before
servicing the mold.
3-6
M1 Plus Controller User Manual
SAFETY
© 2021 Mold-Masters (2007) Limited. All Rights Reserved.
Table of contents
Other Mold-Masters Controllers manuals

Mold-Masters
Mold-Masters TempMaster M2 Plus Series User manual

Mold-Masters
Mold-Masters E-Multi EM1 User manual

Mold-Masters
Mold-Masters TempMaster M2 Plus Series User manual

Mold-Masters
Mold-Masters M2 User manual

Mold-Masters
Mold-Masters TempMaster Series User manual

Mold-Masters
Mold-Masters TempMaster M2 Plus Series User manual

Mold-Masters
Mold-Masters Tempmaster M1 User manual

Mold-Masters
Mold-Masters TempMasters ME Series User manual

Mold-Masters
Mold-Masters TempMaster M3 Series User manual

Mold-Masters
Mold-Masters TempMaster MT User manual