manuals.online logo
Brands
  1. Home
  2. •
  3. Brands
  4. •
  5. Monacor
  6. •
  7. Media Converter
  8. •
  9. Monacor CPA-1005 USB User manual

Monacor CPA-1005 USB User manual

Gleichspannungswandler
mit USB-Buchse
Bitte lesen Sie diese Anleitung vor dem Betrieb gründ-
lich durch und heben Sie sie für ein späteres Nachle-
sen auf.
1 Einsatzmöglichkeiten
Dieser Gleichspannungswandler für den Anschluss an
ein 12-V-Kfz-Bordnetz dient zur Versorgung von elek-
trischen Kleinspannungsgeräten, die über einen USB-
Anschluss gespeist oder geladen werden können (z. B.
P3-Player, Navigationsgeräte).
2 Wichtige Hinweise ür den Gebrauch
Das Gerät entspricht allen erforderlichen Richtlinien
der EU und ist deshalb mit gekennzeichnet. Die
Prüfung entsprechend der Kfz-Richtlinie erfolgte unter
der Nummer e4 021558.
GSetzen Sie das Gerät nur im Innenbereich ein. Schüt-
zen Sie es vor Feuchtigkeit und Hitze (zulässiger Ein-
satztemperaturbereich 0 – 40 °C).
GVerwenden Sie zum Reinigen nur ein trockenes,
weiches Tuch, niemals Chemikalien oder Wasser.
GWird das Gerät zweckentfremdet, falsch ange-
schlossen, überlastet oder nicht fachgerecht repa-
riert, kann keine Haftung für daraus resultierende
Sach- oder Personenschäden und keine Garantie für
das Gerät übernommen werden.
3 Inbetriebnahme
1) Das zu versorgende Kleinspannungsgerät an die
USB-Buchse anschließen.
2) Den Spannungswandler im Auto in eine 12-V-Bord-
spannungsbuchse (Zigarettenanzünder) stecken.
(Fur einen optimalen elektrischen Kontakt sollte
diese nicht durch Zigarettenasche verschmutzt
sein. Falls erforderlich mit einem weichen, trocke-
nen Tuch säubern.) Die Betriebsanzeige auf der
Geräteoberseite leuchtet.
3) Auch wenn das angeschlossene Gerät ausge-
schaltet ist, verbraucht der Spannungswandler
einen geringen Strom. Darum sollte er bei länge-
rem Nichtgebrauch aus der Buchse gezogen wer-
den.
Im vorderen Teil des Wandlers befindet sich eine
Sicherung. Zum Auswechseln der Sicherung die
Kunststoffkappe an der Spitze herausdrehen. Eine
defekte Sicherung nur durch eine gleichen Typs erset-
zen!
4 Technische Daten
Stromversorgung: . . . . 12 – 13,8 V
Ausgang: . . . . . . . . . . . 5 V , max. 1 A
USB-Buchse Typ A
Abmessungen: . . . . . . 103 mm × 39 mm × 31 mm
Gewicht: . . . . . . . . . . . 150 g
Änderungen vorbehalten.
Soll das Gerät endgültig aus dem Betrieb ge-
nommen werden, übergeben Sie es zur um-
weltgerechten Entsorgung einem örtlichen
Recyclingbetrieb.
DC/DC Converter with USB Socket
Please read these operating instructions carefully prior
to operating the unit and keep them for later use.
1 Applications
This DC/DC converter for connection to a 12V electric
system of a car serves to supply electric low voltage
units which can be fed or charged via a USB connection
(e.g. P3 players, satellite navigation systems).
2 Important Notes
The unit corresponds to all required directives of the
EU and is therefore marked with . The test according
to the directive for automobiles was made under the
number e4 021558.
GThe unit is suitable for indoor use only. Protect it
against humidity and heat (admissible ambient tem-
perature range 0 – 40 °C).
GFor cleaning only use a dry, soft cloth, never use
chemicals or water.
GNo guarantee claims for the unit and no liability for
any resulting personal damage or material damage
will be accepted if the unit is used for other purposes
than originally intended, if it is not correctly con-
nected, if it is overloaded or not repaired in an ex-
pert way.
3 Operation
1) Connect the low voltage unit to be supplied to the
USB socket.
2) Connect the DC/DC converter to a 12 V jack (ciga-
rette lighter socket) of the carʼs electric system.
(For an optimum electric contact this jack should
not be impurified by cigarette ash. If required, clean
it with a soft, dry cloth.) The power indication on the
upper side of the unit lights up.
3) Even if the connected unit is switched off, there is a
low power consumption of the DC/DC converter.
Therefore, it should be disconnected from the 12 V
jack if it is not in use for a longer period.
A fuse is accommodated in the front part of the con-
verter. To replace the fuse, unscrew the plastic cover
at the tip. Only replace a defective fuse by one of the
same type!
4 Speci ications
Power supply: . . . . . . . 12 – 13.8 V
Output: . . . . . . . . . . . . 5 V , 1 A max.
USB socket type A
Dimensions: . . . . . . . . 103 mm × 39 mm × 31 mm
Weight: . . . . . . . . . . . . 150 g
Subject to technical modification.
If the unit is to be put out of operation defini-
tively, take it to a local recycling plant for a
disposal which is not harmful to the environ-
ment.
CPA-1005 USB Best.-Nr. 28.2350
Copyr ght©by MONACOR INTERNATIONAL GmbH & Co. KG, Bremen, Germany. All r ghts reserved. A-0830.99.01.04.2008
D A CHConvertisseur de tension
DC/DC avec prise USB
Veuillez lire la présente notice avec attention avant le
fonctionnement et conservez-la pour pouvoir vous y
reporter ultérieurement.
1 Possibilités dʼutilisation
Ce convertisseur de tension à brancher sur un sys-
tème électrique 12 V de véhicule permet dʼalimenter
des appareils électriques basse tension, pouvant être
alimentés ou chargés via un port USB (par exemple
lecteurs P3, systèmes de navigation GPS).
2 Notes importantes
Lʼappareil répond à toutes les directives nécessaires
de lʼUnion Européenne et porte donc le symbole . Le
test selon la directive sur les véhicules a été effectué
sous le numéro e4 021558.
GLʼappareil nʼest conçu que pour une utilisation en in-
térieur. Protégez-le de lʼhumidité et de la chaleur
(température ambiante admissible 0 – 40 °C).
GPour le nettoyage, utilisez un chiffon sec et doux, en
aucun cas de produits chimiques ou dʼeau.
GNous déclinons toute responsabilité en cas de dom-
mages corporels ou matériels résultants si lʼappareil
est utilisé dans un but autre que celui pour lequel il
aété conçu, sʼil nʼest pas correctement branché, sʼil
y a surcharge ou sʼil nʼest pas réparé par une per-
sonne habilitée ; en outre, la garantie deviendrait ca-
duque.
3 Fonctionnement
1) Reliez lʼappareil basse tension à alimenter à la
prise USB.
2) Reliez le convertisseur de tension à une prise dʼali-
mentation 12 V du véhicule (allume-cigare). (Pour
un contact électrique optimal, il ne devrait pas être
sali par de la cendre de cigarette, si besoin, net-
toyez-le avec un chiffon doux et sec). Le témoin de
fonctionnement sur la face supérieure de lʼappareil
brille.
3) ême lorsque lʼappareil relié est éteint, le conver-
tisseur a une faible consommation. En cas de non
utilisation prolongée, veillez à le débrancher de la
prise 12 V.
La partie avant du convertisseur renferme un fusible.
Pour le remplacer, dévissez le couvercle plastique à la
pointe. Tout fusible défectueux doit être remplacé par
un fusible de même type.
4 Caractéristiques techniques
Alimentation : . . . . . . . 12 – 13,8 V
Sortie : . . . . . . . . . . . . . 5 V , 1 A max.,
prise USB femelle type A
Dimensions : . . . . . . . . 103 mm × 39 mm × 31 mm
Poids : . . . . . . . . . . . . . 150 g
Tout droit de modification réservé.
Lorsque lʼappareil est définitivement retiré du
service, vous devez le déposer dans une
usine de recyclage de proximité pour contri-
buer à son élimination non polluante.
®
®
D A CHF B CH
GB
Convertitore DC/DC con presa USB
Vi preghiamo di leggere attentamente le presenti istru-
zioni prima della messa in funzione e di conservarle
per un uso futuro.
1 Possibilità dʼimpiego
Questo convertitore DC/DC per il collegamento con
una rete 12 V di autoveicoli serve per lʼalimentazione
di apparecchi elettrici a basso voltaggio che possono
essere alimentati o caricati mediante una porta USB
(p. es. lettori P 3, navigatori).
2 Avvertenze importanti per lʼuso
Questʼapparecchio è conforme a tutte le direttive
richieste dellʼUE e pertanto porta la sigla . Il test
secondo la norma per autovetture è stato fatto con il
numero e4 021558.
GUsare lʼapparecchio solo allʼinterno di locali. Proteg-
gerlo da umidità e calore (temperatura dʼimpiego
ammessa fra 0 e 40 °C).
GPer la pulizia usare solo un panno morbido, asciutto;
non impiegare in nessun caso prodotti chimici o
acqua.
GNel caso dʼuso improprio, di collegamento sbagliato,
di sovraccarica o di riparazione non a regola dʼarte
dellʼapparecchio, non si assume nessuna responsa-
bilità per eventuali danni consequenziali a persone o
a cose e non si assume nessuna garanzia per lʼap-
parecchio.
3 Funzionamento
1) Collegare lʼapparecchio da alimentare a basso vol-
taggio con la presa USB.
2) Inserire il convertitore nellʼauto in una presa 12 V
(accendisigari). (Per un contatto ottimale, la presa
non dovrebbe essere sporca di ceneri di sigarette.
Eventualmente pulirla con un panno morbido,
asciutto). La spia di funzionamento sul lato supe-
riore si accende.
3) Anche se lʼapparecchio collegato è spento, il con-
vertitore consuma un poʼ di corrente. Perciò con-
viene staccarlo dalla rete se non lo si usa per un
certo periodo.
Nella parte anteriore del convertitore si trova un fusi-
bile. Per sostituire il fusibile svitare il cappuccio di plas-
tica alla punta. Sostituire un fusibile difettoso solo con
uno dello stesso tipo.
4 Dati tecnici
Alimentazione: . . . . . . 12 – 13,8 V
Uscita: . . . . . . . . . . . . . 5 V , max. 1 A
presa USB tipo A
Dimensioni: . . . . . . . . . 103 mm × 39 mm × 31 mm
Peso:..............150g
Con riserva di modifiche tecniche.
Se si desidera eliminare lʼapparecchio defini-
tivamente, consegnarlo per lo smaltimento
ad unʼistituzione locale per il riciclaggio.
Convertidor de corriente DC/DC
con toma USB
Lea atentamente estas instrucciones de funciona-
miento antes de utilizar el aparato y guárdelas para
usos posteriores.
1 Aplicaciones
Este convertidor DC/DC para la conexión a un sis-
tema eléctrico de 12 V de coche sirve para suministrar
aparatos de bajo voltaje que puedan alimentarse o
cargarse mediante una conexión USB (reproductores
P3, sistemas de navegación por satélite, etc.).
2 Notas Importantes
Este aparato cumple con todas las directivas requeri-
das por la UE y por lo tanto está marcado con el sím-
bolo . El test de acuerdo con la directiva para auto-
móviles se hizo con el número e4 021558.
GEl aparato está adecuado para su utilización sólo en
interiores. Protéjalo de la humedad y del calor (tem-
peratura ambiente admisible: 0 – 40 °C).
GUtilice sólo un paño suave y seco para la limpieza,
no utilice nunca ni productos químicos ni agua.
GNo podrá reclamarse garantía o responsabilidad al-
guna por cualquier daño personal o material resul-
tante si el aparato se utiliza para otros fines diferen-
tes a los originalmente concebidos, si no se conecta
correctamente, si se sobrecarga o no se repara por
expertos.
3 Funcionamiento
1) Conecte el aparato de bajo voltaje que quiera ali-
mentar a la toma USB.
2) Conecte el convertidor DC/DC a una toma de 12 V
(toma de mechero) del sistema eléctrico del coche.
(Para un buen contacto eléctrico, esta toma no
debería contener restos de ceniza. Si es necesario
límpielo con un paño seco y suave.) Se iluminará el
indicador de corriente en la parte superior del apa-
rato.
3) Aunque el aparato conectado está apagado, el
convertidor DC/DC continúa teniendo un bajo con-
sumo de corriente. Por lo tanto, habría que desco-
nectarlo de la toma de 12 V si no se va a utilizar
durante un largo periodo de tiempo.
Hay un fusible colocado en la parte frontal del conver-
tidor. Para reemplazar el fusible, desenrosque la tapa
de plástico de la punta. Cambie siempre un fusible
fundido sólo por otro del mismo tipo.
4 Especi icaciones
Alimentación: . . . . . . . 12 – 13,8 V
Salida: . . . . . . . . . . . . . 5 V , 1 A máx.
Toma USB tipo A
Dimensiones: . . . . . . . 103 mm × 39 mm × 31 mm
Peso:..............150g
Sujeto a modificaciones técnicas.
Si va a poner el aparato fuera de servicio
definitivamente, llévelo a la planta de reci-
claje más cercana para que su eliminación
no sea perjudicial para el medioambiente.
CPA-1005 USB Best.-Nr. 28.2350
Copyr ght©by MONACOR INTERNATIONAL GmbH & Co. KG, Bremen, Germany. All r ghts reserved. A-0830.99.01.04.2008
IKonwerter DC/DC z gniazdem USB
Przed rozpoczęciem pracy z urządzeniem, prosimy
zapoznać się z instrukcją obsługi, a następnie zacho-
wać ją do wglądu.
1 Zastosowanie
Konwerter DC/DC służy do zasilania, z 12 V samo-
chodowego systemu elektrycznego, niskonapięciow-
ych urządzeń elektronicznych, które mogą być zasi-
lane przez port USB (np. odtwarzacze P3, systemy
nawigacji satelitarnej).
2 Środki bezpieczeństwa
Urządzenie spełnia wszystkie wymagania norm UE,
dzięki temu zostało oznaczone symbolem . Numer
testu zgodności z normami e4 021558.
GUrządzenie jest przeznaczone tylko do użytku
wewnątrz pomieszczeń. Należy chronić je przed
działaniem wody, wilgoci oraz wysokiej temperatury
(dopuszczalny zakres 0 – 40 °C).
GDo czyszczenia używać suchej, miękkiej ściereczki.
Nie używać wody ani środków chemicznych.
GProducent ani dostawca nie ponoszą odpowiedzial-
ności za wynikłe uszkodzenia sprzętu lub obrażenia
użytkownika w przypadku, gdy urządzenie jest wy-
korzystywane w innych celach niż to się przewiduje
lub jeśli jest nieodpowiednio zainstalowane, użytko-
wane lub naprawiane.
3 Obsługa
1) Podłączyć niskonapięciowe urządzenie elektro-
niczne do gniazda USB.
2) Podłączyć konwerter DC/DC do 12 V gniazda (gni-
azdo zapalniczki z samochodzie) samochodowego
systemu elektrycznego. (Gniazdo nie powinno być
zanieczyszczone popiołem z papierosów. Jeżeli
trzeba, wytrzeć je suchą, miękką ściereczką).
Zapali się dioda sygnalizacyjna na górnej stronie
urządzenia.
3) Nawet jeśli urządzenie jest wyłączone, konwerter
DC/DC pobiera niewielką ilość prądu. Jeżeli
urządzenie nie będzie przez dłuższy czas uży-
wane, należy odłączyć konwerter od gniazda 12 V.
Na przedniej stronie konwertera znajduje się komora
bezpiecznika. Aby wymienić bezpiecznik, należy
odkręcić plastikową pokrywę. Spalony bezpiecznik
wymieniać na nowy o identycznych parametrach!
4 Specy ikacja
Zasilanie: . . . . . . . . . . . 12 – 13,8 V
Wyjście: . . . . . . . . . . . . 5 V , max. 1 A
Gniazdo USB typ A
Wymiary: . . . . . . . . . . . 103 mm × 39 mm × 31 mm
Waga: . . . . . . . . . . . . . 150 g
Z zastrzeżeniem możliwości zmian.
Aby nie zaśmiecać środowiska, po całkowi-
tym zakończeniu eksploatacji urządzenia
należy je oddać do punktu recyklingu.
®
®
PL
E

This manual suits for next models

1

Other Monacor Media Converter manuals

Monacor PA-24AD User manual

Monacor

Monacor PA-24AD User manual

Monacor TVSP-410 User manual

Monacor

Monacor TVSP-410 User manual

Monacor IMG STAGELINE LSP-102 User manual

Monacor

Monacor IMG STAGELINE LSP-102 User manual

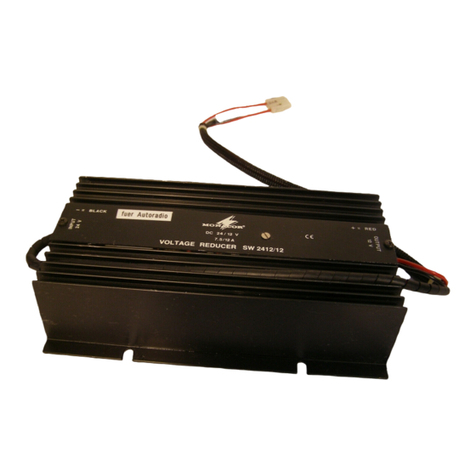
Monacor SW-2412/5 User manual

Monacor

Monacor SW-2412/5 User manual

Monacor USB-10AV User manual

Monacor

Monacor USB-10AV User manual

Monacor DTTA-2 User manual

Monacor

Monacor DTTA-2 User manual

Monacor HDDIST-104 User manual

Monacor

Monacor HDDIST-104 User manual

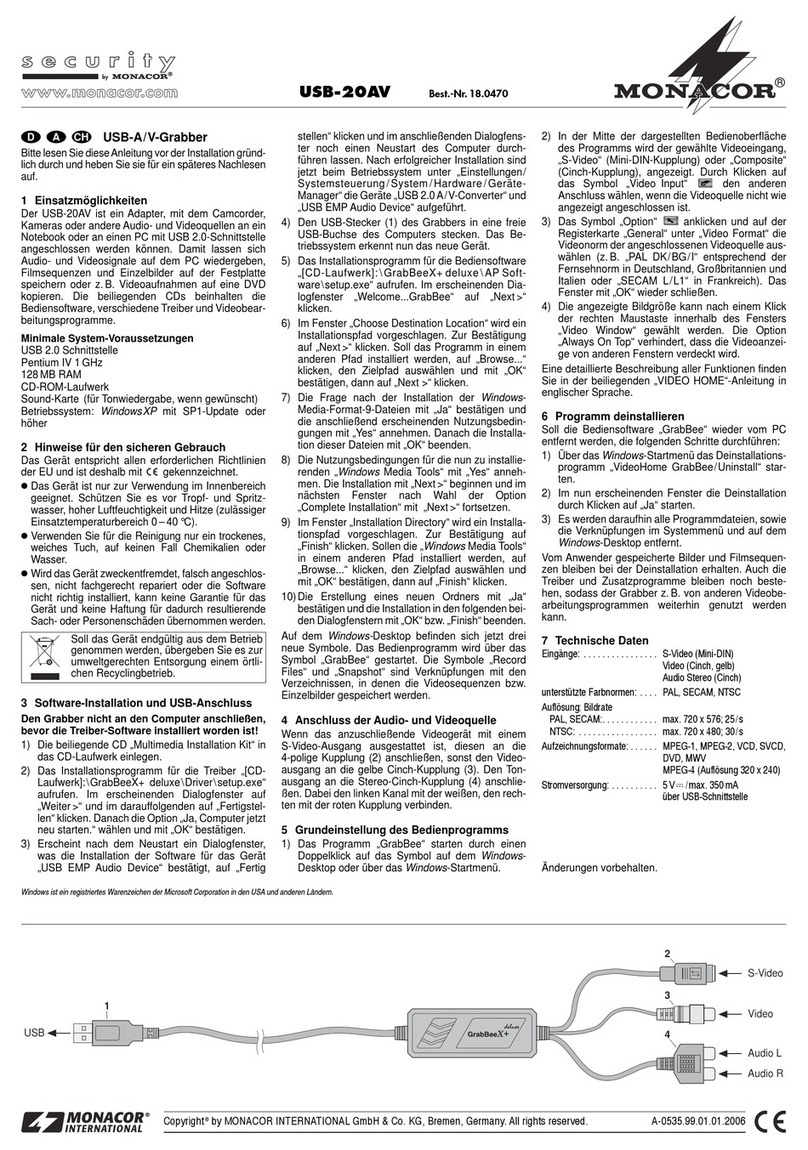
Monacor Security USB-20AV User manual

Monacor

Monacor Security USB-20AV User manual

Monacor SMC-1 User manual

Monacor

Monacor SMC-1 User manual

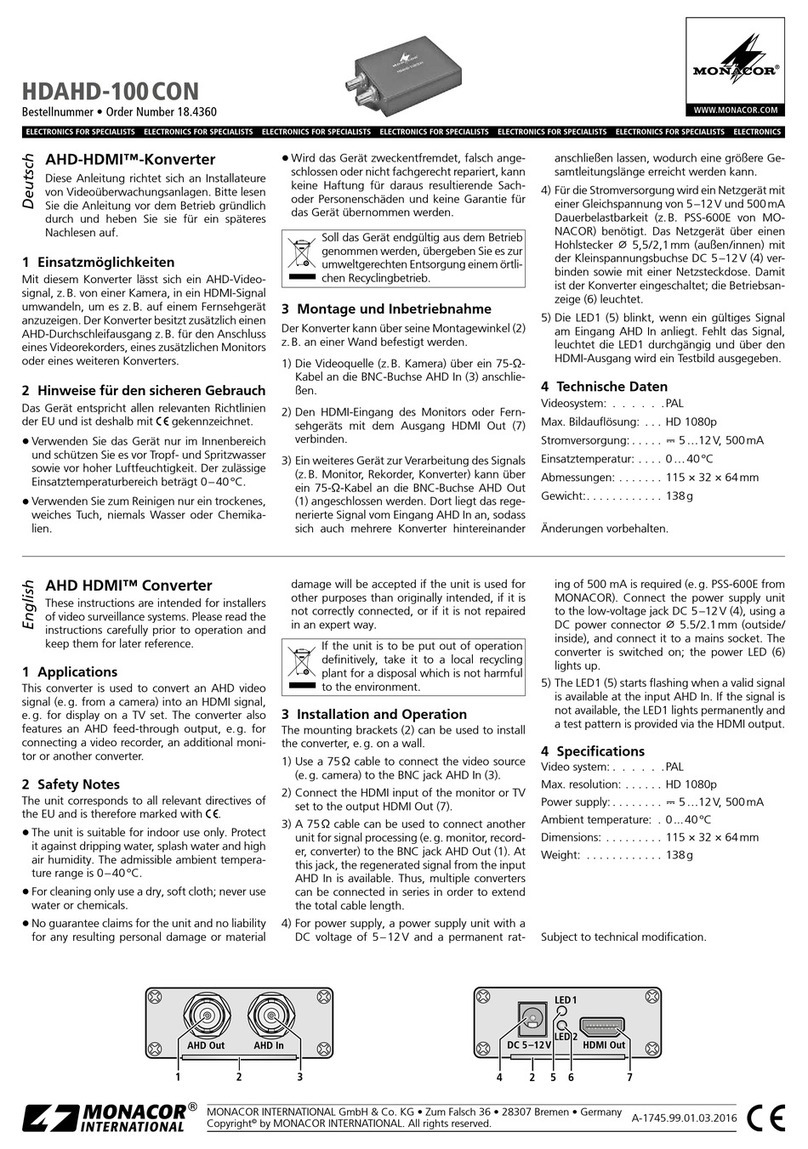
Monacor HDRCA-100CON User manual

Monacor

Monacor HDRCA-100CON User manual

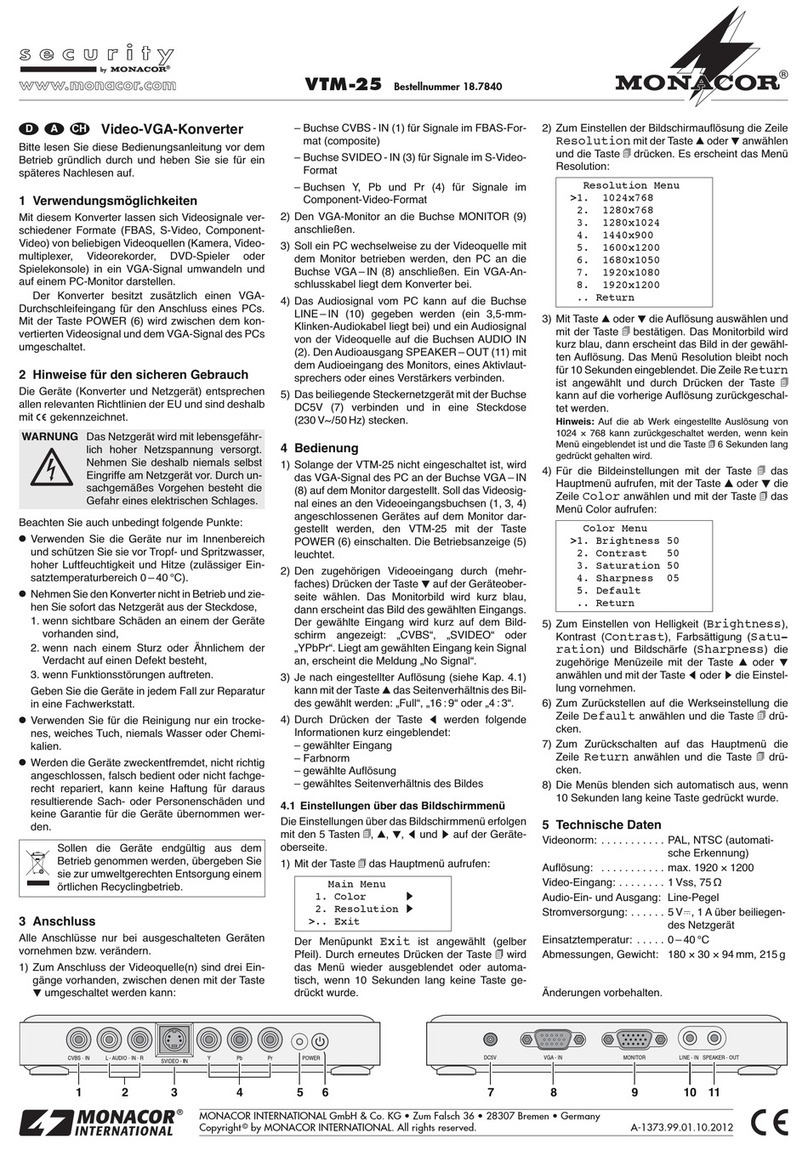
Monacor VTM-25 User manual

Monacor

Monacor VTM-25 User manual

Monacor UA-960 User manual

Monacor

Monacor UA-960 User manual

Monacor HDSDI-100CON User manual

Monacor

Monacor HDSDI-100CON User manual

Monacor VTM-10 User manual

Monacor

Monacor VTM-10 User manual

Monacor IMG Stageline LSP-102 User manual

Monacor

Monacor IMG Stageline LSP-102 User manual

Monacor SR-103DMX User manual

Monacor

Monacor SR-103DMX User manual

Monacor HDTVI-100 CON User manual

Monacor

Monacor HDTVI-100 CON User manual

Monacor TD-204 User manual

Monacor

Monacor TD-204 User manual

Monacor DTRA-2 User manual

Monacor

Monacor DTRA-2 User manual

Monacor SMC-1 User manual

Monacor

Monacor SMC-1 User manual

Monacor IMG STAGE LINE LSP-102 User manual

Monacor

Monacor IMG STAGE LINE LSP-102 User manual

Monacor DADC-144DT User manual

Monacor

Monacor DADC-144DT User manual

Monacor HDAHD-100 CON User manual

Monacor

Monacor HDAHD-100 CON User manual

Monacor MPS-1 User manual

Monacor

Monacor MPS-1 User manual

Popular Media Converter manuals by other brands

Marmitek Connect AH31 user manual

Marmitek

Marmitek Connect AH31 user manual

Botex MIDEA TRIGGER user manual

Botex

Botex MIDEA TRIGGER user manual

Pepperl+Fuchs ICA-AI-I/U-IO-V1 manual

Pepperl+Fuchs

Pepperl+Fuchs ICA-AI-I/U-IO-V1 manual

Schlage BZ200 quick start guide

Schlage

Schlage BZ200 quick start guide

Nitto AJC-16 instruction manual

Nitto

Nitto AJC-16 instruction manual

SIIG AV-GM08U3-S1 manual

SIIG

SIIG AV-GM08U3-S1 manual

EtherWAN EL2211 quick start guide

EtherWAN

EtherWAN EL2211 quick start guide

Humandata USB-010 user manual

Humandata

Humandata USB-010 user manual

Lynx Hilo Preliminary user manual

Lynx

Lynx Hilo Preliminary user manual

Baumer GXP1W Assembly instructions

Baumer

Baumer GXP1W Assembly instructions

Datalogic AMT58 Series instruction manual

Datalogic

Datalogic AMT58 Series instruction manual

DYNAPAR HS20 Series Technical bulletin

DYNAPAR

DYNAPAR HS20 Series Technical bulletin

StarTech.com VGA2VID instruction manual

StarTech.com

StarTech.com VGA2VID instruction manual

D-Link DFE-855 user manual

D-Link

D-Link DFE-855 user manual

iNels Elko AirTM-100NB quick start guide

iNels

iNels Elko AirTM-100NB quick start guide

KAMEHA KA164 user manual

KAMEHA

KAMEHA KA164 user manual

SGM A4 Installation & user manual

SGM

SGM A4 Installation & user manual

Ltech LT-853-6A quick start guide

Ltech

Ltech LT-853-6A quick start guide

manuals.online logo
manuals.online logoBrands
  • About & Mission
  • Contact us
  • Privacy Policy
  • Terms and Conditions

Copyright 2025 Manuals.Online. All Rights Reserved.