5.4.1 Title selection and fast reverse/ forward
Use the buttons TRK and (18) to select the
title desired:
– To go to the beginning of a title, press the but-
ton . Each time the button is pressed again,
the unit reverses one title.
– To go to the next title, press the button .
The buttons TRK /can also be used for
fast reverse/fast forward: Keep the appropriate
button pressed.
To select MP3 titles via their number on the
sound storage medium, call up the title selec-
tion menu:
1) Press the button MENU (10). appears on
the display.
2) Use the number buttons (12 – 19) to enter the
number of the title
or
turn the knob VOLUME (11) to select the
number.
3) Then immediately press the knob VOLUME.
The title is selected.
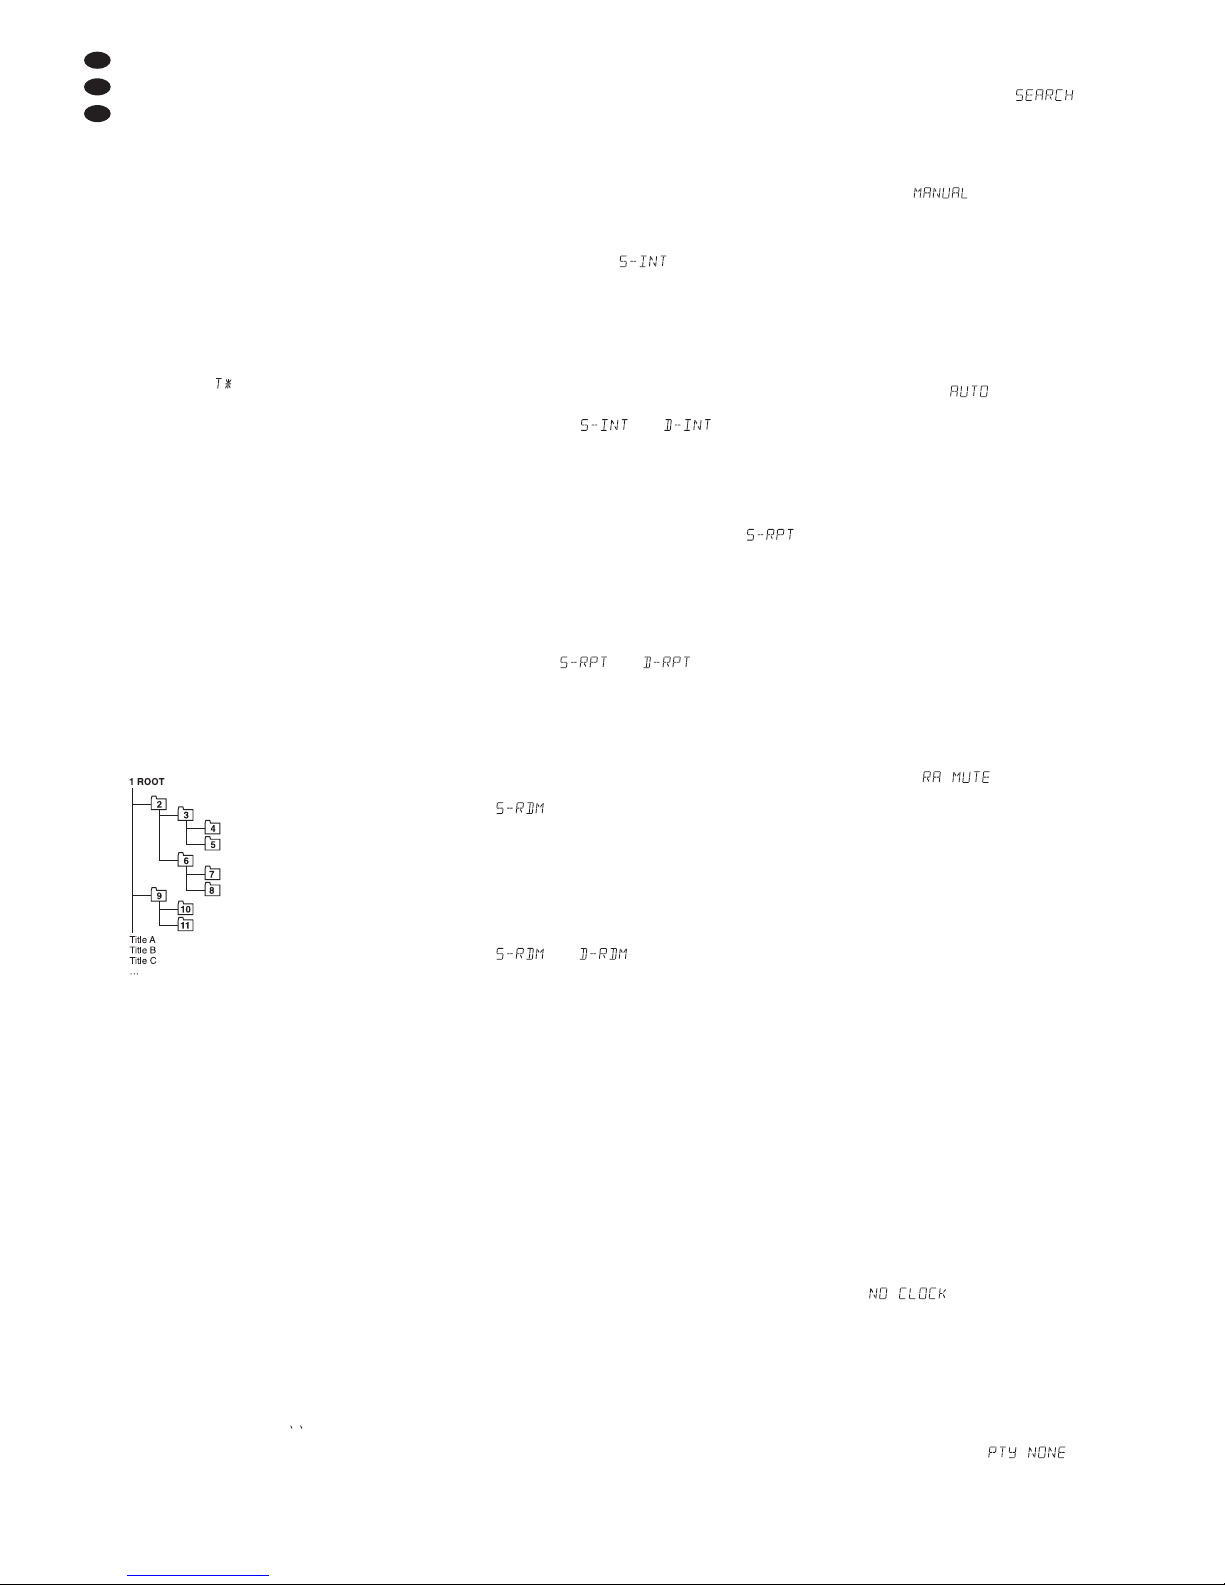
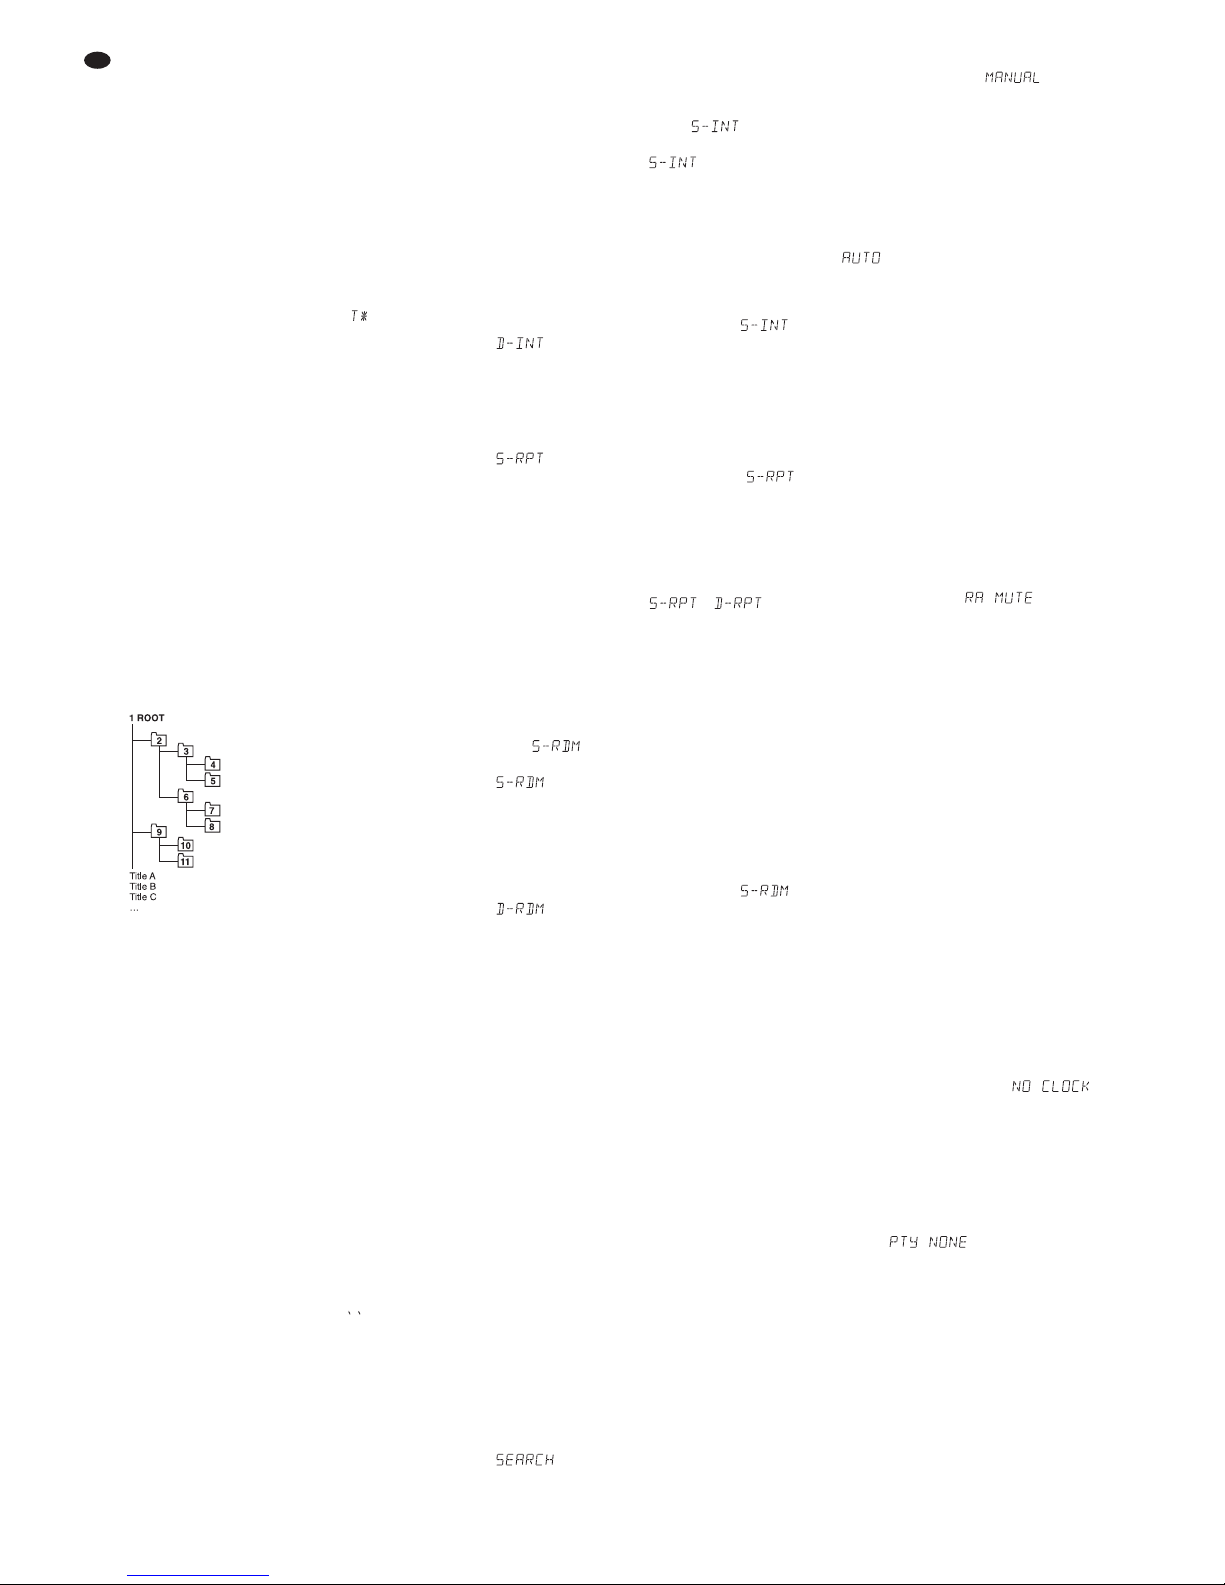
5.4.2 Folder selection
For sound storage media with MP3 files and mul-
tiple folders (directories), the following replay
sequence is applied:
1. first, all titles without folder on the root level
(filed in the folder “ROOT” by the unit)
2. then, the first folder of the root level with its
subfolders
3. then, the next folder of the root level with its
subfolders
etc.
Use the buttons DIR and (16) to select the
folder desired:
– Each time the button is pressed, the unit
goes to the first title of the previous folder.
– Each time the button is pressed, the unit
goes to the first title of the next folder.
To select a specific title in the folder while select-
ing a folder, call up the folder selection menu:
1) Press the button MENU (10) twice. DIR appears
on the display and MP3 flashes. The text line
shows the first folder.
2) Turn the knob VOLUME (11) to the left until
the name of the desired folder appears on the
display. (Starting with the first folder, turn the
knob to the left to subsequently go to the fold-
ers in ascending order, and, when the last
folder has been reached, turn the knob to the
right to subsequently go to the folders in
descending order.)
3) Press the button VOLUME; appears on
the text line. Then immediately turn the knob
to the left until the desired title is shown on
the text line. (Starting with the first title of the
folder, turn the knob to the left to subse-
quently go to the titles in ascending order,
and, when the last title has been reached,
turn the knob to the right to subsequently go
to the titles in descending order.)
4) Press the knob VOLUME. The title is se-
lected.
5.4.3 Various replay functions
Short replaying of the title beginnings
1) To replay the first 10 seconds of each title,
press the button SCAN (13). and the
title number appear on the display; for MP3
titles, the display of and the title
number alternates with the display of the file
name. If the current title has been played for
more than 10 seconds, the unit will go to the
next title.
If, for sound storage media with MP3 titles,
only the beginnings of the titles in the se-
lected folder are to replayed, keep the button
SCAN pressed for approx. 3 seconds when
switching on the function. Instead of ,
will appear on the display.
2) To deactivate the function, press the button
SCAN.
Repeated replaying of titles
1) To repeat a title, press the button RPT (14).
and the title number appear on the
display; for MP3 titles, the display of
and the title number alternates with the dis-
play of the file name.
If, for sound storage media with MP3 titles,
all titles of the selected folder are to be
repeated, keep the button RPT pressed for
approx. 3 seconds when switching on the
function. Instead of , will
appear on the display.
2) To deactivate the function, press the button
RPT.
Random replay
1) To replay all titles of the sound storage
medium at random, press the button RDM
(15). and the title number appear on
the display; for MP3 titles, the display of
and the title number alternates with
the display of the file name.
If, for sound storage media with MP3 titles,
only the titles of the folder selected are to be
replayed at random, keep the button RDM
pressed for approx. 3 seconds when switch-
ing on the function. Instead of ,
will appear on the display.
2) To deactivate the function, press the button
RDM.
The currently active function will be switched off
when one of the other two functions is switched
on.
5.5 Operating the tuner
5.5.1 Station tuning and storing
The tuner is able to receive FM stations and
medium wave stations. To allow storing of more
than six stations with the six station buttons
(12 – 16), the FM band has been divided into
three identical subbands. In each of the three
subbands (F 1, F 2, F 3) and in the medium wave
band (MW), six stations can be stored, i. e. a total
of 18 FM stations and 6 medium wave stations.
1) Use the button BAND (9) to select the desired
band. It is recommended to store six stations
in the band F1 first and then to switch over to
the band F2 and then to F3.
2) For station tuning, use either automatic or
manual station finding:
To start automatic station finding, briefly
press the button TUNE (18) (backward) or
(forward). Automatic station finding stops
at the next station. During station finding,
is shown on the display. Restart
station finding so many times until the desired
station is received.
For manual station finding, keep the button
or pressed until briefly appears
on the display. Then the received frequency
can be increased or reduced step by step with
each pressing of the button (in the FM band
by 50 kHz, in the MW band by 9 kHz). To run
quickly through a wide range, keep the button
or pressed. After manual station find-
ing, the unit switches to automatic station
finding after some seconds, unless the button
or has been pressed again before.
is briefly shown on the display.
3) When the station has been tuned, keep the
desired station button (12 – 16) pressed until
“ch” and the station number appear on the
right in the display (see fig. 1). Then the sta-
tion is stored under this number in the
respective band.
5.5.2 Calling stored stations
1) Use the button BAND (9) to select the band in
which the desired station has been stored.
2) Use the appropriate station button (12 – 16)
to select the station number: The stored sta-
tion is called; a stereo programme is indi-
cated by ST on the display.
5.5.3 Muting the tuner
To mute the tuner, briefly press the button
POWER/STOP (20); appears on the
display. To unmute the tuner, press the button
POWER/STOP again or use the knob VOLUME
(11).
5.5.4 RDS functions
If the selected station transmits RDS information
(radio data system), the name of the station will
appear on the text line of the display instead of
the frequency. Some stations show additional
information alternately with the station name,
e. g. music title, artist.
If a station offers traffic information, TP (traffic
programme) will appear on the display. If EON
(enhanced other networks) is displayed and if a
programme is received which at present does
not offer traffic information, the tuner will auto-
matically switch to another programme of the
same broadcasting station when traffic mes-
sages are transmitted there. After the traffic
announcement, the unit will switch back to the
previous programme.
Information
Press the button DISP (19) repeatedly to change
between the following displays:
– time indication
If no time is transmitted, will be
displayed. As the time is not transmitted con-
tinuously, it can take a few minutes after
switching on the unit until the time is available.
– indication of the band (F1, F2, F3, MW) and
the station frequency
– indication of the programme type
If no programme type is provided by the
station, will be displayed.
– indication of the station name (basic setting)
The display switches to the basic setting a few
seconds after the button was pressed the last
time.
Note: In the mode “Dual”, pressing the button DISP will
also show the ID3 tags of the MP3 title being replayed
(see chapter 5.4, item 2). Press the button DISP repeat-
edly until the information desired is shown.
Alternative frequencies
When the function “alternative frequencies” is
activated (AF on the display), the unit constantly
checks the strength of the received signal and
will, if the received signal is too poor, automati-
Example of the replay
sequence for a sound
storage medium with
titles on the root level
and with 10 folders.
10
GB