manuals.online logo
Brands
  1. Home
  2. •
  3. Brands
  4. •
  5. Monacor
  6. •
  7. Speakers System
  8. •
  9. Monacor ETS-215/WS User manual

Monacor ETS-215/WS User manual

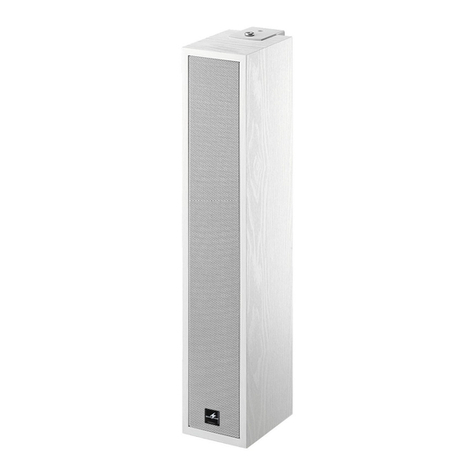
ELA-Tonsäulen
Diese Anleitung richtet sich an Installateure, die
ausreichende Fachkenntnisse in der 100-V-Be-
schallungstechnik besitzen. Bitte lesen Sie die
Anleitung vor der Installation gründlich durch und
heben Sie sie für ein späteres Nachlesen auf.
1 Verwendungsmöglichkeiten
Diese Lautsprechersäulen sind speziell für den Ein-
satz in ELA-Anlagen konzipiert, die mit 100-V-
Technik arbeiten. Durch die Aluminium-Profilgehäuse
sind sie besonders robust.
2 Wichtige Hinweise für den Gebrauch
Diese Tonsäule entspricht allen relevanten Richtlinien
der EU und ist deshalb mit gekennzeichnet.
GVerwenden Sie die Tonsäule nur im Innenbereich.
Schützen Sie sie vor Tropf- und Spritzwasser, hoher
Luftfeuchtigkeit und Hitze (zulässiger Einsatztempe-
raturbereich 0 – 40 °C).
GBenutzen Sie für die Reinigung nur ein trockenes,
weiches Tuch, auf keinen Fall Chemikalien oder
Wasser.
GWird die Tonsäule zweckentfremdet, nicht fachge-
recht montiert, falsch angeschlossen oder über-
lastet, kann keine Haftung für daraus resultierende
Sach- oder Personenschäden und keine Garantie
für die Tonsäule übernommen werden.
3 Montage
Zur Montage werden zwei Montagewinkel sowie
passende Scheiben und Schrauben mitgeliefert. Die
Lautsprechersäule an geeigneter Stelle fachgerecht
befestigen.
4 Elektrischer Anschluss
1) Falls die ELA-Anlage eingeschaltet ist, diese zuerst
komplett ausschalten!
WICHTIG Für eine sichere Montage müssen unbe-
dingt zwei Montagewinkel pro Lautsprechersäule
verwendet werden!
WARNUNG Im Betrieb liegt berührungsgefährliche
Spannung bis 100 V an der Anschluss-
leitung an.
Die Installation darf nur durch Fachper-
sonal erfolgen.
Achten Sie auf die richtige Leistungsanpassung.
Eine falsche Anpassung führt zur Zerstörung des
ELA-Verstärkers! Die Summe der Leistungen aller
angeschlossenen Lautsprecher darf die Verstärker-
leistung nicht überschreiten.
Soll die Tonsäule endgültig aus dem Betrieb
genommen werden, übergeben Sie sie zur
umweltgerechten Entsorgung einem örtli-
chen Recyclingbetrieb.
2) Auf der Rückseite den Verschlussstopfen des
Leistungsumschalters (a) herausziehen. Mit Hilfe
eines Schraubendrehers die Nennbelastung durch
die Lautsprechersäule und deren Impedanz mit
dem Schalter einstellen.
Die Impedanz, die sich aus der eingestellten Belas-
tung ergibt, ist in der folgenden Tabelle aufgeführt:
3) Die Lautsprechersäule über die Anschlussleitung
mit dem Ausgang des ELA-Verstärkers verbinden.
4) Beim Anschluss von mehreren Lautsprechersäulen
darauf achten, dass die Lautsprecher alle gleich
gepolt werden (schwarze Ader = Minuspol).
Änderungen vorbehalten.
Leistung Impedanz
2W 5kΩ
3,75 W 2,66 kΩ
7,5 W 1,33 kΩ
15 W 666 Ω
30 W 333 Ω
PA Audio Columns
These instructions are intended for installers with
sufficient knowledge in 100 V technology for PA
applications. Please read the instructions care-
fully prior to installation and keep them for later
reference.
1 Applications
These speaker columns are designed especially for
PA systems which operate with 100 V technique. Due
to the cabinets of aluminium profile they are especially
robust.
2 Important Notes
The column speaker corresponds to all relevant direc-
tives of the EU and is therefore marked with .
GOnly use the column speaker indoors. Protect it
against dripping water and splash water, high air
humidity, and heat (admissible ambient temperature
range 0 – 40 °C).
GFor cleaning only use a dry, soft cloth, never use
chemicals or water.
GNo guarantee claims for the column speaker and no
liability for any resulting personal damage or mate-
rial damage will be accepted if the column speaker
is used for other purposes than originally intended,
if it is not correctly mounted or connected, or if it is
overloaded.
3 Mounting
For mounting, two mounting brackets as well as
matching discs and screws are included in the deliv-
ery. Fix the speaker column at a suitable place in an
expert way.
4 Electrical Connection
1) In case the PA system is switched on, first switch it
off completely!
WARNING During operation, there is a hazard of
contact with a voltage of up to 100 V at
the connection cable.
The installation must always be carried
out by skilled personnel only.
Observe the correct power matching. An incorrect
matching will damage the PA amplifier! The total
power of all speakers connected must not exceed the
amplifier power.
If the column speaker is to be put out of oper-
ation definitively, take it to a local recycling
plant for a disposal which is not harmful to the
environment.
IMPORTANT For a safe mounting use in any case
two mounting brackets for each column speaker!
2) On the rear side pull out the locking plug of the
power selector switch (a). By means of a screw
driver adjust the rated load by the speaker column
and its impedance with the switch.
The impedance which results from the adjusted
load is listed in the following table:
3) Connect the speaker column via the connection
cable to the output of the PA amplifier.
4) When connecting several speaker columns pay
attention that the speakers are equally polarized
(black core = negative pole).
Subject to technical modification.
Power Impedance
2W 5kΩ
3.75 W 2.66 kΩ
7.5 W 1.33 kΩ
15 W 666 Ω
30 W 333 Ω
ETS-215/WS Bestellnummer 16.1300
ETS-230/WS Bestellnummer 16.1310
ELECTRONICS FOR SPECIALISTS ELECTRONICS FOR SPECIALISTS ELECTRONICS FOR SPECIALISTS ELECTRONICS FOR SPECIALISTS ELECTRONICS FOR SPECIALISTS ELECTRONICS
MONACOR INTERNATIONAL GmbH & Co. KG • Zum Falsch 36 • 28307 Bremen • Germany
Copyright©by MONACOR INTERNATIONAL. All rights reserved. A-0972.99.03.01.2015
®
DeutschEnglish
Technische Daten
Frequenzbereich
Anzahl der Lautsprecherchassis
Nennbelastbarkeit
Mittlerer Schalldruck (1 W/1 m)
Abmessungen (B × H × T)
Gewicht
Specifications
Frequency range
Number of speakers
Power rating
SPL (1 W/1 m)
Dimensions (W × H × D)
Weight
ETS-215/WS
250 – 15 000 Hz
4
15/7,5/3,75/2WRMS
92 dB
105 × 405 × 85 mm
2,5 kg
ETS-230/WS
200 – 15 000 Hz
8
30/15/7,5/3,75 WRMS
95 dB
105 × 687 × 85 mm
4,1 kg
Colonnes sonores Public Address
Cette notice sʼadresse aux installateurs possédant
des connaissances suffisantes en technique de
sonorisation ligne 100 V. Veuillez lire la présente
notice avec attention avant l'installation et conser-
vez-la pour pouvoir vous y reporter ultérieurement.
1 Possibilités dʼutilisation
Les colonnes sonores sont spécialement développées
pour une installation dans des systèmes de sonorisa-
tion Public Address fonctionnant en ligne 100 V. Les
boîtiers en profilé dʼaluminium sont particulièrement
robustes.
2 Conseils importants dʼutilisation
Cette colonne sonore répond à toutes les directives
nécessaires de lʼUnion européenne et porte donc le
symbole .
GCette colonne sonore nʼest conçue que pour une uti-
lisation en intérieur. Protégez-la de tout type de pro-
jections dʼeau, des éclaboussures, dʼune humidité
dʼair élevée et de la chaleur (plage de température
de fonctionnement autorisée : 0 – 40 °C).
G
Pour le nettoyage, utilisez uniquement un chiffon sec
et doux, en aucun cas de produits chimiques ou dʼeau.
GNous déclinons toute responsabilité en cas de dom-
mages matériels ou corporels résultants si la colonne
sonore est utilisée dans un but autre que celui pour
lequel elle a été conçue, si elle nʼest pas correcte-
ETS-215/WS Order number 16.1300
ETS-230/WS Order number 16.1310
ELECTRONICS FOR SPECIALISTS ELECTRONICS FOR SPECIALISTS ELECTRONICS FOR SPECIALISTS ELECTRONICS FOR SPECIALISTS ELECTRONICS FOR SPECIALISTS ELECTRONICS
MONACOR INTERNATIONAL GmbH & Co. KG • Zum Falsch 36 • 28307 Bremen • Germany
Copyright©by MONACOR INTERNATIONAL. All rights reserved. A-0972.99.03.01.2015
®
Français
ment installée, branchée ou sʼil y a surcharge ; en
outre, la garantie deviendrait caduque.
3 Montage
Deux étriers de fixation, avec vis et rondelles, sont
livrés avec la colonne sonore pour permettre son mon-
tage. Fixez la colonne sonore à lʼendroit voulu selon
les règles de sécurité.
4 Branchement électrique
AVERTISSEMENT Pendant le fonctionnement, une
tension de contact dangereuse
jusquʼà 100 V est présente au
câble de branchement.
Seul un personnel qualifié peut
effectuer lʼinstallation.
Veillez à adapter la puissance correctement. Une
adaptation erronée endommagera lʼamplificateur Pu-
blic Adress ! La somme des puissances de tous les
haut-parleurs reliés ne doit pas dépasser la puis-
sance de lʼamplificateur.
Lorsque la colonne sonore est définitivement
retirée du service, vous devez la déposer
dans une usine de recyclage adaptée pour
contribuer à son élimination non polluante.
IMPORTANT Pour un montage sûr, deux étriers de
montage par colonne doivent être impérativement
utilisés.
1) Si lʼinstallation de Public Address est allumée,
veillez avant toute manipulation à la débrancher!
2) Sur la face arrière, tirez le bouchon de fermeture du
sélecteur de puissance (a): à lʼaide dʼun tournevis,
réglez, avec lʼinterrupteur, la puissance nominale
selon la colonne sonore et son impédance.
Lʼimpédance résultant de la puissance réglée figure
dans le tableau suivant:
3) Via le cordon de branchement, reliez la colonne so-
nore à la sortie de lʼamplificateur Public Address.
4) Si plusieurs colonnes sonores sont branchées,
veillez à ce que les haut-parleurs aient tous la
même polarité (conducteur noir: pôle moins).
Tout droit de modification réservé.
Puissance Impédance
2W 5kΩ
3,75 W 2,66 kΩ
7,5 W 1,33 kΩ
15 W 666 Ω
30 W 333 Ω
Colonne sonore PA
Queste istruzioni sono rivolte agli installatori che
possiedono delle conoscenze specifiche suffi-
cienti della tecnica di sonorizzazione a 100 V. Vi
preghiamo di leggerle attentamente prima dell'in-
stallazione e di conservarle per un uso futuro.
1 Possibilità dʼimpiego
Queste colonne sonore sono state realizzate special-
mente per lʼimpiego in impianti PA che usano unʼuscita
audio di 100 V. La custodia profilata in alluminio le
rende particolarmente robuste.
2 Avvertenze di sicurezza
La colonna sonora è conforme a tutte le direttive ri-
chieste dellʼUE e pertanto porta la sigla .
GLa colonna sonora è prevista solo per lʼuso allʼinterno
di locali. Proteggerla dallʼacqua gocciolante e dagli
spruzzi dʼacqua, da alta umidità dellʼaria e dal calore
(temperatura dʼimpiego ammessa fra 0 e 40 °C).
GPer la pulizia usare solo un panno morbido, asciutto;
non impiegare in nessun caso prodotti chimici o ac-
qua.
GNel caso dʼuso improprio, di montaggio non a regola
dʼarte, di collegamenti sbagliati o di sovraccarico
della colonna sonora, non si assume nessuna re-
sponsabilità per eventuali danni consequenziali a
persone o a cose e non si assume nessuna garan-
zia per la colonna sonora.
3 Montaggio
Per il montaggio, sono in dotazione due angoli di mon-
taggio con rondelle e viti. Fissare bene la colonna in
un posto adatto.
4 Collegamento elettrico
AVVERTIMENTO Durante il funzionamento, al cavo
di collegamento è presente una
tensione pericolosa fino a 100 V.
Lʼinstallazione deve essere fatta
solo da personale qualificato.
Fare attenzione al coretto adattamento della po-
tenza. Lʼadattamento errato porta alla distruzione
dellʼamplificatore PA! La somma delle potenze di tutti
gli altoparlanti collegati non deve superare la potenza
dellʼamplificatore.
IMPORTANTE Per un montaggio sicuro è assoluta-
mente necessario usare due angoli di montaggio per
ogni colonna!
Se si desidera eliminare la colonna sonora
definitivamente, consegnarla per lo smal-
timento ad unʼistituzione locale per il rici-
claggio.
1) Se lʼimpianto PA è già acceso occorre per prima
cosa spegnerlo completamente!
2) Estrarre il tappo del commutatore di potenza (a) sul
retro. Con lʼaiuto di un cacciavite, impostare la po-
tenza nominale della colonna e la sua impedenza.
La seguente tabella indica lʼimpedenza che risulta
dalla potenza impostata:
3) Collegare la colonna sonora con lʼuscita dellʼampli-
ficatore PA mediante il cavo di collegamento.
4) Se si collegano diverse colonne sonore, fare atten-
zione allʼidentica polarità di tutte le colonne (con-
duttore nero = negativo).
Con riserva di modifiche tecniche.
Potenza Impedanza
2W 5kΩ
3,75 W 2,66 kΩ
7,5 W 1,33 kΩ
15 W 666 Ω
30 W 333 Ω
Caractéristiques techniques ETS-215/WS
250 – 15 000 Hz
4
15/7,5/3,75/2WRMS
Bande passante
92 dB
105 × 405 × 85 mm
2,5 kg
ETS-230/WS
Nombre de haut-parleurs
200 – 15 000 Hz
8
30/15/7,5/3,75 WRMS
95 dB
Puissance nominale
105 × 687 × 85 mm
4,1 kg
Pression sonore moyenne (1 W/1 m)
Dimensions (L × H × P)
Poids
Dati tecnici
Banda passante
Numero altoparlanti
Potenza nominale
Pressione sonora media (1W/1m)
Dimensioni (L × H × P)
Peso
Italiano
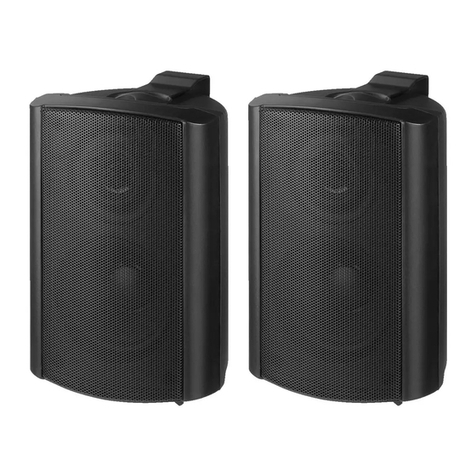
This manual suits for next models

3

Other Monacor Speakers System manuals

Monacor ETS-515TW/SW User manual

Monacor

Monacor ETS-515TW/SW User manual

Monacor EDL-11 User manual

Monacor

Monacor EDL-11 User manual

Monacor PAB-6WP/WS User manual

Monacor

Monacor PAB-6WP/WS User manual

Monacor IMG Stageline MCX-10 User manual

Monacor

Monacor IMG Stageline MCX-10 User manual

Monacor DN-4 User manual

Monacor

Monacor DN-4 User manual

Monacor ETS-422TW/WS User manual

Monacor

Monacor ETS-422TW/WS User manual

Monacor JTS TG-10R/1 User manual

Monacor

Monacor JTS TG-10R/1 User manual

Monacor TXA-602/SW User manual

Monacor

Monacor TXA-602/SW User manual

Monacor MKS-26/SW User manual

Monacor

Monacor MKS-26/SW User manual

Monacor EAM-17DT User manual

Monacor

Monacor EAM-17DT User manual

Monacor MKA-60SET/SW User manual

Monacor

Monacor MKA-60SET/SW User manual

Monacor TXA-400 User manual

Monacor

Monacor TXA-400 User manual

Monacor DSM-26LAN User manual

Monacor

Monacor DSM-26LAN User manual

Monacor EUL-75-WS User manual

Monacor

Monacor EUL-75-WS User manual

Monacor MKS-26/SW User manual

Monacor

Monacor MKS-26/SW User manual

Monacor img Stage Line MEGA-110 User manual

Monacor

Monacor img Stage Line MEGA-110 User manual

Monacor PAB-6WP-WS User manual

Monacor

Monacor PAB-6WP-WS User manual

Monacor EDL-110-WS User manual

Monacor

Monacor EDL-110-WS User manual

Monacor WALL-04T-SW User manual

Monacor

Monacor WALL-04T-SW User manual

Monacor RL-1EN User manual

Monacor

Monacor RL-1EN User manual

Monacor IMG STAGELINE LR-1000SAT User manual

Monacor

Monacor IMG STAGELINE LR-1000SAT User manual

Monacor ESP-5HQ User manual

Monacor

Monacor ESP-5HQ User manual

Monacor ESP-215/WS User manual

Monacor

Monacor ESP-215/WS User manual

Monacor ESP-76AB/ WS User manual

Monacor

Monacor ESP-76AB/ WS User manual

Popular Speakers System manuals by other brands

Community R2-SERIES Installation & operation manual

Community

Community R2-SERIES Installation & operation manual

iLive ITB066B user guide

iLive

iLive ITB066B user guide

Philips Fidelio CSS7235Y quick start guide

Philips

Philips Fidelio CSS7235Y quick start guide

TECHWOOD ST64 owner's manual

TECHWOOD

TECHWOOD ST64 owner's manual

Alphasonik AKDJ8BAT operating instructions

Alphasonik

Alphasonik AKDJ8BAT operating instructions

Louroe Electronics ASK-4 304-DV Installation and operating instructions

Louroe Electronics

Louroe Electronics ASK-4 304-DV Installation and operating instructions

Well WHOOPEE user manual

Well

Well WHOOPEE user manual

Yamaha PDX-B11 owner's manual

Yamaha

Yamaha PDX-B11 owner's manual

Electro-Voice EVS-15B Brochure & specs

Electro-Voice

Electro-Voice EVS-15B Brochure & specs

JBL EVOi.sys user guide

JBL

JBL EVOi.sys user guide

Microlab H21 user manual

Microlab

Microlab H21 user manual

LG S80QR Simple manual

LG

LG S80QR Simple manual

PSB speaker system owner's guide

PSB

PSB speaker system owner's guide

Samsung HW-K355 user manual

Samsung

Samsung HW-K355 user manual

Polk Audio AMR130 owner's manual

Polk Audio

Polk Audio AMR130 owner's manual

Aaron ATS-1 brochure

Aaron

Aaron ATS-1 brochure

Harman Kardon SB 30 quick start guide

Harman Kardon

Harman Kardon SB 30 quick start guide

EAW FR129z Specifications

EAW

EAW FR129z Specifications

manuals.online logo
manuals.online logoBrands
  • About & Mission
  • Contact us
  • Privacy Policy
  • Terms and Conditions

Copyright 2025 Manuals.Online. All Rights Reserved.