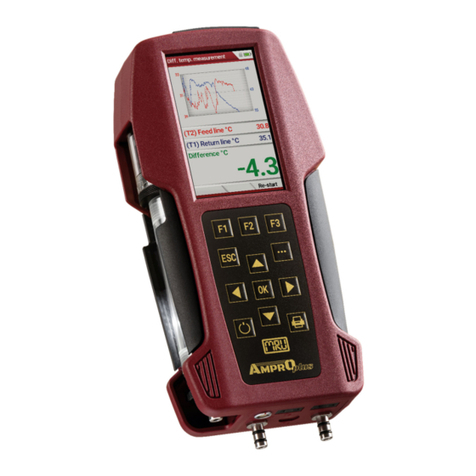
mru AMPRO 2000 GOLD User manual

1 | P a g e
AMPRO 2000 –Quick Start Guide

2 | P a g e
AMPRO 2000 –Quick Start Guide
INDEX ANALYZER:
Introducing the AMPRO 2000 3
AMPRO 2000 connections (top and bottom) 3
Display 4
Key pad 4
Power up the AMPRO 2000 5
Taking a gas measurement 5
Modifying the measurement screen 5
Storing measurements 6
Viewing and changing analyzer settings 6
Charging the battery 6
Power down the AMPRO 2000 7
Leak proof test 7
INDEX BLUETOOTH:
Analyzer Bluetooth settings 12
Android phone Bluetooth connection 11
iOS phone Bluetooth connection 13
Taking a measurement / Adding parameters 14

3 | P a g e
AMPRO 2000 –Quick Start Guide
1. INTRODUCING THE AMPRO 2000.
·The AMPRO 2000 is unique in that it can analyze up to 7 gases –O2, CO, CO2, NO, NO2, SO2and H2S in a single, compact
handheld analyzer. No other analyzer that size can do more than 4 gases! In addition, the AmPro 2000 can be equipped to
calculate many other parameters as listed below.
·The AMPRO 2000 is very competitively priced, certainly for 7 gases, but even in the 2, 3 and 4 gas configurations, it costs
less than any major competitor.
·Measures ambient air and stack gas temperatures; stack draft; differential pressure and temperature.
·Calculates mg/Nm3; NOxas mg/m3NO; combustion calculations based on fuel type –CO2, excess air, heat losses,
combustion efficiency, and flue gas dew point.
2. THE AMPRO 2000’s MANY FEATURES AND BENEFITS
·Sleek, compact and rugged construction
·Large, bright, 3.5”color display
·Robust, stainless steel connectors
·Mini-USB interface, SD card reader
·High speed infrared printer
·Menu guided software
·Integrated, backlit condensate separator
·Rechargeable Li-Ion battery –15 hours
·Universal power supply with charger
1 Color display
2 Condensate separator
3 Key pad
4 Port cover
5 SD Card reader
6 USB port
7 IR window for printer
8 Hose connection probe condensate trap
9 Connector T-Gas
10 Connector T-Ambient air
11 Connector draft
12 Connector differential pressure
13 AUX port / T-Gas
STD. Bottom ViewBottom View with OPTION AUX
TOP View

4 | P a g e
AMPRO 2000 –Quick Start Guide
The Display
All information required to operate the analyzer is displayed as shown below.
1 Menu bar
2 Function key bar
3 Display panel
-Menu
-Measurement value
4 Zeroing active
5 SD-Card in the slot
-Indication GREEN
Read- and write access
-Indication YELLOW
only Read access
(SD-Card write protected)
-Indication RED
Malfunction
6 Battery charge condition
The Key pad
ON/OFF
To switch the analyzer on or off
Function Keys Activates the functions seen on the display
Menu Key
Will show all available functions in the window that are currently in use –also those which
have an own key on the key pad like the printer and the three function keys.
ESC Key
Abort or return to the menu above
Arrow Keys Jump in between lines
Arrow Keys Change values
OK Key Confirmation key, select a marked menu point
Printer Key
Activates the printer function in the measuring and service window.

5 | P a g e
AMPRO 2000 –Quick Start Guide
3. TURN THE AMPRO 2000 ON USING THE BUTTON
The screens below appears, the AMPRO 2000 automatically zeros itself every time it is switched on.
The MRU Logo is
displayed briefly,
then the internal
gas pump turns
on.
Followed by this
screen pointing
out that the probe
must be in
ambient air while
the analyzer zeros
The zeroing bar is
activated while the
analyzer zeros….
then disappears
when the unit is
zeroed. The pump
turns off.
The analyzer is
now ready for
measurement.
Press OK for Gas
Measurement or
use the arrows to
jump between the
lines.
4. TAKING A GAS MESUREMENT
Zeroing is
completed and
your analyzer is
ready to take a
measurement.
Press OK for Gas
Measurement
Select one of the 4
programs then
press OK.
(Each program can
have a customized
screen and
different CO Limit
settings)
Select your fuel
type and press OK.
(The fuel type list
can be modified
using the F2
button).
or
Insert the probe until
you find the hottest
spot in the gas
stream. Then press
OK (or F1).
(this function can be
activated and
deactivated in the
“EXTRAS MENU”
“SETTINGS”)
The gas pump starts
and extracts gas from
the exhaust.
The values will start
changing –once the
measured values are
stable you can store
or print the results.
5. CHANGING THE MEASUREMENT WINDOW –this also defines the print out if you have an external printer
You can modify the
screen for your
needs. In total
there are 3 pages
with 6 values on
each page.
Press the
Folder button
Scroll down to
Define Measuring
Window and press
OK.
The top line is now
highlighted black.
Scroll to the line
that you want to
modify.
These are used to
scroll up and down
to the line you
want to modify
Once all
modifications are
completed, press
the folder button
These are used to
modify the lines
which are
highlighted

6 | P a g e
AMPRO 2000 –Quick Start Guide
Press OK to save
the changes
This procedure can
be performed for
each of the 4
programs.
6. STORING A MEASUREMENT TO THE INTERNAL MEMORY
You can save the measured value to the internal storage
Press the F2
button
Each measurement
must be save to a
site. If there is no
site available yet,
you must first
create one.
Press the F1
button
Press the F2
button to get an
AUTO number
The analyzer will
select the next
available no
Press the F3
button to save the
site.
Please note!
You have saved
the site you still
have to save the
measurement to
that site.
Press the F3
button to save the
measurement.
7. VIEWING AND CHANGING ANALYZER SETTINGS
Press
the F3
button
to get
to the
EXTRAS
menu.
Press OK
to enter
settings
Scroll
Press the F3
button to
get to the
next
window
Modify
8. HOW TO CHARGE THE INTERNAL BATTERY
Connect
the
analyzer
to the
charger
using the
USB port
The MRU
Logo is
displayed
briefly…
then the
analyzer
switches
to
charging
mode
When the
battery is fully
charged, Trickle
charge will be
activated

7 | P a g e
AMPRO 2000 –Quick Start Guide
9. HOW TO TURN THE ANALYZER OFF (power down)
The analyzer can be turned off at any time but it should be clear of gases before it is turned off.
Allow the analyzer to purge the sensors for at least one minute before shutting down.
Press the on/off
button at any time
Press the OK
button
Additional info will
appear then the
screen turns blank
If there is still gas in the analyzer, shut down will happen as follows:
Press the
on/off
button at
any time
Press the
OK button
Once the
sensors are
purged, this
screen
appears
10. LEAK PROOF TEST
Your AMPRO 2000 has a LEAK TEST which enables you to check the systems for leaks.
Every component –probe tube –probe hoses –condensate separator and internal hoses are checked for any leaks.
If the leak test fails the analyzer will notify you and you should check the components for any defects. Here is how to proceed:
We suggest to perform this test on a daily basis!
Here is how to proceed:
Your analyzer
has completed
zeroing –
Press F3 for
extras
Scroll down
to Leak
proof test
then press
OK
Install the
black
rubber cap
on the tip of
the probe
tube.
The leak test
will start and
count down
from 10
seconds to
zero.
At the end of
the test the
analyzer will
display the
result of the
test.
When the result
is OK then you
can make gas
measurements.
When the
result is
LEAKAGE then
you should
check the
system for any
leakages.
See possible
reasons for
leaks on the
next pages

8 | P a g e
AMPRO 2000 –Quick Start Guide
Here is how it works:
Important!
The probe has to be connected to the analyzer,
both the gas sampling line and the draft line
must be connected.
Once the test cap it connected to the probe
tube tip, we have a closed system.
Phase 1
The gas pump (6) will create a vacuum and the
negative pressure is measured using the draft
sensor (14).
Once a defined pressure is reached the pump
will stop and the test enters Phase 2 and will
count down for 10 seconds.
During this time the pressure is monitored, the
analyzer will detect a leak in the system should
the pressure drop.
In case your analyzer has failed the test and you
don’t know if it is the probe, analyzer or
condensate separator, then you can perform
this test without the probe, you would just have
to connect the condensate separator port to
the draft port, using a silicone hose.
Now you can perform the LEAK TEST again -
-if the test passes, you have a leak in
the probe system.
-If the test fails again, you have a leak
either in your condensate separator or
analyzer.
PLEASE NOTE!!
The connection shown on the left is for this test
ONLY. Never use this connection in any other
menus!

9 | P a g e
AMPRO 2000 –Quick Start Guide
Possible reasons the test has failed.
Condensate Separator:
Defect or missing O-
Rings / cracked
condensate show glass
Probe handle and probe tube:
Defect or missing O-Rings.
Or the connection is not tight enough.
Hoses:
Defect hose - very common at
the condensate separator port.
Hoses:
Defect hose - very common at the probe handle.
If you have this PRE-Filter (# 56356) installed, check the show glass
for cracks and check the O-Rings
Also possible:
Internal pump is not working or doesn’t have enough suction.
Spare parts.
POS. Parts for Condensate Separator Part # POS. Parts for Probe Part #
12
Filter housing with O
-
Ring
63919
9
O
-
Ring 8 x 2.4 (probe)
61065
4
O
-
Ring 22 x 1.5
64120
10
O
-
Ring 3
.7 x 1.9 (probe)
59582
6 Show glass 62627 NA O-Ring 24 x 1.5 (PRE-Filter #56356) 51516
9 O-Ring 5 x 1.5 61464 NA Show glass (PRE-Filter #56356) 52648
NA Viton sampling line 55641
POS. Parts for Analyzer Part #
NA O-Ring 4 x 1.5 (draft port) 61463

10 | P a g e
AMPRO 2000 –Quick Start Guide
BLUETOOTH
Make sure your analyzer has the correct Bluetooth settings!
Measurement menu
Press F3 (extras)
Extras menu
Press OK for settings
Settings screen
Press F2 for Bluetooth
BT-LE for iOS
Modify with arrow
left/right
The following steps have
been performed by us
already, but have be
repeated once you change
any settings!
BT-CL for Android
Modify with arrow
left/right
Scroll down to device info
Press OK
Press the folder button
Select Bluetooth
and press OK
Press the folder button
(this can look different depending
on analyzer firmware)
Select initialize
and press OK
Restart the analyzer
You must restart the analyzer once you have modified any of these parameters!

11 | P a g e
AMPRO 2000 –Quick Start Guide
ANDROID
Pairing your analyzer with your Smartphone - Activate Bluetooth in your phone
You can't connect your phone to the analyzer if another phone is already paired with the analyzer!
You have to disconnect any other devices that are paired with your phone (e.g. Bluetooth headset)!
Activate Bluetooth on your phone
Search for available devices Pair with the MRU analyzer
Pin will be requested for older units
Enter PIN 0000 or 1234 Analyzer and phone are paired
Start the MRU4u on your phone
Press connect and measure Press connect device

12 | P a g e
AMPRO 2000 –Quick Start Guide
Select your device
Confirm with OK
If this screen stays empty, another phone might already be paired. Disconnect the other phone first!

13 | P a g e
AMPRO 2000 –Quick Start Guide
iPHONE
Pairing your analyzer with your Smartphone - Activate Bluetooth in your phone
You can't connect your phone to the analyzer if another phone is already paired with the analyzer!
You have to disconnect any other devices that are paired with your phone (e.g. Bluetooth headset)!
Open Settings Select Bluetooth Activate Bluetooth Bluetooth activated
If your phone doesn’t find
any devices
Then open the MRU4u app
(make sure you have the
latest version!!)
Select “Connect &
Measure”
Select “Connect device”
Sometimes you will see
more than one new device
(if you have multiple new
devices in iOS range).
You can either turn off
other devices in range or
select “New device”until
you have the right one.
Select NEW device Once the correct device
has been connected, the
iOS will display the
analyzer name and serial
number

14 | P a g e
AMPRO 2000 –Quick Start Guide
Taking a measurement / adding parameters
Screen while analyzer is zeroing
Screen zeroing completed
Press to modify screen
contents
Select and then press Done
Press +for additional parameters
Select the parameter you wish to
add. Repeat this step for each
additional parameter
Press "Done" to return to
measurement screen
Press "Stop" to stop the
measurement
Analyzers pump stops
Screen turns grey
Press save to save measurement to
the phone
You can add a photo
you can add comments
Save the measurement to a site to
view it

15 | P a g e
AMPRO 2000 –Quick Start Guide
Additional Information
Main page Protocols
Shows saved measurements
Click on any saved measurement
Protocols
Saved measurement
Displayed as "Table"
Protocols
Saved measurement
Displayed as "Graph"
Protocols
Saved measurement / EXTRAS
Use this button to send the
measurements per email
Main page
Sites
Select a site to view it
Press "New site" to add one
Sites
New site, enter information
Sites
Enter information then "Save"

16 | P a g e
AMPRO 2000 –Quick Start Guide
Settings
Insert email address
Change log intervals
Modify measuring units
Settings
Change log intervals
Settings
Modify measuring units
Service
Find a MRU service location
Device info
Shows details about the connected
analyzer
Table of contents
Other mru Measuring Instrument manuals
mru
mru DM 9600 CHP User manual

mru
mru OPTIMA User manual

mru
mru Air Fair MGAprime User manual

mru
mru VARIOluxx User manual

mru
mru SWG100 BIOGAS User manual

mru
mru NOVAplus User manual

mru
mru SWG 100 biogas User manual

mru
mru SWG100 BIOEX User manual

mru
mru Vario Luxx User manual

mru
mru SWG 100 biogas User manual