MSI EC14H User manual

1
Version: 1.1
G52-C6821X2
1. ENGLISH......................................................3
2. DEUTSCH.................................................13
3. FRANCAIS.................................................23
4. ESPAÑOL...................................................33
5. ITALIANO.................................................43
6. NEDERLANDS.........................................53
7. PORTUGUÊS...........................................63
8. ČESKY.....................................................73
9. 简体中文..................................................83
10. 繁體中文..................................................93
,

2

3
ENGLISH
4
EthernettoPowerlineHomePlugAdapter
Before You Begin
Thank you for purchasing MSI Ethernet to Powerline HomePlug
Adapter EC14H. No complex installation. No extra wiring. All you
have to do is to plug the EC14H into a wall outlet and connect it to your
PC or other Ethernet-enabled devices through Ethernet cable. You can
build up an electrical wiring network just in minutes.
This Quick Start Guide is designed to assist with the installation and
utilization of MSI Ethernet to Powerline HomePlug Adapter. Please
note that all figures in this guide are for reference only; the actual setup
screenshots might be vary on different systems. For more information,
please refer to the User’s Guide provided in the CD-ROM, or visit our
website http://www.msi.com.tw to obtain the latest on-line documentation.
How to Use This Guide
If you want to... refer to...
know your HomePlug Adapter page 5
install your HomePlug Adapter page 6 ~ 9
test your network page 10
troubleshoot your network page 11 ~ 12
You will need at least two HomePlug adapters to establish a
poweline communications network.
NOTE
ENGLISH
5
QuickStartGuide
QuickStartGuide
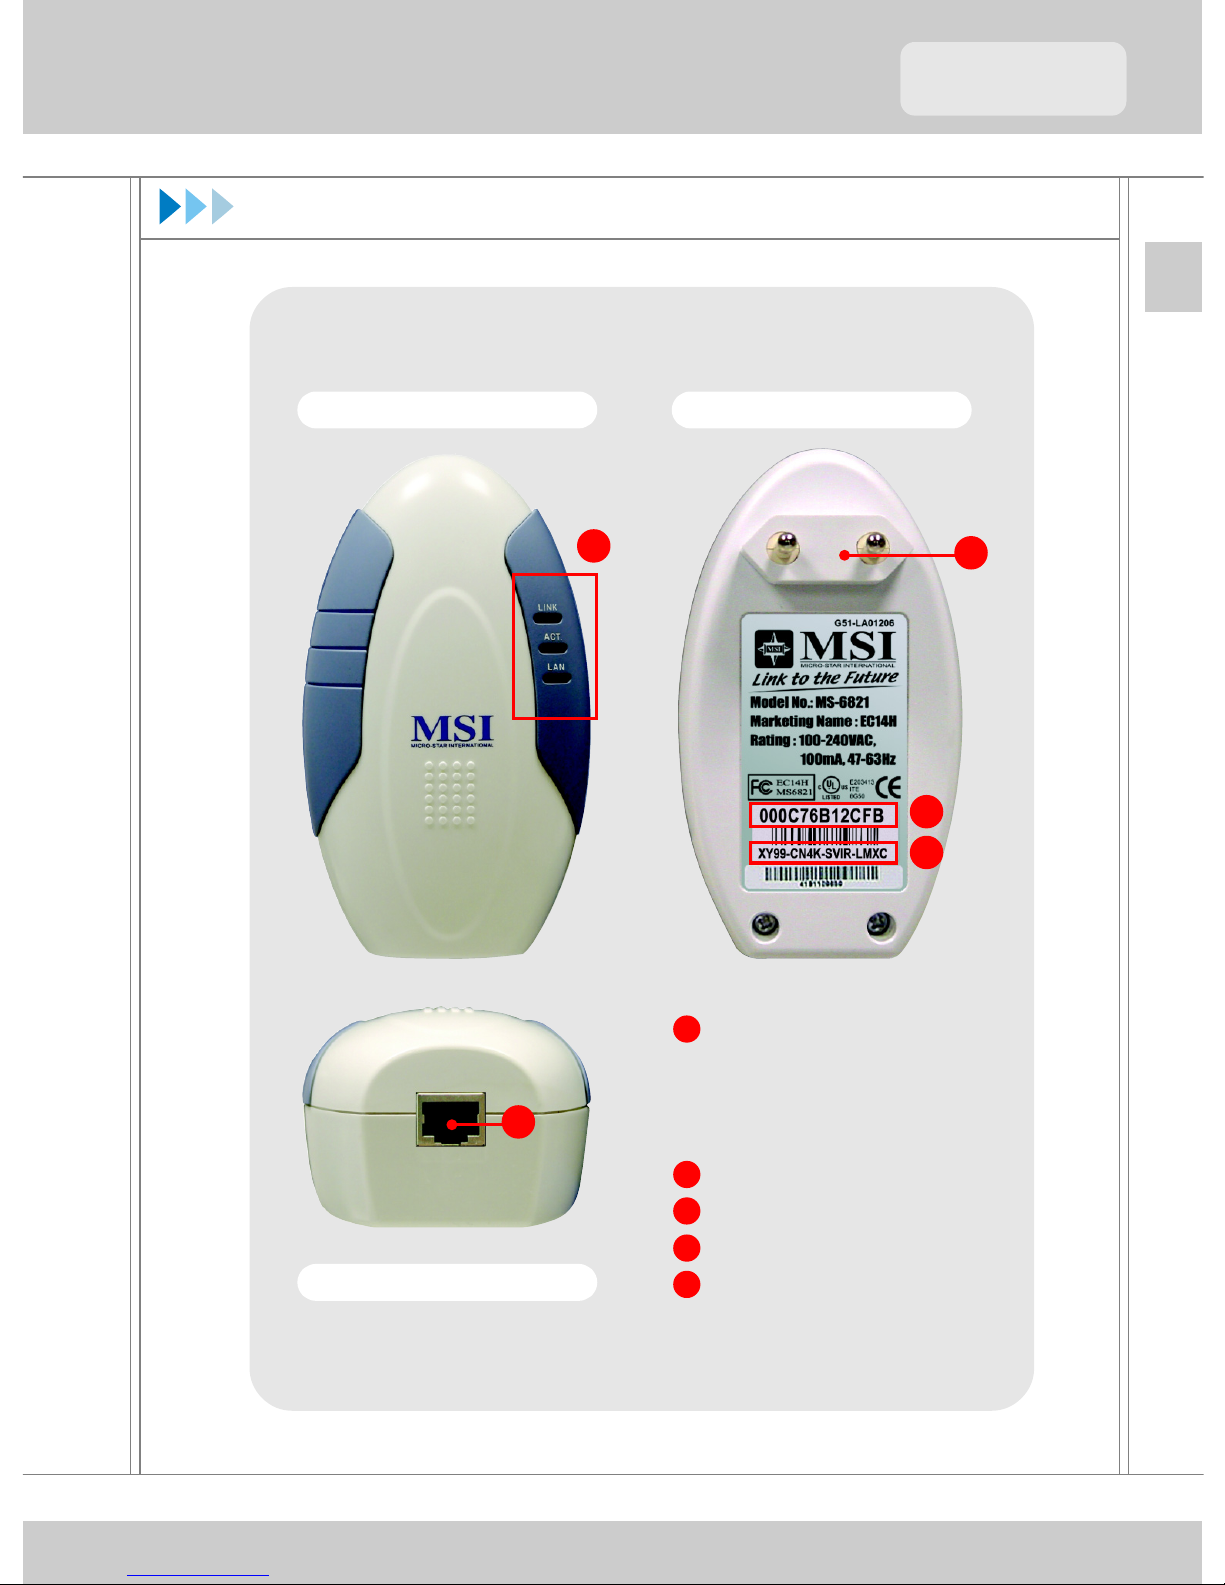
Unit Description
LEDs
- LINK (PLC Link)
- ACT (PLC Activity)
- LAN (LAN Link/Activity)
Plug
MAC Address
Device Password
Ethernet Port (RJ-45)
Front View Back View
Bottom View
12
3
4
5
1
2
3
4
5
6
EthernettoPowerlineHomePlugAdapter
Installation - Software
Installing the Software
You are recommended to install the software provided in the Software
CD before connecting the device to take full advantage of your EC14H,
including changing the configuration or password of device.
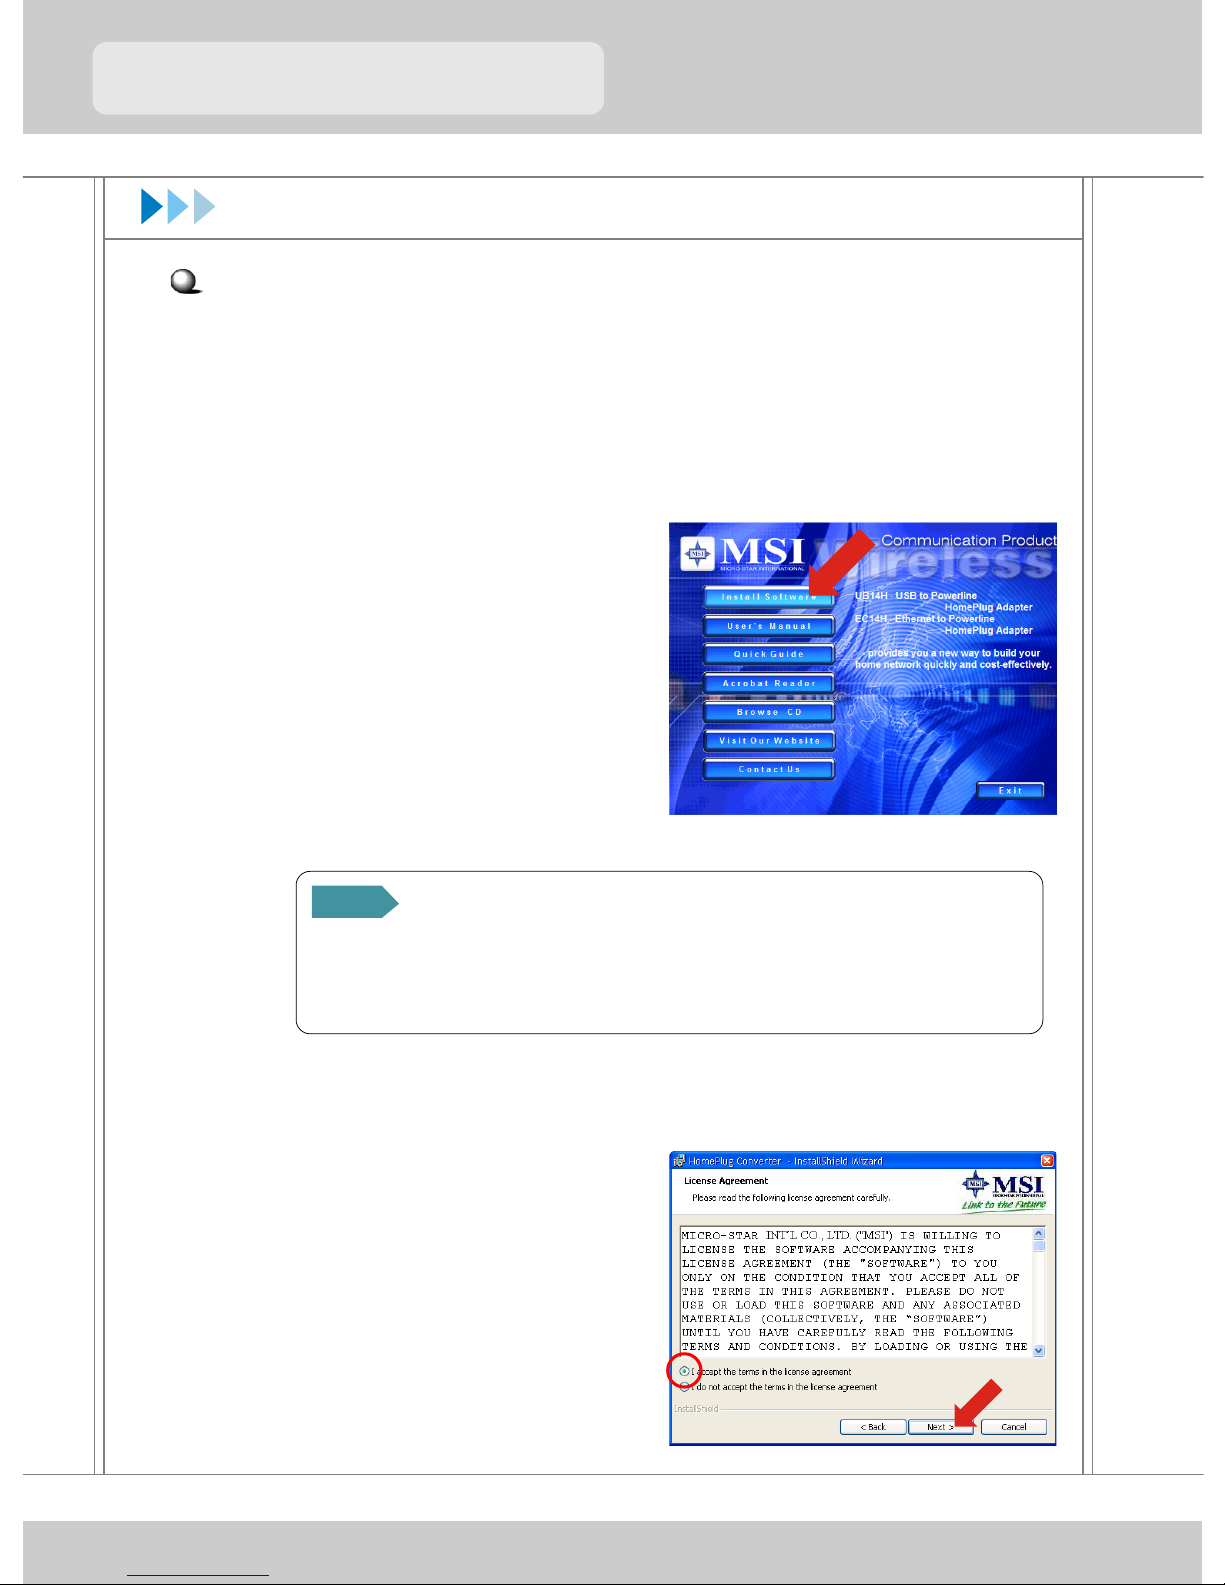
To install the configuration utility:
1. Insert the Software CD into
your CD-ROM drive, and the
Setup program should launch
automatically. Click the Install
Software button on the
installation screen.
2. Click Next in the welcome screen of InstallShield Wizard.
3. A copyright notice window
appears. Select “I accept the
terms in the license
agreement” and click Next
after you read and accept
the License Agreement.
If the Autorun program does not launch automatically,
you can click Start at the taskbar and select Run; then, type
E:\setup.exe (Eis your CD-ROM drive) in the Open box and
click OK.
TIP
ENGLISH
7
QuickStartGuide
QuickStartGuide
Installation (2) - Software
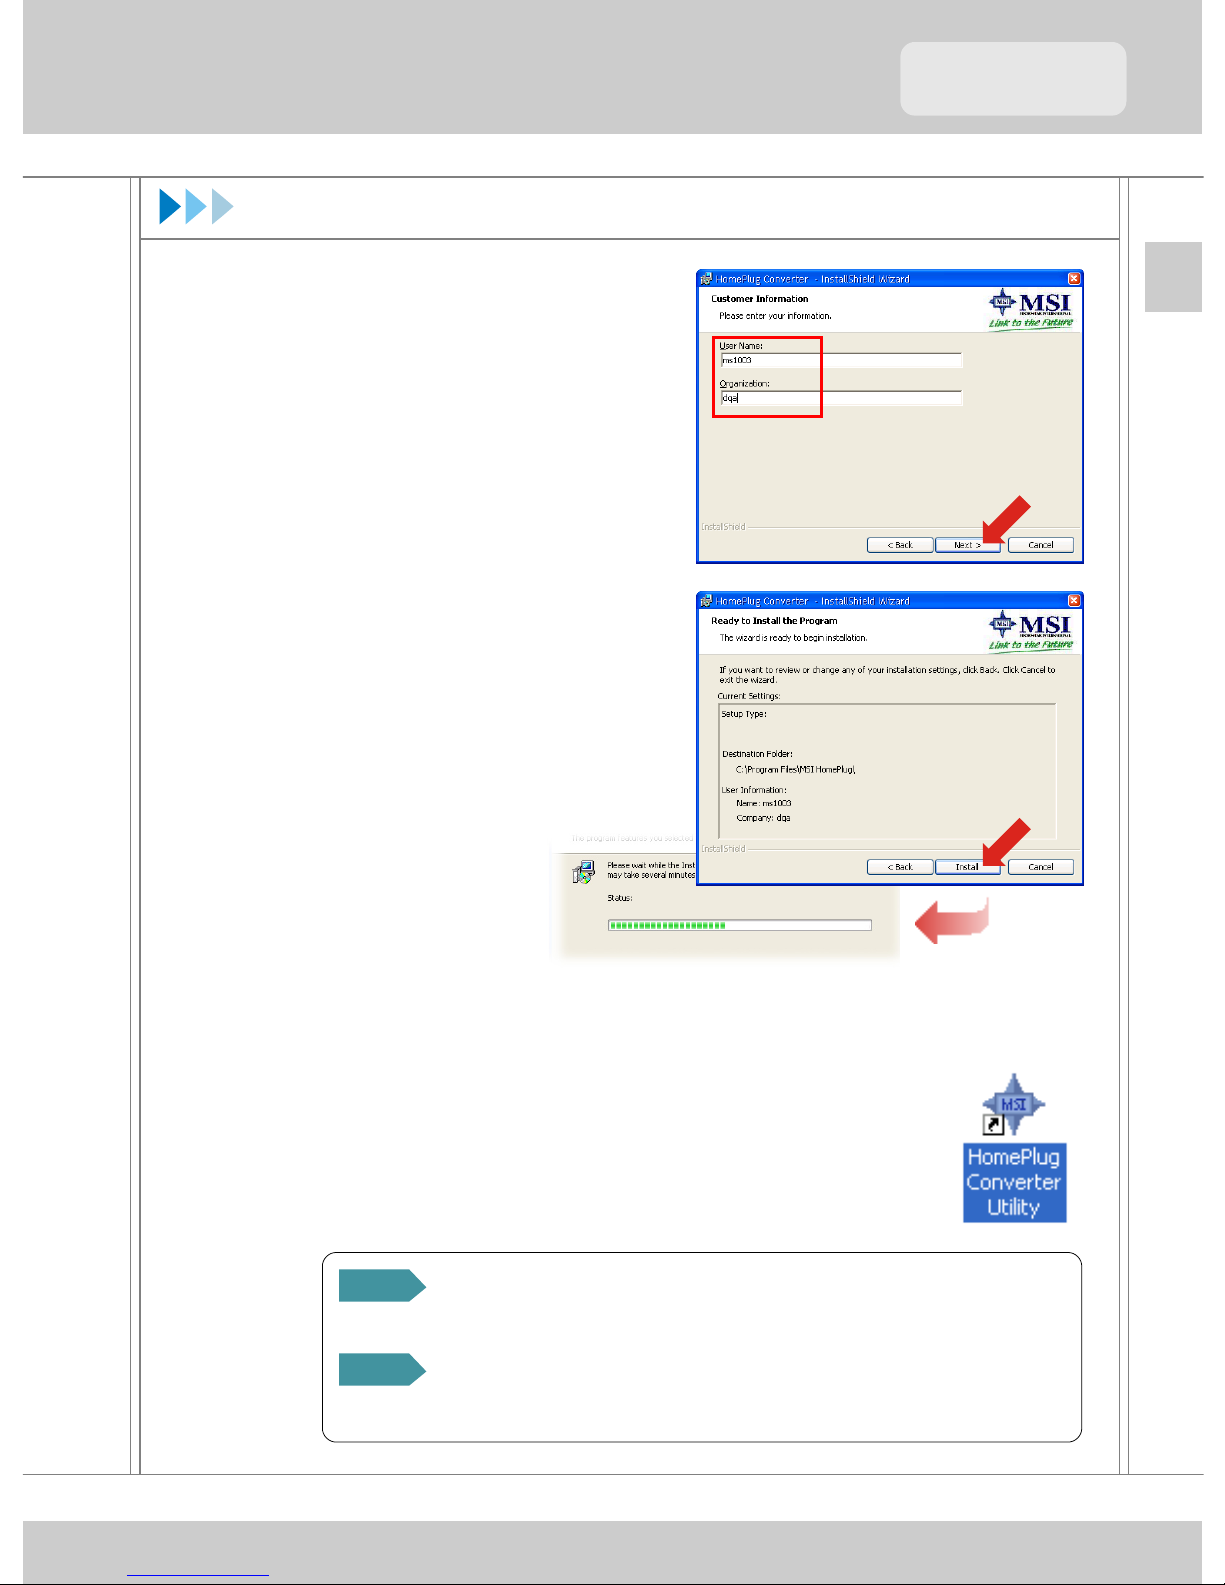
4. Enter your User Name and
Organization; then, click
Next.
5. Click Install in the following
window, and the program
starts to install the software
to the system. The progress
indicator can show you the
installation status.
6. When the installation is completed, click Finish.
7. Click Yes to restart your computer when prompted.
8. After rebooting, the HomePlug Converter Utility
icon will appear on your Windows desktop.
For each Ethernet-enabled device added onto the network,
just repeat the above procedures.
If connecting to a non-PC based device, no further soft-
ware installation is needed.
NOTE1
NOTE2
8
EthernettoPowerlineHomePlugAdapter
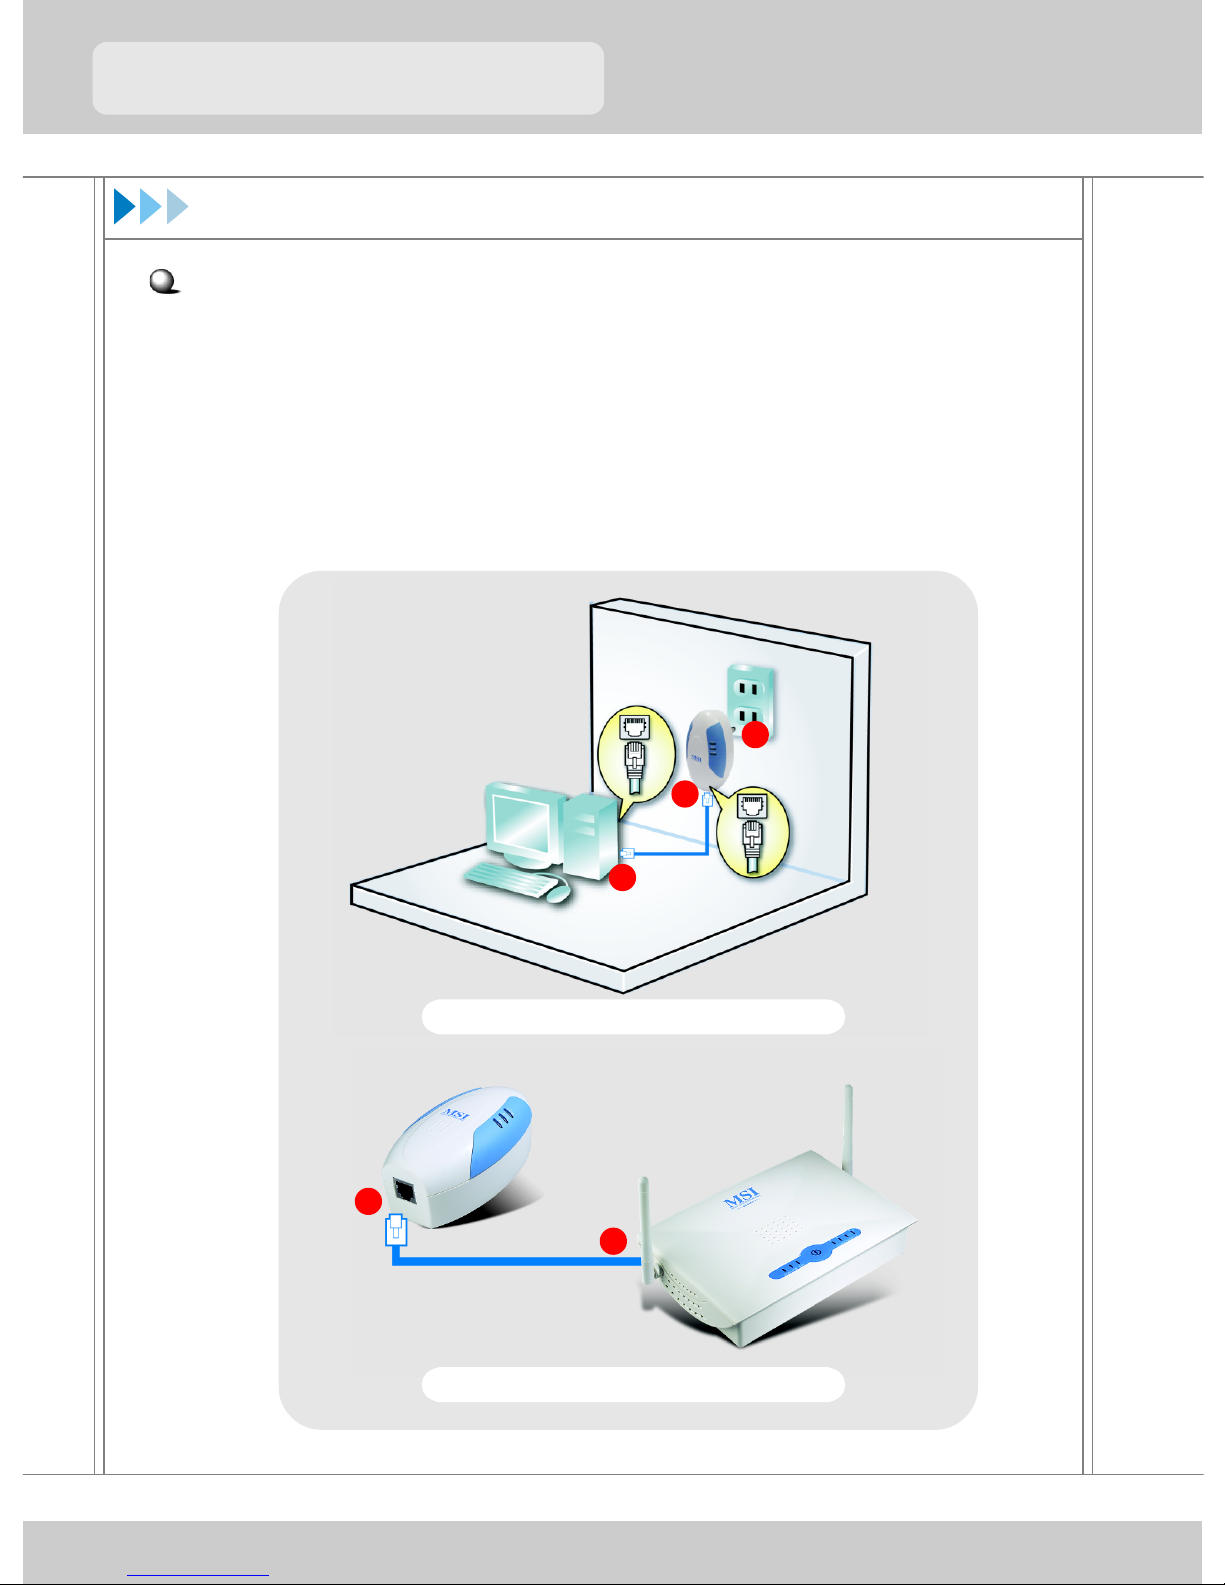
Connecting EC14H
1. Find the EC14H HomePlug Adapter and Ethernet cable from
the package.
2. Connect one end of Ethernet cable to the RJ-45 connector on
the bottom of EC14H (n), and the other end to the Ethernet
port of your computer or network device (o).
3. Plug the adapter into the wall outlet directly (p).
Installation (3) - Hardware
Connecting to your computer
Connecting to network device
1
2
3
1
2
ENGLISH
9
QuickStartGuide
QuickStartGuide
4. Verify the LEDs on the adapter to indicate proper connection
by:
- LINK LED should light solid to show electrical wiring
connection.
- LAN LED should light solid to indicate that the Ethernet
connection is established.
Installation (4) - Hardware
Building Your Network
Once you have built up a powerline network in your location, EC14H
will automatically attempt to connect to the network; generally, EC14H
can access to your network successfully without further configuration.
Alternately, you can set up the Network Password of your EC14H.
MSI EC14H provides you with the convenient utility to customize the
network settings after you installed its software. Whenever you want to
configure the respective settings, double-click the HomePlug Converter
Utility icon on your desktop. For more instructions on configuring your
EC14H, please refer to the User’s Guide in the provided Software CD.
You are advised to plug the HomePlug Adapter into a
power outlet directly. DO NOT plug the device into a power
strip or UPS with surge protection. MSI EC14H has its own
filter to protect from surges.
NOTE
10
EthernettoPowerlineHomePlugAdapter
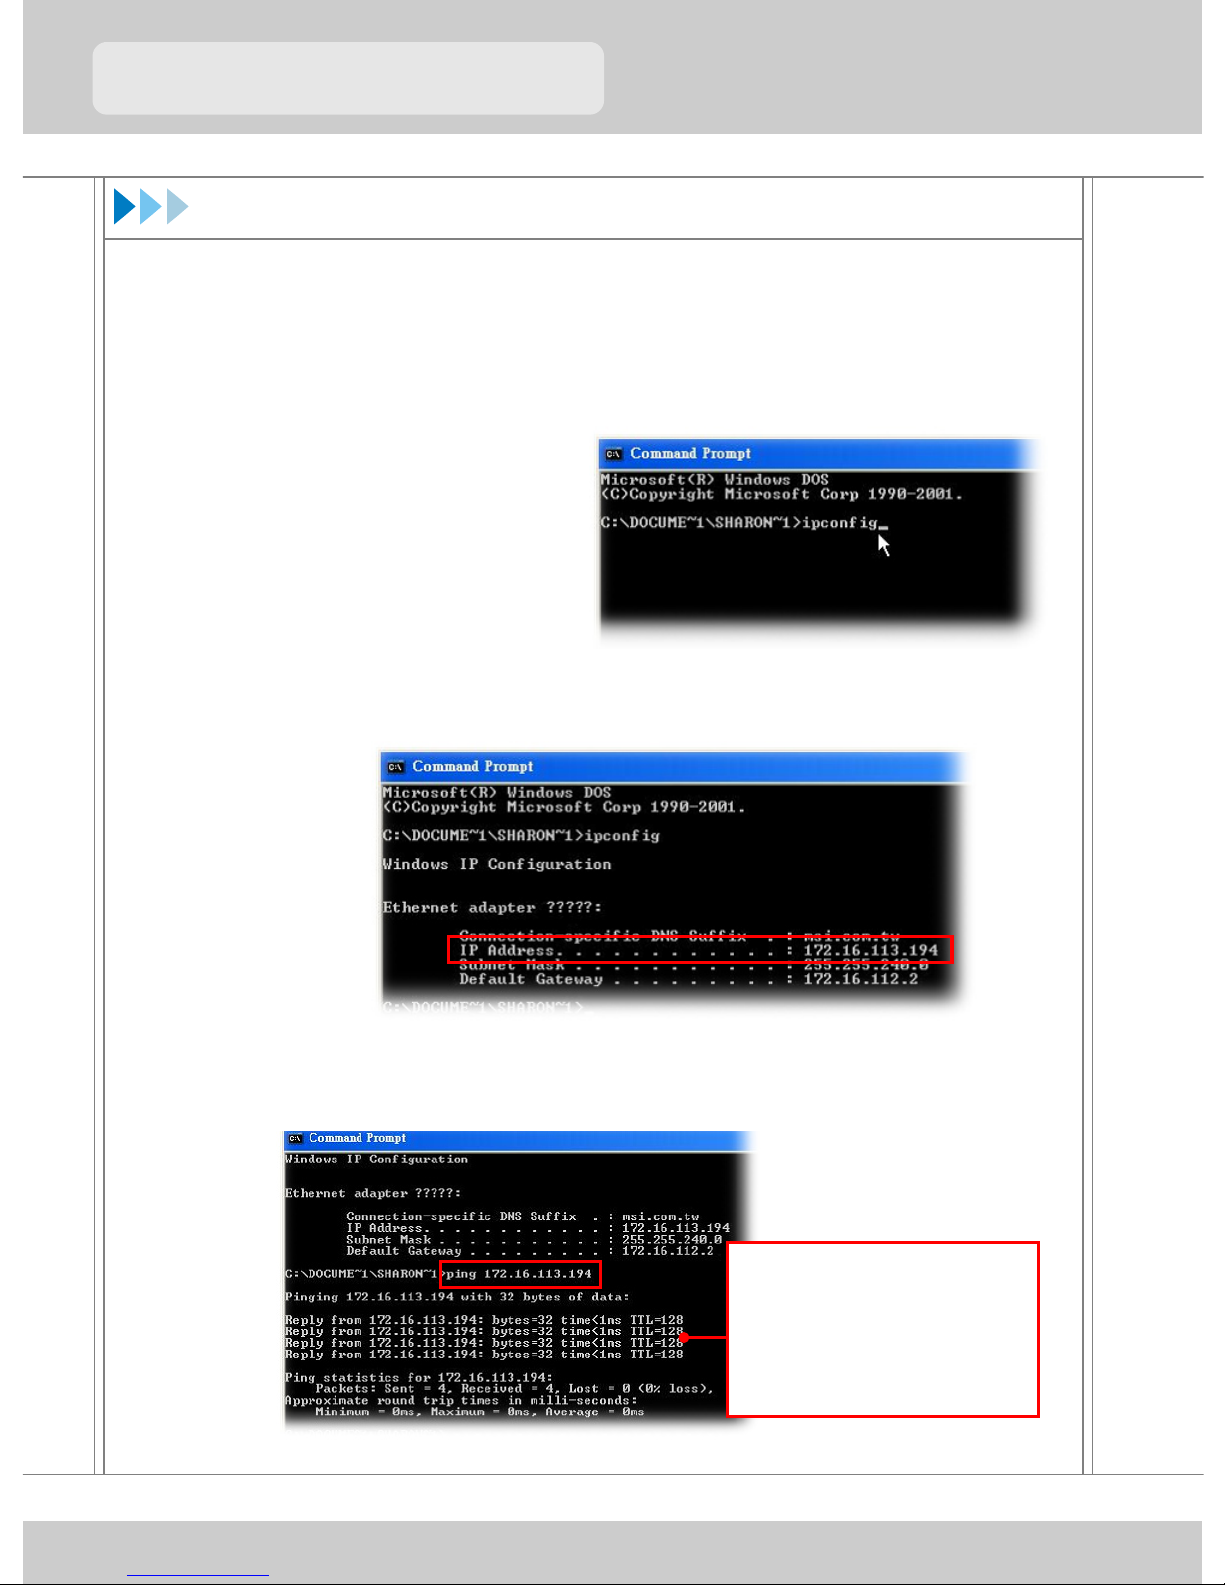
Testing the Connection
You can use Windows standard Ping utility to verify if your powerline
connection is set up properly.
1. Click Start at the taskbar and select Run; then, type command
in the Open box and click OK.
3. It will display the IP address of your PC to which MSI EC14H
is attached, along with Subnet Mask and Gateway address.
4. Enter the command “ping IPADDRESS” and press [Enter],
where IPADDRESS is the one found in preceding step.
If the Ping succeeds, it shows the set
up is correctly done. Then, repeat the
same process with other powerline
devices on the network. If this Ping
fails, it means there is a problem with
the set-up.
2. Type ipconfig in the
prompted DOS command
window and and press
[Enter].
Other manuals for EC14H
1
Table of contents
Languages:
Other MSI Adapter manuals


